Step into the vast and untamed world of Monster Hunter Wilds, where colossal beasts roam and every hunt is a test of skill, strategy, and survival. Whether you’re brand new to the series or a returning hunter, this ultimate beginner’s guide will equip you with essential tips, weapon insights, and survival tricks to conquer the wilds and craft your legend across PC, PlayStation, and Xbox. Ready your weapons, sharpen your wits, and prepare to face the monsters that await!
The tutorialized story mode has lowered the barrier of entry to the point where anyone who enjoys action games can hop in and start hunting monsters without colliding with an impenetrable wall of menus. All that said, Monster Hunter Wilds is still Monster Hunter. It has some inherent quirks, some knowledge checks, and some mechanics that could use some more explanation.
So let’s get into it. What follows is the ultimate Monster Hunter Wilds beginner’s guide, including all the tips, tricks, and secrets you’d need to know before jumping into the game.
Learn the Monster Hunter quirks
Monster Hunter Wilds has several unique quirks that new players should learn to master for a smoother hunting experience. Each monster exhibits distinct attack patterns and behaviors, so observing their movements and knowing when they are vulnerable is key to success. Your Palico companion acts autonomously, providing healing and distraction during battles but cannot be directly controlled. Weapons in the game are diverse, with 14 classes offering different playstyles and complexities; beginners are advised to start with simpler ones like Dual Blades or Long Sword. Capturing monsters instead of killing them can yield different and sometimes rarer materials, but monsters develop resistance to traps if capture attempts fail repeatedly. Efficient use of items, quick healing, and understanding the UI are essential, as is using the SOS Flare to call for help in tough hunts. Additionally, environmental traps and strategic use of terrain can turn the tide of battle in your favor.
Monster Hunter Wilds holds your hand through the first few hours before exposing you to the basic loop of prepping, hunting, and crafting, but there are some distinctive Monster Hunter quirks you’ll notice the moment you pick up the controller, so let’s go over those first.
There are no health bars
Well, you have one. But the monsters don’t. You can get a sense of how a monster is faring by observing their appearance and behavior. That’s part of the fun! We’ll talk specifics in a bit. For now, just keep hitting the lizard.
Sheathing your weapon is actually important
In Monster Hunter, there are lots of good reasons to put your weapon away, even during a fight. That’s because holding your weapon restricts what you can do. You can’t use items, your base move speed is slower, and you can’t sprint. Get used to sheathing your weapon when you need to avoid a big attack, use an item, or just get closer to a monster that is too far for you to hit.
You can manually sheathe your weapon with Square/X, but there are a few practical shortcuts you should use. Holding the sprint button will automatically sheath your weapon. Since you’ll most often be sheathing to reposition or run for your life, this is handy.
Hitting Triangle/Y will unsheathe your weapon, but if you add a directional input, you’ll do a draw attack that skips the standard unsheathing animation and launches you right into a combo.
Stamina is a defensive resource
If you’re a Souls player who is making the jump into Monster Hunter, this one is for you. Stamina governs sprinting and dodging, but you won’t have to worry about spending stamina with your basic attacks. Those are free.
Item selection is wonky
The control scheme for selecting and using items takes a while to get used to. Hold L1, then use Square and Circle to cycle through the items you’re carrying. Once you find the one you want, release L1 and hit Square again. Thankfully, there’s a simplified system too! While holding L1, you can use the right stick to select options from a context-sensitive radial menu. This will get you through 99% of the game.
Furry friends are always there, and sometimes helpful
You’ll be accompanied on your hunts by your cat companion, who will provide support. Just like a real cat, you can’t issue commands. Your Palico is fully autonomous. They’ll provide you with occasional healing and draw the monster’s attention. If you are playing with more than two hunters in your squad, your Palico will retreat to the tent.
Don’t sweat your weapon choice
When starting out in Monster Hunter Wilds, don’t stress too much about picking the “perfect” weapon. The game offers a wide variety of weapon types, each with its own unique playstyle, and many are beginner-friendly, such as the versatile Sword and Shield, the fast Dual Blades, or the powerful Great Sword. The key is to choose a weapon that feels fun and comfortable for you, as all weapons can be effective once you learn their mechanics. Focus on mastering your chosen weapon’s moves and combos, and remember that you can always switch weapons later as you gain experience. Ultimately, your skill and familiarity with your weapon will matter far more than the weapon itself.
Just a few moments after you take control of your character, you’ll be asked to choose your weapon from a menu of 14 distinct classes.
Don’t overthink it! It’s not like choosing a starter Pokemon or committing to a build in an RPG. Changing your kit in Monster Hunter is pretty inconsequential, and after the first few hours of the game, you’ll even be able to carry a secondary weapon on your hunts. (Though if you want some help, see our list of the best weapons for beginners.)
Each has its own appeal and challenges. Appeal is the fantasy that makes a weapon immediately attractive and exciting. Challenges are the complexities and quirks that create friction- and these aren’t inherent drawbacks. A weapon’s appeal is what gets you to pick it up, but learning to master its challenges will be what makes you stick with it. Our guide to all weapons explains a bit more about each one.
To get a taste for those appeals and challenges, you’ll want to hop into the very helpful training area.
Training Mode isn’t a waste of time – it’s essential
The Training Mode in Monster Hunter Wilds is far from a waste of time; it is an essential part of mastering the game. This dedicated area allows players to practice with all 14 weapon types and experiment with various builds in a controlled environment, free from the pressures of actual hunts. By using the High Purrformance Barrel Puncher, players can test weapon combos, adjust training dummy settings, and even simulate real combat scenarios to refine their skills. This practice helps hunters understand the strengths, weaknesses, and optimal attack patterns of their chosen weapons, significantly improving their performance in actual battles. The ability to customize the dummy’s behavior and switch gear at the makeshift camp further enhances the learning experience, making the Training Mode a crucial step for any beginner aiming to excel in Monster Hunter Wilds.

The best way to choose your main weapon is to take them all out and swing ’em around.
You’ll unlock the training area within the first few missions of the main story. In the chest by the entrance you’ll be able to access your inventory, which includes a starter weapon from each class. In the training area, you’ll see a handful of new UI elements. In the lower left corner of the screen, you’ll notice a list of suggested combos.
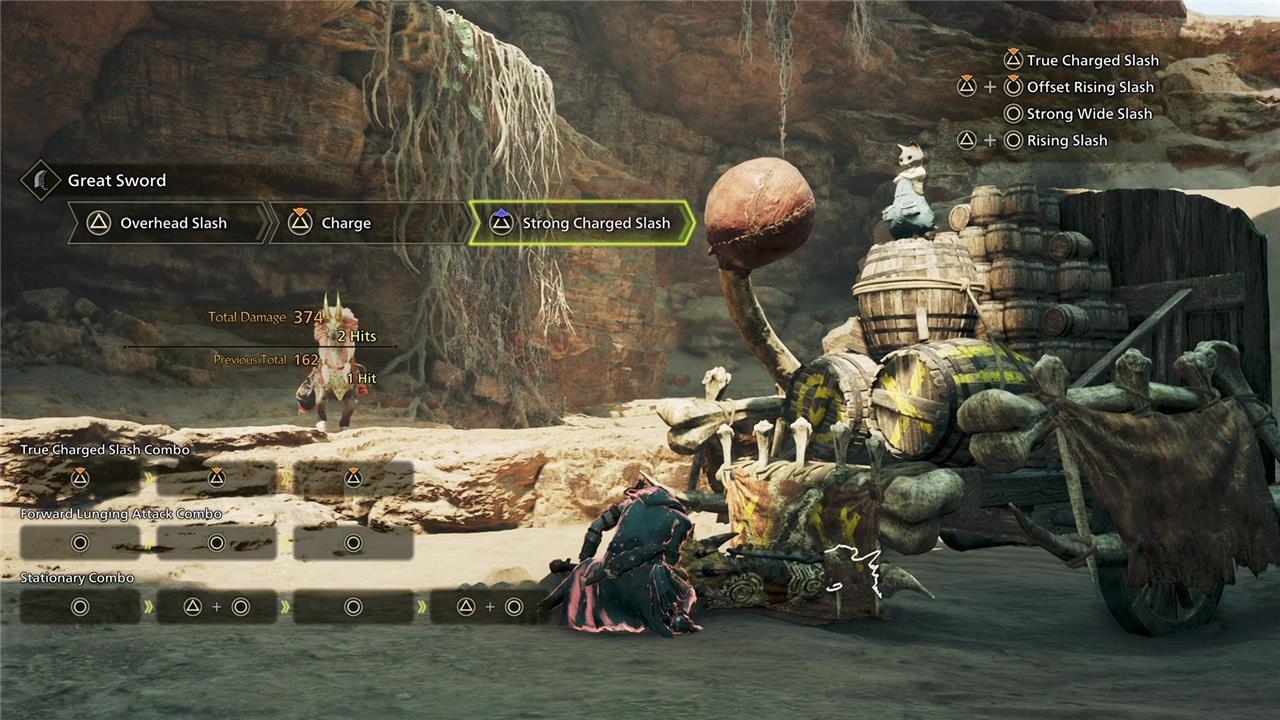
A bit further up, you’ll see your input history. The combo system in Monster Hunter Wilds is pretty flexible. Most moves will allow you to combo into another, but some moves are combo-enders. Experimenting with this input history is great way to feel out those combo paths.
Each weapon has an in-game guide that covers its controls and unique mechanics. From the start menu, tab over to “info” then select “play guide” and “weapon controls.”
The training dummy will display your damage numbers each time you hit it. If you want to test your weapon’s defensive options, you can switch the dummy to attack mode by talking to Luke, the training area meownager, and switching the dummy to “smash mode.” You can also access these dummy options by hitting the menu button, tabbing over to “Missions & Quests” and selecting “Training Settings.”
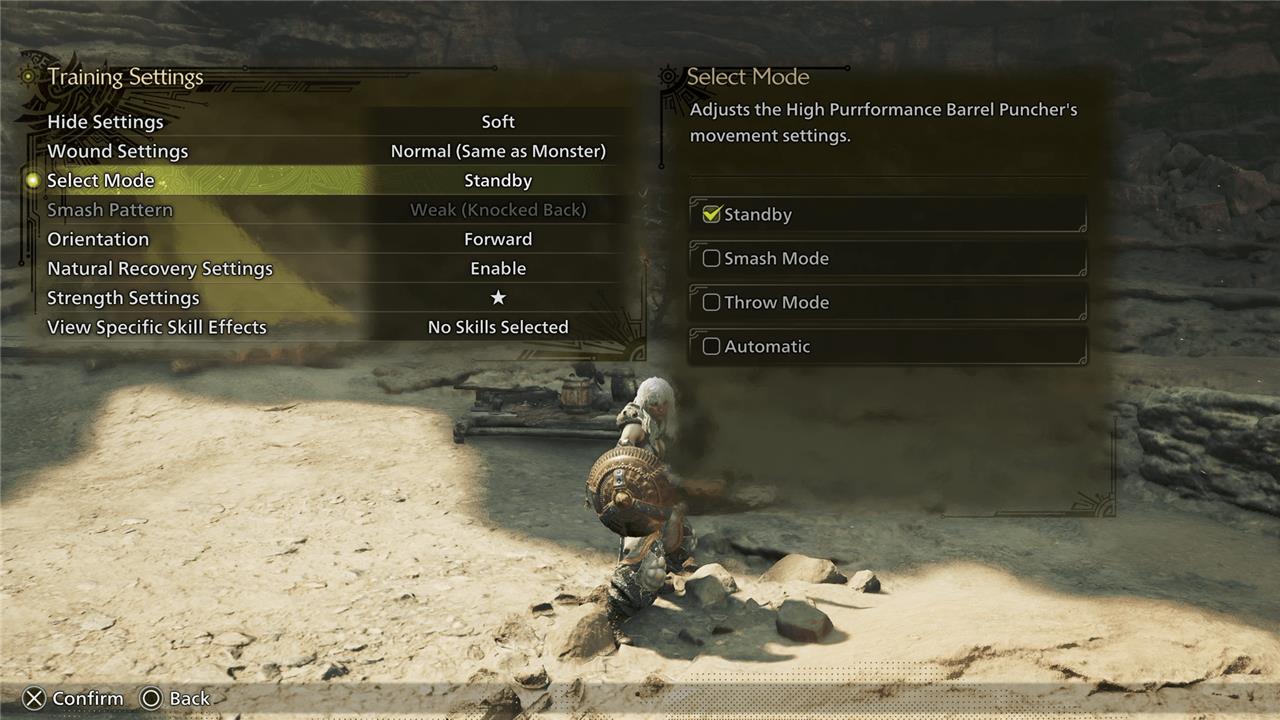
Activating smash mode will program the dummy to wind up and throw a punch at regular intervals. You can also instruct it to use ranged attacks. Don’t worry about getting knocked out in the training room. If your health hits zero, you’ll get back up with full health.
Once you’ve hit some buttons and settled on a weapon, you’re ready to move on to the meaty stuff.
Understand the Monster Hunter loop
The Monster Hunter gameplay loop is centered around a cycle of preparation, hunting, and crafting. Players start by selecting a quest to hunt a specific monster, then prepare by choosing the right weapons, armor, and items, often eating meals to gain buffs. After heading out to the hunting grounds, they track and battle monsters, gathering unique materials from their defeated foes. These materials are then used to craft and upgrade gear, enabling players to take on progressively stronger monsters. This loop repeats as players pursue personal goals such as mastering weapons, completing quests, or acquiring specific gear. In Monster Hunter Wilds, this loop is presented with a dynamic open-world twist, where multiple events and hunts happen simultaneously, requiring players to decide which challenges to engage with while exploring and uncovering the world’s secrets.
Monster Hunter’s gameplay is built on a loop of prepping, hunting, and crafting. It will become a mostly self-directed process, but you’ll need to complete story missions to unlock new monsters, areas, and systems. There will usually be a prompt in the upper right corner pointing you towards the next main objective. Between these main missions, you’ll be able to tackle optional hunts.
Read on, or use the table of contents below to navigate to a specific type of tip.
- Monster Hunter Wilds preparation tips
- Monster Hunter Wilds combat tips
- Monster Hunter Wilds crafting tips
Monster Hunter Wilds preparation tips
Before heading out on a hunt in Monster Hunter Wilds, thorough preparation is key to success. Always restock your inventory with essential items such as potions, traps, and dung pods before leaving camp to avoid being caught unprepared. Eating meals that provide useful buffs can significantly improve your survivability and combat effectiveness during quests. Pay attention to your armor skills and ensure they complement your chosen weapons, especially since you can bring two weapons on a hunt for the first time in this installment. Familiarize yourself with your weapon combos in the Practice Range to maximize damage output and efficiency. Additionally, tailor your armor and resistances to counter the specific elemental weaknesses and attack patterns of the monsters you plan to face. Managing resources wisely during combat, like sharpening your weapon and using healing items strategically, will keep you in the fight longer. Finally, consider using the SOS Flare to call for help if needed, as multiplayer support can make hunts more manageable.
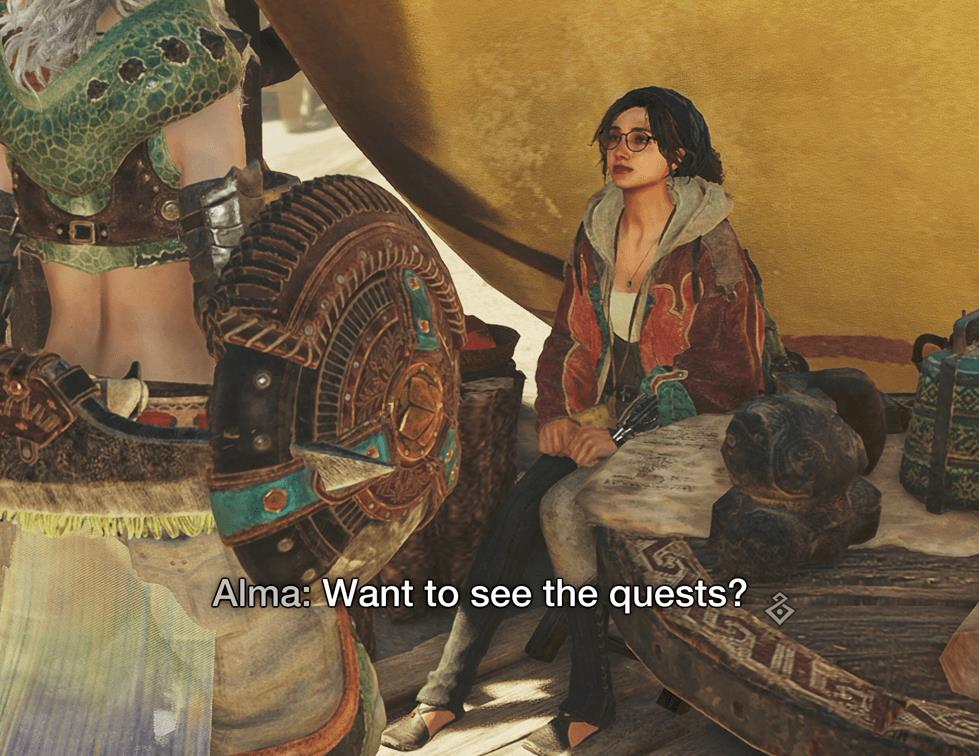
There are multiple ways to start a hunt
There are a few ways of initiating a hunt in Monster Hunter Wilds. One is to talk to your companion, Alma. She will follow you around the open world. If you’re at camp, she should be sitting by your tent. Choose “post/join quest,” and then “optional quests.” Here, you can choose to hunt any monster you’ve previously hunted in the main questline. These hunts are sort of instanced – set at specific times of day, in specific locales, separate from the normal flow of time in the open world.
You can also initiate hunts on monsters wandering the open world, but it”s worth noting that your access to the open world will be restricted during certain phases of the main questline. If you’re able to leave camp, you can initiate a hunt by simply approaching and attacking a wandering monster until you see the “begin quest” graphic appear.
Alternatively, you can open the map, then hit Square/X to see a list of active monsters in the open world. Select the one you want to hunt, and choose “create quest,” hit the confirm button again, and choose “begin field survey.”
Once a quest has been created, that monster will be set as your target, and other players in your lobby will be able to join your hunt. If you want to tweak those permissions, talk to Alma, select “post/join quest,” and then select “settings.”
Bring snacks

Your health and stamina pools will be capped unless you eat a meal. In Monster Hunter Wilds, you can eat a meal anywhere. Just select your portable BBQ grill from your item bar, select “grill a meal” and then choose what you’d like to eat. Approximately 99% of the time, you’ll be perfectly fine choosing the “recommended meal.” Any meal will max out your life and stamina pools. The differences in ingredients confer extra bonuses, like an attack boost, stronger defense, or elemental resistance. Or for more details, see our dedicated cooking guide.
Meal effects last for 30 minutes by default. If you’re not sure if you’ve still got your lunch buff, just hold L1. The remaining time will appear in the upper left corner of the screen.
Use loadouts to stock up on items
You’ll need items on your hunt! You’ll start with a stock of the basics in your crate, but you can only carry so many at once. To make sure you’re topped off, step into your tent at base camp, select “transfer items,” then “item pouch.”
Here, you can move individual items in and out of your pouch, but what we’re really here for is the loadouts list. Click L3 to see a list of preset loadouts. When you choose one, it will dump everything from your item pouch and refill it with the registered items.
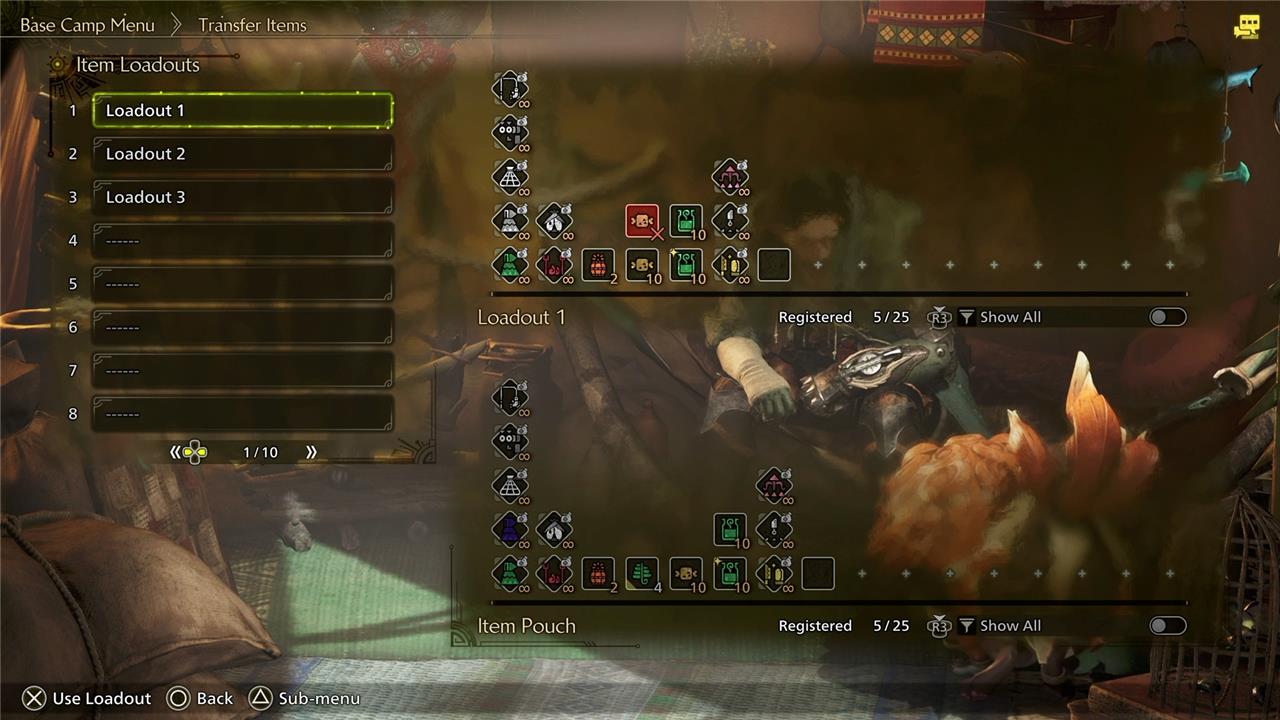
You can get through most of the game using Loadout 1.
Your mount can autopilot toward a hunt
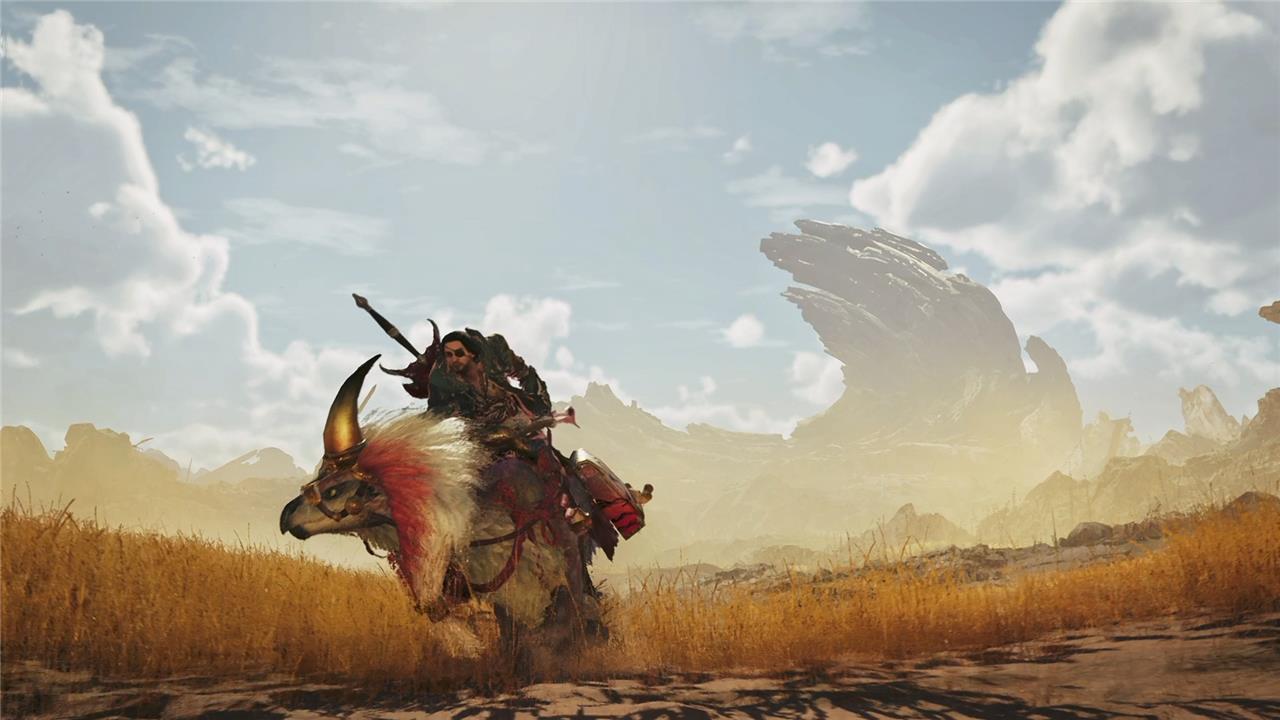
Monster Hunter Wilds has made it really, really easy to get to the monster. Simply tap up on the D-pad and your Seikret mount will scoop you up. If you’re in a hunting quest, they’ll autopilot you towards the monster’s location. If they’re just standing around, try re-initiating autopilot by tapping up again.
You’ll be given a handful of quest items, which you can retrieve from your Seikret’s pouch by tapping left on the D-pad while mounted. (Or see more tips for your Seikret here.)
While you make your way to your target, keep an eye out for resources in the environment. You can grab them from a distance by targeting them with L2 and tapping circle.
Monster Hunter Wilds combat tips
Monster Hunter Wilds combat demands a blend of preparation, timing, and strategic use of the environment. Key tips include mastering your chosen weapon’s combos and learning to dodge rather than relying solely on blocking, as dodging requires precise timing and stamina management. Utilize aerial attacks by mounting monsters to open wounds and deal significant damage, and take advantage of environmental traps and terrain features to control the battlefield. Counterattacks, known as offset attacks, are crucial for turning monster aggression to your advantage, rewarding well-timed responses with powerful strikes. Additionally, managing resources wisely and coordinating with allies can greatly improve your survivability and efficiency in hunts.
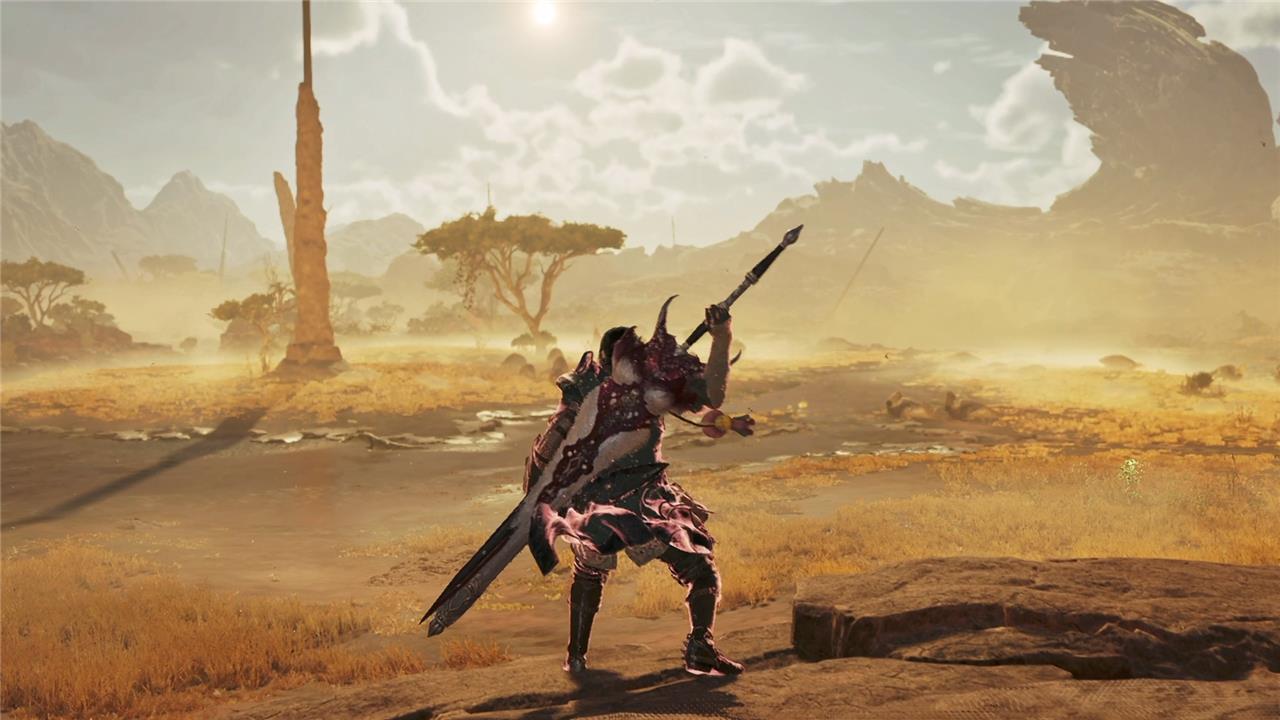
Sooner or later, your mount will get you to the monster’s location, and then it’s time to fight.
Each monster has its own attack patterns and behaviors that you’ll learn over time. A Rathalos, for example, will always do its little spinning tail swipe twice in a row. The way you win is by identifying openings, moving in to do damage, and then getting out before the monster hits you back.
Give yourself a simple mission

When you’re getting started, it helps to enter combat with a simple gameplan based on your weapon. If you brought a hammer, your mission is to bonk the head. If you brought a long sword, your mission is to cut the tail. If you brought a charge blade, you mission is to fill and empty your phials as often as possible. Whatever weapon you bring, giving yourself a simple mission will help you stay focused when claws and fireballs start flying.
Don’t get hit
Unless you’re using a weapon with a big shield, movement is your means of avoiding monster attacks. Depending your positioning, it can be as simple as taking a few steps to the side. Lots of the weapons in Monster Hunter Wilds actually let you reposition while attacking. As you’re chipping away at a monster, try holding a directional input and your hunter may add a little shuffle step to their attack animation. Scooting around the monster like this is a good way of staying out of the danger zone while keeping the pressure on.
If minor adjustments won’t cut it, it’s time to dodge. But be careful! Compared to Souls games that give you a generous helping of invulnerability frames on each dodge roll, Monster Hunter makes it a bit harder to roll through attacks. As the game goes on, you’ll get access to armor sets that enhance your dodge roll, but until then, it’s best to treat dodging like a true evasive maneuver. Roll away or past attacks. Not through.

Finally, there are times where evading attacks requires a full on retreat. If an enemy is winding up for a big area-of-effect slam, a massive fireball, or something similarly huge, the best option might be to sheathe your weapon and run for your life. When you’re sprinting away from a monster, you also get a unique dodge animation that gives you some extra distance and invulnerability frames. It’s got a longer-than-average recovery, but it might save your life.
But what do you do when stuff goes wrong?
Oh no! I got hit!
Most monster attacks are strong enough to knock your hunter down or send them flying. But don’t panic! Very few, if any monsters in the game have attack patterns that can stunlock and kill you before you can recover.
When you get knocked down, keep an eye on the monster. If they are winding up for another attack, you should be able to run and dodge to the left, right, or away. Paired with a dodge roll, this will get you back up on your feet safely.
There are even cases where the best thing to do is stay down! If you don’t touch the directional controls your hunter will remain prone for longer, and their dramatically lowered hitbox will make them a hard target. If a monster looks like it’s prepping up an immediate follow up attack, this could be the move.
You can also get some help from your mount. Even before you can perform other actions, you can hit up on the D-pad, and your Seikret to come scoop you up. Depending on how nearby your Seikret is, this can bypass some of your recovery animation. Either way, your mount will help you get to a safe distance so you can patch yourself up.

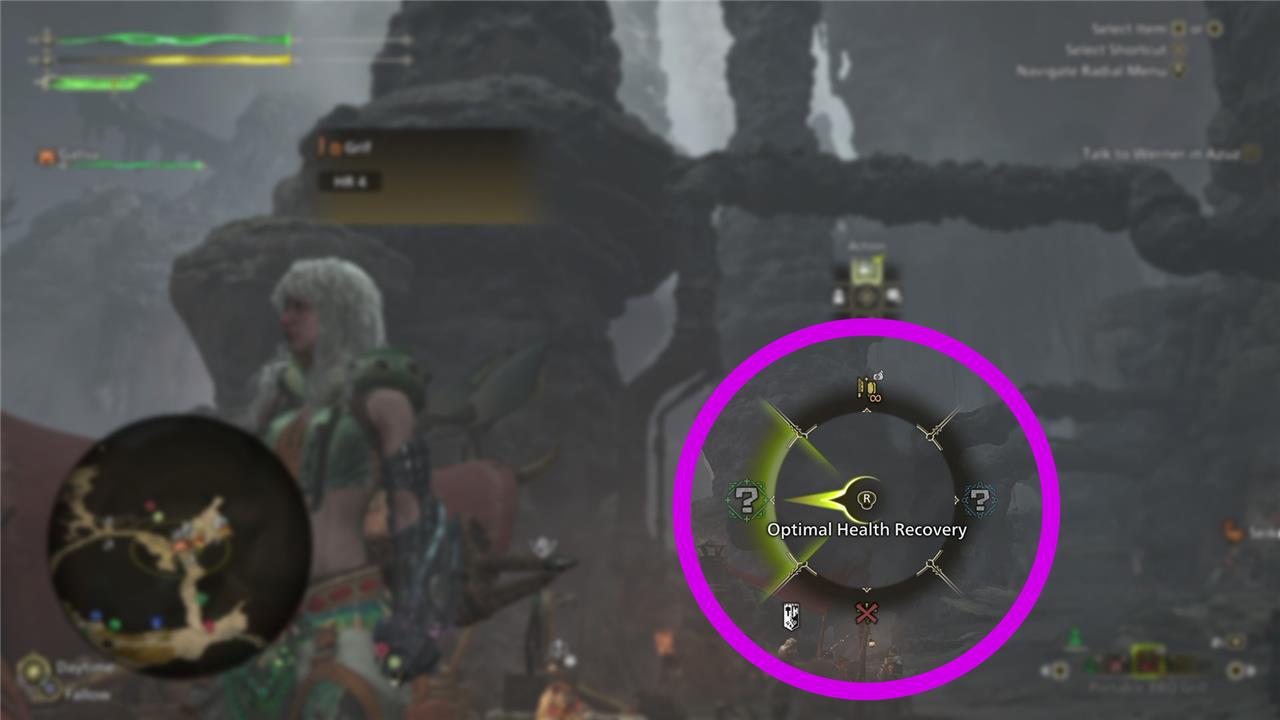
If you took a significant chunk of damage, it’s usually a good idea to heal. Holding L1 and using right stick to select “optimal health recovery” will automatically sheathe your weapon (if it’s drawn), then use the best healing item in your inventory. You can walk, or even slowly run while drinking a health potion, but your fastest, safest option is always to do it while mounted.
Oh no! I got poisoned!
Monsters can afflict you with a whole bunch of nasty status effects, and poison is one of the most common. Poison will turn your health bar purple and slowly drain it for a set period of time. That “optimal health recovery” shortcut has an “optimal status recovery” cousin on the same radial menu that will apply the proper cure, if you’ve got it in your inventory.

In the case of poison, you want an antidote, which can be purchased at the shop or crafted from antidote herbs. If you’re poisoned, and you don’t have an antidote at the ready, its best to play conservatively and stay topped off with health potions until you recover.
Oh no! I’m on fire!
It’s also very common for monsters to hit you with the ol’ fire breath. Like poison, fire will deal damage over time, but you can get rid of it by dodge rolling three times (or once if you roll in water.)
Oh no! Something else happened to me!
We’re not going to go over every status effect, but as a general rule, use the “optimal status recovery” option if your character picks up a weird aura. Pretty often, the quest items you are given will include remedies for whatever your target monster can dish out.
Oh no! I died!
No you didn’t! You got “carted.” If you run out of health, you’ll be shuttled back to the nearest camp. This is a good opportunity to refill on items or switch gear if you have something you think might work better. Generally, you can get carted 3 times before you fail your quest.
Oh no! I failed
Failing a quest is not the end of the world. It can mean a few things. Maybe you simply need to spend more time learning the monster’s attack patterns. Maybe you need to pack more remedies for the status ailments it uses. If you fail a particular quest several times in a row, it might be a sign that you should re-evaluate your equipment.
See, every piece of armor has a set of resistances, which you can see on the equipment info page of the menu. As a general rule, you should only concern yourself with these details if you’re having a really tough time with a particular monster. If your current armor set has a negative resistance for the element your problem monster uses, it might be swapping to a new set.
Stay on target
Once you’re comfortable with hitting and not getting hit, it’s time to start hitting the right parts of the monster. Each one has its own weak and hard points. To see a breakdown of a monster’s defenses, open the menu, tab over to “info” and open the “large monster field guide.” Select the monster you’re hunting, tab over to “suggested strategy,” and have a look at the helpful infographic.
Or, more practically, just look at the damage numbers that fly off the monster with each hit. Yellowish-orange numbers mean you are hitting a weak point or bypassing the monster’s armor. White damage numbers mean you’re not getting full damage, and you should attack somewhere else or sharpen your weapon. Greyish numbers mean your damage is being reduced by some status effect or special property.
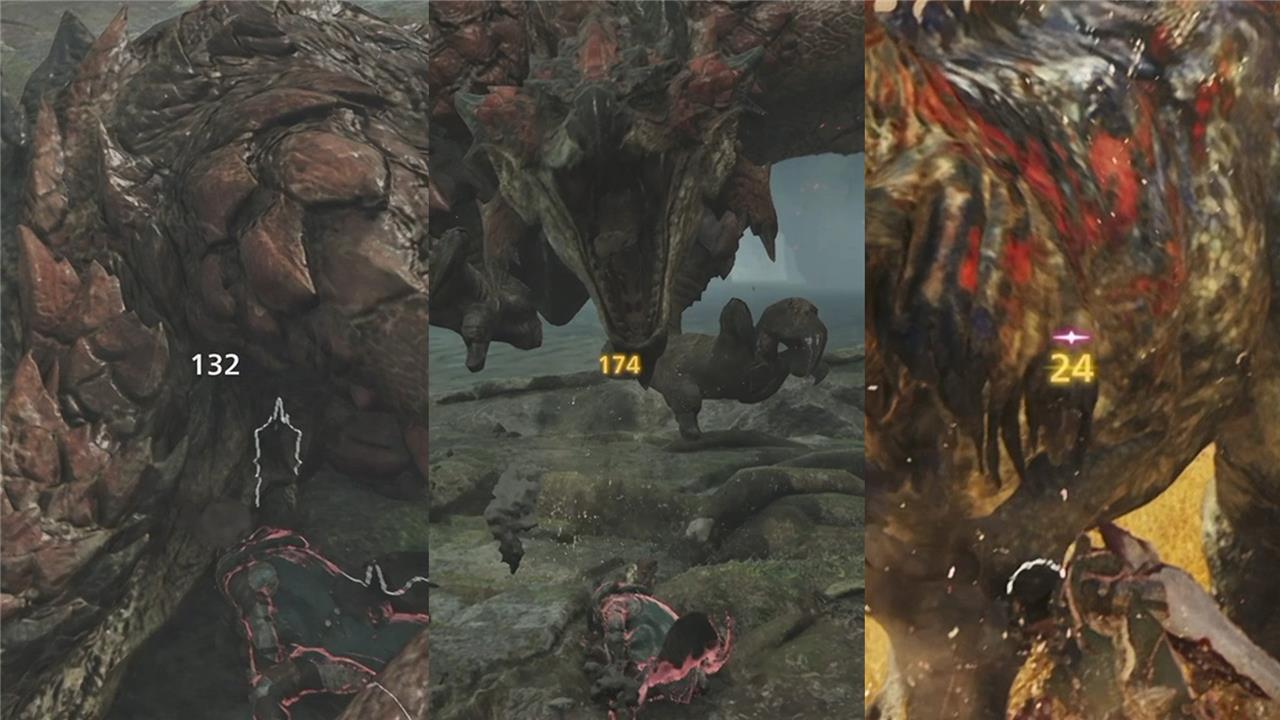
A damage number framed by four triangles indicates that you’re hitting a wound and doing extra damage. A damage number with a red streak above it is a critical hit, which does an extra 25% damage by default. A damage number with a blue streak above it is a “blunder” which does reduced damage. These will happen regardless of whether you’re hitting a monster’s strong or weak points.
Eventually you’ll get the ability to augment your rate of critical attacks (called affinity in Monster Hunter), but for now, if you’re taking monsters down, don’t worry too much about it.
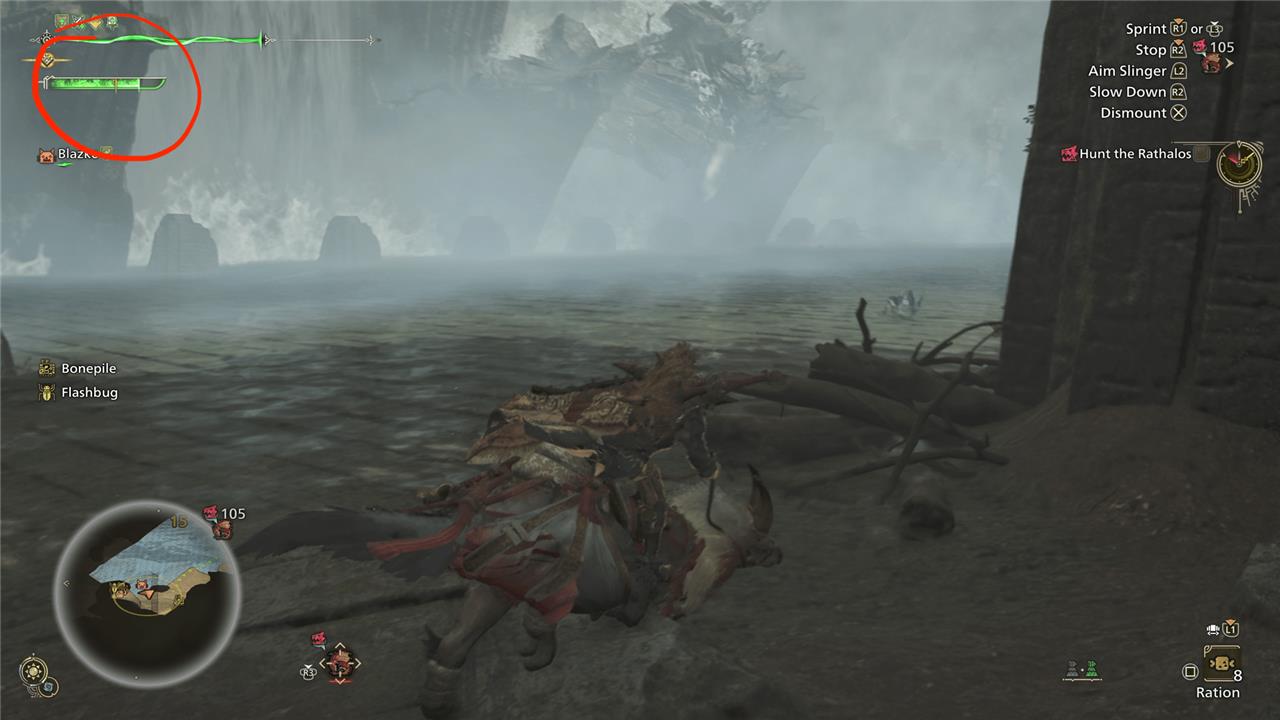
Stay sharp with upkeep
After fighting in for a while, the monster will usually retreat to another zone. This is a good time mount up and do some maintenance. If your maximum stamina has decreased, snack on a few rations. After dealing with any lingering damage, afflictions, or depleted meters, the next thing to check is your weapon’s sharpness. The sharpness, shown below your health bar, will degrade with each attack you land. When it drops down a tier, your weapon will deal less damage and your attacks might start to bounce off the monster. A bounced attack will still deal damage, but you’ll be stuck in the rebound animation, and won’t be able to continue your combo.
You can sharpen using the whetstone, available on that same context-sensitive radial menu. Even in the middle of a battle, it’s a good idea to mount up and get to maximum sharpness. But if you forgot, or got overwhelmed, definitely do it before you follow the monster to the next zone.
Stay on the monster’s trail
Each new zone you fight the monster in will present new dangers and opportunities! Look for environmental traps like loose boulders, or tangling vines that you can use to your advantage.
Once you’ve been fighting for a while, it might be a good time to check the monster for wounds. Monster Hunter Wilds’ opening missions will introduce the wound system, but the short version is that hitting a monster can create wounds, and attacking those wounds does extra damage.
Using L2 will highlight wounds so you can target them directly. After the monster sustains enough of a beating, it will start to limp, and it will usually retreat to its nest to make its last stand.
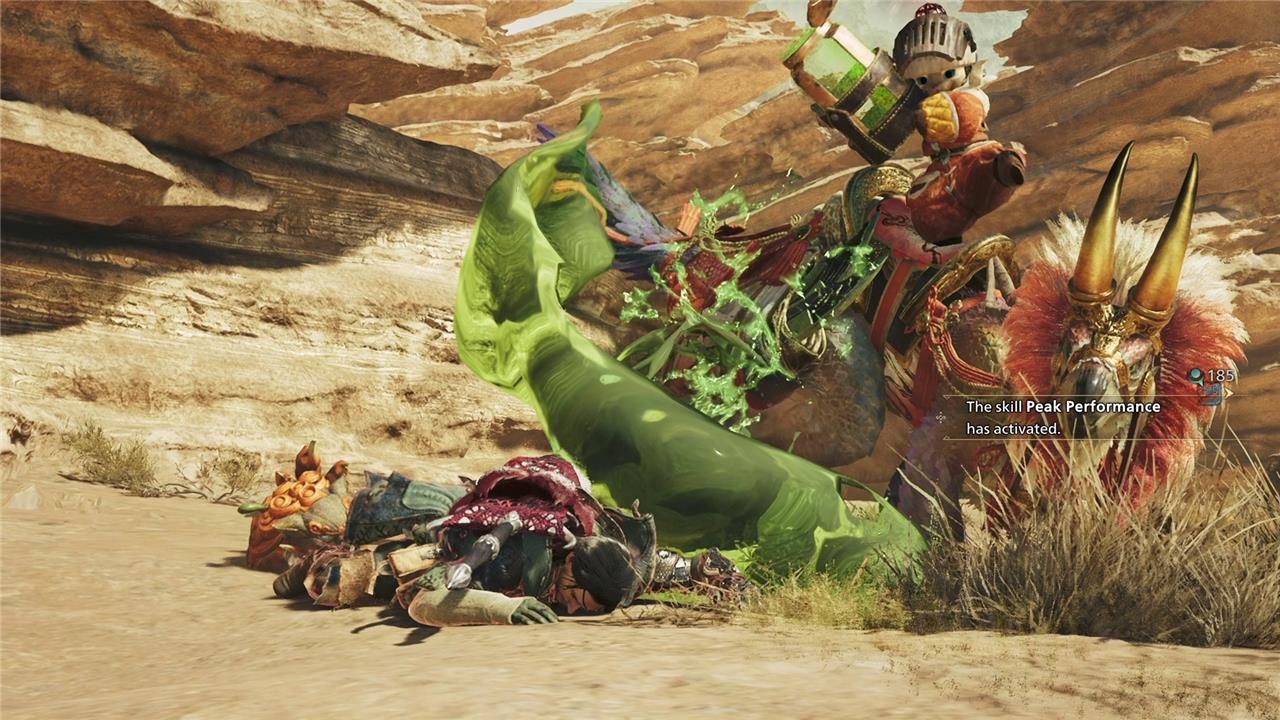
Finish the fight in the monster’s den
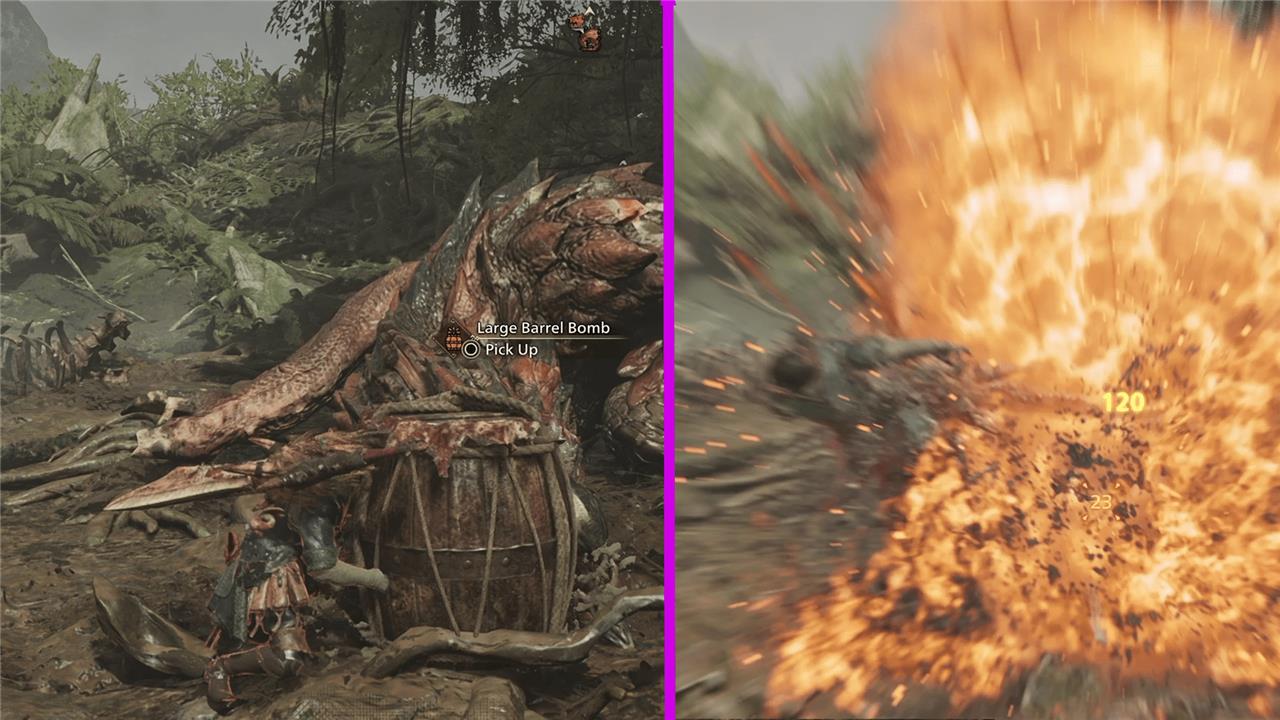
If the monster gets to its nest before you, it will usually lay down and sleep to regain HP. The first hit the monster takes while in a sleeping state will deal double damage and wake it up, so make sure you hit it with the biggest attack you’ve got. If you’re hunting with a great sword user, it’s polite to give them the honors.
You can also use the brief naptime to set up some deadly pranks. Loadout 1 includes barrel bombs, which you can plant around the sleeping monster for a chunk of extra damage. If you’ve got a trap in your inventory, planting one beneath the sleeping monster will leave it temporarily immobilized when it wakes up. (Traps are also used for capturing monsters.)
When the monster finally expires, you’ll have a minute to carve it for resources. If you managed to sever the monster’s tail, don’t forget to run over and carve that as well. When the quest ends, you’ll receive more rewards.
Monster Hunter Wilds crafting tips
Crafting in Monster Hunter Wilds is essential for survival and progression, and getting the hang of it early can significantly enhance your hunting experience. Start by setting up auto-crafting for key consumables like potions, mega potions, antidotes, and utility items such as flash pods and dung pods to ensure you never run out during expeditions. Crafting is accessible both at your base camp and on the go, but while exploring, you can only use materials currently in your inventory. Focus on gathering materials from monsters and the environment to craft and upgrade weapons and armor, which is crucial for tackling stronger foes as you advance. Early game, prioritize crafting items like the Bone Tree weapons and basic consumables to build a solid foundation. Remember, crafting saves money compared to buying from vendors and allows access to powerful items like Ancient Potions and Mega Demondrugs that you can’t purchase. Efficient crafting management and understanding your crafting trees will streamline your hunts and prepare you for the challenges ahead.
Crafting is the final part of the loop! By visiting your blacksmith Gemma, you can transform your collected monster parts into weapons and armor. They’ll reflect the properties of whatever monster they came from. A sword made from a fire-breathing Rathalos will deal fire damage, for example.
Comparing damage numbers between weapon types can be a little tricky, because Monster hunter inflates the damage numbers of slower weapons that do more damage per hit. If you’d rather compare unaltered attack values, hop into the options menu and flip to the third page of the “game settings.” Switch “weapon attack power display” to “display without coefficient.”
An armor’s properties are a bit more complicated. Each piece of armor has a spread of elemental resistances, as well as a base armor stat that determines damage reduction. Armor sets also come with skills that enhance and modify your abilities. Let’s talk about how to interpret all of this.
Don’t worry too much about skills (yet)

To see your skills, go to the start menu and select “equipment info,” hit square to open the “skill info” tab, and then use R1 to flip to your list of active skills. Here, you can scroll through and read a description for each skill. Most of these skills have multiple levels, so you get more benefits by equipping more pieces of armor that have that skill.
Later in the game, you’ll unlock “decorations” which will allow you to add more skills to your armor and weapons. But you’re not there yet! For now, just get used to reading these menus and get familiar with these perks.
You can add items to your wishlist
If you want to build something from Gemma’s crafting menu, but don’t have the resources, you can use triangle to add to your wishlist. Once an item is on your wishlist, any monster that can provide the necessary parts will be tagged on your map with a pin, and when you collect one of those parts, you’ll get a progress update popup.
You can view your wishlist at any time on the “info” tab of the menu. If you’ve got the parts you need to build an item, it’ll have a check mark next to its entry.
Once you’re done crafting, it’s time to.
Repeat all of the above
To master Monster Hunter Wilds as a beginner, it’s essential to repeat and reinforce all the foundational steps: choose an easy-to-learn weapon and practice its combos in the training area, familiarize yourself thoroughly with the user interface and quick item usage, and don’t hesitate to use the SOS flare to call for help during hunts. Continuously gather resources, upgrade your armor and weapons tailored to the monsters you face, and keep exploring the map to discover camps and endemic life. By consistently applying these strategies and learning from each hunt, you’ll build the skills and knowledge needed to thrive in the Forbidden Lands.

Congratulations! You are playing Monster Hunter! As you work your way through the Monster Hunter Wilds main quest line, the game will drip-feed new mechanics. If you’re still having fun when the credits roll, stick around, because that’s when the real monster hunting begins.
What are the top secrets every new hunter must know in Wilds
Here are the top secrets every new hunter must know in Monster Hunter Wilds:
-
Master one primary weapon first to build muscle memory and understand its combos before experimenting with a secondary weapon for versatility in combat.
-
Learn the map and navigation tools thoroughly, including setting waypoints and using quick-navigation options to move efficiently and avoid getting lost.
-
Crafting is key: gather ingredients to make potions, traps, and custom meals that grant powerful buffs lasting up to 50 minutes, tailored to your hunt’s needs.
-
Experiment with different weapon playstyles in the training area to understand strengths and weaknesses, preparing you to adapt to various monsters.
-
Customize your settings to increase camera distance and reduce UI clutter, improving situational awareness during hunts.
-
Utilize your Palico companion effectively by upgrading its gear and abilities, as it provides crucial buffs, healing, and even revives in tough battles.
-
Focus on capturing monsters rather than always killing them; capturing is often faster, safer, and yields rarer materials. Use traps and tranq bombs when monsters show a skull icon indicating they are ready to be captured.
-
Use traps smartly, especially shock traps which are easier to craft and reusable. You can pick up traps you place if missed, making them resource-efficient.
-
Climb onto monsters to cause wounds for big damage and create openings for your team, a powerful but often underutilized tactic.
-
Set up a custom radial menu for quick access to essential items like healing and buffs, saving precious time during combat.
-
Sneak attacks at the start of hunts can stagger monsters and deal significant damage, especially when coordinated with teammates.
-
Manage your pop-up camps and fast travel to optimize movement across the vast game world.
These secrets combined will greatly enhance your efficiency, survivability, and success as a new hunter in Monster Hunter Wilds.
What are the most overlooked crafting tips for new hunters in Wilds
Here are some of the most overlooked crafting tips for new hunters in Monster Hunter Wilds:
-
Avoid crafting everything immediately just because you have materials. Instead, save resources to craft more powerful weapons or gear later, especially ones that exploit specific monster weaknesses when you get stuck on a hunt.
-
Focus on gathering a wide variety of ingredients during exploration and slower narrative moments. Many crafting materials cannot be bought later, and having a diverse stockpile ensures you can craft essential items like traps, potions, and buffs when needed.
-
Understand monster part drops and their uses: horns, tails, and other parts are tied to specific weapon upgrades. Target breaking or severing these parts to maximize crafting materials for your preferred weapon type.
-
Use your Palico effectively by upgrading its gear tailored to your crafting goals, such as equipping it with severing weapons to help carve rare parts like tails during hunts.
-
Craft traps and consumables on the go: carry trap tools and components like thunderbug capacitors and nets so you can craft shock traps or pitfall traps mid-hunt without returning to camp.
-
Customize your item loadout and radial menu for quick access to crafted consumables, which saves valuable time during hunts and improves survival chances.
-
Prioritize crafting weapons that exploit elemental or damage-type weaknesses of monsters rather than just upgrading the strongest weapon you have. This strategic crafting can make difficult hunts much easier.
-
Don’t overthink armor and weapon choices early on; focus more on mastering your weapon and understanding monster behavior. Armor grinding is more important in High Rank, so save crafting materials accordingly.
These tips help new hunters manage resources efficiently, craft strategically, and prepare better for challenging hunts in Monster Hunter Wilds.