Reality fractures at the Nishina Research Station, and Starfield’s “Entangled” quest thrusts you into a mind-bending dilemma: save a lone survivor trapped in a ruined universe, or rescue dozens in a pristine one-unless you can unravel the secret to saving both. Every choice ripples across worlds, and the fate of entire realities hangs on your next move.
In this Starfield guide, we’ll walk you through the “Entangled” mission and which universe you should choose in the mess that is the Nishina Research Station.
A possible bug at launch is that players are sometimes unable to follow the scanner. If this happens to you, we recommend returning to orbit and waiting by passing time. Consider shutting the game off and launching it fresh as well, just in case.
Also, when you make to re-land on the planet, be absolutely sure you’re picking the Scanner Anomaly Site. If you land anywhere else by accident, the temple won’t appear on the map and you won’t be able to find it.
Figuring out what’s going on
In the Starfield “Entangled” quest, players begin by responding to a distress signal from the Nishina Research Station on Freya III. Upon arrival, you are greeted by Ethan Hughes, the Chief of Security, who is initially unaware of the emergency but allows you inside to investigate. As you explore the station, you encounter distortions that let you shift between two parallel realities, revealing the complex situation involving the fate of Rafael, a key scientist, and his colleagues. The quest challenges you to navigate these realities, fight enemies like the Cataxi, and make critical decisions about which universe to save-though with careful effort, it is possible to save both. This sets the stage for a deep narrative about sacrifice, survival, and the consequences of your choices in a fractured timeline.

As part of the “Final Glimpses” mission, where you’re collecting some final artifacts, you’ll find your way to a planet called Freya III. On Freya III, there will be a satellite orbiting the planet and it will send you a hail when you first arrive in orbit. When you accept it, you’ll get the “Entangled” quest, which is much, much bigger than “Final Glimpses.”
In order to complete “Final Glimpses” you’ll be told to finish “Entangled” first.
Investigate the Distress Signal // Enter the Nishina Research Station
After you hear the distress signal and get the “Entangled” quest, ignore the satellite and turn your sights to the Nishina Research Station landing zone on Freya III instead.
Once you land, follow the waypoint to the aforementioned station – which, on the outside, seems totally fine and not at all in distress. Curious.
Activate the intercom and speak to a man named Ethan. Tell him you’re from Constellation and he’ll put you on hold. Eventually, he’ll offer to let you in, but he’ll tell you that you need to leave your current companion outside. Sorry, Sam Coe.
Speak to Ethan // Follow Ethan
After you load inside, look to your left and you’ll see Ethan standing behind some glass. He’ll scan and then talk to you. Ask him about the station and he’ll walk you toward the director. That is until you phase out of this reality and into another one entirely.
Phasing
Phasing is the core mechanic of the “Entangled” quest in Starfield, allowing you to shift between two parallel universes within the Nishina Research Station. After acquiring the Probe Control Unit during your investigation, you can use distortions scattered throughout the facility to alternate between the ruined world-overrun by alien threats-and the intact world where the staff are still alive. Navigating these realities is essential for solving puzzles, bypassing obstacles, and ultimately making the critical choice that determines which universe, and which characters, survive the experiment gone wrong. Mastering phasing is key to accessing all areas, gathering clues, and achieving the best possible outcome in the quest.
This section of the quest deals in the involuntary phasing problem and how to solve it.
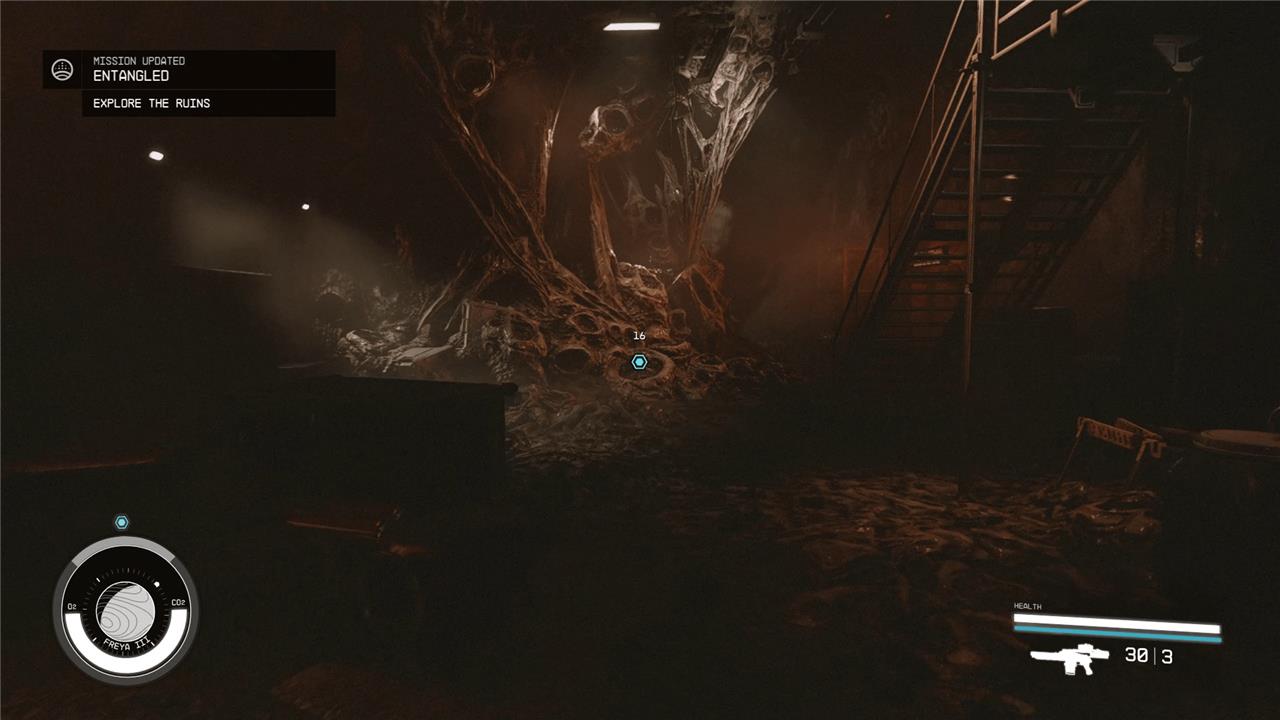
Explore the Ruins
When you pop into the ruined reality – which is what we’re going to call the one with all the bugs from now on – you’ll be under attack by a Cataxi Warrior, a charming creature local to this planet. Kill it and you’ll phase back into the pristine reality. Ethan will freak out and ask you nicely not to shoot him. Talk to him and then continue to follow him until you phase again.
Speak to Rafael
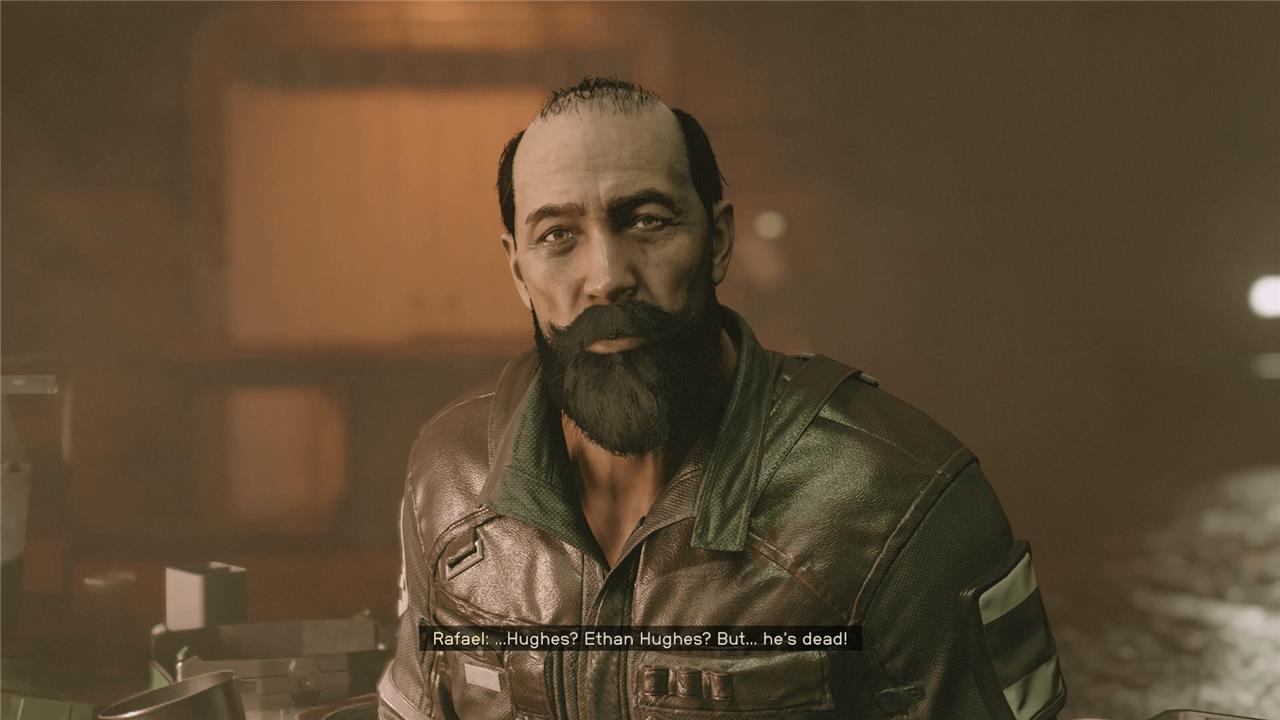
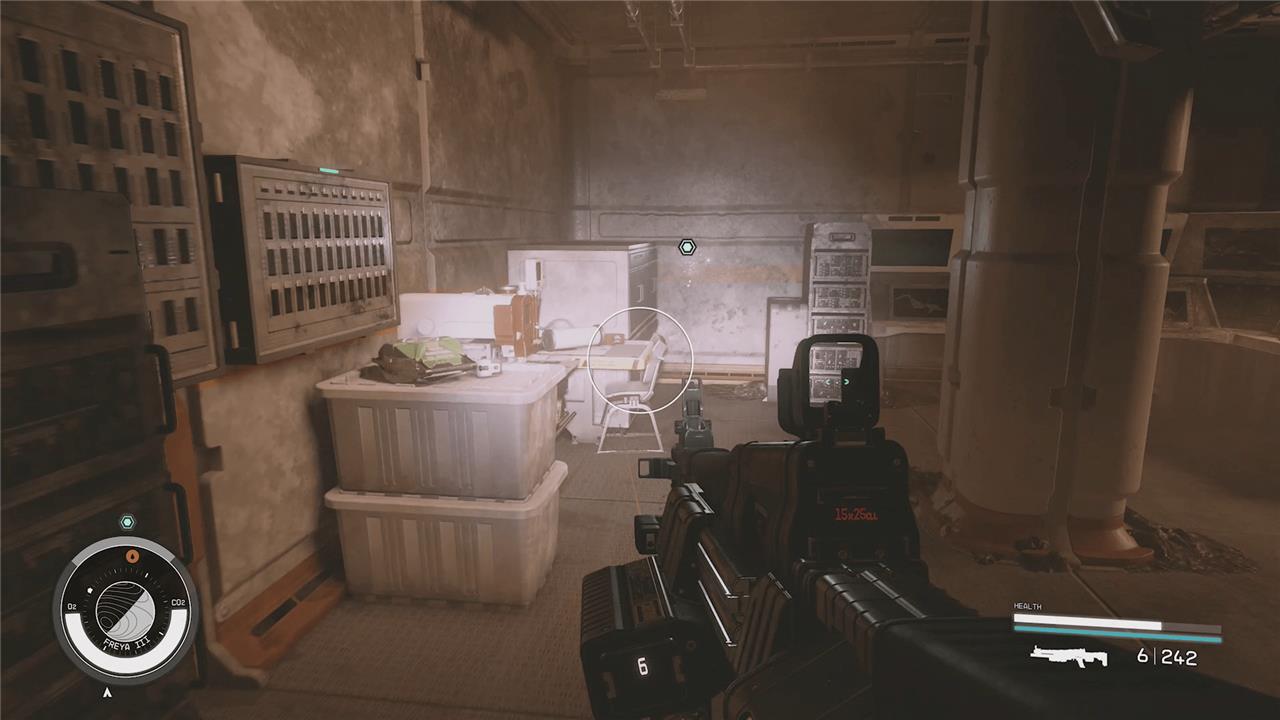
Back in the ruined reality, you’ll find a middle-aged man named Rafael hiding behind some boxes and panicking. Introduce yourself and he’ll tell you that he sent the distress signal – and that he’s the only one in the station left alive after an accident. Ask him about the distortion and you’ll phase back to the pristine reality.
Find the Director’s office // Speak to Director Patel

You’ll phase a few more times on the way to the director’s office. Walk forward, head right, and kill some Cataxi. Go up the stairs and you’ll phase again. Ethan, your loyal companion, will be waiting for you. Continue following him into Director Patel’s office.
Explain what’s happening to Patel and Maria and they’ll piece together what’s going on. They’ll also tell you a bit about the artifact and ask you to fix their little problem. But to do that, you’ll need to shut down the experiment in the basement – the one that caused Rafael’s accident (which killed him in the pristine universe).
Follow Maria // Get to the lab // Speak to Rafael
After talking to Director Patel, head out of her office with Maria and get ready to phase again. Turn around from the dead end and follow the waypoint in order to make it back to Rafael via the collapsed ceiling/floor.
Chat with him and explain the situation and your meeting with the director. You’ll tell him you need to get to the research station and he’ll become very nervous. He’ll give you a key to the door behind you and offer to back you up. Walk with him toward the waypoint and fight some Cataxi along the way.
If you struggle with the waves and waves of Cataxi here, we really recommend you make use of the Anti-Gravity Field, which suspends them for quite some time, regardless of their level.
When you make it into the ruins of the cafeteria, you’ll phase again and everyone will freak out. This is pretty standard practice for you at this point, so power through and cross to the other side of the room, where you’ll phase yet again. Head to the right, deal with the Cataxi, talk to Rafael again, and walk into the security office – where you’ll return to the pristine dimension.
Speak to Ethan
When you pop in behind Ethan, he’ll understandably freak out a bit, but calm down once he realizes it’s you – the two of you have really bonded quickly over the shared trauma of dimensional shifting.
Talk to him and he’ll give you directions to the lab. Keep talking to him and you’ll give an option to persuade him into giving you a weapon to fight the Cataxi. This is a medium difficulty Persuasion (six pips) and is absolutely worth using an auto-persuade on if you have one banked. If you succeed, he’ll hand you the Experiment A-7 shotgun, which deals bonus damage to aliens (that means Cataxi). This thing absolutely rules and we recommend you keep it handy for the rest of the mission.
Funnily enough, now that you’re pals, Ethan won’t mind if you take stuff from his office. That includes guns and ammo – both of which you’ll need a lot of over the next hour. Grab everything that’s not nailed down and head out of his door.
If you turn left back the way you came, you’ll phase back into the ruined dimension, which you don’t want to do (go back into the security office to fix this). Instead, walk out of Ethan’s office and head right. Walk toward the doorway in the next room marked “elevator” and you’ll shift again. Kill the Cataxi here and walk through the open door.
Kill the Cataxi as you go and head up the stairs through the door on your left once you enter the giant rec room – the one with observation windows along the top part of the wall.
Finally, you’ll phase back to the pristine reality. Walk into the door on your left and you’ll find Maria in the lab.
Speak to Maria // Assist Maria // Stand in the Distortion // Find the Probe Control Unit // Recalibrate the Distortion // Speak to Maria
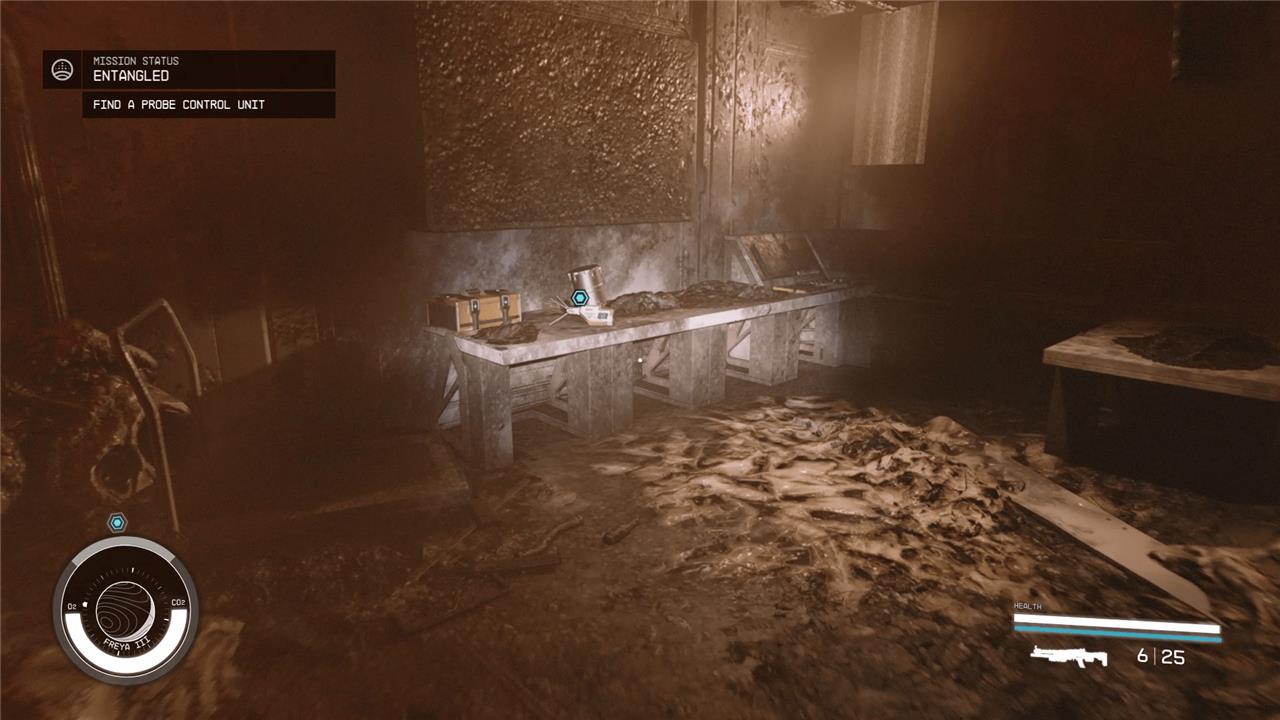
Talk to Maria, who doesn’t seem to trust you very much – and who can blame her. She want to test a control unit on you. Eventually, she’ll cause a Distortion to appear (the spinning light). Step into it and you’ll phase.
In the ruined dimension, walk forward and grab the Probe Control Unit from the table. Walk over to the Distortion in the corner of the room and activate it. This will teleport you back to the pristine reality. And with that, you’re officially done teleporting to different dimensions against your will.
Talk to Maria again and she’ll see that you already have a Probe Control Unit of your own. She’ll send you to talk to Director Patel one more time.
Speak to Director Patel // (Optional) Get supplies
Turn left from the lab and talk to Director Patel. She’ll give you the unfortunate news that you’re going to need to choose which reality stays tethered to your Starfield universe. Basically wherever you are when you shut off the machine will become the prime reality in your game. Thankfully you’ll have plenty of time to pick which dimension you want to choose.
Before you head into the basement, follow the waypoint – it should be quite a bit simpler now that you’re not phasing against your will – to Dr. Barakova. She’ll grumpily give you some meds, which you’re going to need on your adventure.
Into the basement
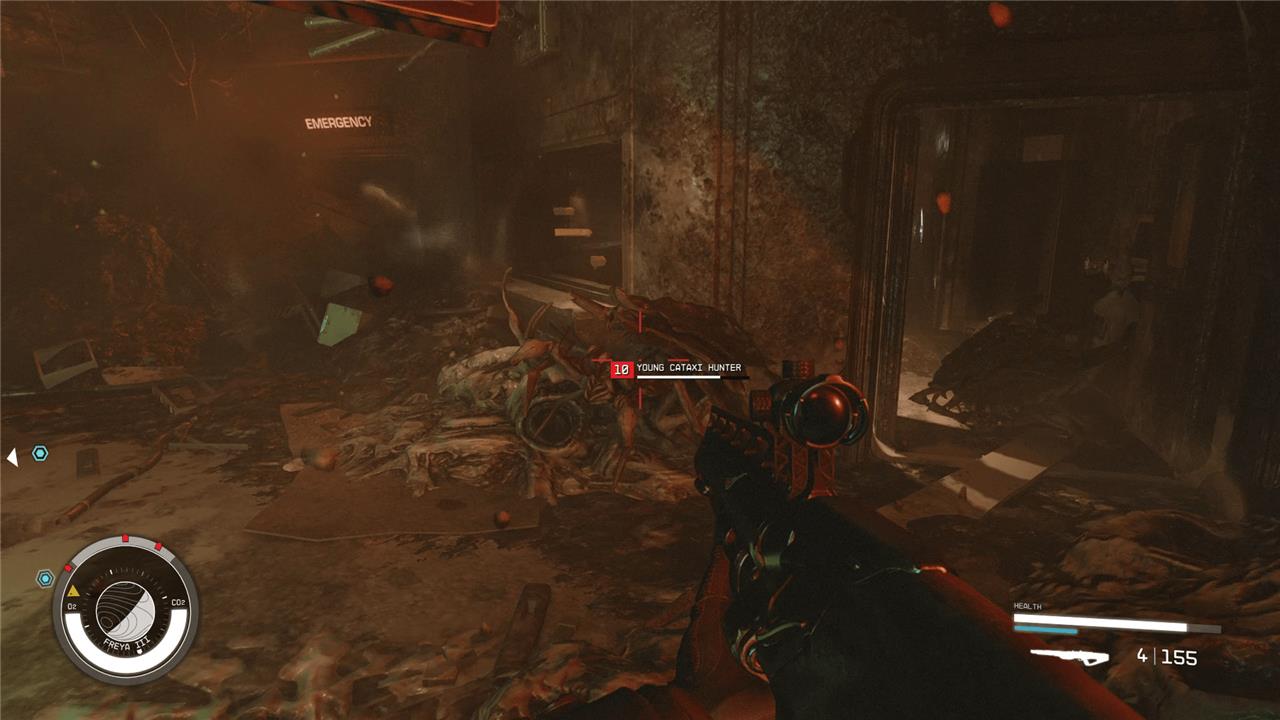
After navigating the shifting corridors and confronting hostile security systems, you’ll need to descend into the basement to continue the Entangled quest. Follow the objective marker through the east door and into a cave, battling Cataxi enemies along the way. As you climb the slope and reach a room with a hole in the ground, drop down to access the basement area. Here, you’ll encounter more distortions and security threats, so stay alert as you make your way toward the next objective marker, which will guide you deeper into the facility and closer to overriding the lockdowns critical to progressing the mission.
This next section of the quest is almost entirely about combat. Make sure you stock up on weapons and ammo before you head into the basement.
Take the elevator
When you’re ready to go down, make sure you’re in the pristine dimension before heading to the elevator. Although it’s worth mentioning that you can speak to Rafael in the ruined dimension if you want his input on the whole “which reality to choose” situation.
Anyway, use the Distortion next to the elevator to change back to the ruined dimension and ride it down to the research level.
Get to the lab // Override the lockdown the facilities section
This entire section is long and a bit tedious. We recommend you quicksave often and only grab the stuff you really want, as it’s easy to get encumbered quickly. If you do get encumbered and don’t want to drop anything, use the Personal Atmosphere power if you have it to make sure you don’t suffocate yourself by accident.
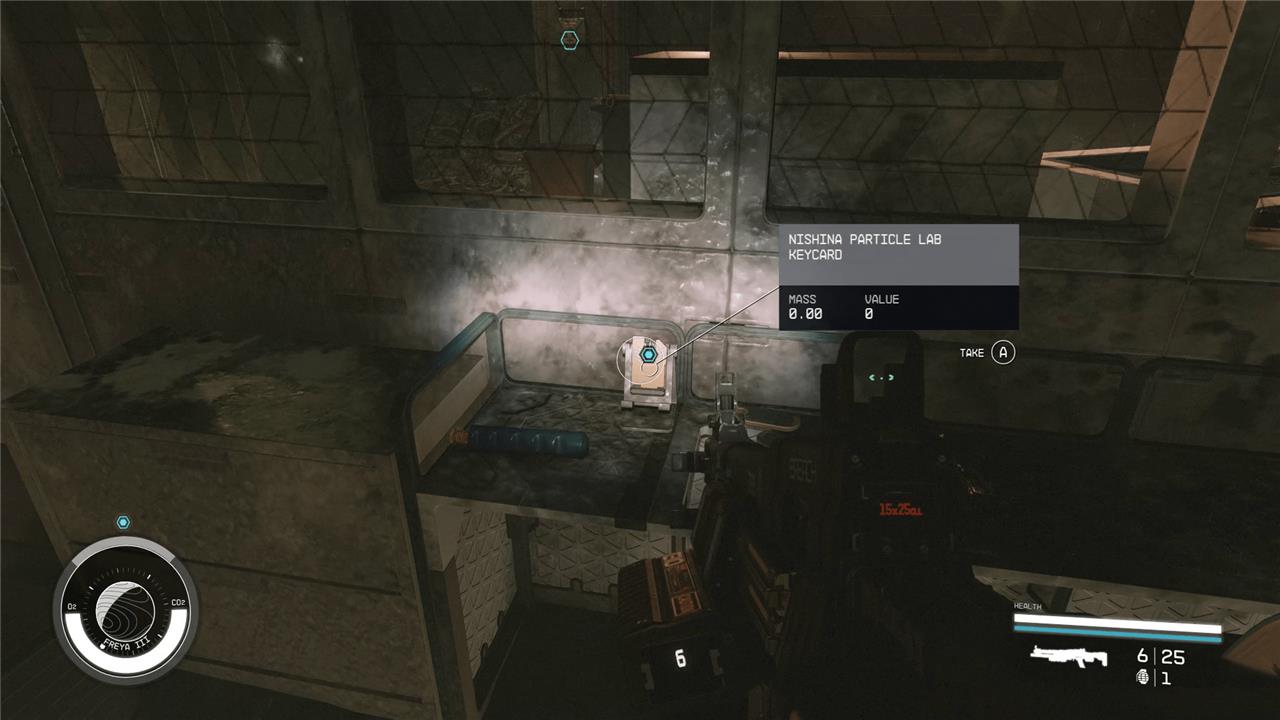
First thing you’ll need to do here is override the lockdown in the facilities section. Use the Distortion by the elevator to return to the pristine dimension. Walk forward to all the lockers (ignore the path to the left, that’s a shortcut for later) and use the Distortion to change realities to the ruined one. Head through the broken doors and grab the Nishina Particle Lab Keycard. Poke around if you’d like, but when you’re ready, use a nearby Distortion to get back to the pristine dimension.
The security system is on here, and it’s a major pain. Deal with the robots and the turrets – we’ve found laser weapons to be pretty effective – and remember that you can always shift realities if you get overwhelmed.
Use the key on the door and head down the stairs, deeper into the research area. Shoot the turrets before they get the chance to shoot you and take the Distortion in the room on your right. Back in the ruined dimension, head through the open emergency door ahead of you. (If you need more ammo and want some loot, backtrack a little to the hall with the turret, go through that emergency door, and use the Distortion to shift to the pristine dimension).
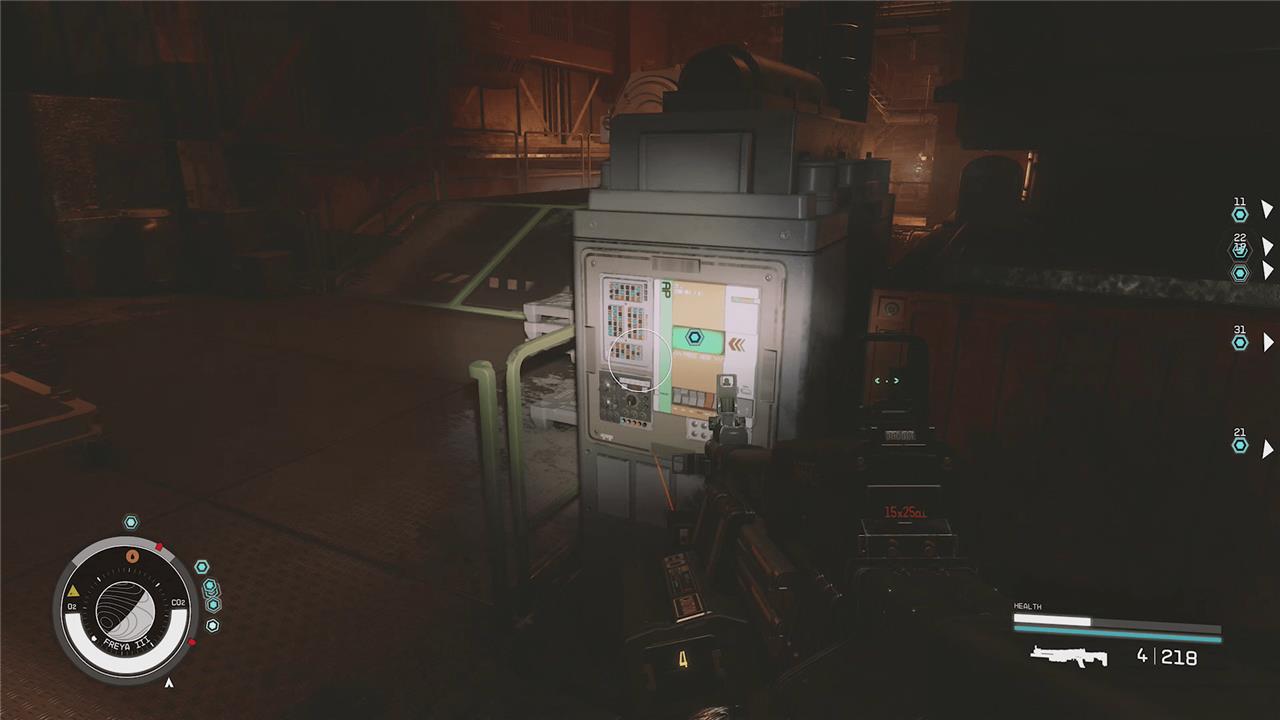
Turn left through the emergency door and follow the waypoint to a broken computer terminal. Use the nearby Distortion – which is hiding next to the machines behind you – to return to the pristine dimension. Kill the robots and turrets before accessing the computer. Override the security lockdown and turn the security system off, which will help you in this area, at least.
Override the lockdown in the accelerator section
With the door open, head through and into the hall. You’ll find yourself near the elevator back up to the station if you need to take a breather or drop off some stuff in your ship.
When you’re ready to get back to it, go through the now open door at the bottom of the ramp. Head down the stairs in the pristine dimension and open the door. This is a big area packed with robots and turrets. Take it as slow as you need to. When everything is dead or disabled, head up the stairs and into the room on the left from where you entered.
You’ll be blocked by another emergency door, so use the nearby Distortion and get ready to fight a bunch of Cataxi – if you got the experimental shotgun from earlier, now is the perfect time to use it. Clear out the room and head through the open emergency door near the Distortion you used to enter the ruined dimension.
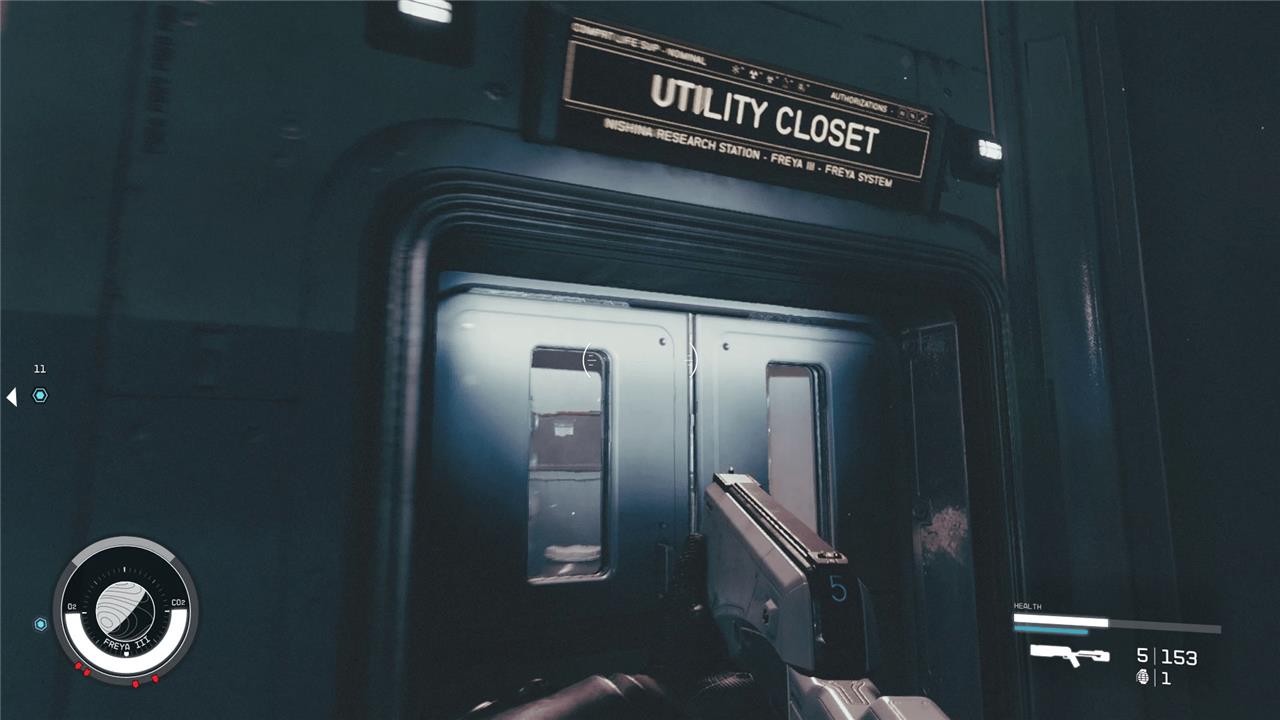
Go down the broken stairs and kill any Cataxi you find. Grab the Nishina Utility Closet Keycard off the desk. Return to the pristine dimension to loot the place if you’d like, otherwise head back up the stairs in the ruined dimension, return to the big room, and then swap back to the pristine dimension.
With the keycard in hand, head over to the wall where your waypoint is sending you. You’ll notice that all the doors are locked, but to the right of the windows you’ll find a closet. Open it using your fancy new key and you’ll find a Distortion. Bingo. Active it to travel to the ruined dimension, which is so messed up that the accelerator lab and closet are connected.
Walk into the lab and swap realities again, but be prepared for the turret waiting for you in this ruin. Take the turret out and access the console to shut down the security for this section, just like you did earlier.
Head back the way you came in (via the ruined dimension and the closet) and when you make it back to the pristine dimension you’ll find that a new doorway to a working computer will be open. Kill any new security threats and follow your waypoint to the PC in the Accelerator Control Room. Deactivate the security in here and override the locks.
Get to the lab // Override Lockdown in the Storage Section
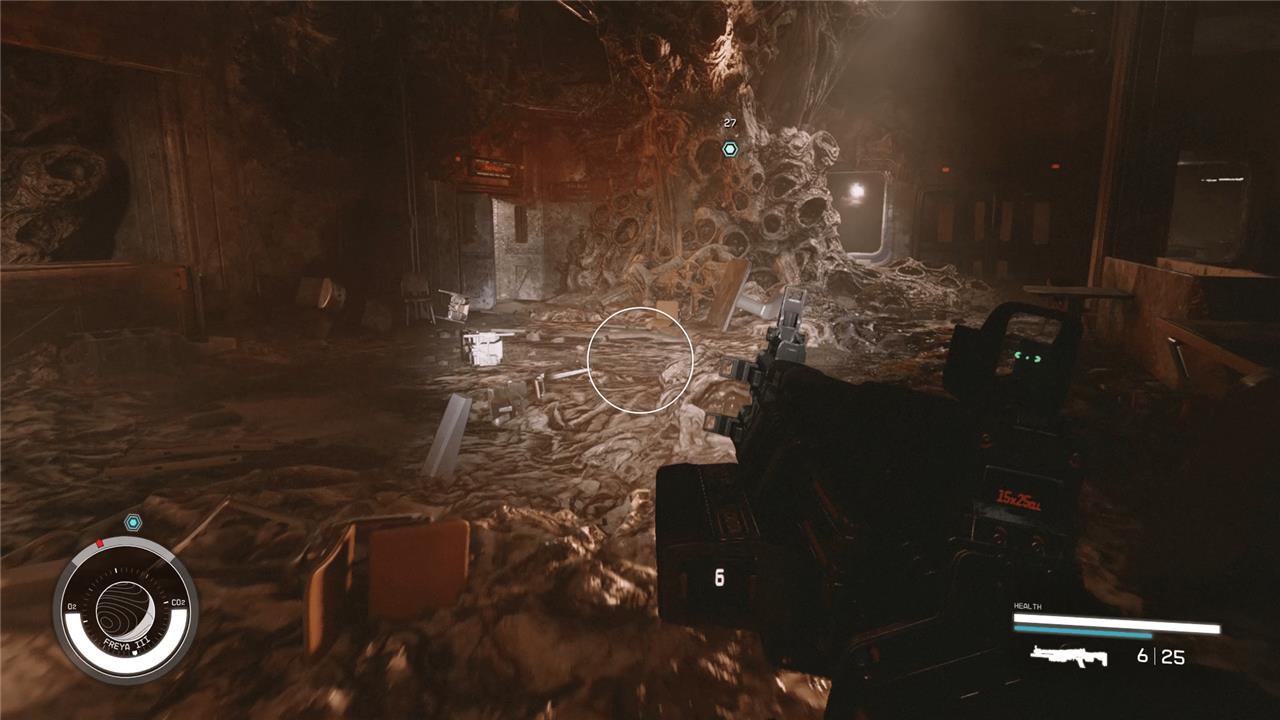
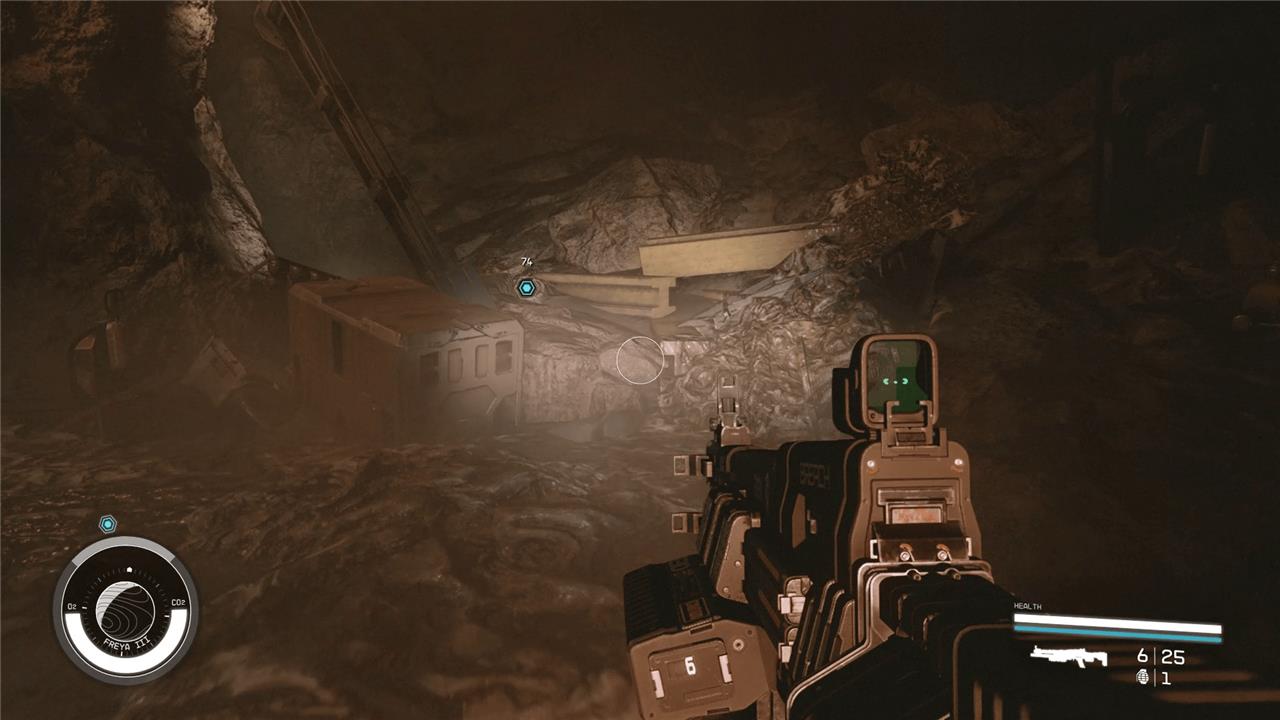
The door at the northside of the big room (again, from where you started) will now be open. Head through and swap to the ruined dimension when you reach the Distortion on your right. Walk forward and head into the Cataxi cave on your right. Climb up the rocks to the upper platform, where you’ll find another Distortion. Activate it to teleport back to the pristine dimension.
Head to your left and walk inside the little lab, dealing with all the security bots if you trip the alarm. Use the Distortion in the lab to teleport to the ruined dimension and deal with some minor Cataxi. Opposite of the door you entered, you’ll find another hole in the wall leading to another Cataxi cave. Head inside and kill the big Cataxi you find, then proceed along the path until you reach a Distortion with the waypoint marker on it. Use it.
In the pristine reality, turn around and use the computer to override this section, then head out and deal with the security here. Go up the ramp, turn right, and focus all your firepower on the extremely high level turret above the door (level 36). Use the Distortion at the bottom of the stairs and then go up the stairs and through the open door.
Which universe should you choose?
When deciding which universe to choose in Starfield’s “Entangled” quest, you’re faced with a major moral and gameplay decision. You can either save Rafael, who is trapped alone in one reality, or save the rest of the Nishina Research Station staff in the other. However, there’s also a hidden third option: with careful actions, you can actually save both universes. To do this, you must complete specific steps in both realities before making your final choice, which is a bit more time-consuming but results in the best rewards-including more credits, unique gear, and the ability to recruit Rafael as a companion later on. If you want the most satisfying outcome and maximum rewards, saving both universes is the optimal choice. Otherwise, choose based on which character or group you feel deserves survival more, knowing each outcome has its own consequences for the story and your journey.
Finally, you’ll reach the machine and the probe. This is the decision point here. Select the universe you want to be your universe.
Keeping in mind the morals of one man vs 30 people, it’s worth mentioning that you can eventually hire Rafael to your crew if you save the ruined dimension. If you save Director Patel and company you get a very cool space suit.
Which universe you should choose is ultimately up to you, as neither reward is so game changing that you absolutely must have it. And, as far as we’ve been able to tell, there are no long-term affects on the story based on your choice here.
Still, you’re never really wanting for companions in Starfield, so unless you’re a big outpost builder, the spacesuit will do you a lot more good than Rafael – not to put too fine a point on it. You’re also able to ask Director Patel to honor Rafael’s sacrifice, which doesn’t really do anything, but helps absolve the guilt a little bit (and really makes saving the pristine dimension feel like the “good” choice).
Disengage power interlocks (7/7) or switch universes // Shut down the probe // Take the artifact
Once you’ve made your decision, change to that dimension and head into the room with the machine. Shut off the switches in the reality of your choice.
Enemies will try and attack you while you do this, regardless of your universe. This actually makes this room pretty lucrative for XP, as you can swap between dimensions, kill all the enemies, and then choose the one you want.
When you’re ready, turn off the probe and grab the artifact from the wall.
Speak to Director Patel/Rafael
Whichever reality you chose, head through the exit and back up the elevator.
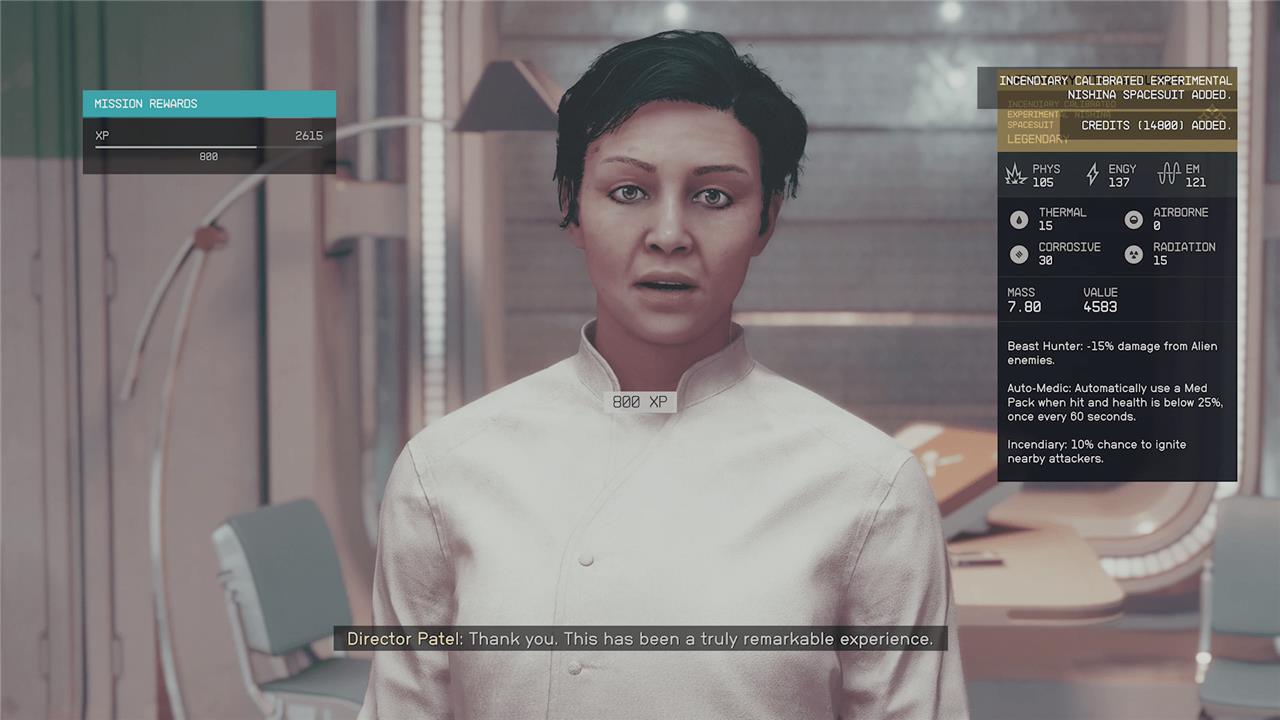
The surviving NPC will talk to you as soon as you exit the elevator room. Director Patel and company will thank you for your service with a legendary spacesuit that gives you bonus damage to aliens and has some pretty beefy stats. Rafael will return with you to your ship and ask for you to drop him off at the next civilized system, but promises that he’ll eventually work for you, if you’re ever in need of an engineer.
Which universe should I choose to maximize my rewards in Starfield’s Entangled quest
To maximize your rewards in Starfield’s “Entangled” quest, you should choose the secret third option: save both universes. By following the Calibration Protocol found on Rafael’s body in the unruined universe, you can complete a series of steps involving degaussing switches and calibrating frequencies in both realities. This allows you to save everyone, resulting in the best set of rewards:
-
Experimental Nishina Spacesuit (legendary)
-
Experimental Nishina Helmet (legendary)
-
A higher credit payout (typically 17,000-23,000 credits)
-
Rafael becomes available as a recruitable crew member later in New Atlantis
This option gives you all the unique gear, the most credits, and access to Rafael as a companion-making it the most rewarding outcome both narratively and financially.
How does saving both universes affect my overall rewards in Starfield’s Entangled quest
Saving both universes in Starfield’s Entangled quest gives you the most substantial overall rewards compared to choosing just one universe. If you successfully save both, you’ll receive:
-
The Incendiary Refined Experimental Nishina Legendary Spacesuit
-
The Reactive Refined Experimental Nishina Legendary Helmet
-
23,000 credits (higher than the payout for saving only one universe)
-
800 XP
-
Rafael becomes available as a recruitable crew member in New Atlantis, bringing valuable engineering skills for outpost and starship management.
If you only save one universe, you get either the legendary suit and helmet or Rafael as a crew member, but not both, and the credit reward is lower. Therefore, saving both universes maximizes your rewards in terms of gear, credits, and crew options.