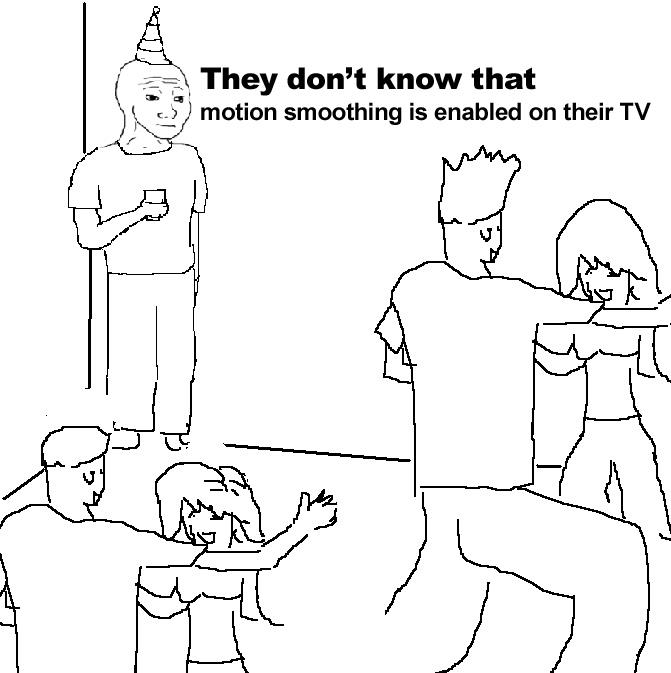
You sit down to watch a cinematic masterpiece-only to find the actors moving with an eerie, hyper-real smoothness, as if you’ve stumbled into a daytime soap opera. The culprit? Motion smoothing, a default TV setting that’s quietly sabotaging your movie nights. Here’s how to banish the “soap opera effect” from your screen-and anyone else’s-so films look just as their creators intended.
The technology, which rose to prominence with the advent of high-definition televisions in the mid-2000s, is a terrific demonstration of the adage that ignorance is bliss. If you know what motion smoothing is, there’s a good chance that it drives you mad every time you see it in action at your parents’ house, or at a local sports bar, or on the wall of TVs at Target. Meanwhile, normal people happily live their lives free of this mental prison, unaware that there’s anything wrong with what they’re seeing (perhaps because the feature is often enabled by default).
Not to worry: We’re here to help you save the day. Now, it’s probably not worth bringing this up at the pub – but if you’re spending time with family over the holidays, your uncle is presumably (somewhat) less likely to ask you to leave than your favorite bartender would be. So why not do everyone a favor and help them watch things As The Filmmakers Intended™?
What is motion smoothing?
Motion smoothing, also known as motion interpolation or image interpolation, is a feature on most modern TVs that artificially increases the frame rate of video content by generating and inserting extra frames between the originals. This process involves the TV analyzing adjacent frames and creating new transitional images to make motion appear smoother, typically to match the TV’s higher refresh rate. While motion smoothing can make fast-moving content like sports look sharper, it often causes movies and TV shows-usually filmed at lower frame rates-to look unnatural and overly smooth, a phenomenon commonly referred to as the “soap opera effect”. This effect can alter the intended cinematic feel, making films look more like live video or daytime television.
Motion smoothing, which is also known as video interpolation or, more colloquially, the soap opera effect, is a post-processing technique applied by a television to video it’s displaying. The TV takes the video feed’s individual frames – of which there are typically 24 per second for movies, and 30 or 60 per second for TV broadcasts and streaming services – and artificially inserts extra frames between the existing ones. In doing so, it scales up the frame rate to match the screen’s native refresh rate of 60 Hz or 120 Hz. TVs use interpolation (i.e., they do math) to make educated guesses as to what the in-between frames should look like, and generate them in real time. Hence the alternate name!
The goal of this technique is to smooth out the footage and reduce motion blur. While it works as advertised, it can wreak havoc on the video itself (by introducing input lag as well as visual artifacts, a type of anomaly that arises from the challenges of algorithmically interpolating frames) and on the intended appearance of films and TV shows. After all, the other alternate name is a similarly literal one: Turning motion smoothing all the way up will make a movie look the way daytime soap operas on television do, with uncannily fluid motion that robs films of their cinematic look. (It’s worth noting that there is one area where motion smoothing can be useful: watching live sports.)
The people who make movies and TV shows despise motion smoothing, as you might expect. Rian Johnson, director of the Knives Out films and Star Wars: The Last Jedi, described the feature in a since-deleted tweet as making movies “look like liquid diarrhea.” Christopher McQuarrie is the writer-director of the past three Mission: Impossible films, but his most enduring work in my mind may be the Twitter five years ago from the set of Top Gun: Maverick, in which the two of them explained why motion smoothing is bad and recommended that cinephiles disable it.
Is there an easy way to turn off motion smoothing?
Yes, turning off motion smoothing is generally straightforward on most modern TVs. The feature is usually found in your TV’s settings menu under names like “Auto Motion Plus” (Samsung), “TruMotion” (LG), “Motionflow” (Sony), or “Action Smoothing” (Roku/TCL). Simply use your remote to navigate to the picture or advanced settings menu, locate the motion smoothing option, and switch it off. Many TVs also offer a “Filmmaker Mode,” which disables motion smoothing and other post-processing effects automatically for a more authentic viewing experience. While the exact steps vary by manufacturer, the process typically takes only a minute or two and requires no special technical knowledge.
As of 2023, many of the latest TV models – especially higher-end ones – offer a feature called Filmmaker Mode, which debuted a few years ago as the result of a collaboration between consumer electronics companies, movie and TV studios, and Hollywood creatives. Filmmaker Mode disables all post-processing effects, including motion smoothing, and ensures that a TV is displaying content in its original aspect ratio with the appropriate brightness levels and the highest possible accuracy in colors.
If your TV supports Filmmaker Mode, you’ll usually be able to find it as a distinct setting in the list of picture modes, alongside typical options like Standard, Vivid, Game, Movie, and Sports. In addition, certain types of content feature metadata that can automatically enable it during playback, whether you’re watching via a built-in smart TV app or a plugged-in device like an Apple TV 4K. So if you pull up an HDR movie on, say, Netflix or Prime Video, it should flip on Filmmaker Mode without you having to change the picture setting yourself.
How do I turn off motion smoothing on my TV?
To turn off motion smoothing on your TV, start by opening the settings menu-usually accessible via the Settings, Menu, or Home button on your remote. Next, navigate to the Picture or Display settings, and look for an advanced or expert settings submenu. Motion smoothing features go by different names depending on your TV brand: Samsung calls it “Auto Motion Plus,” LG uses “TruMotion,” Sony labels it “Motionflow,” Vizio has “Smooth Motion Effect,” and TCL or Roku TVs use “Action Smoothing.” Once you find the relevant setting, select it and switch it to “Off.” Some TVs also offer a “Filmmaker Mode” or “Cinema/Movie Mode,” which disables motion smoothing automatically for a more authentic viewing experience.
Almost every one of the major TV brands has its own special name for motion smoothing, so it can be difficult to hunt it down in your settings menu. Thankfully, we’ve done that work for you! Simply scroll down to learn what your TV maker calls it, and where to find it so you can disable it.
Note that if you don’t see the setting in question in your TV’s menu, it either doesn’t support motion smoothing at all, or doesn’t allow users to disable it.
Amazon Fire TV 4-Series / Omni Series / Omni QLED Series
To turn off motion smoothing on Amazon Fire TV 4-Series, Omni Series, or Omni QLED Series, you need to access the picture settings while actively playing a video. Start by playing content from any app (like Netflix or Disney+), then hold down the Home button on your remote to bring up the quick menu. Navigate to “Picture,” then select “Clarity Settings” or “Advanced Settings,” depending on your model. Look for the option labeled “Motion Processing” or “Action Smoothing” and set it to “Off.” This will disable the motion smoothing effect, helping restore a more cinematic and natural look to movies and shows. If you don’t see the option in the main settings, make sure you’re adjusting settings while a video is playing, as some Fire TVs only reveal these controls during playback.
Name: Action Smoothing
Location: Settings > Picture > Advanced Settings > Action Smoothing
Hisense
To turn off motion smoothing on a Hisense TV, press the Home button on your remote, navigate to Settings, select System Settings, then Picture, and scroll to the Motion Smoothing option to switch it off. On some models, you may find the setting under Picture > Advanced Settings > Motion Enhancement, where you can set it to Off or Clear. Disabling this feature should remove the “soap opera effect” and restore a more cinematic look to your content. However, some users have reported persistent smoothing effects even after turning the setting off; in rare cases, additional steps like disabling fast startup or reinstalling apps may be necessary to fully resolve the issue. Overall, Hisense TVs provide a straightforward way to disable motion smoothing, ensuring you can enjoy films and shows as intended.
Name: Motion Enhancement
Location: This will depend on your specific TV, since some higher-end Hisense models allow users to adjust video settings separately for each input, but here are two common menu setups:
Settings > Display & Sound > Picture > Color/Clarity > Motion Enhancement
Settings > Display & Sound > Picture > Advanced Settings > Motion Enhancement
LG
On LG TVs, motion smoothing is referred to as “TruMotion.” To turn it off, press the Settings button (the gear icon) on your remote, navigate to the Picture menu, then go to Advanced Settings, and select Clarity. Within Clarity, find the TruMotion option and set it to Off or Cinematic Motion. For those who want a hassle-free experience, LG also offers Filmmaker Mode, which automatically disables motion smoothing and other post-processing effects to preserve the director’s intended look. This mode can be set to activate automatically when compatible content is detected, ensuring movies and shows are displayed as intended without the need to adjust settings each time.
Name: TruMotion
Location: Settings > All Settings > Picture > Advanced Settings > Clarity > TruMotion
Roku Select Series / Plus Series
To turn off motion smoothing-known as “Action Smoothing”-on Roku Select Series and Plus Series TVs, start by pressing the Star (*) button on your Roku remote while you’re watching content. This opens the Options menu. From there, scroll to “Advanced Picture Settings” and look for “Action Smoothing.” You can then use the left and right buttons on the remote to adjust or disable the feature. If “Action Smoothing” is not listed in the Advanced Picture Settings, your Roku TV model may not support this feature. Some users have reported issues with always-on motion smoothing after recent Roku OS updates; if you’re affected and can’t turn it off, try switching to “Filmmaker Mode” if available, or wait for a software fix from Roku.
Name: Action Smoothing
Location: Settings > TV Picture Settings > Advanced Picture Settings > Action Smoothing
Samsung
To turn off motion smoothing on a Samsung TV, navigate to the Settings menu, then select Picture, followed by Expert Settings. Look for the Auto Motion Plus or Picture Clarity Settings option-these are Samsung’s names for motion smoothing features. Set Auto Motion Plus (or Picture Clarity) to Off to disable the effect entirely. If you prefer more control, you can choose Custom and adjust Blur Reduction, Judder Reduction, and LED Clear Motion individually. On some models, switching to Filmmaker Mode or turning off Intelligent Mode can also help eliminate motion smoothing across all apps, though some users report that certain streaming apps may still display the effect due to content-specific processing or software bugs.
Name: Auto Motion Plus / Picture Clarity
Location: Regardless of what it’s called on your Samsung TV, the motion smoothing setting lives in essentially the same place.
Settings > Picture > Expert Settings > Auto Motion Plus Settings > Auto Motion Plus
Settings > Picture > Expert Settings > Picture Clarity Settings > Picture Clarity
Sony
On Sony TVs, motion smoothing is referred to as Motionflow. To turn this feature off, press the Settings or Home button on your remote, then navigate to the Settings icon. From there, go to Picture Settings (sometimes labeled as Display & Sound), select Picture, then Motion, and finally Motionflow. Set Motionflow to Off or Clear to disable motion smoothing entirely. Depending on your Sony model, you may need to access Advanced Settings to locate the Motionflow option. Adjusting or turning off Motionflow will remove the “soap opera effect” and restore a more natural look to movies and TV shows.
Name: Motionflow
Location: Settings > Display & Sound > Picture > Motion > Motionflow
TCL
On TCL TVs, motion smoothing is referred to as “Action Smoothing.” This feature artificially increases the frame rate of movies and shows, which can make them appear unnaturally smooth, often resulting in the so-called “soap opera effect.” To turn off Action Smoothing on most TCL models, press the gear button on your remote, navigate to Settings > Display & Sound > Picture > Advanced Settings, and then select Action Smoothing to switch it off. For TCL Roku TVs, open an input or app, press the asterisk (*) button on your remote, go to Picture Settings, and look for the Action Smoothing option within Advanced or Expert Picture Settings to disable it. If you’re running into issues after a software update, try holding the Star button on your remote to access Advanced Picture Settings, where you can turn off Action Smoothing, or switch to Filmmaker Mode if available.
TCL’s settings menu varies depending on your particular model’s smart TV platform. Some of the company’s TVs rely on Roku, while others use Google TV. TCL also manufactures displays that have Amazon’s Fire OS as their smart TV platform, but we were unable to confirm the motion smoothing features of those models.
Note that on Roku-based TVs, you’ll need to press the remote’s Options button (it’s the one with the asterisk on it) separately on each input to change the motion smoothing setting.
Name (Google TV): Motion Clarity
Location: Settings > Display & Sound > Picture > Advanced Settings > Motion > Motion Clarity
What makes 4K monitors the best choice for crystal-clear visuals and precision tasks?
Advantages of 4K Monitors for Crystal-Clear Visuals and Precision Tasks
4K monitors are increasingly recognized for their exceptional visual quality and precision, making them a preferred choice for various applications, including gaming, content creation, and professional tasks. Here are the key reasons why 4K monitors stand out:
1. Superior Resolution and Image Quality
-
High Pixel Density: With a resolution of 3840 x 2160 pixels, 4K monitors provide four times the pixel count of Full HD (1920 x 1080) displays. This results in incredibly sharp and detailed images, which are crucial for tasks that require fine detail, such as photo editing and graphic design.
-
Enhanced Color Accuracy: Many 4K monitors support wide color gamuts (e.g., sRGB, Adobe RGB), ensuring that colors are vibrant and true to life. This is particularly beneficial for creative professionals who rely on precise color reproduction.
2. Increased Screen Real Estate
-
More Workspace: The higher resolution allows users to fit more content on the screen simultaneously. This is advantageous for multitasking, enabling users to work on multiple applications or documents without the need to switch between windows constantly.
-
Improved Text Clarity: The increased pixel density also enhances text sharpness, making it easier to read and reducing eye strain during prolonged use.
3. Enhanced Gaming Experience
-
Smooth Motion: Many 4K gaming monitors feature high refresh rates (e.g., 144Hz), which provide smoother motion and reduce motion blur during fast-paced gaming. This leads to a more immersive gaming experience, allowing gamers to react quickly in competitive scenarios.
-
Tear-Free Gameplay: Technologies like AMD FreeSync or NVIDIA G-SYNC synchronize the monitor’s refresh rate with the graphics card’s frame rate, eliminating screen tearing and stuttering for a fluid gaming experience.
4. Future-Proofing
-
Content Availability: As more media content is produced in 4K resolution, having a 4K monitor ensures compatibility with the latest high-quality media formats. This is especially relevant for streaming services and video games that are increasingly adopting 4K standards.
5. Versatile Connectivity Options
-
Multiple Input Ports: Many modern 4K monitors come equipped with various connectivity options such as HDMI, DisplayPort, and USB-C, allowing users to connect multiple devices easily. This versatility is essential for both gaming setups and professional workstations.
Conclusion
In summary, 4K monitors offer crystal-clear visuals and precision that cater to a wide range of uses from gaming to professional applications. Their superior resolution, enhanced color accuracy, increased workspace efficiency, and future-proof capabilities make them an ideal choice for anyone seeking an elevated visual experience.
How does 4K resolution improve productivity for tasks like video editing
4K resolution significantly enhances productivity for video editing and similar precision tasks by offering a combination of sharper visuals, expanded workspace, and improved color accuracy. The high pixel density of 4K monitors delivers exceptionally sharp and detailed images, allowing editors to see fine details in footage without pixelation, which is crucial for tasks like color grading and frame-by-frame adjustments.
The increased screen real estate means you can view more of your editing timeline, multiple video tracks, and editing tools simultaneously, reducing the need to constantly zoom or toggle between windows. This allows for a more efficient workflow, as editors can keep reference materials, media bins, and effect controls visible at all times.
Additionally, the enhanced clarity and color precision of 4K monitors help reduce eye strain during long editing sessions and ensure that the final output matches professional standards. These advantages make 4K monitors a valuable investment for anyone engaged in video editing or other demanding visual tasks.