Before you take on the colossal beasts of Wild Hearts, there are a few secrets that can spare you countless setbacks. From mastering Karakuri constructs to reading a Kemono’s patterns, knowing these ten things could be the edge you need before your first hunt begins.
Wild Hearts is a game with a lot of mechanics and lengthy menus. It’s easy to get lost. But we’ll help you along with the tips and tricks we’ve picked up from roughly 20 hours with the game. Below, our Wild Hearts beginner’s guide has advice on everything from the basics of game to mastering the Karakuri magic to the best way to build your camps.
Yeah, look, it’s a Monster Hunter clone
Wild Hearts wears its inspiration proudly, borrowing much from Monster Hunter’s structure and pace. You’ll chase massive beasts across open areas, gathering materials to craft better weapons and armor before facing tougher foes. What sets it apart is the Karakuri system-buildable gadgets that add movement, strategy, and creativity to combat. While the core loop will feel familiar to Monster Hunter veterans, the mechanical twists keep encounters fast, flexible, and surprisingly distinct.
If you’ve played one of the (many) Monster Hunter games before, you know basically everything you need to know about Wild Hearts. The Karakuri mechanic will be new to you (and a lot of fun), but you’re going to have a solid grasp on everything else.
Don’t judge Wild Hearts too harshly for this, though. Think of it like this: the Monster Hunter games define the monster hunting genre – a genre Wild Hearts fits neatly into.
If you’re not familiar with Monster Hunter (or monster hunting games in general), let’s talk about what you’ll need to know.
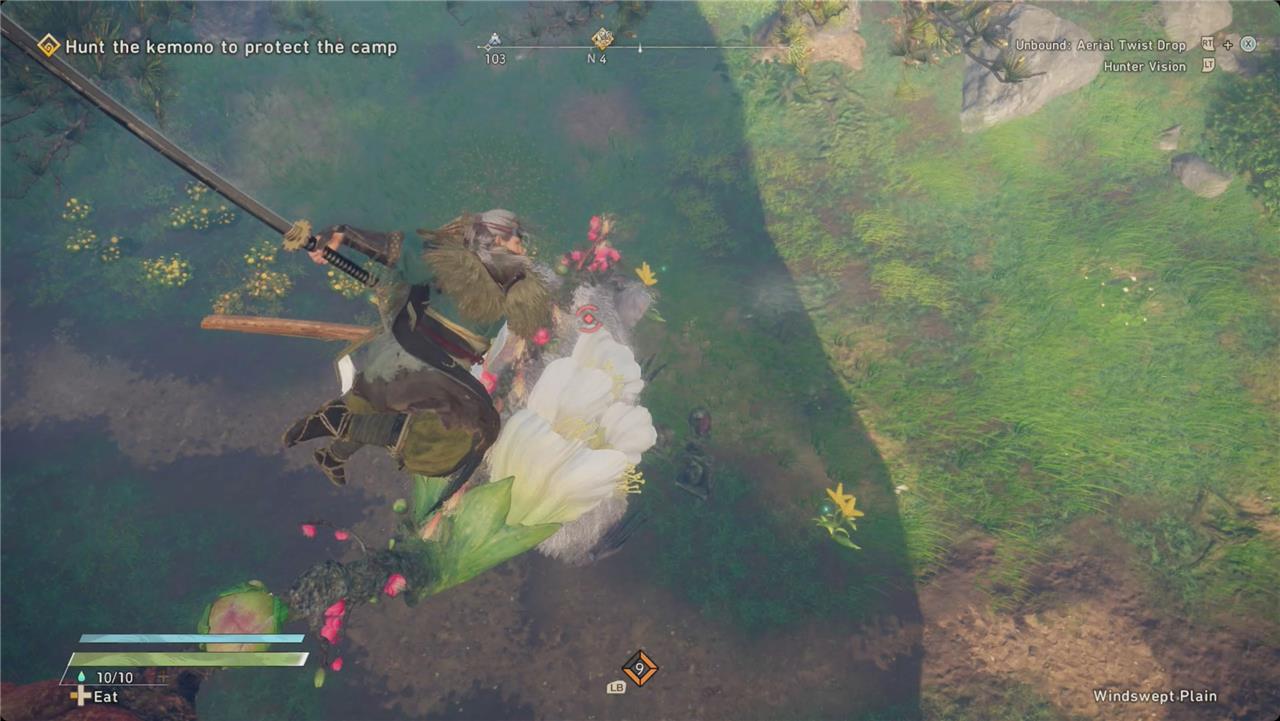
Kill monsters for better gear to kill better monsters
Progress in Wild Hearts depends on the loop of fighting fierce beasts to earn materials that craft stronger weapons and armor. Each new creature drops unique components, allowing you to tailor your loadout and improve your odds in tougher battles. Upgrading your gear isn’t just about raw power-it also grants resistances and bonuses that can turn close encounters into clean victories as you face the game’s most dangerous monsters.
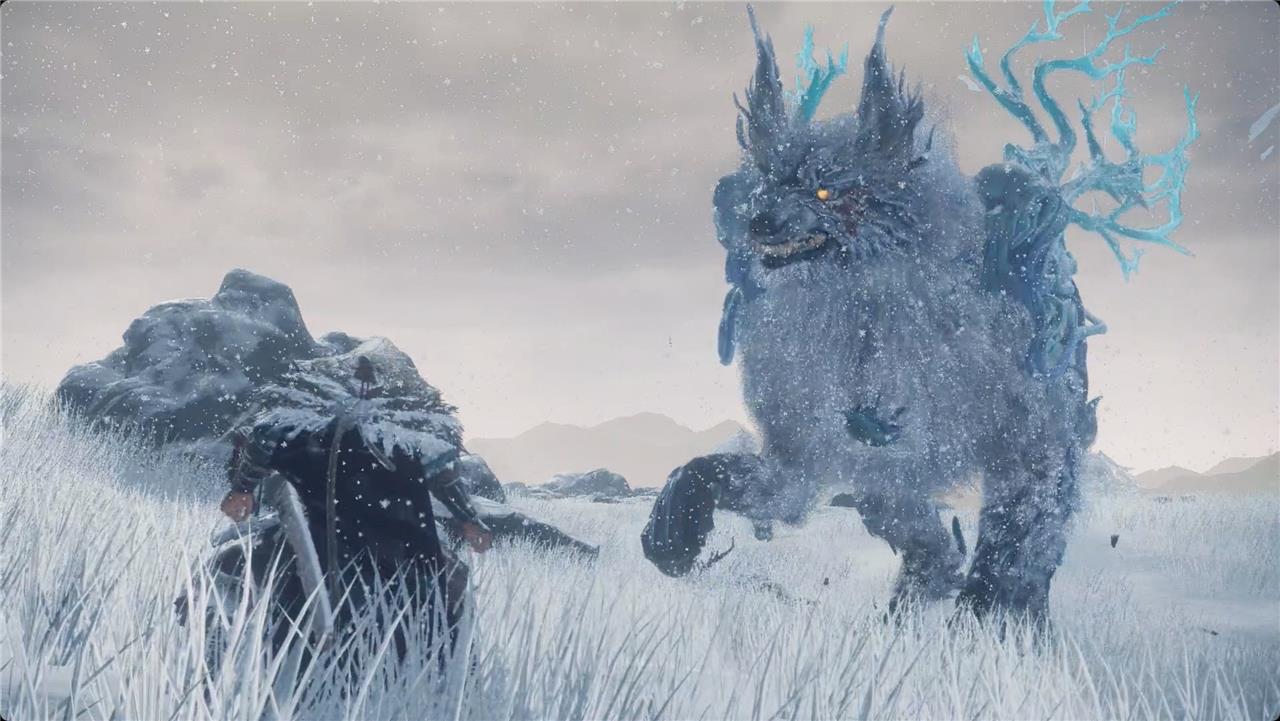
Wild Hearts is a monster hunting game with the familiar monster hunting loop. You kill monsters (Kemono) to get monster parts that you turn into new armor and weapons. Those new armor and weapons help you kill better monsters for better gear. Lather, rinse, repeat.
In Wild Hearts, that’s the core loop you’ll play, but continuing along the main story to hunt new monsters is also how you’ll unlock new Karakuri (magical constructions).
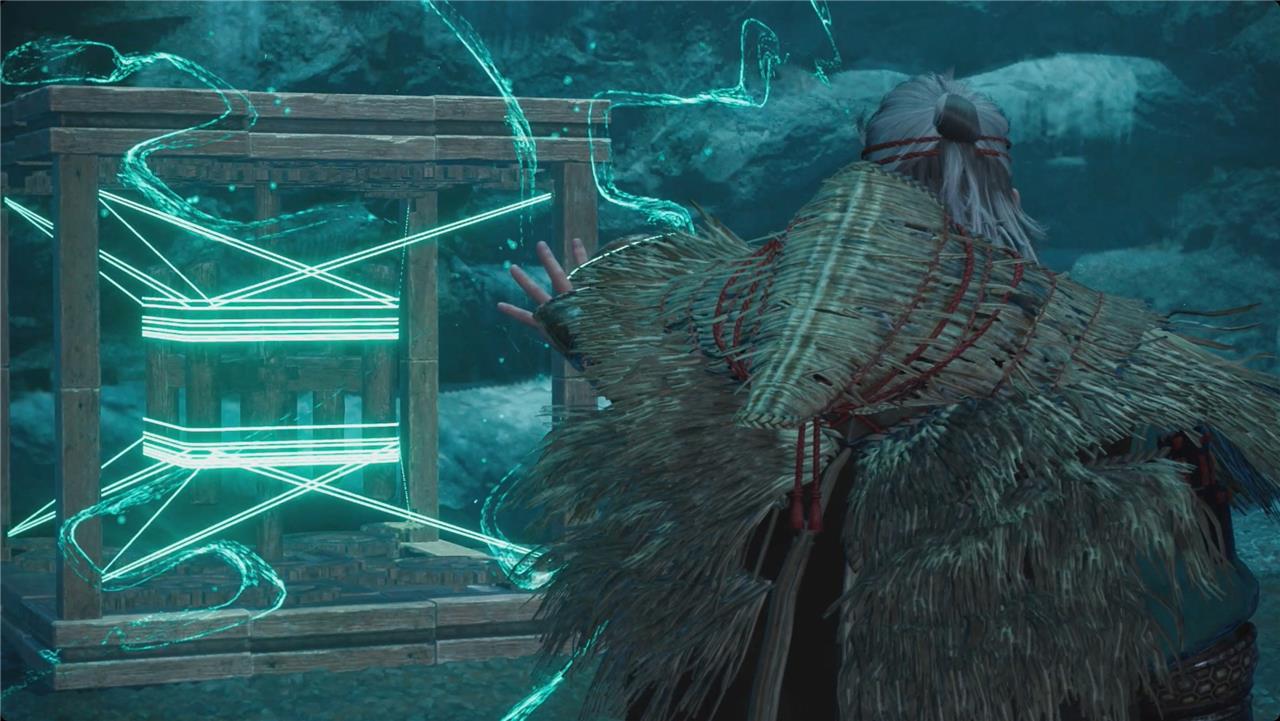
Two kinds of Karakuri
Karakuri come in two main types: Basic and Fusion. Basic Karakuri are simple constructs created from a few thread units, such as springs, gliders, or walls, which help you move quickly or defend yourself. Fusion Karakuri combine multiple basic forms into advanced structures that can turn the tide of battle, like giant hammers or healing towers. Mastering when and how to build each type makes combat smoother and lets you adapt to different enemy behaviors.
You’re introduced to Karakuri – Wild Hearts‘ cool gimmick for a monster hunting game – pretty early on. With it, you can conjure devices and structures (like crates and springs and radar towers and tents) into existence, kind of like Fortnite.
These serve two purposes: to build camps and to aid you in combat.
In combat, you’ll use Karakuri do things like build a tower of three crates, which you can jump off to deal extra damage, or conjure a torch that’ll add fire damage to your attacks.
At a camp – which has to be built near a Dragon Pit (more on these in a second) – you’ll use Dragon Karakuri to build things like a tent for fast travel or a radar tower to help locate monsters.
Not every Dragon Pit is the same
Each Dragon Pit in Wild Hearts offers different resources and capacity limits, so you can’t treat them all the same. Some provide more elements for building Karakuri, while others have restricted space that limits what you can construct nearby. Before expanding your base or crafting tools, check the upgrade potential and resource balance of each pit. Choosing the right location early saves materials and keeps your Karakuri network running smoothly across the map.
Each area you visit will have several Dragon Pits. These underground springs serve as potential camp locations. You’ll need to unblock a Dragon Pit when you discover it – which requires a few local resources to do. After that, you can continue to upgrade it – which costs increasingly rare items like Large Mist Crystals and Giant Spring Dust Crystals (we haven’t found any yet) – to build even more Dragon Karakuri nearby.
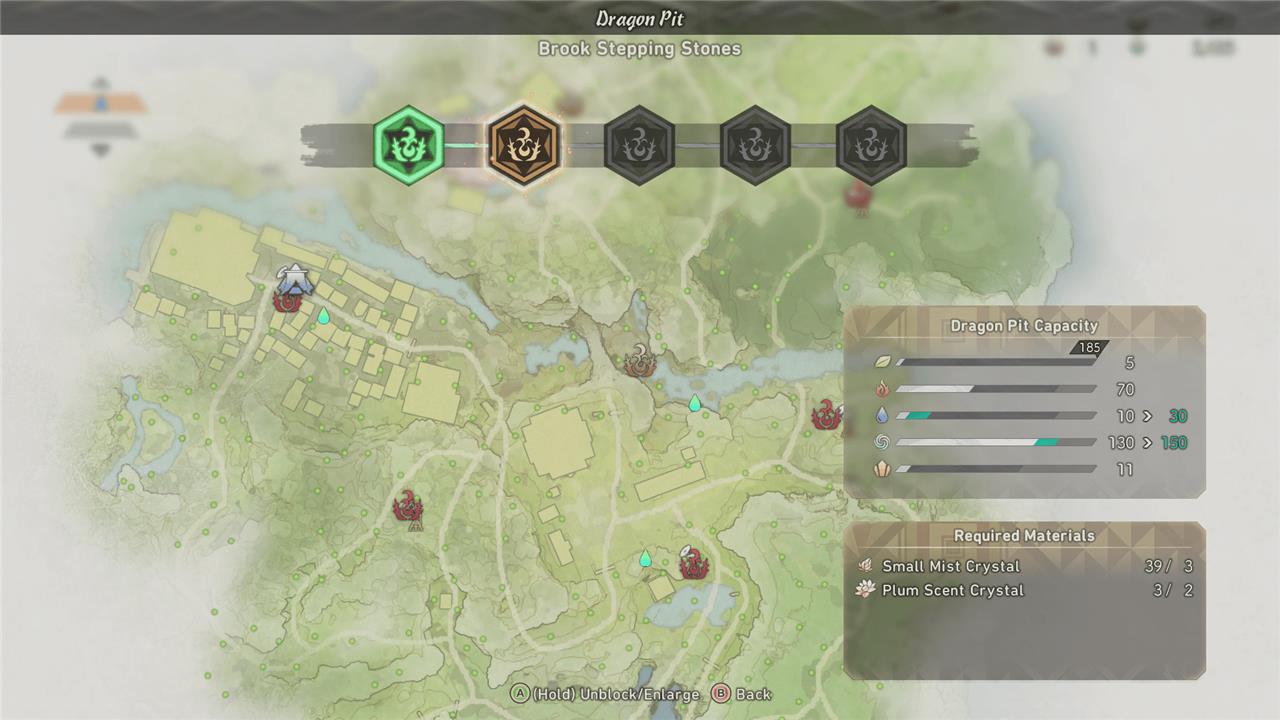
Every Dragon Spring has a set of stats to represent what can be built there, and each Dragon Kurakuri has an associated type that matches those stats. For example, the Dragon Spring in the image above has low wood, water, and earth, but high fire and wind.
When you hold down L1/LB to pull up your Kurakuri menu and switch to Dragon Kurakuri, you’ll see matching icons next to each Dragon Kurakuri you can build, along with the requirements for each.
If the Dragon Pit doesn’t have enough of any one stat (resource), you’ll either need to upgrade it until it does (which takes a lot of work and resources), or just look elsewhere for a pit that does.
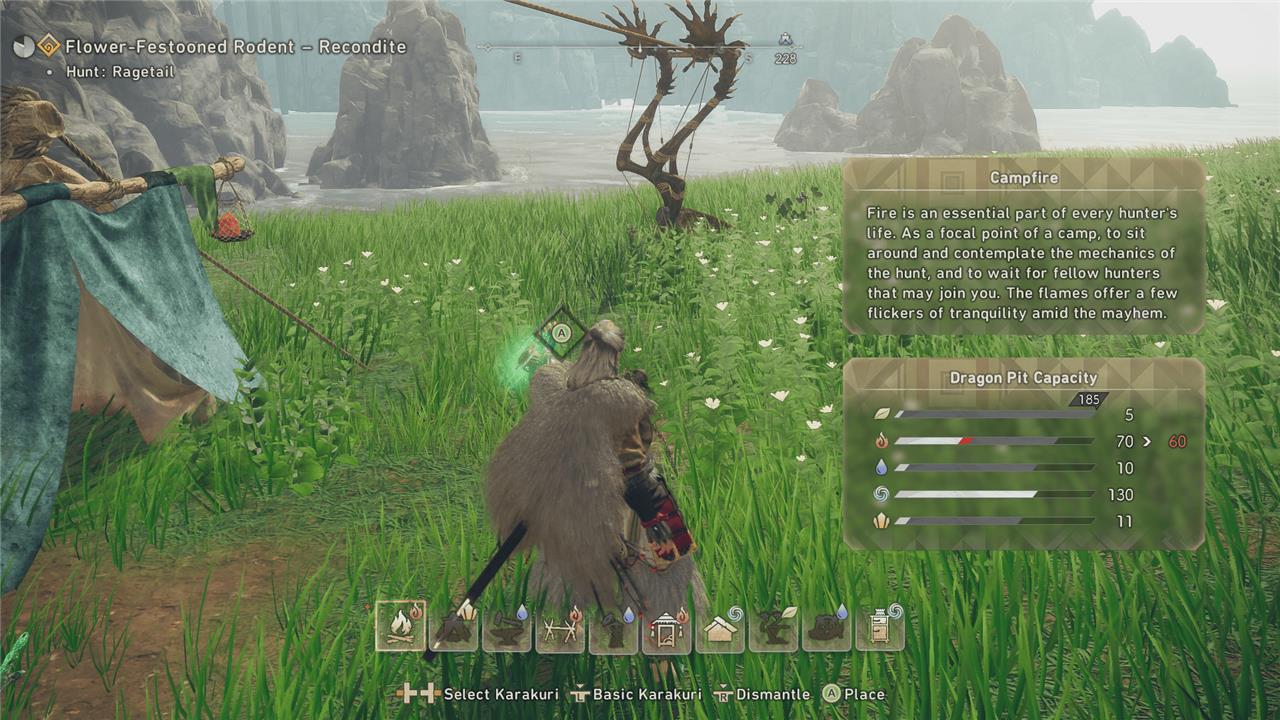
Build Hunting Towers everywhere
Master a network of elevated sentries across the map to spot threats early, gather airtime resources, and flank monsters with strategic visibility as you evolve through the Karakuri system.
Hunting Towers are a form of Dragon Karakuri that act like a radar tower. Interacting with one will highlight any Kemono in the area. If you build multiple towers, they spread out as a network and find Kemonos anywhere any of the towers cover.
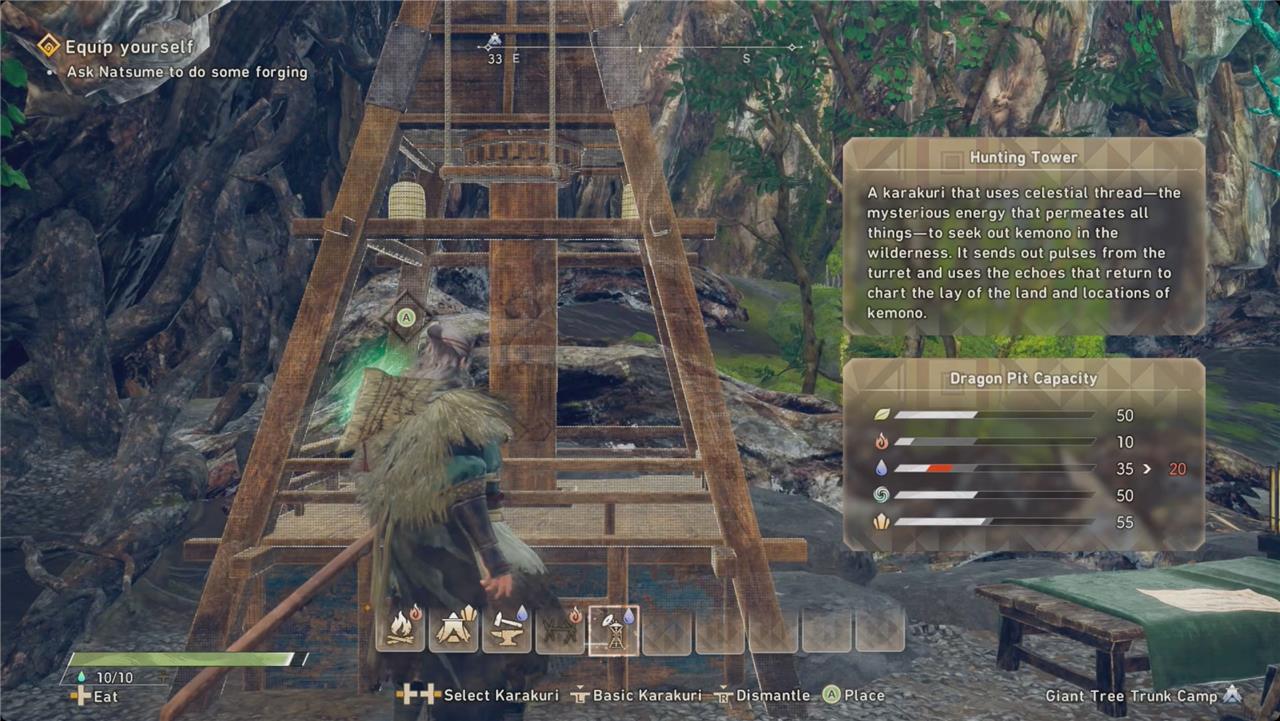
Hunting Towers are cheap to build at a Dragon Pit, requiring only 15 water, and will prevent you needing to wander around in the hopes of bumping into the Kemono you’re hunting.
You can interact with icons from the map
You can interact with various icons on the map to track objectives, mark points of interest, or fast-travel between camps. Each icon represents something different, such as monsters, resources, or quests, helping you plan your next move. Learning what each symbol means will make exploration easier and save time during your adventures across Azuma.
Some things in Wild Hearts need to be done in-person. You’ll have to travel to specific locations to turn in challenges or interact with certain people. Others, though, can be done from the map.
Once you’ve touched a Dragon Pit as you explore each region of Wild Hearts, the map icon for it will go from gray to red or yellow. Yellow means you have the material to unblock that pit further, while red means you don’t. You don’t have to travel to those locations, though. You can unblock and upgrade Dragon Pits right from the map.
Similarly, once you’ve gotten a mission by sitting at a Campfire and Decide what to hunt next, that mission will appear as an icon on your map. After that, you can start the missions from the map without having to travel to a Campfire first.
Karakuri is key
Karakuri are the backbone of combat and exploration in Wild Hearts, offering versatile tools that can turn the tide of any fight. These ancient mechanisms let you construct barriers, traps, and platforms on the fly, rewarding quick thinking and creativity. Mastering their placement and timing can give you strategic advantages against massive Kemono, while also making traversal smoother and faster. Experiment with different combinations to discover surprising synergies between your Karakuri builds and weapon choices.
The structures you build with Karakuri during a Wild Hearts hunt are invaluable – even if every Kemono you face knocks them down almost immediately.
Even the simplest construction, a Crate, will help your hunt. Stacking three Crates gives you a little tower to climb. And from the top of it, you can jump onto a Kemono to deal some extra damage.
During certain hunts along the main storyline, you’ll get struck with a flash of inspiration while building. This awakens a new Karakuri, usually in the form of a Karakuri Fusion.
A bit later, you’ll also start to learn Karakuri Fusion. These are new constructions that form automatically from basic ones. Stacking two towers of three crates each right next to each other will build a Bullwark. A bit later, you’ll learn that a stack of 3 Springs creates a cartoonishly large hammer called a Pounder that deals huge damage.
Sure, you could take down a Kemono by just chipping away with your weapons, but Karakuri will help you get it done faster.
Speaking of weapons and weapon damage.
Practice your combos
Practicing combos is key to mastering combat in Wild Hearts. Each weapon offers unique timing and synergy with Karakuri tools, allowing you to chain attacks and control the flow of battles. Spend time in safe zones or early hunts experimenting with moves to understand their reach, speed, and stamina cost. The more familiar you are with combo transitions, the easier it becomes to adapt on the fly and exploit openings during tougher encounters.
Each weapon has a set of combos associated with it (they’re all pretty much the same combos, but they have different names). Some of them are easy – a series of three to five light attacks, for example – but others will take some work to master.
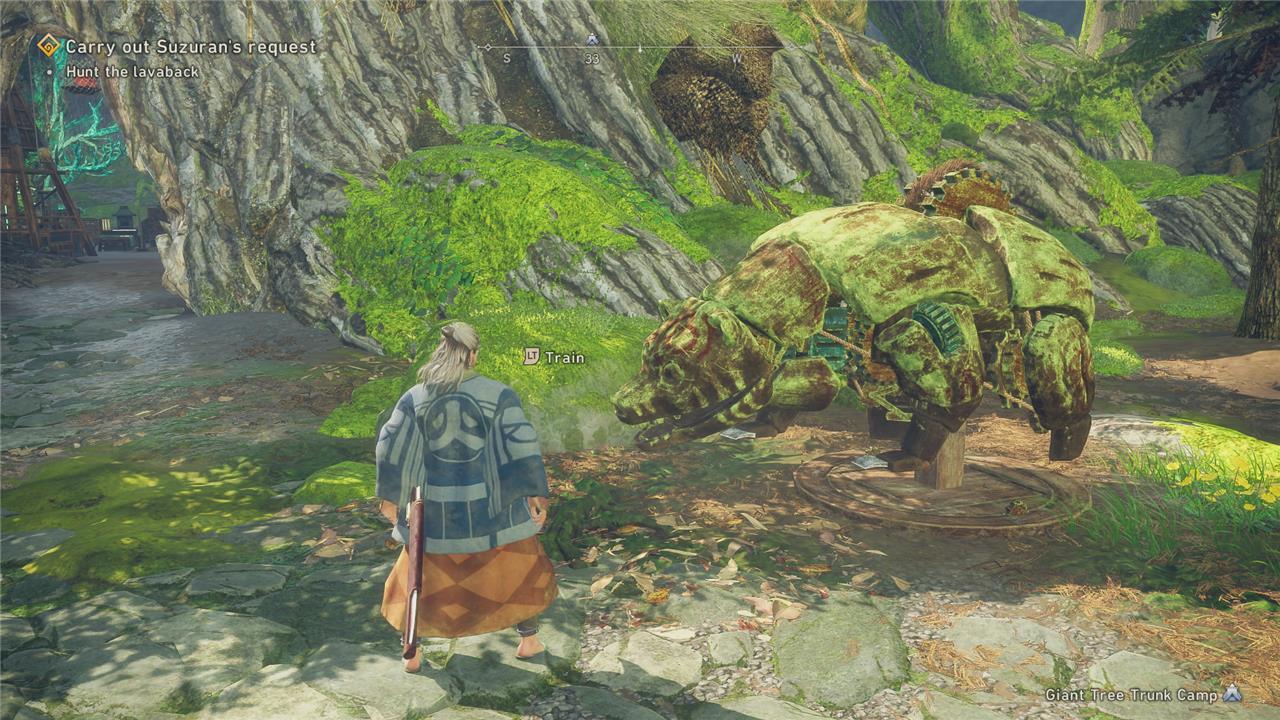
You’ll find a bear mannequin just north of the first camp, Giant Tree Trunk Camp, in the first area, Harugasumi Way. That mannequin is where you’ll train with each weapon. (Once you upgrade your Karakuri enough using the Kemono Orbs you get after each successful hunt, you’ll also be able to build your own Training Bear Dragon Karakuri at any Dragon Pit for 10 fire.)
There’s no fall damage. until there is
Falling from high places in Wild Hearts can feel harmless at first-your hunter lands gracefully without taking a scratch. But once you start fighting massive Kemono, you’ll find that gravity doesn’t always forgive. Certain falls during combat, especially from unstable terrain or midair attacks, can leave you wide open or cause serious damage. Pay attention to your footing, use Karakuri tools to control your descent, and avoid turning a jump into a disaster.
Our last tip is just for traversing the world while you’re out hunting Kemono, and that is: You don’t have to worry about fall damage. until you do.
It’s unclear what the limit for fall damage is. You can usually take quite a leap and walk away unscathed. But, after a certain point, you just fall to your death. There’s no visual indication of this that we saw. You might make the jump or you’ll die instantly. There’s no in between.
Only D-pad navigates menus
Menus in Wild Hearts can only be controlled with the D-pad, not the analog sticks. This can feel restrictive at first, especially if you’re used to fluid stick movement in other games. The system is simple but can slow you down when switching between options quickly. Make sure to adjust your hand positioning during intense moments, as you might instinctively try to use the stick and lose time. Once you get used to it, the layout feels structured and consistent.
Best beginner weapon for Wild Hearts
The Karakuri Katana stands out as the best beginner weapon in Wild Hearts. It’s your starting weapon and excels as a versatile all-rounder with straightforward combos, solid damage, and good mobility.
Why Katana for Beginners
The Katana offers light and heavy attack chains that end in powerful finishers-like a flurry of slashes or a repositioning cleave-making it forgiving for learning monster patterns.
Its special gauge fills quickly for a barbed blade mode that boosts multi-hit damage and range, helping you stay aggressive without complex timing.
Practice at the Training Bear to build muscle memory; it pairs well with basic Karakuri like crates for mounting, unlike slower options such as the Nodachi or trickier ones like Bladed Wagasa.
Quick Alternatives
If you prefer ranged play, try the Bow for consistent shots via stance-switching, though it demands more positioning.
For blunt force, the Maul provides rhythmic, high-impact hits with aerial options, but it’s less flashy than Katana.
Karakuri Katana combos and techniques for beginners
The Karakuri Katana in Wild Hearts uses fast light attacks for combos and builds a Release Gauge for Unbound mode, where it turns into a bladed whip for multi-hit damage boosts.
Practice these beginner-friendly combos at the Training Bear to learn timings without pressure.
Basic Attacks
Light Attack (Square/X): Chain up to five quick slashes-zero stamina cost, great for gauge building and poking safely.
Heavy Attack (Triangle/Y): Three slower Iai draws with forward dashes-use after lights for mix-ups, but watch stamina drain.
Special Attack (RT/R2): Sheath strikes that combo into lights/heavies; spam after 3x lights on downed Kemono for steady damage.
Key Combos
-
Light x3 → Special → Repeat: High DPS on knockdowns; fills gauge fast for Unbound entry.
-
Heavy → Special: Repositions you forward while slashing, then follow with Heavy to charge back-ideal for evasion and closing gaps.
-
RT + Light/Heavy (full gauge): Activate Unbound for amped attacks; exit early with RT + Circle/B to conserve gauge.
Karakuri Synergies
Stack 3 Crates and jump off for a diving slash finisher-your most powerful basic move.
Leap from Springs for rolling double slashes, or use Torches to ignite the blade for burning multi-hits.
These keep you mobile and aggressive without defenses, so dodge actively and eat for buffs.