Lurking in the shadowy depths of the Scarlet Forest, the Lala Barina is a mesmerizing yet deadly arachnid whose graceful dance hides a lethal arsenal of paralyzing florets and swift stings. To conquer this elusive foe in Monster Hunter Wilds, hunters must exploit its glaring weaknesses-especially its vulnerable tail and fiery susceptibility-while mastering the art of dodging its rhythmic, yet punishing attacks. Ready your weapons and strategy; the Lala Barina’s beauty is only matched by its danger.
Despite being one of the first encounters of the main story, you shouldn’t underestimate Lala Barina, especially if you’re planning on getting its full armor set and weapons. This guide covers the Lala Barina weaknesses and resistances to prepare accordingly, where to find it, and the best strategy to defeat the new not-so-friendly neighborhood in the block.
PSA: Toggling the Arachnophobia Assistance setting in Monster Hunter Wilds only adjusts the appearance of “small monsters and endemic life,” meaning that Lala Barina will still show up as a giant spider.
Lala Barina location
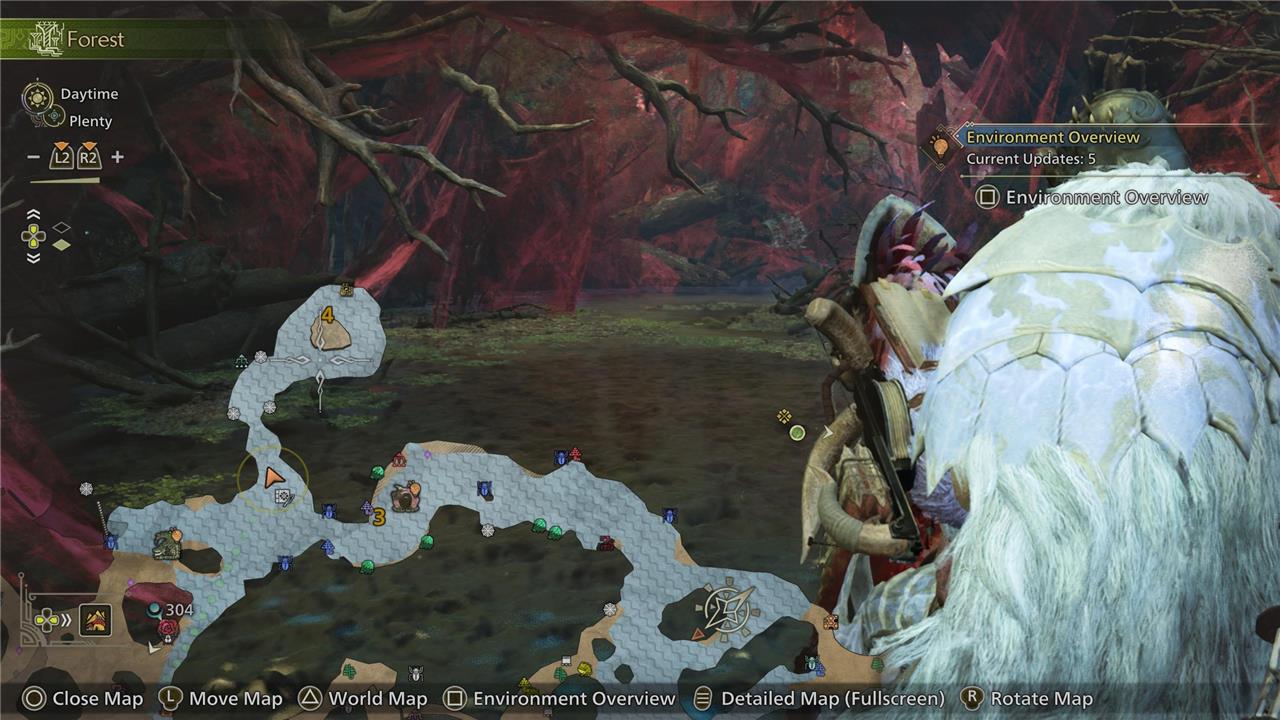
Lala Barina is primarily found in the Scarlet Forest region of Monster Hunter Wilds, with its most common lair located in Area 4 of the Forest biome. It can also appear in surrounding areas like 12 and 13, and occasionally in the Ruins of Wyveria during the post-game. Players can track it by following environmental clues such as red petals and large red web formations, which lead to its lair. The monster is often encountered during main and optional quests set in the Scarlet Forest, making this area the key location for hunting Lala Barina.
You’ll first encounter Lala Barina in Chapter 1, during the Forest Findings main mission. As such, all you need to do to unlock the monster is progress through the questline.
Lala Barina is usually found in the Forest biome, but there’s a chance of seeing it in Wyveria during the post-game (once you finish Chapter 3). In the former, the most common spot is its own den in 4. If not there, the areas surrounding 12 and 13 are a safe bet to find it.
Keep in mind that in Monster Hunter Wilds, tracking monsters isn’t really a prominent feature. Except for a few first-time exceptions, you can use the Environment Overview screen to see if your target is roaming around the map. If not, exploring its corresponding biome(s) for a few minutes usually does the trick – you’ll see a notification on screen announcing its appearance. Worst case scenario, you can speak to Alma and post a hunt for it. For better or worse, the process of finding a monster is much more streamlined now. If you find tracks or other monster residuals on the ground, you can loot them for materials.
How to prepare for Lala Barina
To prepare for the Lala Barina fight in Monster Hunter Wilds, focus on equipping fire-elemental weapons, as the monster is particularly weak to fire and physical damage, especially to its tail and red petals. Bring plenty of healing items such as regular and mega potions, and consider traps like shock traps or pitfall traps to immobilize it during the battle. Be ready to dodge its paralyzing florets and surprise tail stinger attacks by circling wide and staying alert. Target its legs first to trip it, then focus on breaking its claws and tail to maximize damage and reduce its attack capabilities. Finally, prepare for a fight in the Forest biome, particularly around Area 4 where it commonly resides.
Lala Barina is part of the main story of Monster Hunter Wilds. As such, its encounter is likely to fit your Hunter Rank at that corresponding moment. I was able to complete the hunt on my own using fairly weak gear. If you have a weapon with Fire as its main element, you’ll have the advantage of targeting an elemental weakness. But I wouldn’t recommend you go out of your way to grind materials and create one just for this fight.
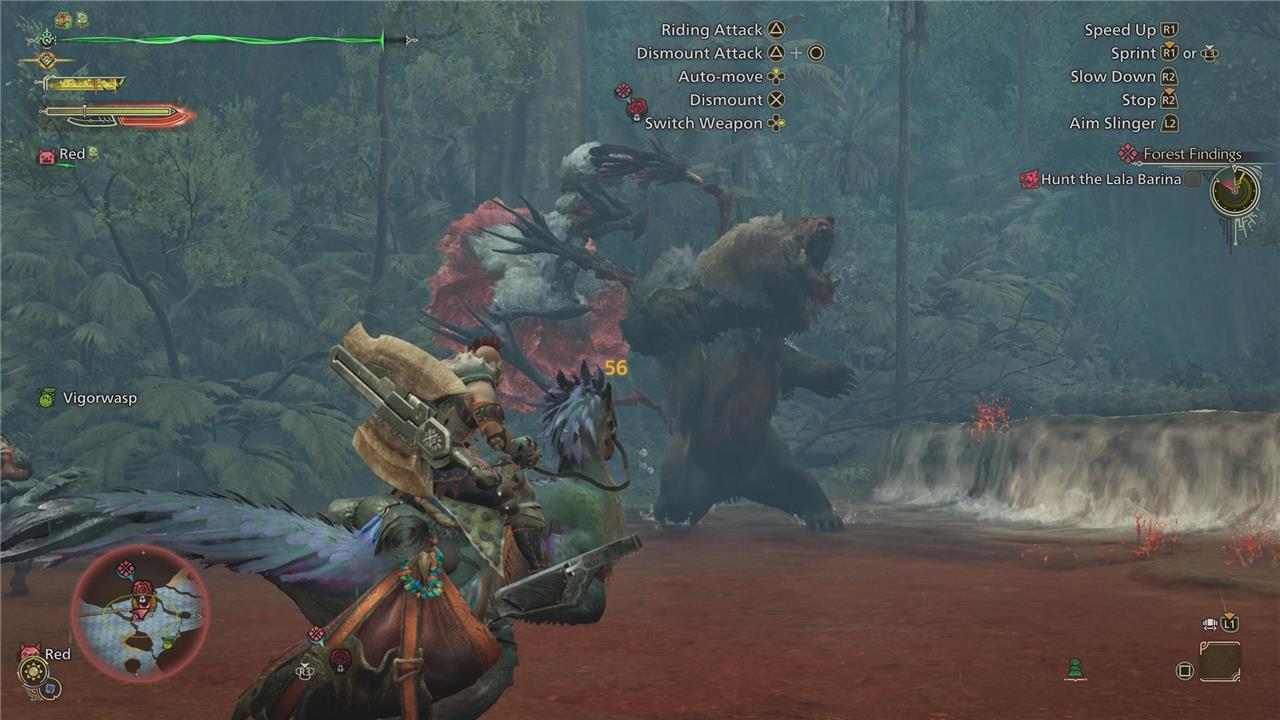
Since the encounter occurs during a main mission, you’ll be thrust into the fray after the introductory cutscene. As per usual, whenever you’re asked if you’re ready to depart, make sure that you’re carrying regular and mega potions with you. If you’re short on the latter, take a lap around the biome and loot any honey you come across.
In addition, don’t forget to eat – you can use the portable BBQ to grill a meal. Increasing your health and stamina are good shouts, and you can use ingredients like Wild Herb as finishing touches to boost your elemental resistance, which is fairly common.
For later encounters, carrying a few Torch Pods will be beneficial – if either you or one of your teammates have a ranged weapon with Flaming Ammo, even better. All in all, there are far more dangerous monsters than Lala Barina. The trick is avoiding its paralyzing attack, as well as the tail stings, which can be deadly in quick succession.
Lala Barina weakness
Lala Barina’s primary weaknesses lie in its tail, petals, and head, with the tail and petals being especially vulnerable to physical damage, both blunt and severing. Fire element attacks are most effective when targeting these areas, significantly increasing damage output. Additionally, Lala Barina has a strong susceptibility to Stun, particularly when hitting its head with blunt weapons, making stunning a viable strategy. It is resistant to Dragon and Water elements and only mildly affected by ailments like Paralysis, so those are less effective choices. Focusing attacks on its legs can trip it, creating openings to strike its weak points more safely. Avoid its paralyzing florets by breaking the petals quickly to prevent the spread of paralysis during the fight.
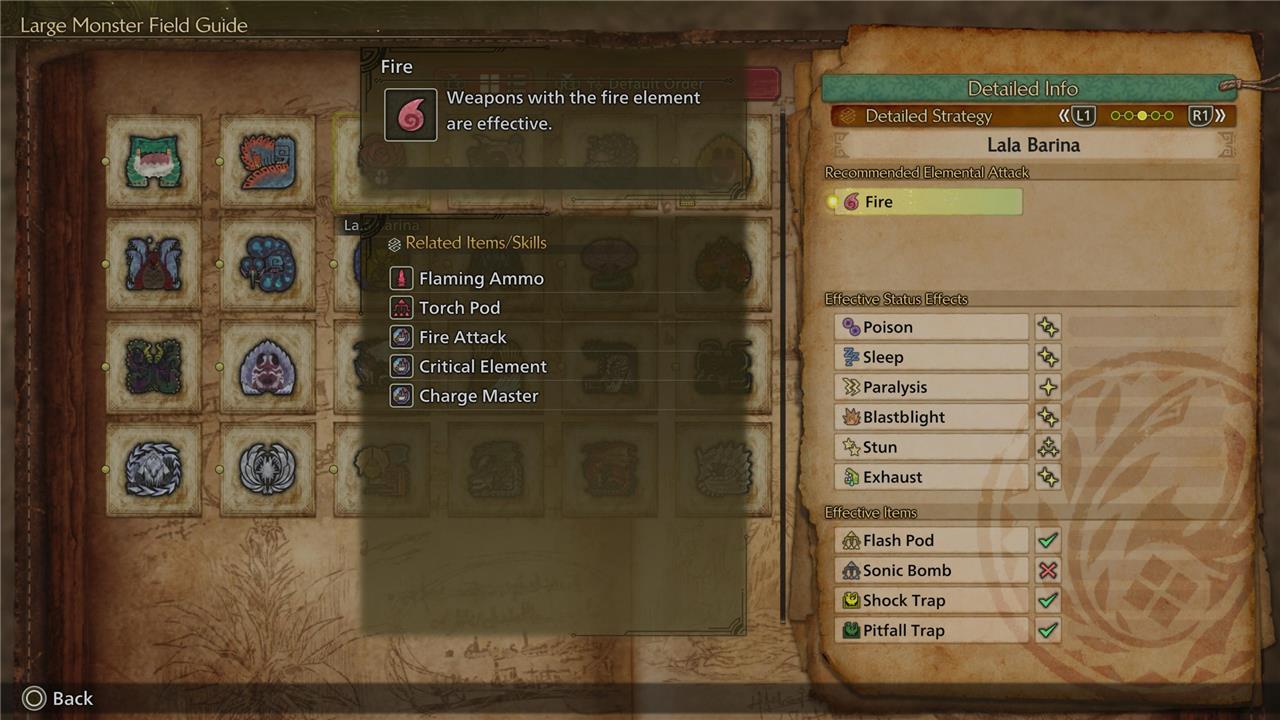
As one of the first monsters in the game, Lala Barina’s elemental resistances are fairly straightforward. Lala Barina’s recommended elemental attack is Fire, which encompasses Flaming Ammo, Torch Pod, as well as skills like Fire Attack, Critical Element, and Charge Master – in addition to your own weapon’s properties.
You can find a breakdown of Lala Barina’s elemental weaknesses and resistances below:
Effective status effects
- Poison: 2 stars
- Sleep: 2 stars
- Paralysis: 1 star
- Blastblight: 2 stars
- Stun: 3 stars
- Exhaust: 2 stars
Effective items
- Flash Pod: Effective
- Sonic Bomb: No effect
- Shock Trap: Effective
- Pitfall Trap: Effective
Weak points
Lala Barina’s weak point is its Tail. Both its Claws (x2) and Petals can be broken as well.
Before diving deep into combat strategy, here’s the breakdown of Lala Barina’s weak points:
The Lala Barina in Monster Hunter Wilds is a spider-like monster found primarily in the Forest region, especially in enclosed areas like caves. Its main weak points are the tail and the red petals on its backside, which are highly vulnerable to physical damage, particularly severing attacks, and it is especially weak to fire elemental weapons. The monster is resistant to water and moderately affected by most status ailments, with stun being the most effective status to exploit. During combat, it’s strategic to use traps to immobilize Lala Barina, focus attacks on its legs to wound and stagger it, then target the tail and petals for maximum damage. Players should be cautious of its paralytic floret attacks and circle wide to avoid paralysis. Staying behind the monster and dodging its telegraphed claw and lunge attacks also helps in managing the fight effectively.
Part |
Sever |
Blunt |
Ranged |
Fire |
Water |
Thunder |
Ice |
Dragon |
|---|---|---|---|---|---|---|---|---|
| Head | 3 stars | 4 stars | 3 stars | 2 stars | No Effect | 1 star | 1 star | No Effect |
| Torso | 3 stars | 3 stars | 2 stars | 1 star | No Effect | 1 star | 1 star | No Effect |
| Left Foreleg | 3 stars | 3 stars | 2 stars | 1 star | No Effect | 1 star | 1 star | No Effect |
| Right Foreleg | 3 stars | 3 stars | 2 stars | 1 star | No Effect | 1 star | 1 star | No Effect |
| Left Claw | 3 stars | 3 stars | 3 stars | 1 star | No Effect | 1 star | 1 star | No Effect |
| Right Claw | 3 stars | 3 stars | 3 stars | 1 star | No Effect | 1 star | 1 star | No Effect |
| Left Hind Leg | 3 stars | 2 stars | 2 stars | 1 star | No Effect | 1 star | 1 star | No Effect |
| Right Hind Leg | 3 stars | 2 stars | 2 stars | 1 star | No Effect | 1 star | 1 star | No Effect |
| Petals | 4 stars | 4 stars | 3 stars | 2 stars | No Effect | 1 star | 1 star | No Effect |
| Tail | 4 stars | 4 stars | 3 stars | 2 stars | No Effect | 1 star | 1 star | No Effect |
For details about what to expect in terms of attacks and general behavior, the following section has you covered.
Lala Barina attacks and strategy
Lala Barina’s attacks in Monster Hunter Wilds are characterized by rhythmic, dance-like movements that make its attack patterns somewhat predictable. Up close, it primarily uses its front legs to strike from above or the side, with clear visual cues such as raising an arm or opening its claws before attacking. From behind, it can deliver a powerful hindleg thrust with extended reach. At a distance, Lala Barina may charge forward, snapping its claws to close the gap, often following a jump away. Its attacks carry a paralyzing effect, especially through the red petal-like florets it releases, which can immobilize hunters temporarily. Key moves include claw swipes, bites that can paralyze, and quick jabs with its arms. The monster’s movements are generally slow enough to allow dodging, especially by rolling behind it, which also opens opportunities for counterattacks. Staggering it by targeting its legs can create openings to hit its more vulnerable tail and petals.
It’s not just a marketing spiel – Lala Barina’s behavior and move set are genuinely different than your usual Monster Hunter foe. The trick is in how it prepares before an attack, usually doing one or two movements almost in a rhythmic pattern. This, in turn, is quite helpful for memorization.
Let’s start with close-quarter moves. If you’re facing Lala Barina head on, it will likely try to use its front legs to attack you from above (signaled by lifting one arm, opening the claws) or from the side (signaled by moving one arm to the side and opening the claws). If you’re behind the monster, it’ll likely try to use its legs to attack from above (signaled by lifting a leg twice up in the air), which have more range.
When you gain some distance, the spider can also rush toward you and follow up with short, quicker hits in front of its head by closing the claws to bridge the gap. This usually happens after Lala Barina jumps away, which tends to be in pairs. Other jumps are shorter and are only for repositioning itself.
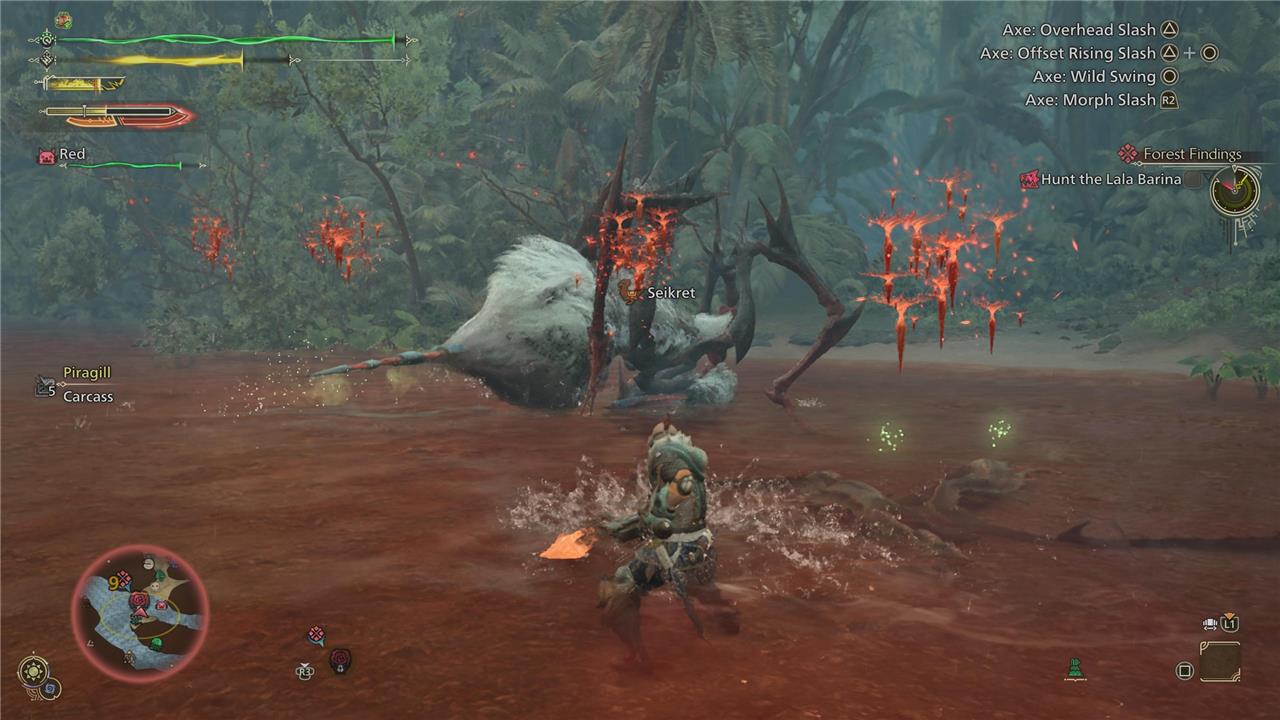
All of the above is manageable with a bit of practice. The issue is when Lala Barina opens its thorax like a blooming flower – basically it’s equivalent to being enraged, although it can happen quite often. During the state, the monster can do the following:
- Its claws grow longer, increasing both the range and damage of the aforementioned moves
- It gains some additional attacks, like a massive leap in front of it, which is signaled by standing on two legs and lifting its arms. It’s easy to notice but very fast
- The “flower” itself throws spores, which can paralyze you upon touch
- Lala Barina also has a pointy tail, which it uses during this state to try and sting you – usually done in two jabs as well
- On occasion, especially if you’re fighting inside its nest, it can jump and hang itself upside down using its webs. It then proceeds to spin around, letting out a large quantity of spores
For most close-quarter attacks, the key is simple memorization, but also moving around the spider. Since it has to take a few steps before each move, this grants you a window to continue damaging it. Using sidesteps rather than full dodges might help when you’re feeling more confident. You’re going to want to avoid the tail sting, which you can wait out for a second while Lala Barina prepares it to dodge roll, and then keep an eye out to see if it follows up with another sting to dodge again.
The spores might seem scary at first, but don’t panic. When they’re in the air, they usually float on one spot while slowly falling to the ground. You can easily move around them or just step away from where the affected area – unless busy with your Palico or another teammate, Lala Barina will come to you. You can also attack the spores to destroy them, although I recommend doing so if you’re using weapons like the Great Sword or the Switch Axe, which can open up a path with a swift swipe attack without exposing you to close quarters. But again, if you don’t want to risk it, either wait for the spores to hit the ground or dodge out of the way.
All in all, Lala Barina isn’t a complex encounter in Monster Hunter Wilds, as long as you avoid its biggest attacks. While its tail is its weak spot, it might take a while to actually be able to hit it. During the first few fights, focus on successfully dodging it, and target its legs and head instead to create wounds. Once on the ground, go for the tail or at least the petals around it. Lastly, whenever the monster is hanging from the ceiling, it’ll be prone to being stunned to the ground if you manage to attack it a few times.
Lala Barina drops
Lala Barina drops in Monster Hunter Wilds include valuable materials used for crafting and upgrading gear. Key drops come from breaking specific parts such as its tail and petals, which yield items like Lala Barina Carapace, Lala Barina Claw, and Lala Barina Tail. These materials are essential for creating fire-elemental weapons and armor sets that exploit the monster’s weakness to fire. Additionally, hunters can obtain rare crafting components by targeting its weak points during the fight, maximizing the rewards from the hunt.
If you’re wondering what the Lala Barina drops in Monster Hunter Wilds are, you can find a handy list below:
Low Rank materials
Material |
Availability/Probability |
Frequency |
Source |
|---|---|---|---|
| Lala Barina Claw | Target rewards (x1/11%). Broken part rewards (x2/100%). Carving (x1/15%) | 4 stars | Claws |
| Lala Barina Floret | Target rewards (x1/20%). Wound destroyed reward (x1/45%). Carving (x1/33%) | 3 stars | N/A |
| Lala Barina Stinger | Target rewards (x1/8%). Broken part rewards (x1/100%). Carving (x1/15%) | 3 stars | Petals |
| Lala Barina Shell | Target rewards (x1/20%). Wound destroyed reward (x1/43%). Carving (x1/23%) | 2 stars | N/A |
| Lala Barina Mucus | Target rewards (x1/15%). Wound destroyed reward (x1/12%). Carving (x1/18%) | 2 stars | N/A |
| Monster Fluid | Target rewards (x1/18%) | 2 stars | N/A |
| Lala Barina Certificate | Target rewards (x1/8%) | 1 star | N/A |
High Rank materials
Material |
Availability/Probability |
Frequency |
Source |
|---|---|---|---|
| Lala Barina Claw | Target rewards (x1/11%). Broken part rewards (x2/100%). Carving (x1/15%) | 4 stars | Claws |
| Lala Barina Floret | Target rewards (x1/20%). Wound destroyed reward (x1/45%). Carving (x1/33%) | 3 stars | N/A |
| Lala Barina Stinger | Target rewards (x1/8%). Broken part rewards (x1/100%). Carving (x1/11%) | 3 stars | Petals |
| Lala Barina Carapace | Target rewards (x1/20%). Wound destroyed reward (x1/43%). Carving (x1/23%) | 2 stars | N/A |
| Lala Barina Mucus | Target rewards (x1/15%). Wound destroyed reward (x1/12%). Carving (x1/18%) | 2 stars | N/A |
| Monster Broth | Target rewards (x1/18%) | 2 stars | N/A |
| Lala Barina Certificate S | Target rewards (x1/8%) | 1 star | N/A |
How can I exploit Lala Barina’s fire weakness during battles
To exploit Lala Barina’s fire weakness effectively during battles in Monster Hunter Wilds, use fire-based weapons to maximize damage, especially targeting its head and tail (stinger) where fire deals the most impact. Prioritize breaking the rose-like petals on its back with fire attacks, as this disables its ability to spread paralytic florets and exposes the stinger for more damage. Since Lala Barina moves quickly and often jumps around, use traps like Pitfall or Shock Traps to immobilize it temporarily, giving you a clear window to unleash powerful fire attacks on its weak points. Additionally, focusing on stunning the monster by hitting its head can create opportunities to safely target the tail with fire damage. Staying close to the monster and circling wide when it releases paralytic florets helps avoid paralysis and keeps you in position to capitalize on its fire vulnerability.
How do I effectively target Lala Barina’s stinger to weaken it
To effectively target Lala Barina’s stinger and weaken it in Monster Hunter Wilds, focus your attacks on its tail (stinger) when it is exposed, as this is one of its main weak points and dealing damage here reduces the range and power of its paralytic strikes. Use fire-elemental weapons to maximize damage on the stinger and petals, as these parts are especially vulnerable to fire. Since attacking the stinger up close is risky due to its lunge and spinning attacks, consider using traps like Pitfall or Shock Traps to immobilize Lala Barina, giving you a safer opportunity to strike the stinger. Additionally, targeting its legs to create wounds and then stunning it by hitting the head can provide openings to safely focus on the stinger for heavy damage. Always dodge the floating paralytic florets and the stinger’s lunges while positioning yourself behind or between its legs early in the fight, switching to more aggressive stinger attacks once it is exposed.