When you stumble upon the mysterious ECS Constant drifting silently above Porrima II, Starfield’s “First Contact” quest plunges you into a tense dilemma: negotiate a peaceful settlement, equip the ship for a new journey, or trigger a catastrophic reactor overload. Each choice carries profound consequences for the ship’s lost colonists and the corporate-controlled resort planet below, making this side mission a gripping test of your moral compass and strategic wit in the vastness of space.
As noted in our list of the best side quests in Starfield, “First Contact” can be tackled early, as it doesn’t involve direct combat and its location (the Porrima system) isn’t very far from your Alpha Centauri stomping grounds. Instead, you’ll mostly act as a mediator between two opposing groups. Don’t worry, though. As a quest that’s more than 200 years in the making, “First Contact” is more interesting than it initially sounds.
Our Starfield “First Contact” guide walks through all of the quest steps for “First Contact,” explains the ramifications of each choice, and, of course, details the rewards you get based on what you choose.
How to find Porrima and the ’First Contact’ side quest in Starfield
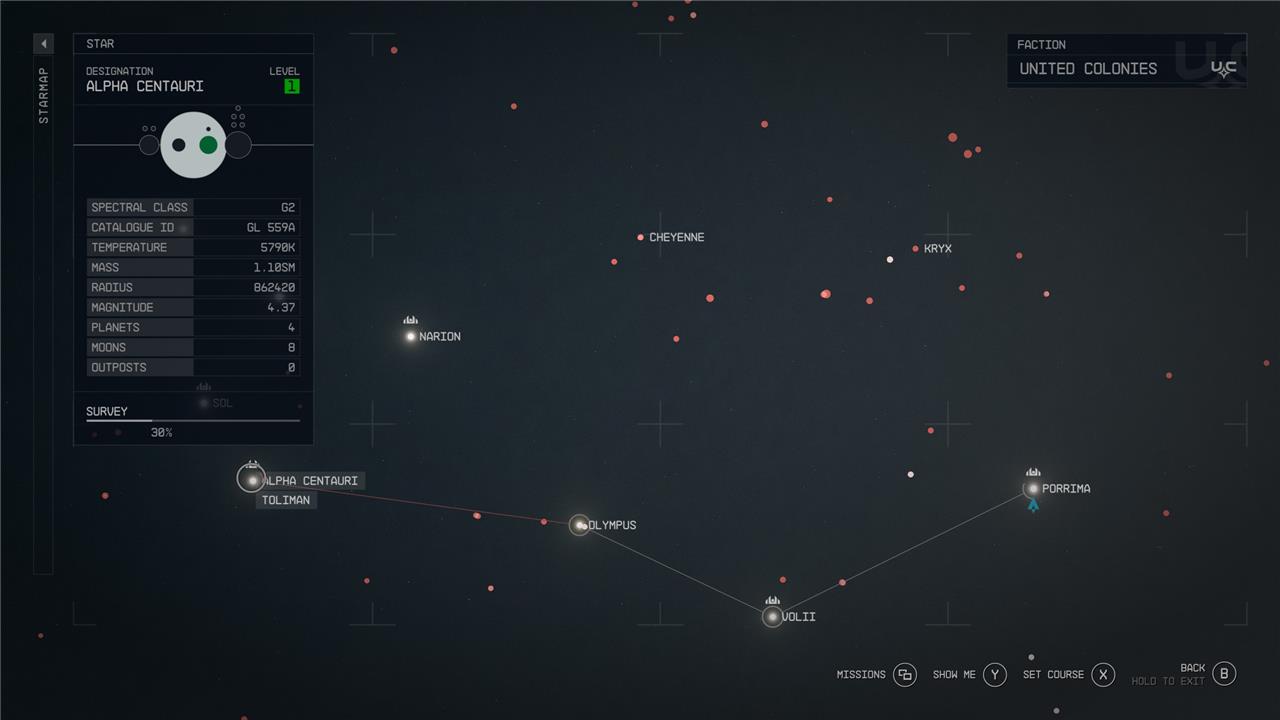
To find Porrima and start the “First Contact” side quest in Starfield, you need to travel to the Porrima star system, which is located northeast of the Volii system and east of Olympus. You can reach it early in the game without upgrading your ship’s grav jump range. Upon entering the Porrima system, you will receive a call from Chief Sugiyama, marking the start of the quest. Then, land on Porrima II, also known as Paradiso, and find Sugiyama in the main security office to begin the mission. From there, you will investigate a mysterious ship in orbit and engage with the quest’s key events.
“First Contact” can be found in the Porrima system. The easiest way to get there (if you’re starting from Jemison) is to chart a trip from Alpha Centauri to Olympus. From there hop over to Volii and then finally to Porrima.
As soon as you warp in, you’ll be greeted with a message from a security officer named Jiro Sugiyama, stationed on the planet Porrima II. He’ll ask for your help in dealing with a strange ship currently floating right in front of you. This will unlock the “First Contact” side quest and start you on the path of diplomacy.
Chat with Jiro Sugiyama on Paradiso
At Paradiso on Porrima II, you will meet Chief Jiro Sugiyama, who is deeply concerned about a mysterious and unresponsive ship, the ECS Constant, orbiting the planet. Sugiyama will brief you on the situation and request your help in discreetly investigating the ship and mediating between its crew and the Paradiso residents. He emphasizes the importance of diplomacy and asks you to keep the mission confidential, guiding you to approach the ship only after all communication attempts fail. Your conversation with Sugiyama sets the stage for the complex choices and negotiations that follow in the “First Contact” quest.
Head down to the planet and talk with Sugiyama. He’s located in a small security station in front of the Paradiso resort. Once there, Sugiyama will explain that this strange ship just appeared out of nowhere and that he doesn’t know if the folks currently floating around Porrima II’s atmosphere are friendly or not; all efforts to communicate with those on board the ship has failed. Eventually, he’ll ask if you could try speaking with its crew, with an emphasis placed on peaceful measures over combat.
Board the ECS Constant in Paradiso orbit
Boarding the ECS Constant in Paradiso orbit is a key step in the Starfield “First Contact” quest. After landing on Paradiso and speaking with Chief Sugiyama, players are directed to approach the mysterious ship, the ECS Constant, which has been drifting in orbit. Upon docking, you meet the ship’s captain and learn that the crew are colonists who have been traveling for centuries, unaware that human civilization has flourished elsewhere. This encounter sets the stage for critical decisions about the fate of the ECS Constant and its crew, influencing the quest’s outcome and rewards.

Leave Sugiyama’s office and head back into space. Once there, try communicating with the ship. You’ll notice that any attempt at hailing the crew won’t work – you’ll get feedback over the coms no matter what option you choose. To learn what’s going on, you’ll need to dock and board the ship.
Once inside, you’ll be met by a group of people led by Captain Diana Brackenridge. She’ll explain that the ship, named the ECS Constant, has been traveling through space for 200 years.
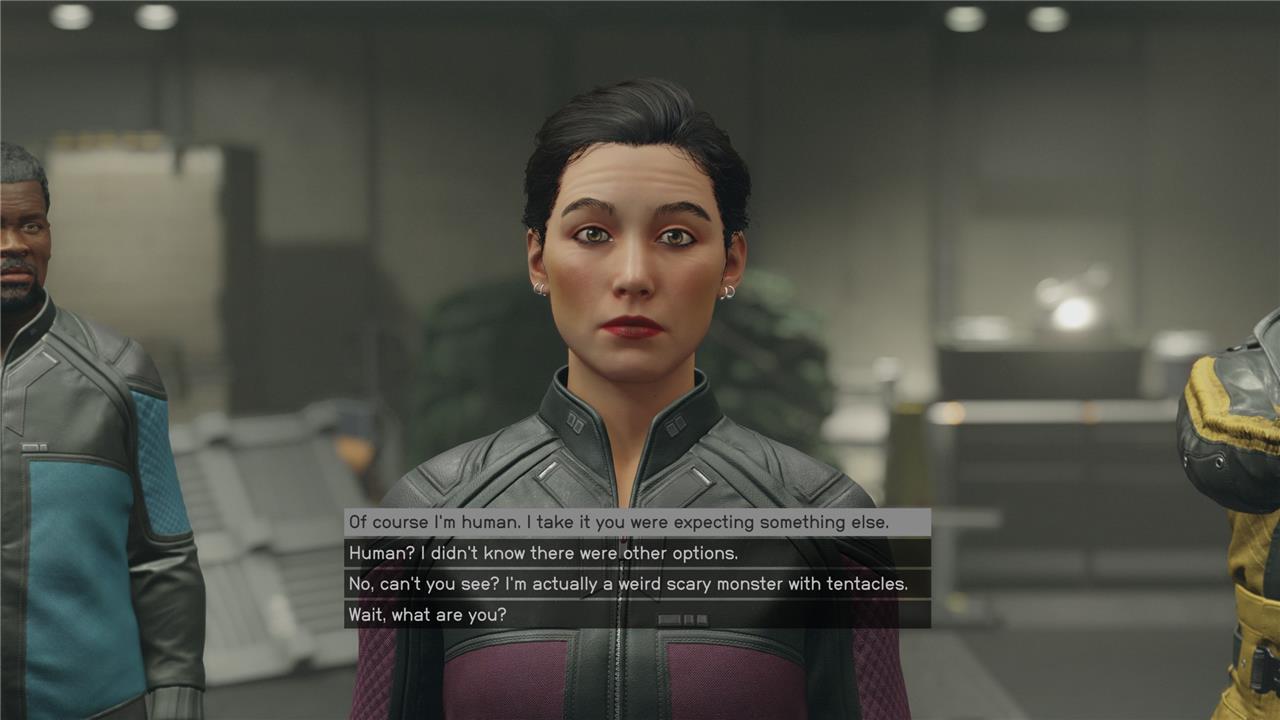
See, the ECS Constant’s original crew fled Earth to avoid some catastrophe with the hope that their descendants, the current crew, would eventually make it to Porrima II. But because they didn’t have access to light speed travel – the means of which hadn’t been invented yet – they ended up taking the scenic route.
Start Negotiations between Paradiso and the ECS Constant
To start negotiations between Paradiso and the ECS Constant in Starfield’s “First Contact” quest, you first land on Paradiso and speak with Chief Sugiyama, who informs you about the situation involving the mysterious ECS Constant ship orbiting Porrima II. After attempting communication with the ship, you board the ECS Constant and meet Captain Diana Brackenridge, learning that the colonists aboard have been traveling for 200 years and now claim Porrima II as their home, which is currently owned by the Paradiso resort. Returning to Paradiso, you meet Oliver Campbell, the CEO, who presents you with negotiation options: either purchase a Grav Drive for the ECS Constant to continue their journey, convince the colonists to settle on Paradiso under certain conditions, or take a more drastic approach by destroying the ship. Your choice will determine the outcome of the quest and the fate of both parties.
Porrima II is a big planet. Unfortunately, neither the folks stuck on the ECS Constant nor the corporate entities that own Paradiso (and, essentially, the entire planet) want to share it. That’s why you’re there to mediate the situation.
After chatting with Captain Brackenridge and agreeing to speak on her behalf, head back down to Porrima II. Go directly to the resort and speak with Paradiso Group CEO Oliver Campbell. Take the elevator by the check-in station, past the general store, and go to the executive floor.
Once inside, chat with Oliver about the situation. He and the other board members will suggest three different ways to tackle this problem. They are:
- Choice 1: Convince the ECS crew to work as indentured servants until they pay off the cost of living “freely” at Paradiso.
- Choice 2: Buy them the grav drive necessary to travel to another planet.
- Choice 3: Make their ship “go away.”
Choice 1: Take the Settlement Deal
Choosing the settlement deal in Starfield’s “First Contact” quest involves convincing the ECS Constant colonists to stay on Paradiso and work off their debt by contributing resources to the planet’s resort operations. To pursue this option, you select the dialogue choice “I’ll convince them to take the settlement deal” when speaking with Oliver Campbell, Paradiso’s CEO. This leads to a resource-gathering task where you must collect items like lithium, iron, sealant, and fiber to support the settlers’ integration. Although the process can be somewhat tedious, successfully completing it results in ferrying the colonists to Paradiso and receiving rewards such as antique Earth relics and the XM-2311 pistol. However, the resources gathered are not taken by the NPCs and remain in your inventory, allowing you to use or sell them afterward.
If you choose to convince them to take the settlement deal, you’ll be tasked with gathering materials needed to house the ECS Constant’s crew.
The materials needed:
- 40 fiber
- 80 iron
- 10 lithium
- 20 sealant
Go back and speak with Captain Brackenridge about the deal. She’ll be surprisingly amenable to the idea, expressing that her crew will need to learn how to work and survive on the planet anyways. Once she agrees, it’ll be up to you to gather the needed materials. This will take some time if you haven’t been farming resources second-nature prior to tackling “First Contact.” There are a few ways of getting your hands on a decent number of materials pretty quickly, though.
One way is to persuade Captain Brackenridge to help out. This optional sub-quest isn’t too tricky if you’ve placed points in Persuasion. We were able to convince her to share some of the materials found on the ECS by picking “I’m not asking for a lot, just what little you can spare” followed by “Are you sure you don’t have anything to spare? I’m doing this for you.”
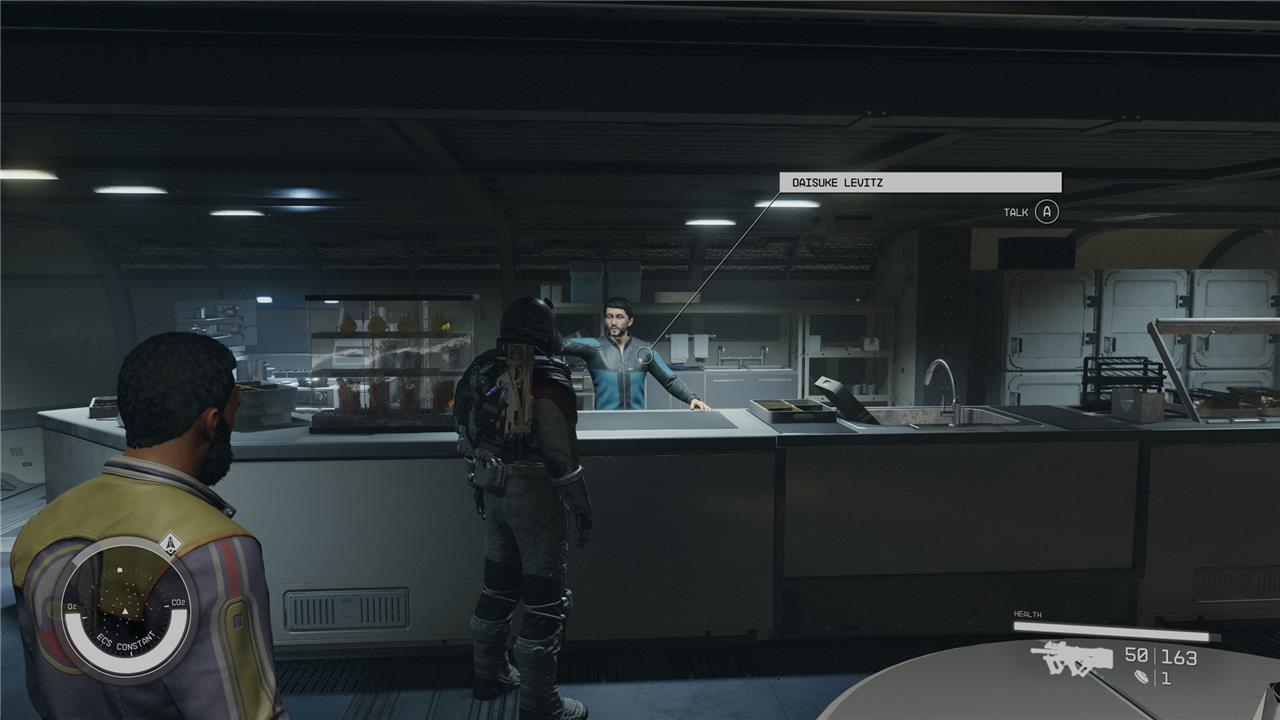
If you’re successful, Brackenridge will tell you to speak with Daisuke Levits. To find him, go down the hall past the Med Bay, turn right, and go down the steps toward the mess hall. He’ll give you 50 iron, 12 sealant, 15 fiber, and 6 lithium.
The other way you can quickly grab some materials is through the general store at Paradiso. You should be able to buy the rest of the sealant and fiber for a decent price. The rest you’ll have to get by going to your map, scanning nearby planets for each material, and then flying to those locations. Once there, you’ll be able to use your scanner cutter to gather what’s needed.

After collecting the needed materials, head back to Captain Brackenridge. She’ll ask you to take her and some of the crew down to Porrima II. Follow them for a bit, then talk with Brackenridge again to clear the mission. You’ll be rewarded with a chunk of XP, several antique items you can sell for a lot of money (including an Old Earth Piggy Bank), an XM-2311 pistol (with some mods), and some .45 caliber bullets.
Choice 2: Purchase the Grav Drive and prepare the ship
Choosing to purchase the Grav Drive and prepare the ship in Starfield’s “First Contact” quest is widely regarded as the best and most moral option. After deciding to buy the Grav Drive, you must negotiate with Bennu St. James on Hopetown to acquire it, potentially lowering the price from 40,000 to 25,000 credits with a successful Persuasion check. Once purchased, you return to the ECS Constant and work with Amin Kazemi, the ship’s head engineer, to retrofit the Grav Drive by adjusting specific ship systems via the engineering control computers: on Computer Alpha, select “Turbopump – Port” and “Cryogenic Radiator – Auxiliary”; on Computer Beta, set the “Plasma Run-Off Inhibitor” to 5%; and on Computer Gamma, set “Magnetic Flange Pipe Enclosures” to Decouple and choose “Auxiliary Module Assembly.” Completing these steps prepares the ship for departure without any negative consequences. This choice ensures the colonists can continue their journey without becoming indentured servants or facing destruction, and rewards include valuable Earth antiques and an XM-2311 pistol. Additionally, the ECS Constant may later request fetch quests, extending your interaction with the crew.
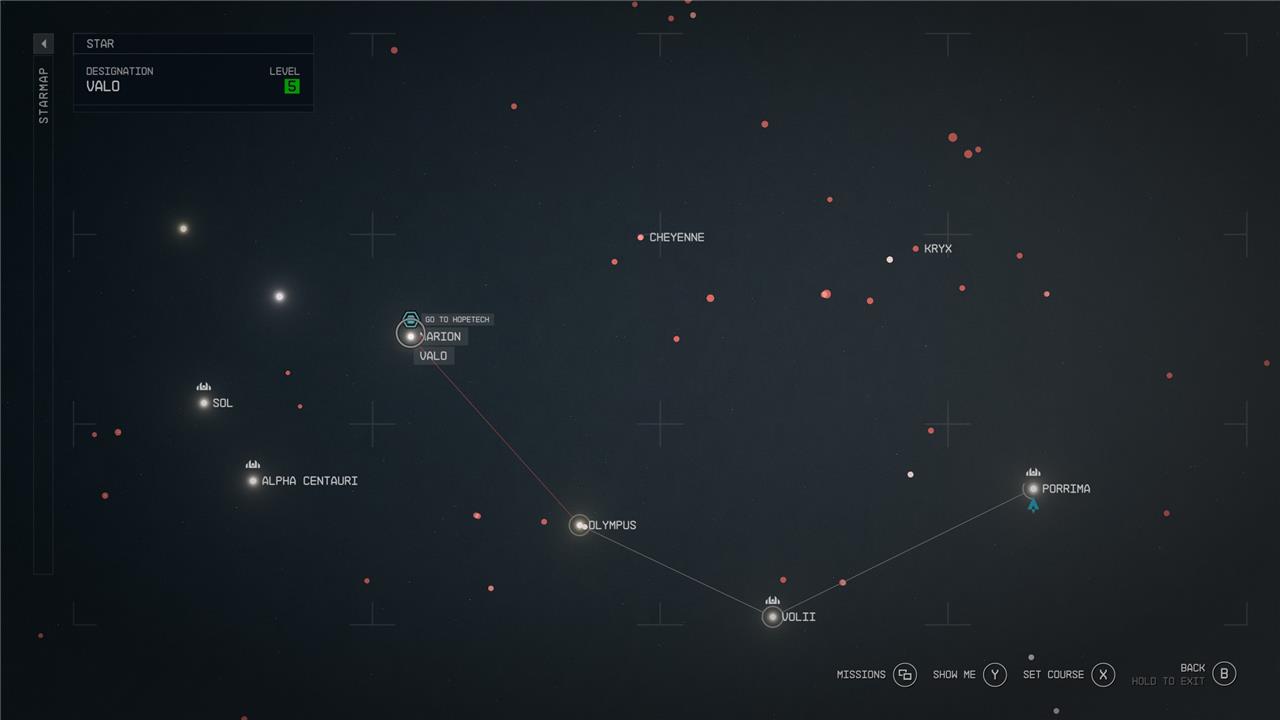
If you decide to pay for the grav drive – because Oliver and his coterie are too cheap to front the cost – you’ll be asked to meet with one Bennu St. James at HopeTech. It’s located on planet Polvo in the Valo system. To get there, hover over the Narion system, and chart a course to Valo.
Land on Polvo and head inside HopeTech. James’ office will be on the second floor, so head up the steps on the left. Let him know that Oliver sent you to get him to sell a grav drive. The initial cost will be a pricey 40,000 credits. However, it is possible to Persuade him to lower the price. When doing so, make sure to remind him that he’ll be helping those in need and he’ll fold, dropping the price to a still pricey 25,000 credits.
After you acquire the drive, fly back to the ECS and chat with Engineering Officer Amin Kazemi about preparing the ship. He’ll ask you to assist him by:
- Rerouting the power from the port turbopump to the auxiliary cryogenic radiator
- Turning the plasma run-off inhibitor to 5%
- Decoupling the magnetic flange pipe enclosures from the auxiliary module assembly
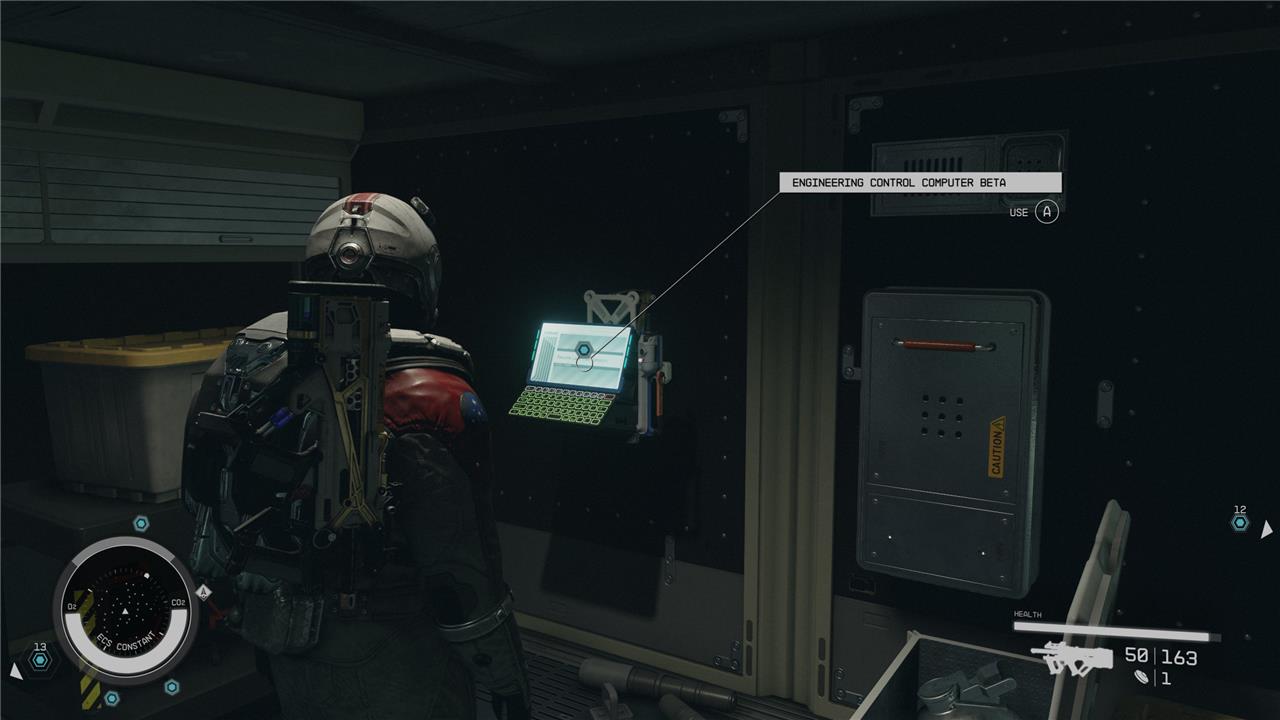
To complete each task, simply run to the computers stationed around the room and follow the prompts. Keep in mind what needs to be changed at each station. For instance, the computer controlling cryogenic aspects of the ship will have several options to choose from. Make sure to pick the turbopump port first, then the cryogenic radiator – auxiliary second to correctly route the power.
After you’ve made the preparations, go talk with captain Brackenridge. Afterwards, you’ll be rewarded with a selection high-value Earth antiques (which is great, considering how much money you spent on the drive). As for weapons, you’ll get an XM-2311 pistol with some mods.
Choice 3: Blow the reactor
In the “First Contact” quest in Starfield, choosing to blow the reactor is the most drastic and violent option. After discussing the mysterious ECS Constant ship with Oliver Campbell, he subtly suggests that overloading the ship’s reactor could make it “disappear.” To carry out this plan, you need to pickpocket the chief engineer Amin to obtain the reactor terminal key, then access the reactor computer to initiate an Emergency Reactor Overdrive. Next, you must hack the captain’s terminal to confirm the overdrive request. Once confirmed, the ship’s crew becomes hostile, and you must quickly escape to your ship before the reactor explodes, destroying the ECS Constant and killing everyone aboard. This choice results in the loss of the colonists who had been searching for a new home, and it significantly impacts your standing with the involved factions.
To choose the last option, you’ll need to ask Oliver how someone could get rid of the ECS Constant. Oliver will explain that someone could “hypothetically” override the safety systems in the ship’s reactor computer – essentially, blowing up the ship. Once he’s done explaining, back out of the conversation and you’ll see a new optional mission objective.

Fly back up the ECS Constant and go to the engineering room like before. Only this time, don’t talk to Amin Kazemi. Instead, sneak up behind him and pickpocket his key. (To do this, you’ll need to have unlocked the Pickpocket skill.) Going the violent “club him over the head” route is too risky; alerting the entire ship to your intentions will make the next steps nearly impossible to pull off.
Once you have the key, go over to the reactor computer located on the left when facing the back of the room. Log on and set the overdrive to Emergency Overload. After that, you’ll need to head to the bridge/command bay and locate captain Brackenridge’s computer. Make sure she isn’t around, then hack into it. (You’ll need to have unlocked the Security skill to do so.)

After hacking her computer, click Confirm Request for the reactor override. At this point, the ECS Constant guards will become hostile. Just run back to your ship and undock. The ship will explode seconds after you fly away, killing everyone on board. Head back to Oliver for your reward: 6,500 credits and an unlimited pass at Paradiso. Fair warning: Asking for double will get you nothing. So don’t be greedy.
What is the best choice in ’First Contact’?
The best choice in the Starfield “First Contact” quest is to purchase a Grav Drive for the ECS Constant. This option is considered the most moral because it allows the ship’s crew to continue their journey freely without becoming indentured servants or facing death. Choosing the settlement deal forces the crew into servitude on Paradiso, while blowing up the ship kills everyone aboard. By buying the Grav Drive, you help the crew find a new home without sacrificing their freedom or lives, and you receive valuable rewards such as antique Earth relics, ammo, the Scout’s XM-2311 pistol, and 300 XP.
Out of all three choices, detonating the reactor (choice 3) has to be the worst. Not only is it a moral issue (your companion, if you have one at the time, will not be pleased), but it’s also the least rewarding. The indentured servitude outcome (choice 1) is a little better, but it’ll probably take the longest to complete if you haven’t been collecting materials prior to starting the “First Contact” quest.
Choosing to purchase the grav drive (choice 2) isn’t very time-consuming. It is very expensive, though – even if you pull off the Persuasion check at HopeTown and factor in your prizes. Ultimately, it seems like the best route will be factored by the skills, items, and credits you’ve acquired along the way, as well as your moral compass concerning the people of the ECS Constant.
What’s the most surprising outcome of choosing to blow up the ECS Constant in Starfield
The most surprising outcome of choosing to blow up the ECS Constant in Starfield is that you completely annihilate the ship and its entire crew, resulting in the deaths of hundreds of colonists with no chance of survival or redemption. This choice is irreversible and leads to no meaningful rewards-only a small payment from Paradiso’s CEO Oliver Campbell if you accept it, or nothing if you demand more. The explosion leaves no loot or ship parts behind, and it can upset your companions, making it a grim and morally harsh option that starkly contrasts with the more humane alternatives of buying a Grav Drive or negotiating a settlement.
Why is blowing up the ECS Constant considered a surprising or drastic choice in Starfield
Blowing up the ECS Constant in Starfield is considered a surprising and drastic choice because it results in the complete destruction of the ship and the death of all its colonists, eliminating any chance of a peaceful resolution or continued story with them. This choice starkly contrasts with the more humane options of buying a Grav Drive to let the ship continue its journey or negotiating a settlement that, while imperfect, spares lives. Moreover, destroying the ship yields minimal rewards, risks upsetting companions, and ends the quest abruptly with no loot or future interactions, making it a morally harsh and strategically unrewarding path that stands out amid the otherwise complex diplomatic and logistical options.