Join Walter Stroud on a high-stakes mission to Neon in Starfield’s “All That Money Can Buy” quest, where your negotiation skills will be tested as you track down a mysterious seller carrying a coveted artifact. From decoding secret code words to navigating tense deals in the Astral Lounge, this walkthrough reveals how to find the elusive seller, secure the artifact, and survive the fallout in one of the game’s most thrilling encounters.
Once you finish the first block of quests in Starfield, the game will start you on a quest called “All That Money Can Buy,” which will send you to Neon – Bethesda’s version of the prototypical rainy, corporatized, and of course neon-soaked sci-fi city. Here you’ll need to work with Walter to haggle for another piece of the artifact. But, as you can imagine, things don’t exactly go smoothly.
In this Starfield guide, we’ll walk you through how to complete the “All That Money Can Buy” quest and add yet another artifact to your collection.
A possible bug at launch is that players are sometimes unable to follow the scanner. If this happens to you, we recommend returning to orbit and waiting by passing time. Consider shutting the game off and launching it fresh as well, just in case.
Also, when you make to re-land on the planet, be absolutely sure you’re picking the Scanner Anomaly Site. If you land anywhere else by accident, the temple won’t appear on the map and you won’t be able to find it.
Get to Neon
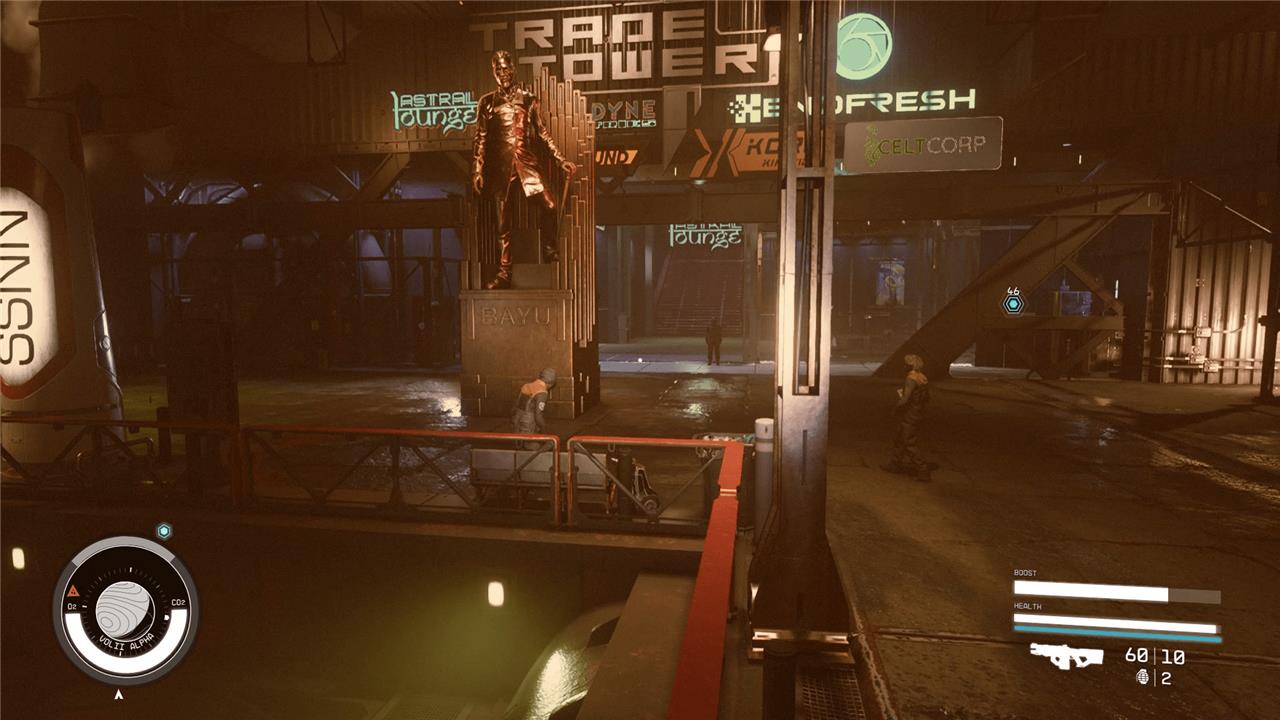
To get to Neon in the “All That Money Can Buy” quest in Starfield, you first need to board your ship and travel to the Volii system, where Neon is located on the planet Volii Alpha. Once you arrive, land in the city of Neon and prepare to meet Walter Stroud, who will guide you through the mission. Neon is a bustling city with a nightclub called the Astral Lounge, where you’ll find the seller carrying a large briefcase-your target for the artifact deal. Use the code phrase “Ramsay and Travers” to identify yourself as the buyer when you locate the seller near the bar. After finding him, report back to Walter to proceed with the negotiation and next steps in the quest.
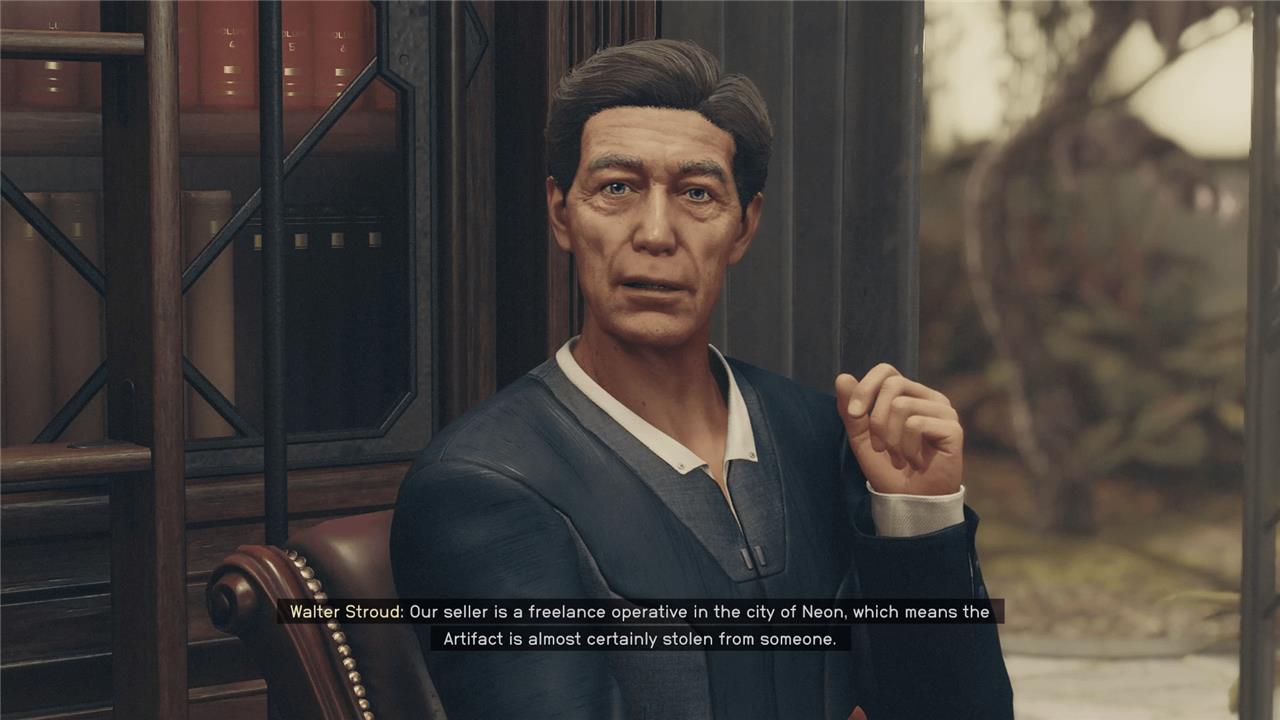
After you finish the “Into the Unknown,” “The Empty Nest,” and “Back to Vectera” trifecta, Walter – the rich benefactor of Constellation – will want to see you. He’s organized a deal to buy one of the artifacts, and he needs some muscle to come with him to the dangerous city streets of Neon.
Talk to Walter Stroud // Travel to Neon // Talk to Walter Stroud
Once you finish the final quest in the game’s first quest block, Walter will pipe up and ask to talk to you. Chat with him and he’ll offer to go with you to Neon. Tell him you’re ready to go and he’ll wait on your ship until you’re ready to leave.
Head back to your ship and plot a course to Volii Alpha in the Volii System. When you arrive in orbit, head down to Neon. When you land, exit your ship and walk out into the rain. You’ll see Walter standing by some boxes. Go talk to him.
Check In at Stroud-Eklund HQ // Talk to Issa Eklund
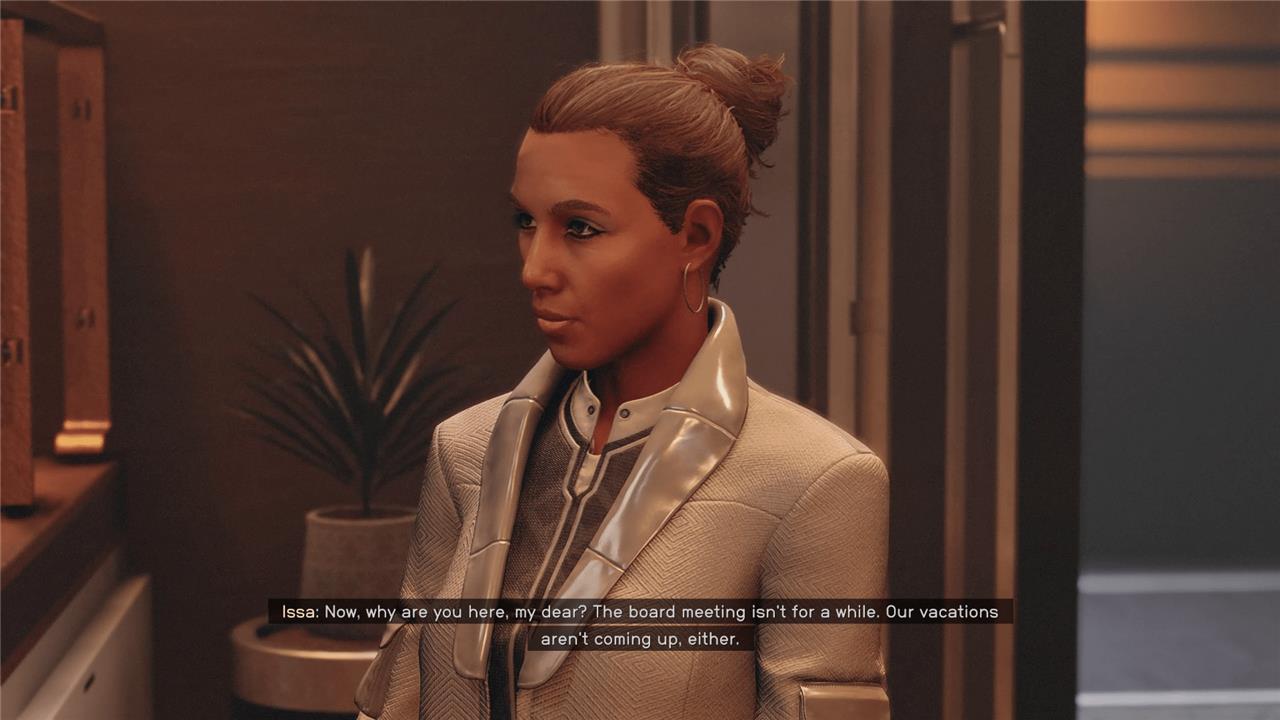
Once you’ve spoken to Walter, head through the checkpoint and ride the elevator into the city proper. Turn right and follow the waypoint into the massive trade tower. Take the elevator up to Stroud-Eklund HQ. Follow Walter and you’ll meet Issa Eklund, the other half of “Stroud-Eklund” and Walter’s wife.
The three of you will talk about a meeting that’s been setup in the Astral Lounge, which is the bar downstairs. Walter will give you some spending money and send you on your way while he and Issa catch up.
Set up the buy
To set up the buy in the “All That Money Can Buy” quest in Starfield, first speak with Walter Stroud, who arranges a meeting on Neon to acquire an artifact from a mysterious seller. Travel to Neon in the Volii system and accompany Walter to the Astral Lounge, where you need to locate the seller among many NPCs carrying briefcases. Use the code phrase “Ramsay and Travers” to identify the seller, who is standing near the bar with a large briefcase. After confirming the seller’s identity with Walter, prepare to negotiate the deal, keeping in mind the seller will likely ask for double the price, but you can persuade him to accept the original offer or use other tactics to secure the artifact.
Here you’ll need to set up the buy and open up options for yourself and Walter in case things go bad. That includes learning vital information about the seller and setting up some security in the Astral Lounge.
Ask about security // Check the door controls
Once you’re back on Neon’s main floor, walk into the Astral Lounge and head to the very back so you can talk to the bartender, Boone Morgan. If you ask about the security situation – both guards and door control – he’ll tell you way more than he probably should and also offers you drugs. He’s a weird guy.
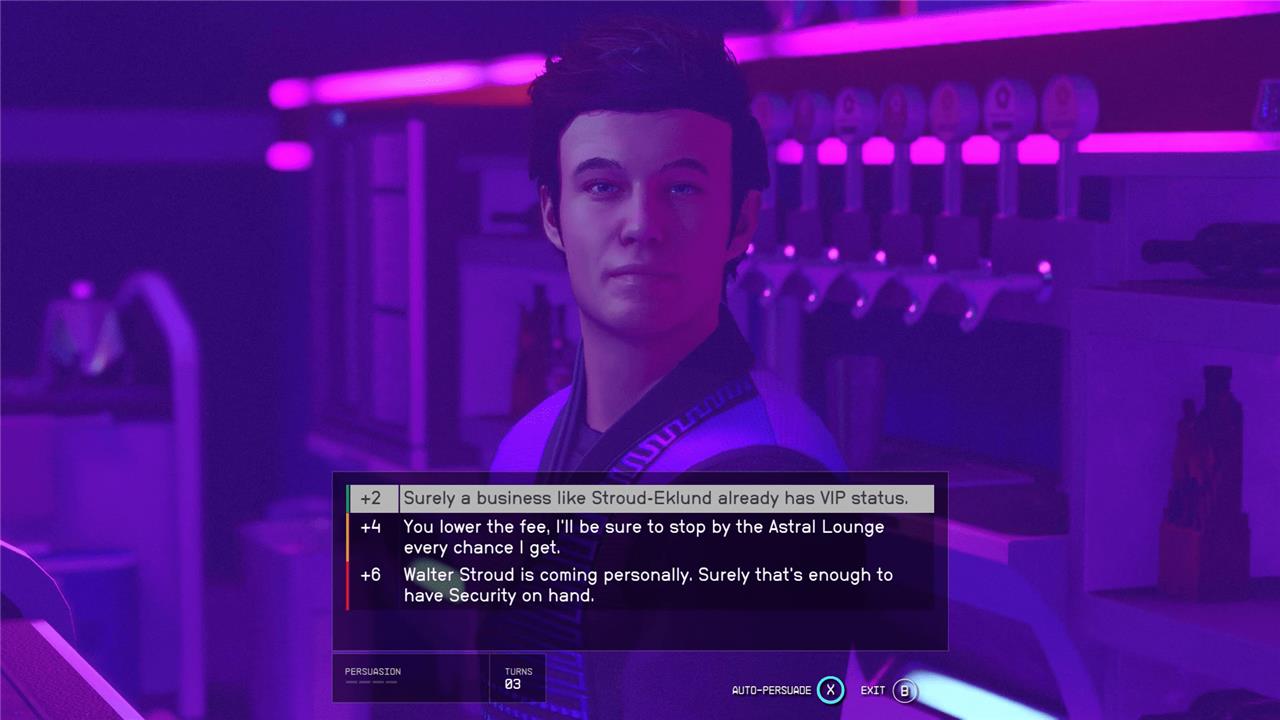
Anyway, if you want to buy security, you can upgrade yourself to a VIP in the Astral Lounge. He’ll offer you VIP status for 4,000 Credits, but you can use Persuade on him to lower that to only 1,000 Credits – the exact amount of money Walter gave you, how convenient. The persuasion check is relatively low-level at only four pips. Pay the Credits to ensure that security will be on your side if things go south during the buy.
When you’re done talking to Boone, take the elevator up to the VIP area and follow the waypoint over to your room. Interact with the panel on the wall and pass a Novice digipick lock. Once you’re in, change the permissions on the door security to respond to your commands.
Investigate the Seller // Search the Seller’s Sleepcrate
With the Astral Lounge security situation now in your favor, head back out to the streets of Neon and head down the strip, following the waypoint.
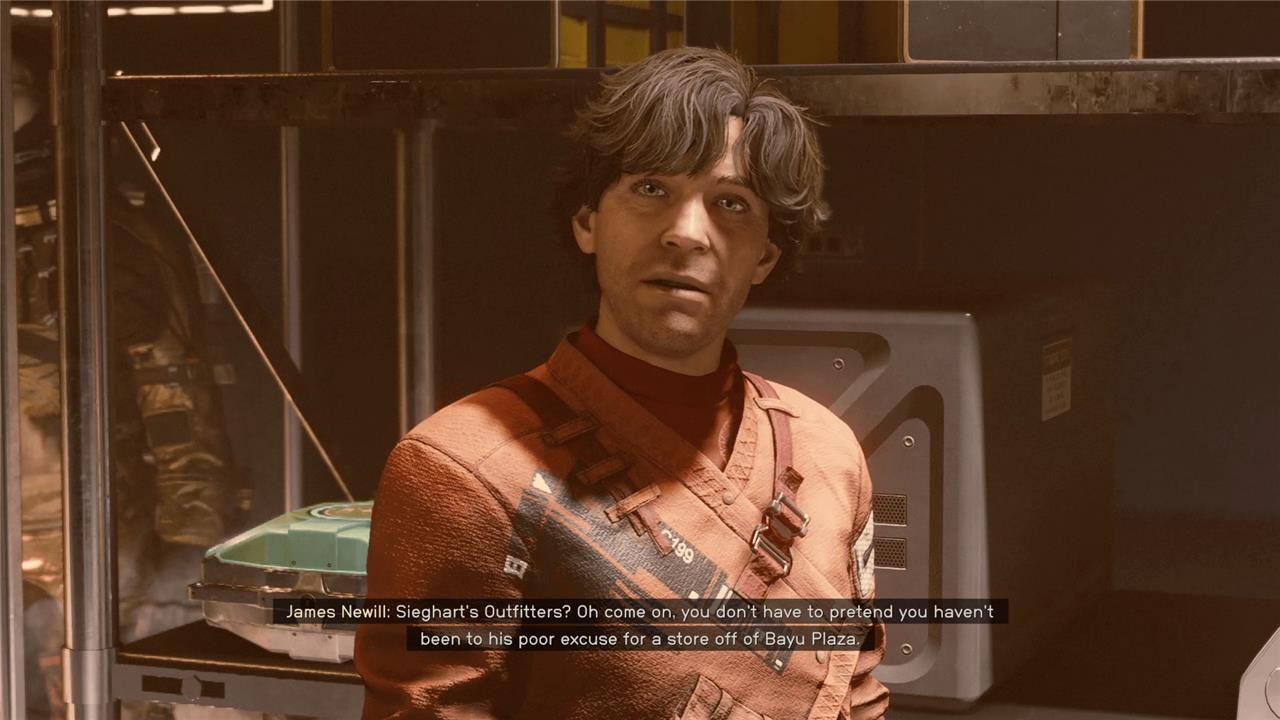
Head into Newill’s Goods and strike up a conversation with the nervous guy behind the counter, James Newill. Newill is pretty bent out of shape about a competitor, Sieghart’s Outfitters, and isn’t very cooperative. If you ask him about a meeting he setup recently, he’ll be coy and ask you to pay for the info. You can persuade him to tell you or just pay the 2500 Credits he’s asking for. Either way, he’ll tell you where to find the seller’s “Sleepcrate,” which is sci-fi for “one bedroom apartment.”
Follow the waypoint and use a digipick on the Novice-level lock. Access the seller’s computer to gather a bit of information on them that you can use in the negotiation.
Talk to Walter Stroud // Go to the Astral Lounge // Talk to Walter Stroud
With all your pre-sale chores down, head back up to Stroud-Eklund and talk to Walter. You’ll need to wait for his long conversation with Issa to end.
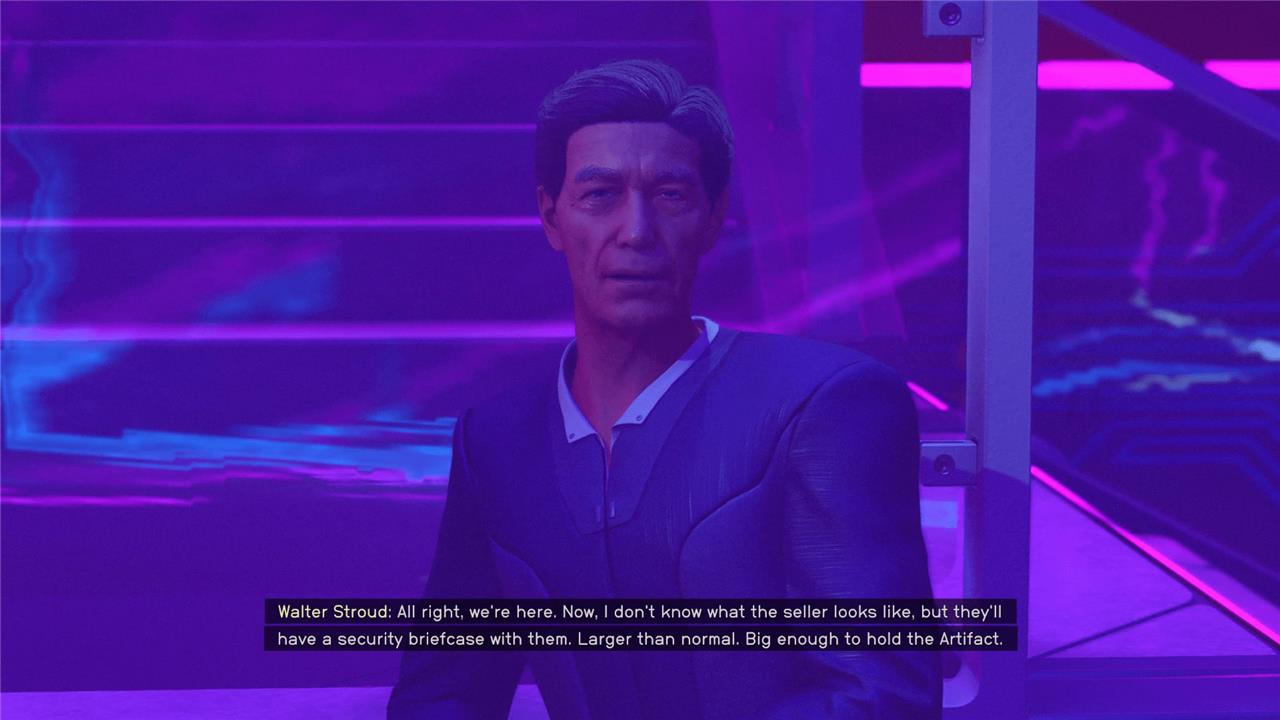
Head down to the Astral Lounge and talk to Walter again when you’re ready to start the sale. He’ll give you a description of the seller and tell you the secret code words to start the sale: “Ramsay and Travers.”
Locate the Seller
To locate the seller in the “All That Money Can Buy” quest in Starfield, head to the Astral Lounge on Neon after traveling there with Walter Stroud. Inside the lounge, look toward the back near the bar area where the seller can be found standing against the wall with a large briefcase at his feet. To confirm his identity, use the code phrase “I’m with Ramsay and Travers,” which will prompt him to proceed to the VIP lounge for the deal. After speaking with him, return to Walter to continue the mission.
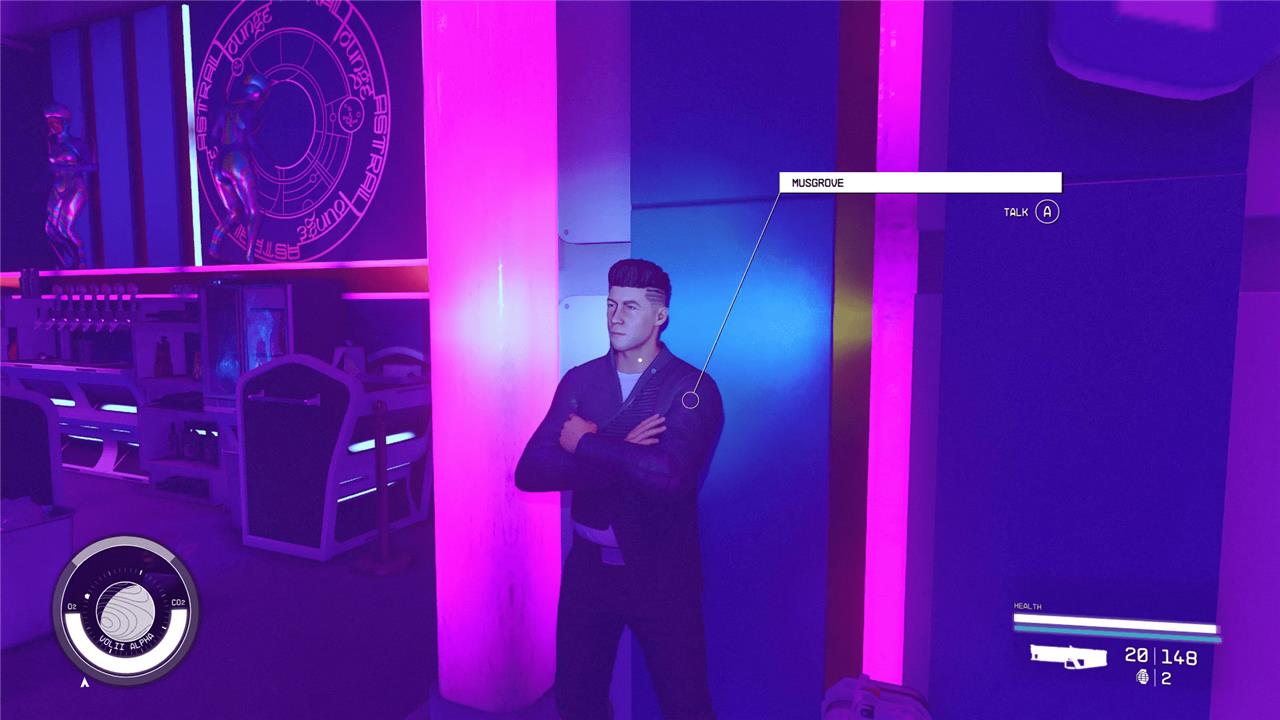
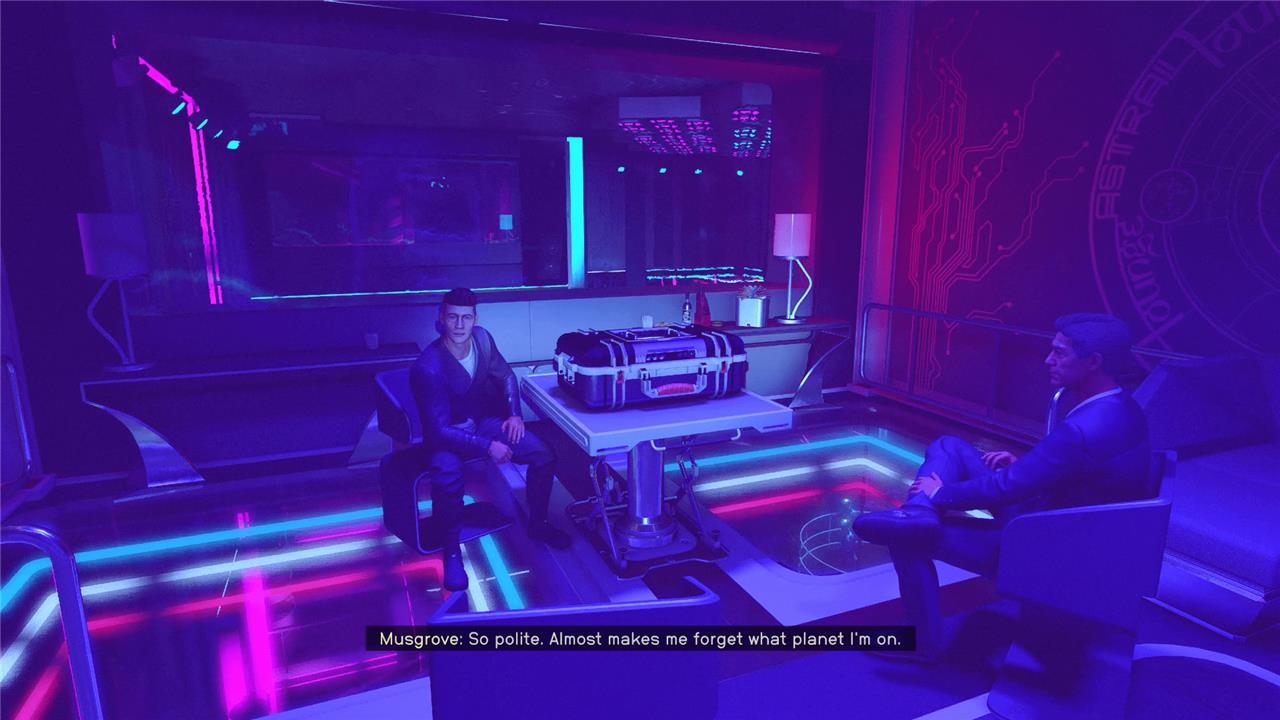
Once Walter sets you loose, walk around the Astral Lounge until you find the seller, who will have a briefcase and a pin on their lapel. We found the seller up the stairs, by the bar, leaning against a back wall. His name is Musgrove, and he looks like he’s wearing a leather jacket.
Chat with Musgrove and tell him you’re with “Ramsay and Travers.” He’ll tell you he heard you have a meeting and say he has to go.
Talk to Walter Stroud
Head back and talk to Walter. He’ll give you some info on how the meeting will go down. Tell him you’re ready to go and head up to the VIP room.
Negotiate for the artifact // Head to the entrance
Go into your VIP room and either sit or stand during the meeting.
Musgrove will try and take you for a ride, just like Walter predicted. He’ll ask for double. Tell him to stop bluffing and that you know he needs to sell it quick.
When he threatens to walk out of the room, remote trigger the doors to close.
Musgrove will flip and call for security. Tell him that you and the security team have come to an agreement.
If you do all of that, Musgrove will give you the artifact for the agreed upon amount.
When you leave the office, a Slayton Agent will stop you and tell you you’re in possession of stolen property. You have a few options of how to deal with this situation:
- Persuade the guy to leave you alone
- Signal Neon Security to deal with him, assuming you are a VIP
- Attack him outright
Whichever option you choose, head down the elevator and out of the Astral Lounge.
Get off of Neon
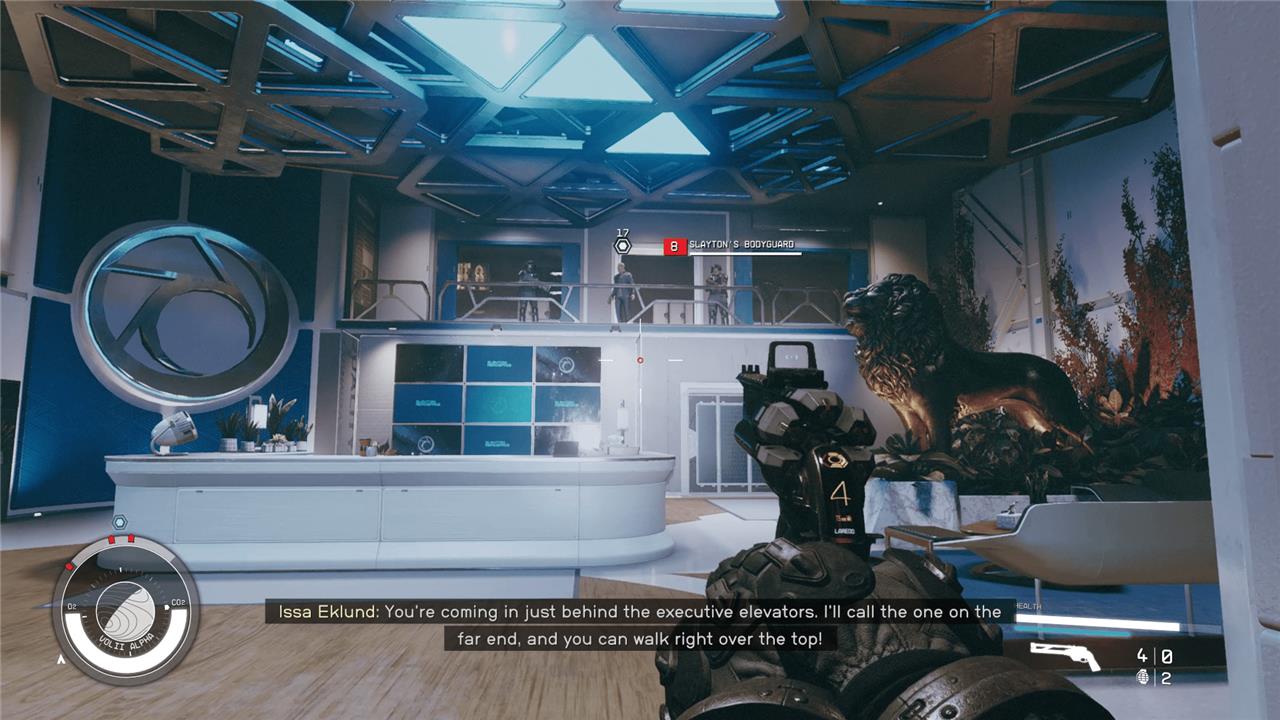
After arriving on Neon for the “All That Money Can Buy” quest, you need to get off your ship and head into the city to meet Walter Stroud and begin the deal. Your first step is to enter the Astral Lounge, where you will find the seller carrying a large briefcase. Use the code phrase “Ramsay and Travers” to identify the seller among the crowd. Once located, you will negotiate for the artifact, with options to persuade or force the deal. After securing the artifact, be prepared for a confrontation with a Slayton Aerospace agent at the lounge entrance. Following this, you will need to follow Issa Eklund’s guidance through vents and alleys to evade security and continue the mission on Neon.
Slayton has impounded your ship and made getting off of Neon with the artifact impossible. You’ll need to talk to Slayton, resolve the “misunderstanding,” and get your ship back.
Talk to Issa Eklund
When you reach the exit out of the lounge, Issa will tell you there’s been a problem. Slayton has put a bounty on your head and impounded your ship. This means you’ll have to go and make a deal with him if you want to get home.
Go to Slayton Aerospace HQ // Find a way to the next floor
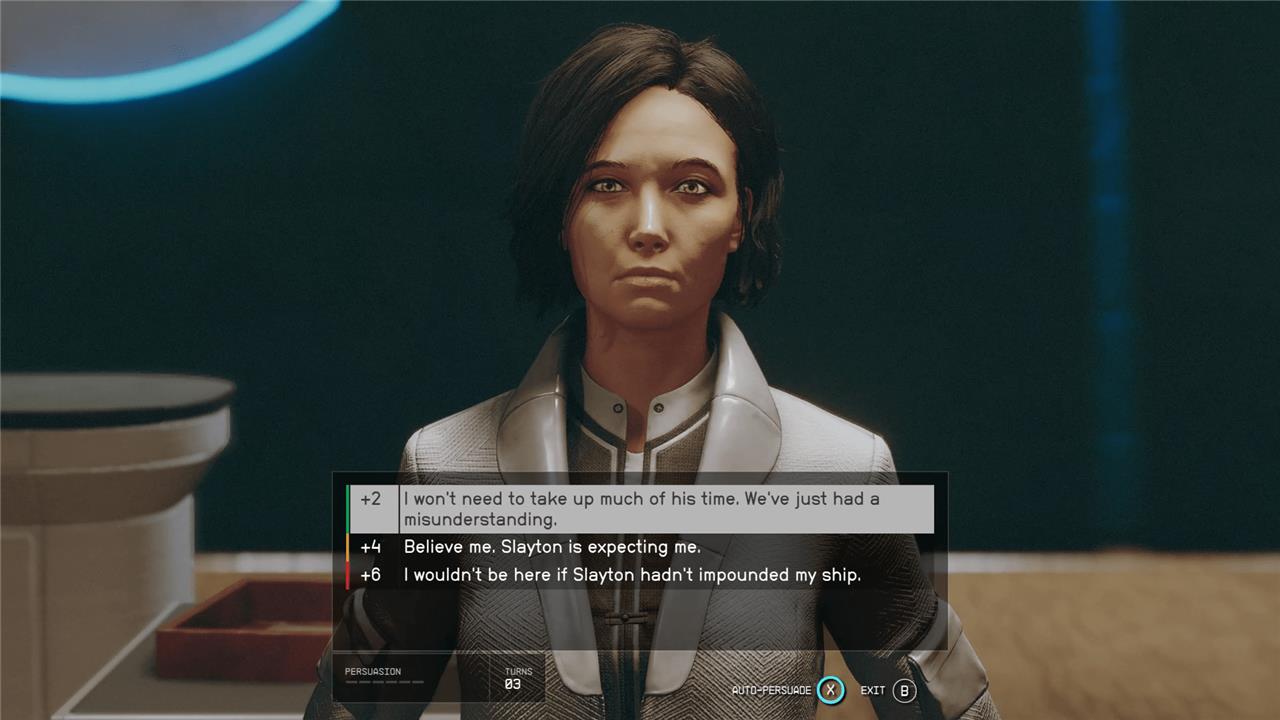
Follow the waypoint to Slayton’s office and talk to the woman at the front desk. You can either persuade her to help you or you can attack and fight your way through the office building.
We’re going to proceed as if you passed the persuade check (six pips, a great candidate for auto-persuade, if you have one banked), as the violence in Starfield tends to be a bit more straightforward.
Take the elevator // Talk to Walter // Go to the next floor // Climb the trade tower
With your successful persuasion, head over to the elevator in the lobby and take it up. Slayton will stop the elevator as a kind of ambush. Issa will pop over the radio and offer to help you out of the office. Talk to Walter and get ready for some “stealth.”
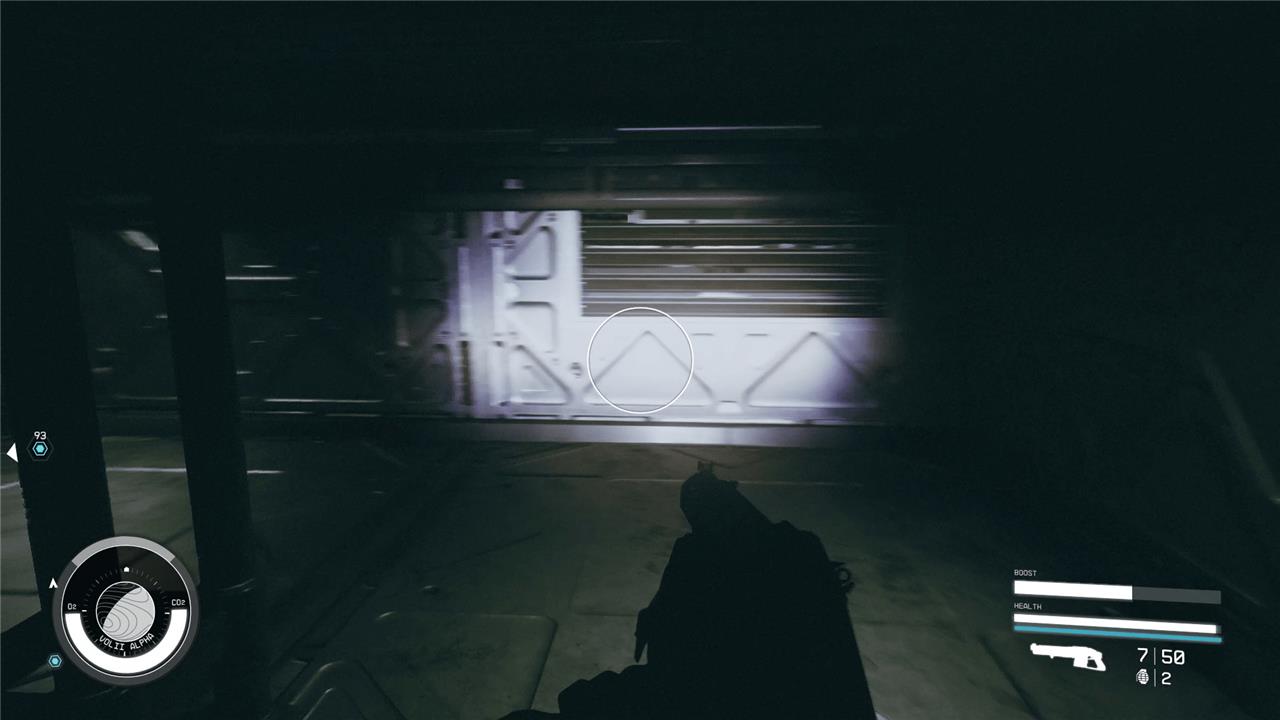
For this next section, you’ll just need to follow Issa’s commands and wait for her to tell you what to do. Just be patient, move slowly, and act as soon as she tells you what to do. If she says wait, wait. If she counts you down until something isn’t looking, go when she says go.
Eventually, Issa will lead you outside of the tower. Here you can continue to sneak around or get dangerous and engage the security guards in combat. Either way, continue your climb up the tower. When you re-enter, you’ll be on the executive floor.
Confront Nicolaus Slayton // Talk to Musgrove
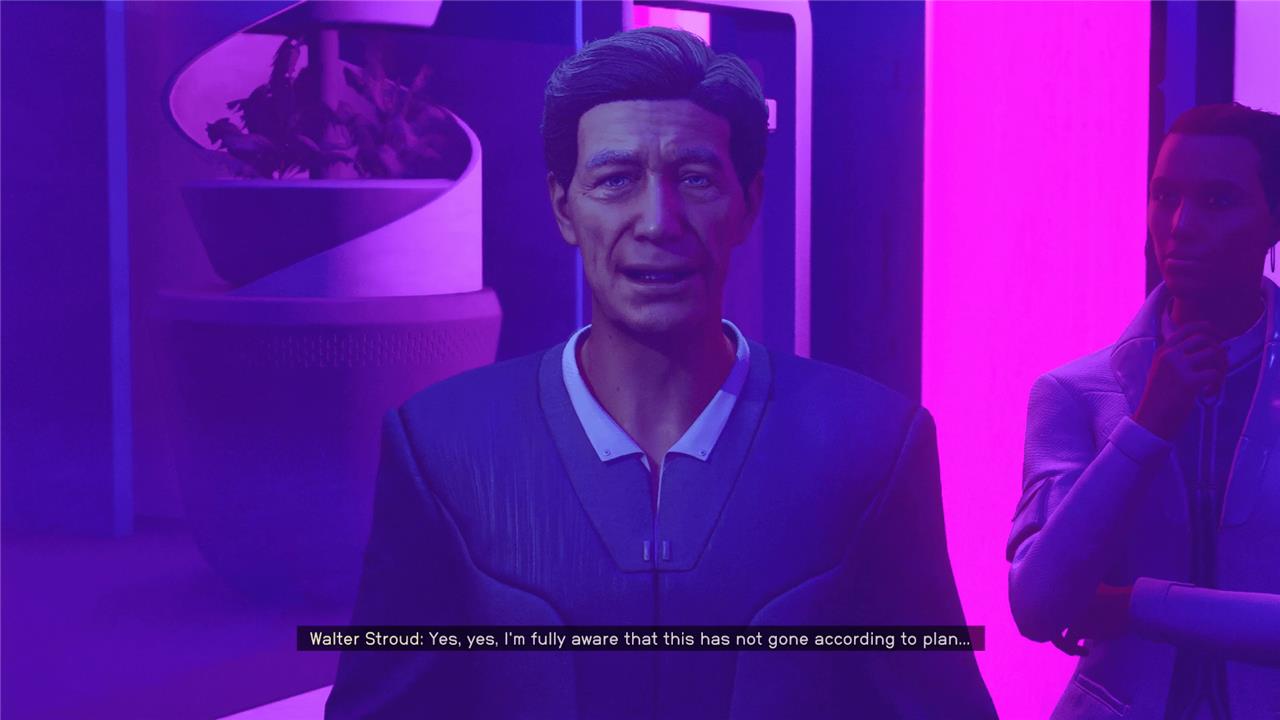
When you walk in, you’ll see Nicolaus Slayton and he’ll say some rich guy, existential nonsense. You can attack him if you want, but you can also just ask Walter to make a deal with him (this doesn’t require a Persuade action). Walter will ask Slayton about his “quarterlies” and you’ll be free to go once you deal with Slayton’s old employee: Musgrove.
Walk into the back office and talk to Musgrove, the guy who sold you the artifact. You’ll have three options with how to deal with him:
- Kill Musgrove
- Send Musgrove to jail
- Let Musgrove go
The only impact here is a narrative one – outside of your companion’s favor, depending on who you have with you. Walter will like it if you let Musgrove go, but if you have Sam Coe with you, for instance, he’ll be sad you didn’t lock him up.
Feel free to loot or even steal some of Slayton’s cool stuff on your way out.
Go to the ship // Talk to Walter Stroud // Take off from Neon // Return to the lodge
Head down to your ship, talk to Walter, and take off from Neon. You’ll meet a mysterious visitor back in orbit. They’ll demand the artifact from you and you’ll have three options:
- Escape the ship
- Fight the ship
- Eject the artifacts from your ship
Normally we don’t offer suggestions on your choices here, but this time we’re going to. If you want to keep the artifact and also don’t want to die (the ship is very powerful), select “full evasive maneuvers.” As soon as combat starts, open your menu and plot a path to literally any other system. When you close your menu, pull all your ship energy out of weapons and put them into shields and the Grav Drive. Wait for the Grav Drive to boot up – the more energy you have in it the faster it’ll go – and cheese it.
How can I locate the seller in Neon’s Astral Lounge easily
To easily locate the seller in Neon’s Astral Lounge during the “All That Money Can Buy” quest in Starfield, head to the back of the lounge near the large bar. The seller, named Musgrove, can be found leaning against the wall to the right of the bar, distinguished by a large briefcase resting on the floor beside him and a pin on his lapel. He typically wears a black blazer or leather jacket, making him stand out among the crowd. When you approach him, use the passcode “Ramsay and Travers” to initiate the meeting and proceed with the quest.
Is the seller always near the back of the bar in Neon’s Astral Lounge
The seller in Neon’s Astral Lounge is consistently found near the back of the bar, standing against the wall to the right of the bar area. He is recognizable by a large security briefcase at his feet and a Slayton Aerospace pin on his lapel. This location is reliable for identifying him during the “All That Money Can Buy” quest in Starfield.