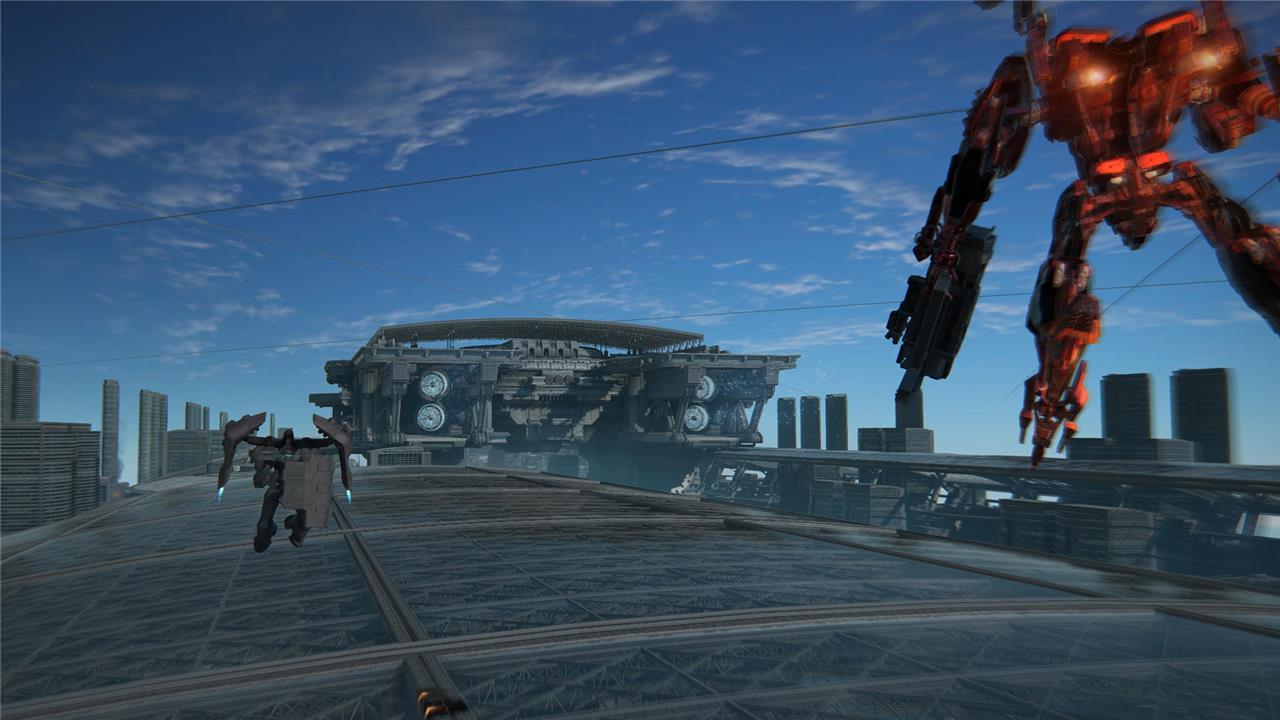
Hunting down every elusive Combat Log enemy in Armored Core 6: Fires of Rubicon is no easy feat – but mastering their hidden locations is key to unlocking powerful rewards and boosting your Hunter Class rank. Whether you’re on PC, PlayStation, or Xbox, this guide reveals all the secret spots where these formidable foes lurk, ensuring you never miss a chance to claim their valuable logs and upgrade your mech arsenal.
Hunting these special targets is not only a matter of honor and testing your skills as a pilot. Some good rewards await you as well. To assist you in completing the Loghunt missions and collecting all the Combat Logs, we cover in this article the locations of all the Combat Log enemies.
How Loghunts work in in Armored Core 6
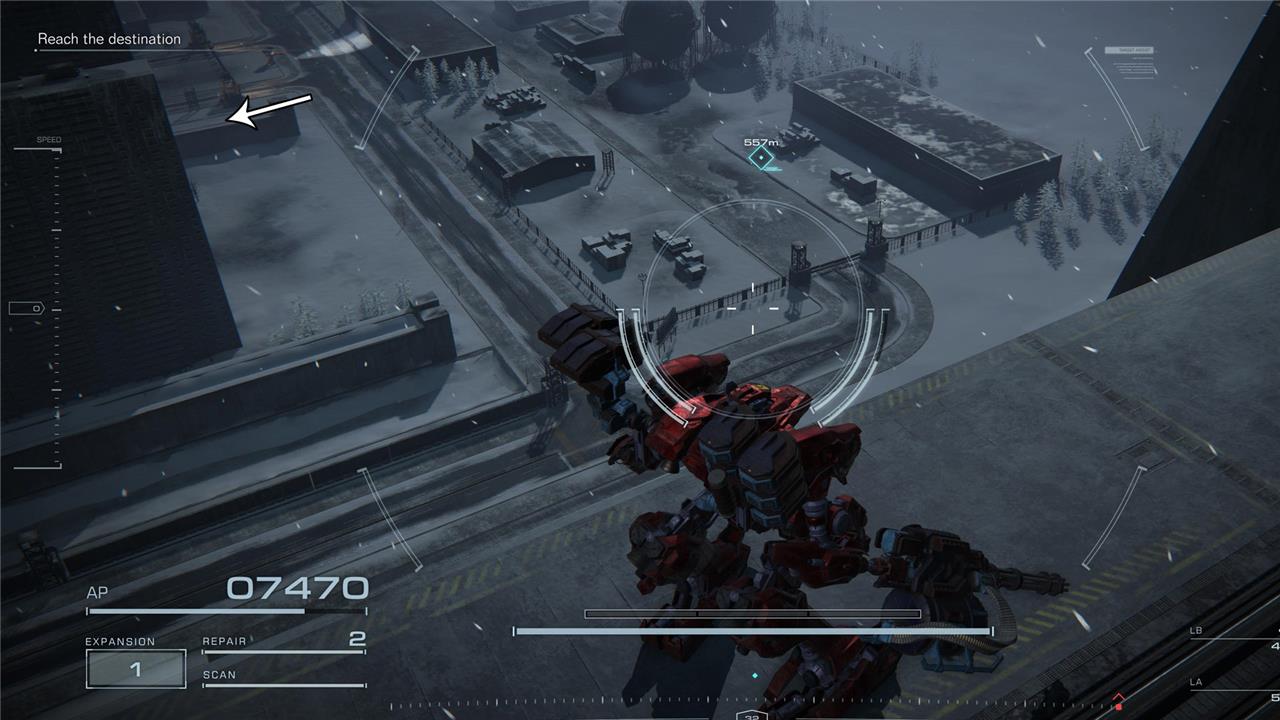
The LOGHUNT system in Armored Core 6: Fires of Rubicon involves hunting down specific marked enemies during missions to collect Combat Logs. These targets, indicated by icons next to their health bars, range in rarity from bronze to platinum, with higher-tier logs contributing more to your Hunter Rank progression. To earn a Combat Log, you must defeat the marked enemy and complete the mission; simply killing the target is not enough. As you gather more logs, your Hunter Rank increases, unlocking unique mech parts and weapons as rewards. Some logs are hidden or tied to tougher enemies like ACs and tetrapods, and replaying missions allows you to collect missed logs to fully progress in the LOGHUNT program.
The Loghunt Program is one part of the side content in Armored Core 6, consisting of hunting for collectibles called Combat Logs. These are obtained by defeating certain targets that can be found during missions. They are marked with the sign of a Combat Log when you aim at them, which looks like this:

To check which missions have enemies with Combat Logs, you can look at the Replay Mission menu.
There are four types of Combat Logs – Bronze, Silver, Gold, and Platinum – and each increases your rank by a certain amount. While collecting Combat Logs is not mandatory, you should consider doing it, because as you collect them, your Hunter Class ranks up, rewarding you with parts for your mech that are only obtainable through the Loghunt program.
It’s important to keep in mind that the Combat Logs are only registered and used to rank you up if you destroy the target and finish the mission. You can’t simply start the mission, look for the target, defeat it, and then quit out. As with all things Armored Core 6, you’re in it for the long haul.
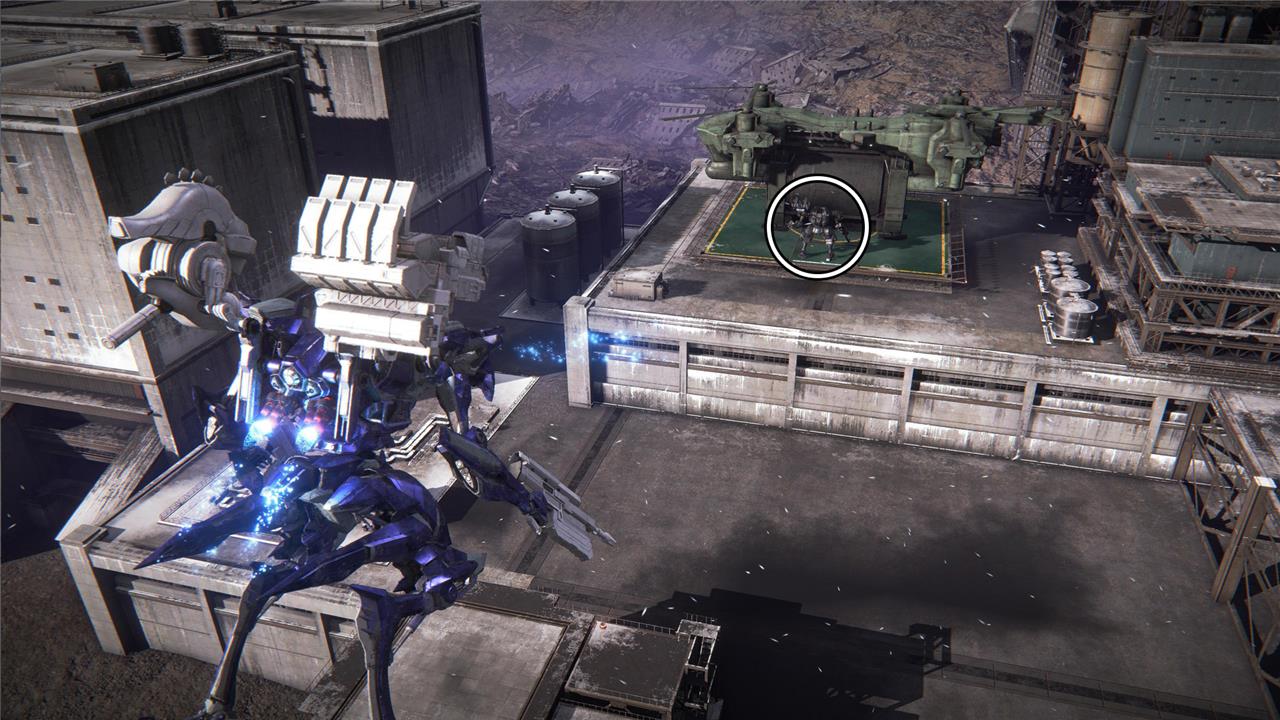
Chapter 1 – Destroy the Transport Helicopters
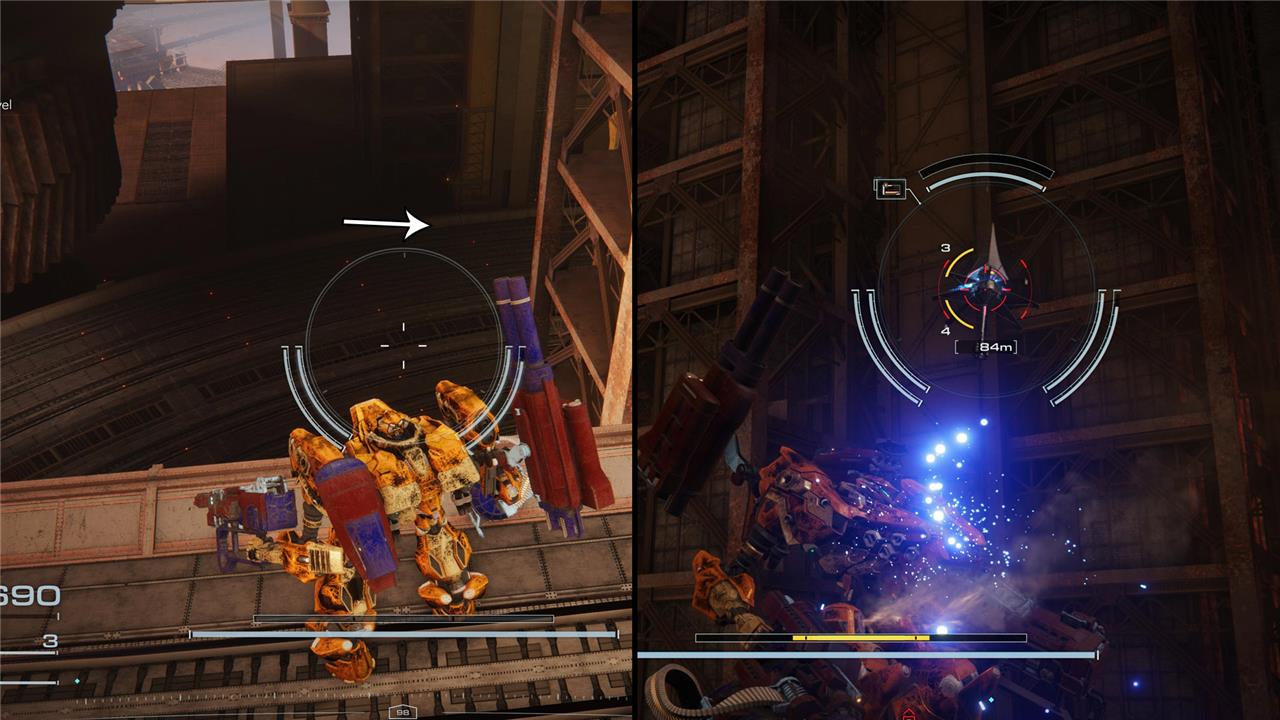
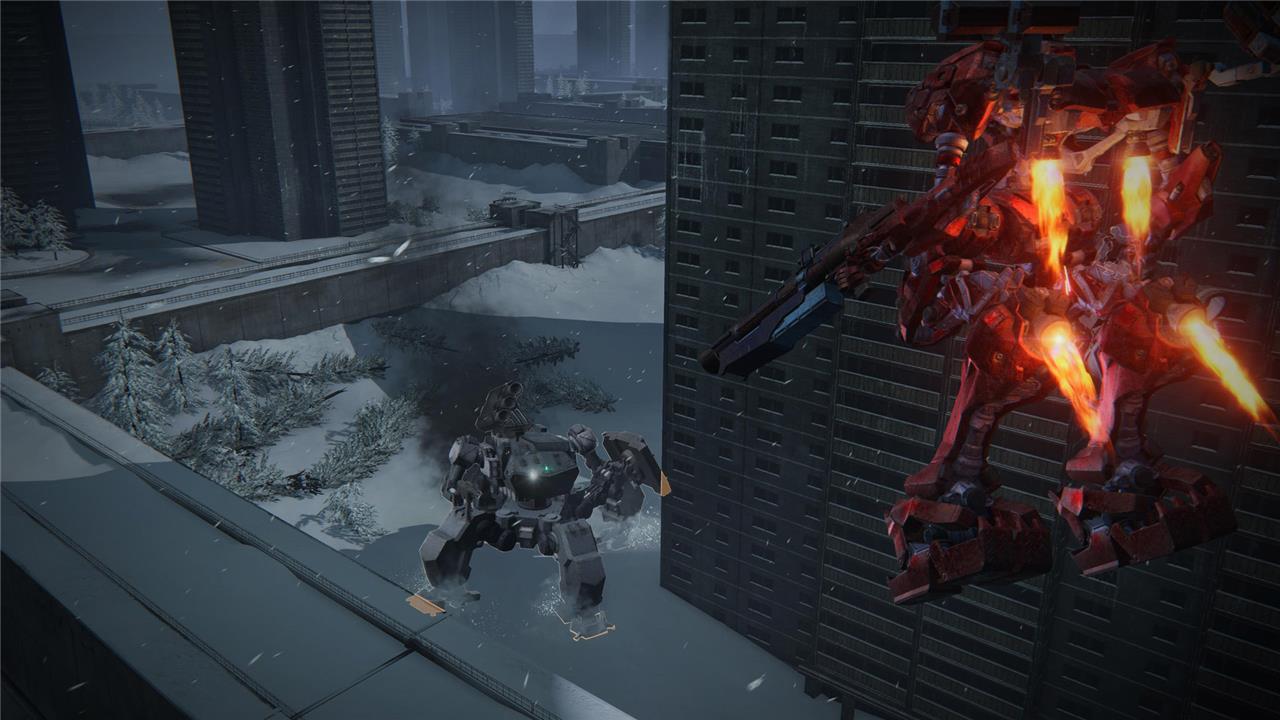
In Chapter 1 of Armored Core 6: Fires of Rubicon, the mission “Destroy the Transport Helicopters” tasks you with taking down multiple transport helicopters operated by the Rubicon Liberation Front. Starting by descending to a factory area, you must eliminate enemies guarding the helicopters, progressing through increasingly fortified zones with more helicopters and hostile mechs. Strategic use of your weapons and mobility is crucial, especially when dealing with artillery missile launchers and powerful enemy units like the Tetrapod MT. Successfully destroying all the transport helicopters will complete the mission and reward you with COAM and a Combat Log collectible found after the initial helicopter kills.

Target: Tetrapod
Location: The tetrapod unit that can be found in the last section of the mission.
After destroying the second Helicopter, you need to go to a higher section of the map and fight the remaining enemies that are close to the third and last helicopter. This is where you find the tetrapod. It has a few gap-closer moves and a cannon. Both attacks can be avoided by remaining airborne – and constantly staying on the move.
Chapter 1 – Destroy the Tester AC
In “Destroy the Tester AC,” the first one-on-one AC battle in Armored Core 6: Fires of Rubicon, players are tasked with intercepting and destroying a new advanced tester Armored Core being transported by Balam Industries. The mission takes place in a contaminated city zone, where the lone enemy AC, piloted by an inexperienced student, wields a pulse blade, burst rifle, and homing missile launcher. The pilot’s poor AI and slow reactions make an aggressive melee-focused strategy effective. Using weapons like a bazooka and pulse blade to stagger the Tester AC repeatedly while staying close to avoid homing missiles is key to victory. Defeating this enemy also grants a Combat Log, boosting the player’s Hunter Rank and unlocking new parts.
Target: Enemy Armored Core.
Location: Main area of the map.
You can’t miss this target because the mission’s objective is to destroy it. It can be easily found in the area you start at. This is a faster enemy than the previous target, so you might want to try a close-range dual-weapon build to cause a lot of stress to it and stagger it more easily.
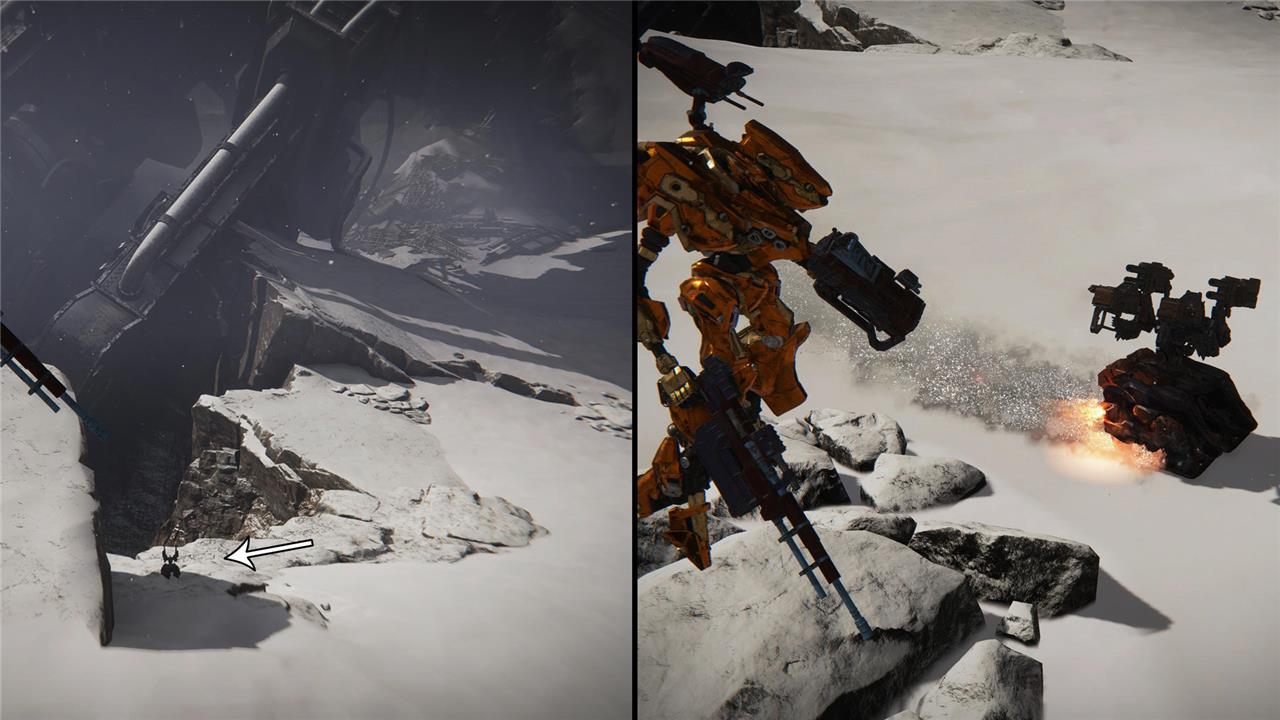
Chapter 1 – Attack the Dam Complex
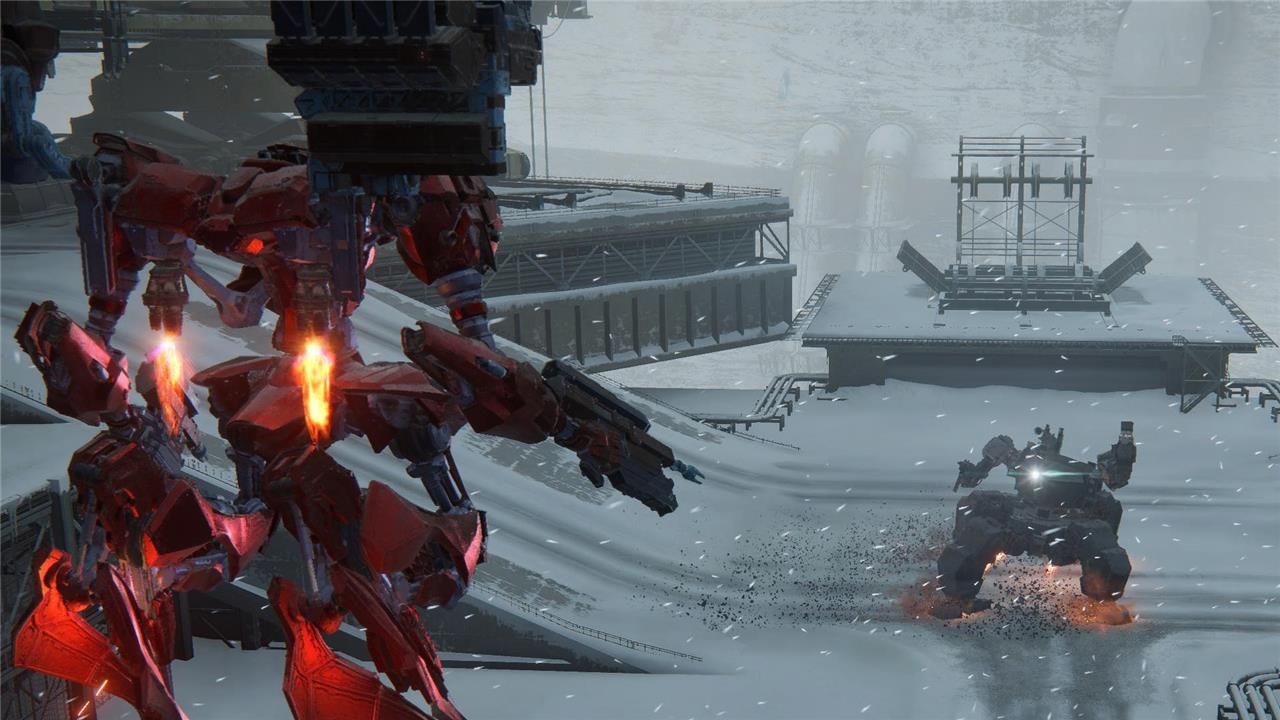
In the mission “Attack the Dam Complex” in Armored Core 6: Fires of Rubicon, players team up with G4 Volta and G5 Iguazu from the Balam Redguns to destroy generators around the dam complex, aiming to cut the dam’s power. The mission features intense combat where your allies charge head-on, drawing enemy fire, allowing you to provide crucial support and flank artillery positions. Two key Combat Logs can be found here: a Silver Combat Log from a heavy MT tetrapod near a frozen lake after destroying the second generator, and a Gold Combat Log earned by defeating the optional boss AC pilot Index Dunham, known as Burning Pickaxe, near the final generator. Strategic use of pulse blades and ranged weapons is essential to stagger and defeat these enemies and collect their valuable Combat Logs.
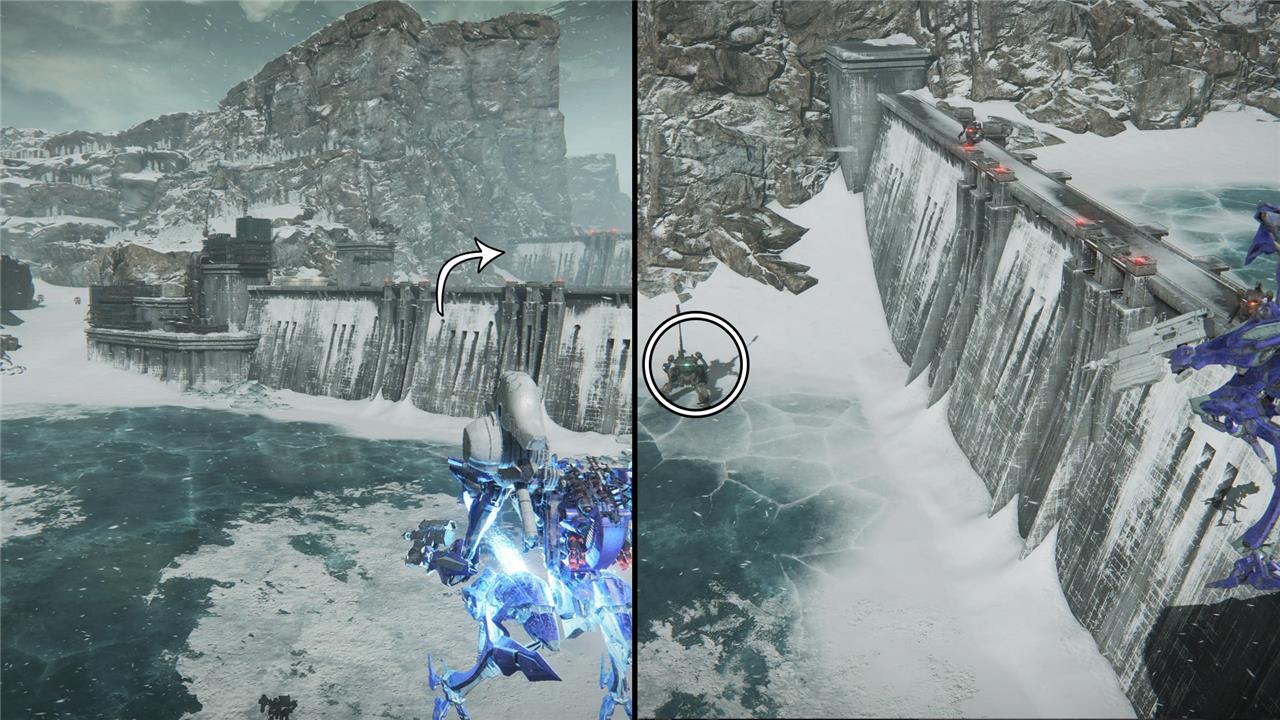
Target: Tetrapod
Location: The unit is in an area right from the second generator.
This unit uses a cannon to hit you, a small gun to shoot you, or it might jump and attack with its pulse blade. The strategy to fight it is similar to the one employed with the previous tetrapod unit. Keep moving and take advantage of the fact that this unit can’t fly. Before starting the fight it’s important to kill the two mechs at the top of the wall.
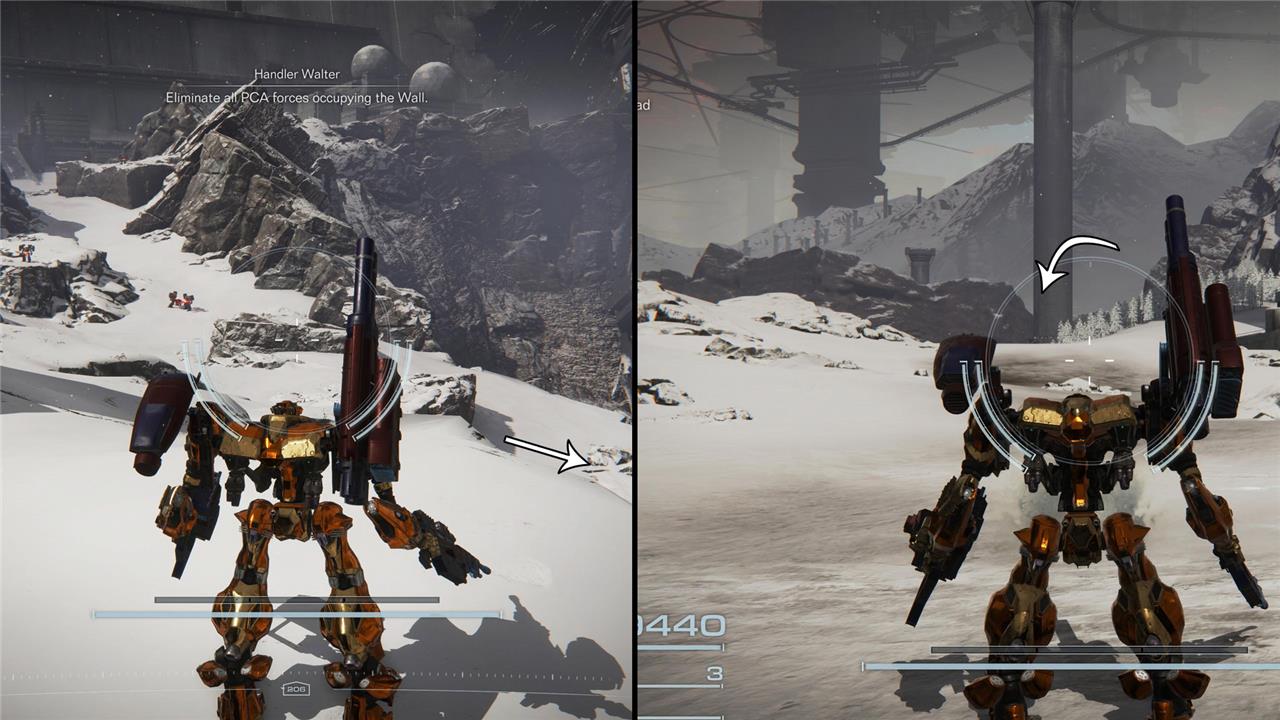
Chapter 1 – Operation Wallclimber
Operation Wallclimber is a pivotal mission in Armored Core 6: Fires of Rubicon where players must breach the Liberation Front Fortress known as “The Wall.” The mission involves destroying key enemy defenses, including city gatling cannons and a heavy Tetrapod MT, before ascending the fortress to confront the formidable JUGGERNAUT boss. Along the way, players encounter various shielded artillery and mobile tanks, requiring a balanced build with medium-range mobility and tactical flanking to overcome. The mission also offers opportunities to collect three Bronze Combat Logs by defeating specific enemies, contributing to the LOGHUNT program that rewards players with new parts and upgrades. Success in Operation Wallclimber significantly boosts the player’s reputation and advances the story, setting the stage for tougher challenges ahead.
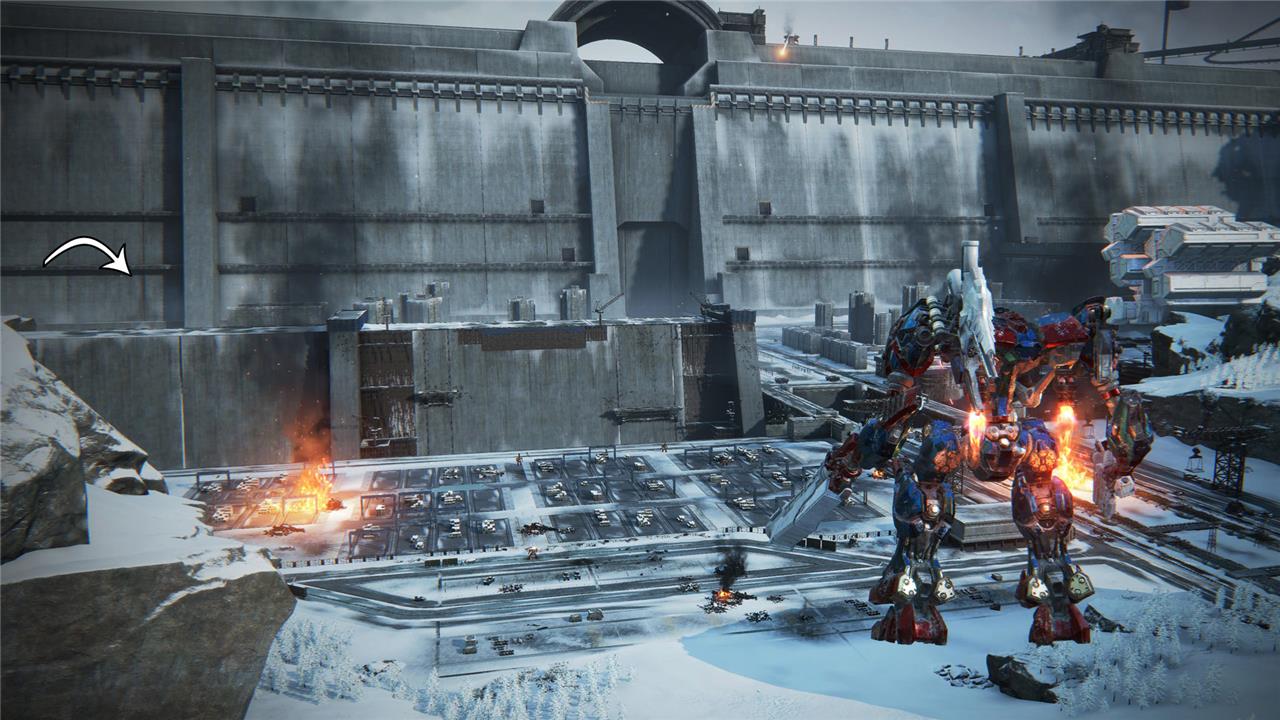
Target: Three Enemy Mechs
Location: Left section of the initial area, before infiltrating into the wall.
There are two ways to reach the area where you’ll find these three units. The first one is through following the steps to complete the objective of destroying the gatling cannons and clearing most of the area. Or you can try your luck and fly over the left side of the wall. This last one is the most dangerous strategy since there are a lot of cannons in the area that can hit you from afar.
Chapter 1 – Retrieve Combat Logs
Chapter 1 of Armored Core 6: Fires of Rubicon introduces players to the Retrieve Combat Logs mission, where the primary goal is to collect at least five Combat Logs scattered across the map within a strict four-minute time limit while fending off enemy forces. These Combat Logs are obtained by defeating specific marked enemies, often found off the main path, and are crucial for progressing in the LOGHUNT Mercenary Program. Successfully collecting these logs not only advances your Hunter Class rank but also rewards you with valuable COAM bonuses and unlocks new parts. Players must balance speed and combat efficiency, as the mission area is expansive and enemies like guard mechs and light MTs pose threats that can slow down log retrieval. Careful navigation and prioritizing targets are key to completing this mission and unlocking further content in the game.
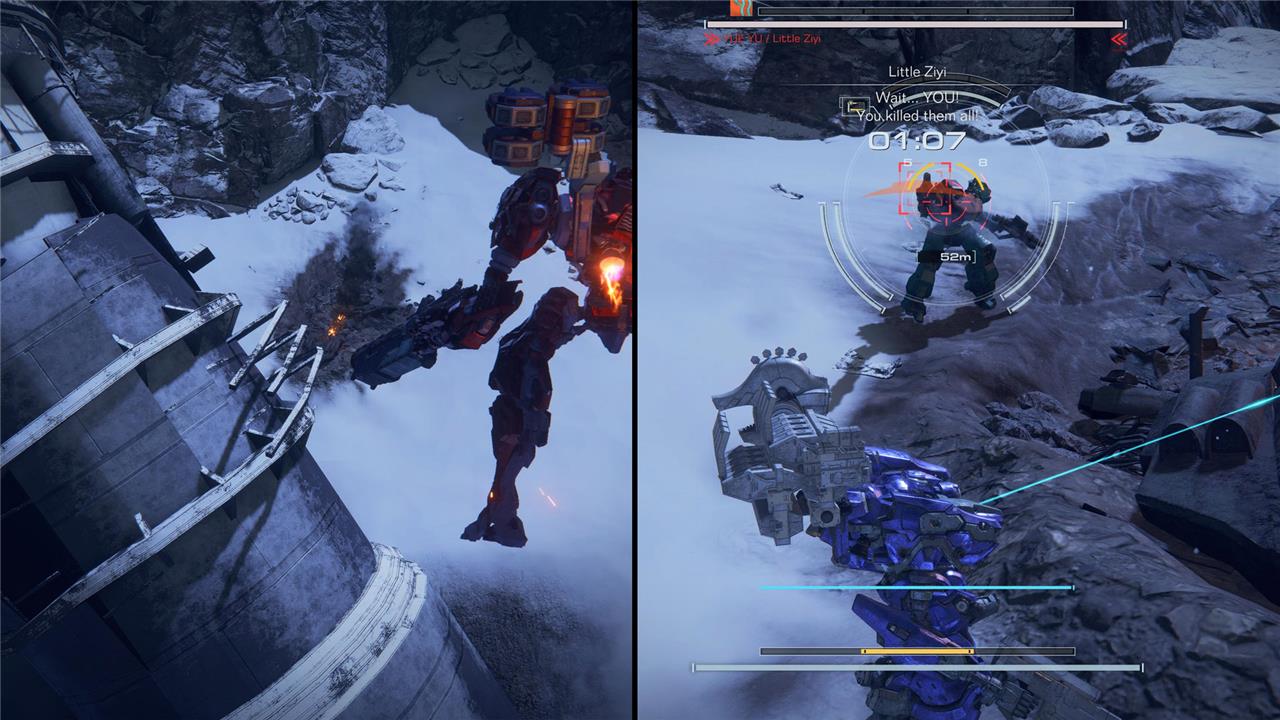
Target: Yue Yu/ Little Ziyi
Location: They can be found in the lower part of the map.
When the mission begins, if you just go straightforward, you come upon an open area with huge debris. By jumping into it, you can find where Little Ziyi is. Fighting this unit is not complicated, but you need to keep up with their pacing and try to stagger them. However, your main challenge is to finish them quickly so you have time to complete the mission’s objective of retrieving logs spread on the map before the time runs out.
Chapter 1 – Attack the Watchpoint
In “Attack the Watchpoint,” the pivotal mission of Chapter 1 in Armored Core 6: Fires of Rubicon, players take on the role of mercenary 621 tasked with infiltrating the Watchpoint facility under the cover of night to destroy a critical sensor valve. The mission challenges you to navigate through heavily guarded sectors filled with artillery and Subject Guard MTs, culminating in a tough boss fight against the agile AC pilot Sulla, who carries a valuable Gold Combat Log. Success requires strategic use of cover, prioritizing artillery cannons, and managing thruster levels to dodge missile attacks. Defeating Sulla not only advances the mission but also rewards you with the Gold Combat Log, essential for progression and unlocking achievements.
Target: Sulla
Location: Sulla is the miniboss you have to face in order to progress through the mission.
Sulla has a pretty fast AC unit and, depending on the build you’re running, it can be a problem. Focus on causing constant damage with either missiles or close-range weapons. Slower builds might have a hard time facing this enemy.
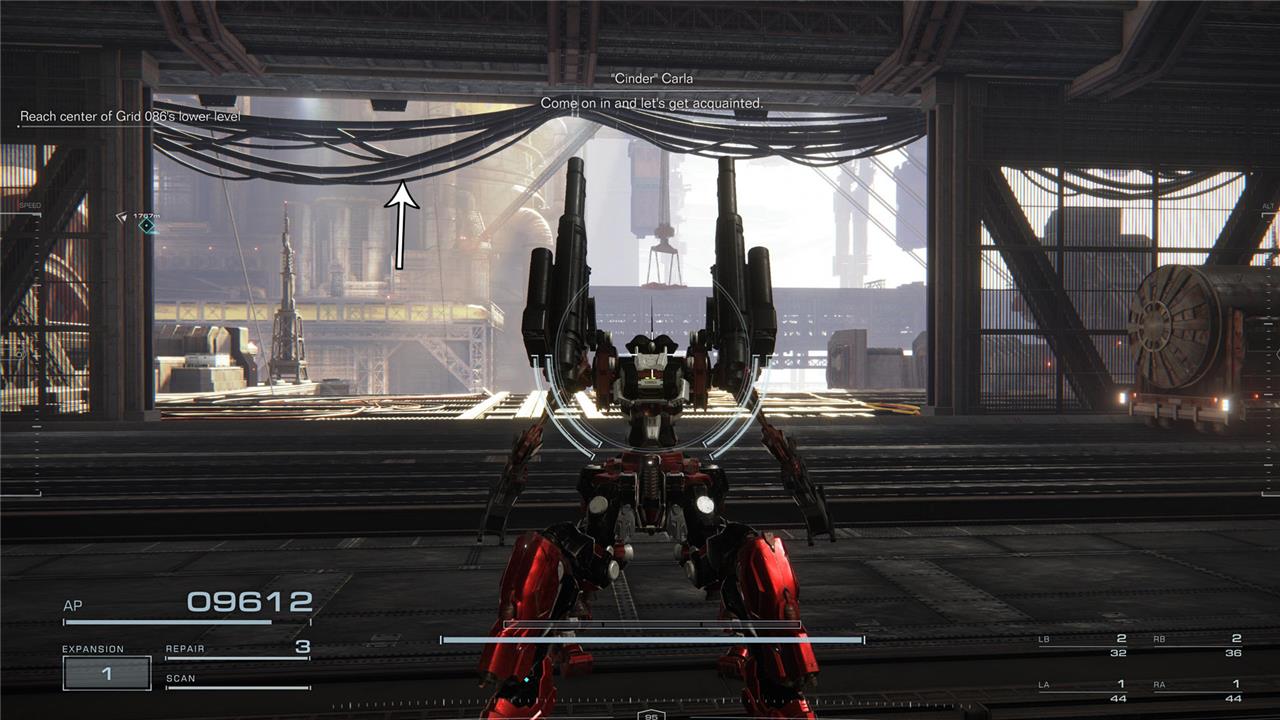
Chapter 2 – Infiltrate Grid 086
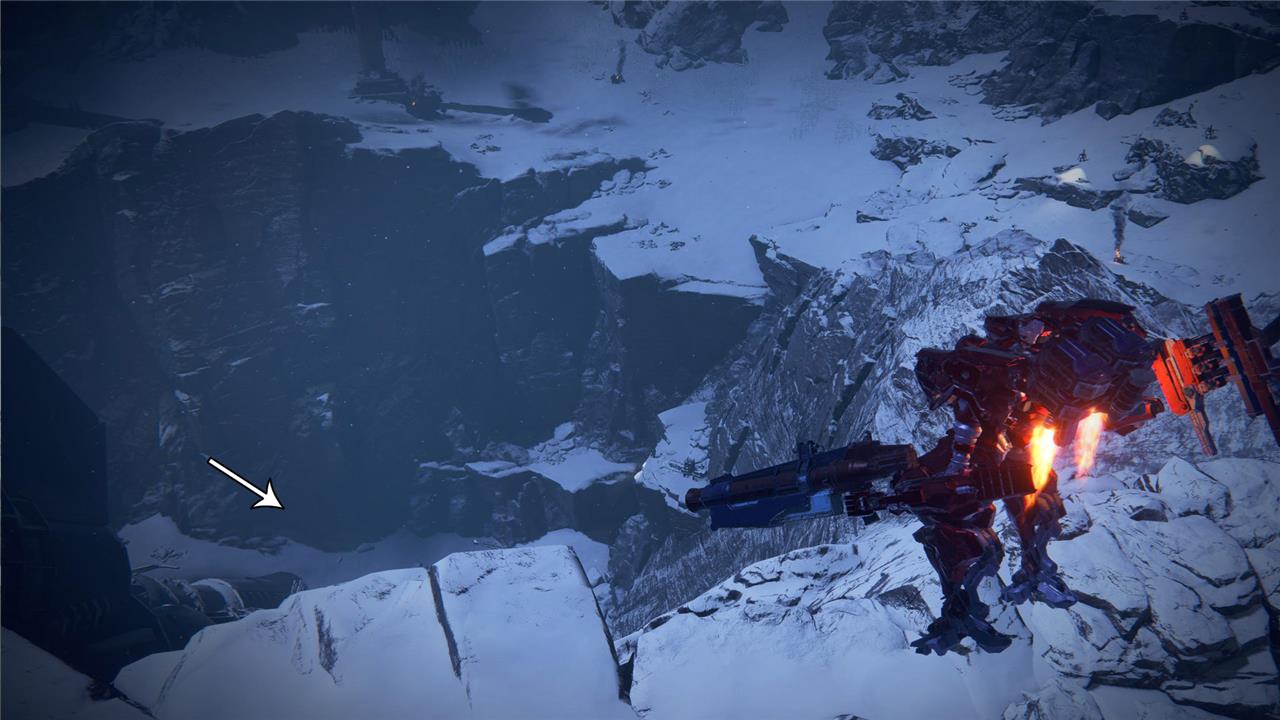
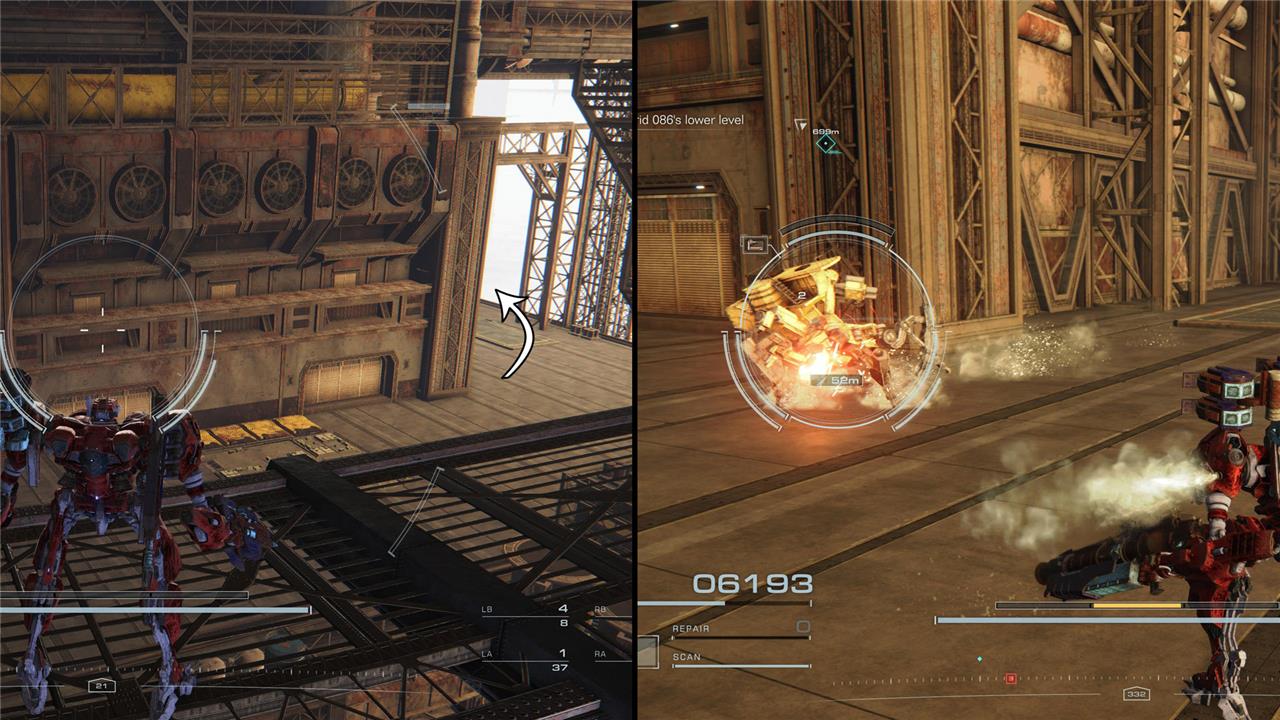
Chapter 2 – Infiltrate Grid 086 takes you into the heart of RaD territory in the icy expanse of Grid 086, where your mission is to reach the lower level’s center and eliminate the autonomous heavy SMART CLEANER. Early on, you will face “Invincible” Rummy, a key combatant who drops the first Combat Log. As you progress, be sure to explore thoroughly to find all nine Combat Logs scattered around, including battles against Tetrapods, Heavy MTs, and the elusive Nosaac hidden near molten metal pipes. The mission demands careful navigation through platforms, pipes, and corridors, with enemies often clinging to ceilings or hiding in hard-to-reach spots. Successfully collecting all Combat Logs requires completing the entire mission run without exiting early. Prepare for intense close-quarters combat and use hover tactics to gain the upper hand against the agile Tetrapods and other foes in this challenging and content-rich stage of Armored Core 6.
Target: “Invincible” Rummy
Location: You end up meeting him in the initial sections of the mission.
Facing Rummy is quite easy if you learn to use his attacks against him. When Rummy uses his melee attack, he becomes motionless for a brief period. The best strategy is to bait him into using this attack by staying considerably close to Rummy. Then, wait for his attacks to shoot your missiles or heavy weapons.
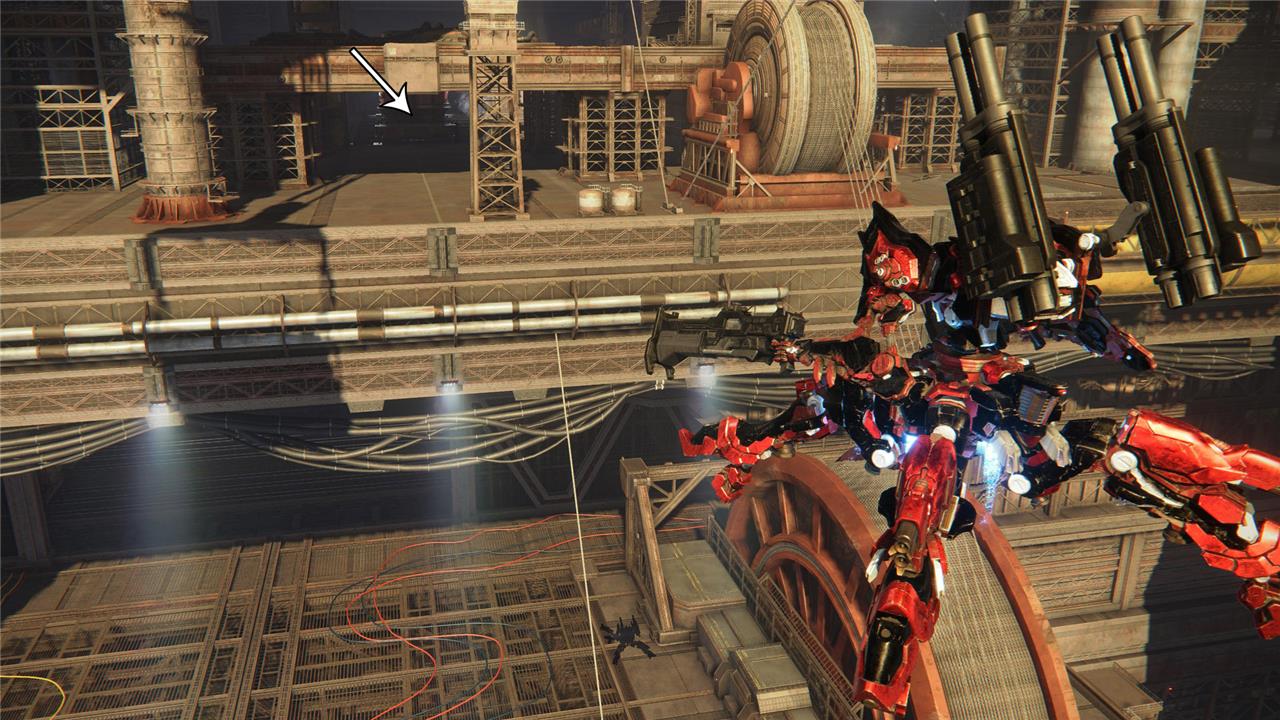
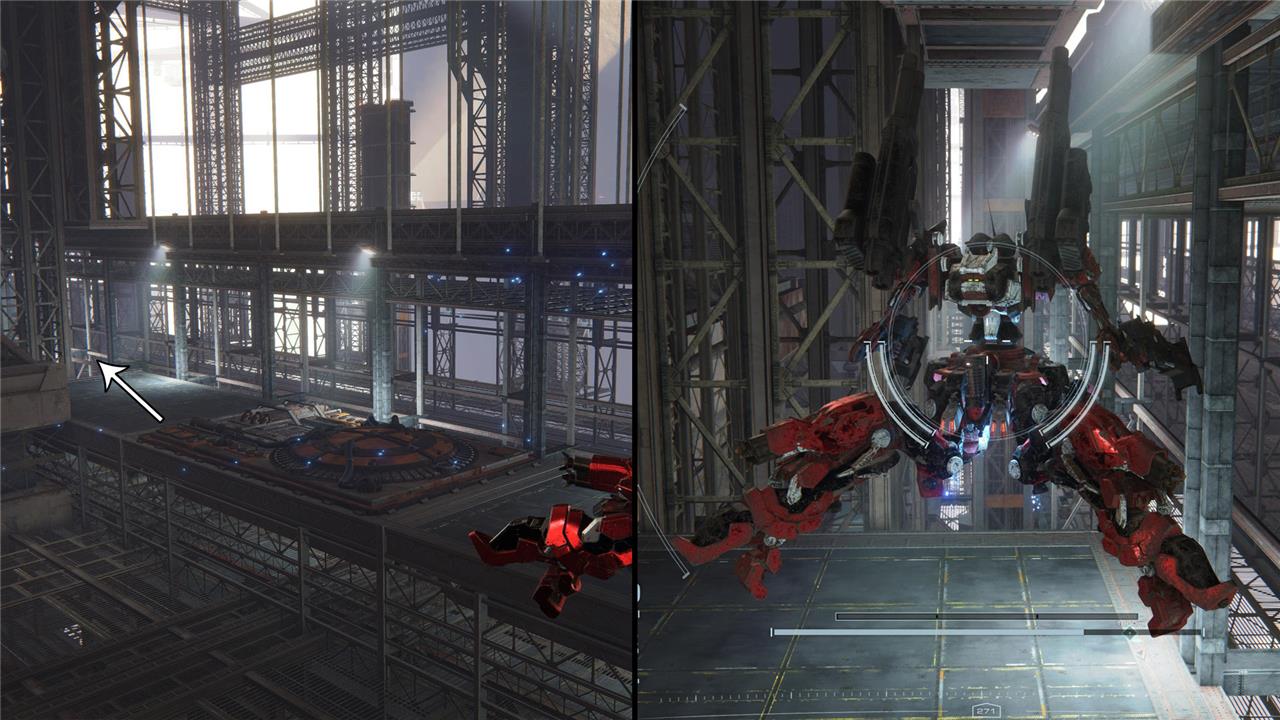
Target: Two Tetrapod Units
Location: Upper area after the “Invincible” Rummy
After finishing the fight against Rummy, you get access to a new area. Instead of going forward following the quest mark, turn back to face the building you came from. You will see that you can fly upward, above the door that opened for you to access the new area you’re now in. A little bit ahead, you can find the two Tetrapod units patrolling.
Target: Two Rolling MT units
Location: Closer to where you fought the last two Tetrapod Units
In the upper area where you found the two Tetrapod units, if you keep going right, you will find a path. Keep following it to find, on your left, two spheres. Get closer to activate both units and destroy them.
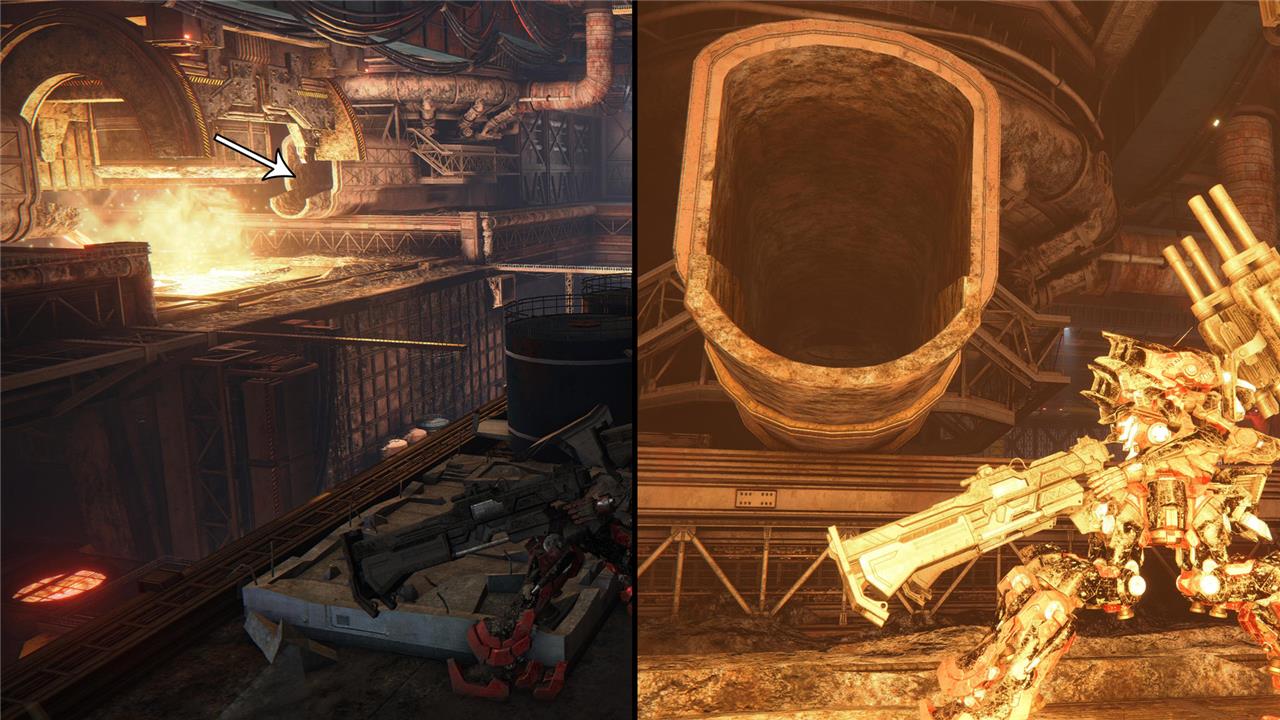
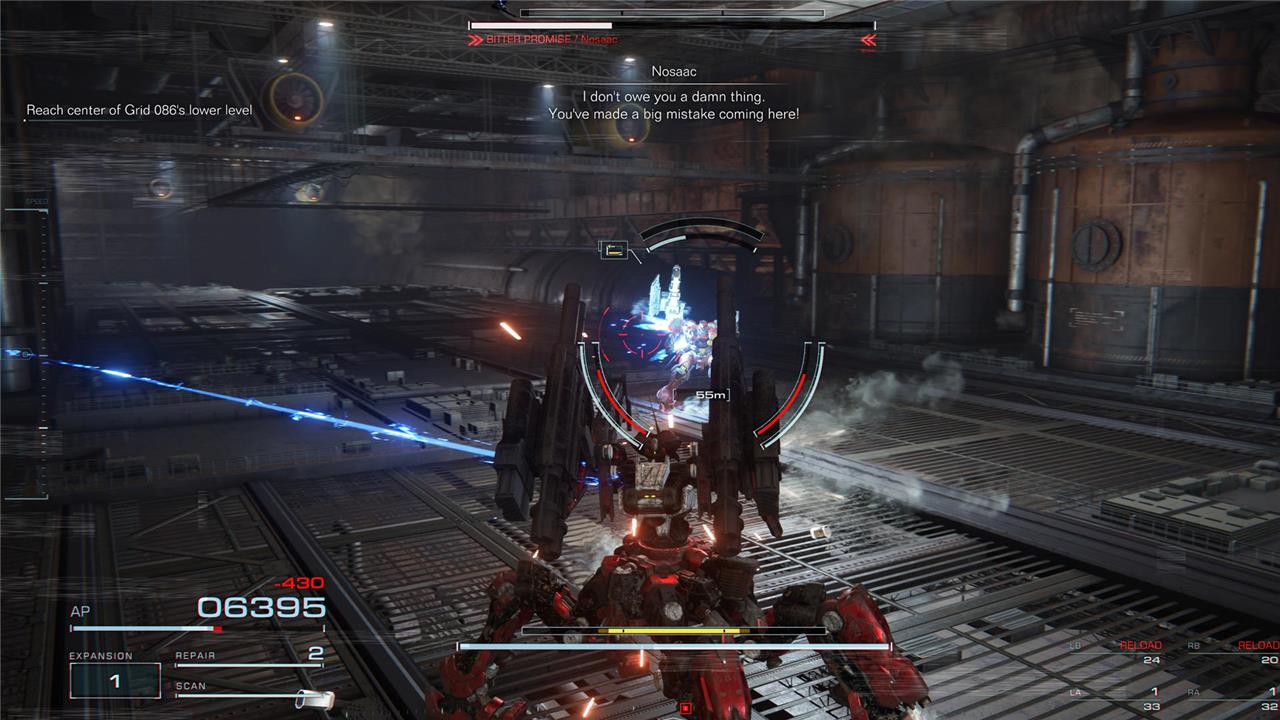
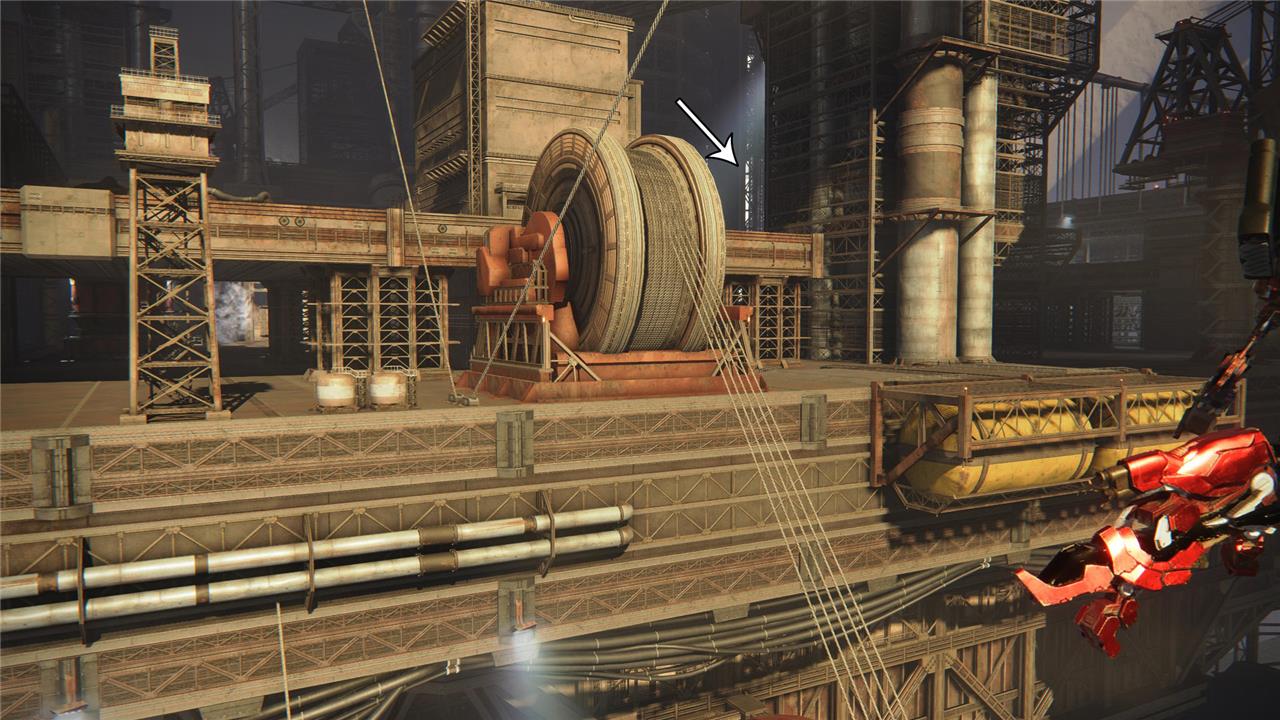
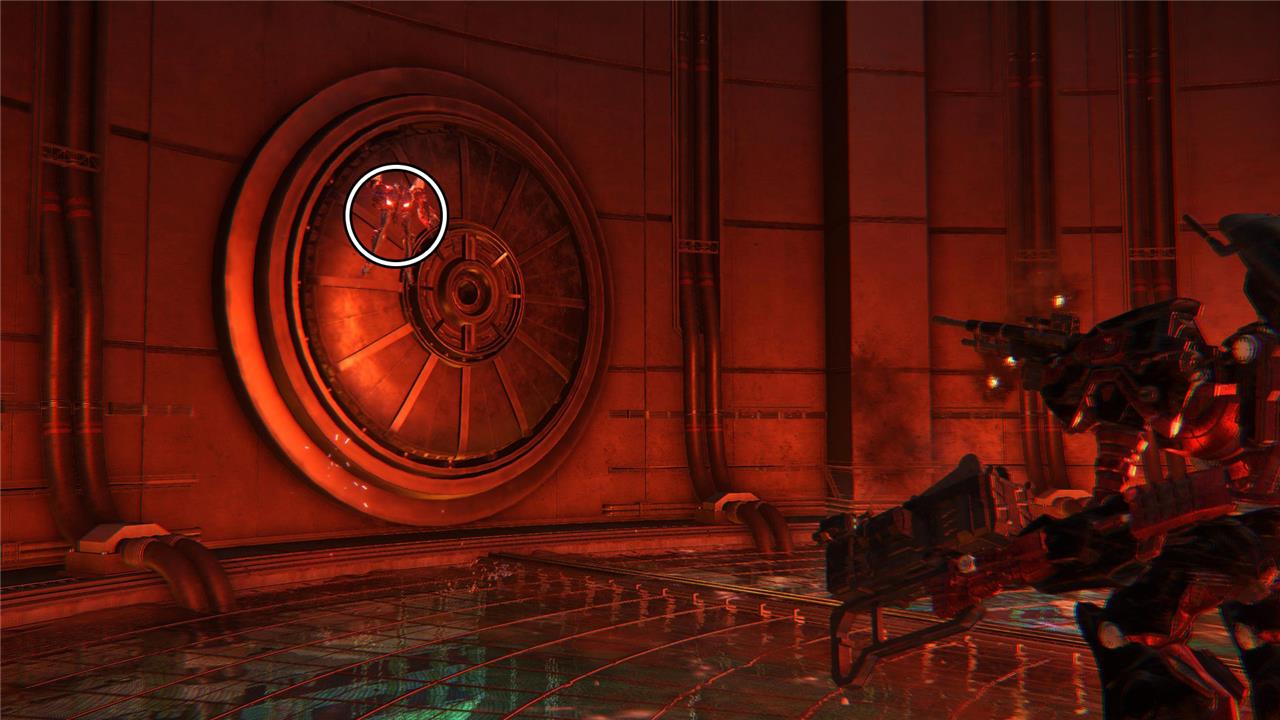
Target: Nosaac
Location: In a secret room accessed through a tube
To find the room where Nosaac is, you must first reach the area where there is a container of what seems to be melted metal. Destroy the units and enter the tube on the right close to the heated liquid. There is only one path to follow from here, which leads you to a room with a chest. The encounter is triggered once you get closer to it.
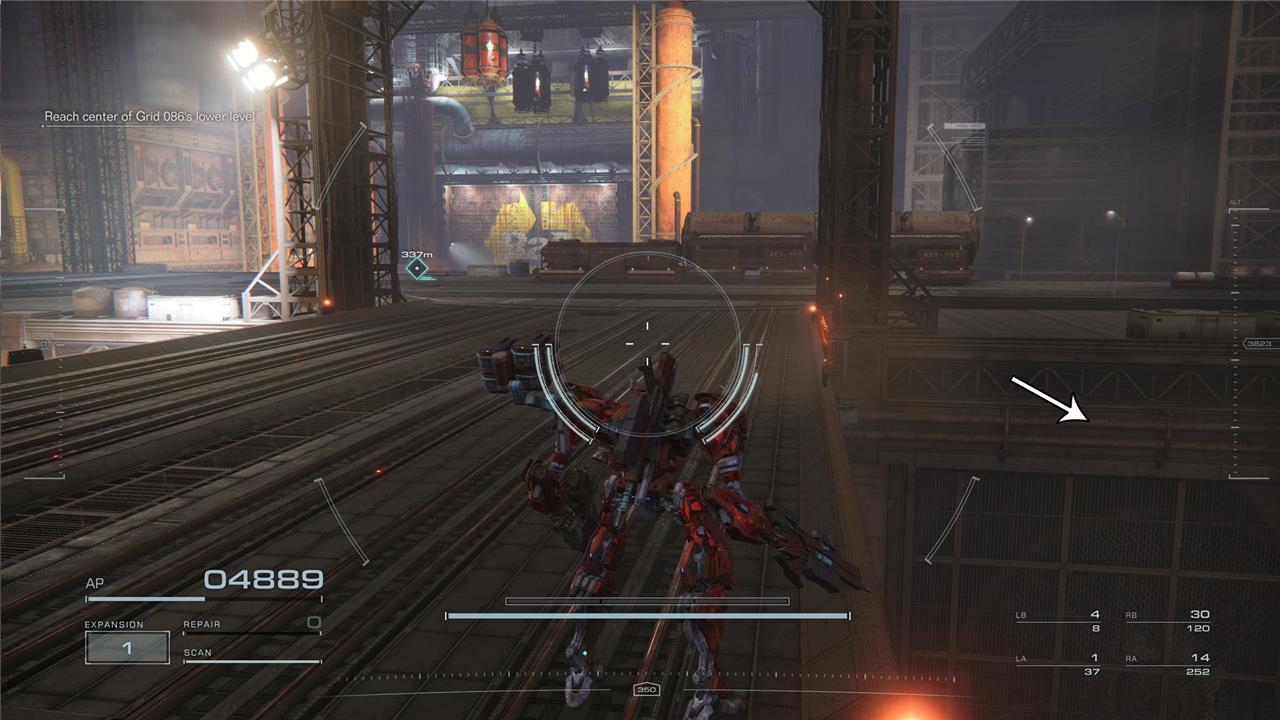
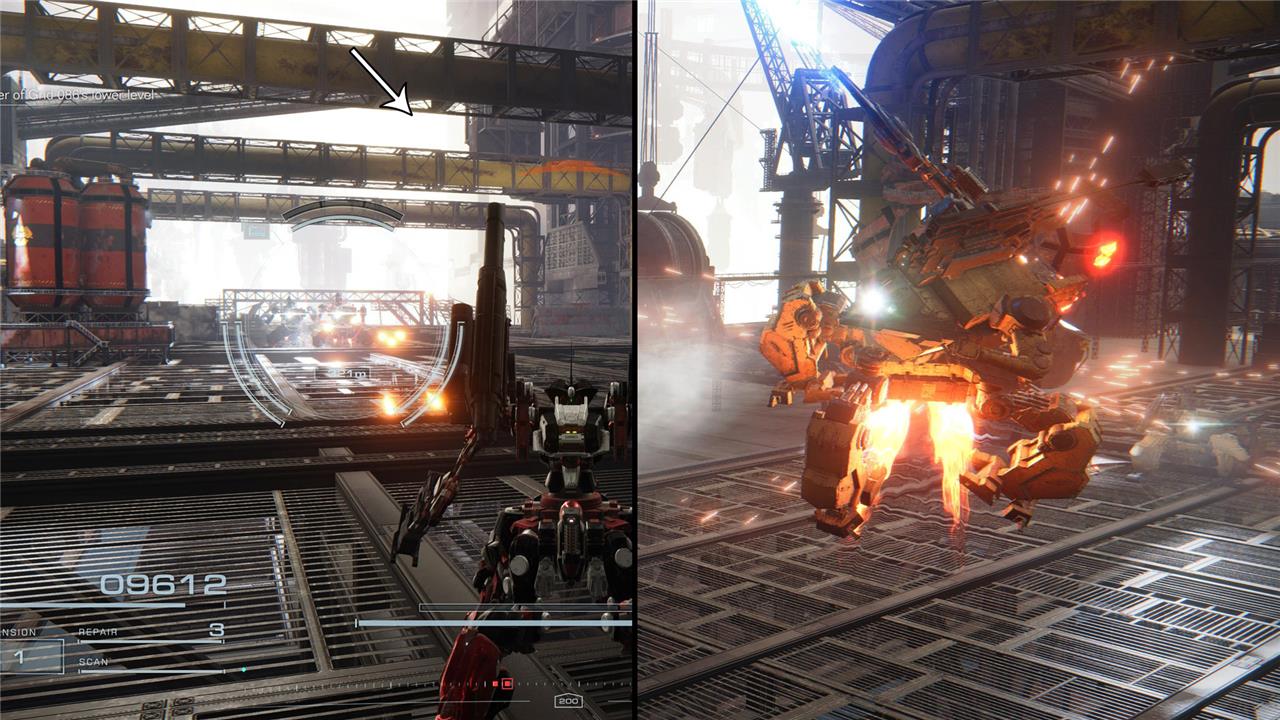
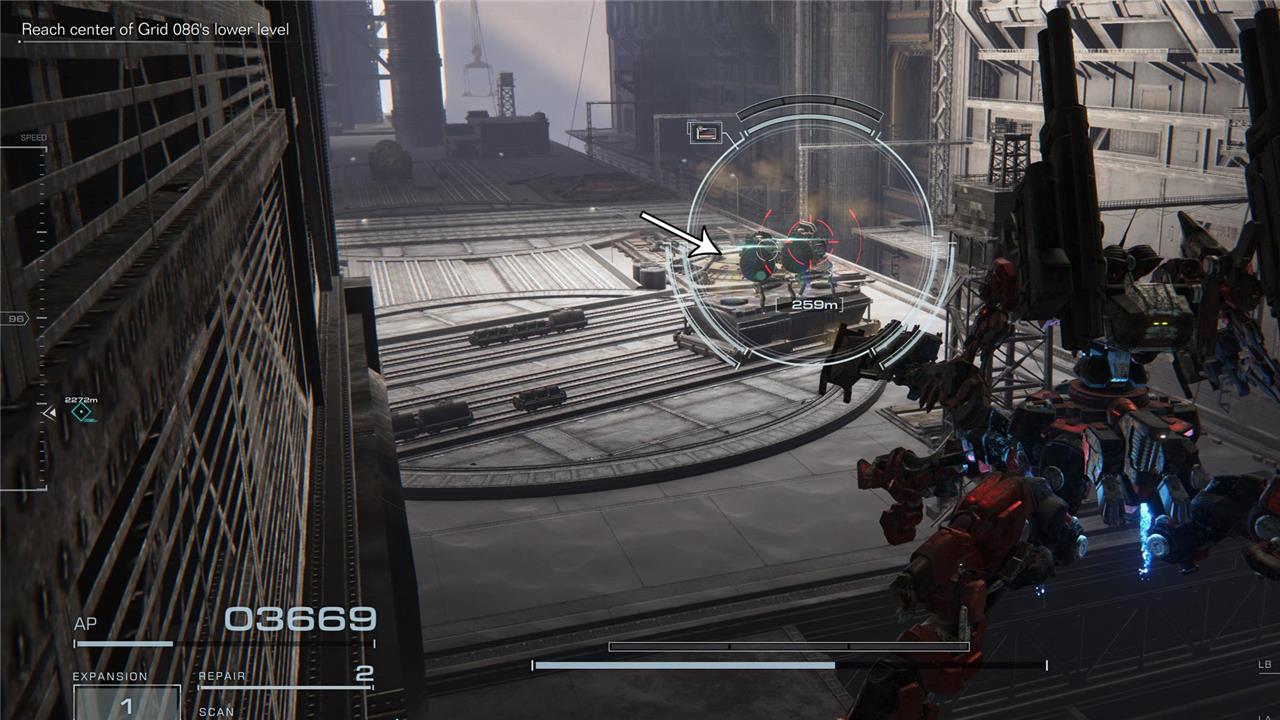
Target: Three Light MT Units
Location: The right side before reaching the center of Grid 086’s lower level.
When you get around 500 meters from the place the mission is sending you, in front of a gate with a yellow sign, turn right, and go to the lower part of the platform. There, you find the Light MT units you need to beat up. These units are similar to some you have already fought during this mission. Avoid getting too close to them, and you should be good.
Chapter 2 – Ocean Crossing
Chapter 2 – Ocean Crossing covers the final mission of Armored Core 6: Fires of Rubicon’s second chapter, where players must navigate the upper area of Grid 086 to reach the intercontinental cargo launcher. The mission demands high mobility and careful navigation to avoid deadly orbital lasers, with the optimal route involving traveling under the bridge using platforms and tunnels to evade direct fire. Along the way, players face swarms of small drone enemies, which carry four Bronze Combat Logs crucial for completion. The mission culminates in a challenging boss fight against the Sea Spider, which is vulnerable to explosive damage. Successfully collecting all Combat Logs before defeating the boss is essential, as missing any requires replaying the mission. This mission emphasizes strategic movement, efficient combat, and thorough exploration to secure all objectives and logs.
Target: 4x Flying Units
Location: Two are on the right side before leaving the first part of the initial area, while the other two at the end of the path you find after the first duo.
Once the mission begins and you’re out of the elevator, jump straight into a hole on the lower level. This is a short corridor with only one exit. Destroy the targets on your way.
When you get to the exit of the corridor, turn right. There, you find the two flying units on the wall.
Jump over the edge and follow the path to the right. There is a short corridor. Follow it and you will find the other two units on the left.
Chapter 3 – Steal the Survey Data
In the “Steal the Survey Data” mission of Armored Core 6: Fires of Rubicon, players are tasked with collecting survey data from four drones scattered across a snowy area, each marked clearly on the HUD. After gathering the data, the mission intensifies as you must confront a Heavy MT enemy carrying a Combat Log, located behind a large crane near the first three data points. Defeating this enemy not only progresses the mission but also grants a valuable Combat Log collectible. Following this, players face waves of enemy mechs arriving by helicopter and a powerful Heavy Warship, requiring strategic combat skills to complete the mission successfully.
Target: Heavy MT Unit
Location: In the middle section of the mission
From the starting point of the mission, follow the road on the right. Destroy the first group of units you meet in your way. In the next part of this area, you can find the Heavy armor unit with the Combat Log.
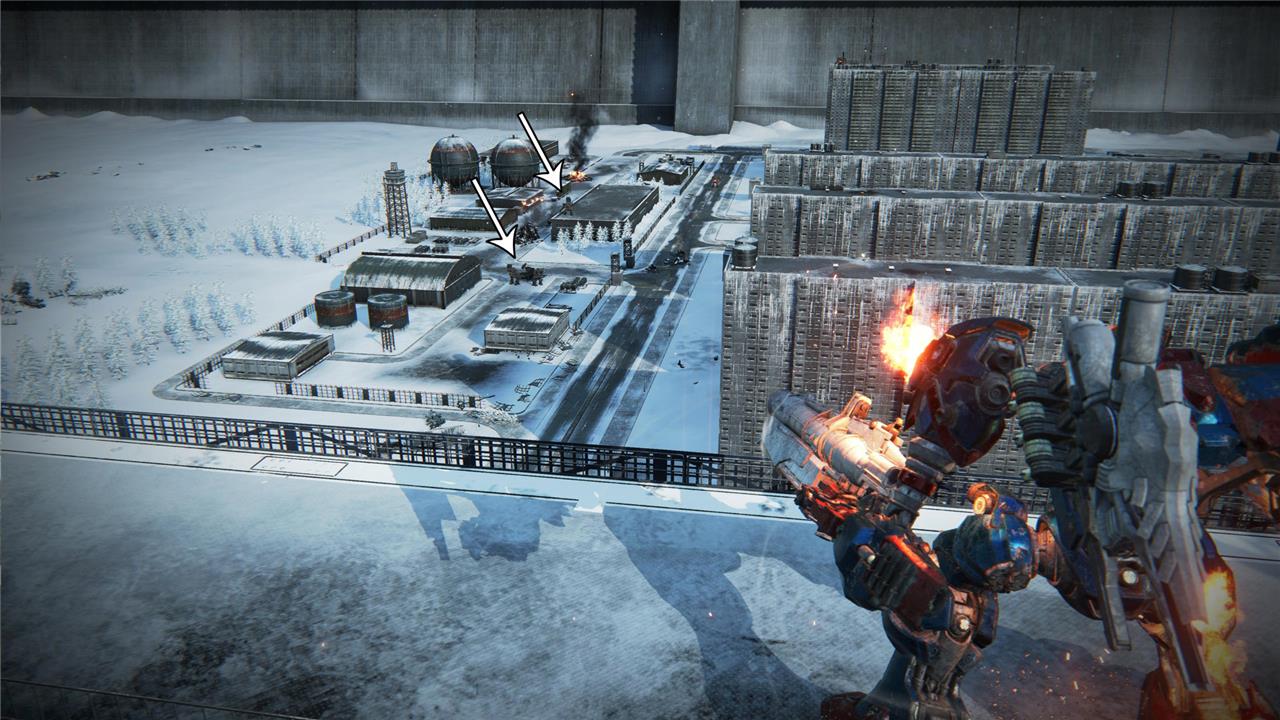
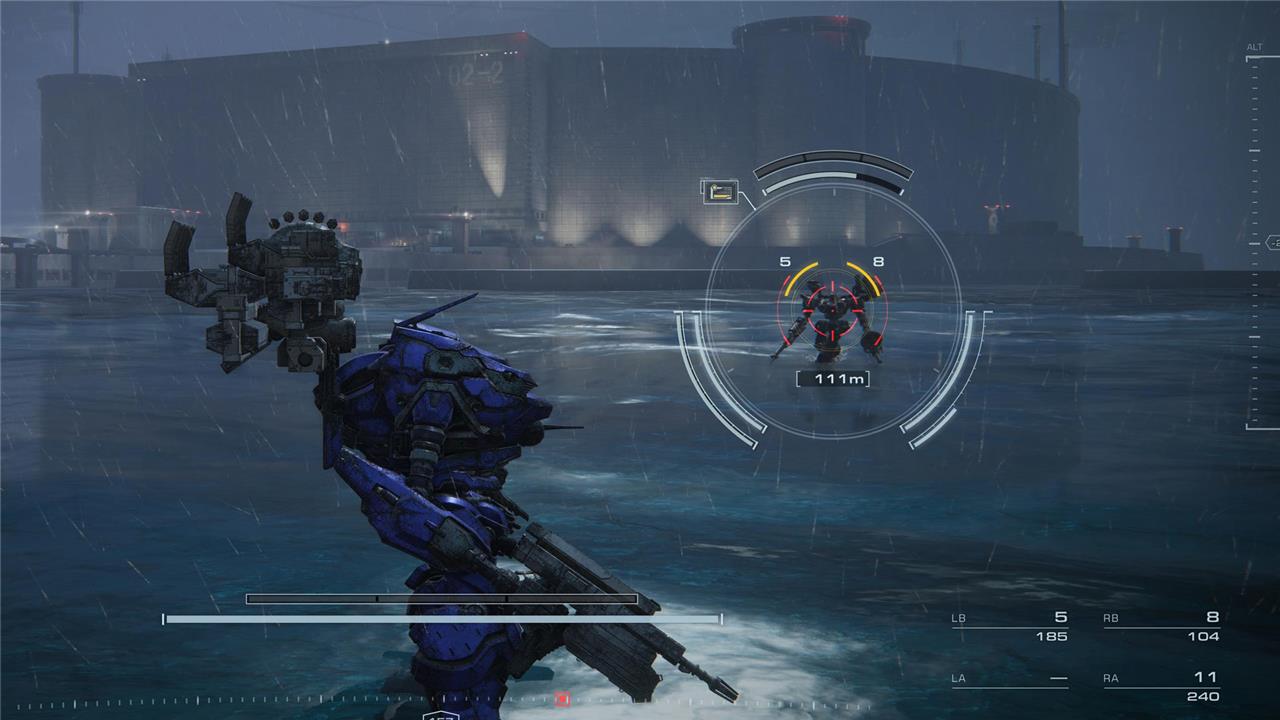
Chapter 3 – Attack the Refueling Base
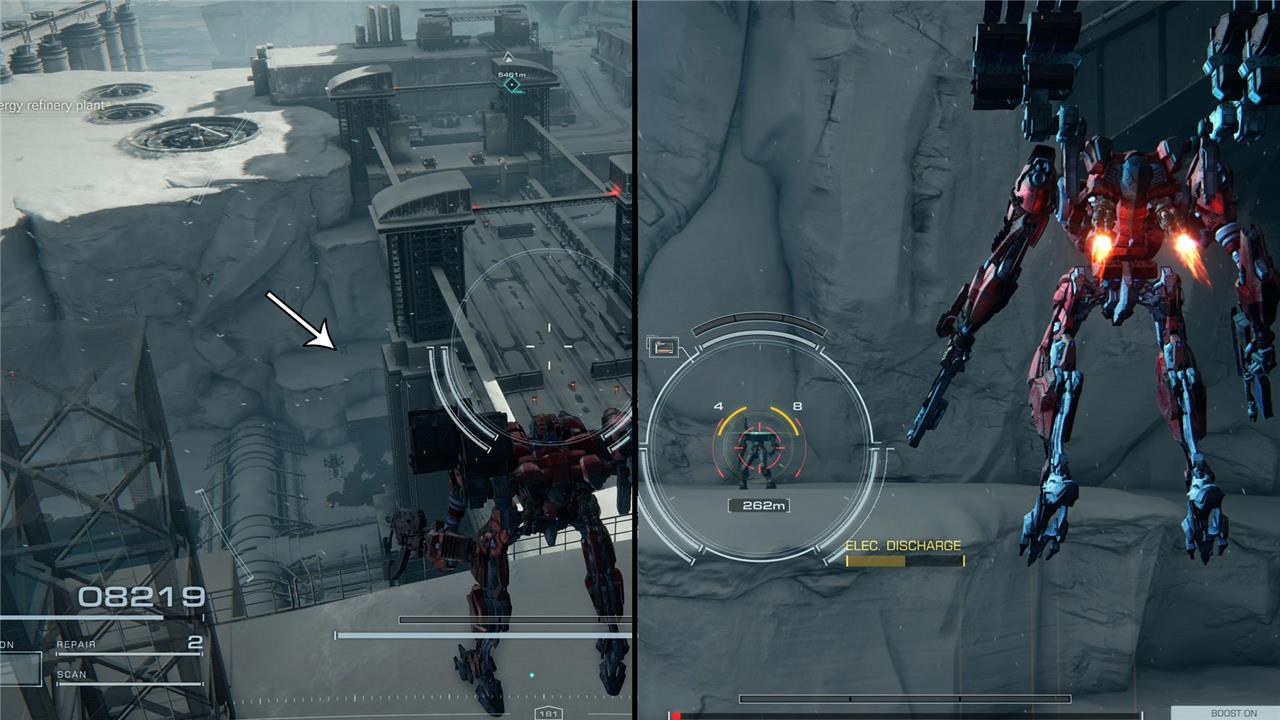
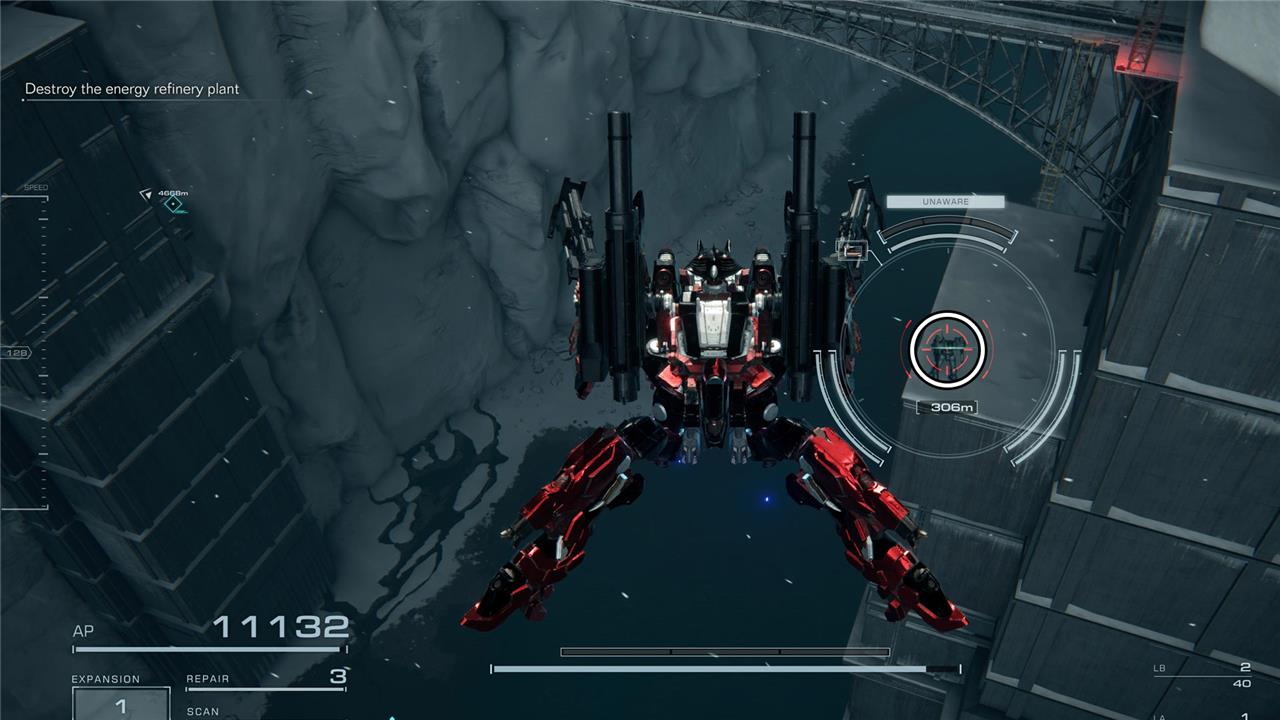
In “Attack the Refueling Base,” Chapter 3 of Armored Core 6: Fires of Rubicon, players are tasked with destroying a PCA-controlled energy refinery plant to disrupt their operations. The mission involves navigating through enemy-infested territory, taking out turrets, snipers, and various mechs while collecting valuable COAM by destroying fuel storage tanks scattered around the map. Key tactics include using missile launchers to handle groups of enemies and carefully flanking turrets on the bridge. After reaching the refinery, players must face elite PCA SP crafts in a challenging final battle. Successfully destroying all fuel tanks and defeating the enemies will yield significant rewards and progress the storyline.
Target: LC Unit
Location: Under a bridge that you find during the middle section of the mission.
After completing the first section of the mission, where you fight some units and destroy a few tanks, you end up on a long bridge. By jumping over the left side of it, you can find some units under the bridge. The one with the Combat Log is an LC Unit that is targeting you with a plasma gun.

Target: LC Unit
Location: In one of the platforms on the right side of the bridge.
From the same bridge where you found the previous target, you can see a path on the right, with metal platforms in the mountainside. Go there to find your target.
Chapter 3 – Eliminate V. VII
In the mission “Eliminate V.VII” in Chapter 3 of Armored Core 6: Fires of Rubicon, players must carefully navigate through a city area near the Wall to avoid detection while progressing toward their objectives. Along the way, a Tetrapod MT guarding a staging area carries a Silver Combat Log, which can be obtained by drawing its attention and defeating it. The main challenge is to confront and defeat V.VII Swinburne, who holds a Gold Combat Log. The fight requires dodging his stun attacks and quickly unleashing high-impact damage to build his stun meter, allowing for a critical damage window. Successfully defeating Swinburne rewards players with valuable Combat Logs essential for progressing in the Loghunt missions and unlocking unique parts.
Target: 1x Heavy MT Unit and V. VII Swinburne
Location: The Heavy MT unit in one of the streets near to where is the first checkpoint in the mission.
When the mission begins and you make your way to the first checkpoints, follow the wall on the right side. Once you get close to the checkpoint, you can find the target hidden next to some buildings. The challenge in fighting it is to avoid getting caught by the other units, so try to clear the area first.
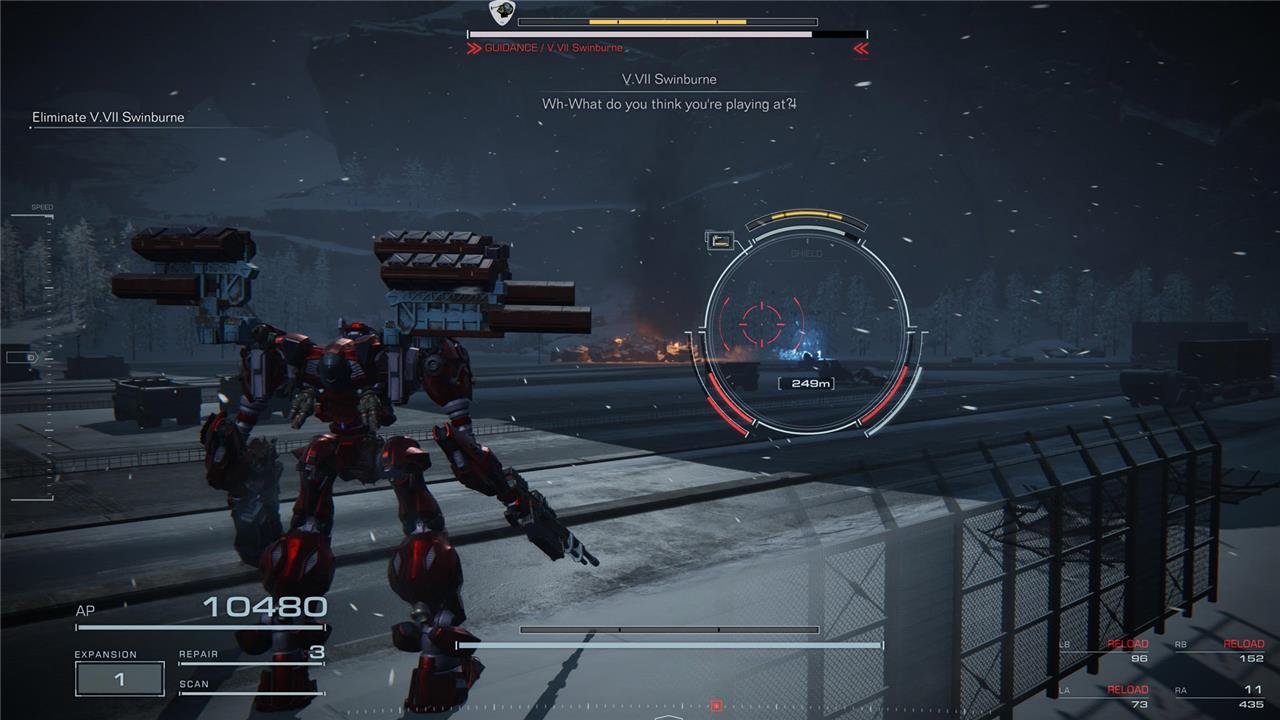
Target: V. VII Swinburne
Location: V. VII Swinburne is the final encounter of the mission.
V. VII Swinburne is impossible to miss since you have to fight him to complete the mission. This is not a complicated encounter, but it’s important to keep a safe distance from him. If not, you might be hit by his melee attacks.
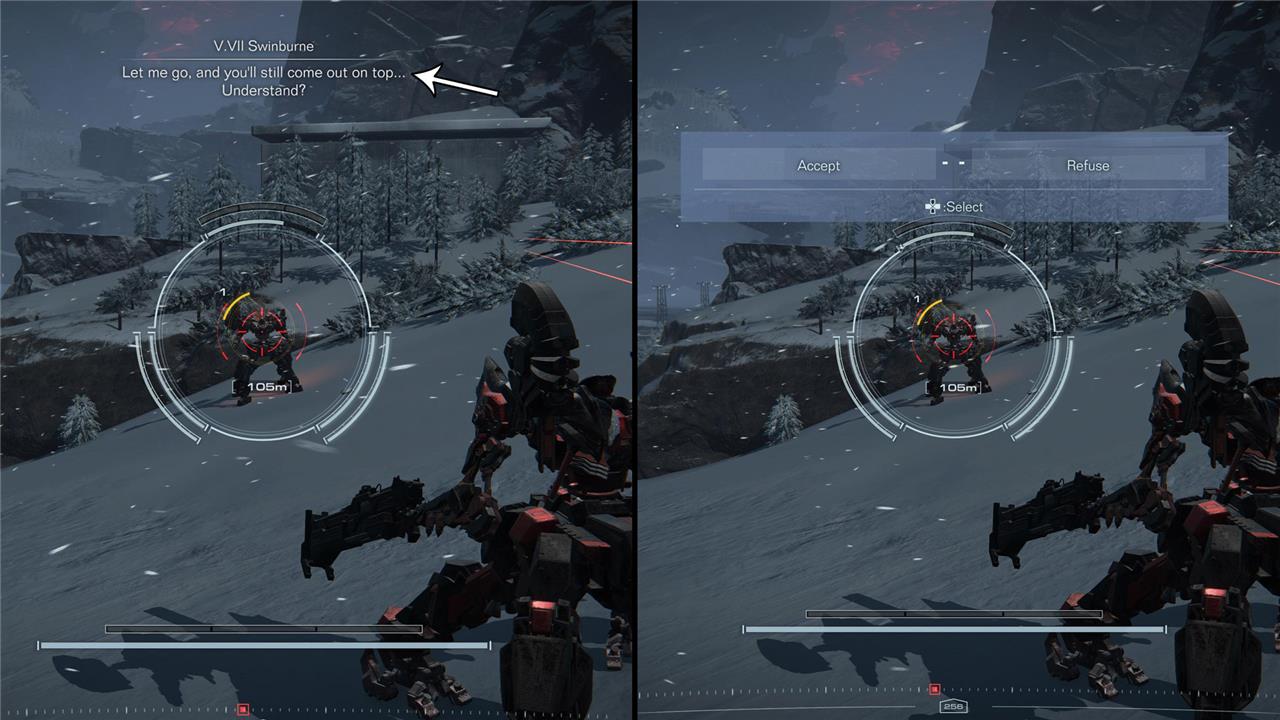
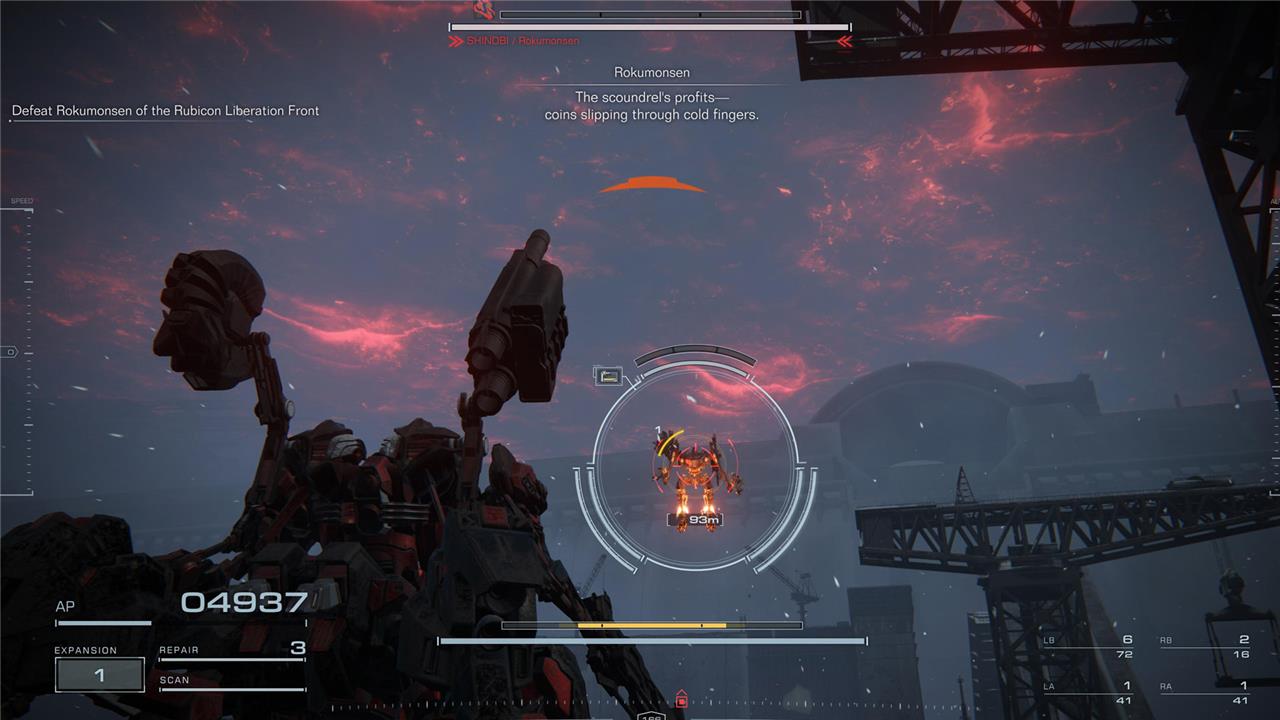
Target: Rokumonsen
Location: In the same place where you fight V. VII Swinburne
This target is only possible to find if, during the fight against Swinburne, you choose to accept his request. After Swinburn loses half of his health, he starts talking, asking you to let him go. Stop attacking him and wait until the Accept/Refuse menu pops up. Select ’Accept’ to trigger the next fight.
Chapter 3 – Tunnel Sabotage
Chapter 3 – Tunnel Sabotage involves a mission where you are tasked by Dafeng to attack the derelict Engebret Tunnel to disrupt PCA forces. The primary objective is to infiltrate the underground facility, destroy an old sensor device protected by a bubble shield, and then make a rapid escape as the cave collapses due to a Coral eruption triggered by your sabotage. The mission emphasizes mobility and quick boosting to evade hazards, with enemies mostly being smaller, clustered foes. Players are advised to equip area-of-effect or close-range weapons and maintain a light, agile mech build to survive the frantic retreat. A notable collectible in this mission is a Bronze Combat Log guarded by a sniper on a bridge inside the cave system. Successfully completing the mission rewards 130,000 COAM and unlocks further challenges.
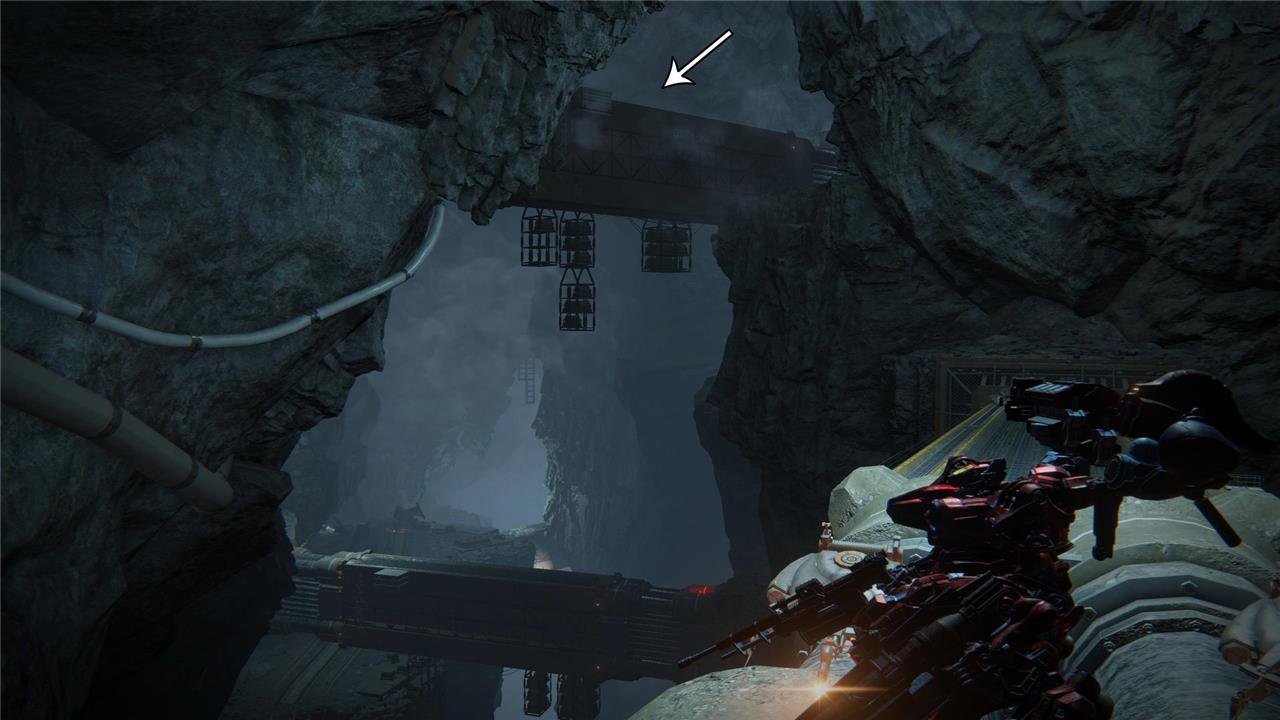

Target: 1x LC Unit
Location: In the upper area accessed through one of the enormous beams you jump on to traverse the initial area.
To progress through the first part of the mission, you jump on large beams of metal. The target is inside a small cave that you access through a beam that is higher than the others. You can find a path on the right side of the area after you pass where this specific beam is. There, you can find platforms which you can use to reach the beam. Cross it to find the target.
Chapter 3 – Survey the Uninhabited Floating City
In Chapter 3 mission “Survey the Uninhabited Floating City” of Armored Core 6: Fires of Rubicon, players are tasked with navigating the fog-covered floating city of Xylem to deactivate ECM fog control devices that obscure visibility. Without the usual objective markers due to thick fog interference, you must rely on following blinking red beacons to locate and disable these generators. Along the way, expect to face kamikaze drones, sniper fire, and transforming flying mechs guarding key points. After disabling the fog generators, a challenging boss fight awaits, requiring strategic use of cover and careful targeting of both ground and aerial enemies. This mission also offers opportunities to collect Combat Logs and valuable loot, including the IA-C01G AORTA Generator, enhancing your progression in the game.
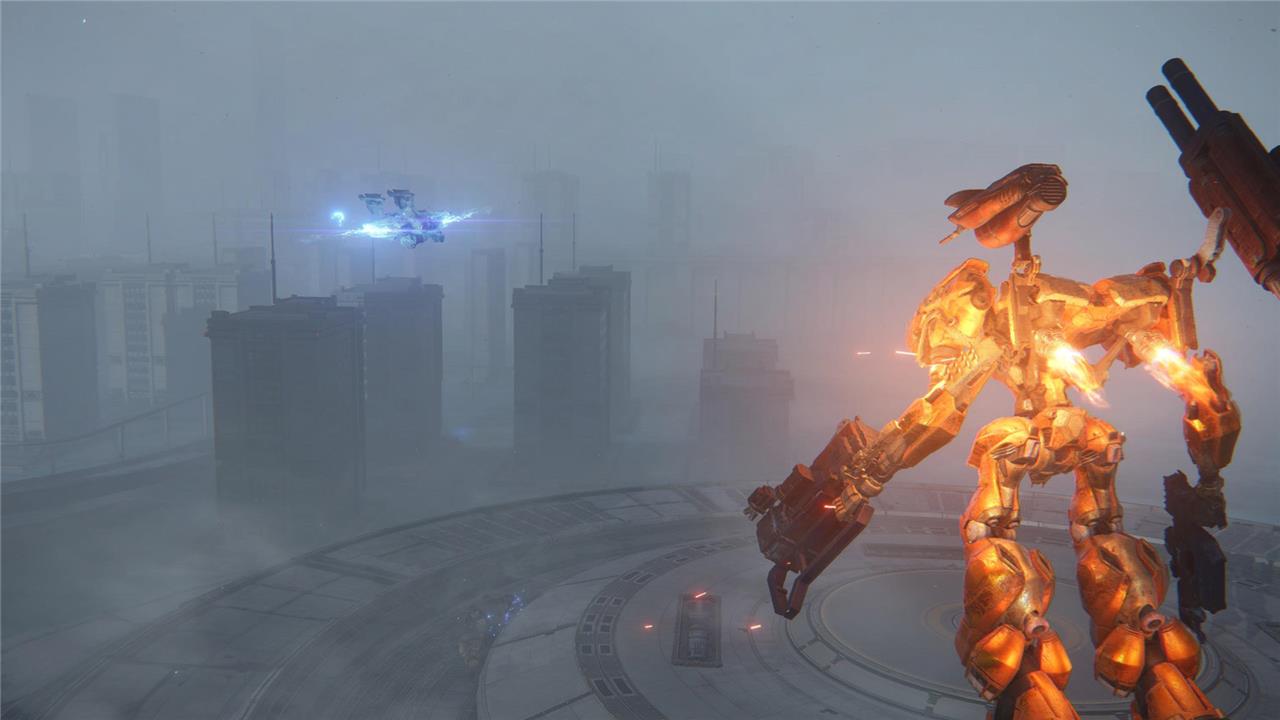
Target: Flying Unit
Location: Closer to where you find the destroyed drone during the mission.
By progressing through the mission, you find the drone that left the beacons you have been following so far. Facing the wrecked drone, turn left and follow the path until you find a circular building. Go to the top of this build and the target will start to attack you.
Chapter 3 – Eliminate the Enforcement Squads
In Chapter 3 of Armored Core 6: Fires of Rubicon, the mission “Eliminate the Enforcement Squads” tasks you with retaking the Wall and defeating the PCA’s troops in a challenging combat scenario. This mission involves fighting through multiple enemy squads, including rocket-equipped mechs and melee-focused units inside the Wall, culminating in a tough boss fight against Heavy Cavalry. Success requires a balanced AC build prioritizing maneuverability and effective use of weapons like the Plasma Rifle, Stun Baton, and Pulse Blade to handle both ranged and close-quarters combat. Strategic movement and quick elimination of elite enemies are key to progressing, as you navigate ambushes and tight indoor spaces. Completing this mission unlocks further story developments and offers the choice between this and another major mission, shaping your playthrough path.
Target: Ring Freddie
Location: Right from where you start the mission, down the hill.
From the starting point, turn right and follow the path until it turns into a slope. Right at the bottom of it, you can find Ring Freddie hidden behind a rock. His unit is pretty fast, so prepare your build accordingly.
Chapter 3 – Attack the Old Spaceport
In the Chapter 3 mission “Attack the Old Spaceport” in Armored Core 6: Fires of Rubicon, players are tasked with destroying several heavy warships docked at the Old Bertram Spaceport, which has been seized by the PCA. The mission begins on a snowy cliff overlooking the spaceport, where players can find and collect three Silver Combat Logs by defeating specific enemy LCs positioned around the area. The main objective involves reaching three marked locations to attack the bridges of the warships, effectively destroying them. Afterward, players must resupply and prepare for incoming PCA reinforcements, which include additional LC mechs and two more heavy warships. The mission culminates in intercepting and defeating these reinforcements alongside an ally, with the final challenge involving a large worm-shaped mech, signaling the mission’s end. Strategic use of melee attacks on ship bridges, aggressive missile tracking, and careful management of reinforcements are key to success in this intense battle at the Old Spaceport.
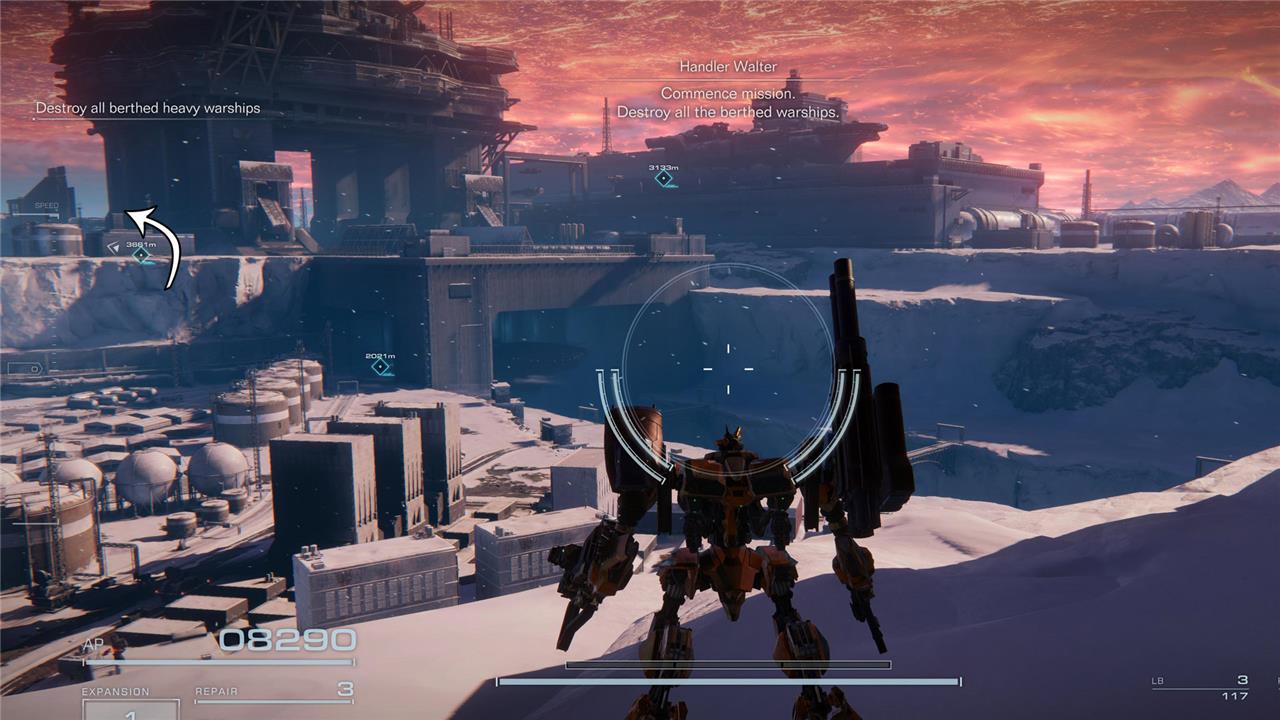
Target: 3x LC units
Location: One of the targets is left from the main hangar while the others are on the opposite side, close to some fuel reserves.
From the mission starting point, you can already see the hangar with one of the heavy warships. To find the first target, go left. When close to the wall, you can take the mechanism to springboard you upward. Go a little bit further and you will find the first LC unit.
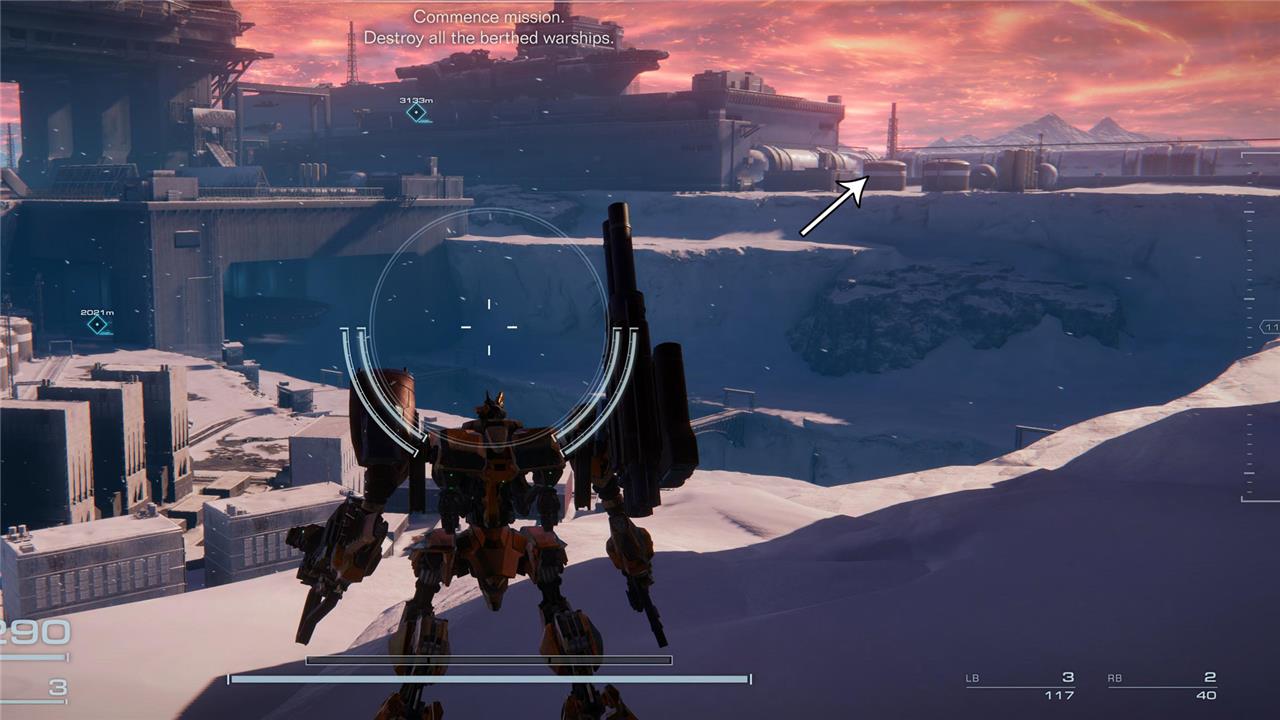
Now, the two other LC units are in the right area. From the starting point of the mission, go right. You can find both units overseeing the fuel reserves.
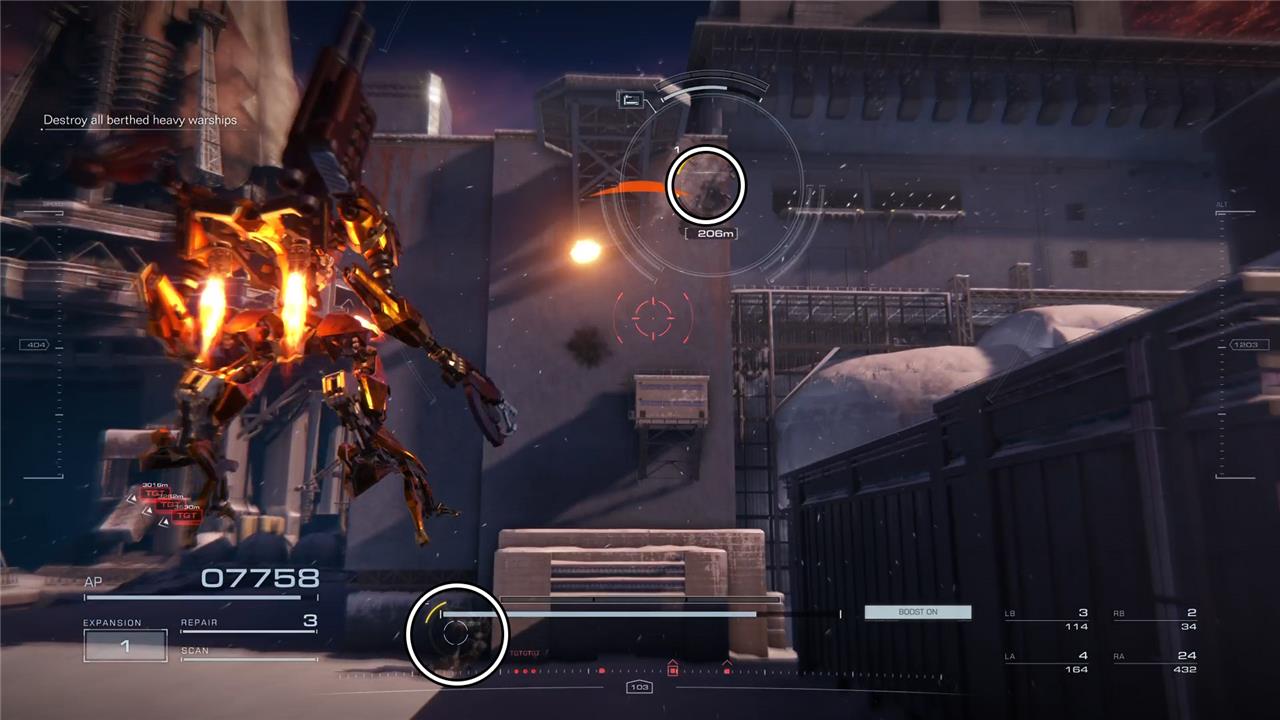
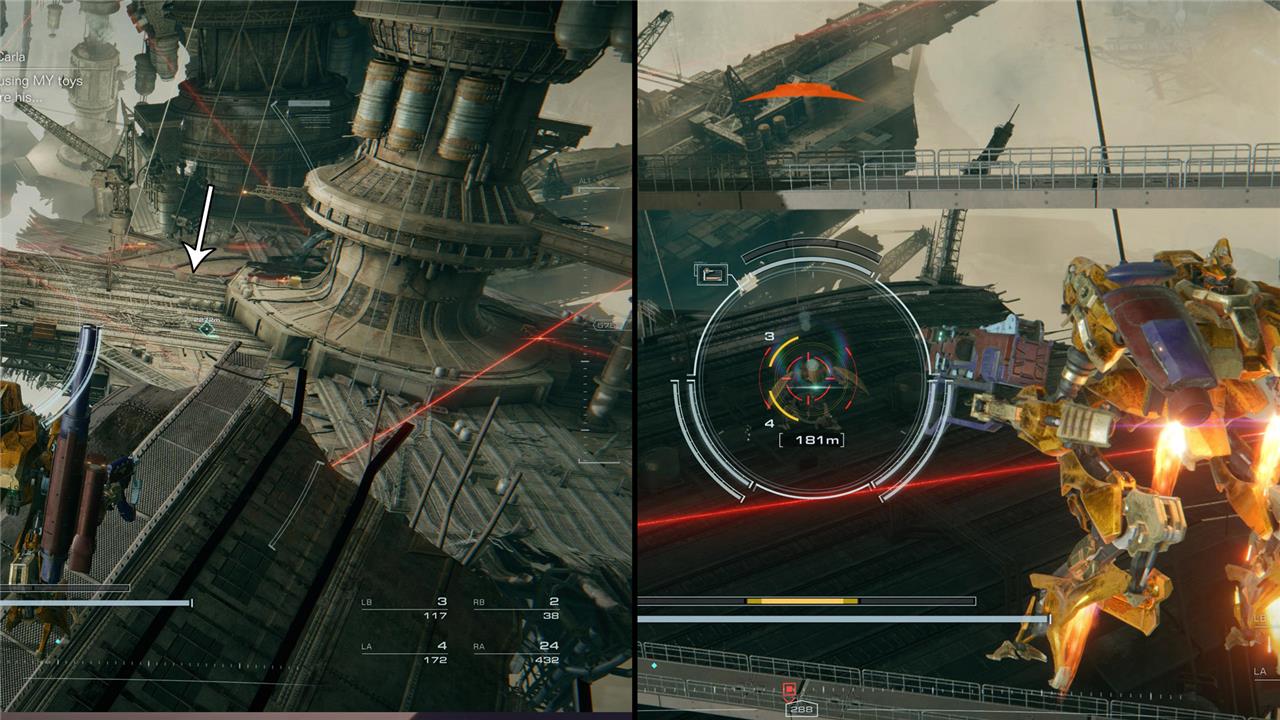
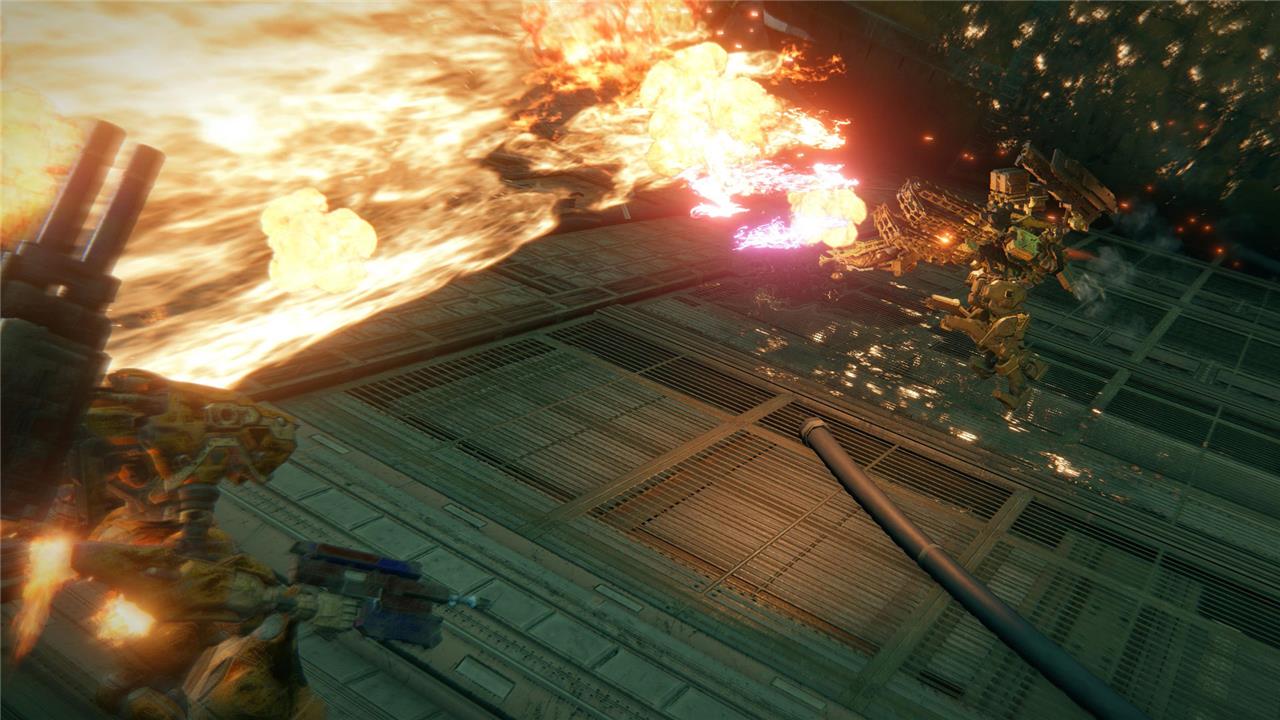
Chapter 3 – Eliminate “Honest” Brute
In Chapter 3’s “Eliminate ‘Honest’ Brute” mission, players descend through a hazardous facility filled with laser traps and explosive drones while hunting down the target, “Honest” Brute, in Grid 012. Along the way, several enemy MTs on upper balconies and laser-laden platforms hold valuable Combat Logs, so thorough exploration and defeating these foes is essential for collectors. The final confrontation takes place in a hangar where Brute ambushes you; he wields a powerful flamethrower and grinder weapon, making distance and mobility crucial for survival. Defeating Brute not only progresses the story but also rewards you with new parts and a Combat Log, marking this as a key mission for completionists.
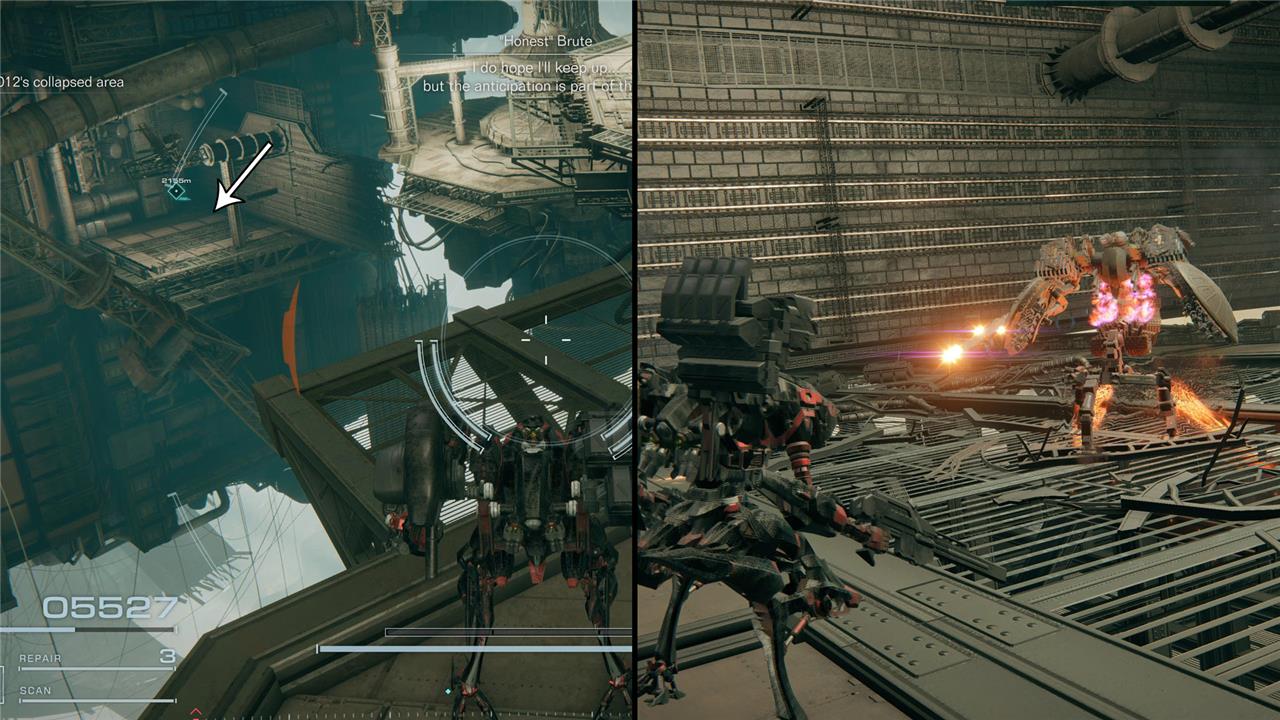
Target: 3x Rolling Heavy MT Units
Location: In the initial platforms with lasers as well as the last platform in the first area.
One unit is on the first platform you reach where there are lasers. You can find it on the right side of the platform. The next target is on a platform beside the one where you destroyed the first unit. This time, however, the unit is on the left side of the platform. The last Rolling Heavy unit is in the final platform of the first area.
Target: 1x Tetrapod unit
Location: This unit is also in one of the platforms found during the first part of the missions.
After you pass the platforms with lasers, you inevitably find a big platform where there is a rotating part in the center. This is where you can find the Tetrapod unit.
Target: “Honest” Brute
Location: At the end of the mission.
You can’t miss “Honest” Brute because he is the final boss of this mission. He is the first enemy using a flamethrower, so be prepared to fight from afar.
Chapter 3 – Defend the Old Spaceport
In Chapter 3’s mission “Defend the Old Spaceport” in Armored Core 6: Fires of Rubicon, players face a tough challenge as they arrive to find the Old Bertram Spaceport already devastated. The mission pivots from a straightforward defense to a high-stakes battle against the formidable mercenary known as Nightfall, also called the real Raven. Nightfall is a fast and agile opponent with the ability to regenerate health, making the fight intense and demanding. To succeed, players are advised to use a fast, lightweight build with reverse-jointed legs to evade attacks, dual-wield Assault Rifles, and Split Missiles to stagger and keep pressure on Nightfall. Defeating Nightfall not only completes the mission but also rewards the player with a valuable Combat Log.
Target: Raven
Location: The unit can be found right at the beginning of the mission.
This is a simple mission that consists of only one boss which is Raven. You won’t have trouble finding the unit. The encounter, however, is pretty intense. Prepare your build for a fast-paced fight.
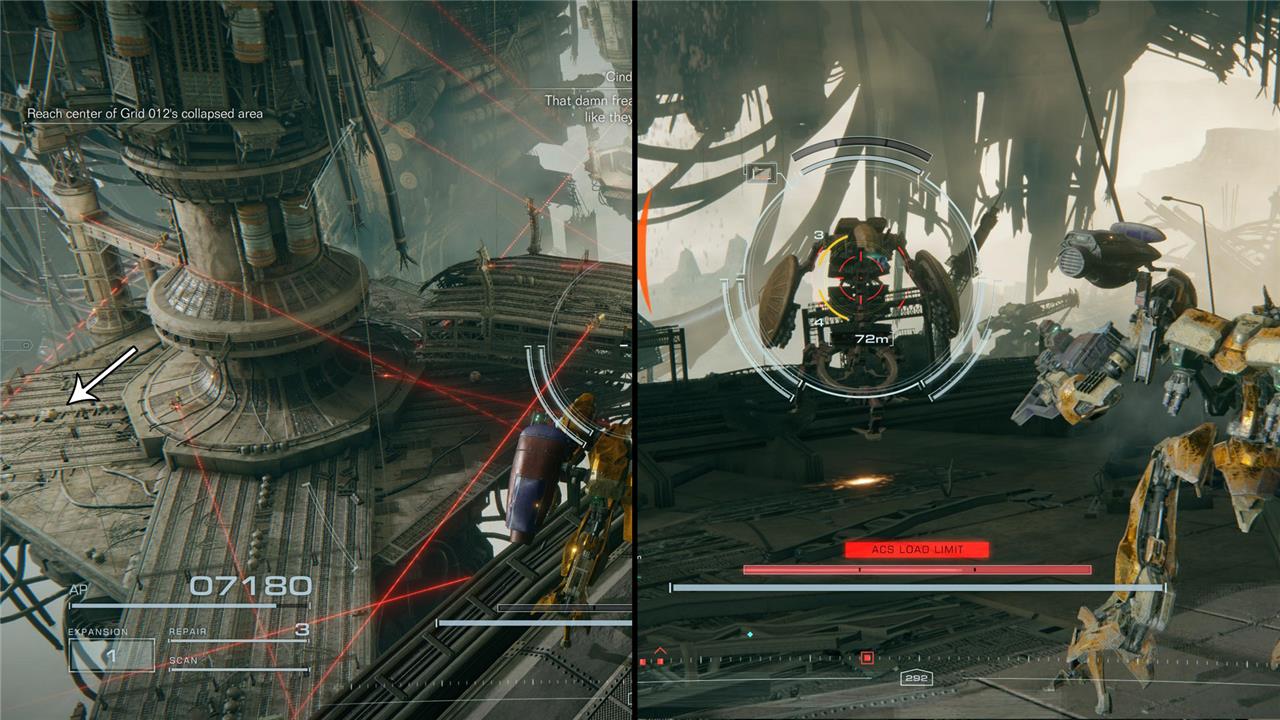
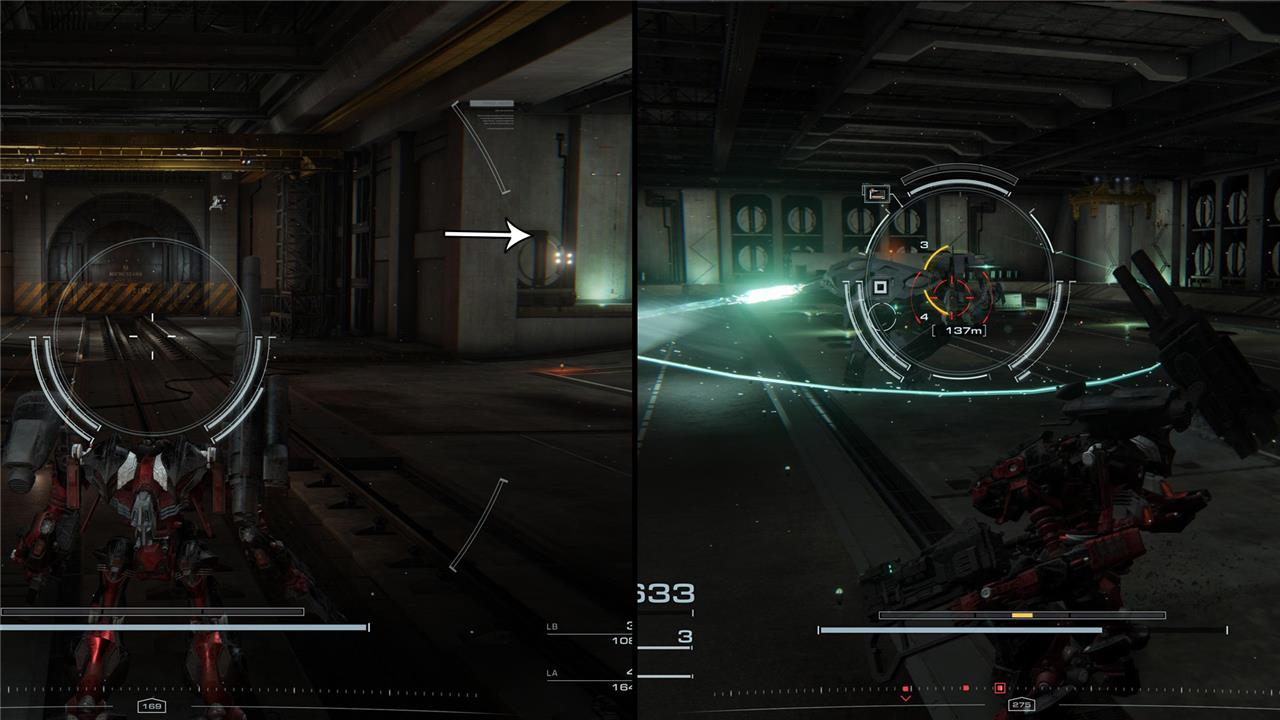
Chapter 4 – Underground Exploration – Depth 2
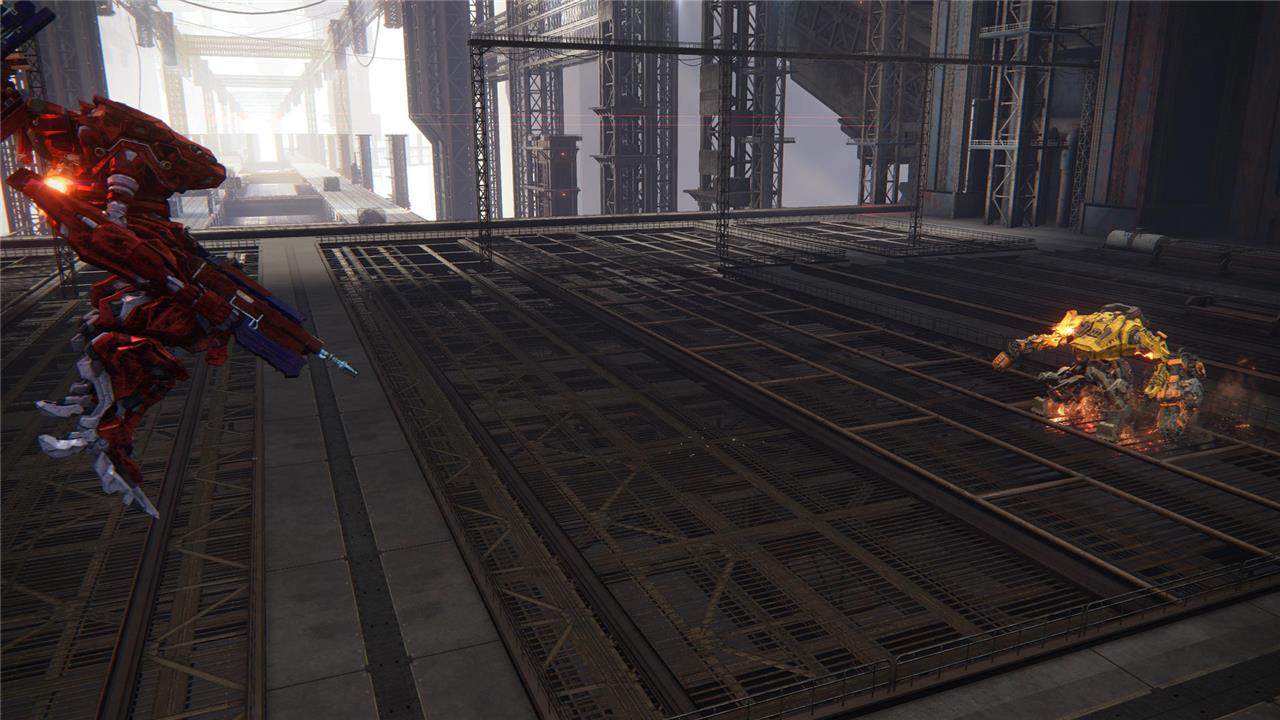
Chapter 4 – Underground Exploration – Depth 2 in Armored Core 6: Fires of Rubicon takes players deeper into the Watchpoint Alpha facility, where the environment becomes tighter and more confined. This mission challenges you to navigate close-quarters combat with a focus on nimble movement and a versatile weapon loadout optimized for short-range engagements. Recommended gear includes the DF-MG-02 CHANG-CHEN Machine Gun, Plasma Rifle, a SONGBIRDS Grenade Cannon, and a Plasma Missile Launcher, best suited for a lightweight Assembly with strong evasive capabilities. The mission culminates in a boss fight against the Autonomous Defense Weapon Enforcer, and along the way, players can find several Combat Logs crucial for progression and achievements.
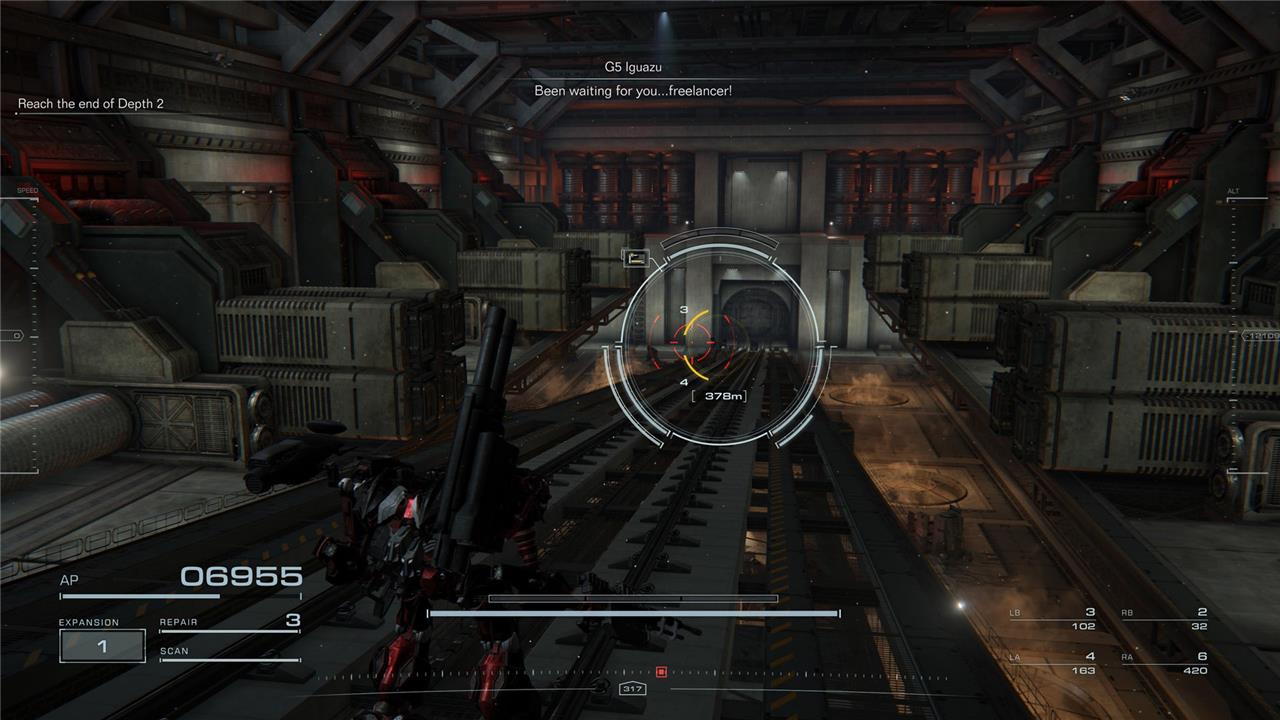
Target: G5 Iguazu
Location: The first target is in the room you get access after unlocking the first door that you find locked in the mission.
Target: 2x PCA units.
Location: These two units are found in the room right from the second door you need to unlock.
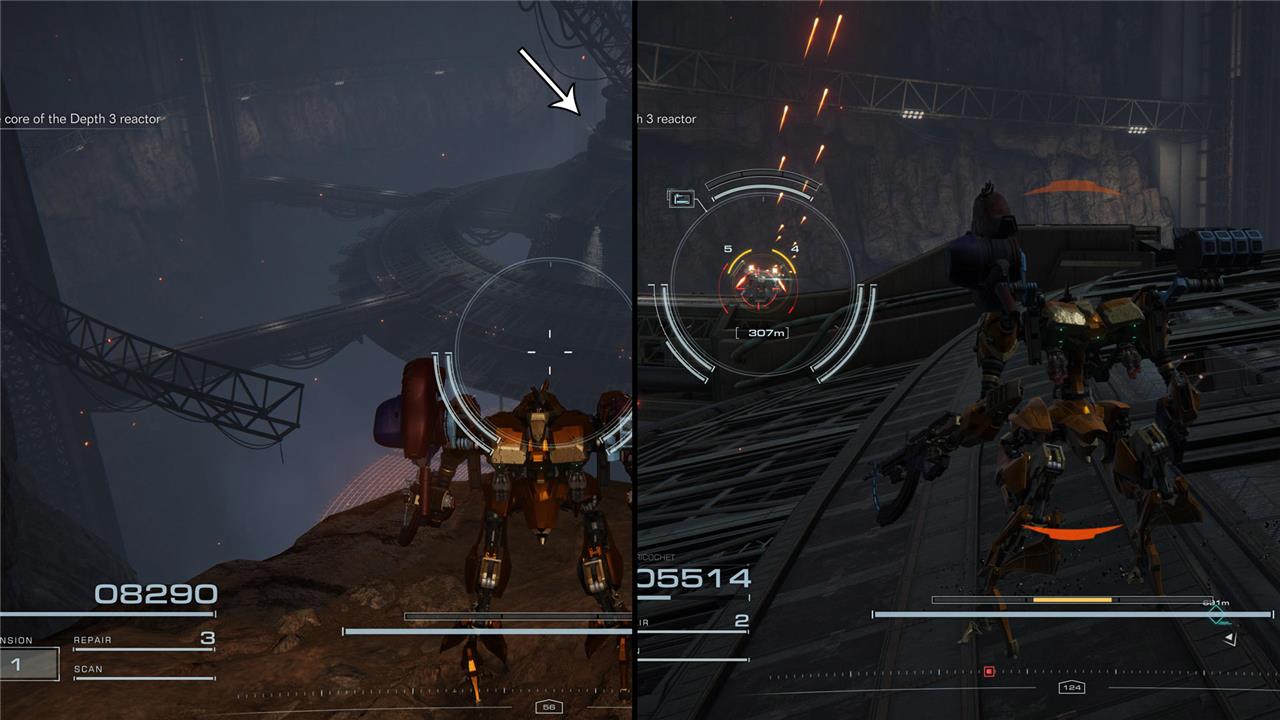
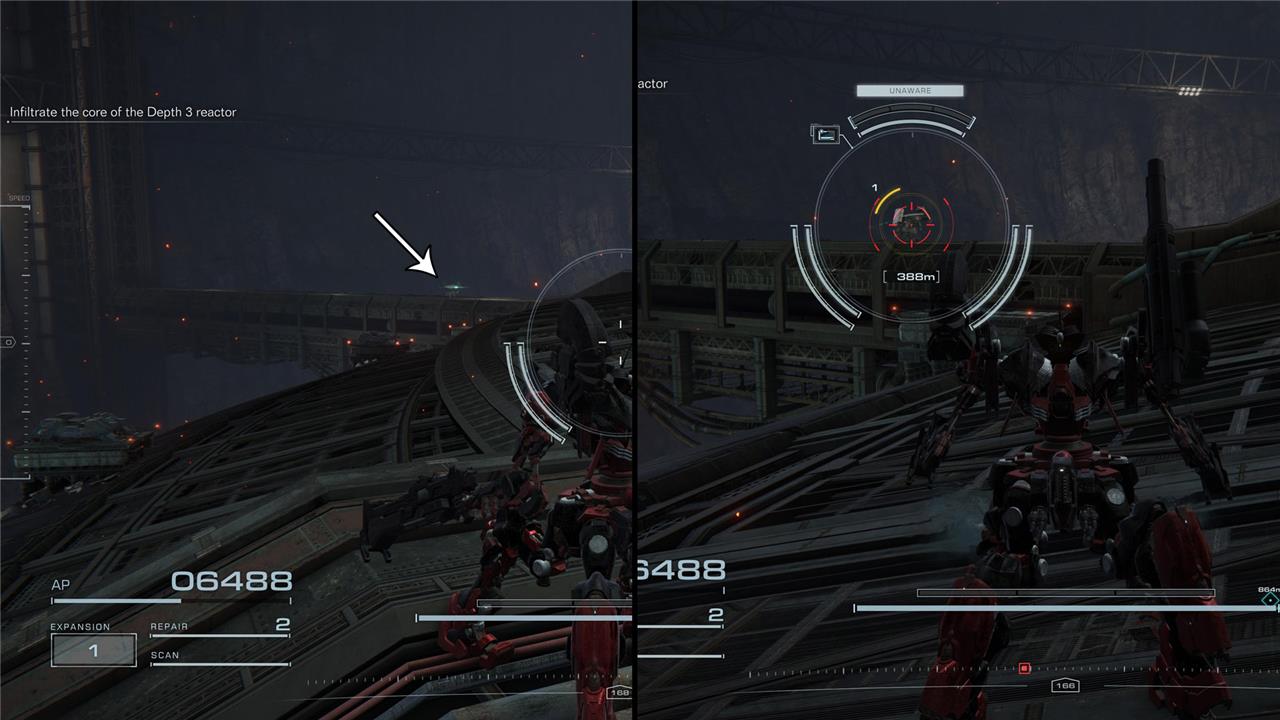
Chapter 4 – Underground Exploration – Depth 3
In Chapter 4’s Underground Exploration – Depth 3 mission of Armored Core 6: Fires of Rubicon, players delve deeper into the Watchpoint Alpha facility to disable a reactor powering a laser barrier. The mission involves navigating around a central reactor structure while facing multiple security turrets and enemies carrying valuable Silver Combat Logs. Key objectives include infiltrating the reactor core, destroying the pressure chamber, and defeating the autonomous defense AC Ephemera within a strict two-minute time limit before escaping the facility. Successfully completing this mission rewards players with a Gold Combat Log and 270,000 COAM, marking a critical step in the chapter’s progression.
Target: 1x PCA unit
Location: In one of the platforms in the upper area.
In the first part of the mission, there is a central structure connected to the wall by long narrow platforms. In one that is found behind the part that is visible at the beginning of the fight, you can find the PCA unit that you need to destroy.
Target: 1x PCA unit
Location: It’s also on a platform like the previous one.
After destroying the previous target, go to the next platform, right from where you were, to find the target.
Target: AC unit
Location: At the last part of the mission, you need to fight it.
This target is the last enemy you need to defeat in order to open the wayout of the reactor. While the fight is not difficult, you can’t take long to defeat this unit. Otherwise, the mission will fail.
Chapter 4 – Intercept the Redguns
Chapter 4’s mission “Intercept the Redguns” in Armored Core 6: Fires of Rubicon is a challenging late-game battle where players must eliminate G1 Michigan and the Balam MT forces supporting him. The fight involves multiple waves of enemies, including shielded and unshielded MTs, tetrapods, and aerial threats, requiring a medium-weight build with energy weapons that have area-of-effect capabilities. A recommended strategy is to keep moving around the arena, prioritizing smaller enemies and missile launcher MTs, while using a mix of Plasma Rifles, Laser Handguns, and multi-lock missiles or drones for effective crowd control. The final showdown with Michigan demands careful ammo management and tactical staggering to secure victory and earn a Platinum Combat Log reward.
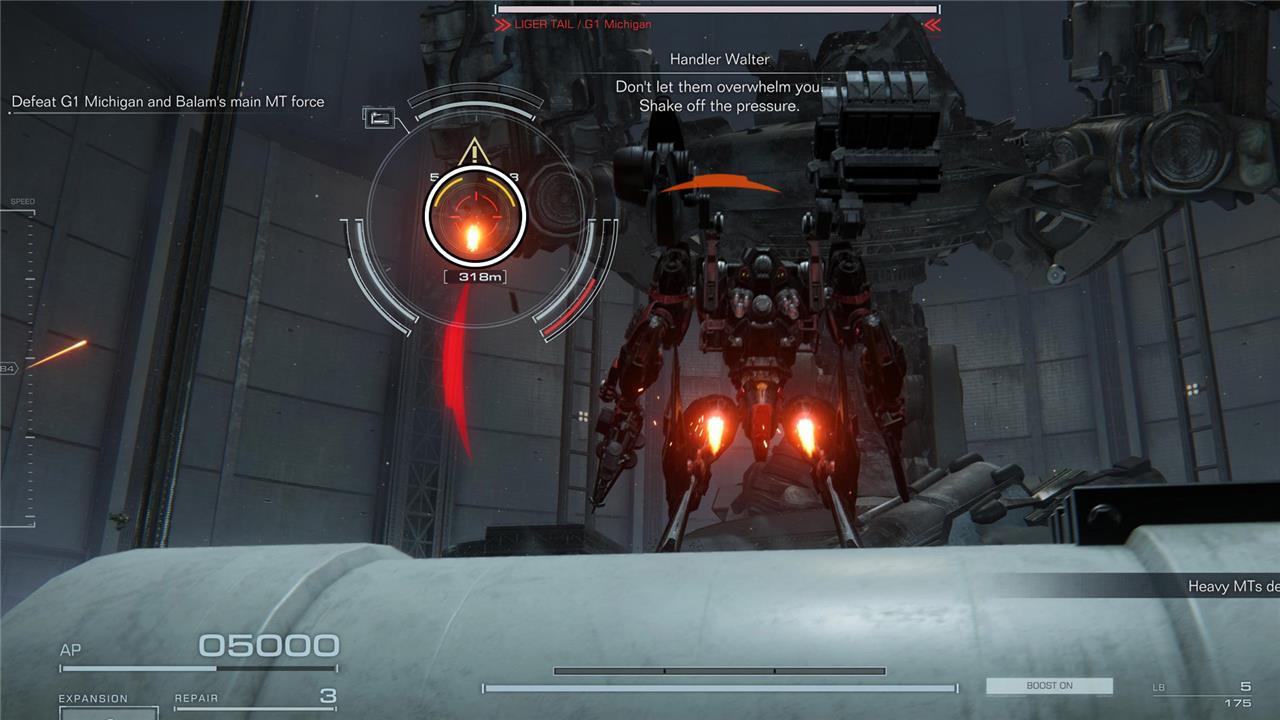
Target: G1 Michigan
Location: The main area of the mission
Intercept the Redguns is a mission that consists of fighting many MT units as well as G1 Michigan. He is the strongest enemy you face in this area and defeating him is necessary to complete the mission.
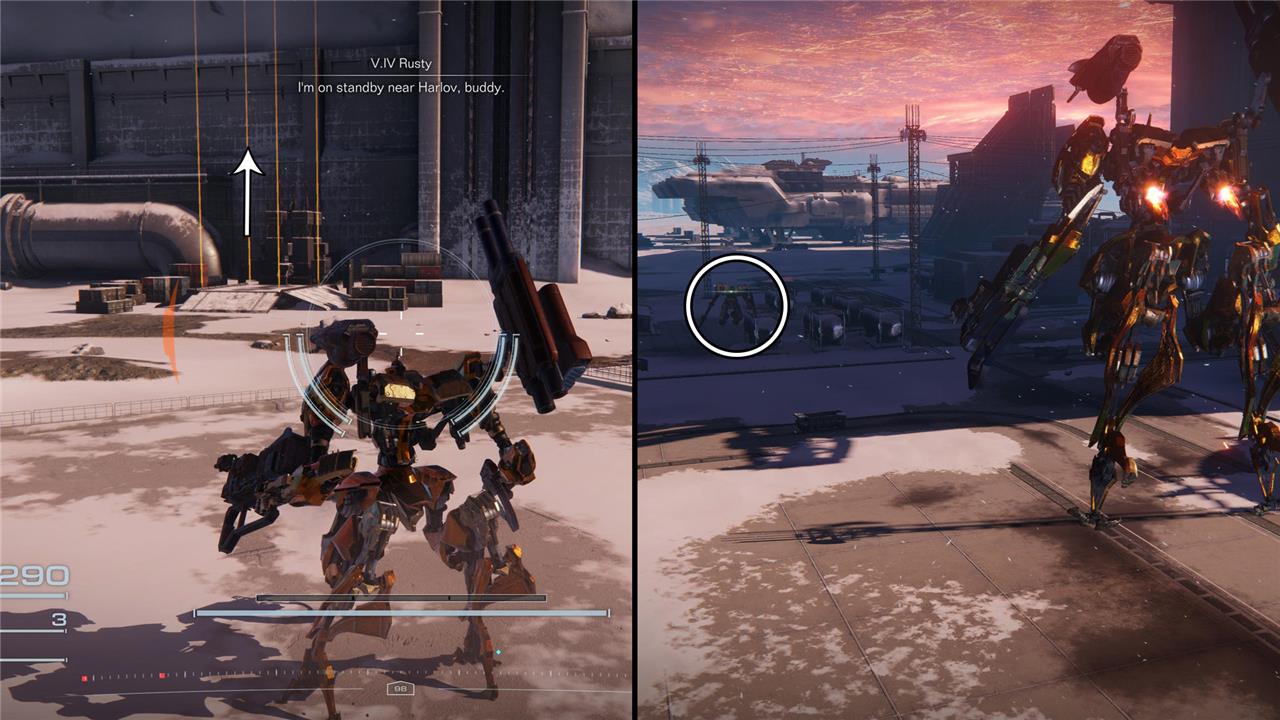
Chapter 4 – Unknown Territory Survey
Chapter 4’s “Unknown Territory Survey” mission in Armored Core 6: Fires of Rubicon takes players deep beneath Watchpoint Alpha, beyond the disabled laser shield from earlier missions. The objective is to explore this uncharted area, reach the Coral Convergence, and confront a fast, agile enemy AC pilot named V.IV Rusty who relentlessly pursues you. This mission emphasizes speed and constant pressure in combat, as Rusty can regenerate health during the fight. Players must navigate dangerous terrain filled with explosive slug-like creatures and use tactical builds that balance agility and firepower to succeed. Defeating Rusty rewards a valuable Combat Log and advances the story into the depths of the unknown territory.
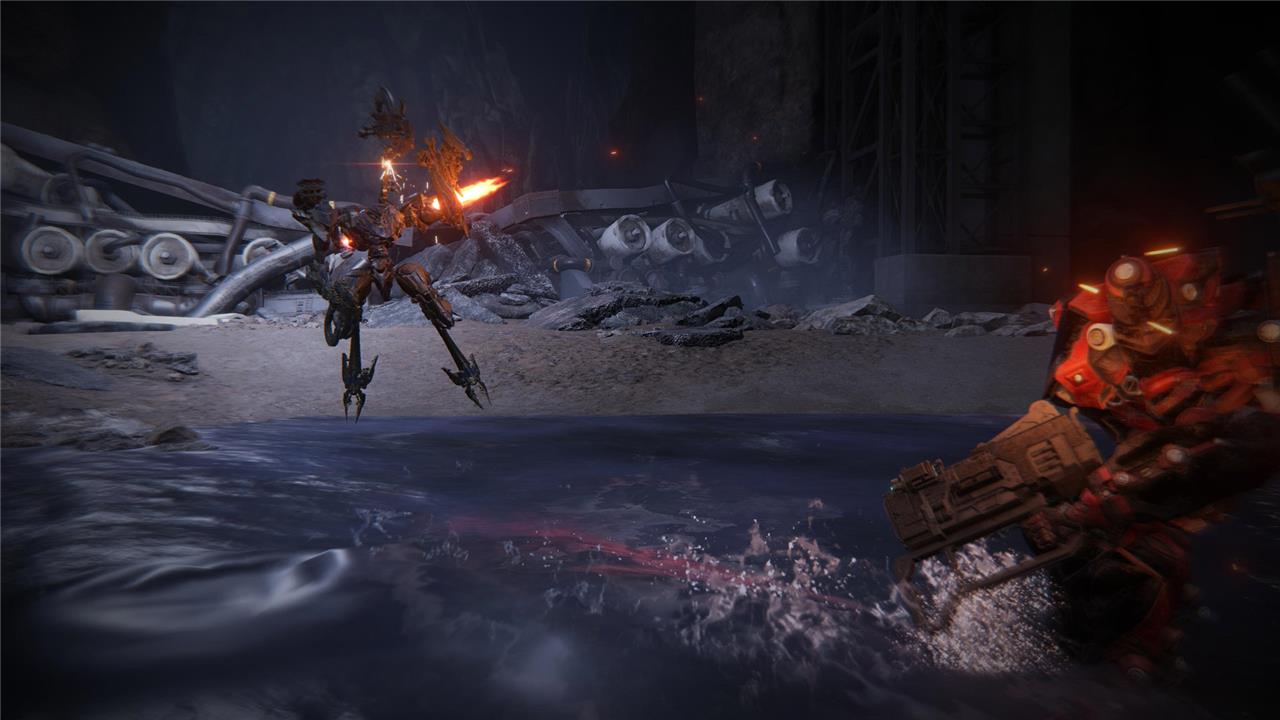
Target: IV Rusty
Location: He is found in the last part of the mission.
Rusty is the final boss of this mission, so you inevitably fight him. He is fast and he can also use Repair Kits, so consider this to come up with your strategy when fighting Rusty.
Chapter 4 – Reach the Coral Convergence
Chapter 4’s final mission, “Reach the Coral Convergence,” challenges players to navigate the ruins of Institute City, where corporate factions clash amid the remnants of a once-thriving metropolis. The mission tasks you with defeating two powerful enemy ACs, V.VI Maeterlinck and G3 Wu Huahai, before securing the area and advancing to the Coral Convergence itself. Along the way, players can collect numerous Combat Logs from various enemies, including fast-moving grinder wheels and ambushing ACs, which are key for completion and rewards. The mission culminates in a showdown with the Ibis Series CEL 240, requiring strategic combat and careful exploration of the devastated urban landscape to succeed.
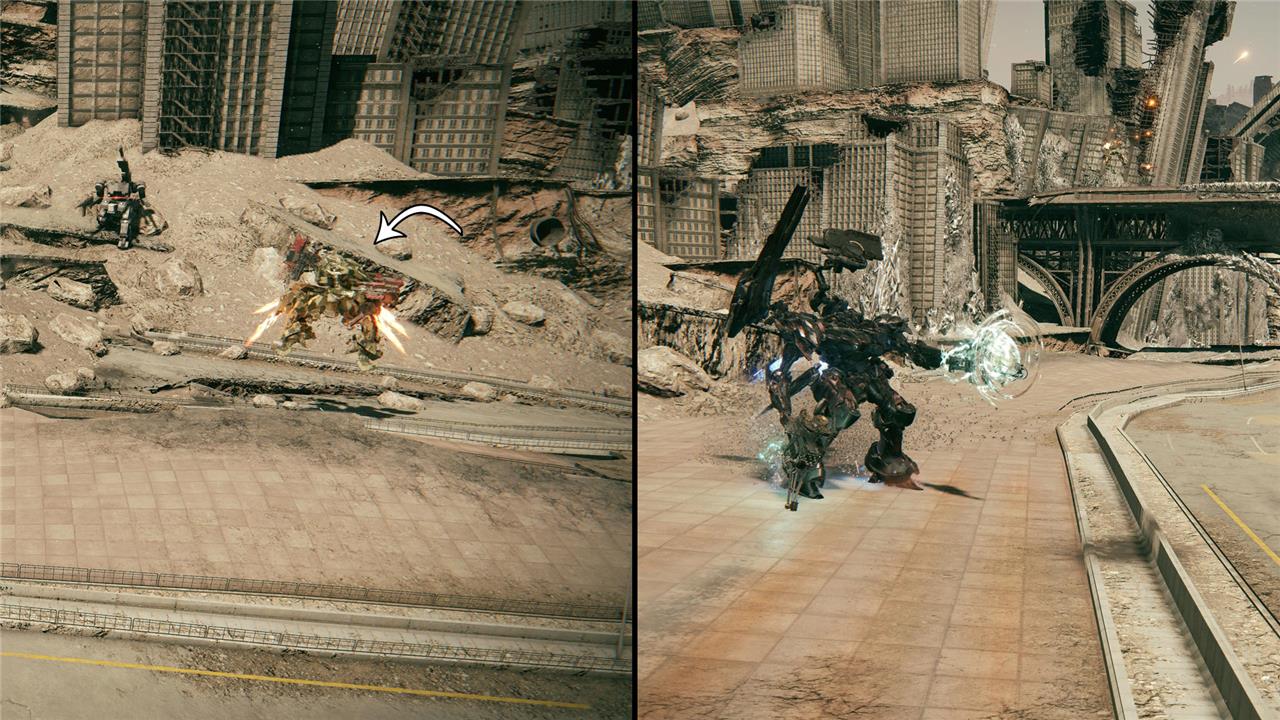
Target: V.VI Maeterlinck and G3 Wu Huahai
Location: Both are found in the initial area of the mission
As the mission begins, your first task is to defeat V. VI Maeterlinck and G3 Wu Huahai. Just follow the marker on the screen to find them fighting other units. It’s possible to lure only one of them to avoid having to deal with both at the same time.
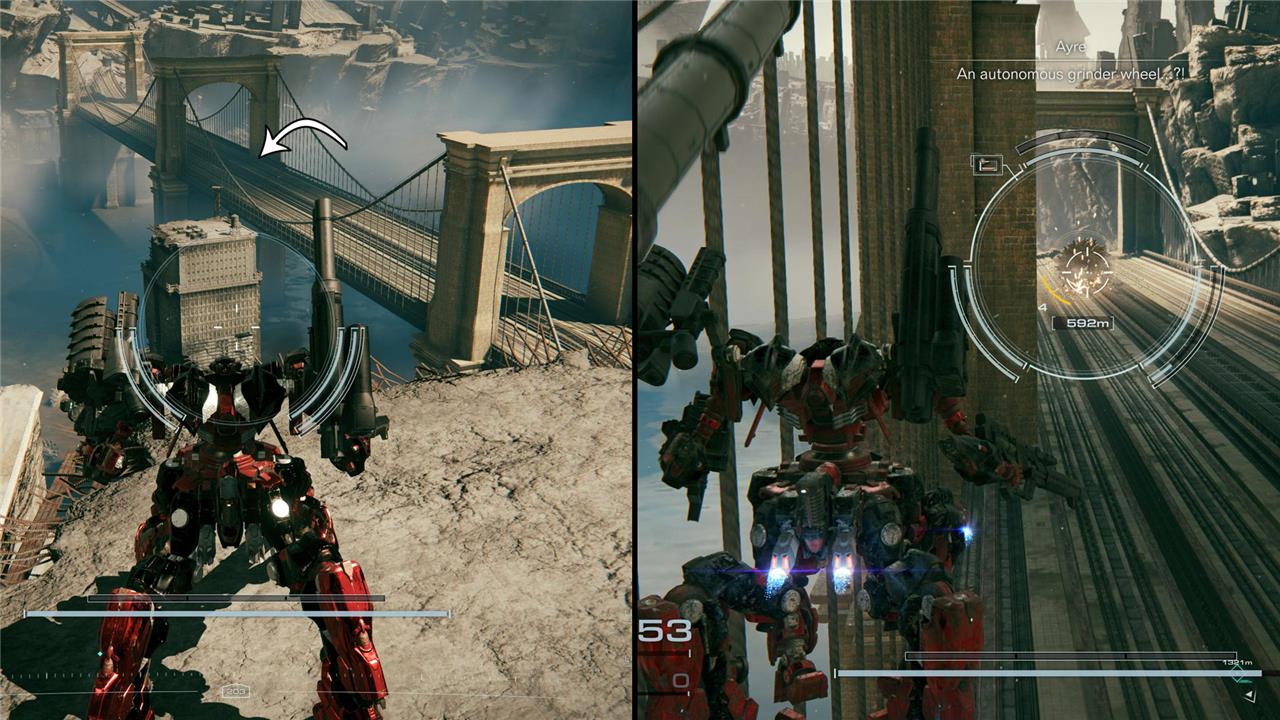
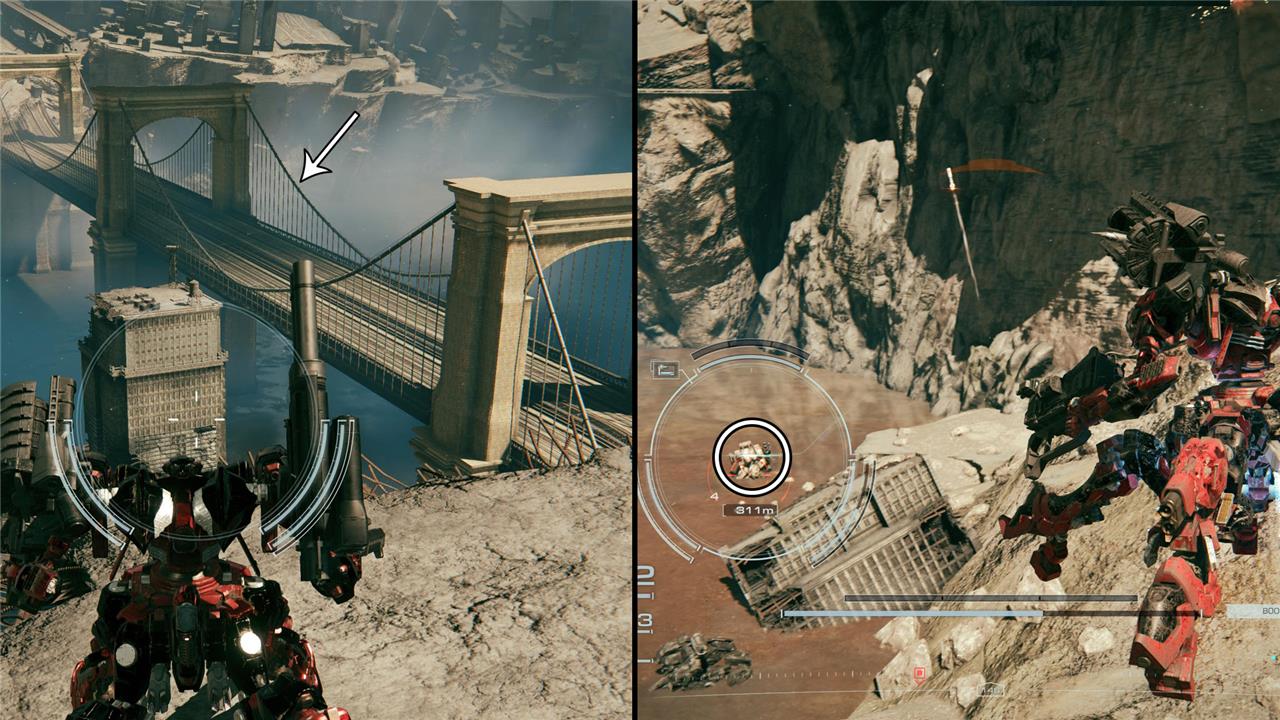
Target: 9x Autonomous Grinder Wheels
Location: One is at the bridge you find after defeating Maeterlinck and Wu Huahai. The others are below the bridge in the water area.
As you progress through the main quest, you end up facing the first Autonomous Grinder Wheel on the bridge. By jumping over the edge and getting below the bridge, you can find four Autonomous Grinder Wheels. Now, follow the direction of the bridge, still in the water area, to find the other four Autonomous Grinder Wheels close to a chest.
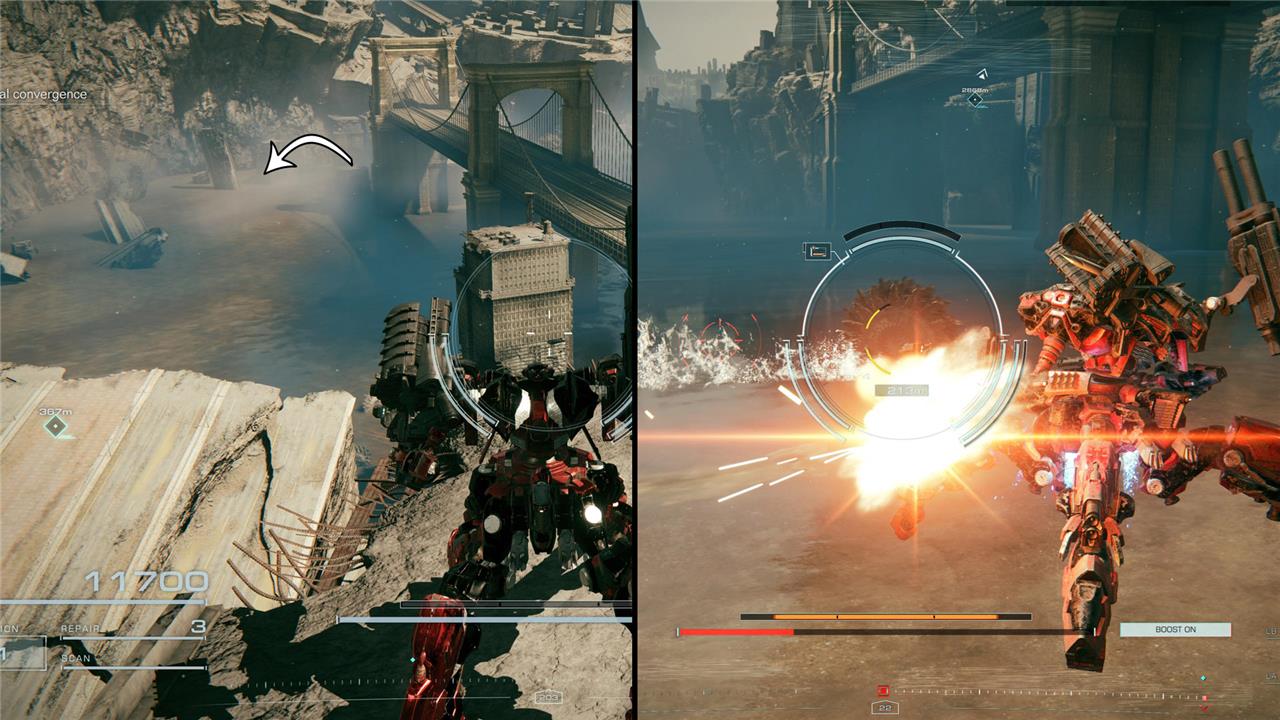
Target: 2x AC Units
Location: In the water area below the bridge, where you find the first Autonomous Grinder Wheel.
By going below the bridge to the extreme right, near the debris of old buildings, you can find the two AC units you need to destroy. They aren’t challenging enemies, but, to avoid making this more complicated, you might want to destroy the Autonomous Grinder Wheels that are on the opposite side of the area.
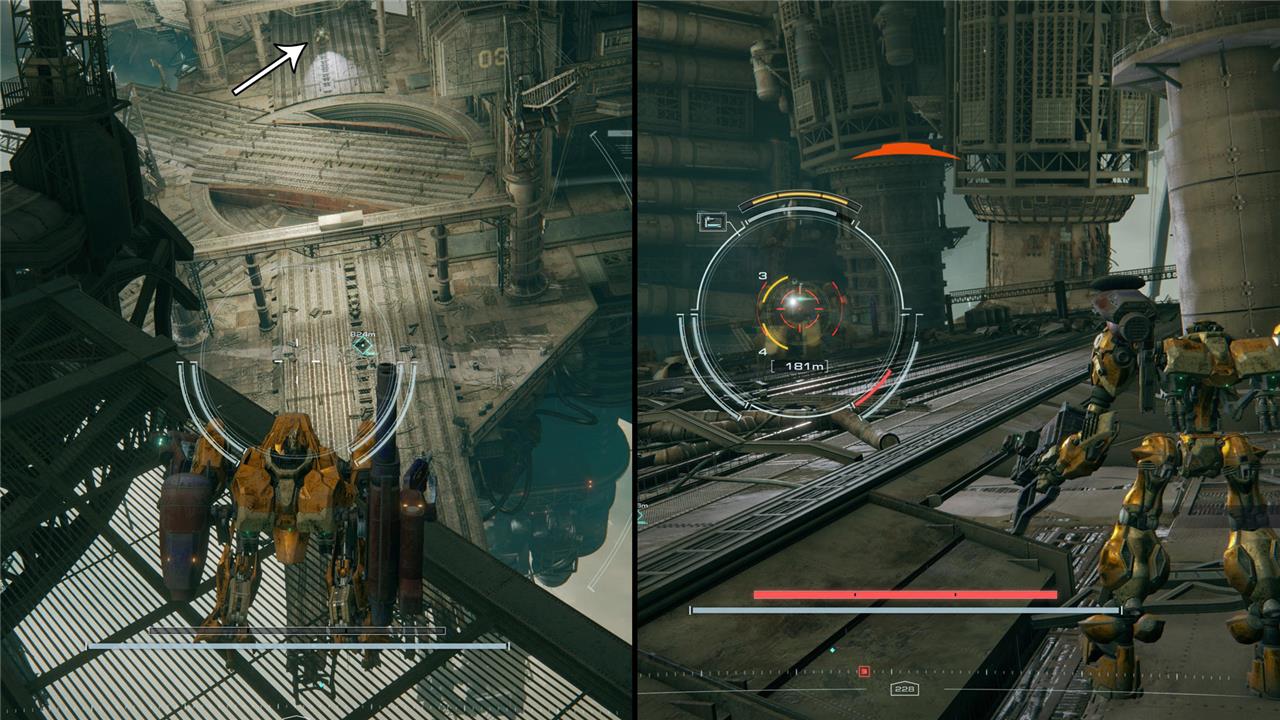
Chapter 5 – Intercept the Corporate Forces
In Chapter 5 of Armored Core 6: Fires of Rubicon, the mission “Intercept the Corporate Forces” challenges players to halt the Arquebus forces advancing on the city of Xylem. Early in the mission, players can secure a Silver Combat Log by defeating an Arquebus Heavy Cavalry unit positioned on a glass roof. The mission culminates in a decisive battle against V.I Freud, the leader of the Vesper Squad, who carries a Platinum Combat Log. Defeating Freud is mandatory to complete the mission, ensuring players do not miss this critical collectible. Utilizing weapons like the SG-027 ZIMMERMAN Shotgun to quickly build the enemy’s ACS meter and following up with the PB-033M ASHMEAD Pile Bunker for heavy stagger damage is an effective strategy. Collecting these Combat Logs not only advances the Loghunt but also contributes to unlocking new parts and achievements, making this mission pivotal for completionists aiming to gather all Combat Logs in the game.
Target: 1x PCA Unit
Location: In the upper level of the initial area.
When the mission begins, you’re at the top of the floating base. To find the target, you must fly to the upper level of the region where the quest mark is. There is a ceiling there. Once you land on it, the target comes up flying in front of you.
Where are the most hidden enemy locations for Combat Logs in Armored Core 6
The most hidden enemy locations for Combat Logs in Armored Core 6: Fires of Rubicon are often tucked away in secret passages, beneath bridges, and off the main mission paths. Notably, one of the most concealed spots is a hidden passage behind a wall in the mission “Infiltrate Grid 086,” where an enemy AC waits to be eliminated alongside hidden parts, making it one of the trickiest to find. Additionally, beneath a large bridge in the mission “Attack the Refueling Base,” enemies holding Combat Logs lurk in the water and on pillars nearby, requiring careful exploration to spot. Other hidden Combat Log enemies can be found near frozen lakes, on rooftops, and behind debris fields, demanding thorough map exploration and sometimes backtracking to uncover them all.
Which hidden areas in Chapter 2 have the most Combat Log enemies to discover
In Chapter 2 of Armored Core 6: Fires of Rubicon, the mission Infiltrate Grid 086 boasts the most hidden Combat Log enemies, with a total of nine logs scattered across several secret areas. Key hidden spots include:
-
A second-floor bridge area where you can find multiple enemies carrying Combat Logs by turning away from the main objective and exploring down the bridge to find platforms with hostile ACs and MT units.
-
A hidden room inside a smelting machine where a tough AC pilot guarding a Gold Combat Log awaits.
-
A concealed passage behind a wall hosting an enemy AC and several hidden parts.
-
Platforms beneath and around the main path with groups of enemies holding Bronze and Silver Combat Logs.
Additionally, the Ocean Crossing mission in Chapter 2 contains four Combat Logs, mostly from drones hidden under platforms and inside tunnels beneath the large outdoor platform after the elevator. These areas require careful exploration off the main path to uncover the most hidden Combat Log enemies in Chapter 2.