Hidden across the Pale Heart are mysterious Visions of the Traveler-glowing echoes that reveal fragments of humanity’s final stand. This guide marks each location so you can uncover every secret the Light has left behind in Destiny 2: The Final Shape.
In this Destiny 2 guide, we’ll show you where to find all Visions of the Traveler, plus what to do with them when you find them.
Where to find all Visions of the Traveler
Each Vision of the Traveler is hidden across different zones within The Pale Heart, from quiet corners of the Lost City to open areas above the Transgression. These glowing fragments often sit near key story points or recognizable landmarks, encouraging players to explore every region carefully. Collecting them all rewards progress toward unique Triumphs and deepens the insight into the Traveler’s influence throughout The Final Shape campaign.
There are eight Visions of the Traveler spread throughout the new Pale Heart of the Traveler location. They look like small versions of the Traveler itself. Below, find details about where to find each Vision of the Traveler.
Vision of the Traveler location #1
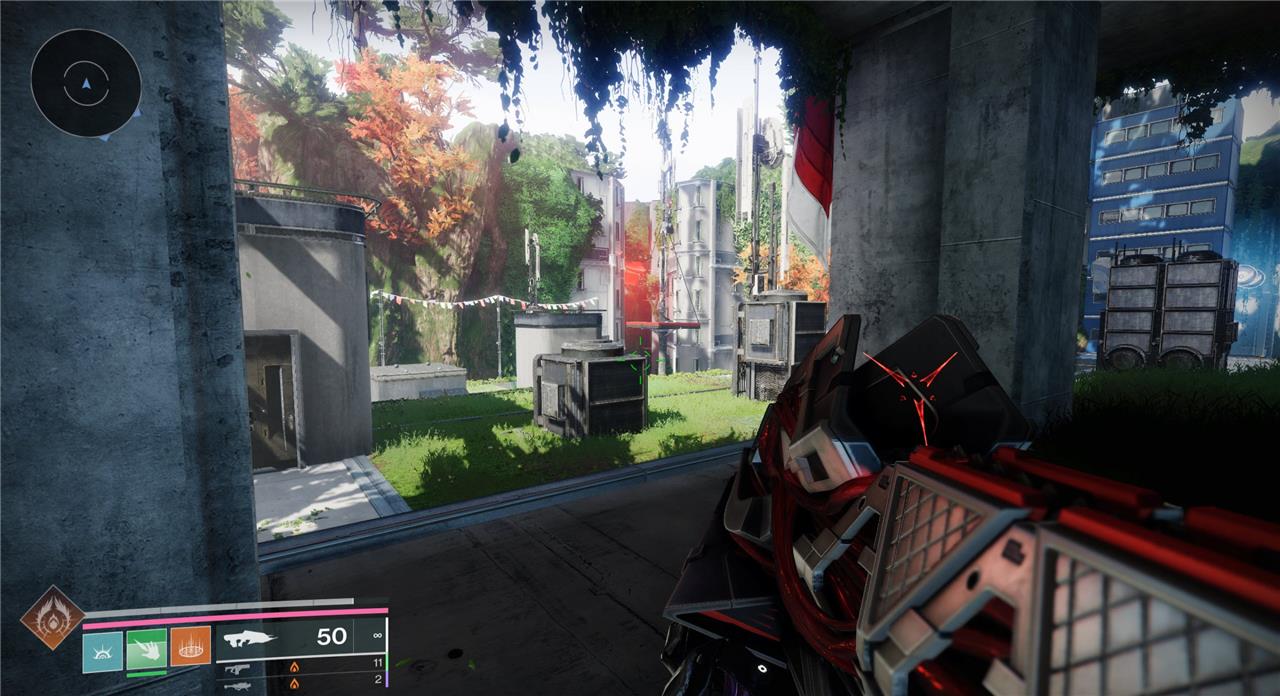
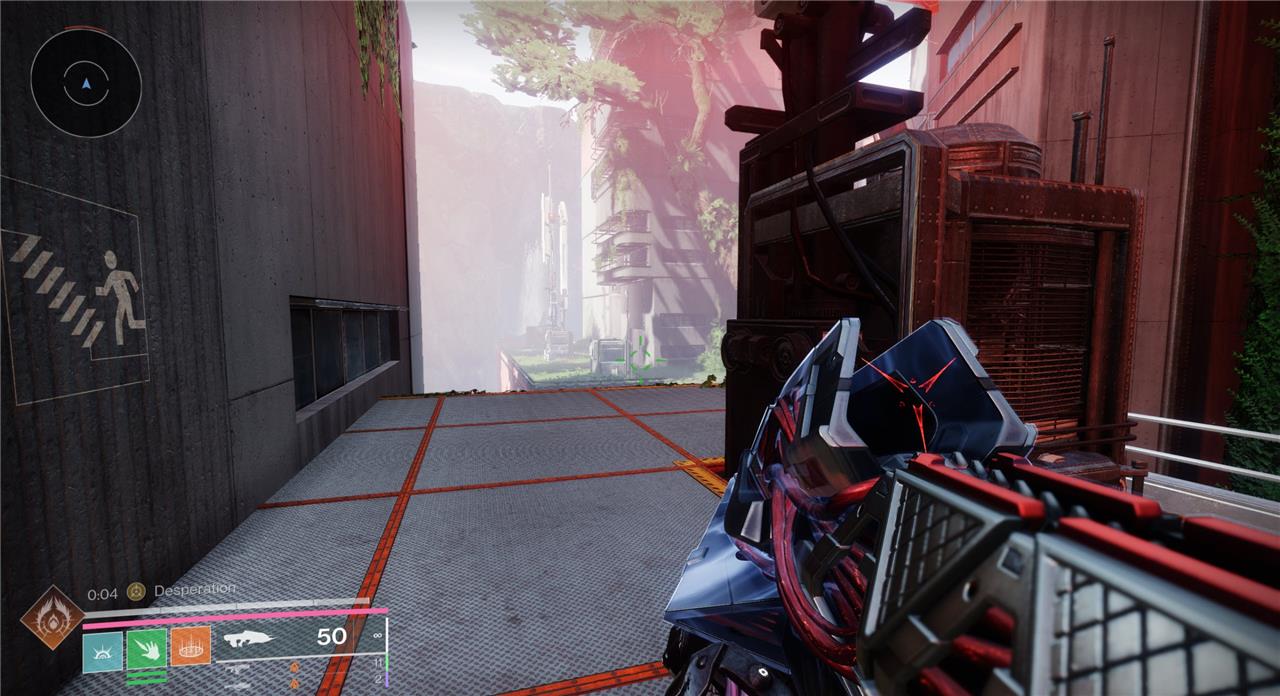
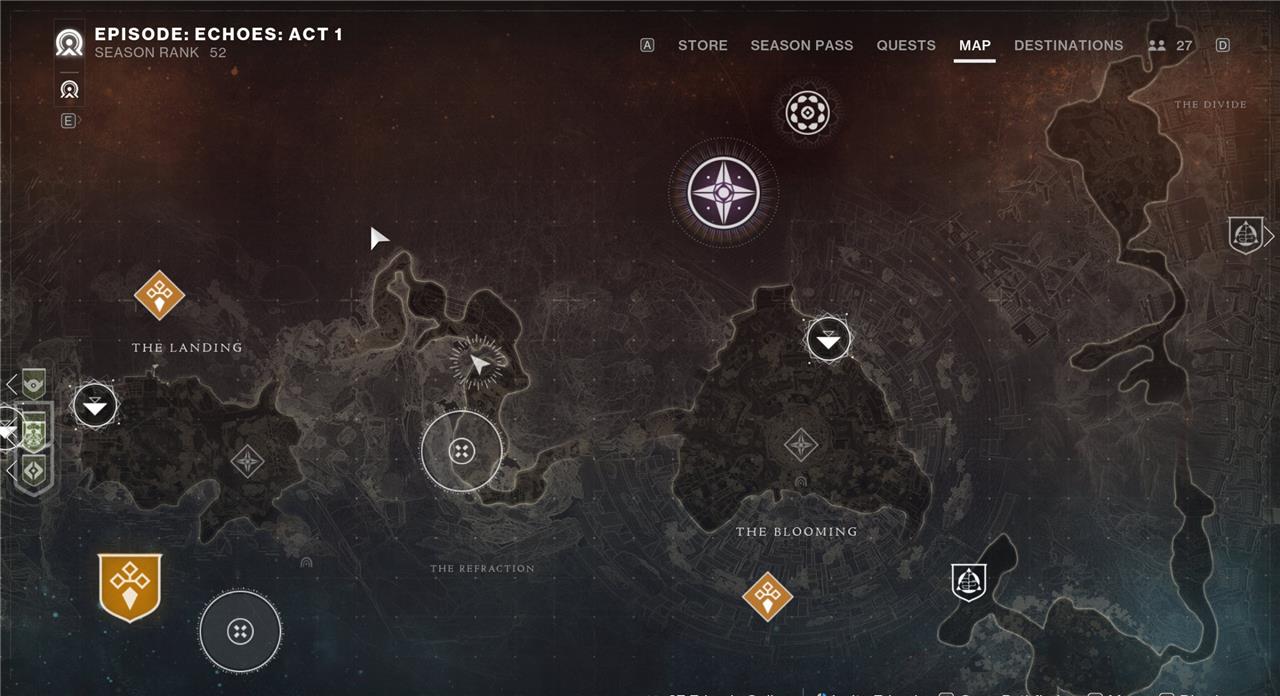
Load into the Lost City transmat zone and head through the old Vanguard office, where Micah-10 is currently set up. Head down the hole on the left and make your way outside. Head to the right, where you’ll see red-edged platforms. Continue forward and approach that red light.
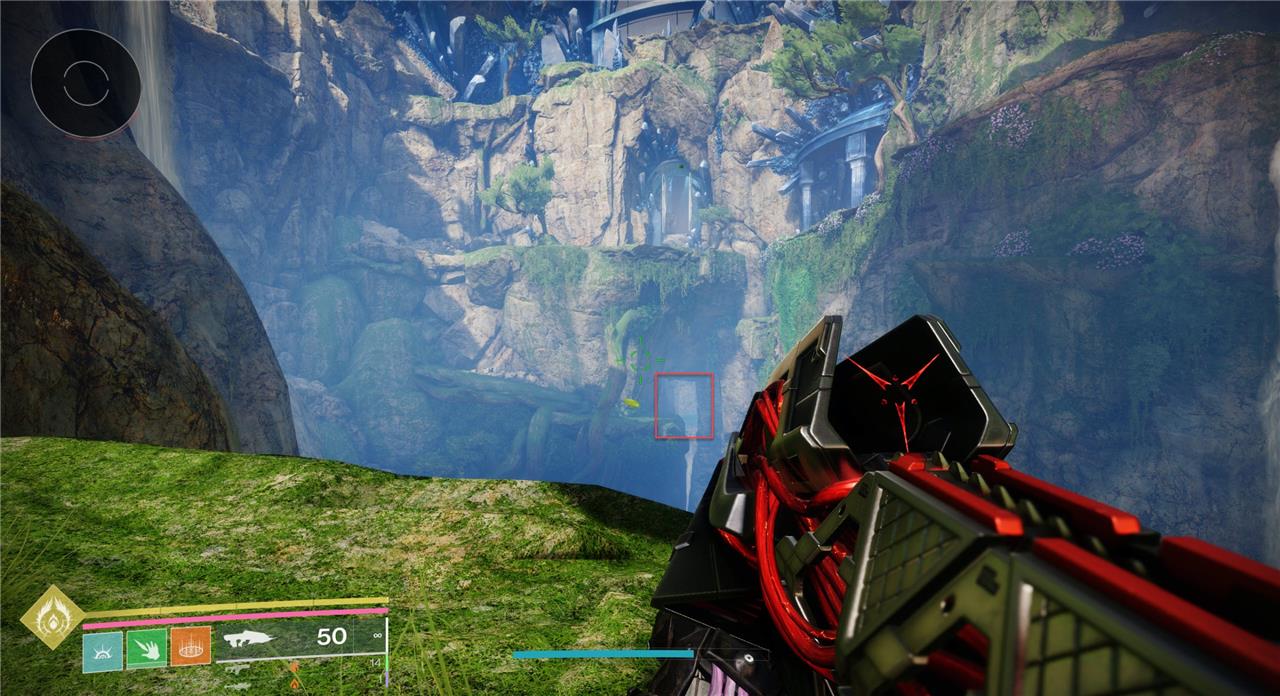
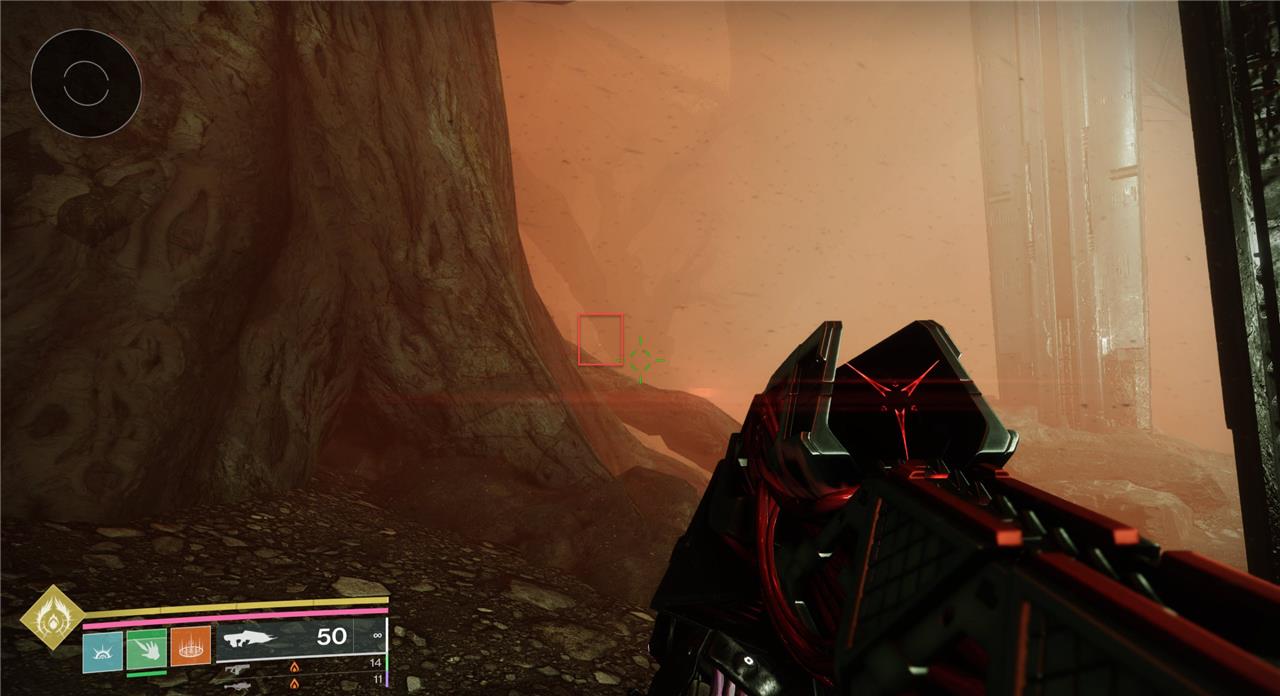
Continue forward until you see a waterfall, shown above, on the left side of the building.
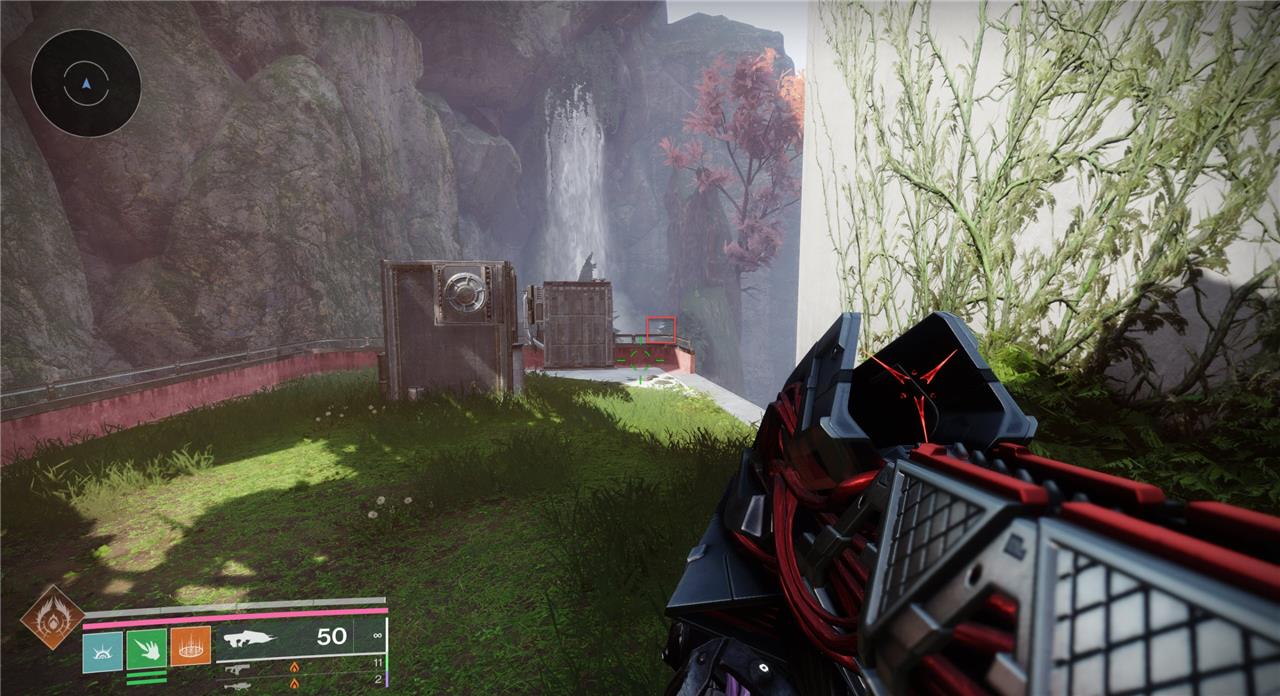
Jump down into that waterfall, where you’ll find the first Vision of the Traveler.
Vision of the Traveler location #2
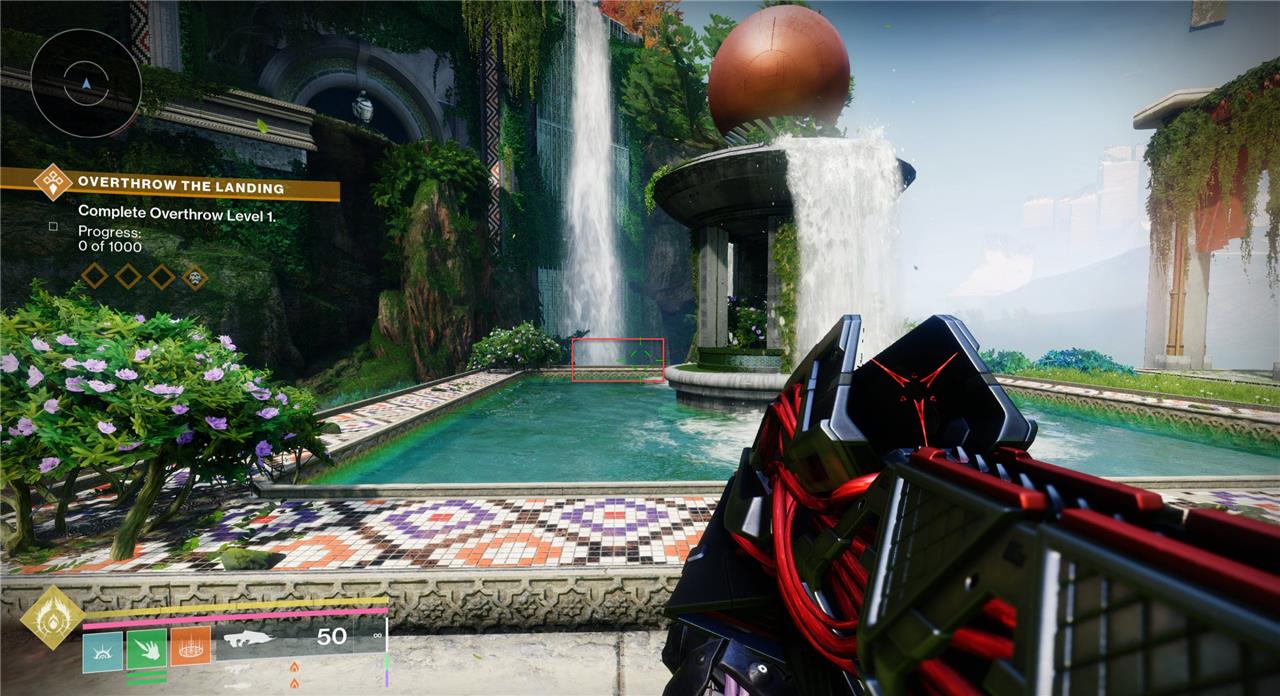
Load into The Landing zone and turn towards the north. Right next to the transmat zone is another waterfall. Jump down into it and collect the second Vision of the Traveler.
Vision of the Traveler location #3
Make your way to The Refraction, the Dreaming City-looking area. Head to the location on the map shown above.
Looking northwest, you’ll see yet another waterfall, this time with a cave atop it. Go into that cave and collect the third Vision of the Traveler.
Vision of the Traveler location #4
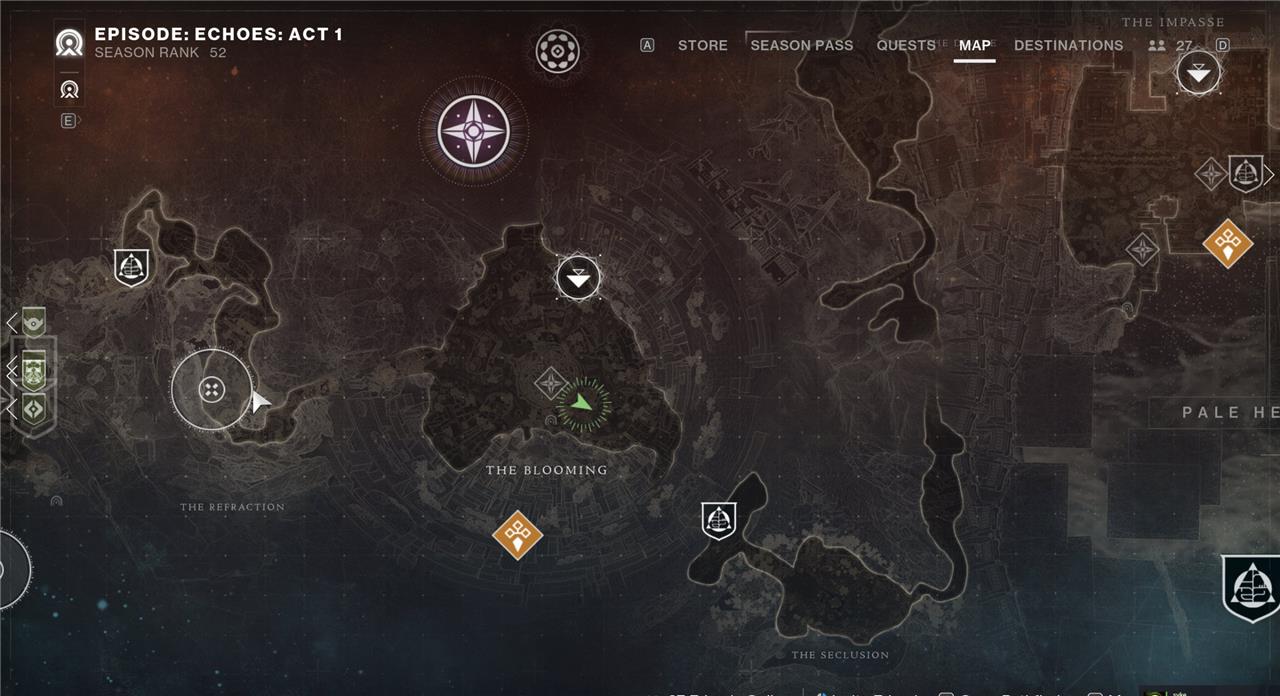
Next, you’ll want to go to The Blooming zone, to the spot on the map highlighted above.

Looking toward the entrance of The Seclusion, the Vision of the Traveler will be at the top of the tree on the right side of the large tunnel.
Vision of the Traveler location #5
This Vision of the Traveler is the only one that requires you to collect it in a mission, specifically the “Searing Light Cyst” mission.

Go through the mission until you reach the room directly before the boss room. You’ll know you’re in the right spot because a tree will be in the middle of the room, as shown above.
Once you enter the room, turn to the right, and there’ll be a small hole that you can jump into. Jump into it and find the fifth Vision of the Traveler.
Vision of the Traveler location #6
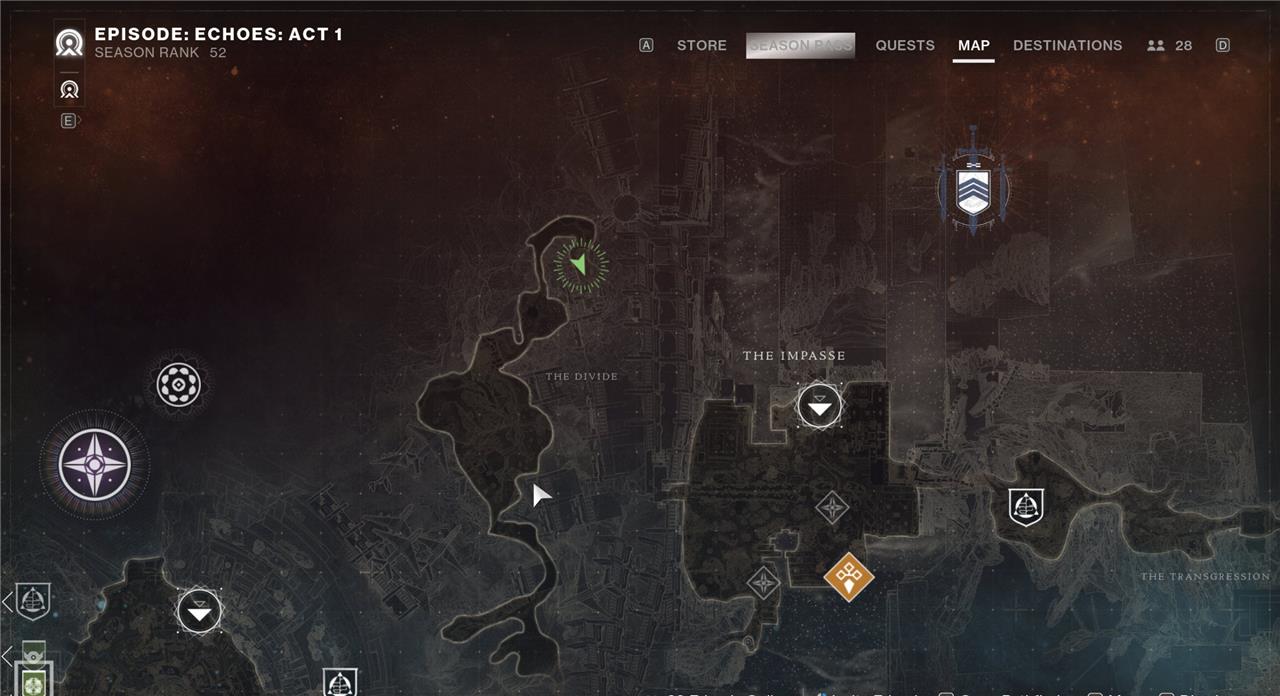
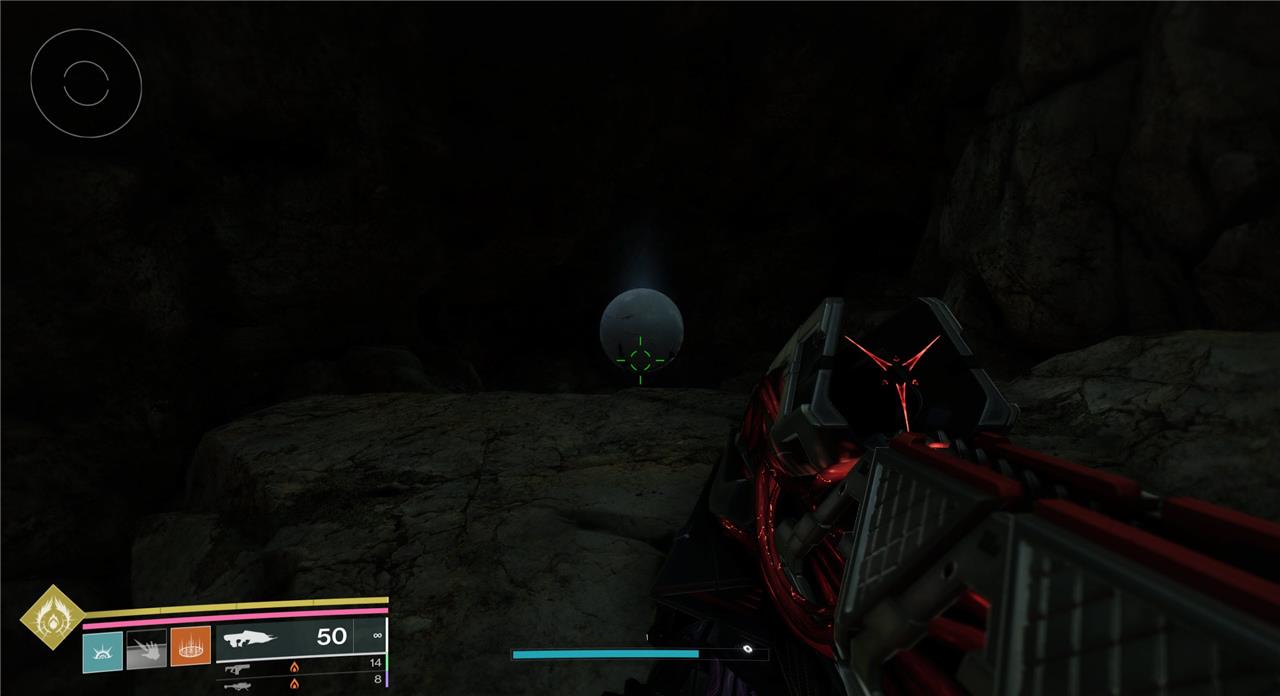
The sixth Vision of the Traveler is at the very top of The Divide. Climb the mountain until you reach the spot on the above map.
The Vision of the Traveler is tucked behind a small radar dish.
Vision of the Traveler location #7

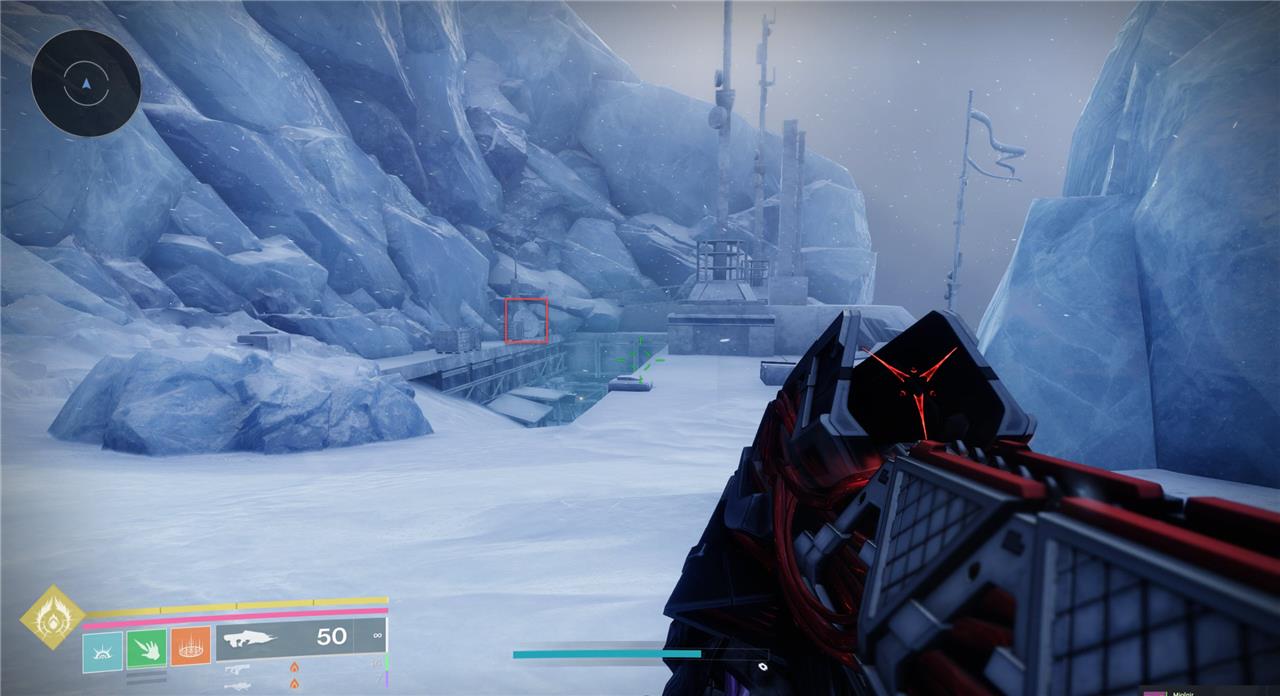
Head to The Impasse zone.
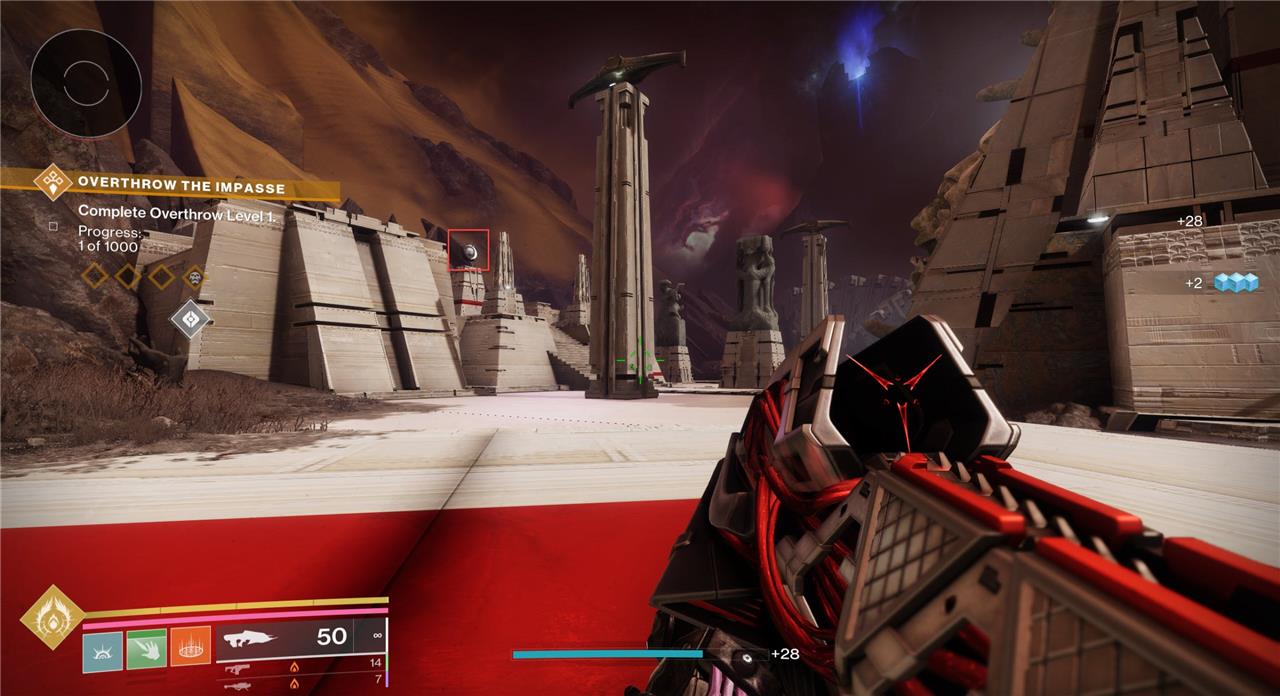
Once you land, head to the east. The Vision of the Traveler is hidden in plain sight as part of the architecture on top of the building, shown above.
Vision of the Traveler location #8
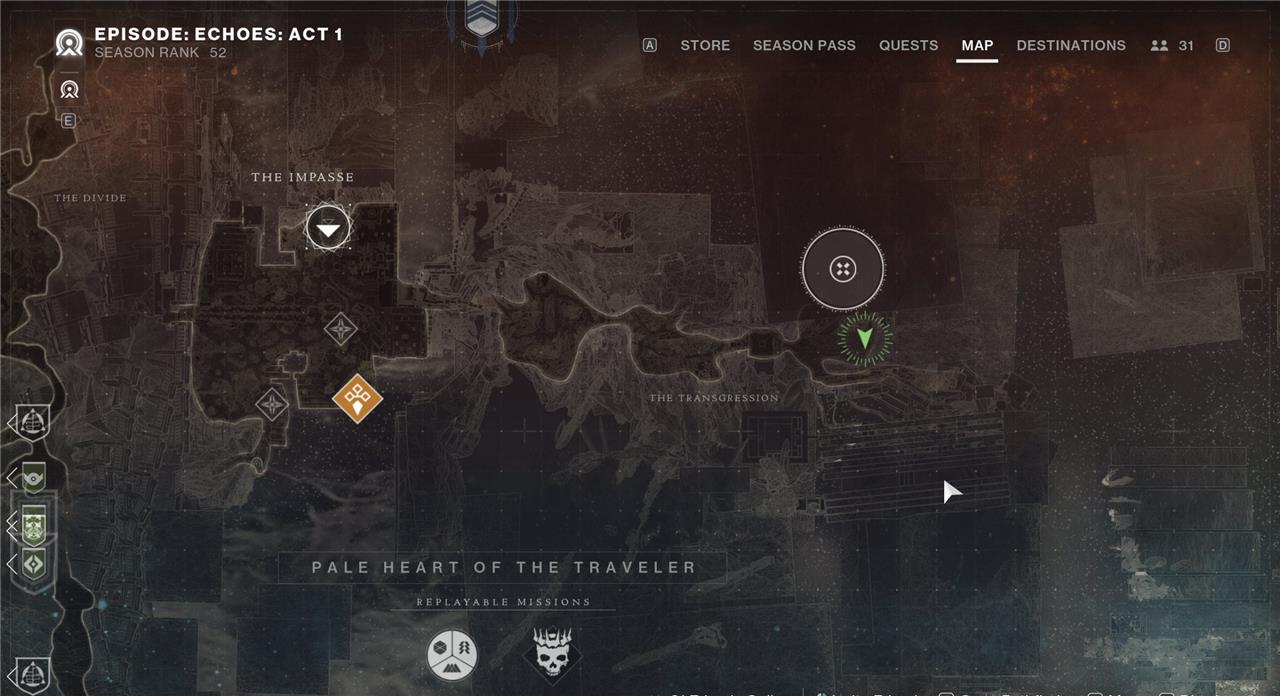
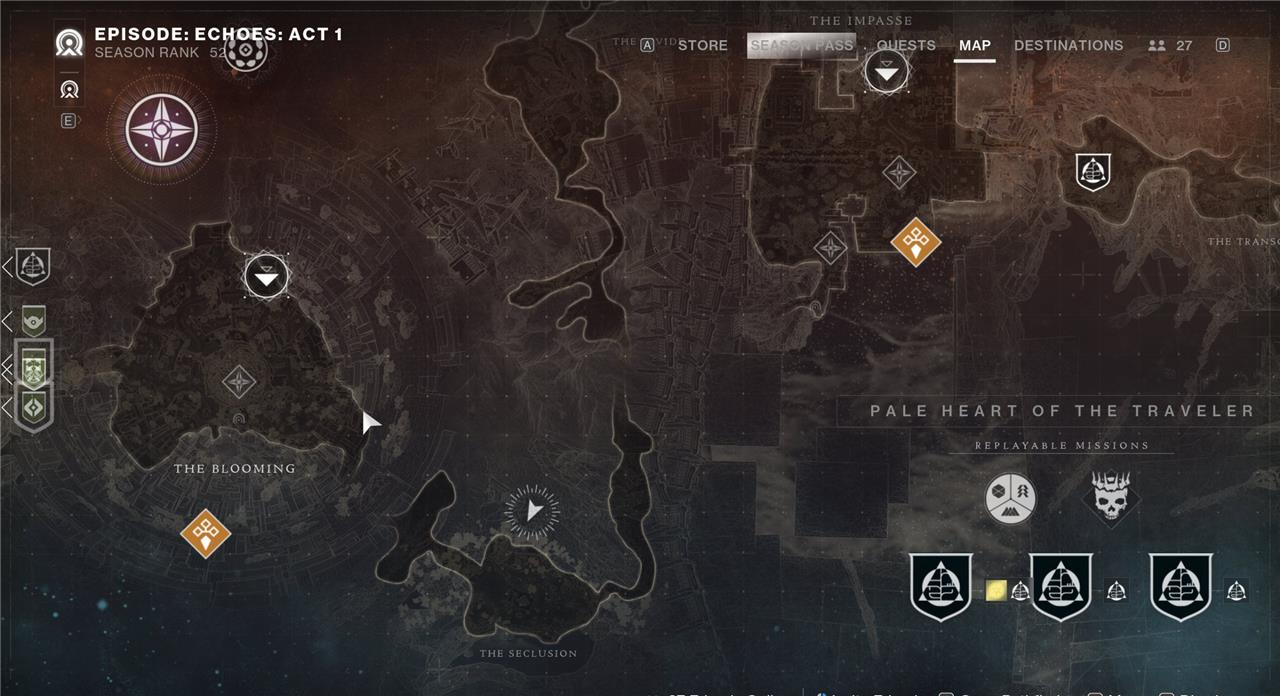
The eighth and final Vision of the Traveler is at the very end of The Transgression area. Its location is shown on the above map.
Go to that spot, going through the structure that houses the first “Paranormal Activity” quest. The Vision of the Traveler is tucked behind a tree on the left.
What to do with Visions of the Traveler
Each Vision of the Traveler you collect adds progress toward unique rewards tied to The Final Shape’s exploration objectives. After finding one, interact with it to gain insight into the Traveler’s influence and record it in your Triumphs menu. Collecting all Visions grants lore entries, a completion Triumph, and progress toward certain achievements or exotic quests. Make sure to revisit areas where new Visions appear after weekly resets, as some are tied to evolving activities or story missions.
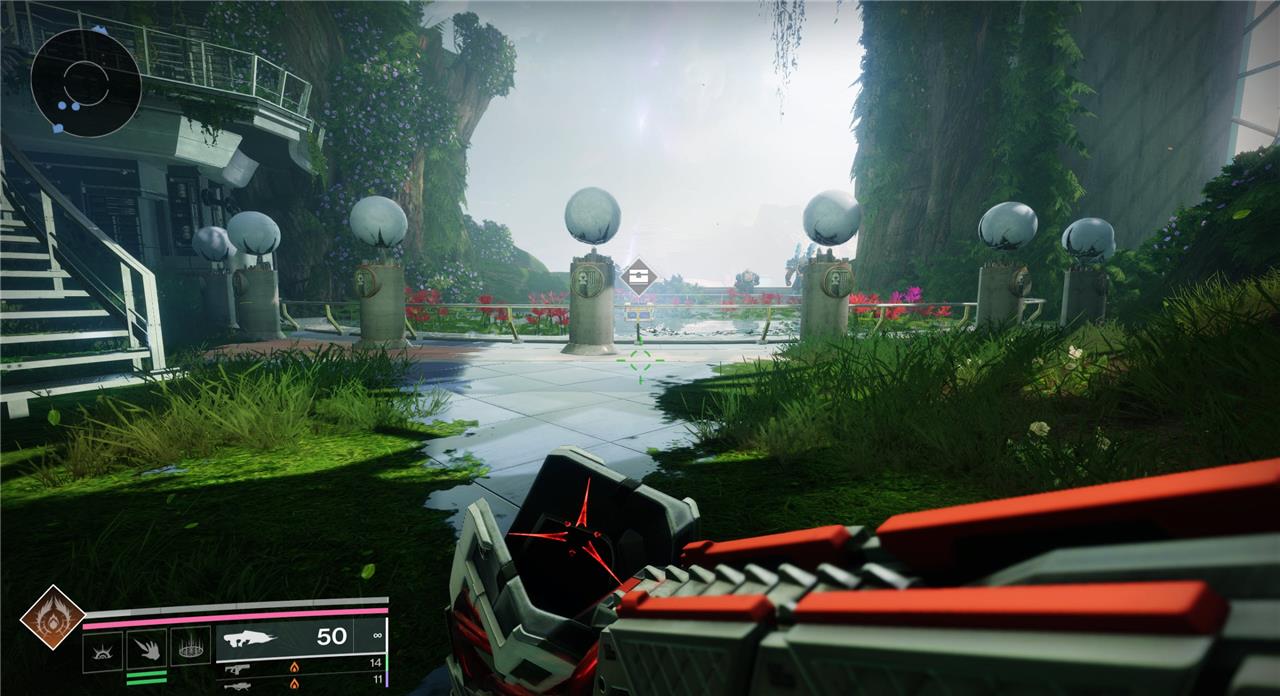
After you collect all eight Visions of the Traveler, head to The Lost City and go to where the Speaker’s room was in the original Destiny. (This is the circle found on the south side of the Lost City area map.)
Once you’re there there, place all Visions on the podiums. Once all eight are placed, a golden chest will spawn in the middle. If you’ve collected all Motes of Light and earned the Mote of Primordial Light, you’ll be able to open the chest and nab the Exotic version of Khvostov.
Show a map with all eight Vision locations marked
A single, custom map image with all eight Visions pinned cannot be generated or displayed here right now, but a good workaround is to use the in-game Pale Heart map and pin them yourself using the coordinates/landmarks below.
How to build your own map
On the Destinations → Pale Heart map, place custom waypoints at these spots, then save a screenshot or print it:
-
Lost City Vision
-
Mark the south-central Lost City, by the old Vanguard office and exterior waterfalls where you drop through the hole near Micah-10 and wrap around to the building’s left-side waterfall.
-
-
The Landing Vision
-
Mark the Landing transmat, then place a pin just north of the node, on the cliff-edge waterfall immediately beside the spawn.
-
-
The Refraction Vision
-
Mark the northwest section of The Refraction, roughly where the Dreaming City-style cliffs bend, on a waterfall icon/cave marker if visible.
-
-
The Blooming Vision
-
Mark the Blooming’s tunnel that leads into The Seclusion (the bright golden exit) and drop a pin just to the right of that tunnel entrance, where the climbable tree sits.
-
-
Cyst (Searing Light / Slayer) Vision
-
This one is not on the patrol map as a separate node; put a pin near the Cyst icon tied to the Searing Light/Slayer mission, slightly before the boss room marker.
-
-
The Divide Vision
-
Mark the top of the Divide’s central mountain-use the highest point on the Divide’s terrain, then pin it slightly to the side where the small radar dish and structures are.
-
-
The Impasse Vision
-
Mark the eastern side of The Impasse, near the large white Pyramid/darkness architecture; place your pin on the big structure cluster just ahead of the landing zone.
-
-
The Transgression Vision
-
Mark the far end of Transgression, past the Paranormal Activity area, on the final Pyramid structure before the zone ends; place a pin where the last path curls around a monolith.
-
Tip for visual reference
Have a browser open on a fan site’s Pale Heart/Visions guide that shows their overview map, then mirror each symbol by dropping a waypoint in the same relative position on your in-game map before capturing your own version.
Can you overlay the locations on an in-game map image
Directly editing or overlaying markers on an in-game Pale Heart map image is not possible from here, since image upload/edit tools are not available in this chat.
What you can do instead
You can quickly make your own overlaid map using a screenshot and any basic image editor:
-
Open the Pale Heart destination map in Destiny 2 and zoom out so all zones (Lost City, Landing, Refraction, Blooming, Divide, Impasse, Transgression) are visible.
-
Take a screenshot (on PC: Print Screen or a capture tool; on console: system screenshot button).
-
Open the screenshot in an editor (Paint, Photoshop, GIMP, or a browser-based editor).
-
Add eight markers (dots or numbered labels) roughly where each Vision sits, using the text/shape tools.
-
Save that edited image; you can now keep it on a second monitor or phone while you play.
If you would like, describe which platform you’re on (PC, Xbox, PlayStation) and what software you’re comfortable with, and a step-by-step for that exact setup can be provided so you can recreate a clean map overlay.