Dragons soar high above Hyrule, leaving trails of rare materials that can power up your gear and fuel your strongest elixirs. Knowing where and when to meet these elemental titans is the key to harvesting their scales, claws, and horns without missing a beat.
- Dragon scales
- Dragon spikes
- Dragon fangs
- Dragon horns
- Dragon claws
Each dragon part is imbued with the elemental property associated with the dragon. The part you get will depend on which area of the dragon’s body you attack with either a melee or ranged weapon. You’ll want to start farming dragon parts sooner than later since they’re extremely beneficial when you want to Fuse weapon combos, craft recipes and elixirs, and upgrade armor.
This guide explains how to farm each dragon part in Zelda: Tears of the Kingdom and the benefits and uses for each one.
How to prepare for farming dragon parts
Before farming dragon parts, make sure you have enough stamina and proper gear for flight and survival. Carry plenty of arrows, food that boosts stamina or attack, and warm or heat-resistant clothing depending on the dragon’s habitat. It helps to set up nearby Skyview Towers or Shrines for quick access to the dragons’ routes. Tracking their flight patterns through different regions will save time and improve your chances of collecting their materials safely.
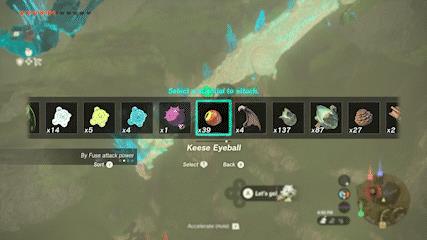
Before you set out to farm dragon parts, you’ll have an easier time if you’re stocked up on Keese, Aerocuda, or Octorok eyeballs. Fusing these to your arrows give them a homing effect, increasing the accuracy of your shot and helping you hit the flying dragons easier. However, for dragon fangs and claws, the accuracy of a regular arrow will work best, as homing arrows are guaranteed to hit the dragon, but their area of impact is random.
The Glide Armor set can also be of help to get closer to the dragons when you’re skydiving, since you’ll want to be as nimble in the air as possible.
How often can you get dragon parts?
Dragon parts can usually be collected from each dragon every ten minutes of real-world time, but only one part can drop per interaction. The type of part you receive depends on where your arrow or weapon makes contact-shooting the horn, claw, fang, or body determines the item. After a drop, the dragon must move a good distance away before another part becomes available, so tracking their flight routes and timing your visits helps you gather materials more consistently.
There is a timer in place for farming dragon parts. After you get a dragon part – excluding shards of spikes – it takes 10 minutes for parts to drop again. This is indicated by the dragon losing its colorful glow. If you pause the game in any capacity, you’ll also pause this hidden timer, so be mindful of those bathroom breaks.
If you want to farm a multiple dragon parts in one encounter, you can just stay on top of a dragon and leave the game idle for 10 minutes. The risk of doing so is a surprise attack from an Aerocuda or passing through an electric storm, which can leave you vulnerable to lightning if you have any metal weapons, shields, or bows equipped.

Remember, Farosh, Naydra, and Dinraal all have hazardous conditions around them based on their signature element. If you don’t have the proper resistance to counter them, your best chance is to approach the dragon, grab the part you need, and make a swift escape.
Note the dragon’s location on your map and after the 10 minutes have passed, head over to the nearest Skyview Tower and jump on the dragon again. Dragons move fairly slow, which should make this easier. But if you can, let Link rest for a while on top of the creature, and you’ll be getting six materials an hour or so.
There may also be times when you have to leave the dragon’s back to retrieve the part you farmed. Using a close-range weapon will make it simpler to get the part while still riding the dragon. If that isn’t an option – or if the part simply falls off – a light trail will follow the dragon part, making it easy to find and retrieve it.
How to farm dragon scales
Dragon scales can be obtained by striking a dragon’s body with an arrow while it’s flying over Hyrule. Wait for the scale to drop and glide down to collect it before it disappears. Each dragon-Dinraal, Naydra, and Farosh-yields its own type of scale, used for upgrading armor or crafting elixirs. Targeting the body, not the head or horns, ensures you get a scale instead of other dragon materials. It’s best to visit their flight paths at specific times of day, as each dragon follows a predictable route and schedule.
Here’s the list of dragon scales in Tears of the Kingdom and what they do when Fused with a weapon:
- Farosh’s scale: 16 Fuse attack power
- Naydra’s scale: 16 Fuse attack power
- Dinraal’s scale: 16 Fuse attack power
- Light Dragon’s scale: 12 Fuse attack power, imbues weapons with a healing effect (restores a quarter of a heart per hit)

Dragon scales are obtained by hitting the dragon anywhere on the body – except the mouth, feet, or horns – with either a melee or a ranged weapon. But while you can farm scales with your bow, if you’re able to just hop on the dragon and do a quick hit with a melee weapon, it’ll be an easier method all around.
How to farm dragon spikes
Dragon spikes can be collected from the three elemental dragons that roam the skies: Dinraal, Naydra, and Farosh. To farm them, aim for the spikes along their backs with arrows while they are flying. Once struck, a glowing shard will fall to the ground, often landing on a surface below the dragon’s flight path. Use your map to follow their routes and glide in from a Skyview Tower for an easier shot. Spikes respawn after a game day has passed, so rest at a fire or pass time to repeat the process.
Here’s the list of dragon spike shards in Tears of the Kingdom and what they do when Fused with a weapon:
- Shard of Farosh’s spike: 16 Fuse attack power, imbues weapons with lightning
- Shard of Naydra’s spike: 16 Fuse attack power, imbues weapons with frost
- Shard of Dinraal’s spike: 16 Fuse attack power, imbues weapons with fire
- Shard of Light Dragon’s spike: 12 Fuse attack power, imbues weapons with a healing effect (restores a quarter of a heart per hit)
Shards of spikes are manually picked up from the dragon’s back, near its spikes. There are around eight to 12 of them at a time. This is a new type of dragon part that wasn’t present in Breath of the Wild.
Unlike all other items, you can grab shards of spikes in bulk. That said, they won’t respawn after 10 minutes like the other dragon parts. For this, you’ll have to dismount the dragon, go somewhere else, and come back later. While the timing of the part’s respawn rate is uncertain, if you’re periodically checking on the dragons to farm their parts, it won’t take too long until you see them again.
How to farm dragon claws
Dragon claws can be obtained by shooting any of the four dragons-Farosh, Naydra, Dinraal, or the Light Dragon-on their feet with an arrow while they are flying. Wait for the claw piece to drop, then glide down or use Recall on a dropped object to reach it safely. Each dragon drops one claw per in-game day, so resting at a campfire until morning helps speed up farming. Using nearby Skyview Towers or high plateaus makes tracking their flight routes easier for repeat collection.
Here’s the list of dragon claws in Tears of the Kingdom and what they do when Fused with a weapon:
- Farosh’s claw: 18 Fuse attack power
- Naydra’s claw: 18 Fuse attack power
- Dinraal’s claw: 18 Fuse attack power
- Light Dragon’s talon: 14 Fuse attack power, imbues weapons with a healing effect (restores a quarter of a heart per hit)

Dragon claws are obtained by hitting any of the dragon’s feet or hands, which are on the sides of the body towards the lower end.
In order to get dragon claws, I recommend jumping on the dragon first. Then, you can drop off from its back and use your paraglider to stay afloat, using the wind currents around the dragon to help.
Using your bow in mid-air to activate slow motion, attack the legs or hands from the front. Make sure to get as close as possible, as there’s a chance for the arrow to hit the body instead. Dragon claws are by far the most tricky body part to farm, but it’s only a matter of practice.
How to farm dragon horns
Dragon horns can be obtained by striking a dragon’s head with any weapon and staying close until the glowing shard drops. Aim for the dragon you need-Dinraal, Naydra, or Farosh-since each provides a different horn used in cooking and upgrades. Wait for the dragon to appear along its flying route, then use a glider or nearby Skyview Tower to reach it. After collecting the horn, rest at a campfire or fast-travel to another location to reset the dragon’s spawn and repeat the process.
Here’s the list of dragon horns in Tears of the Kingdom and what they do when Fused with a weapon:
- Shard of Farosh’s horn: 26 Fuse attack power, imbues weapons with lightning
- Shard of Naydra’s horn: 26 Fuse attack power, imbues weapons with frost
- Shard of Dinraal’s horn: 26 Fuse attack power, imbues weapons with fire
- Shard of Light Dragon’s horn: 20 Fuse attack power, imbues weapons with a healing effect (restores a quarter of a heart per hit)
Dragon horns are obtained by hitting the dragon’s horns with either a melee or a ranged weapon.
The best method is to jump on a dragon and then make your way toward the head. Once there, use any melee weapon to hit the horns. The part will drop on the spot, so you don’t even have to worry about it falling down to the ground. Of course, ranged weapons will also work if you have arrows to spare.
How to farm dragon fangs
Dragon fangs can be collected by shooting any of the four dragons in the mouth with an arrow, ideally infused with elemental damage for accuracy. Once the arrow connects, a fang will drop from the dragon and glide to the ground below. Mark the fall spot on your map and glide down quickly before it disappears. Each dragon can provide a fang about once every real-world ten minutes, so plan a rotation route between them to keep farming steady.
Here’s the list of dragon fangs in Tears of the Kingdom and what they do when Fused with a weapon:
- Shard of Farosh’s fang: 20 Fuse attack power
- Shard Naydra’s fang: 20 Fuse attack power
- Shard of Dinraal’s fang: 20 Fuse attack power
- Shard Light Dragon’s fang: 16 Fuse attack power, imbues weapons with a healing effect (restores a quarter of a heart per hit)

Dragon fangs are obtained by hitting the dragon’s mouth. Now, there’s an intricacy at play here, as you’ll need to hit the lower jaw to farm dragon fangs. If you aim higher, you’re likely to get a dragon scale instead, since it’ll be considered an area of the larger body.
I recommend moving towards the dragon’s head, dropping into the air, and immediately aiming with your bow so you can slow down time. Then, aim at the lower half of the dragon’s mouth, and the item will drop.
The dragon fang will stay in place for a few seconds. If you don’t pick it up on the spot, it will start falling towards the ground. You can either skydive and pick it up in the air, or grab it once it hits the surface.
Dragon parts effects and uses
Dragon parts such as scales, claws, fangs, and horns each have distinct properties that make them valuable for crafting, upgrading armor, and cooking powerful elixirs. Scales and claws are often used to enhance armor sets linked to each dragon’s element, while horns yield high-potency material bonuses in elixirs. Fangs typically provide strong attack boosts, and shards from dragon spikes or horns can greatly extend the duration of potion effects. Knowing the right use for each part helps maximize their benefits and reduce farming time.
Weapon Fusing
Fusing a dragon part with a weapon increases its attack power, gives the weapon higher durability, and infuses the weapon with the element associated with the dragon: lightning for Farosh, frost for Naydra, and fire for Dinraal. All Light Dragon parts also imbue your weapon with a healing effect.
Below are some suggestions for Fused weapons using dragon parts:
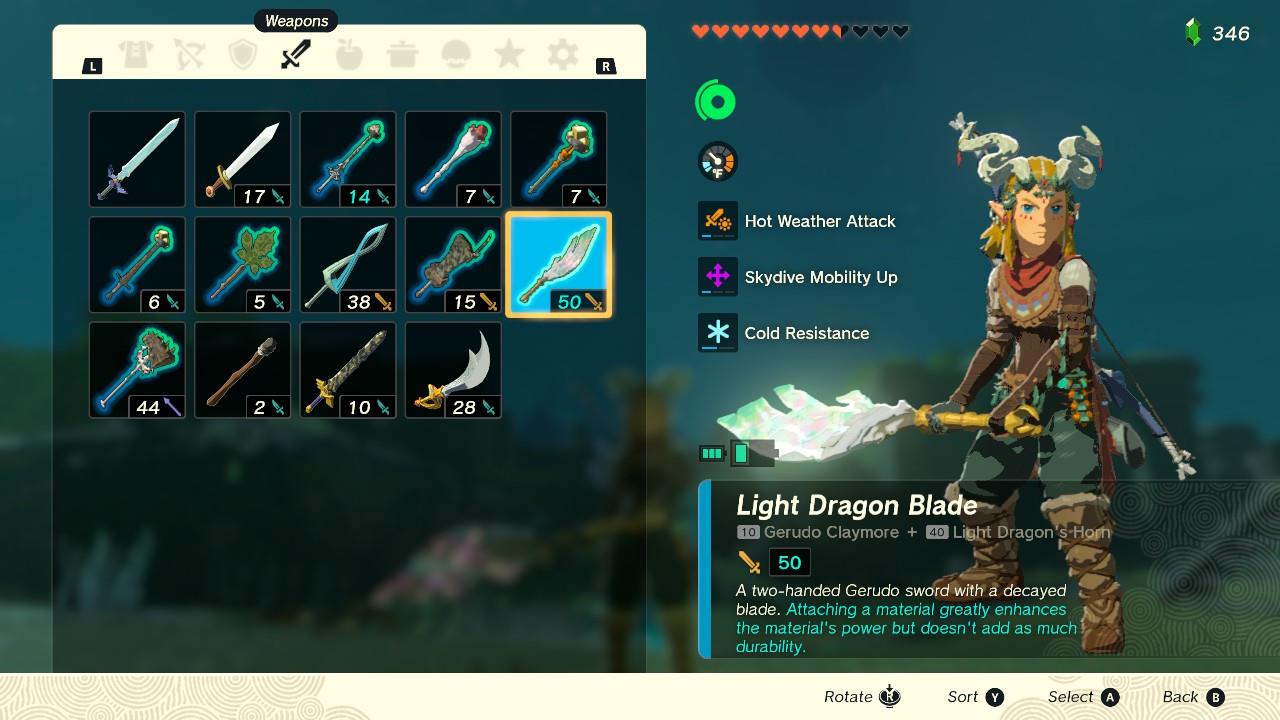
- Master Sword and Light Dragon’s Horn: Adds 20 fuse attack power on top of the Master Sword’s base stats, and heals a quarter of a heart per hit.
- Farosh Hammer: Infuses a sword with lightning damage. Combining a Gerudo Claymore with a Shard of Farosh’s Spike led to a weapon with 42 fuse attack power.
- Naydra Spear: Infuses a spear with frost damage. Combining a Royal Guard’s Spear and Naydra’s Claw led to a weapon with 33 fuse attack power.
Cooking elixirs and food
Cooking food and elixirs with dragon parts provides great boosts to your recipe and often leads to a “Critical Success,” which will give the meal an additional bonus effect such as increased stamina recovery or effect duration depending on what you cooked.
Dragon horns are particularly useful for recipes, as they give you the biggest increases for heart recovery and effect duration.
- Dragon horns: 30 minutes effect duration, 3 3⁄4 heart recovery
- Dragon fangs: 10:30 minutes effect duration, 2 2/4 heart recovery
- Dragon claws: 3:30 minutes effect duration, 2 heart recovery
- Dragon spikes: 1:50 minutes effect duration, 0 heart recovery
- Dragon scales: 1:30 minutes, 1 1⁄4 heart recovery
Below are some suggestions for recipes using dragon parts:
- Energizing meat and seafood fry: 1 raw meat, 1 bright-eyed crab, 1 Hylian shroom, and 1 Shard of Naydra’s Spike. Using a dragon part increases the amount of stamina you regain from the recipe.
- Fish and mushroom skewer: 1 hearty bass, 2 golden apples, 1 sunshroom, and 1 Shard of Light Dragon’s fang. Grants 13 2/4 heart recovery.
- Spicy elixir: 1 Bokoblin horn, 1 warm darner, and 1 Light Dragon’s Horn. Grants 30 minutes of cold resistance, as well as 3 3⁄4 heart recovery.
- Warding meat skewer: 1 raw meat, 1 dark clump, and 1 Naydra’s Claw. Grants 11:30 minutes of gloom resistance, as well as 4 heart recovery.
Upgrading armor
Best dragon to farm for scales and claws
Naydra is the best dragon to farm for scales and claws in The Legend of Zelda: Tears of the Kingdom due to its short, predictable loop over accessible terrain near Kakariko Village.
Why Naydra
Naydra emerges from East Hill Chasm, flies west over Mount Lanayru and Kakariko, then loops back through Naydra Snowfield Chasm, making it easy to spot and board repeatedly without long travel. Scales drop from hitting its body anywhere, while claws come from targeting its feet-both straightforward when landed on its back. Its morning spawn lets players fast travel to Kakariko Tower, rest until dawn, and harvest every 10 minutes for efficient cycles.
Comparison to Others
| Dragon | Scale/Claw Access | Path Accessibility | Drawbacks |
|---|---|---|---|
| Naydra | Easy (body/feet) | High (Kakariko) | Cold weather prep |
| Dinraal | Similar | Medium (Eldin) | Fireballs burn wood bows |
| Farosh | Similar | Low (Hylia/Gerudo) | Lightning storms risky |
| Light | Similar (talons) | Variable (loops) | Harder to predict early |
Which dragon drops the most scales per minute
Naydra drops scales at the highest rate per minute in The Legend of Zelda: Tears of the Kingdom due to its short, accessible flight loop allowing the fastest harvest cycles.
Why Naydra Excels
All dragons yield one scale per body strike every 10 real-time minutes, so efficiency hinges on how quickly players can spot, board, strike the body (melee or arrow), collect the glowing scale, and repeat. Naydra’s predictable path over Kakariko Village-emerging from East Hill Chasm around dawn-enables 6+ cycles per hour via fast travel, resting at a fire, and minimal travel, outpacing others.
Rate Comparison
| Dragon | Cycle Time (Spot-to-Harvest) | Scales/Hour Estimate | Key Factor |
|---|---|---|---|
| Naydra | 1-2 min | 30-36 | Short loop, easy access |
| Dinraal | 3-4 min | 15-18 | Northern spawn, longer flight |
| Farosh | 4-5 min | 12-15 | Stormy path, distant chasms |
| Light | Variable (2-5 min) | 12-24 | Endless loop, tracking needed |