Hidden high above Hyrule’s frozen peaks, the Mayaumekis Shrine challenges players to master the art of downward force. This guide reveals how to reach its soaring platform and solve every gravity-defying puzzle inside.
When you’re done, our shrine locations page or interactive Hyrule map can direct you toward something else to do.
Mayaumekis Shrine location
Mayaumekis Shrine is located in the Hebra Mountains Sky region at coordinates (-2948, 3050, 0896). You can reach it by gliding southeast from the Rospro Pass Skyview Tower. The shrine sits on a floating island, so use the tower’s launch to gain height, then steer toward the glowing structure visible among the nearby sky islands. Bring enough stamina or food boosts for extended gliding, as the distance is substantial.
The Mayaumekis Shrine is found within the Hebra Mountains Sky region in the Rising Island Chain. It is located below The Wind Temple at a lower altitude and slightly northwest. The exact coordinates are (-2947, 3051, 0897).
You can find it easily while completing the “Tulin of Rito Village” quest chain. The shrine will be accessible just after the cutscene where a voice beckons Tulin and Link to go to the giant floating ship. After the scene ends, run up the stairs and then use the trampoline at the top to launch into the air. From there, you can glide right to the entrance of Mayaumekis Shrine.
Mayaumekis Shrine ‘Downward Force’ walkthrough
Mayaumekis Shrine challenges you to use air currents and precision timing to control falling objects. Begin by gliding across the wind streams to reach the main platform, then shoot the switch to release the ball. Use the wind from your paraglider’s lift to guide the ball into the goal below. Watch the timing carefully, as missing the switch or the gust pattern can reset your progress. After completing the puzzle, collect your reward from the chest before activating the shrine’s exit.
This shrine is basically one big trampoline gym. Be ready to get springy with it. It’s a fun one!
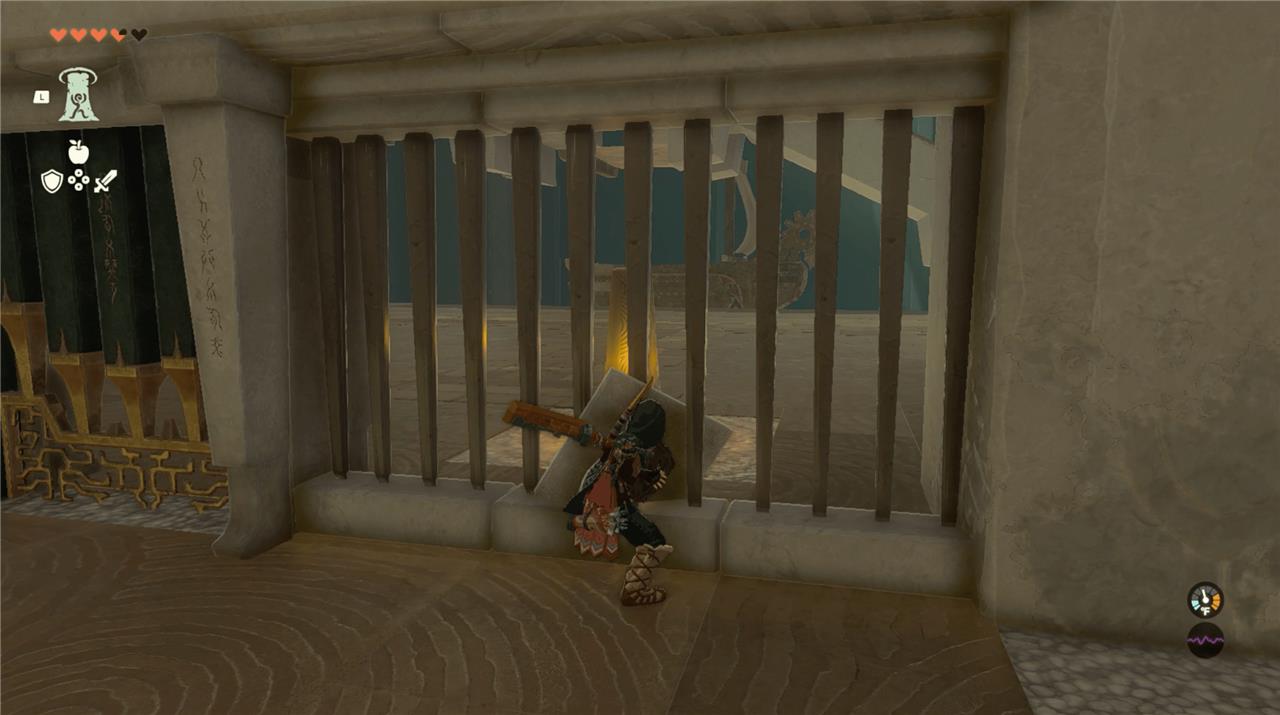
1. You start this shrine trapped inside a room. First, walk over to the wall with bars. On the right side of that barred wall, you can see a glowing yellow rock/switch sitting just beyond it on the other side. Hit that rock and the door will open. We used a charged spin attack to hit the yellow rock, but you’re welcome to try any other means like a bow and arrow.
2. Enter the next room and walk up the stairs. Defeat the Construct at the top. From there, use a trampoline that will launch you up through the hollow middle of another higher level. Land on the large square platform you got shot through.
3. That platform also has a trampoline. Go ahead and jump on it again, then glide. Immediately look for a floating boat slightly in the distance. It should be easy to spot as you spring up, but it will be moving slowly in a circle. Land on its trampoline and spring up into the air again!
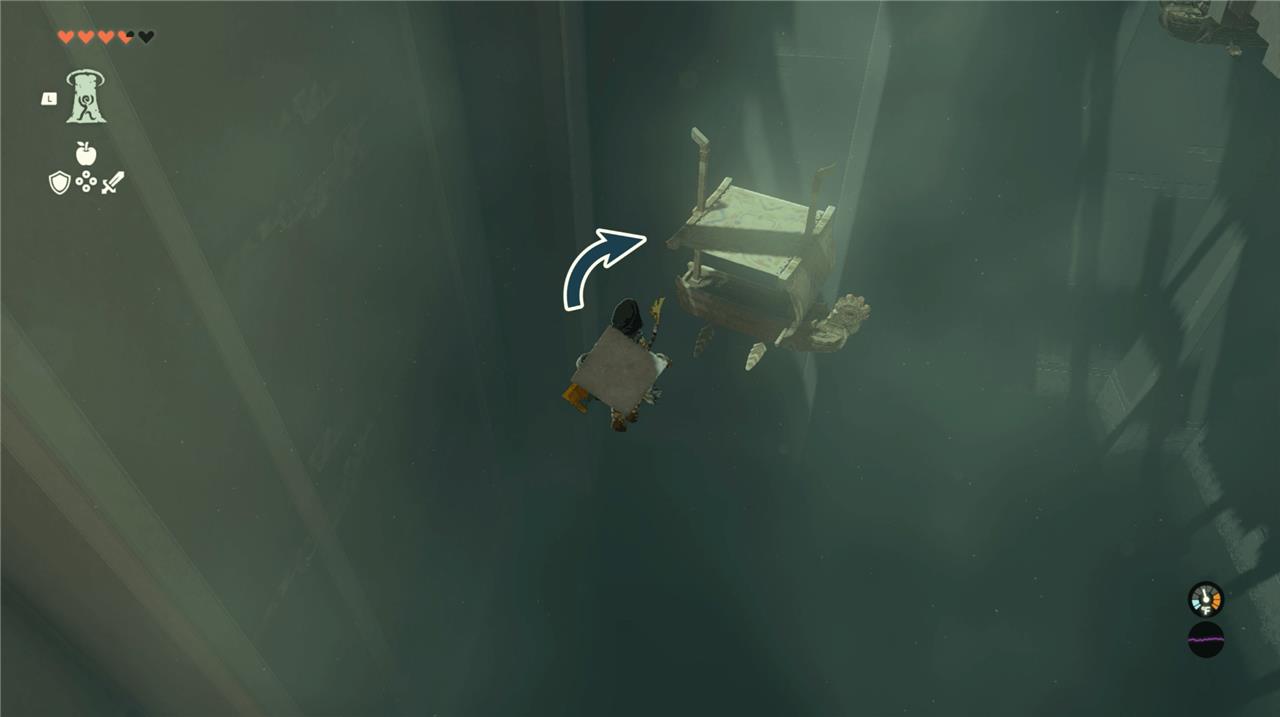
4. Close to the floating boat and trampoline you just used, there’s a large square platform with another trampoline attached. Glide over to it and land there.
How to get the Mayaumekis Shrine chest
After riding the first few trampolines and landing on the main square platform, face the route of the circling boat and look up toward the back corner to spot the chest platform. Use the trampoline on your current platform to launch yourself, glide onto the moving boat, then bounce again to gain enough height to reach the corner platform and open the chest for 10 arrows.
1. Turn and look in the direction of where the circling floating boat is. If you look up and into the corner, you will see a chest, as pictured below.
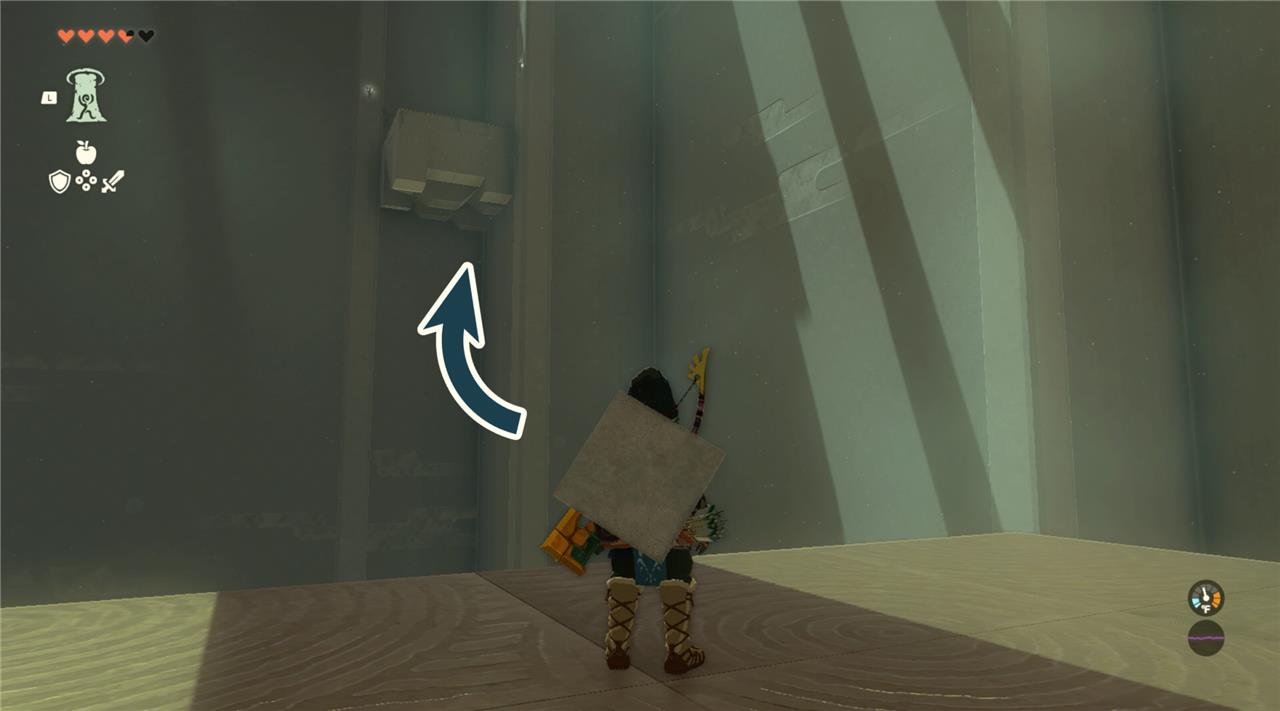
2. Use the trampoline on the platform you’re currently standing on to launch into the air. Then glide over to the moving boat to get another boost. That will get you high enough to land on the platform with the chest. (We tried directly gliding over using the attached trampoline, but we didn’t get enough height. So make sure you get that extra boost in with the moving floating boat.) Open it to get 10 arrows.
3. Glide back down to the platform you arrived on.
4. Use the trampoline again. As you jump, you’ll see a portion of the wall closest to you blocked off with metal bars. There is another yellow rock/switch behind them. Pull the bow mid-air to activate slow-mo aiming, then fire an arrow through the bars to hit the rock.
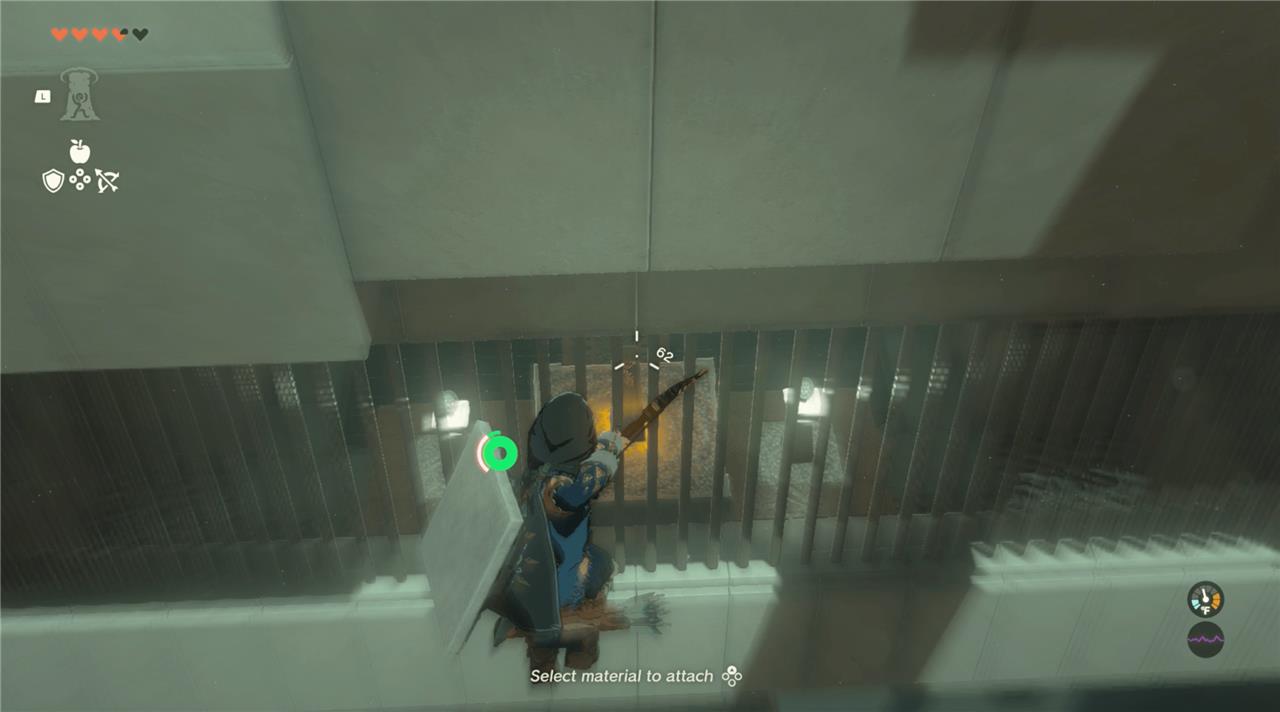
5. Once you hit it, the rock will emanate a greenish-blue light and a cutscene will show a trap door opening. (If you don’t get it at first, don’t sweat it. You can just bounce up and down until you land a shot.)
How to get to Rising Island Chain from Rito Village
To reach the Rising Island Chain from Rito Village in The Legend of Zelda: Tears of the Kingdom, progress through the “Tulin of Rito Village” main quest until Tulin joins you after retrieving his bow from the Aerocuda atop the snowy peak near the village.
Starting the Journey
Follow Tulin eastward from the peak platform. Use his gust ability (activated by aiming your bow in the air) to glide across gaps to the first set of ruins on a distant mountain. Climb using Ascend on stacked blocks, defeat any Constructs, and open chests like the one with a Zonaite Sword along the way.
Navigating to the Chain
Continue north along more ruins, then up snowy slopes to a higher platform. Glide with Tulin’s wind to the next island, climb pillars, and speak to Huck the Rito near a tower ruin. Ascend repeatedly through the ruins to the top, then glide and Ascend again to enter the Rising Island Chain proper, marked by a cutscene overlooking the storm clouds.
Key Tips
Wear cold-resistant gear like the Snowquill Set for Hebra’s chill. Rely on Tulin’s gust for long glides between trampoline-like boat sails and platforms; defeat Soldier Constructs as needed. The chain leads northwest toward Mayaumekis Shrine first.
How to complete Tulin of Rito Village quest
To complete the “Tulin of Rito Village” main quest in The Legend of Zelda: Tears of the Kingdom, start by speaking to Teba at the village’s flight range platform (coordinates around -3601, 1802, 0212). You’ll need cold resistance gear like the Snowquill Set for the Hebra Mountains.
Find Harth
Glide or travel northeast from Rito Village to Hebra Trailhead Lodge (near two fires). Talk to Harth inside about Princess Zelda sightings.
Locate Tulin
Head north from the lodge to Cecili at (-3514, 2400, 0210), who directs you to Hebra South Summit Cave (marked by a bonfire). Enter, ride updrafts, light fires with Hylian Pine Cones and Flint for boosts, smash barrels/thorns, defeat enemies like Horoblins and Pebblits, exit, then climb Talonto Peak north to Tulin under a cedar tree at (-3147, 2703, 0568).
Recover Tulin’s Bow
Help Tulin fight Aerocudas; use his new wind gust ability (bow aim in air) to reach the platform, shoot the bow-holding Aerocuda, and retrieve it. Tulin joins you permanently.
Reach Rising Island Chain
With Tulin, glide/climb east/north via ruins, platforms, and Ascend on pillars. Speak to Huck near a tower, continue northwest using gusts on trampoline sails and boats to the chain’s sky islands, passing Mayaumekis Shrine (-2949, 3048, 0896).
Enter Wind Temple
Follow Tulin to the large sky island with a spiral staircase and ship. A voice draws him into the storm cloud; enter the Great Sky Island’s Wind Temple, solve five turbine puzzles by firing Recall on fans to align them, then defeat Colgera (dodge dives, shoot weak points/mouth with eyes exposed).
Quest Completion
Clearing the temple stops the blizzard. Return to Rito Village (fast travel via shrine/tower), speak to Teba-quest ends, unlocking Tulin’s ability for future use.