Steel towers, silent streets, and danger around every corner-Pittsburgh hides more than just clickers. From hidden comics to Firefly pendants, every collectible tells a story of what’s been lost and what’s worth saving.
Once you finally get a working car, you’ll arrive in “Pittsburgh“, the fourth chapter of The Last of Us Part 1. In this chapter, you’ll need to find seventeen artifacts, three Firefly pendants, fifteen optional conversations, four training manuals, and four comics. The collectibles are spread out across four sections: Alone and Forsaken, Hotel Lobby, Financial District, and Escape the City. The game does not indicate to you when you’re moving onto a new section, but you can select and begin playing any section from the Chapters option on the main menu.
Read on to find out when each section begins and ends, and where all of the collectibles can be found in “Pittsburgh.”
Alone and Forsaken Collectibles
In the chapter “Alone and Forsaken,” players can find several collectibles scattered throughout the Pittsburgh section, including artifacts, Firefly pendants, comics, and training manuals. Carefully search abandoned buildings, wrecked vehicles, and side alleys, as many items are hidden off the main path. Pay close attention to notes and pendants left behind-they reveal extra story details about the city’s survivors. Thorough exploration not only helps complete the collection but also deepens the sense of place and history within this tense part of the game.
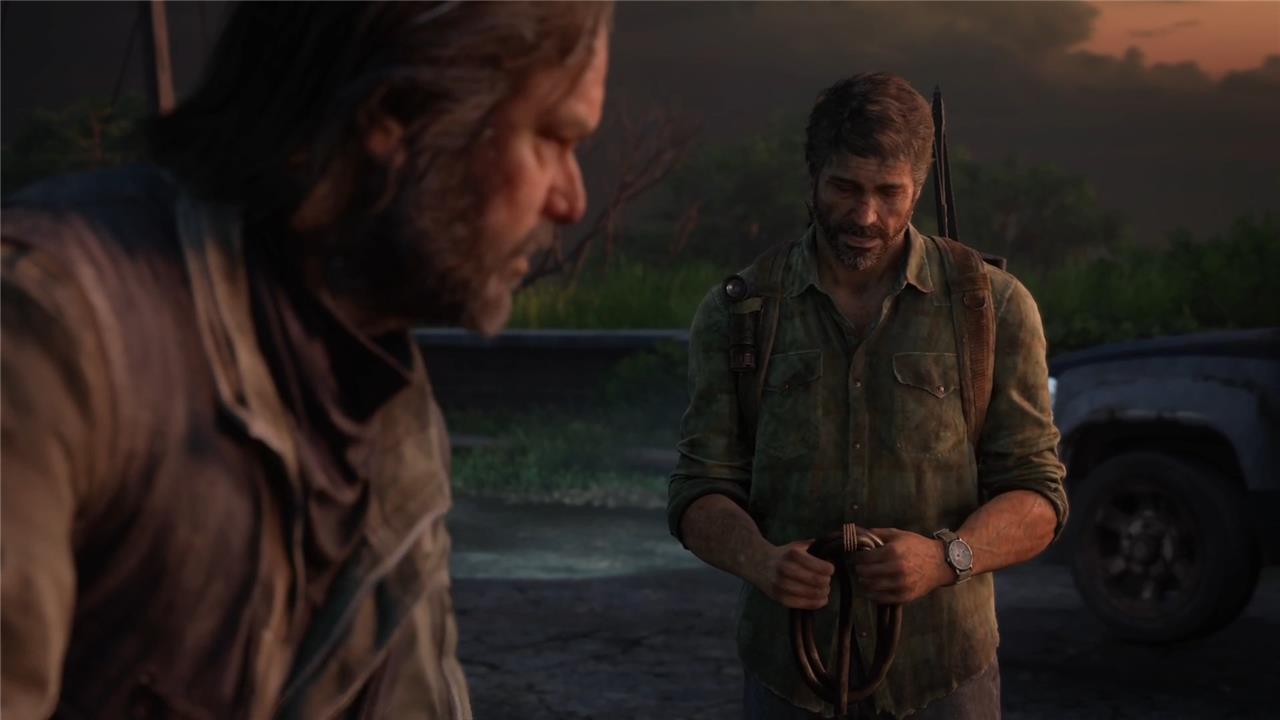
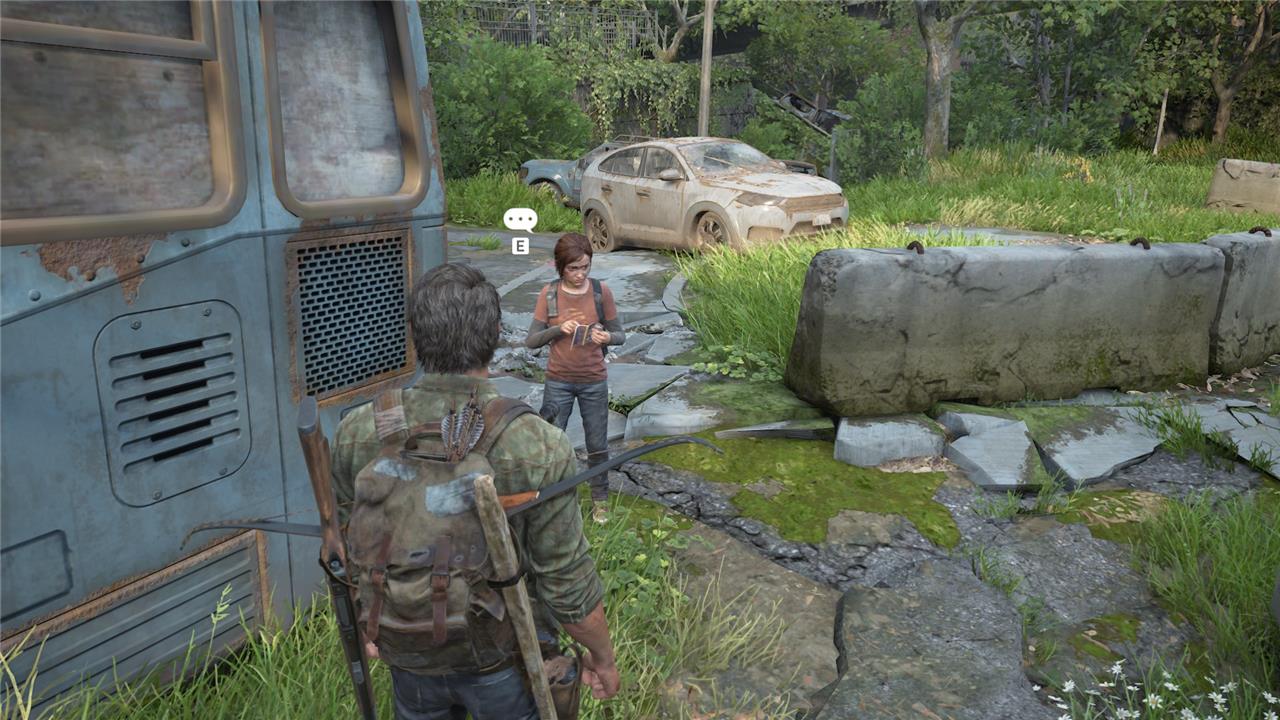
The “Alone and Forsaken” section of “Pittsburgh” starts with Joel and Ellie driving their car through PIttsburgh only to be attacked by people in the street. This section ends when you reach the hotel.
Siphon Hose Artifact Location
During the final “Bill’s Town” cutscene, Bill gives Joel the siphon hose to get gas from other vehicles on the road.
Force Carrier Comic Location
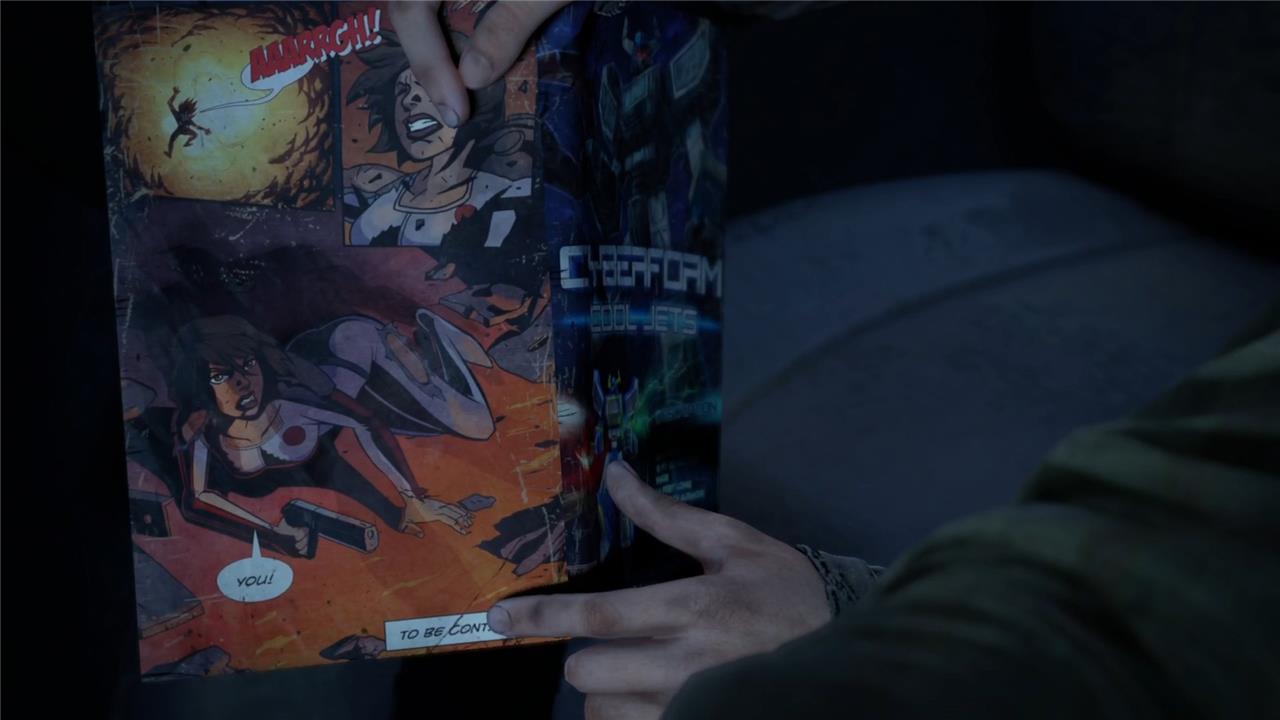
As Joel is driving up to Pittsburgh, Ellie shows Joel the Force Carrier comic that she stole from Bill.
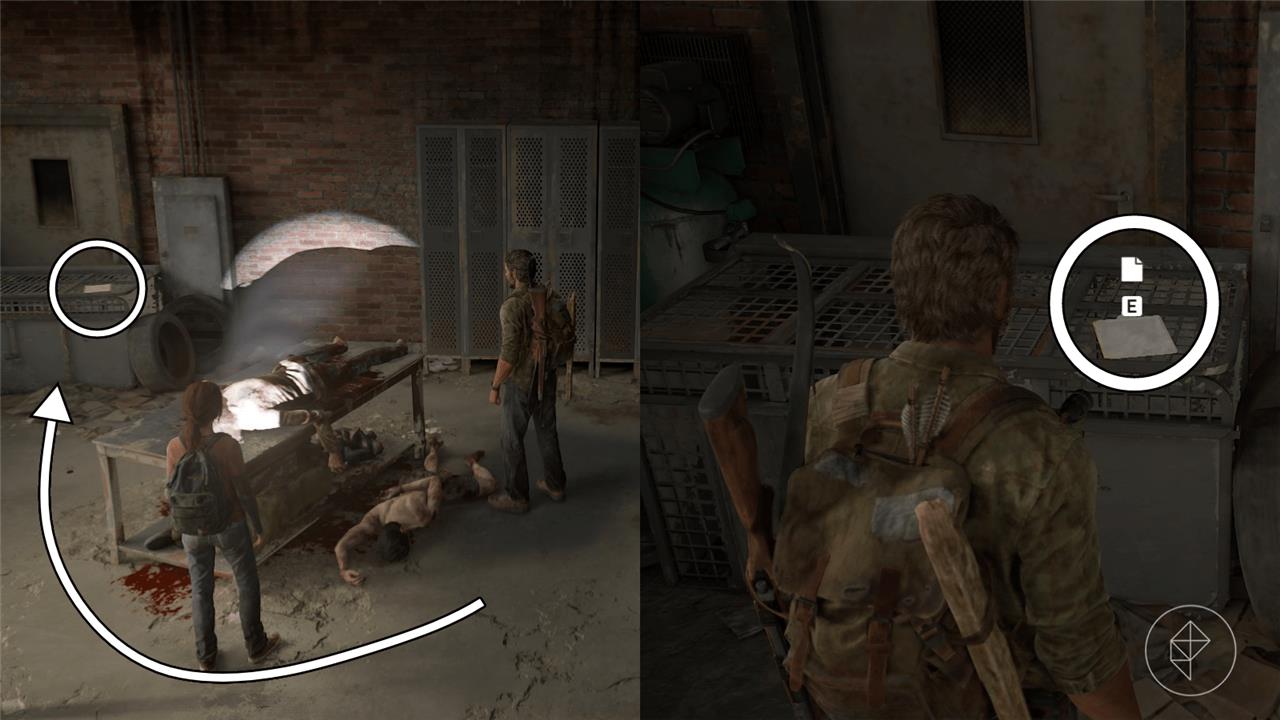
Optional Conversation 14 Location

After you defeat all of the enemies and enter the garage, you’ll find a couple corpses on tables and the floor. Interact with Ellie to start an optional conversation about what could’ve happened had they gotten caught.
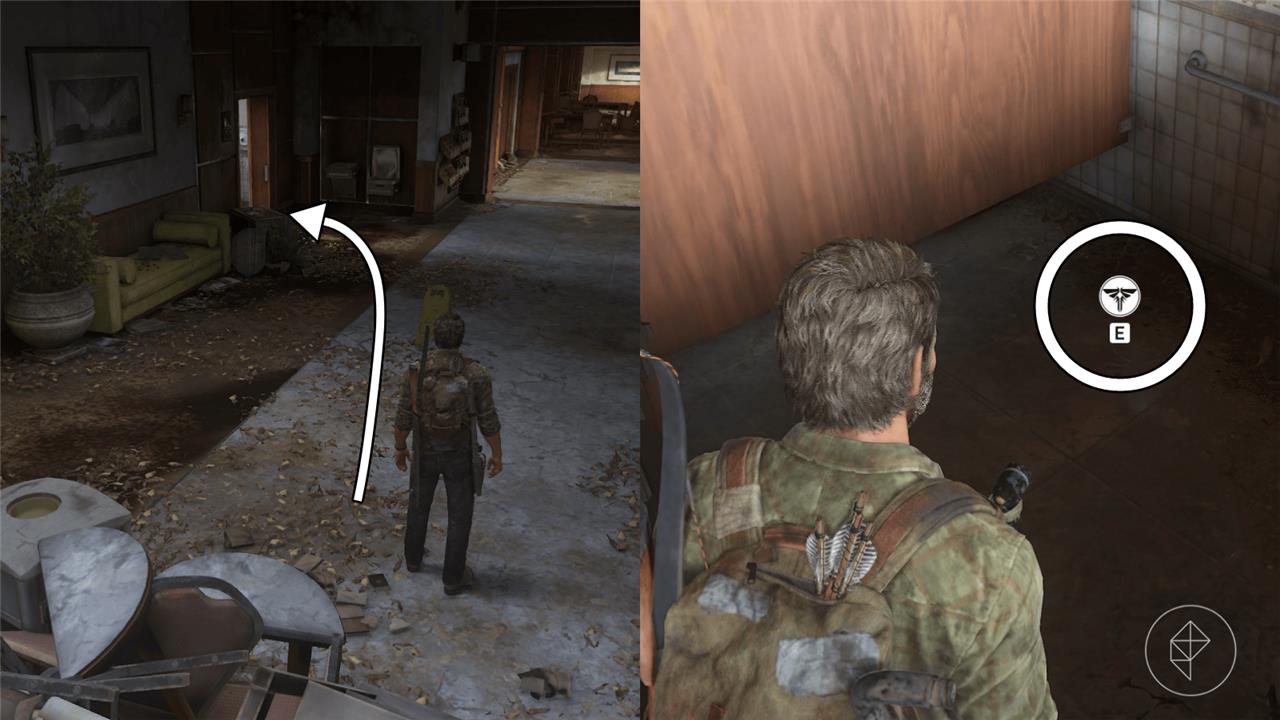
Tools Level 2 Location
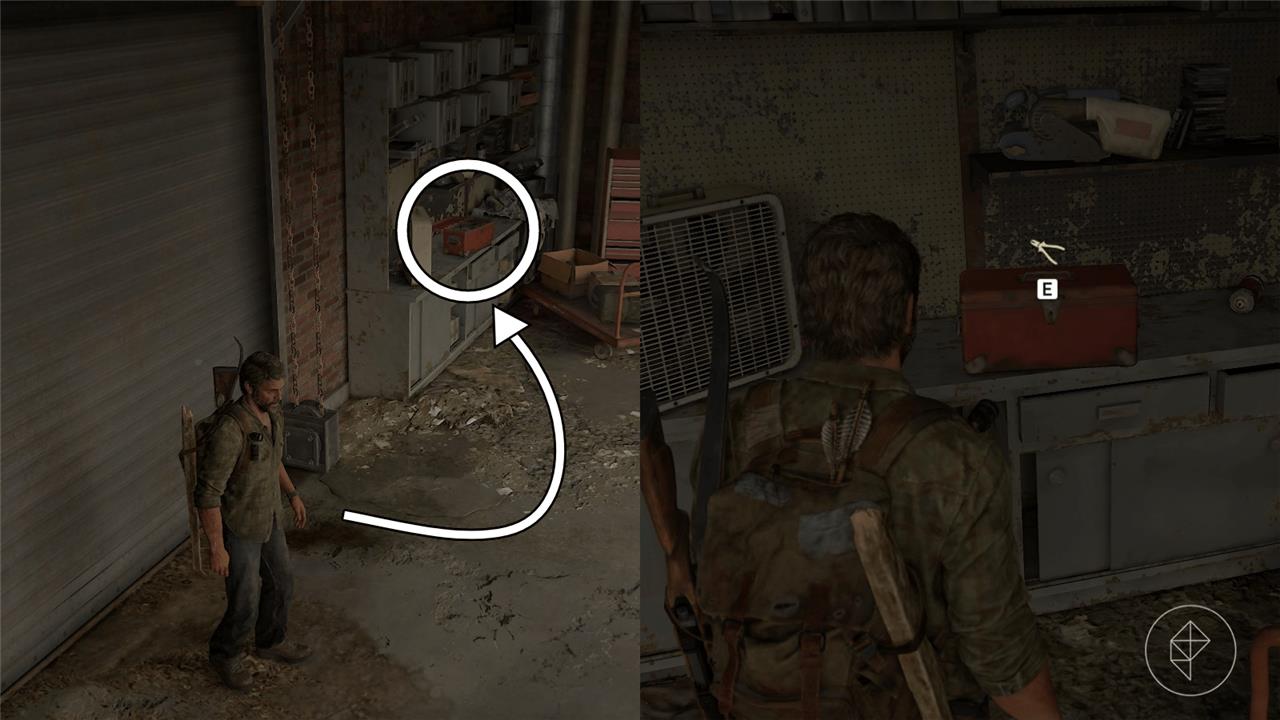
After entering the garage, turn to your left to find a toolbox containing the level 2 tools on a shelf.
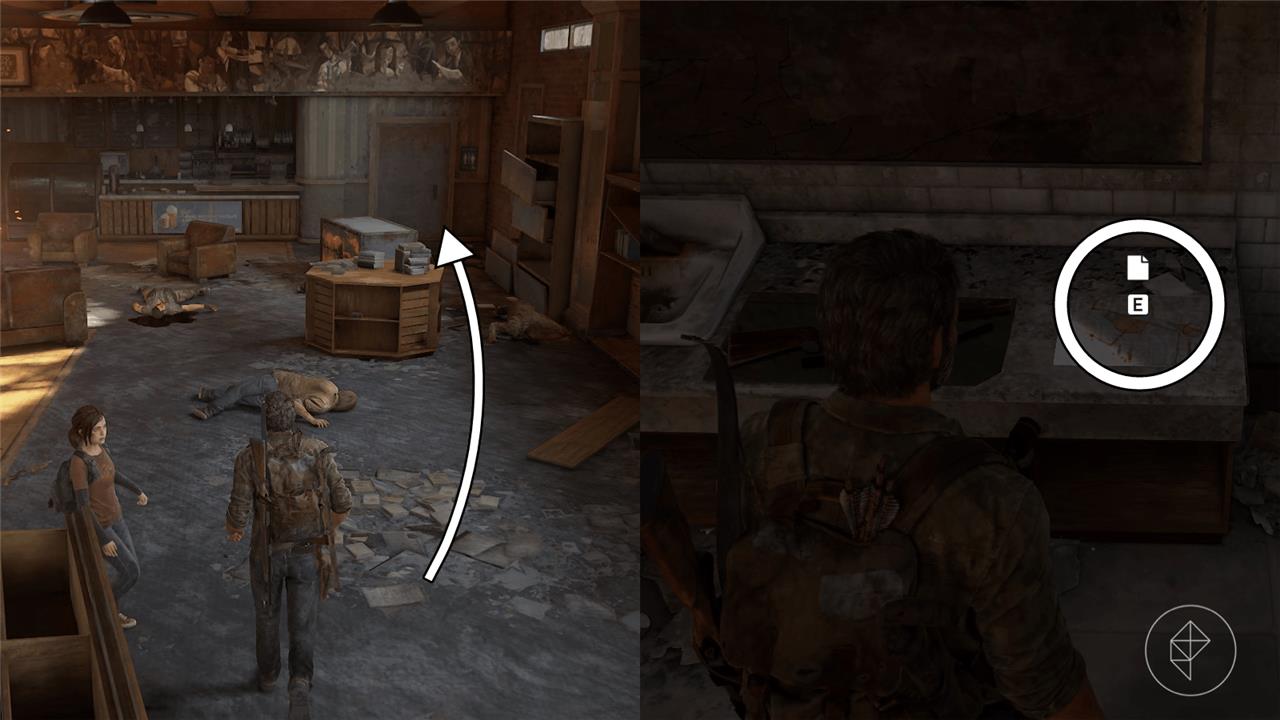
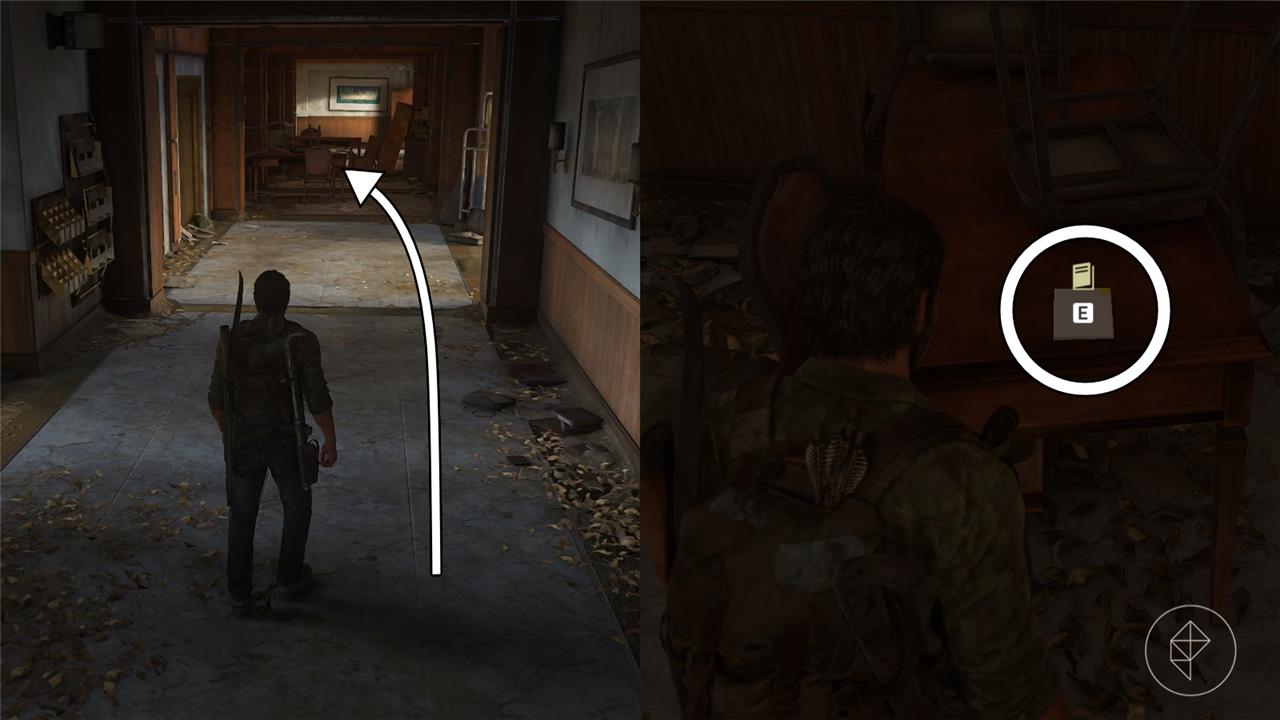
Tourists Manifest Artifact Location
If you turn right after entering the garage, you can find the Tourists Manifest artifact on a knocked over cage in front of a door.
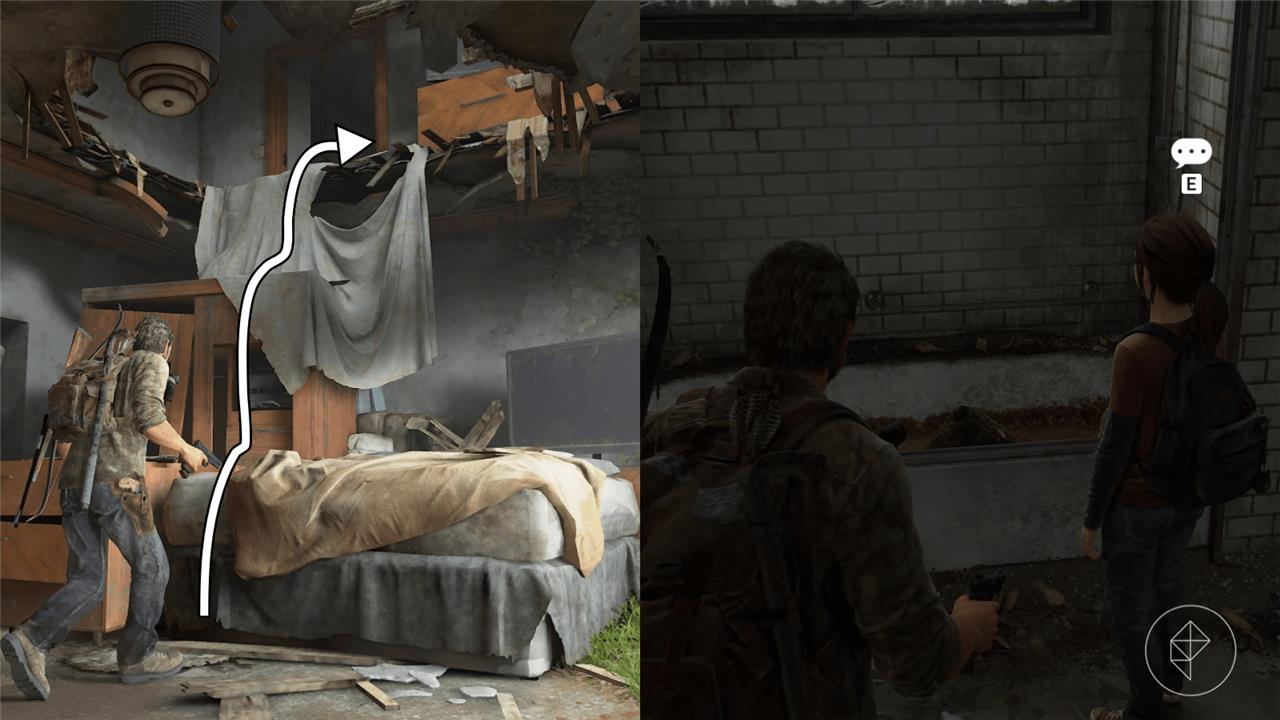
Health: Splinting Training Manual Location
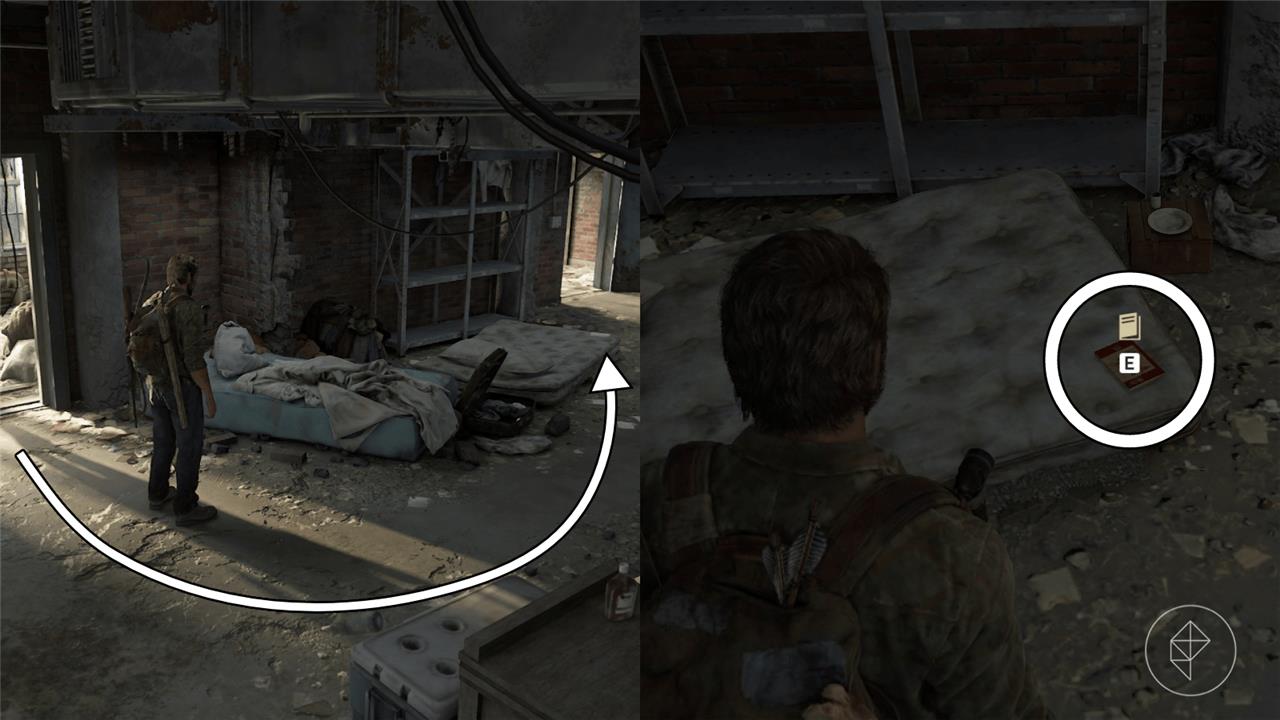
Head up the stairs from the garage, and enter the first room on your right. Find the Health: Sprinting Training Manual on the mattress to your left.
Ambush Map Artifact Location
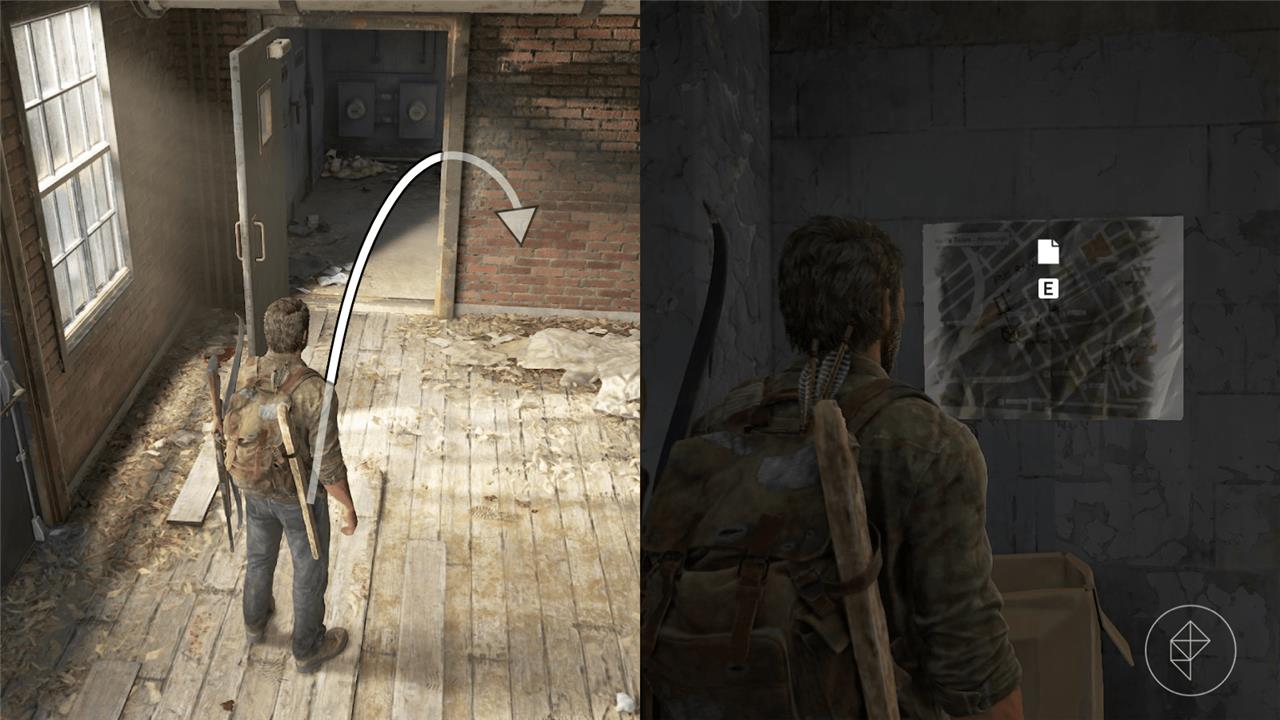
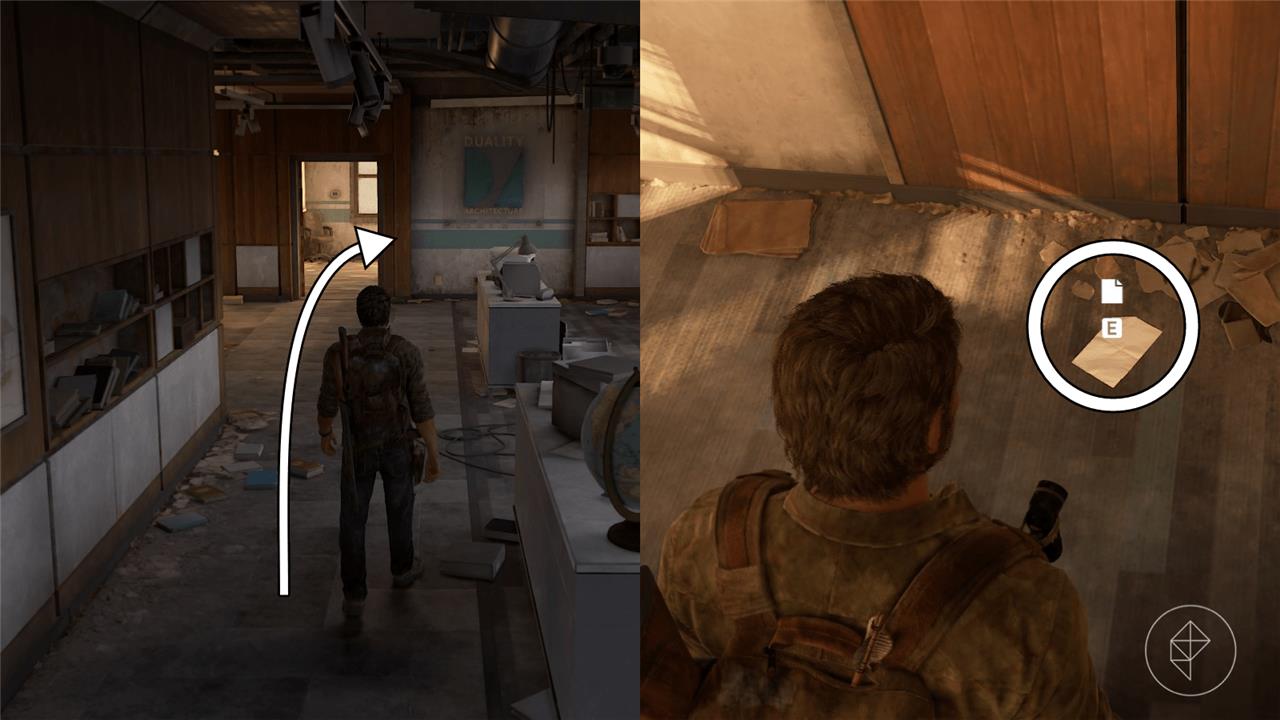
Head through the door at the end of the hall outside of the sleeping quarters. Immediately turn to the right to find the Ambush Map on the wall and the workbench along the adjacent wall.
Termination Shock Comic Location
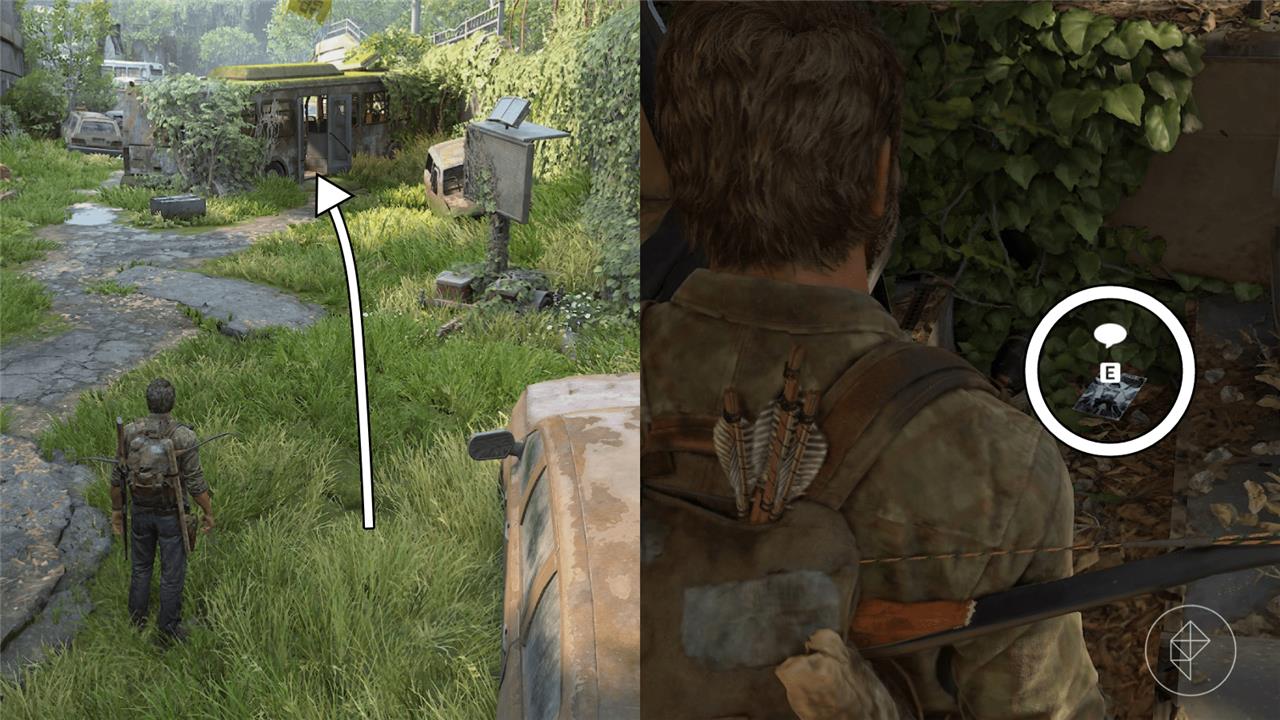
After you exit the building and descend down to the road, enter the crashed bus on the right side of the street. Immediately turn left to find the Termination Shock comic on the floor.
Optional Conversation 15 Location
Proceed up the street to find a corpse falling out of a brown car on the right side of the road. Interact with Ellie to start an optional conversation about what could’ve caused the person to die.
Optional Conversation 16 – Ellie’s Jokes 1 Location
After the three hunters leave, stick around the bus for a short amount of time until Ellie takes out her joke book. Interact with Ellie to hear one of Ellie’s jokes.
Optional Conversation 17 Location
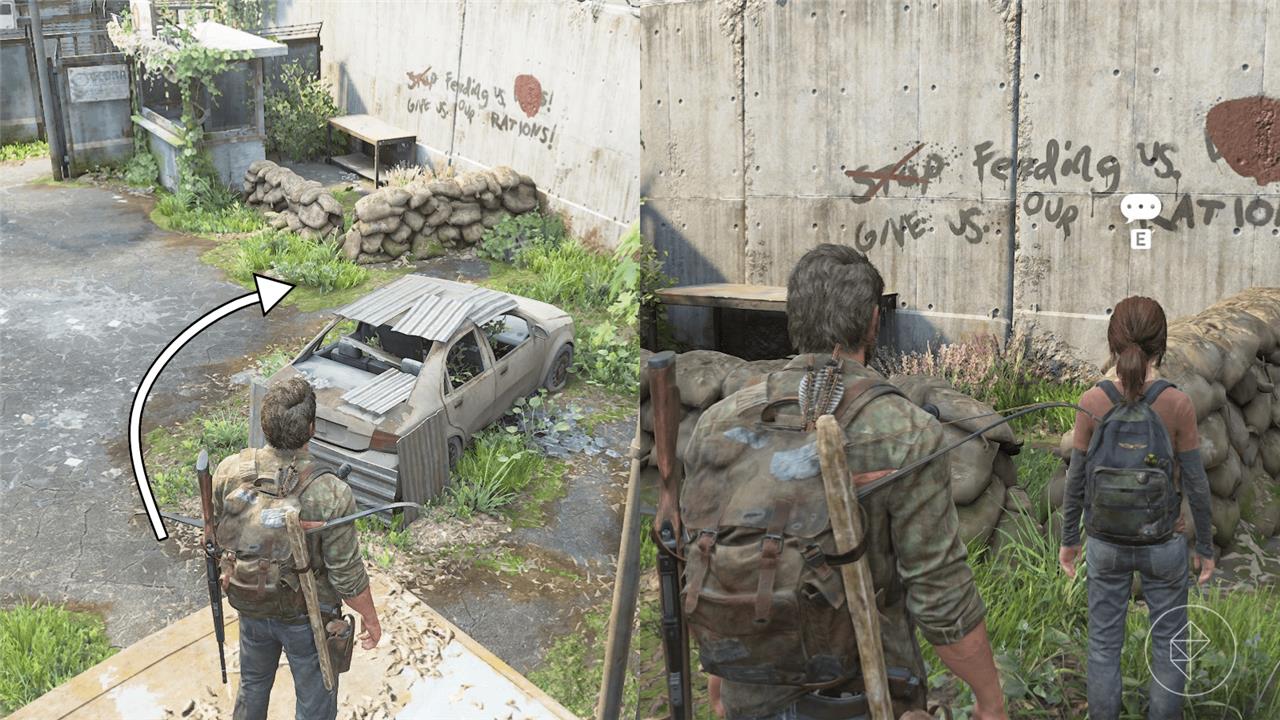
After the three hunters leave, hop onto the bus and drop down into the security checkpoint. Ellie will walk up to the the graffiti and comment on it, prompting an optional conversation. Interact with her to talk about rations and how it was done in Boston.
Don’t wander off too far, though, because the next collectible is very close by.
Lost Hill Note Artifact Location
After you drop down from the bus, hop over the sand barricade and enter the guard booth to find the Lost Hill Note on the floor inside.
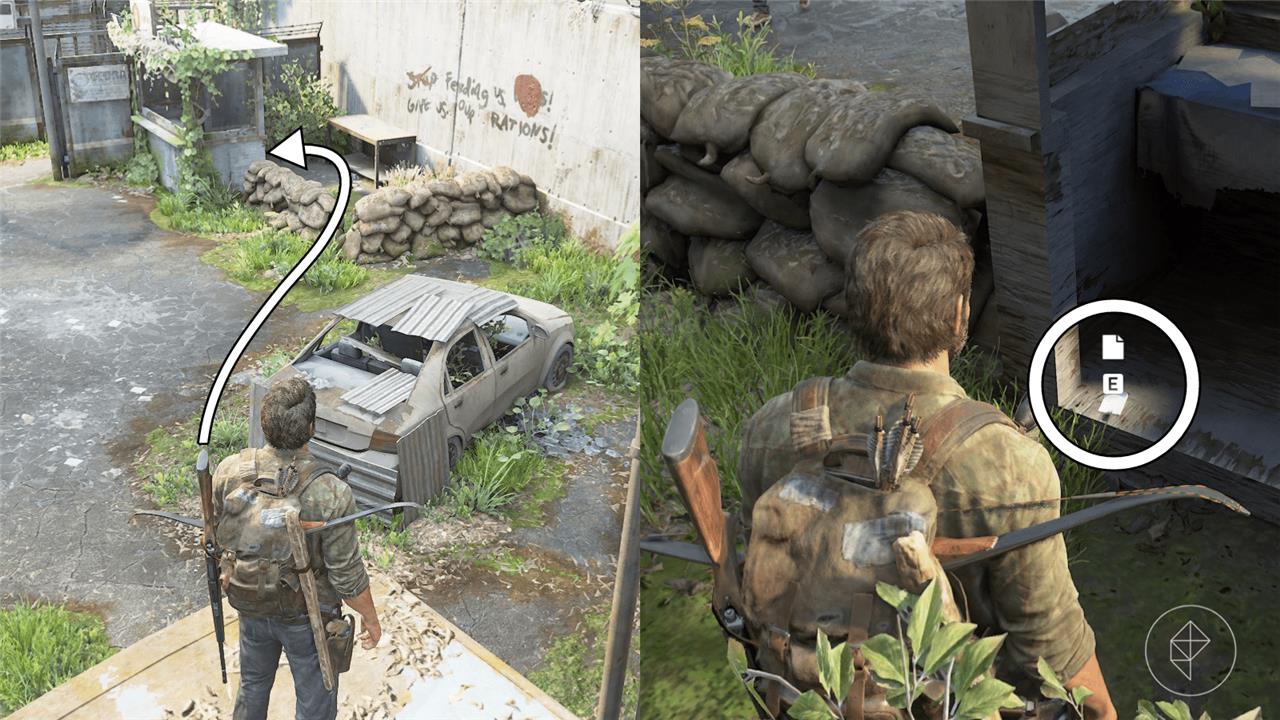
Traitors Flyer Artifact Location
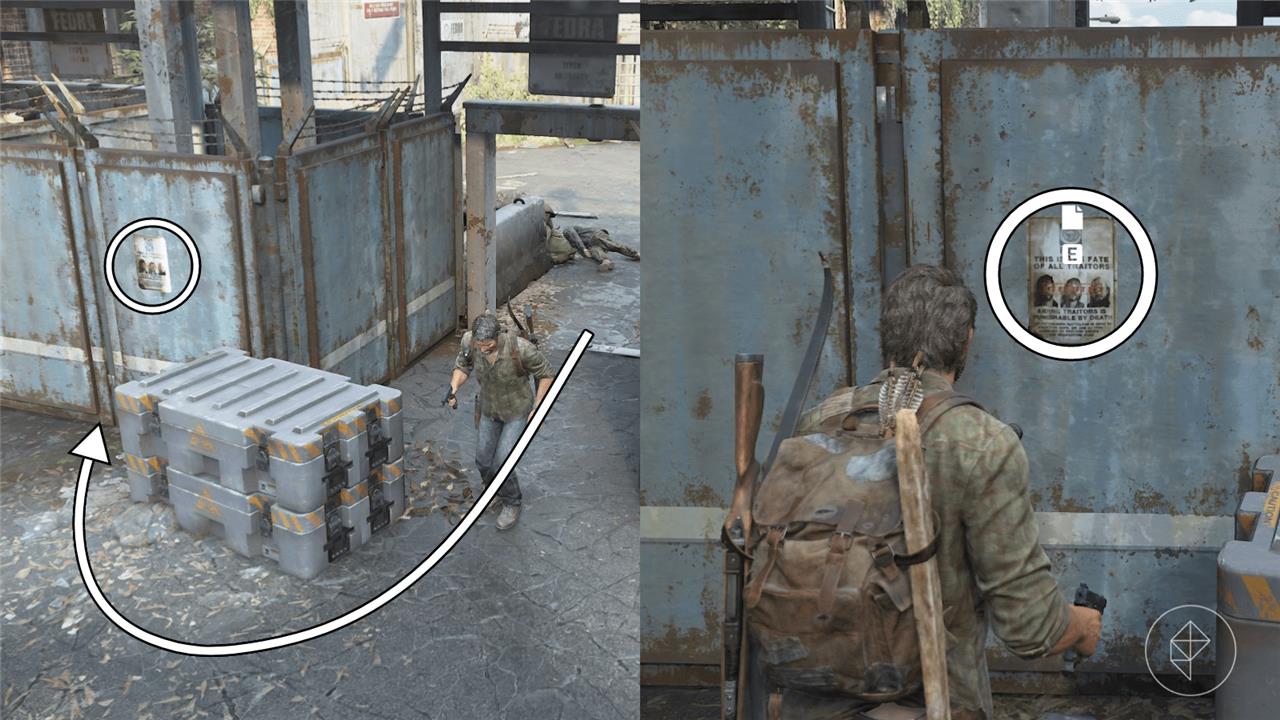
After you proceed through the turnstile, you’ll encounter three hunters outside. As soon as you enter the outdoor area with the tarp-covered pavilion, take note of the Traitors Flyer that is on the metal barricade wall directly to the right. Take out all of the hunters outside before returning to the artifact.
Kazden Risk Firefly Pendant Location
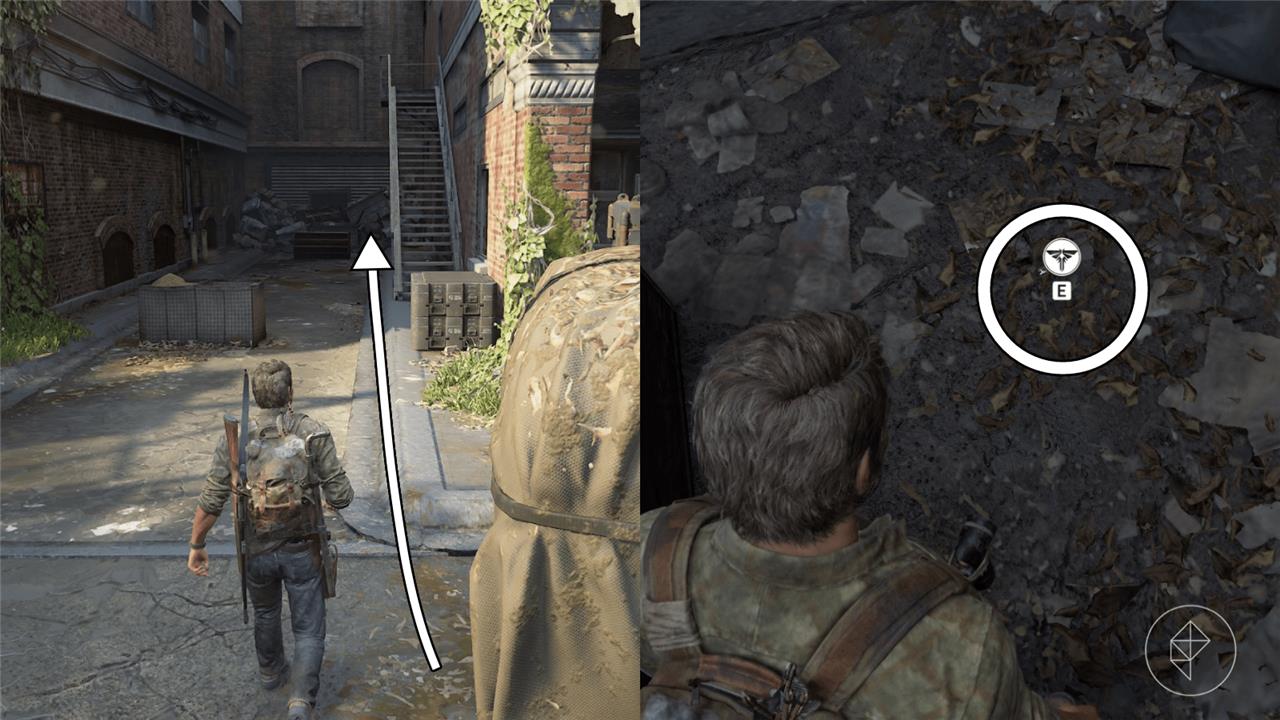
Once all of the hunters outside have been dealt with, continue along the outside of the bookstore to find an alleyway. Proceed down the path and search behind the knocked over shelf to find the Kazden Risk Firefly pendant on the floor.
Optional Conversation 18 – Ellie’s Jokes 2 Location
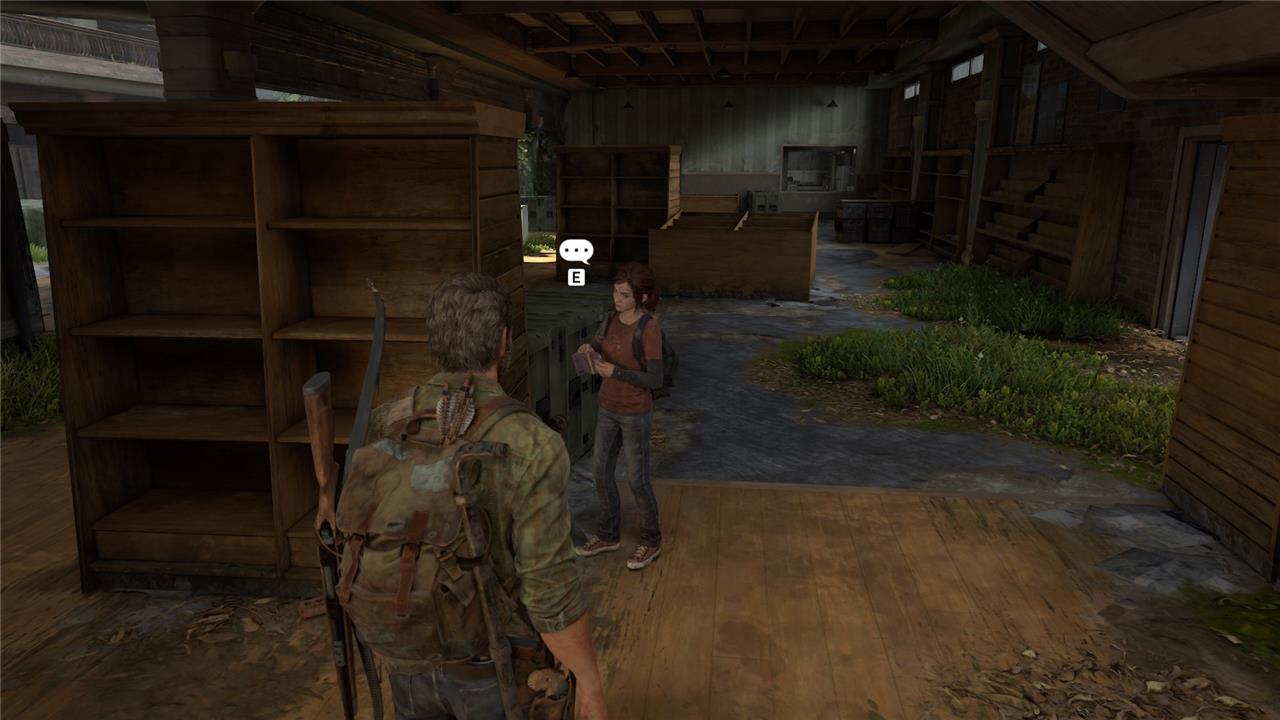
After you defeat all of the hunters inside of the bookstore, you’ll start searching around for the collectibles in the area, but Ellie will grow tired of waiting and crack out her joke book. Interact with her to hear some of Ellie’s jokes from her book.
Applicant Checklist Artifact Location
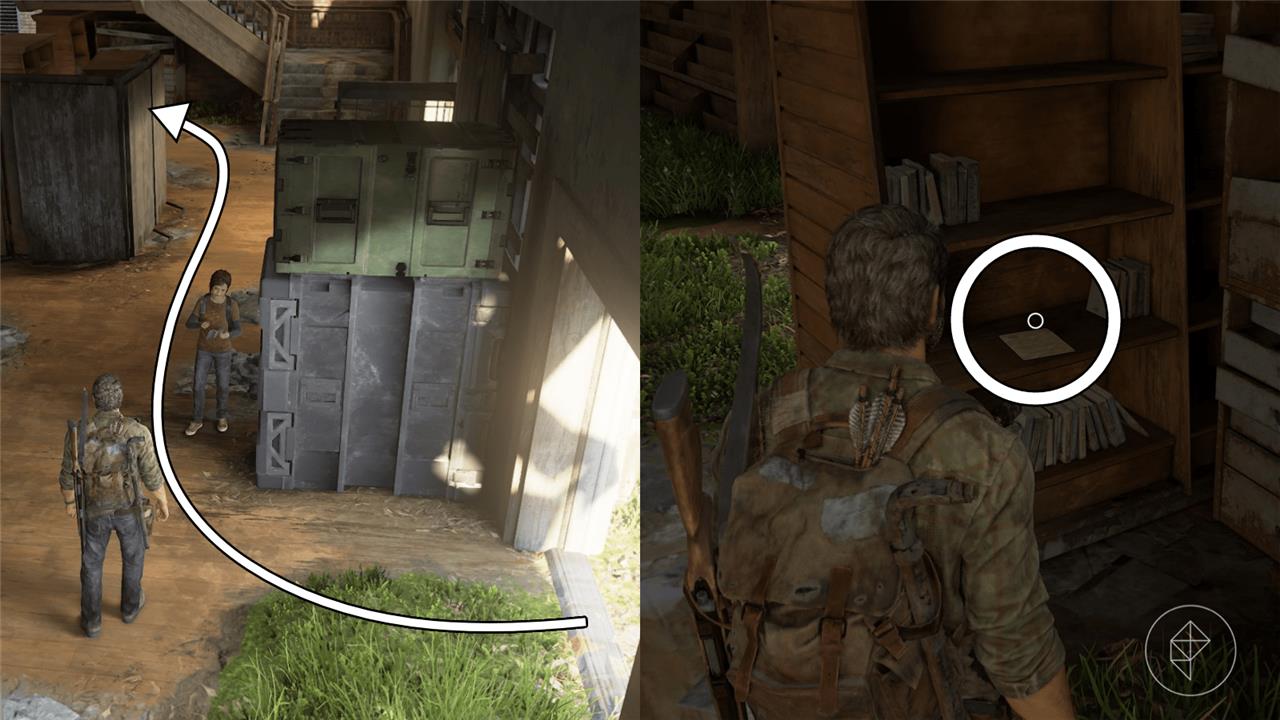
Return to the entrance of the bookstore, and turn right towards the stairs in the corner. Search the bookshelves underneath the stairs to find the Applicant Checklist on one of the shelves.
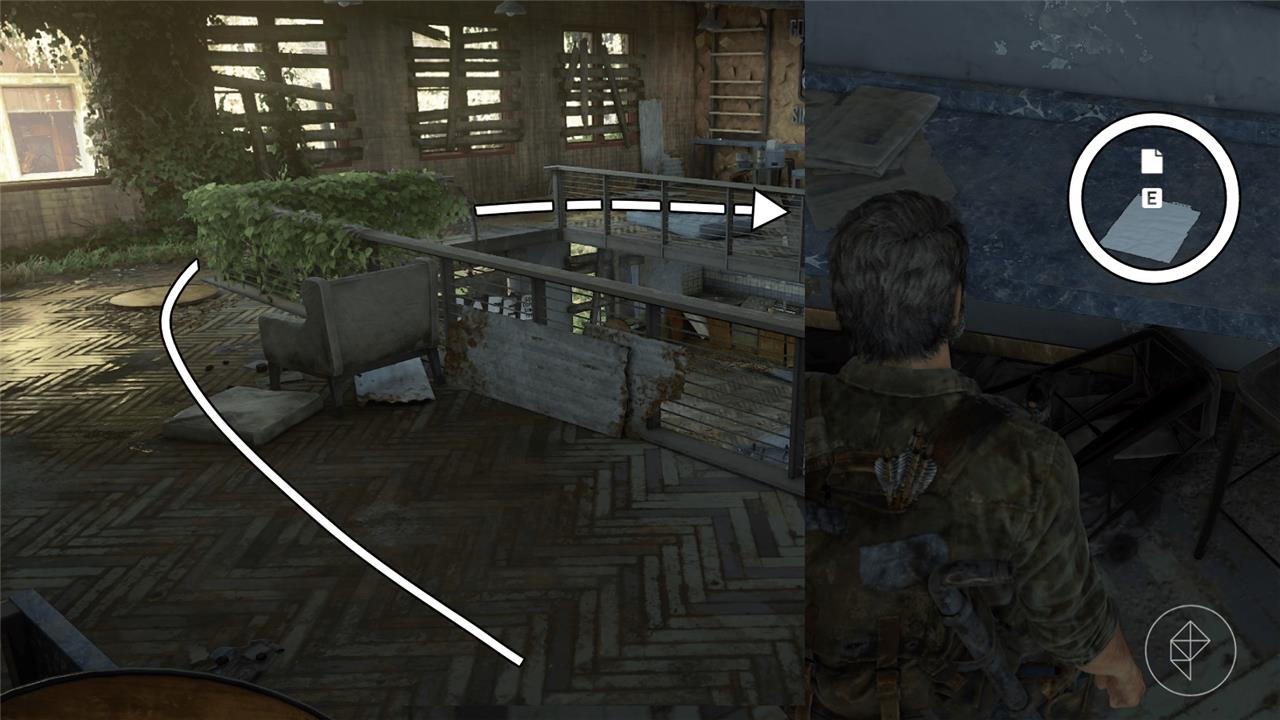
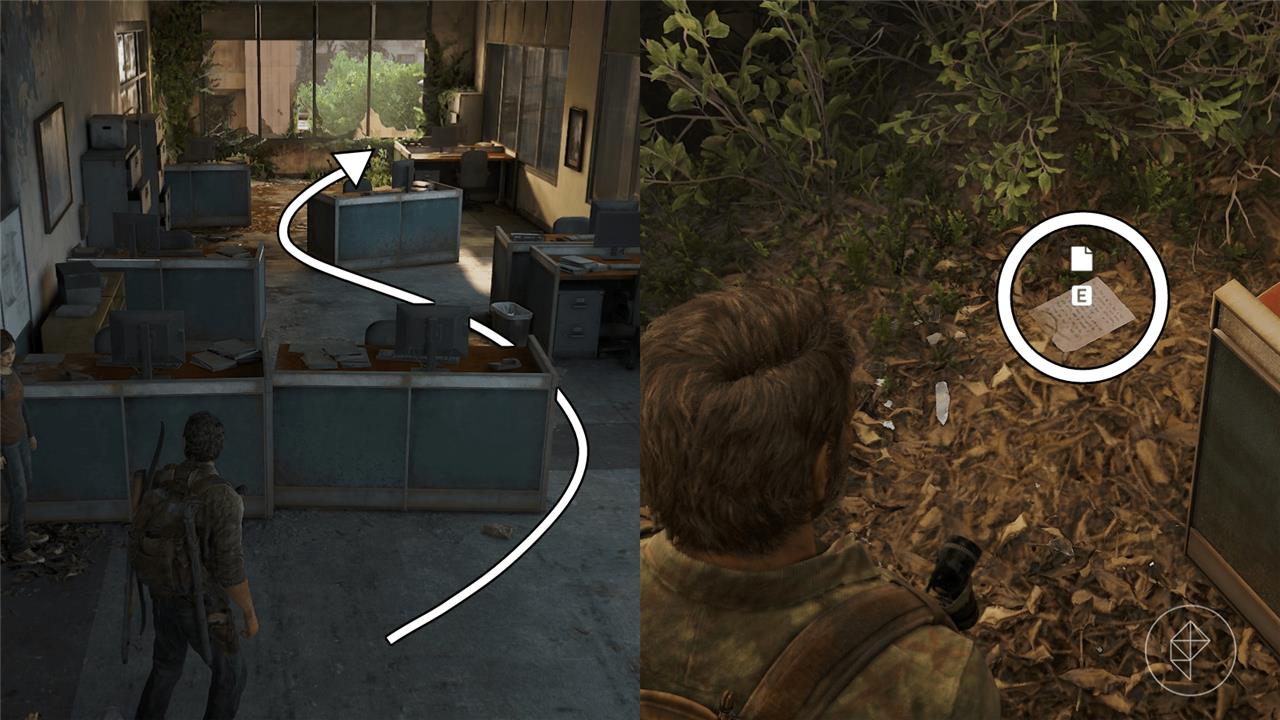
Abandon Zone Note Artifact Location
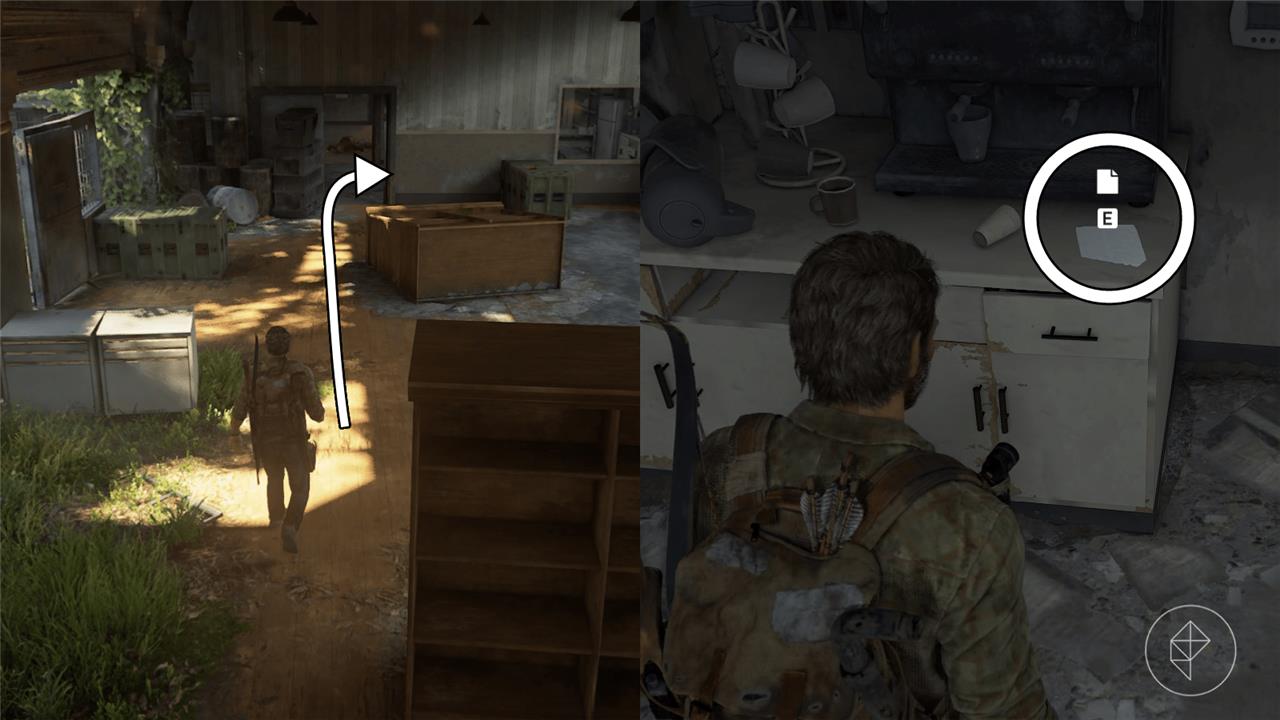
From the front entrance, head to the back right corner of the bookstore. Enter the open doorway, and take an immediate right to find the Abandon Zone Note on the counter on your right.
Lost Areas Map Artifact Location
On the second floor of the bookstore, make your way to the bathroom in the back right corner to the right of Rivers Cafe. Unlock the door using a shiv, and collect the Lost Areas Map and some supplies inside.
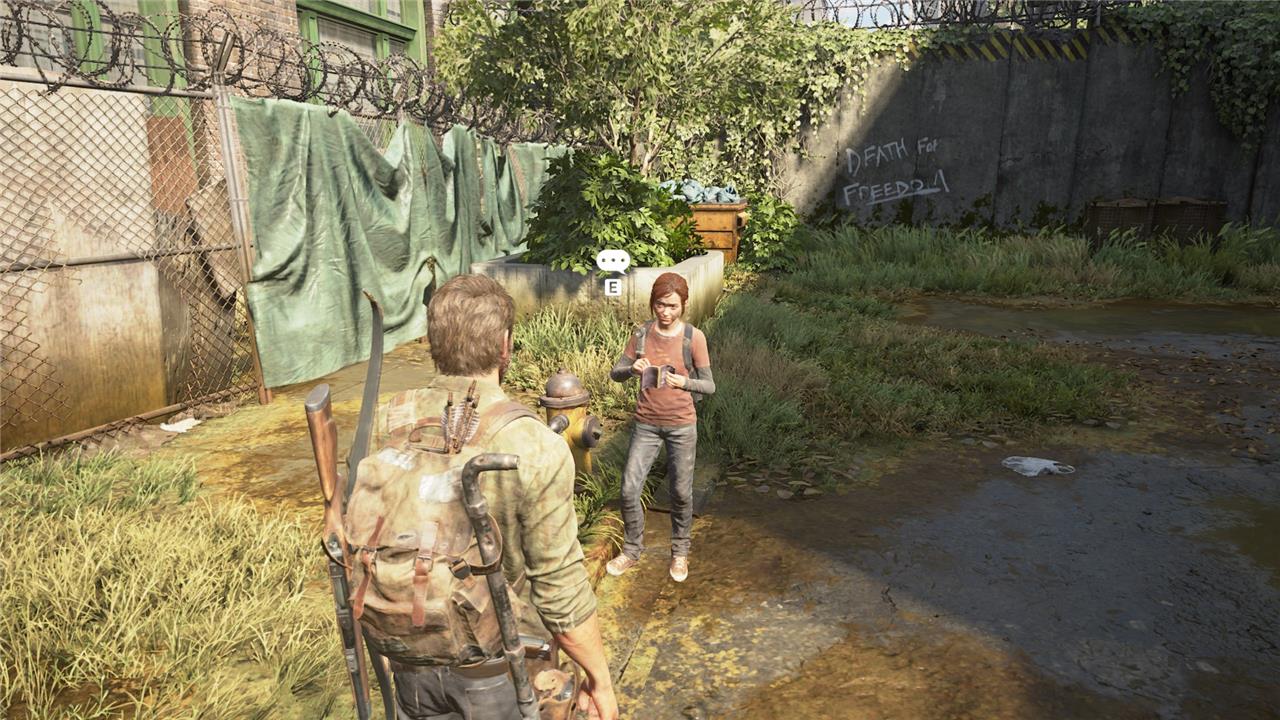
Optional Conversation 19 Location

After you leave the bookstore via the fire escape in the back, you’ll encounter a cutscene showing a few hunters walking on top of a bus. Once the cutscene is over, turn around and walk towards the storefronts down the street. Ellie will walk over to a storefront with an advertisement of a model triggering an optional conversation.
Optional Conversation 20 – Ellie’s Jokes 3 Location
Don’t progress too far after the cutscene with the hunters on top of the bus and stick around the storefronts for a bit. If you wait long enough, Ellie will grow tired and whip out her joke book to tell you one of Ellie’s jokes.
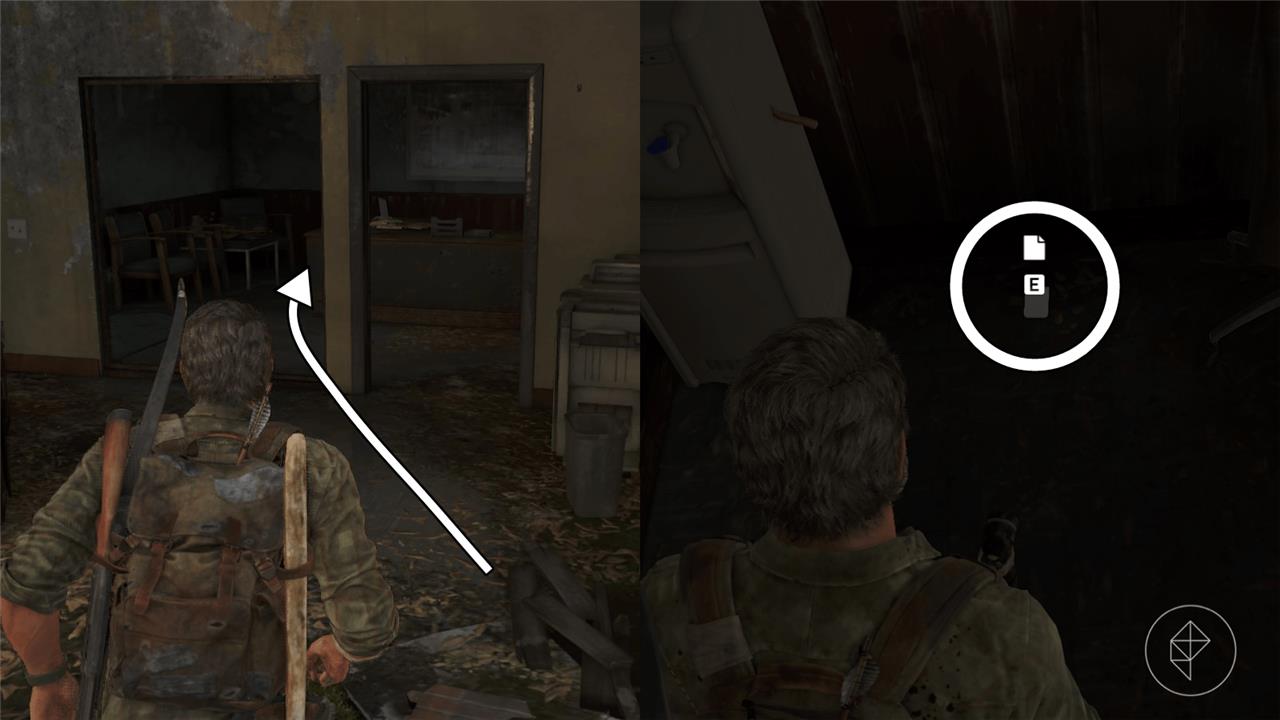
Mother’s Note Artifact Location
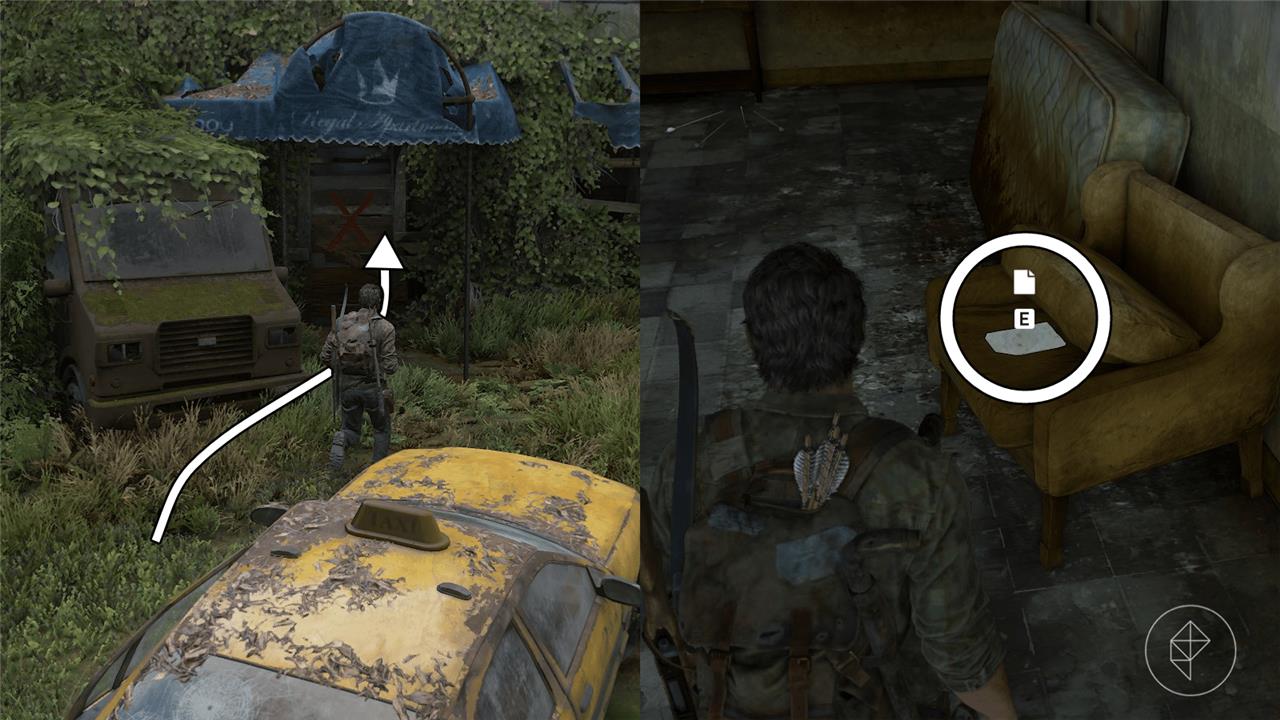
From the yellow taxi, turn left to find a barricaded door with a red “X” painted onto it. Open the door using a shiv, and head inside to find the Mother’s Note on top of a chair just ahead of the entrance.
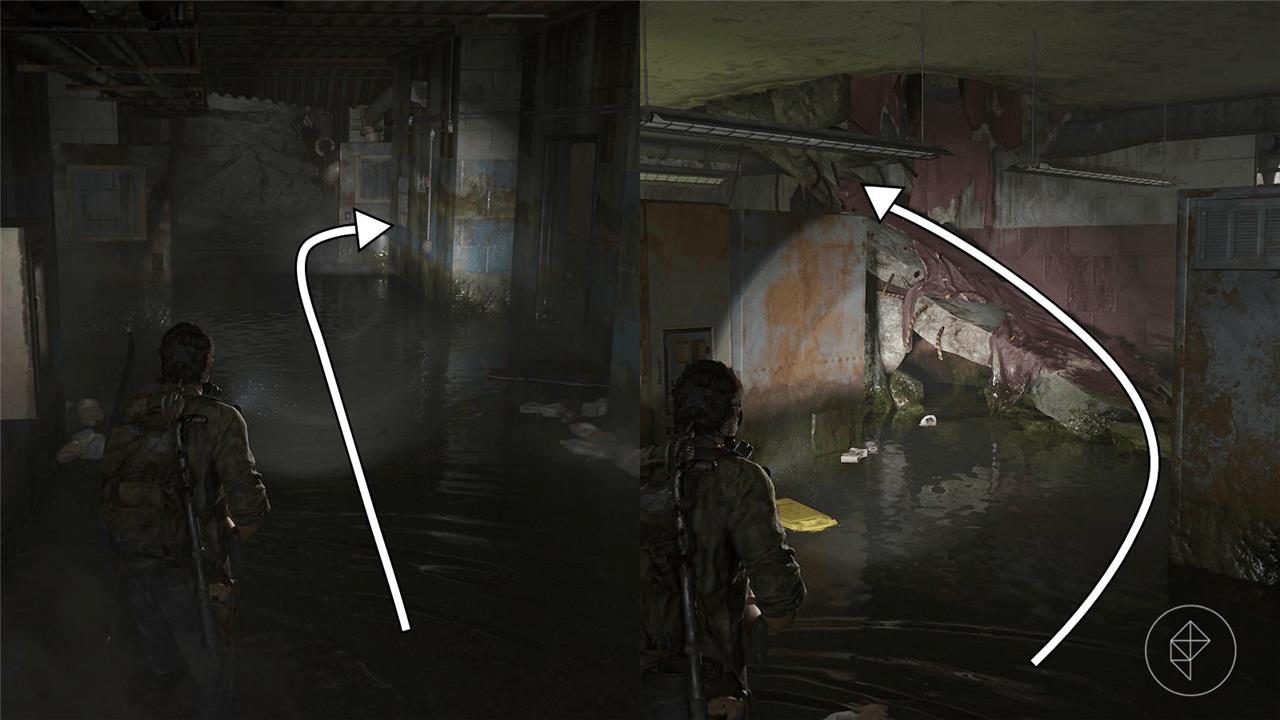
Stash Note Artifact Location
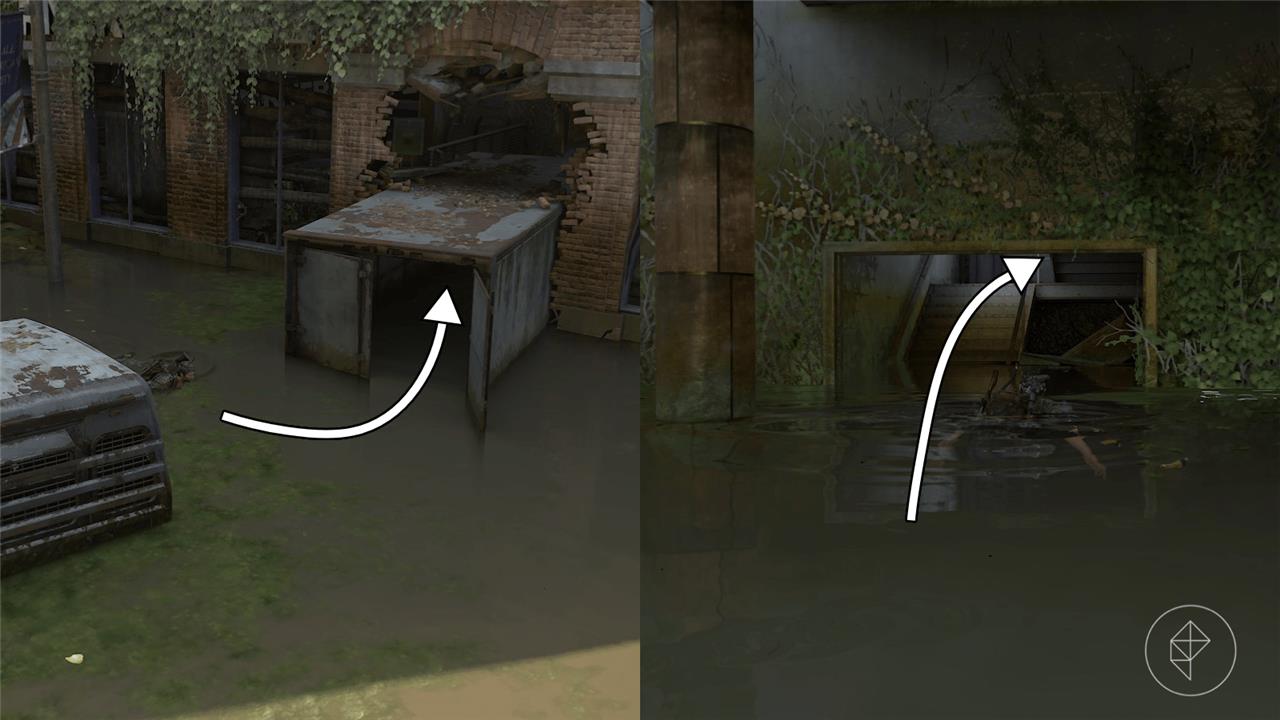
Start swimming in the flooded street and turn into the open box truck. Swim to the staircase ahead of you and go up to the second floor. Walk around to the far side of the second floor to find the Stash Note on a counter.
Hotel Lobby Collectibles
Inside the Pittsburgh hotel lobby, pick up the note “Hotel Keycard” from the front desk counter amid scattered papers and debris. Check the side table near the check-in area for the “Lost Hill Resort Map” artifact, tucked under a lamp. A comic book, “Pittsburgh Tribune,” sits on a bench by the elevators, partially hidden by luggage. These items appear right after entering the building with the group, before moving deeper into the structure.
The “Hotel Lobby” section of the “Pittsburgh” chapter begins once you drop into the hotel lobby, and ends after Joel and Ellie escape the hotel.
Optional Conversation 21 Location
As soon as you drop into the hotel lobby, turn left and head toward the the bar counter. Interact with the coffee machine to start an optional conversation.
Note to Staff Artifact Location (Safe Code)

After you climb the ladder to reach the second floor of the hotel, turn to the right and shimmy across the broken stairway. Search the open suitcase on the floor to find the Note to Staff that has a safe code (22-10-56) written on the bottom of it.
Shiv: Reinforcement Training Manual
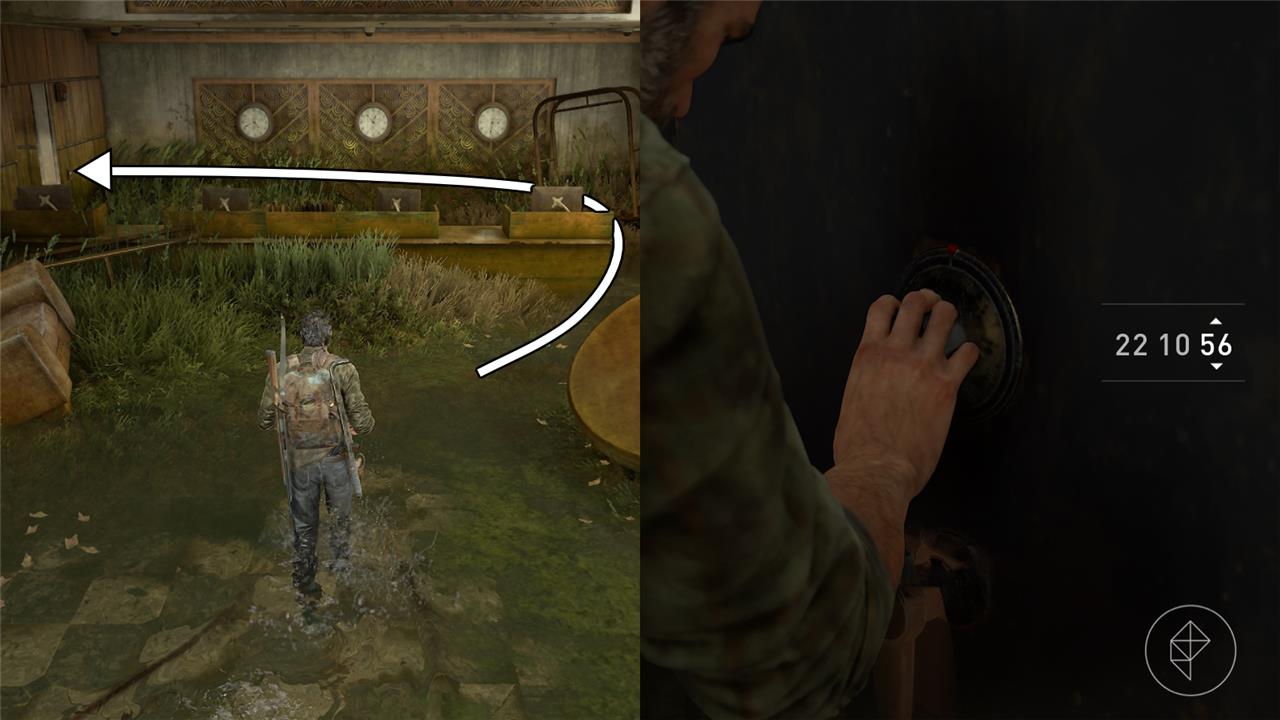
Now that you know the safe code from the Note to Staff, make your way to the room attached to the front desk. If you’re facing the front entrance of the hotel, the front desk is to your left. Make your way behind the desk and head into the attached room to find the safe. Input the code 22-10-56 to find the Shiv: Reinforcement training manual inside.
Optional Conversation 22 – Ellie’s Jokes 4 Location
After you’ve collected the training manual, return to Ellie by climbing up the ladder to the second floor. Wait by the elevators for a minute or two until Ellie wants to lighten the mood with her jokes. Interact with Ellie to hear some of Ellie’s jokes from her joke book.
Optional Conversation 23 Location
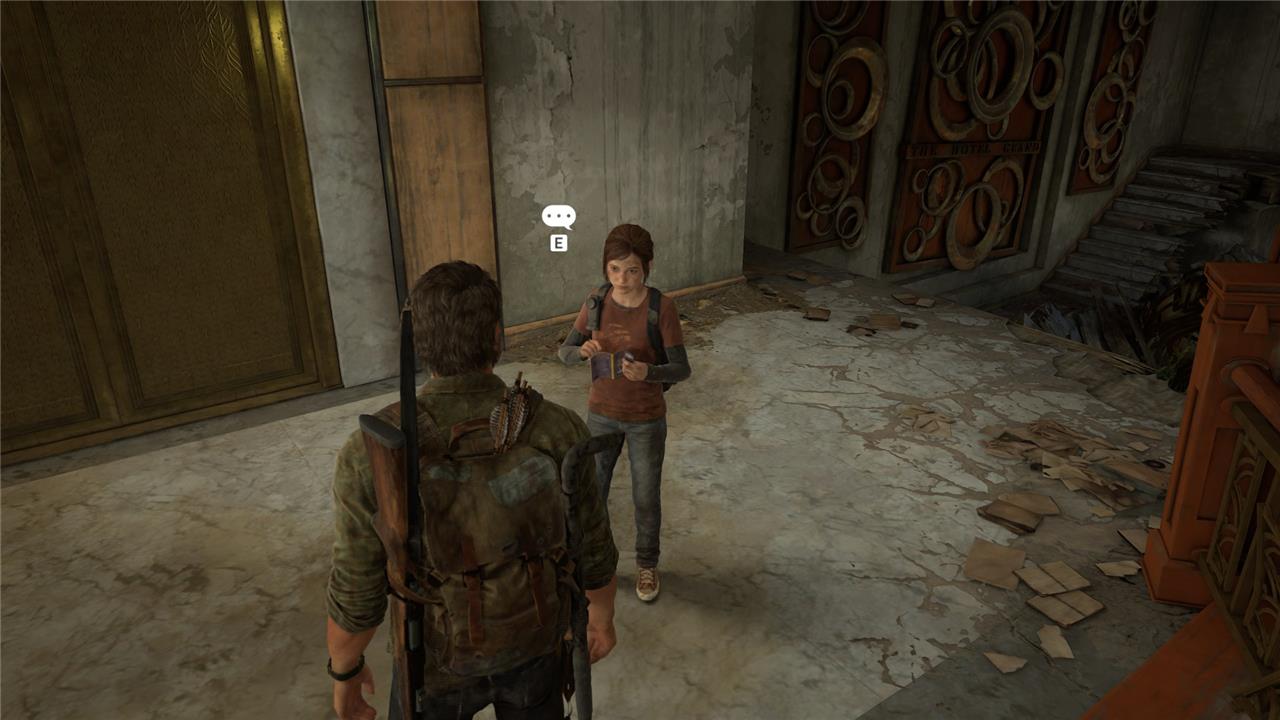
After going up the stairs from the hotel lobby, jump out of the window at the top of the stairs and into the next window on your left. There will be enemies scattered around this floor, so take them out as you go along. Exit through the balcony door of Room 204 and jump into the window of the adjacent room. Climb up the debris inside, and enter the bathroom on the left to find a deceased couple in the bath tub. Once Ellie sees the bodies, interact with her to start an optional conversation.
If you’ve already passed this section, you can return to the bathroom of Room 304.
Hotel Keycard Artifact Location
After you enter the spore-filled section of the basement, crawl under the collapsed rubble to enter a long hallway where a horde of rats will run in your direction. In this area, you’ll face off against multiple stalkers who will lunge at you from out of no where so be wary of your surroundings. Enter the second room on your right to find the generator, but don’t turn it on just yet. Go up the ramp and turn left. Leave the room and enter the security room directly across the hall to find the Hotel Keycard on the desk.
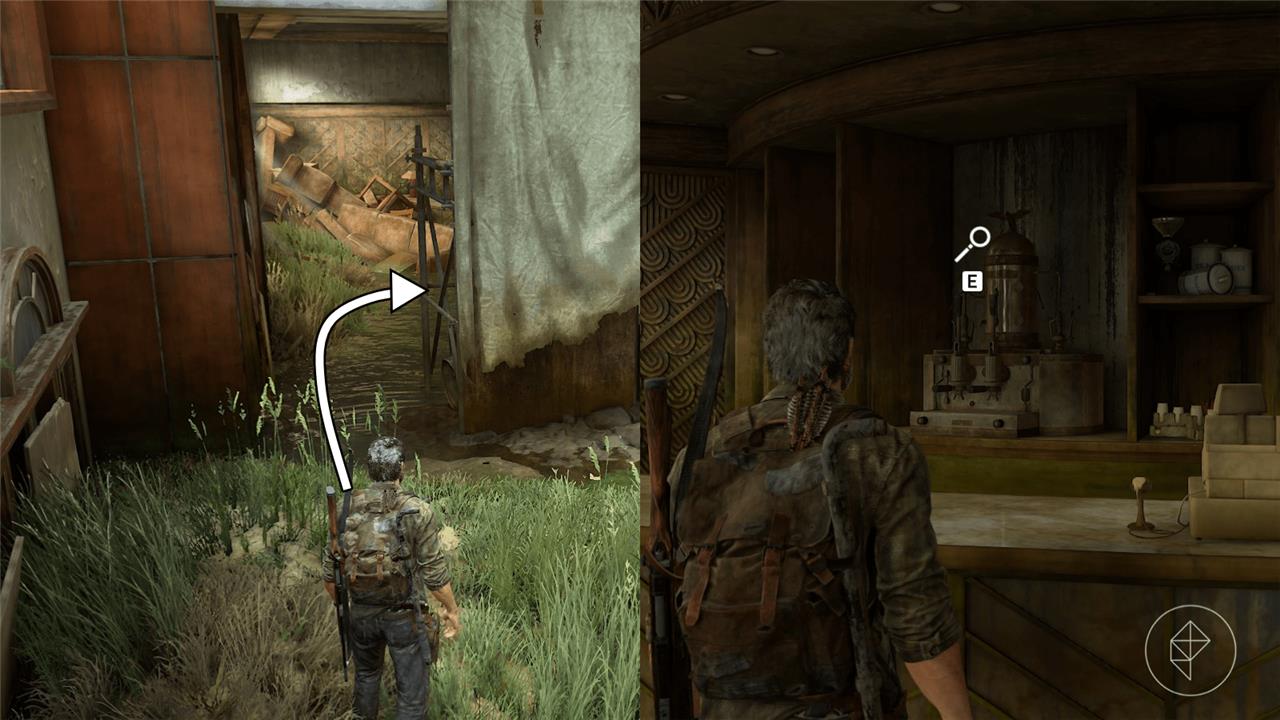
Accretion Comic Location
Turn the generator back on and head back upstairs using the Hotel Keycard. Take out the hunters in the kitchen and dining room, and use the ladder to climb up to the second floor. A hunter will knock you off prompting a cutscene where you reunite with Ellie. Climb up the ladder for real this time, and take two lefts to reach the second floor of the dining area. Shimmy across to the bar, and find the Accretion comic on the table by the couches on your left.
Colby Reed Firefly Pendant Location
Return to Ellie and drop down to the first floor. Head in to the second door on the left – the women’s bathroom – and enter the larger stall to find the Colby Reed Firefly pendant on the floor by the toilet.
Melee: Knots Training Manual Location
Back in the hallway, turn left and continue down the corridor until you reach a table with a couple chairs on top of it. On top of the table, you’ll find the Melee: Knots training manual.
Optional Conversation 24 Location
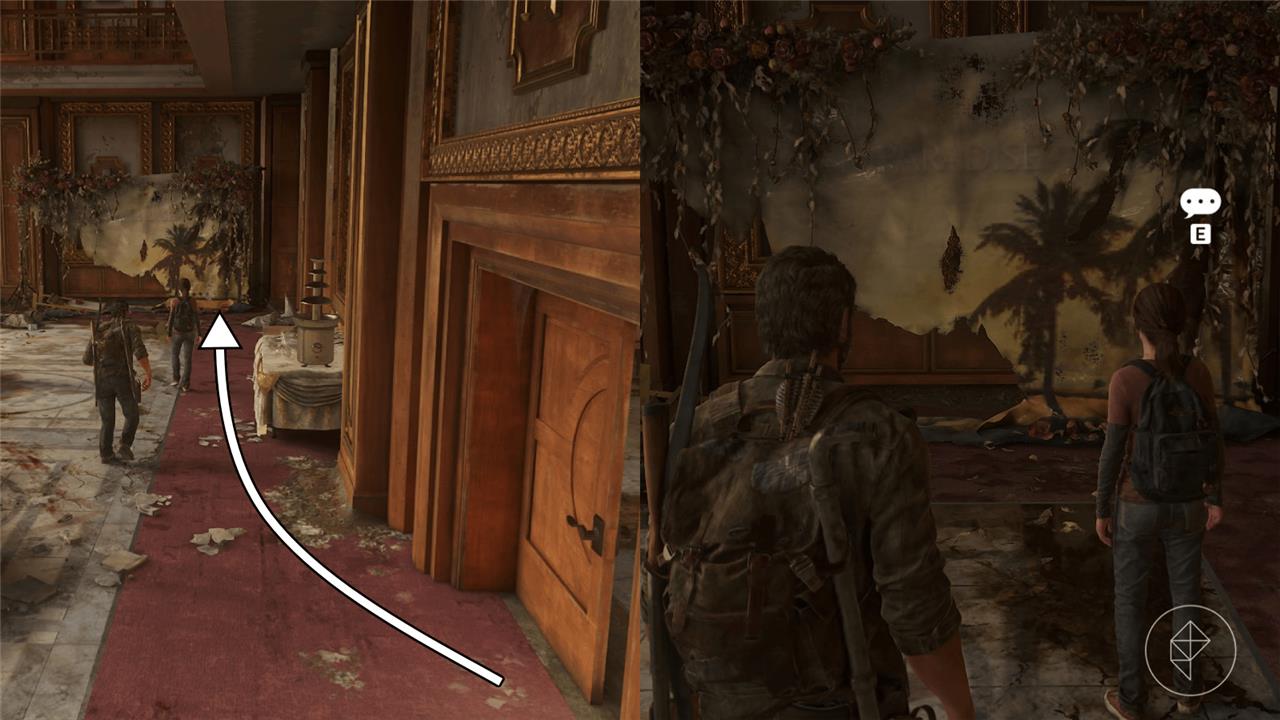
Vault over the table in the hallway and continue into the ball room on the right. Turn right and head to the backdrop in the corner of the room. Once Ellie makes her way over to the backdrop, interact with her to start an optional conversation.
Financial District Collectibles
The Financial District area in Pittsburgh contains a mix of carefully hidden collectibles scattered across offices, streets, and abandoned vehicles. Players can find artifacts that reveal details about the city’s collapse, Firefly pendants tucked in high places, and supplements hidden in side rooms. Scavenging thoroughly through the bank lobby, alley shops, and nearby buildings ensures nothing is missed before moving deeper into the city.
The “Financial District” section begins after Joel and Ellie leave the hotel, and ends when you meet Henry and Sam.
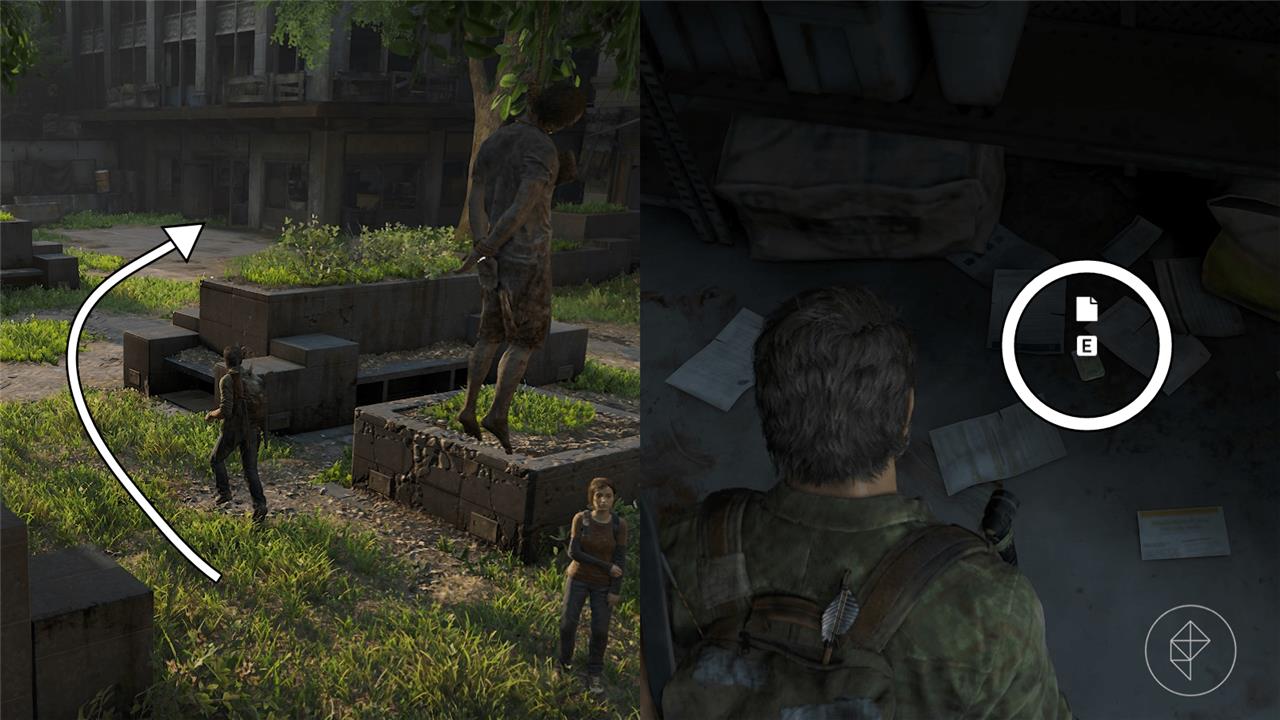
Optional Conversation 25 Location

When you first gain control of Joel, keep note of the hanging corpse where a few hunters are gathered, but defeat all of the hunters in the square before worrying about gathering the collectibles. Once all of the hunters are dealt with, return to the body to initiate an optional conversation.
Fireflies Note Artifact Location
From the hanging body, head to the far right corner of the square into a Don Fiocchi’s Sandwiches. Make your way into the freezer, located at the back of the store, to find the Fireflies Note on the floor.
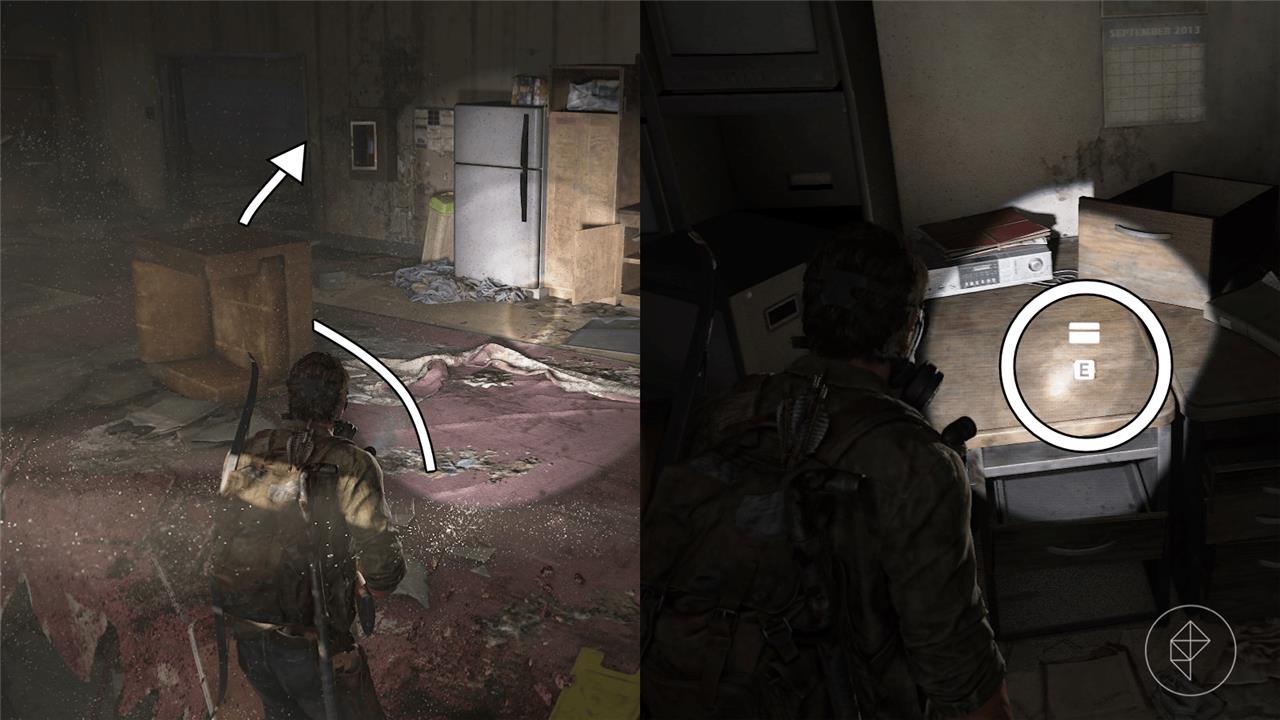
Final Attack Note Artifact Location
After you enter the garage door and head up the stairs, enter the main office on this floor, and head to the back right corner. Find the Final Attack Note artifact on the floor by the desk and window.
Mob Attack Note Artifact Location

Once you’re on the street level, take out the hunters roaming the streets and buildings. After you deal with them, you’ll notice a building with a gaping hole in the side of the second floor. Enter the building, and head up to the second floor. Make your way to the back room and go behind the desk to find the Mob Attack Note on the floor.
Truck Note Artifact Location
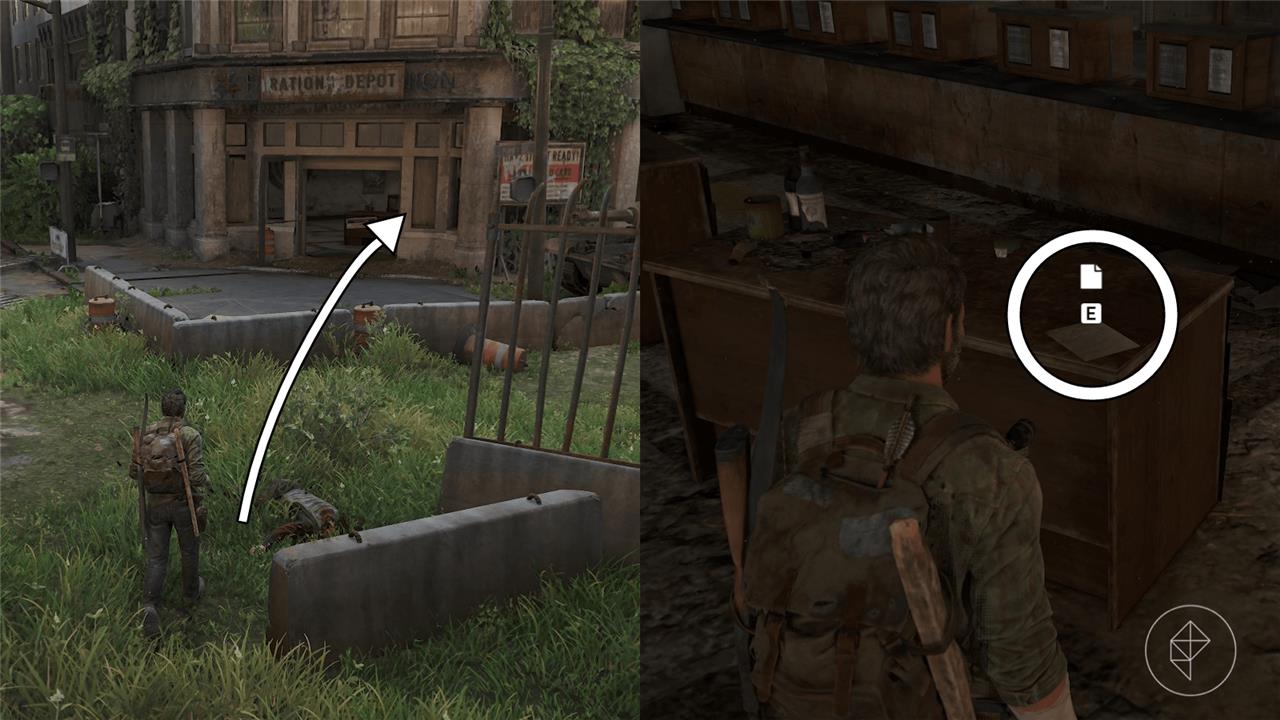
Back on the street, make your way to the Rations Depot which can be found at the end of the road by a concrete barricade. Enter the store and grab the Truck Note on a desk in the front of the store.
Optional Conversation 26 Location
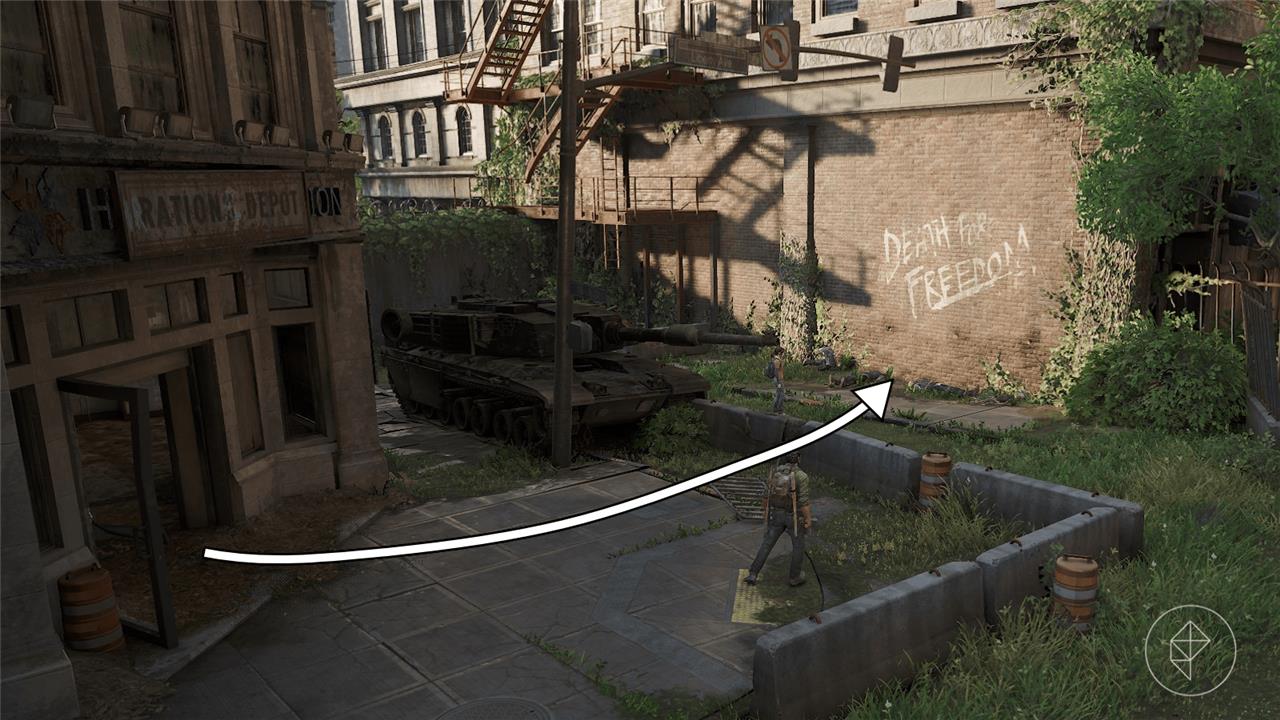
After exiting the Rations Depot, turn left to find the wall with “Death For Freedom” on it and a few corpses below the graffiti. Interact with Ellie to start an optional conversation.
Optional Conversation 27 Location
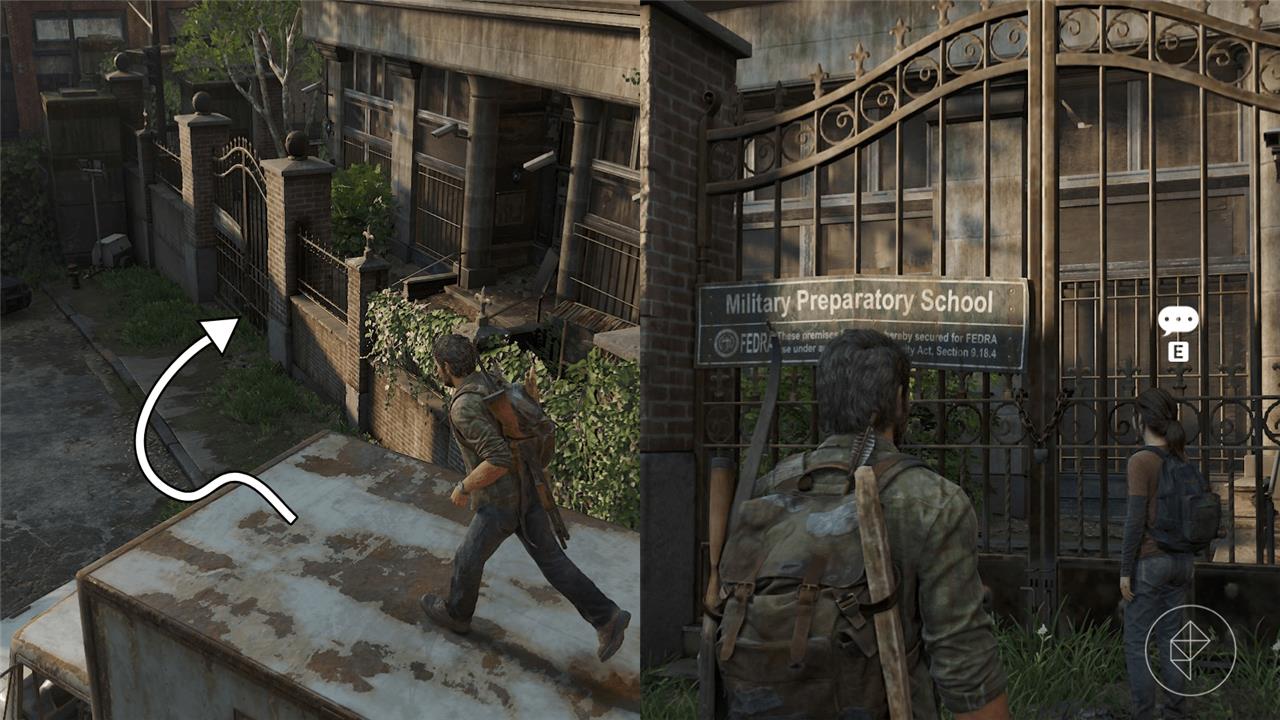
After climbing the fire escape, drop down onto the truck and then the ground in front of the Military Preparatory School. Ellie will walk over and talk about how she went to a school like this back in Boston, initiating an optional conversation.
Optional Conversation 28 Location
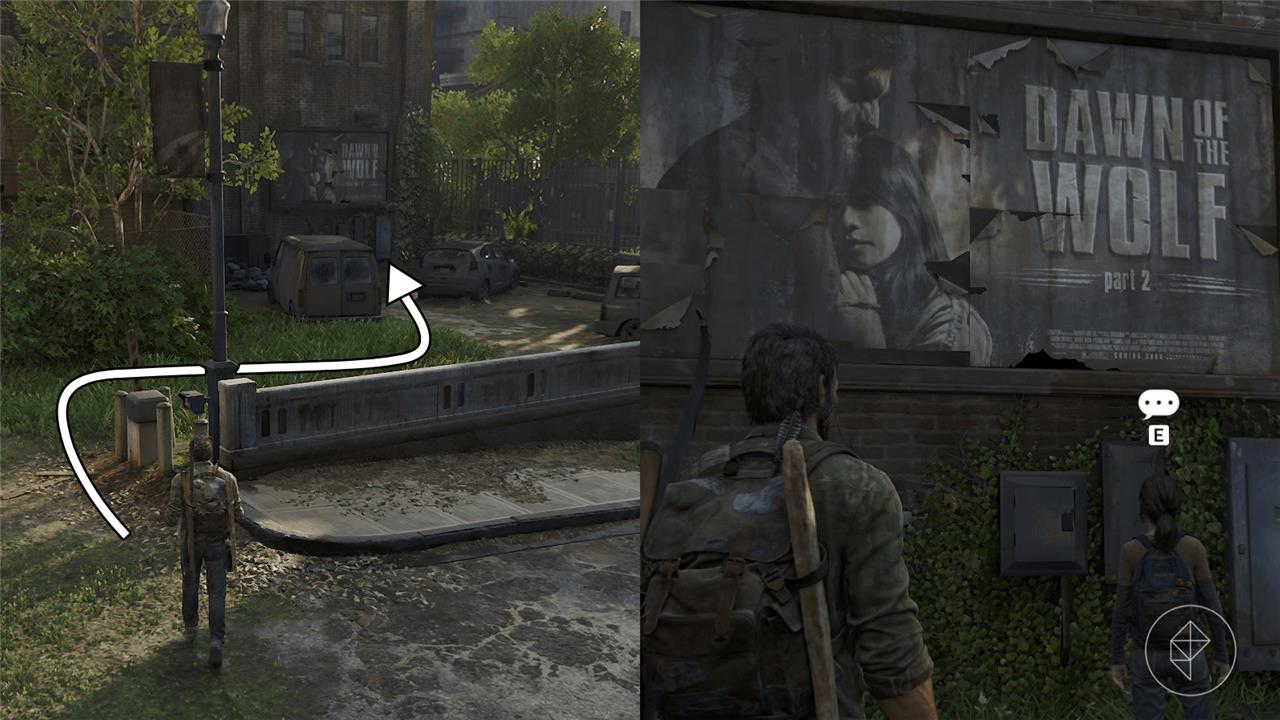
After dropping down from the fire escape, turn to the left to see a “Dawn of the Wolf Part 2” billboard. Ellie will run up to the poster and start an optional conversation.
Escape the City Collectibles
Grab these elusive city souvenirs amid Pittsburgh’s chaotic streets and ruined high-rises. Firefly pendants dangle from hunter camps and submerged cars, while artifacts like faded letters and comic books hide in apartments and shipping containers. Shiv doors guard extra supplies and notes, and training manuals boost your crafting options. Pin their positions on your map to sweep the area clean before pushing forward.
The “Escape the City” section of this chapter starts after you meet Henry and Sam and ends when Joel and Ellie jump off the bridge to escape the turret.
Molotov: Construction Training Manual
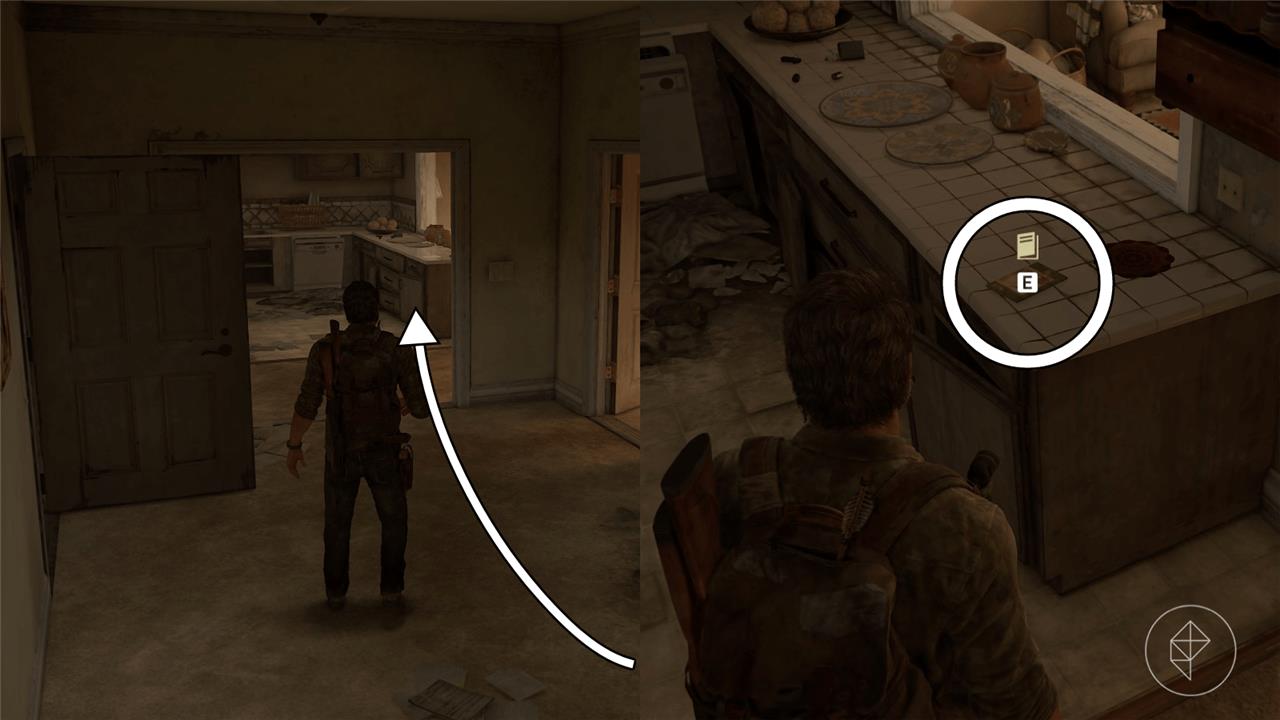
Once you gain control of Joel after the cutscene where you meet Henry and Sam, walk out of the bedroom into the kitchen to find the Molotov: Construction Training Manual on the counter.
Deep Phase Comic Location

Follow Henry down one floor and use a shiv to enter the door across from the staircase. Turn left and enter the bedroom on the right. Find the Deep Phase comic on the desk on top of the keyboard.
Lucas Rios Firefly Pendant Location
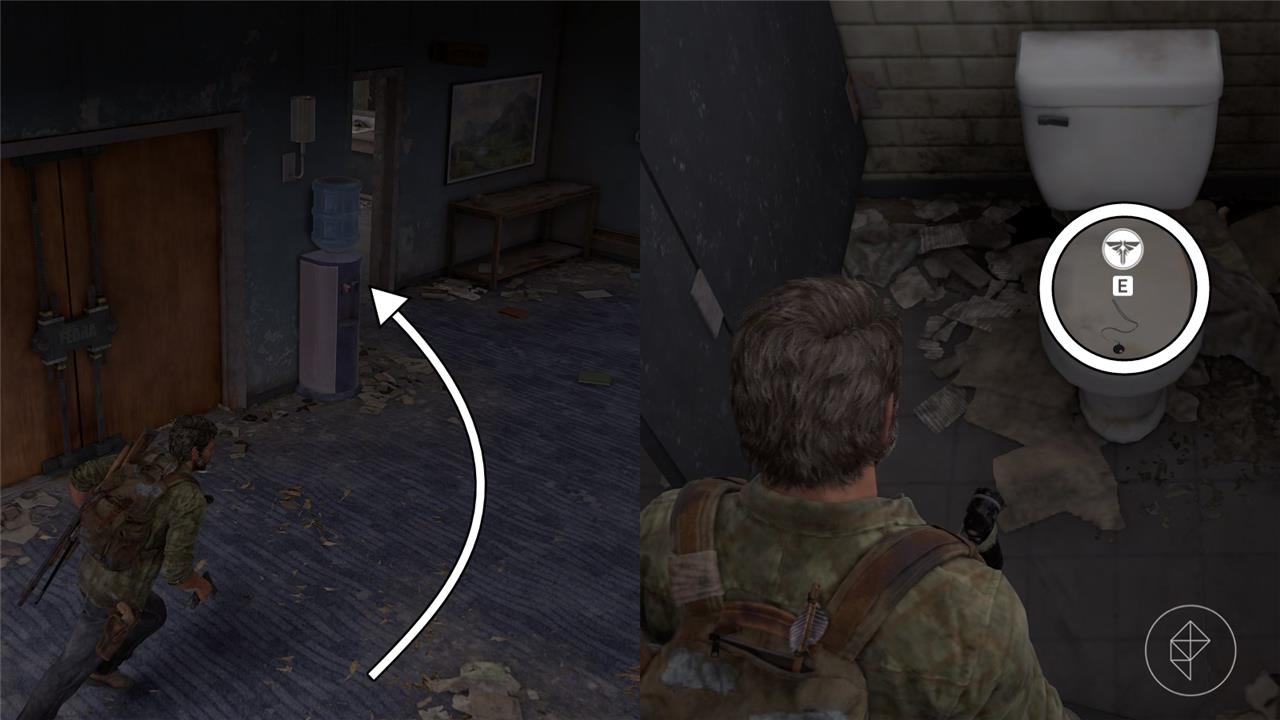
After you exit the toy store, you’ll encounter three hunters chatting outside. Take out the enemies only to be faced against two more hunters above you. Eliminate these two and head inside, but don’t follow Henry, Sam, and Ellie immediately. Turn left into the bathroom and find the Lucas Rios Firefly pendant on top of the left toilet.
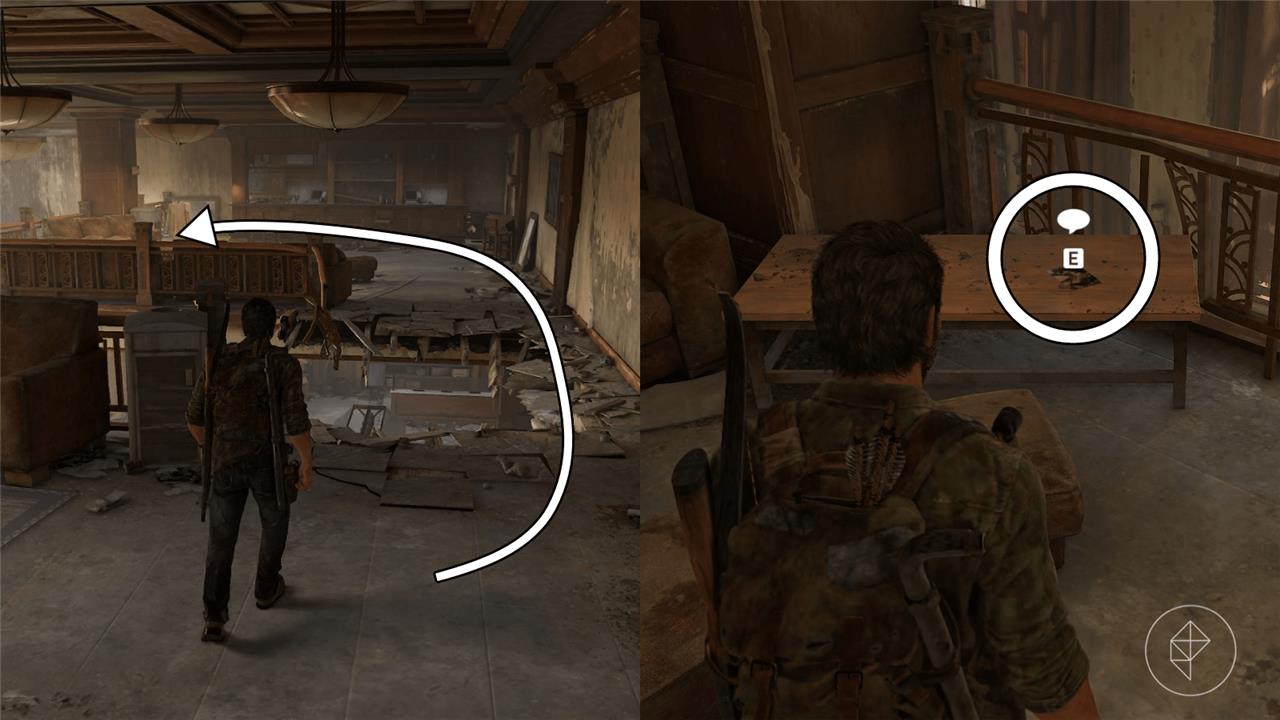
Trial Note Artifact Location
After following Henry, Sam, and Ellie through the double doors, head straight ahead to the open door. Enter the office and turn to the right to find the Trial Note on the floor in the corner.
That marks the end of “Pittsburgh” in The Last of Us Part 1. If you’re ready to take on the next chapter, check out our guide on where to find all “The Suburbs” collectibles.
Pittsburgh chapter safe codes and shiv door locations
The Last of Us Part 1‘s Pittsburgh chapter includes one safe and four shiv doors, offering valuable loot like training manuals, parts, and ammo.
Safe Location and Code
The sole safe is in the flooded Hotel Grand lobby during the Hotel Lobby section.
-
Enter the lobby, grab the ladder on the left, and place it against the back wall left of the ruined staircase.
-
Climb up, turn right, shimmy along the ledge past chandelier wreckage to a dead-end room; the code (22-10-56) is in an open suitcase on “Note to Staff.”
-
Return downstairs, go behind the reception desk, enter the coat-check room; input 22-10-56 for Shiv: Reinforcement Training Manual, 50 parts, revolver ammo, and explosives.
Shiv Door Locations
Pittsburgh has four shiv doors across its sub-chapters; craft shivs beforehand as they break on use.
Alone and Forsaken (Two Doors)
-
Rivers Cafe: After clearing bookstore enemies, go upstairs; right of the cafe counter in Kingston Bookstore.
-
Red X Taxi Area: Post-cutscene hiding behind taxi (after submerged truck infiltration), left side door marked with red X.
Financial District (One Door)
-
Rations Depot: After intersection fights and sniper nest, enter HSNL Credit Union (Irrational Depot sign); back room.
Escape the City (One Door)
-
After meeting Henry and Sam in apartment, descend one flight of stairs; wooden shiv door straight ahead.
Rewards vary but often include parts, ammo, and supplements; use chapter select to backtrack.
Pittsburgh chapter training manuals locations
The Last of Us Part 1‘s Pittsburgh chapter contains four training manuals, which permanently upgrade crafting abilities like shiv durability and melee weapons.
Alone and Forsaken
-
Health: Splinting: After the initial ambush and entering the garage, go upstairs to the first room on the right (with corpses on tables). It’s on metal shelves or a table there.
Hotel Lobby
-
Shiv: Reinforcement: Inside the safe behind the hotel reception desk (code 22-10-56, found in a suitcase upstairs). Rewards extra shiv uses.
-
Melee: Knots: After escaping the infected basement and Ellie saves Joel from drowning, head to the hallway before the ballroom. It’s on a central desk/table with chairs.
Escape the City
-
Molotov: Construction: After meeting Henry and Sam and resting in their apartment (post-armored car chase), check the kitchen counter.
These manuals stack for better upgrades; use chapter select to revisit if missed.