Leon’s mission pushes deeper into danger as you enter the Valley and the Village Chief’s Manor – a section filled with hidden traps, brutal ambushes, and secrets that test your aim and nerve. This guide shows how to survive every encounter, find key items, and prepare for what lies ahead.
Our Resident Evil 4 remake Chapter 2 walkthrough will make sure you don’t miss any items and survive from the beginning of the chapter all the way through the Abandoned Factory, meeting the merchant, the Valley, and the Village Chief’s Manor to the end of Chapter 2.
Throughout this walkthrough, we’re not going to mention every item that anyone (or anything) you shoot drops – if you kill something, look for a loot drop.
Also, there’s a little randomness to the contents of crates based on your inventory and weapons, so you probably won’t find the exact same things listed below. The crates and barrels themselves will always be in the same locations, though. And all other items – keys, collectibles, and resources not found in crates – should be the same.
Head for the church/Abandoned Factory
After clearing the path through the valley, move toward the church area marked on your map, but you’ll find the gate locked for now. Check the nearby routes leading to the abandoned factory instead. Inside, you’ll face aggressive Ganados and can gather valuable resources like handgun ammo and pesetas. Be sure to explore every corner for keys and notes that help progress the story. Once the area is secure, watch for the exit leading toward the Village Chief’s Manor to continue the mission.
After the cutscene with Luis, you’ll find that you have no gear. Neat. Let’s do something about that.
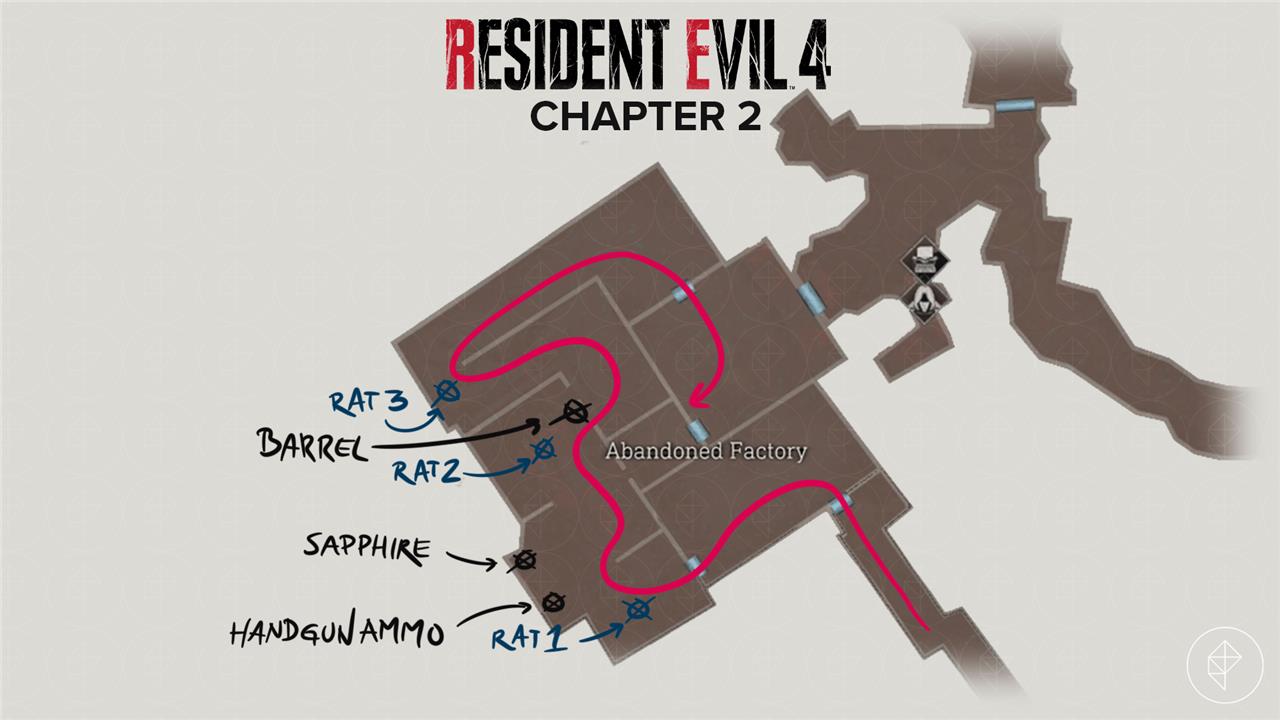
Head through the door and follow the hall. There’s a crate around the corner with a green herb. Continue along until you find a corpse helpfully holding onto a kitchen knife for you.
You’ll also learn about the L1 R2 quick stab at this point – which seems to do a lot more damage.
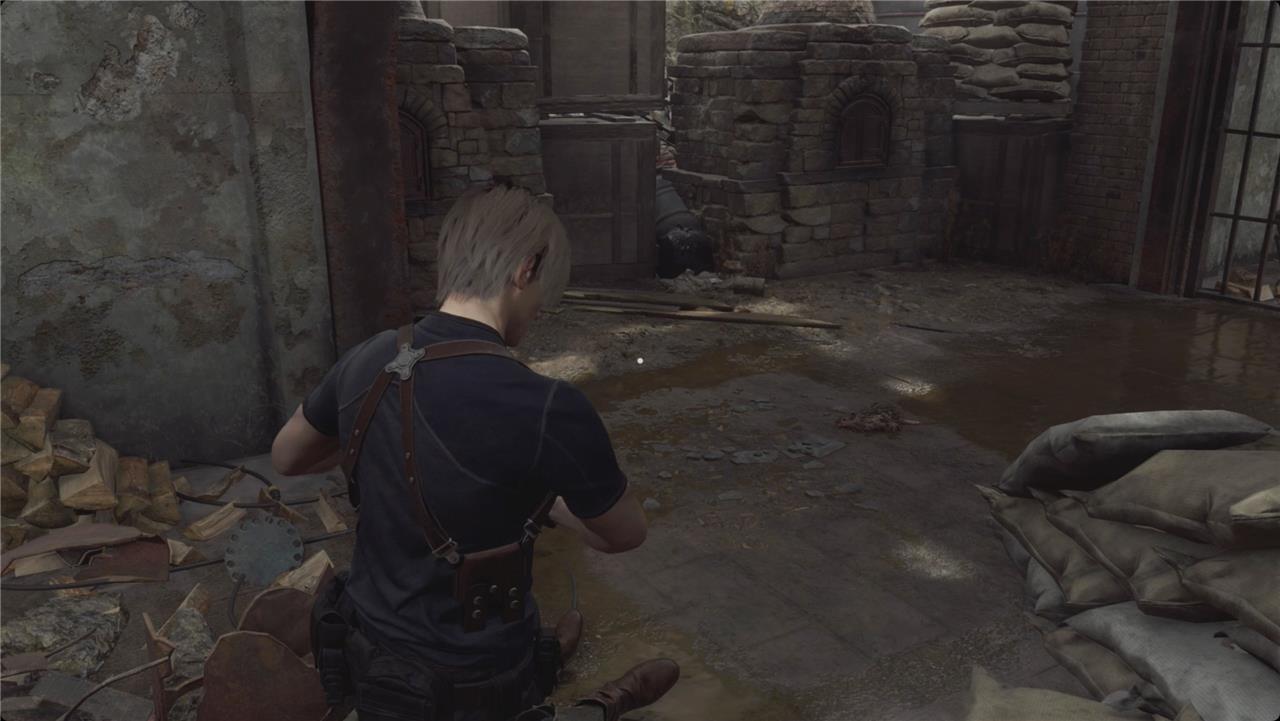
Head up the stairs and through the gate. Crouch as soon as you get through and stealth kill the villager there. You’ll spot your gear on the right, but you can’t get to it. Head through the door and deal with another villager.
There’s also a (gigantic) rat here. Stab it to start the Pest Control Blue Note Request.
Over on the left, open the first oven for some handgun ammo and the second for a sapphire.
The door to your gear is blocked (also there’s a bear trap in front of it), so continue past. There’s a barrel with another kitchen knife on your right and another rat.
Vault through the window on your right and stay crouched. At the next corner, you’ll find the final rat. Handle the patrolling villager around the corner.
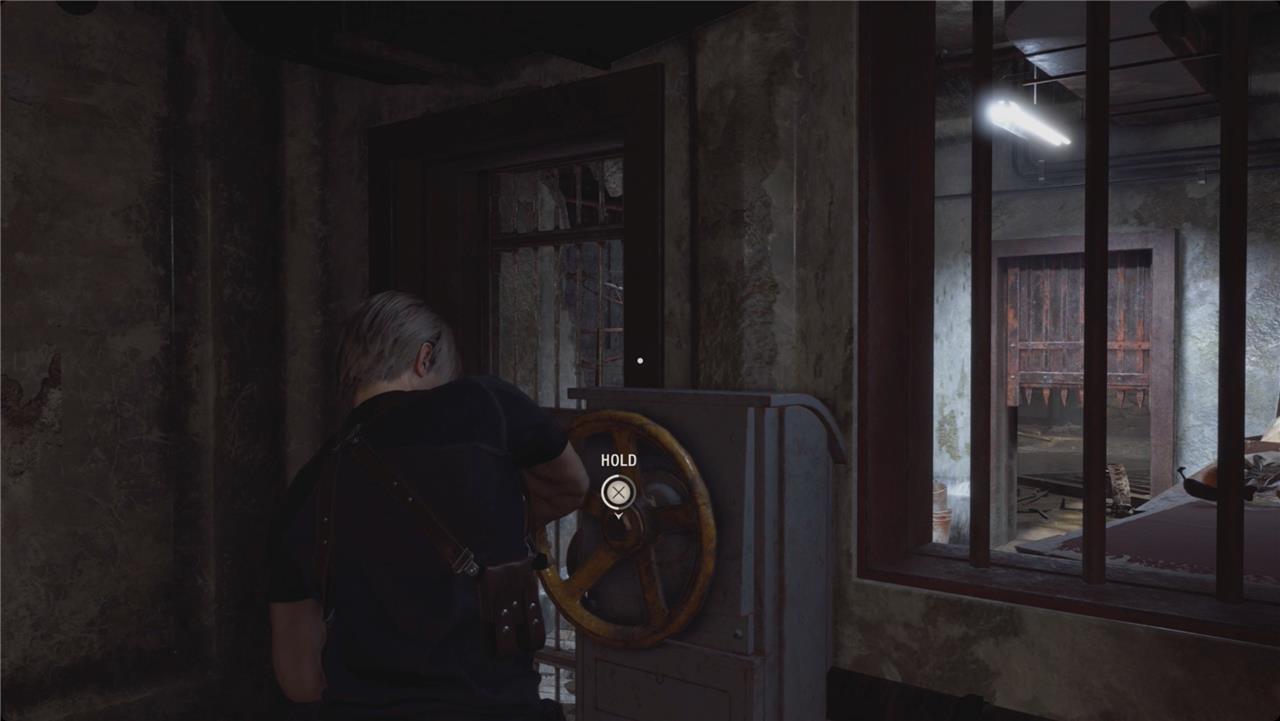
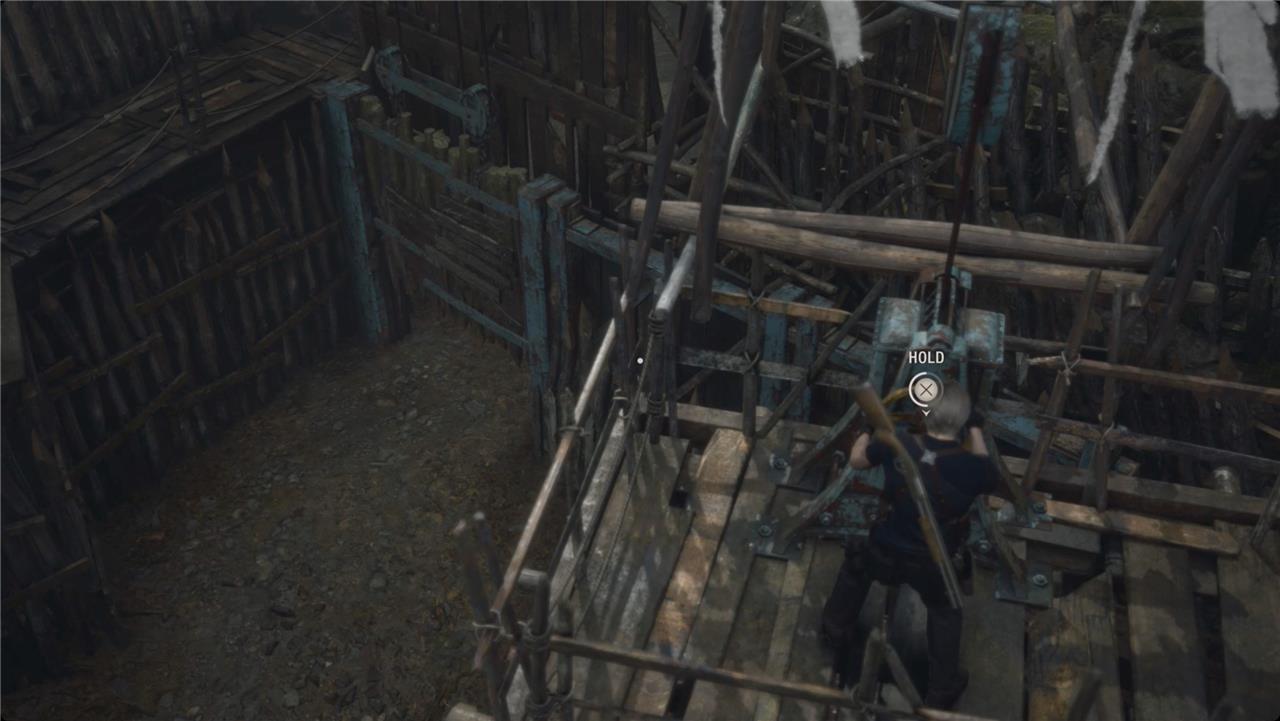
Follow the path around and stick to the right. You’ll find a wheel that temporarily opens the door to your gear. You have to sprint to get back in time – make sure to vault through the wall as a shortcut. Grab your gear, and take a second to craft anything you might need (and to free up some inventory space).
Meet the merchant
Meet the merchant, your go-to trader in the Valley who stocks weapons, ammo, and upgrades amid the chaos of Chapter 2. He sets up shop near the Village Chief’s Manor, offering a chance to bolster your arsenal before tougher fights ahead. Hand over pesetas or spineless treasures to snag shotguns, grenades, or attache case expansions that keep Leon sharp. This grizzled arms dealer returns across the campaign, proving a reliable ally against the Ganados onslaught.
Unlock the door back to the wheel room and you’ll meet the merchant. To the left of his table, there’s also rifle ammo, a typewriter, and the Merchant Tip: Get Rich Quick! file. Turn around and check the far side of the merchant’s area for a crate with pesetas.
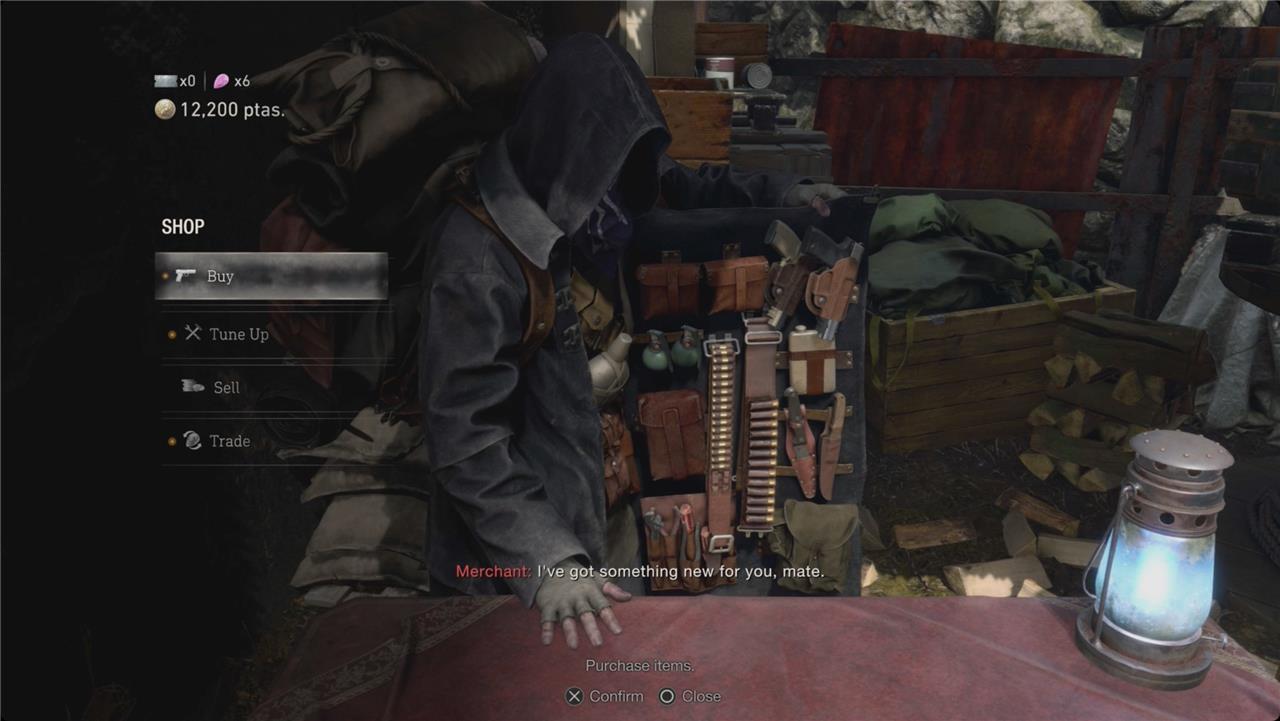
Before you visit the merchant, open your inventory and tab over to Key Items & Treasures. Select the flagon and choose inlay gemstones. Pick the two best gemstones you can, but the shape matters here – round slots only take round gemstones. We went with 2 rubies. Combining them like this will make them all more valuable – a modifier of 1.2x – when you sell them.
When you visit the merchant, you’ll automatically turn in the two Blue Note Requests we’ve completed so far for 3 spinels each. Sell the Hunter’s Lodge Key, Pearl Pendant, any Velvet Blue you picked up, and the flagon. You should get at least 20,000 pesetas for them all.
Buy the Case Upgrade (7×12) to expand your inventory space, and then pick up the SR M1903 rifle. You’ll get the rifle scope for free. In your inventory, select the Scope and then choose Parts > SR M1903 to equip it.
If you’ve got the cash, grab the Bolt Thrower and Recipe: Bolts – good for stealth kills from a distance.
After that, tab over to Trade. Spend your spinels on the Treasure Map: Village (or don’t and just follow this guide) and the Yellow Herb. Combine that with other herbs for a healing item that also (permanently) increases your max health.
We didn’t have you upgrade any of your weapons yet – we’ll get to that eventually. Right now, it’s more important to diversify your arsenal. You could also repair Leon’s knife, but you’ve got a few kitchen knives to hold you over while we earn (loot) some more pesetas.
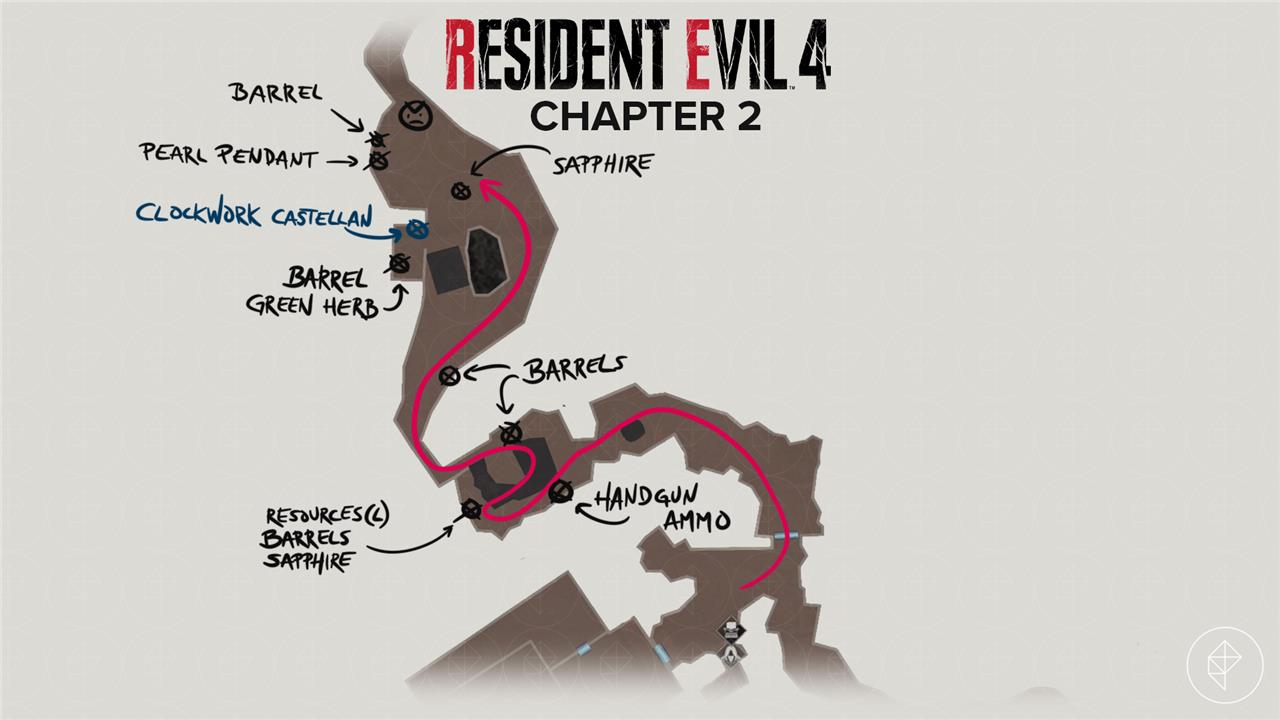
Valley
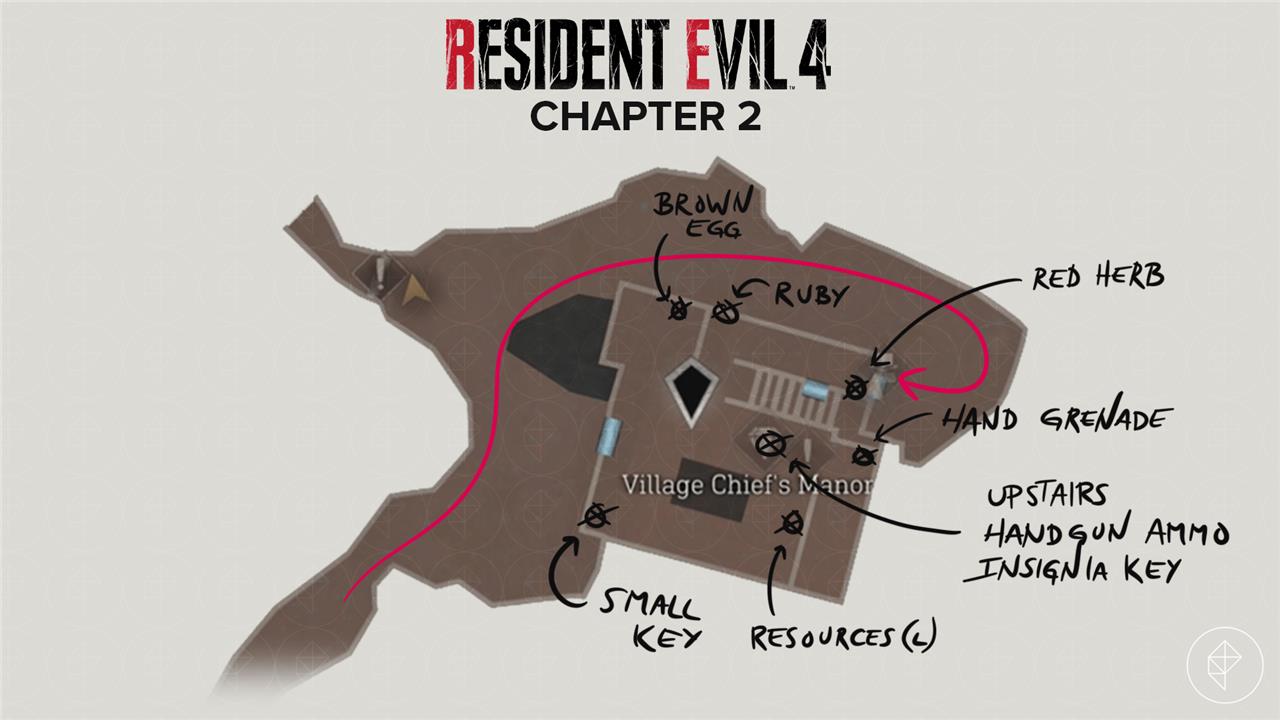
After the village fight, push forward through the gate into the Valley area. Cross the covered bridge and drop down to raid the merchant’s cache for ammo and herbs. Head uphill past the bear trap, then squeeze through the narrow path to reach the Village Chief’s Manor. Inside, clear the first room of Ganados, grab the key from the desk, and check the attic for loot like the shotgun shells. Proceed to the church puzzle next, solving it to claim the valley’s hidden rewards.
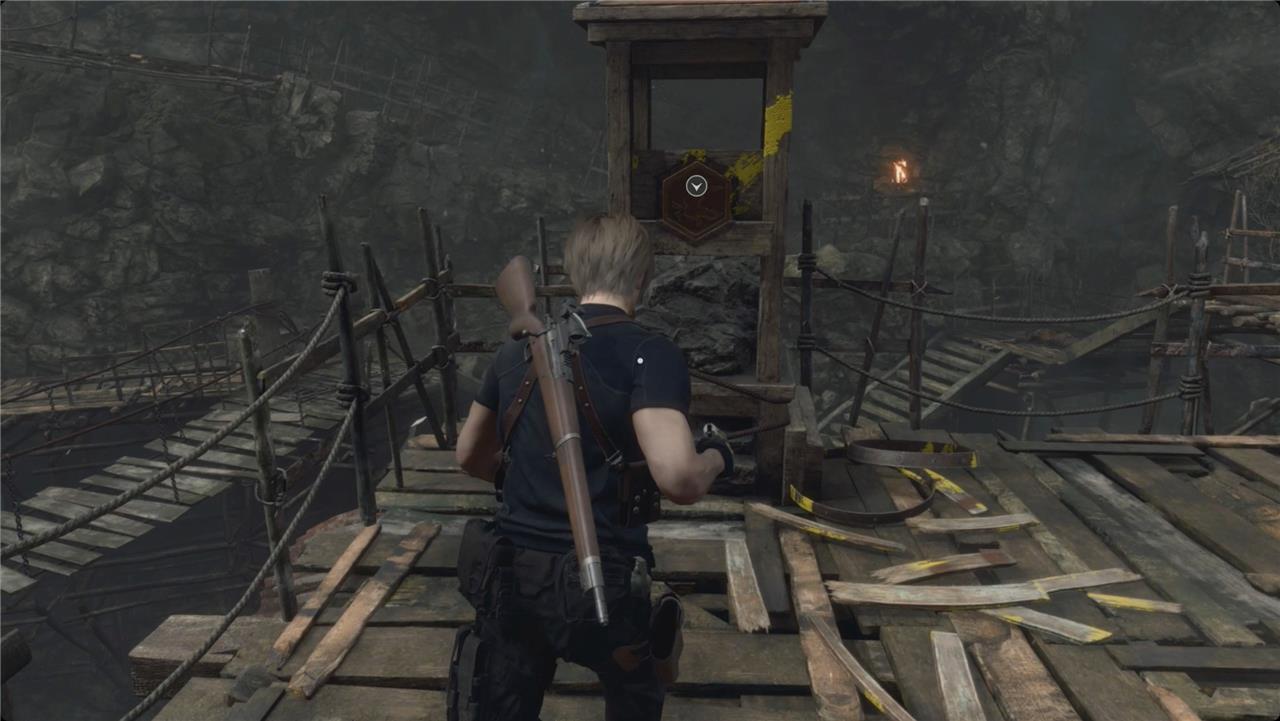
Over to the left of the merchant, you’ll spot a gate locked by a Hexagon-Shaped Slot. We don’t have that yet, so turn right and follow the wooden walkway.
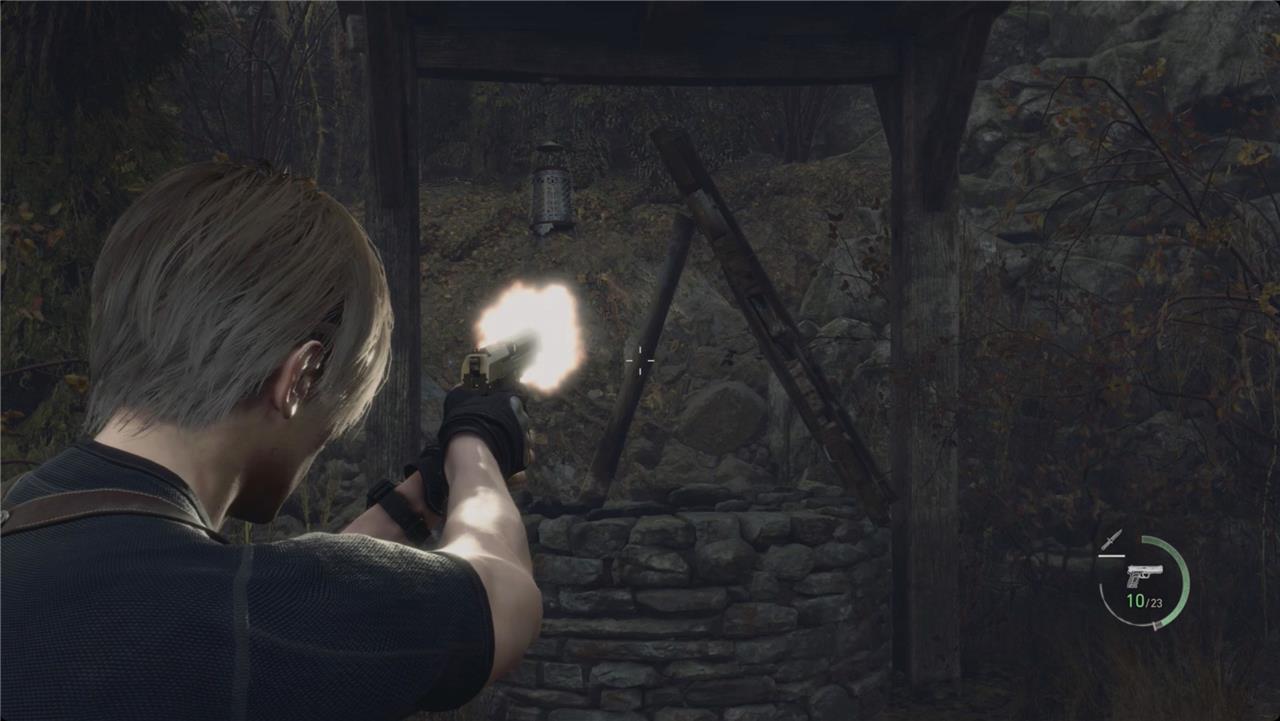
Follow the path (and shoot the old lady) until you reach the ladder.
At the top of the ladder, use your new rifle to deal with any villagers you see. You’re going to get swarmed by a few more when you drop down, but any you snipe will only make your life easier. Drop off that platform and take out any more villagers who rush you – there are several coming from both directions, so don’t let your guard down.
Smash the barrel right there for some resources (L). Take a left and vault through the window on your left for a Yellow Herb and some First Aid Spray. Shoot the padlock off the door for good measure.
Cut to the left of the Valley again. Stick to the left and follow the switchback up. Deal with the villagers at the top (there’s an exploding barrel to shoot) and open the chest for a ruby. Smash the barrels there for some pesetas.
Continue across the walkway to find a wheel that opens the main gate (back to the merchant, if you’re so inclined). You’ll get swarmed by some more villagers.
Drop back down and head to the left again. This time, continue straight instead of heading up the switchback. Follow the walkway around to the right at the far side of the Valley and smash the barrel for some gunpowder. A little farther, smash another barrel for more gunpowder.
On your right, grab the Hexagonal Emblem.
Continue across the roof for one more barrel with some resources (L). Turn around and look down through the hole in the roof. Take a shot at the villager below you to get his attention. He and another villager will keep trying to climb the ladder to you. Just shoot them before they get to the top – they’ll fall off the ladder and take a little extra damage. Take your time and you can safely dispatch them both without directly engaging.
Climb down the ladder and into the shack.
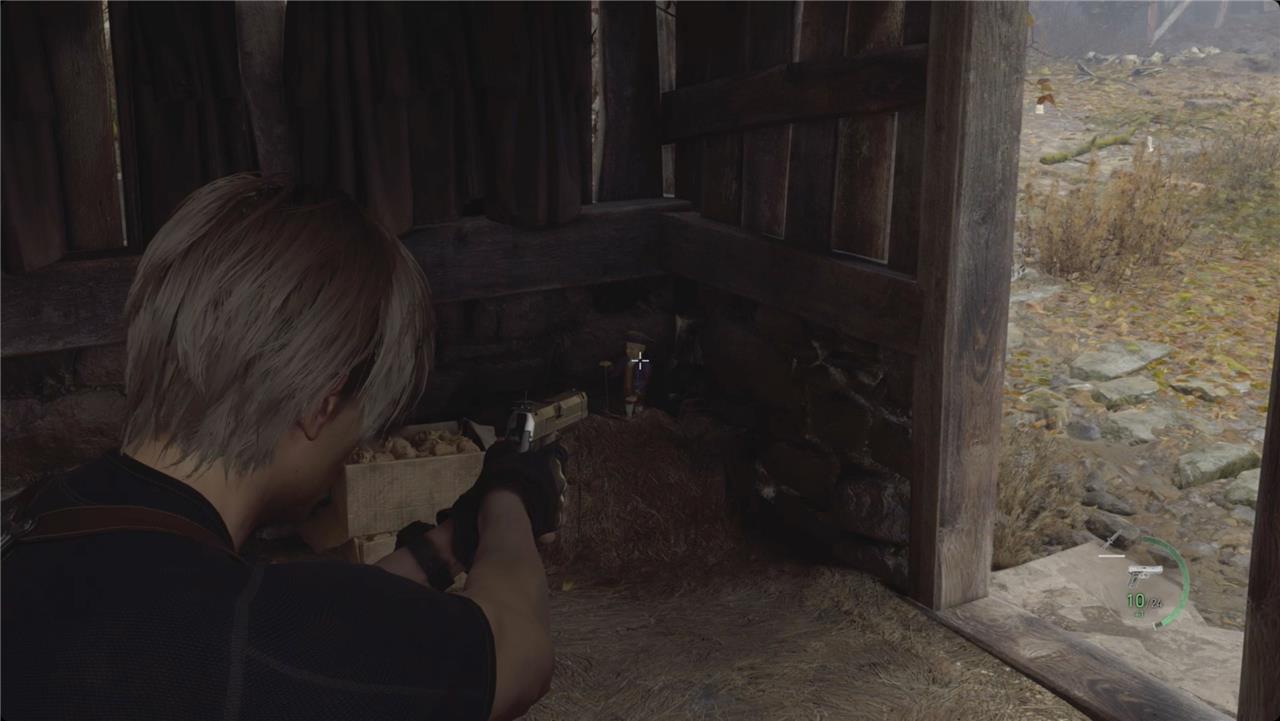
At the bottom of the ladder, turn left. Grab the flash grenade from the lockers and then head right to un-padlock the front door. Head back past the ladder and grab the hand grenade from the other lockers.
Go through the door next to the lockers. Open the chest on the left for a small key. Head through the next door. Loop back to the front of the shack to find a barrel with pesetas.
You’ll have a few more villagers to deal with, but now that we have the Hexagonal Emblem, it’s time to head back to the merchant and typewriter.
Merchant again
Return to the Merchant in the Valley after clearing the Village Chief’s Manor. Stock up on ammo and grenades from his shelves, then sell treasures like the Brass Pocket Watch and Elegant Headdress found inside the manor. Upgrade your handgun or shotgun for better crowd control against upcoming Ganados groups, and grab the TMP submachine gun if you have enough pesetas. His typewriter saves your progress right there.
When you get there, backtrack to the room where you picked up your gear inside the Abandoned Factory. Use the small key on the locked drawer to collect the Elegant Mask treasure. Combine it with a few round gemstones (like rubies) to increase its value – three rubies gets its value up to 19,600 pesetas.
Sell it, and use the cash to start tuning up (upgrading) your weapons. You can also repair your Combat Knife (it’s almost certainly broken by this point) and increase its durability.
Hexagonal-Shaped Slot
The hexagonal-shaped slot is found inside the Village Chief’s Manor, upstairs in a locked room that Leon can access later in the chapter. It’s part of a puzzle involving a key item that fits perfectly into the slot, allowing progress deeper into the story. Make sure to search the manor thoroughly, collecting any documents and treasures before leaving, as this area connects to the next major section of the game.
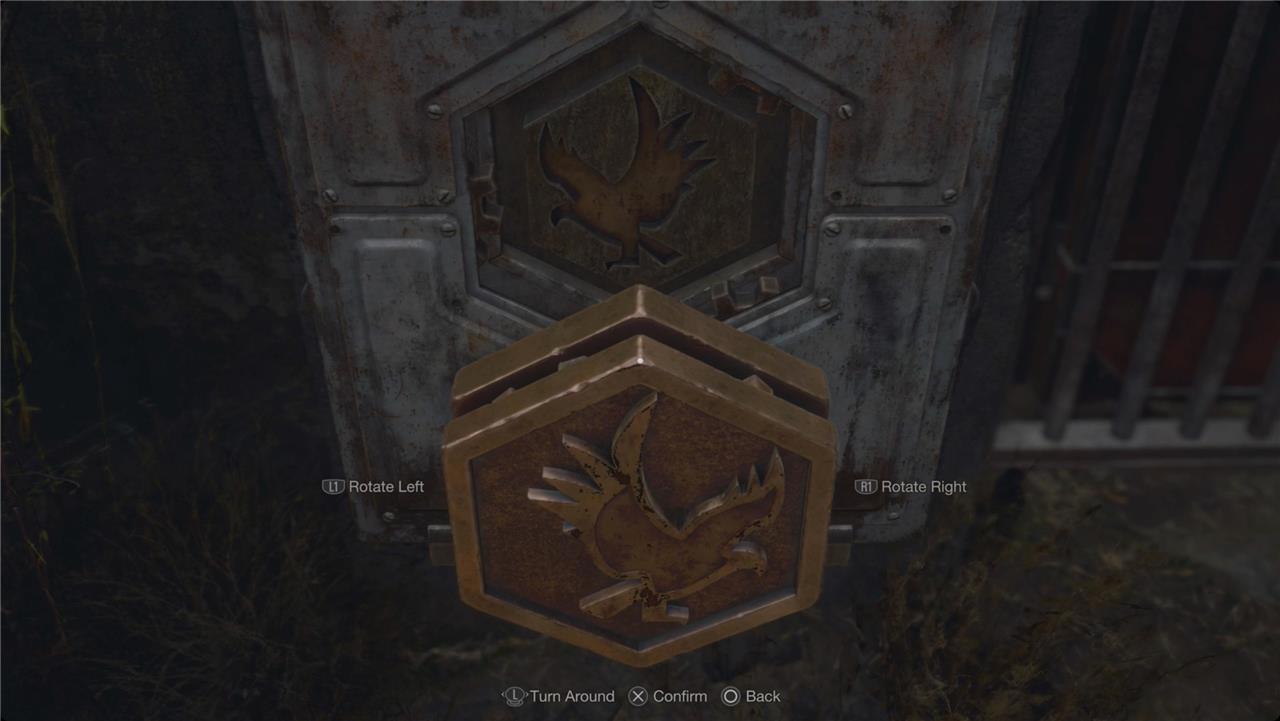
When you’re done with the merchant, save at the typewriter, and head to the Hexagonal-Shaped Slot to use the Hexagonal Emblem. Rotate it until it’s oriented the same way as the lock, and then turn it around. It’ll transform into a crank that raises the gate. Push through the doors.
Follow the path around and deal with the villagers. When you reach the storage area, grab the handgun ammo from the barrels on the left and smash the barrel on the right for some gunpowder (just watch the bear traps on the ground).
Head back to the left side and crouch through the opening. Grab the resources (L) as you pass, and then smash the barrels for resources (S) and handgun ammo. Open the chest to the right for a sapphire. Duck back through the gap and head up the stairs on the right.
Take a right and smash the barrel for handgun ammo. Around the time you reach the totally not creepy altar, a pair of villagers will appear behind you, followed by a Chainsaw Man ahead of you.
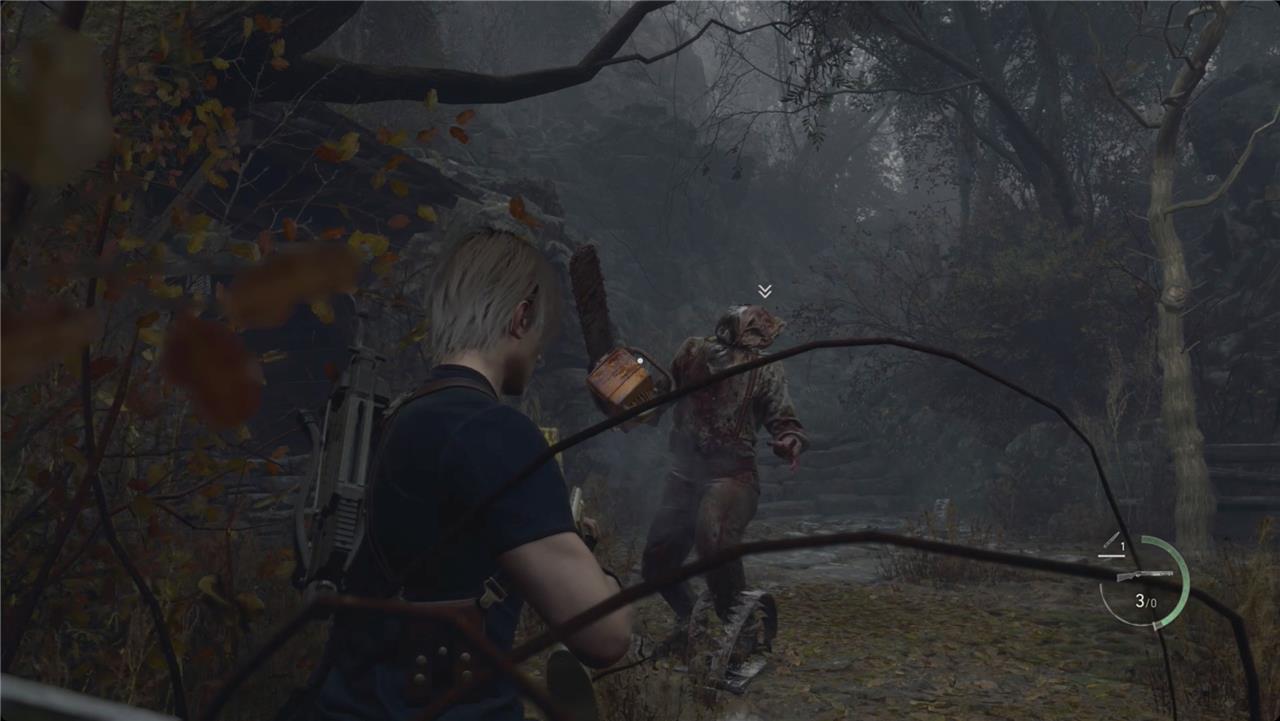
Get the villagers out of the way quickly, and then try to lure the Chainsaw Man through any bear traps you see around. Use the few seconds they buy you to put a few rounds into his head.
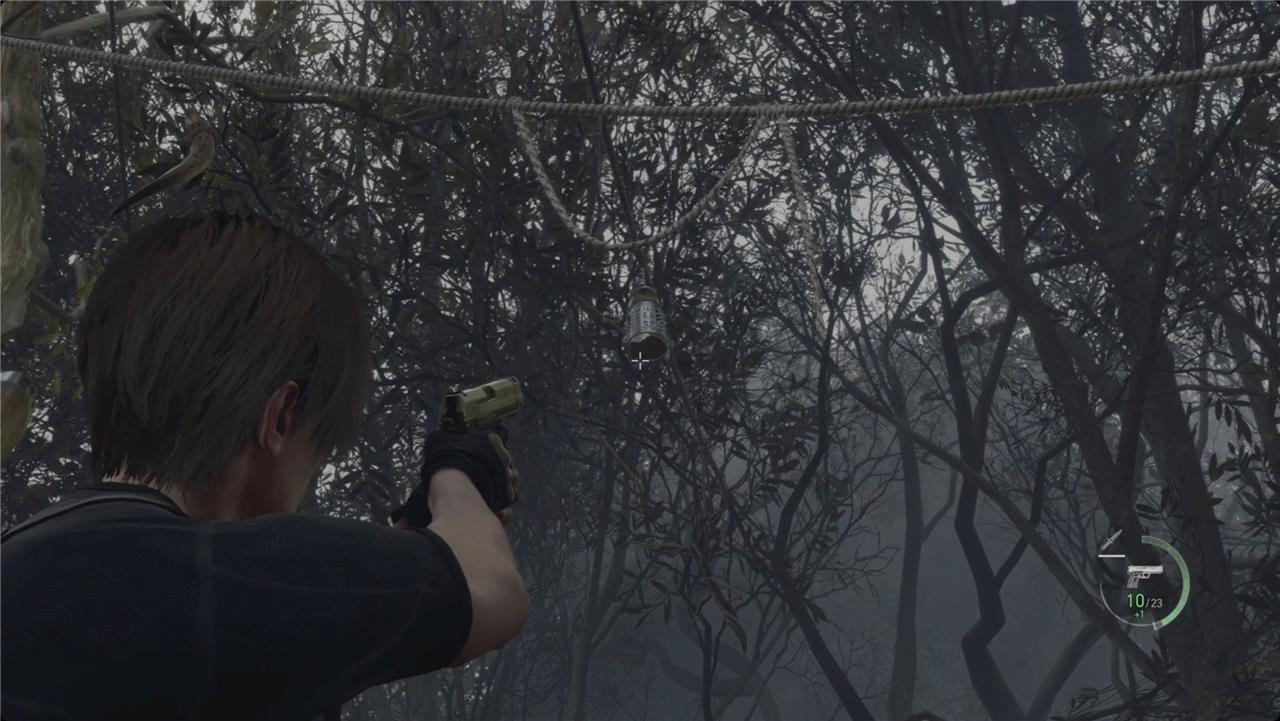
Back at the altar, look at the ropes above you. You’ll see a lantern like the one that was attached to the windmill in the Farm. Shoot it down for a sapphire.
Turn left and head into the shack. Smash the barrel inside for pesetas, and then grab the green herb and Scribbles About Dolls file from the table to the left.
When you turn around, look to the left of the door for the second Clockwork Castellan.
Back outside, turn left and look at the well. Shoot the upright to close the lid, and then shoot another lantern for another Pearl Pendant. Smash the barrel to the right for a kitchen knife.
Head up the stone steps.
Village Chief’s Manor
The Village Chief’s Manor stands as a foreboding stronghold in Chapter 2, packed with traps, Ganados, and hidden treasures. Players push through barricaded doors and solve the clock puzzle to claim the Old Wayshrine Key from the attic, while blue medallions lurk in shadowed corners for extra rewards. Expect brutal close-quarters fights in the dining hall and upper rooms-use the shotgun for crowds and grenades to clear paths. A typewriter lets you save progress before exiting toward the Church.
Watch for the trip wire at the gate, and then head up to the house. The front door is, unsurprisingly, locked, so head around to the left side. Smash the barrel by the well for some resources (L) and then keep walking into the weeds – watch for bear traps as you go.
Smash the barrel by the back door for some handgun ammo, and then head inside.
If you check the first door on the left, you’ll very embarrassingly interrupt someone on the toilet. Deal with them.
At the end of the hallway, check the drawer for a ruby.
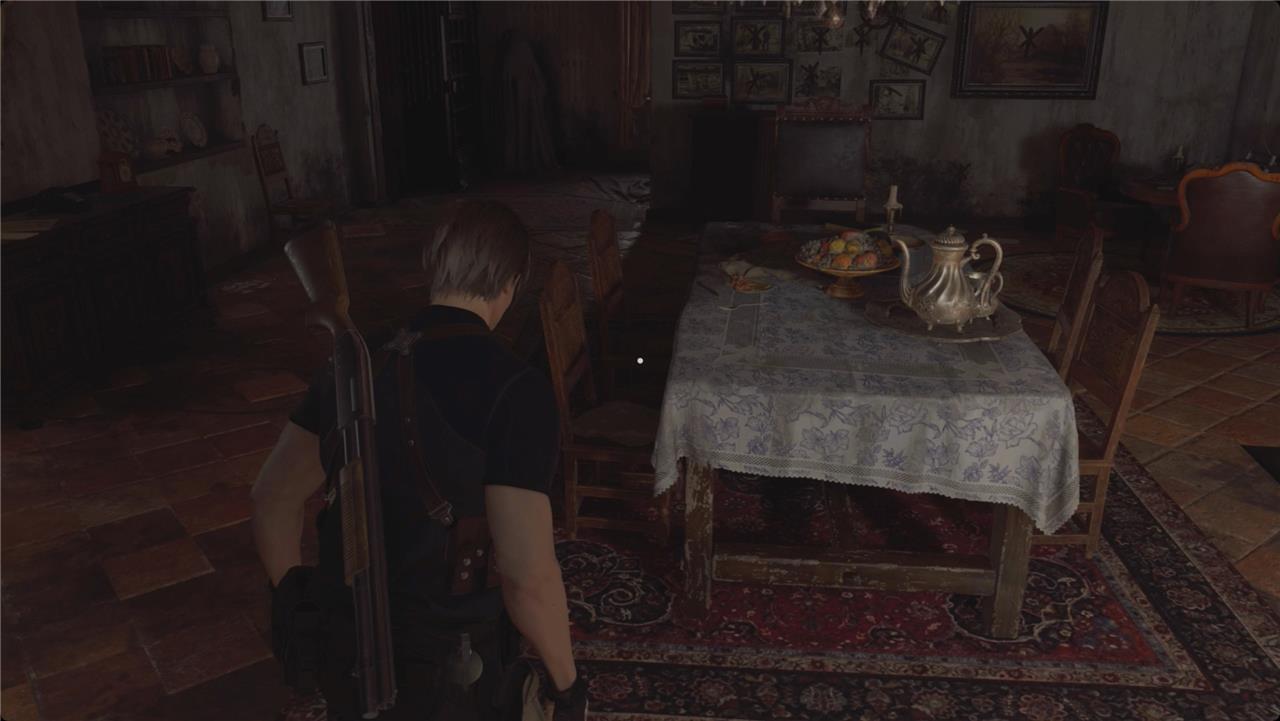
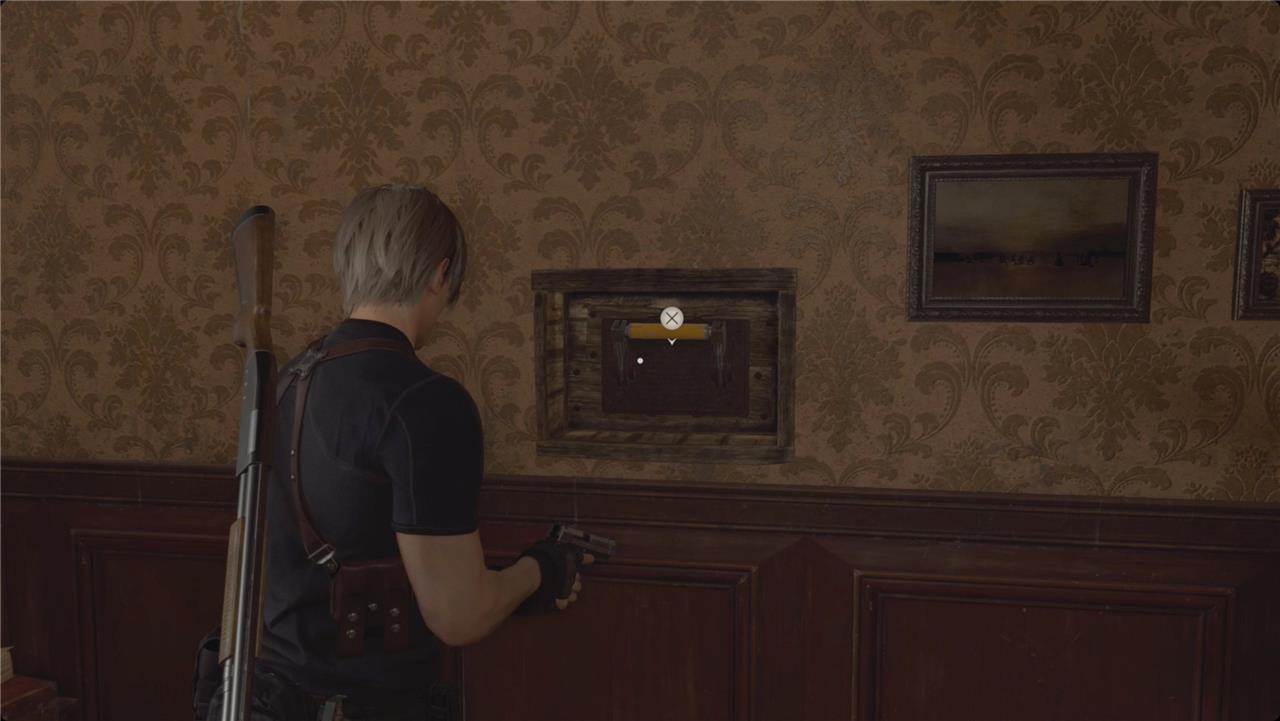
Go past the stairs and into the dining room. Turn right into the little kitchen nook and get the brown egg from inside the oven. Unlock the front door, and then grab another small key from over by the window. Pick up the Photo of a Family file from the table (flip it over to read the back).
Check the cabinet at the back of the room for some resources (L). Go through the doorway, and grab the hand grenade from the shelves on the left. Take a right. Pick up the pesetas (1,000!) from the table as you pass. The cabinet at the end has a combination lock on it – we’ll be back for that in a minute.
Head upstairs. At the top, there’s a typewriter and a red herb on your left.
Turn around and head down the hallway. There’s a book on your left with the Iluminados 4:3 file – which is also has the combination to that lock: crop, pig, and babe (as in baby).
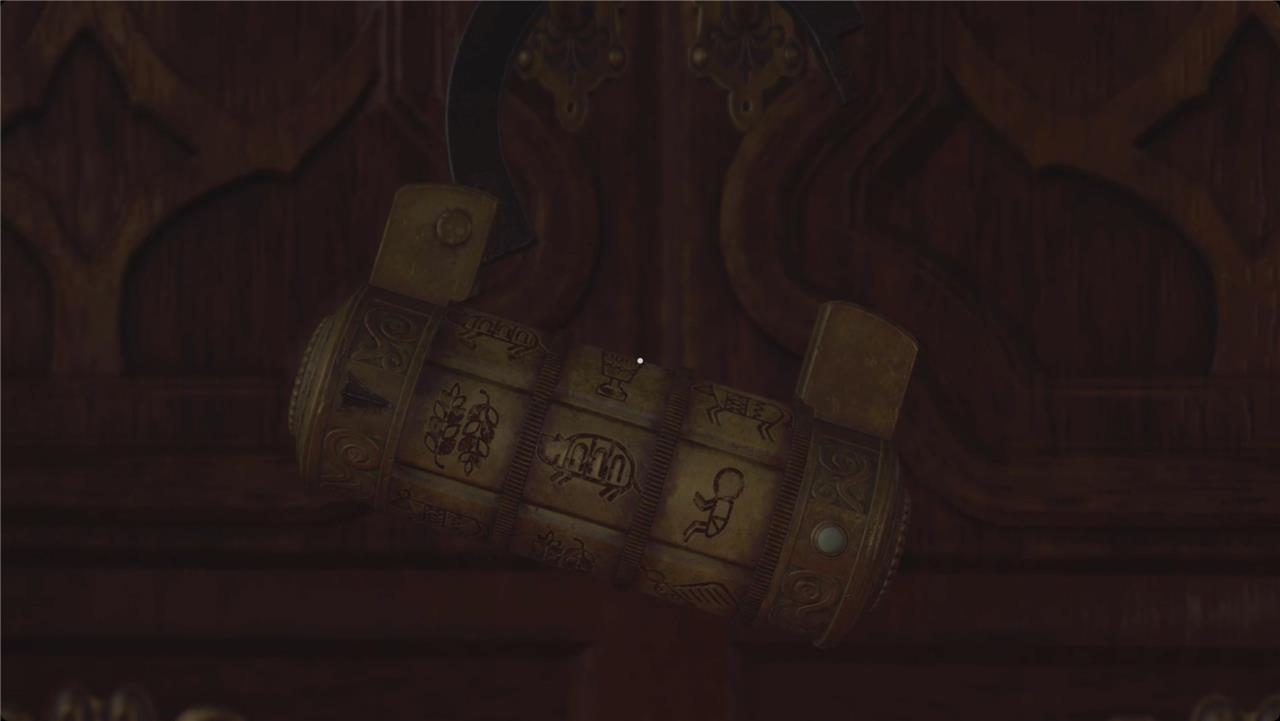
The pictograms are a little vague. The crop looks like laurel leaves, the pig looks like an armadillo, and the babe looks like a little guy facing left. Inside, you’ll find the Crystal Marble.
At this point, your buddy from the poop closet will show up again. Put him down (again), and then head upstairs.
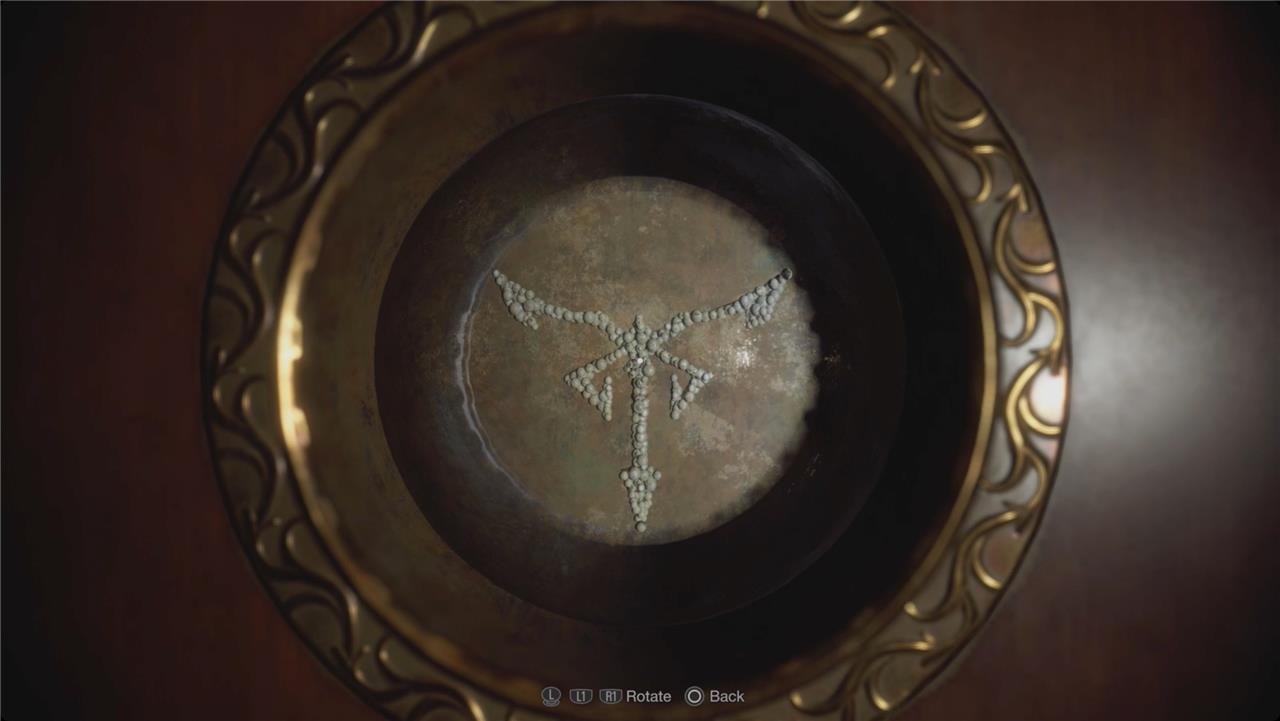
Place the Crystal Marble into the door. You’ll need to spin it so the air bubbles line up with the symbol in the lock:
- Spin it up until it looks like the symbol upside-down
- Spin it sideways 180°
- Spin it down 180°
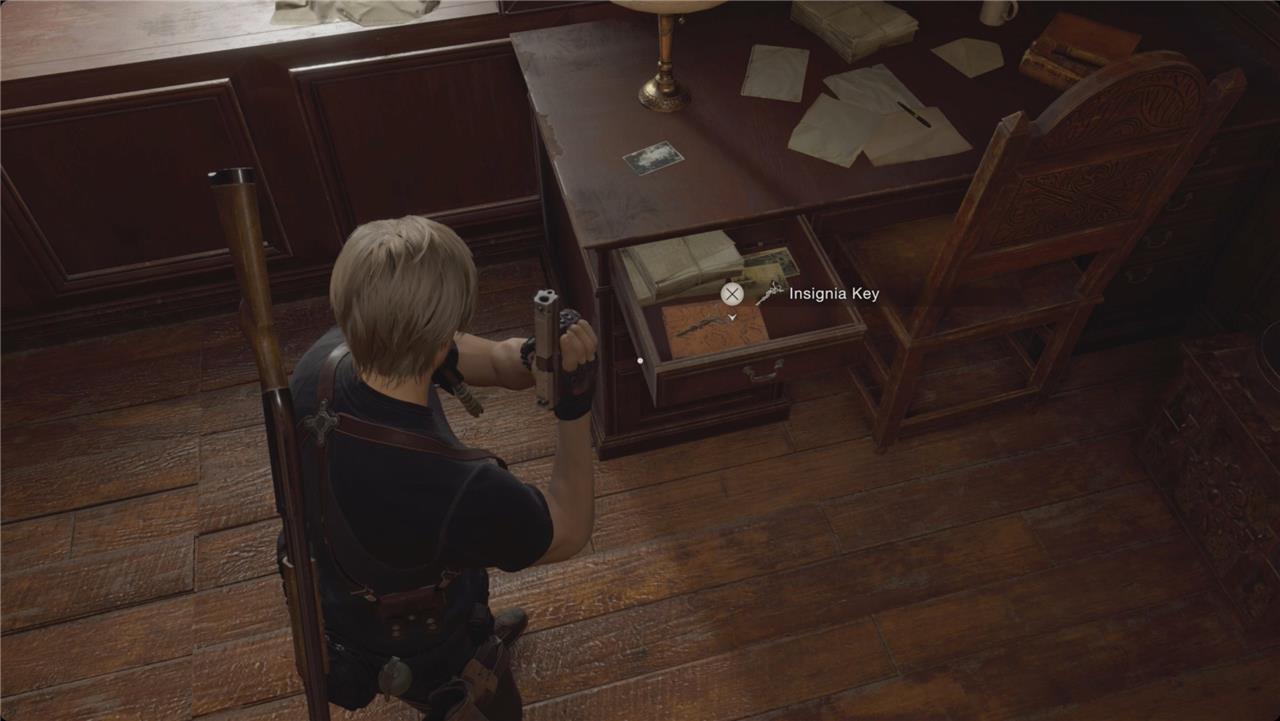
When you line it up, you’ll head into the bedroom. Make sure you pick up the key last – it’ll trigger a cutscene that ends the chapter.
On the left, read the very-not-concerning Village Records Vol 3 file and examine the portrait. On the right, ignore the desk and grab the handgun ammo.
One picture is hanging crooked along the right wall. Interact with it to knock it down and then pull the switch behind it to drop a ladder. You might be able to hear a Clockwork Castellan in the attic. We’ll be back for that later when we have some help.
Village Chief’s Manor all treasures and collectibles
Village Chief’s Manor in Resident Evil 4 Remake Chapter 2 holds several treasures and collectibles worth grabbing for Pesetas and completion. Some require backtracking later with Ashley in Chapter 5.
Chapter 2 Collectibles
-
Ruby: In the entry hall, check the drawer to the right of the stairs soon after entering. Worth 3,000 Pesetas.
-
Small Key: On a box in the corner of the living room; unlocks drawers elsewhere like the Vintage Compass (8,000 Pesetas) in Village Square.
-
Crystal Marble: From the upstairs combination lock cupboard (use code from nearby notes); solves the round door puzzle.
-
Insignia Key: Found upstairs after puzzles; opens paths forward.
Later Access (Chapter 5 Attic)
Boost Ashley up from the second-floor bedroom to reach the attic via ladder.
-
Antique Camera: Crawl under a wooden plank at the end; worth 10,000 Pesetas.
-
Castellan 5: Behind a yellow crate on the left side.
Nearby Path Treasures
On the Valley path to the manor: shoot lanterns for Pearl Pendant 2 (5,000 Pesetas, dirty if dropped in well) and Sapphire 3 (4,000 Pesetas).
Village Chief’s Manor all puzzles and solutions
Village Chief’s Manor in Resident Evil 4 Remake Chapter 2 features two main puzzles that must be solved sequentially to obtain the Insignia Key and progress.
Combination Lock
Upstairs, read the “Iluminados 4:3” book near the typewriter for the clue: offerings of crop (farmer), pig (swineherd), and babe (grandam). Head downstairs through the kitchen to the locked cabinet behind a beaded curtain. Input the symbols left to right: crop (leaves/wheat), pig, baby (small figure facing left). This unlocks the Crystal Marble.
Crystal Marble Puzzle
Take the marble upstairs to the Door with Round Slot at the hall’s end (watch for a spawning Plaga enemy). Insert it, then rotate using the left stick, L1/LB, and R1/RB: first align all white balls inside the sphere, then match the pattern to the door’s symbol (resembles a parasite or crest-typically upside down, rotated 180° sideways, then down). This opens the room with the Insignia Key in a drawer.