In the tense depths of the Missile Command Delta bunker, cracking the Breaker Room puzzle is your gateway to powering critical rooms and unlocking new paths. But beware-flipping the wrong switch could leave you powerless. Ready to master this electrifying challenge and turn the tide in your favor? Here’s how to solve the Breaker Room puzzle step-by-step on Nintendo Switch 2, PC, PlayStation, and Xbox.
Where to find the Power Generator
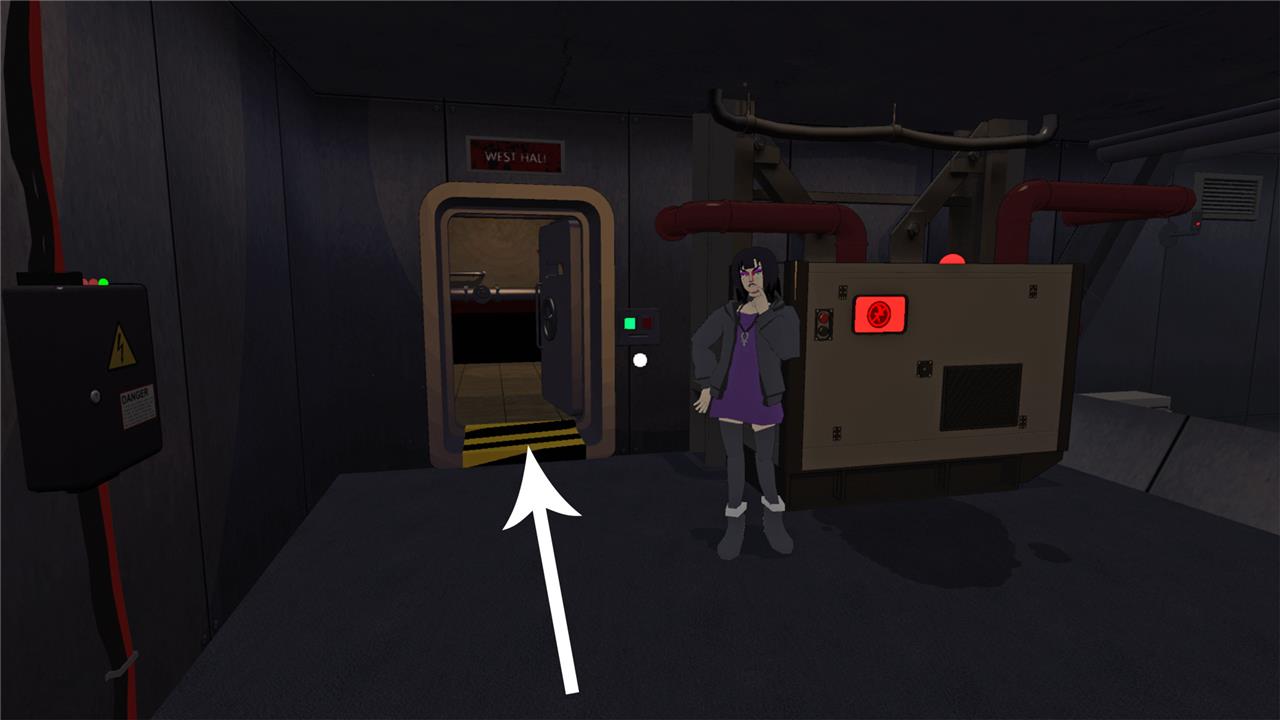
To find the Power Generator in Missile Command Delta’s Breaker Room puzzle, start by entering the bunker and then walk left from the entrance, moving into the hallway behind the character named Adel. This hallway leads directly to the room where the power generator is located, allowing you to proceed with the puzzle and further exploration of the bunker.
After Missile Command Delta’s tutorial, you and your friends will descend into an underground bunker shrouded in darkness. One of your buddies, Marta, will ask you to turn on the power.
To make your way toward the power generator, then walk left from the bunker’s entrance, entering the hallway behind Adel.
Follow the path to the right. The first door is locked, but the second door on the right can be opened. This is the Utility Closet.
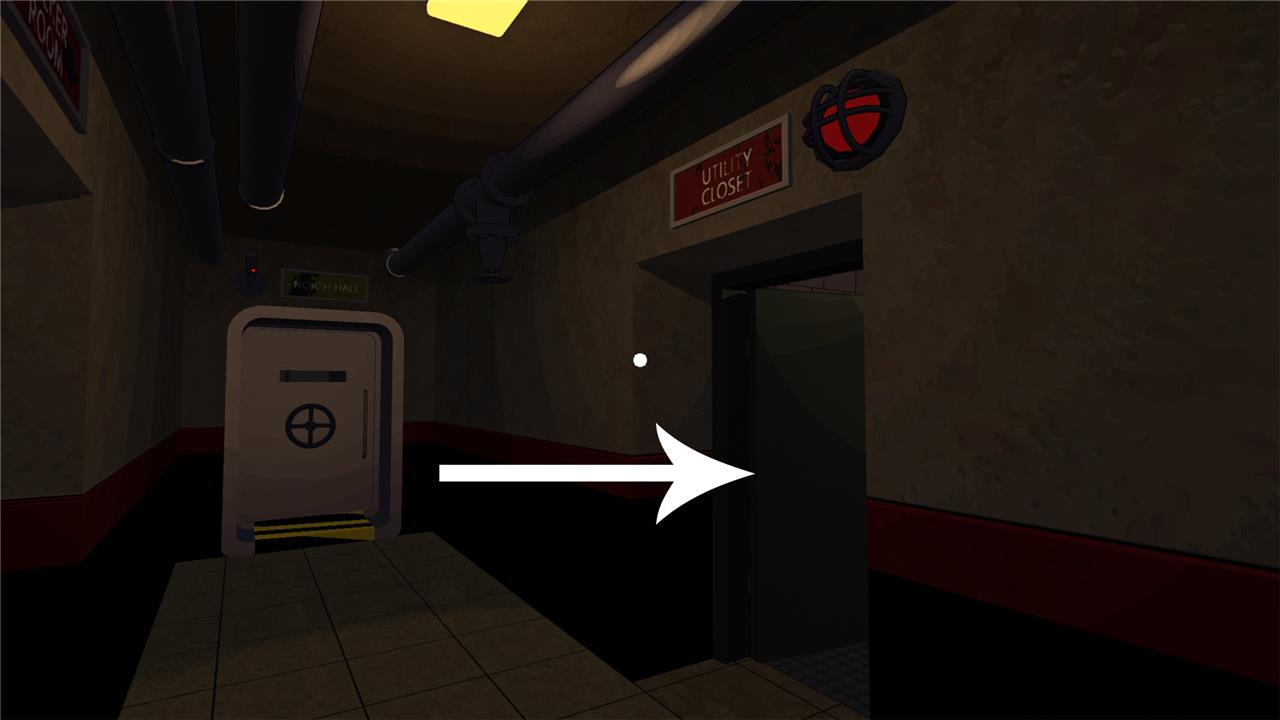
As it’s tough to navigate this room in near-complete darkness, don’t walk further than necessary; grab the Blue Keycard from the table just behind the door, which is all you need for now. It’s on a “notice” sign along with an access card (you’ll need this to access a computer later on). If you do get stuck in the darkness, it’s helpful to turn up the game’s brightness in the settings.

Walk back in the direction you came from. Remember that locked door? Now that you’ve got the Blue Keycard, you can open it. Interact with the device on the left side of the door. This room is called the Breaker Room, and it contains the power generator.
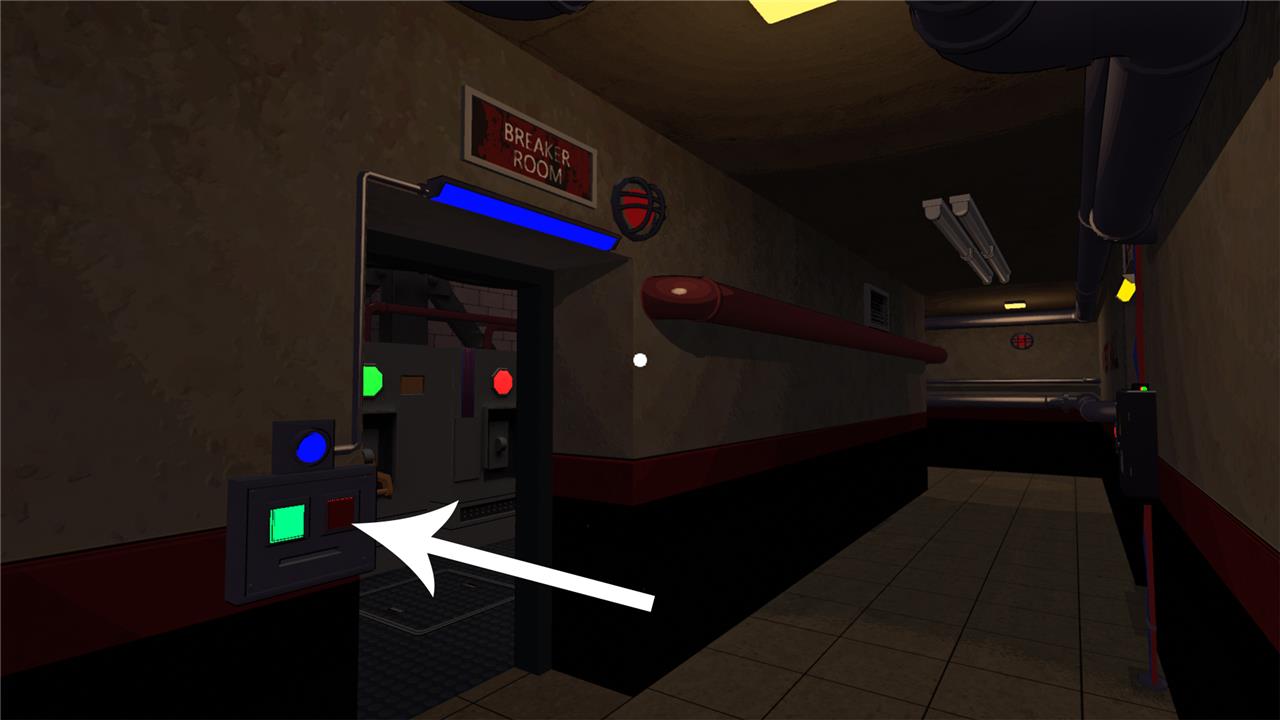
Inside the room, on the wall to the left, you will see four lights (either red or green) and three switches – alas, the second light is missing its switch! You’ve got to find it before you can solve the energy puzzle.
Where to find the missing power switch
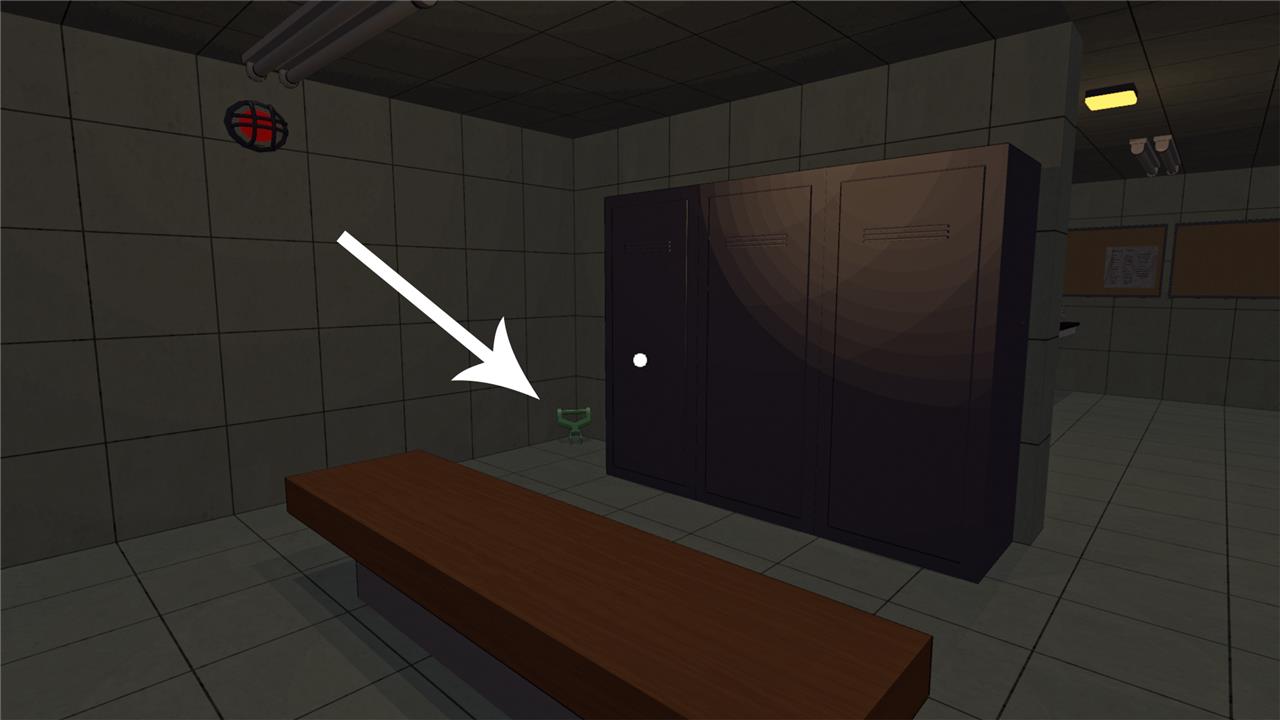
The missing power switch in the Breaker Room puzzle of Missile Command Delta can be found by turning right toward the Utility Room and taking the first door on your left, which leads into the Locker Room. Inside, enter the room on the left and search the corner on your right, behind the closet, where the switch will be lying on the ground.
Walk back into the hallway. Turn right, into the direction of the Utility Room, but this time, take the first door on your left, leading into the Locker Room.
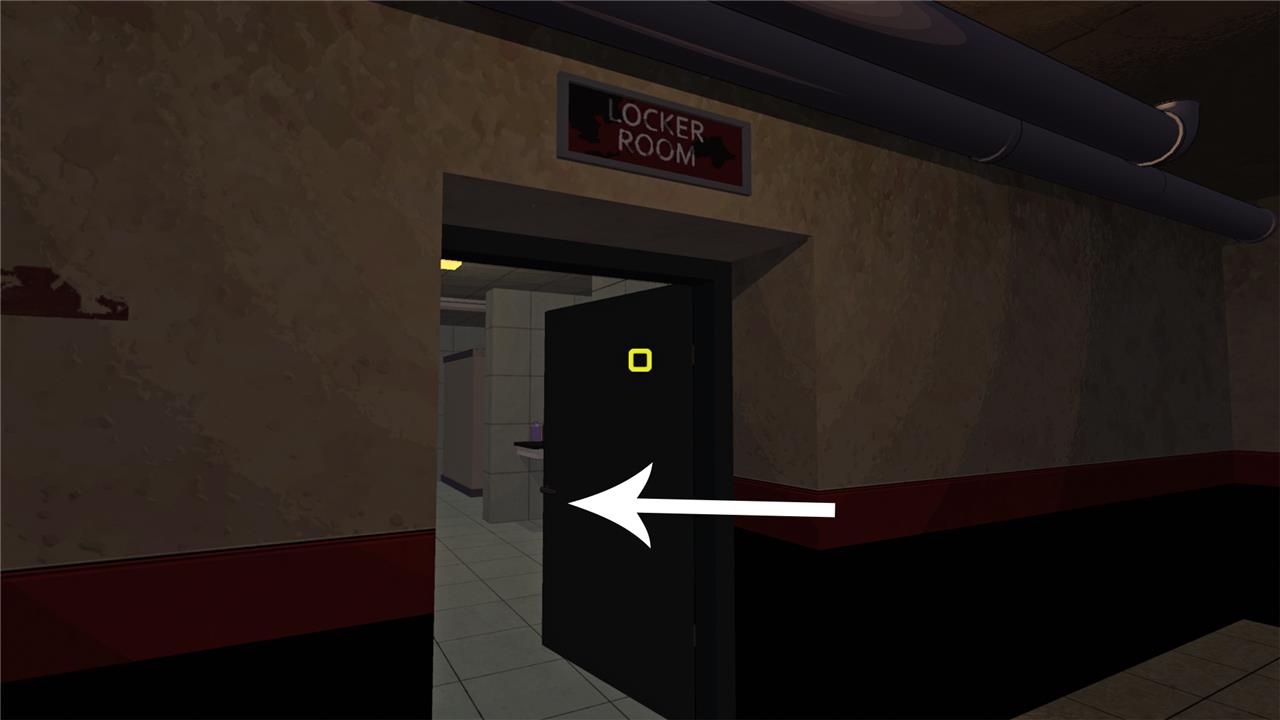
Enter the room on the left, then search the corner on your right, behind the closet. You’ll find the missing switch on the ground.
Pick it up and take it back to the Breaker Room, where you must place it below the first red light. There’s only one thing left to do: solve the energy puzzle.
Breaker Room puzzle solution in Missile Command Delta
In Missile Command Delta, to solve the Breaker Room puzzle after re-attaching the green lever, you must ensure all the lights on the power generator turn green. Initially, the first and third lights switch to red, while the second and fourth lights turn green. The goal is to manipulate the controls so every light becomes green, thereby restoring power and progressing in the game.
After re-attaching the green lever, the first and third lights on the power generator are switched to red, and the second and fourth lights are switched to green. To turn on the power, every light must become green. Annoyingly enough, switching certain lights to green will automatically switch other lights back to red, so you have to pull the levers in the correct order.
Pull the switches in the following order to turn on the power:
What is the key step to solving the Breaker Room puzzle quickly in Missile Command Delta
The key step to solving the Breaker Room puzzle quickly in Missile Command Delta is to pull the levers in a specific sequence: first the right lever, then the left lever, and finally the third lever. This order ensures the puzzle is solved efficiently without unnecessary lever flips.
Additionally, understanding the logic behind the breaker switches is essential: you often need to flip two switches at a time to match the numbers associated with the doors you want to open. For example, to open the middle door (cage 3), you flip breaker 1 and 2 together rather than just one switch alone. Avoiding incorrect lever flips that could cause power issues or dead ends is crucial too.
So, the fastest way is to follow the correct lever pulling order and understand that flipping pairs of switches corresponds to unlocking specific doors, which prevents time-consuming trial and error.
What is the sequence of levers to pull in the Breaker Room puzzle
The sequence of levers to pull in the Breaker Room puzzle in Missile Command Delta involves flipping the breakers in specific pairs based on the door numbers you want to open. The breakers are labeled 1, 2, 3, and 4, and the cage doors are numbered 3, 5, and 7.
To open the middle cage door (number 3), you need to pull breakers 1 and 2 together. For opening Jacob’s cage door (number 5), you pull breakers 2 and 3 together. The key is that you flip two breakers at a time, and their numbers add up to the target door number. Avoid flipping breaker 3 alone or in the wrong combination, as it can cause power issues or fail the puzzle.
So the main lever pull sequence for the middle door (the central puzzle objective) is:
-
Pull breaker 1 and breaker 2 together first.
This sequence ensures you solve the puzzle efficiently by matching the breakers to the cage door numbers correctly.
Additionally, pulling levers in the order of right lever, then left lever, and finally the third lever was previously noted as a quick solving strategy, which aligns with the idea of a specific lever sequence to avoid unnecessary attempts[previous conversation].
In summary: Use pairs of breakers whose numbers add up to the cage door numbers, starting with breakers 1 and 2 for the middle door. Avoid flipping breakers individually or in the wrong pair.
If you want a more detailed step-by-step or tailored instructions for other doors, please let me know.