Perched high above Elyos, the Somniel isn’t just your headquarters-it’s a haven packed with hidden features, character moments, and ways to strengthen your allies between battles. Here’s why spending time there can change how you play Fire Emblem Engage.
After each chapter and mission in Fire Emblem Engage, out now for Nintendo Switch, you can head back to the Somniel, the headquarters for you and your allies. You can also go straight to the next chapter or another mission without returning, but you’ll miss out on a slew of benefits that you’re better off reaping sooner than later. Continue reading to learn what you can do to strengthen your allies – and why you should spend your time exploring the Somniel.
What is the Somniel in Fire Emblem Engage?
The Somniel acts as the central hub in Fire Emblem Engage, a floating fortress players access between chapters to manage their army. It hosts facilities like the Arena for training units and boosting Emblem bonds, the Armory for gear upgrades, and a Farmyard for gathering materials from rescued animals. Players interact with allies through conversations, minigames such as fishing or Wyvern Riding, and Sommie the mascot for extra Bond Fragments.
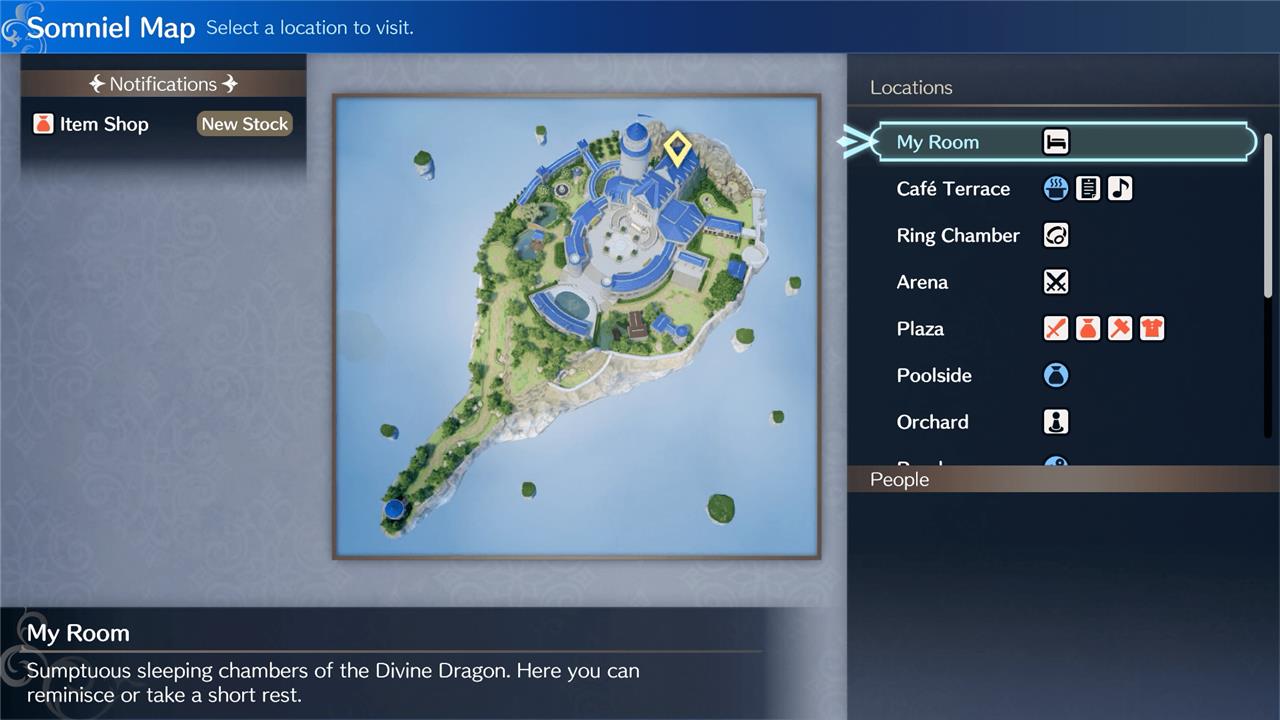
The Somniel is your floating island sanctuary where you can purchase items, socialize with allies, hone your team’s skills, and perform a variety of other tasks that’ll bolster your squad. As you progress in the story, more people will take shelter at the Somniel, and you’ll unlock more activities and tasks you can complete. Any action you take will provide some sort of benefit, such as stat boosts or extra resources. Returning to the Somniel is completely optional, so you might not complete any of these activities, but you’ll be missing out on a lot of buffs to your characters if you skip them.
What can you do at the Somniel?
At the Somniel, you can manage your team, interact with allies, and strengthen your bonds between missions. It serves as a personal retreat where you can train units, prepare equipment, cook meals, care for animals, and collect rewards from various facilities. Exploring the different areas helps you improve support levels, gain useful bonuses for battle, and enjoy relaxing moments with your companions between fights.
When you travel to the Somniel, you’ll spawn at the Plaza, a shopping center where you can buy items, upgrade weapons, and change outfits. Restock your items and change out your gear while you’re here, if you’re running low on heals or not dealing enough damage during battle. The Plaza is also the center of the Somniel, so head over to any connecting area or fast travel to any location by using the map.

One of the Plaza’s connecting areas is the Café Terrace, where you can check the bulletin board. Support other countries at the bulletin board through donations, which will increase the rewards you receive from missions within a supported country’s borders. You can also claim bond fragments, a resource used to create Bond rings and increase bonds with Emblems, by completing achievements listed on the bulletin board. Your bedroom can be found just above the café. In your room, you can rewatch cutscenes, rest in bed to change the time of day, and lower your difficulty level.
From the Café Terrace, you can go to the Ring Chamber and the Arena, two of the most important areas on the Somniel. At the Ring Chamber, you can use the Emblem rings, rings that have the power of Fire Emblem characters from previous games, in your possession to gain passive abilities by spending SP, a resource earned through battles, and create Bond rings, rings that increase stats and allow units to earn SP.

In the Arena, you can train your allies to gain experience and bond levels.
- Participate in standard training to have two allies spar one another for experience; this costs nothing, but you can only train three times between missions.
- Select emblem training to increase the bond between an ally and an Emblem; this costs bond fragments, and you can train as much as you like – as long as you have fragments to spare.
These two areas will change the way you play the game by allowing you to customize how you want your characters to fight. Raise the bonds between your characters and Emblems to learn how to use any weapon, giving you more flexibility in how you play.
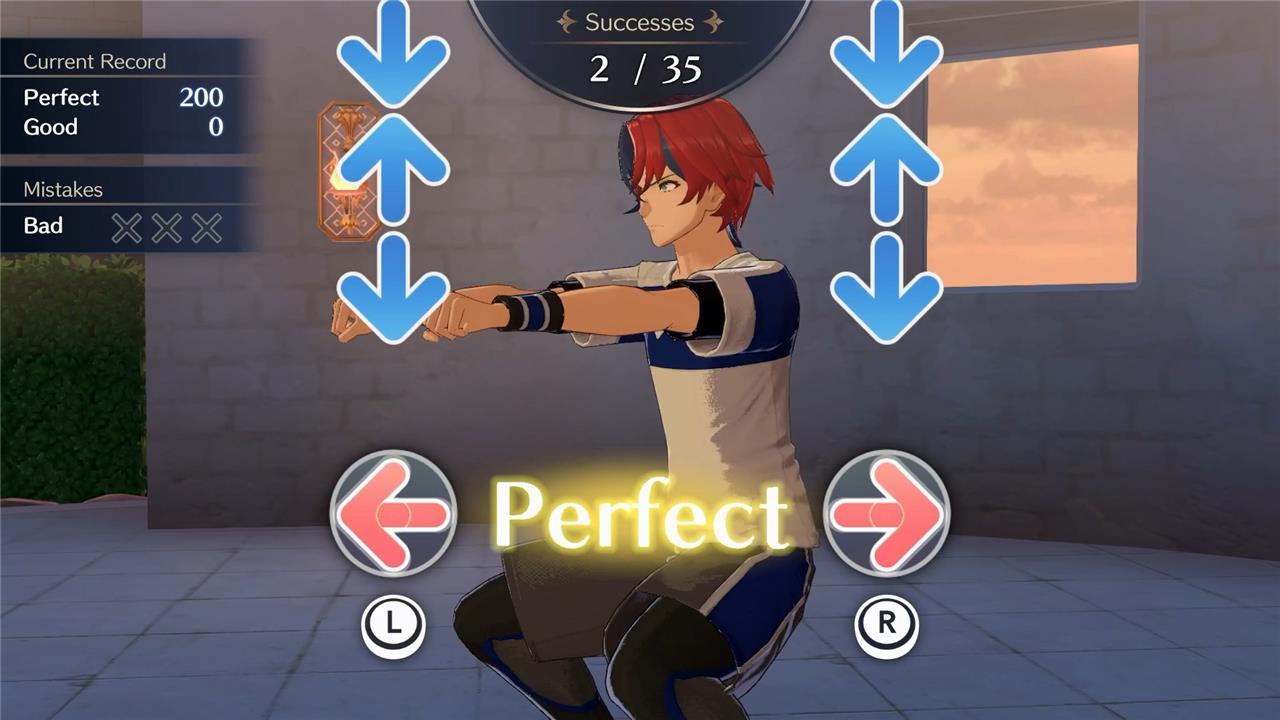
There are a few ways to boost your characters’ stats for the next mission. Head to the training yard to complete minigames, that’ll increase a single stat for the next battle. You’ll also gain bond fragments, with more resulting from harder difficulties. As you progress, you’ll unlock Wyvern Riding, a minigame that’ll provide you with bond fragments and battle items. Over at the Café Terrace, order a meal for two of your allies in the dining area to boost your support level – the relationship level between characters – and combat stats for your next mission. Catering the dishes to your dining partners’ tastes will result in a larger increase to your companion’s stats, but be careful: The chef can mess up your dish, resulting in a stat decrease.
There are a ton of resources, indicated by pulsing white dots on the map, you can gather around the Somniel. These materials can be used to cook a meal at the café, refine your weapons in the Plaza, or as gifts to boost support between you and your allies.
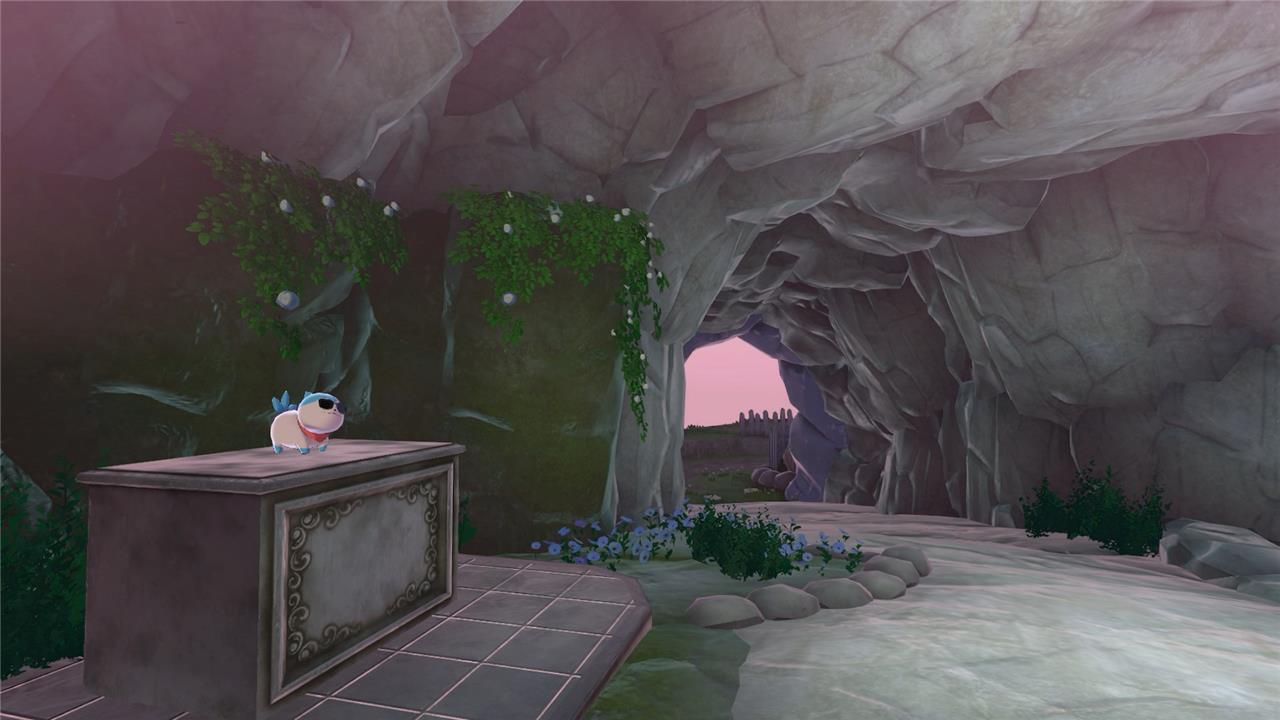
As you progress through Fire Emblem Engage, you may have adopted animals that you’ve encountered. Let them roam the Farmyard to obtain animal specific goods that you may need. For example, dogs tend to drop ingots that can be used to upgrade your weapons. If you’re looking for more bond fragments, visit the Grotto to find Sommie, the watchdog of the Somniel. Feed and pet the guardian spirit to receive bond fragments after every mission. (Yes, Fire Emblem Engage lets you pet the dog.)
Located at the southern tip of the Somniel is the Tower of Trials, which is unlocked after completing Chapter 11. At the Tower of Trials, you’ll complete a series of battles that’ll reward you with experience and crystals. Crystals can be used to raise stats like Might and Hit for Engage weapons, weapons available to you after Engaging an Emblem ring in battle, at the Ring Chamber. You can also participate in multiplayer content at the tower by cooperating with one another or facing each other head on. Any change to your army will be reverted back once the trial is over, so don’t worry if a character falls in battle.
How to create and use Bond Rings effectively
Bond Rings in Fire Emblem Engage provide passive stat boosts and SP gains without occupying your main ring slots. They’re crafted in the Somniel’s Ring Chamber using Bond Fragments, offering a key way to strengthen units between battles.
Creating Bond Rings
Head to the Ring Chamber and select “Create Bond Rings” at the central pedestal. Choose an Emblem (like Sigurd or Byleth), then spend 100 Bond Fragments for one ring or 1000 for ten-randomly generated based on that Emblem’s ally table (e.g., S-rank Dimitri from Byleth’s slots).
To upgrade, meld duplicates: two C-rank rings make a B-rank for 100 fragments, scaling up to S-rank. Farm fragments via Sommie interactions, fishing, or battles, then save-scum post-battle: create ten rings, note desired ones by position/slot, reload, and buy singles or swap Emblems for exact matches-saving fragments long-term.
Equipping Effectively
Access the Unit Info menu (Y button) on any ally and slot Bond Rings freely-no limits beyond inventory. Prioritize S/A-ranks on frontline units for max stats (e.g., +6 HP, Str, etc., varying by ring) and consistent SP for Emblem skill inheritance.
Focus high-value rings like Wrath/Resonance builds on mages or cavs; equip early for SP grinding in Arena. They stack with Emblem Rings but prioritize Emblems in combat-use Bonds for passive farming.
Best Emblems for Bond Rings on each unit
Bond Rings from specific Emblems provide tailored stat boosts and skills that synergize with each unit’s role, maximizing passive benefits like SP gain and combat utility. Prioritize S-rank versions for optimal effects, focusing on Emblems whose ally pools offer skills matching unit strengths (e.g., magic boosts for tomes).
Infantry and Lords (Alear, Vander, Clanne, Framme)
Use Byleth for Dimitri (Str/Spd/Def focus, Perceptive aids dodges) or Edelgard (HP/Str/Def, Flickering Flower freezes foes). Lyn works too for Eliwood (balanced stats, Extra Attack procs).
Armors (Celine, Louis, Anna)
Sigurd’s Seliph (Str/Dex/Def, Battlewise stacks Crit) or Byleth’s Edelgard shine here, boosting tankiness. Avoid frail magic rings.
Cavalry (Fogado, Bunet, Goldmary)
Leif for Finn (Str/Dex/Spd, Miracle survival) or Sigurd for Ayra (Dex/Spd/Lck, Astra multi-hits). Lyn’s Hector adds raw power.
Fliers (Chloé, Jade)
Roy for Lilina (Mag/Spd, Blazing) or Lyn for Florina (Spd/Lck/Res, Airspeed boosts). Prioritize speed/evasion synergies.
Mages/Healers (Citrinne, Lapis, Pandreo)
Celica for Mae (+2 Mag/Spd/Res, Thunder boost) or Micaiah for Sothe (Dex/Spd, Ambush). Byleth’s Lysithea amps magic nukes.
Thieves/Bows (Panette, Merrin, Zelkov)
Lucina for Gaius (Dex/Spd/Lck, Lethality crit-kills) or Lyn for Matthew (Dex/Spd, Locktouch utility).
| Unit Type | Top Emblem Choices | Key Stats/Skill | Notes |
|---|---|---|---|
| Sword Infantry | Byleth/Lyn | Dimitri/Eliwood: Str+Spd, Perceptive/Extra Atk | Dodge tanks |
| Axe Armor | Sigurd/Byleth | Seliph/Edelgard: Def+Crit freeze | Frontline hold |
| Lance Cav | Leif/Sigurd | Finn/Ayra: Spd+Miracle/Astra | Pursuit/evasion |
| Bow Flier | Roy/Lyn | Lilina/Florina: Spd+Blazing/Airspeed | Air superiority |
| Tome Mage | Celica/Micaiah | Mae/Sothe: Mag+Thunder/Ambush | Damage spikes |