Beneath the searing heat of Monster Hunter Wilds’ Basin biome, the Ajarakan-a magma-fueled, wrestling-obsessed beast-awaits challengers with relentless aggression and volcanic fury. Its weak points, especially the arms and head, offer brief windows for counterattack amid a barrage of crushing slams and fiery eruptions. Tracking it to the lower levels near lava pools, hunters must balance ice-based offense and fire resistance, exploiting the monster’s recovery after its most powerful attacks to turn the tide in this explosive showdown.
As far as new additions in Wilds go, Ajarakan makes a huge effort to steal the spotlight by sheer force alone. This guide covers the Ajarakan weaknesses and resistances to prepare accordingly, where to find it, and the best strategy to defeat one of the new foes introduced in Monster Hunter Wilds.
Ajarakan location
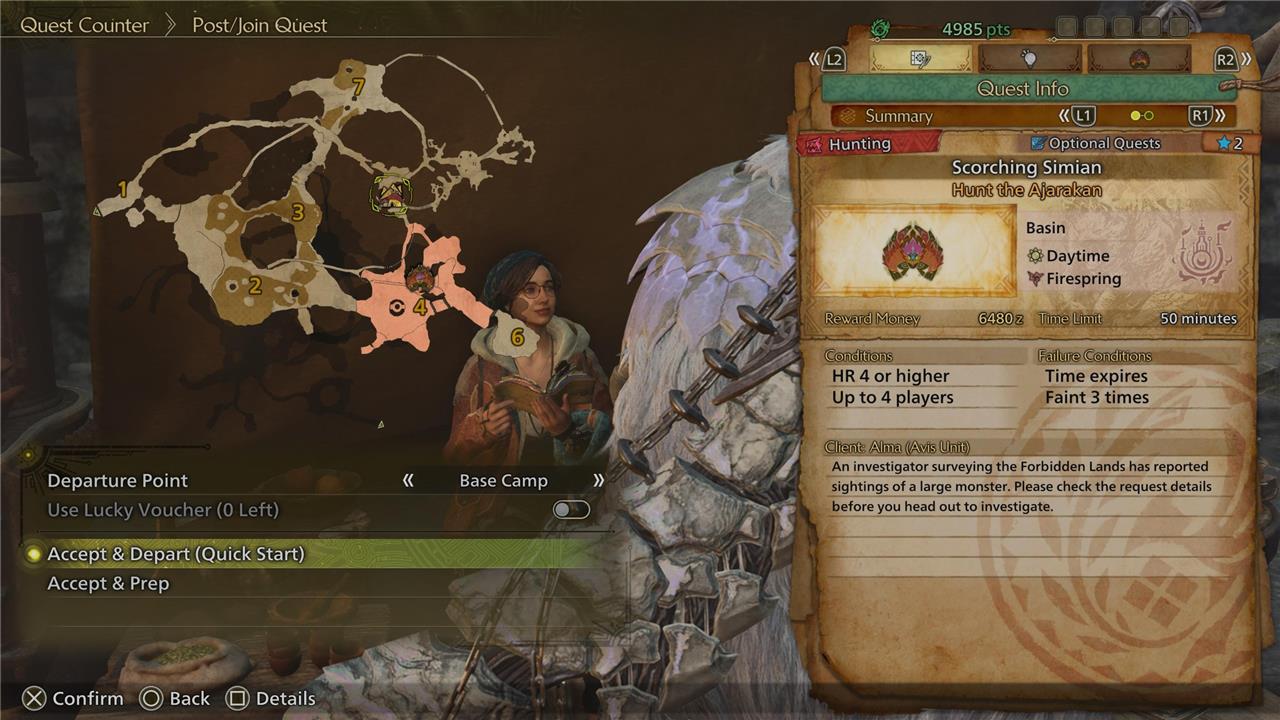
Ajarakan is primarily found in the Oilwell Basin biome in Monster Hunter Wilds, where it tends to roam the lower levels, especially near lava pools, making heat resistance essential for hunters exploring this area. After progressing through the main story, particularly post-Chapter 3, Ajarakan can also occasionally appear in the Ruins of Wyveria, though the Basin remains its main habitat. Within the Basin, it commonly moves between specific zones, such as areas 2, 4, and 6, and may avoid the central village level. To check if Ajarakan is currently present, players can use the Environment Overview screen or look for tracks and signs in its designated biomes.
You’ll first encounter Ajarakan in Chapter 2, during the Long Forgotten Flame main mission. As such, all you need to do to unlock the monster is progress through the main questline.
Ajarakan is usually found in the Basin biome, but there’s a chance of seeing it in Wyveria during the post-game (once you finish Chapter 3). In the first, the beast tends to roam around 4, and then circles between 2 and 6.
Keep in mind that in Monster Hunter Wilds, tracking monsters isn’t really a prominent feature. Except for a few first-time exceptions, you can use the Environment Overview screen to see if your target is roaming around the map. If not, exploring its corresponding biome(s) for a few minutes usually does the trick – you’ll see a notification on screen announcing its appearance. Worst case scenario, you can speak to Alma and post a hunt for it. For better or worse, the process of finding a monster is much more streamlined now. If you find tracks or other monster residuals on the ground, you can loot them for materials.
How to prepare for Ajarakan
Preparing for the Ajarakan fight in Monster Hunter Wilds requires careful planning due to its fiery attacks and hazardous environment. Make sure to stock up on Potions, Cool Drinks, and Nulberries, as you’ll need to manage both the intense heat and status effects like Fireblight and Blastblight throughout the encounter. Bringing equipment or items that grant resistance to these status effects-such as Chillmantle Bugs for insulation and armor with Fireblight or Blastblight resistance-will help you survive longer. Flash Pods, Shock Traps, and Pitfall Traps are effective tools for controlling the fight, while Sonic Bombs should be left behind as they are ineffective against Ajarakan. Before heading out, eat a meal to boost your health and stamina, and consider gathering honey to craft Mega Potions for additional healing support. Equipping Water or Ice elemental weapons will give you a significant advantage, as Ajarakan is highly susceptible to these elements, while Fire weapons are completely ineffective. Finally, remember to maintain your distance when possible and stay mobile to avoid Ajarakan’s powerful melee attacks.
Ajarakan is part of the main story of Monster Hunter Wilds. As such, its encounter is likely to fit your Hunter Rank at that corresponding moment. If you have a weapon with Water or Ice as its main element, you’ll have the advantage of targeting an elemental weakness. Both Uth Duna and Hirabami will be helpful for the elements, respectively. As for armor, I didn’t particularly target a set that would protect me from Fire. If you’re really struggling, the sets from the aforementioned monsters will help, or at least some parts of them alongside your existing loadout.
Since the encounter occurs during a main mission, you’ll be thrust into the fray after the introductory cutscene. As per usual, whenever you’re asked if you’re ready to depart, make sure that you’re carrying regular and mega potions with you. If you’re short on the latter, take a lap around the biome and loot any honey you come across.
In addition, don’t forget to eat – you can use the portable BBQ to grill a meal. Increasing your health and stamina is essential, as Doshaguma packs a punch. You can use ingredients like Wild Herb as finishing touches to boost your elemental resistance, helpful to deal with all that fire. Also, since you’ll be in the Basin biome, don’t forget your Cool Drink.
For later encounters, carrying a few Puddle or Frost Pods will be beneficial – if either you or one of your teammates have a ranged weapon with Water or Freeze Ammo, even better. I also recommend investing in defense as much as possible. Remember that you can not only craft better armor, but also upgrade your current pieces. Even if you don’t have new monsters left to hunt to unlock more powerful sets, take the time to improve your gear and boost its stats.
Ajarakan weakness
Ajarakan weakness
Ajarakan in Monster Hunter Wilds is especially vulnerable to Water and Ice elemental attacks, with Water being the most effective choice. Its primary weak points are the head, tail, and forelegs, all of which receive significantly increased damage from both Slashing and Bludgeoning weapons. Targeting the tail is particularly advantageous, as severing it early in the fight reduces the threat of its sweeping tail attacks. Hunters are advised to use weapons like Longswords, Dual Blades, and Hammers to exploit these weaknesses and maximize damage output.
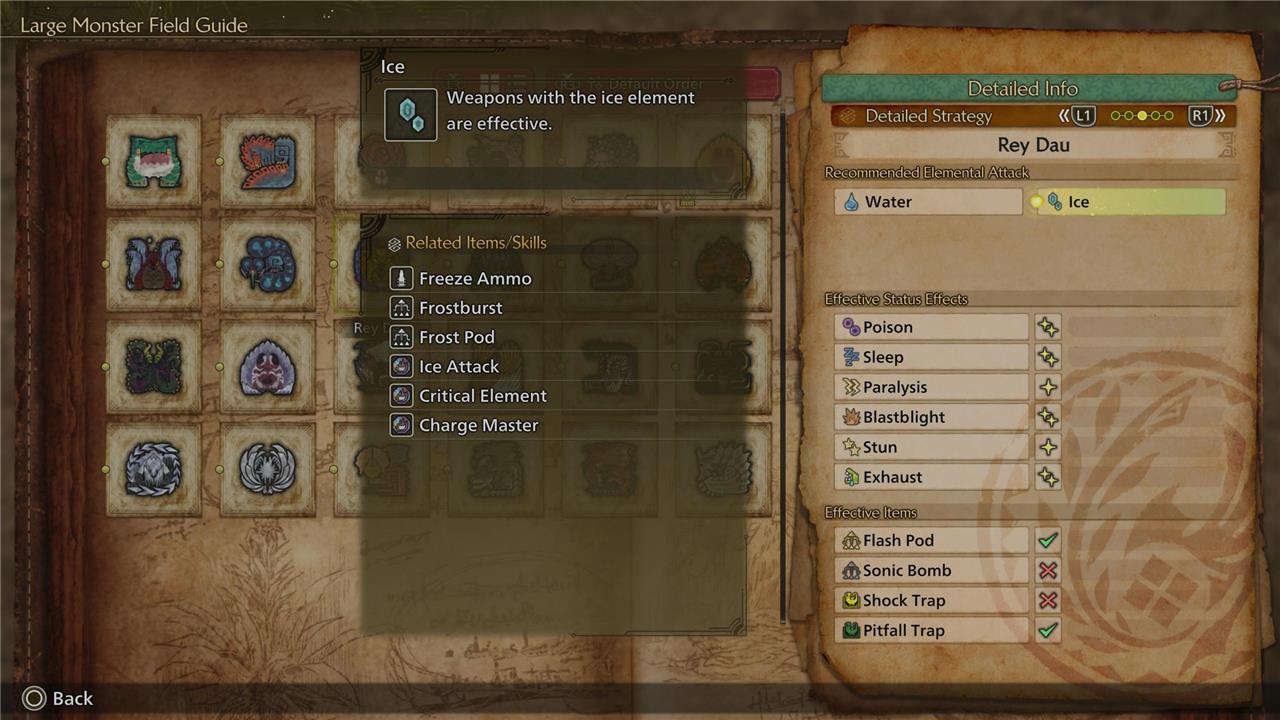
Ajarakan’s recommended elemental attacks are Water and Ice. The first encompasses Water Ammo, Puddle Pod, as well as skills like Water Attack, Critical Element, and Charge Master. The second encompasses Freeze Ammo, Frostburst, Frost Pod, Ice Attack, Critical Element, and Charge Master. Both are in addition to your own weapon’s properties.
You can find a breakdown of Ajakaran’s elemental weaknesses and resistances below:
Effective status effects
- Poison: 2 stars
- Sleep: 2 stars
- Paralysis: 2 stars
- Blastblight: 2 stars
- Stun: 2 stars
- Exhaust: 2 stars
Effective items
- Flash Pod: Effective
- Sonic Bomb: No effect
- Shock Trap: Effective
- Pitfall Trap: Effective
Weak points
Ajarakan’s weak point is its Arm. Its Back can be broken, and its Tail can be severed.
Before diving deep into combat strategy, here’s the breakdown of Ajarakan’s weak points:
Ajarakan is a formidable brute in Monster Hunter Wilds, blending the raw power of a gorilla with the armored defenses of an armadillo and surprising agility. You’ll first encounter it in the Oilwell Basin during the Long-Forgotten Flame quest in Chapter 2, and it later appears in Wyveria, often favoring volcanic, ledge-filled terrain that it uses to its advantage. This monster is highly resistant to fire but is especially vulnerable to Water and Ice elemental attacks, with Water being the most effective. Its weak points include the head, forelegs, tail, and tail tip, each offering prime opportunities for maximum damage. In battle, Ajarakan uses a mix of heavy punches, ground slams, and boulder throws-watch for its double-fist slam, which leaves it briefly exposed and is your best window to counterattack. Staying mobile and exploiting its elemental weaknesses are key to taking down this relentless foe.
Part |
Sever |
Blunt |
Ranged |
Fire |
Water |
Thunder |
Ice |
Dragon |
|---|---|---|---|---|---|---|---|---|
| Head | 3 stars | 3 stars | 3 stars | No Effect | 2 stars | 1 star | 1 star | 1 star |
| Left Foreleg | 3 stars | 3 stars | 3 stars | No Effect | 2 stars | 1 star | 1 star | 1 star |
| Right Foreleg | 3 stars | 3 stars | 3 stars | No Effect | 2 stars | 1 star | 1 star | 1 star |
| Belly | 2 stars | 2 stars | 2 stars | No Effect | 1 star | 1 star | 1 star | 1 star |
| Back | 2 stars | 2 stars | 2 stars | No Effect | 2 stars | 1 star | 1 star | 1 star |
| Left Hind Leg | 2 stars | 2 stars | 2 stars | No Effect | 1 star | 1 star | 1 star | 1 star |
| Right Hind Leg | 2 stars | 2 stars | 2 stars | No Effect | 1 star | 1 star | 1 star | 1 star |
| Tail | 3 stars | 3 stars | 2 stars | No Effect | 1 star | 1 star | 1 star | 1 star |
| Tail Tip | 3 stars | 3 stars | 3 stars | No Effect | 2 stars | 1 star | 1 star | 1 star |
For details about what to expect in terms of attacks and general behavior, the following section has you covered.
Ajarakan attacks and strategy
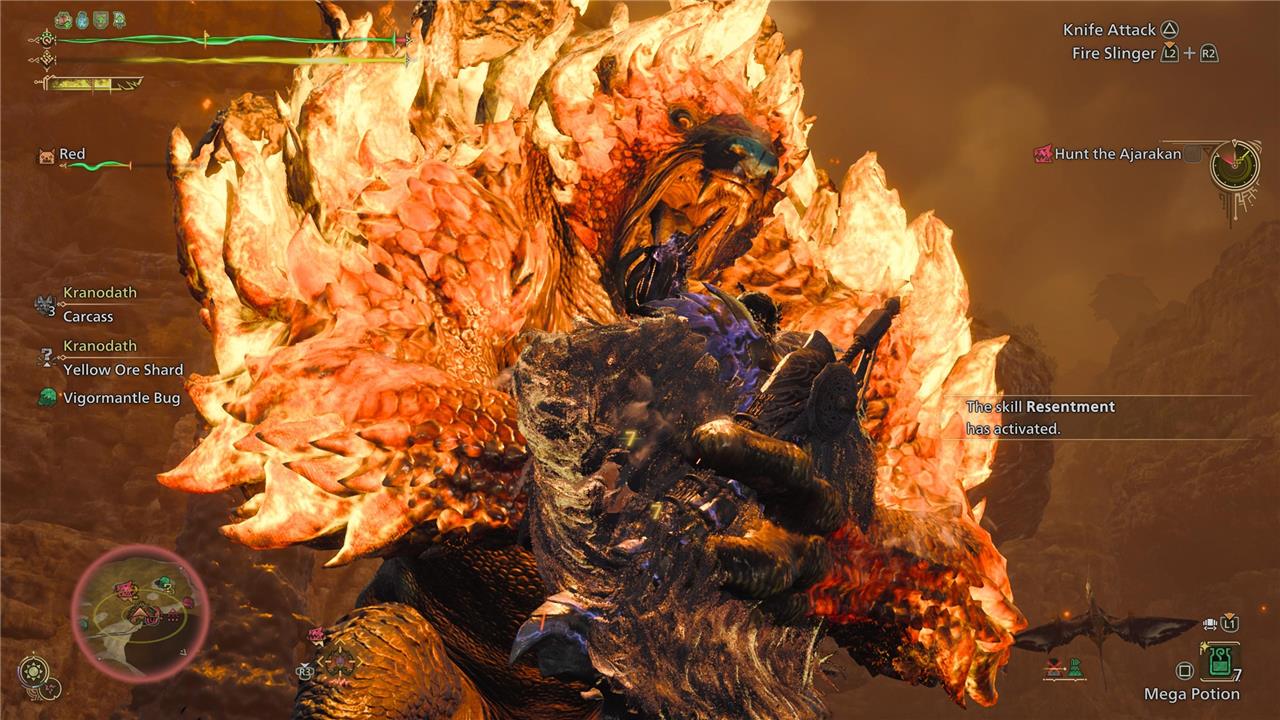
Ajarakan employs a mix of heavy physical and fiery attacks, making it a formidable opponent that demands constant vigilance and mobility. Its primary offensive moves include ground punches-sometimes dragging its arm before slamming down for massive damage-side swipes, shoulder slams, and tail strikes, many of which become more dangerous when Ajarakan enters its Ignited Phase and covers itself in molten lava. During this phase, attacks can trigger explosive lava eruptions and pools of fire, so maintaining distance and dodging sideways is crucial. Ajarakan can also hurl boulders or lava projectiles over a distance, and when enraged, it may leap onto the arena ceiling before crashing down with a powerful slam. To counter these threats, focus on targeting its weak points-especially the forearms, head, and tail-while using heat-resistant gear and Water or Ice elemental attacks for maximum effectiveness. Flash Pods and traps can create openings, and severing the tail will reduce the threat of sweeping tail attacks. Always watch for signs of enragement, such as glowing or pounding its back, and exploit the monster’s recovery windows after its more telegraphed attacks to press your advantage.
Ajarakan is an aggressive, powerful beast in Monster Hunter Wilds. It’ll force you to be in constant motion trying to find an opening to counterattack. Let’s start with its arms. In one attack, the monster punches the ground and drags the arm for a few feet until it lifts it up in the air with force. There’s a variation in which it uses an open arm instead, almost like scratching the surface underneath.
There’s a stronger attack in which Ajarakan uses both fists to slam the ground. It’ll get a good chunk of health if you’re hit, but if you’re outside the area, make sure to counterattack, as its fists will be stuck for a few seconds. You can also see it throwing boulders, usually done in twos. This happens in both mid- to long-distances.
Ajarakan loves to fearsomely slam the ground with its shoulder. Especially since it follows a similar pattern as the “punching the ground” one, with the monster dragging its body and then getting up with force. Be careful, though, as there’s another move with a similar wind-up antimutation, but its quickly interrupted with a ground fist instead. It’s not that powerful, but it’s easy to catch that stray if you’re unprepared. It can sometimes do two punches in quick succession, too.
Now, into the monster’s enraged state. Ajarakan is quite the showoff, so you’re unlikely to miss it becoming enraged. The monster creates a fissure on the ground and embeds itself with molten lava. It will sometimes slap its back with its tail, too. As you might have guessed, it’ll become more aggressive as a result.
There are some attack variations, as well as some new moves. Similarly to the ground scratches, it now does two in quick succession. There’s also the double fist ground slam, which now creates a molten lava fissure – this effect applies to all other basic attacks as well. Fun. Then, you can expect Ajarakan to do a stampede run toward you, extending its arms while doing so. There’s sometimes a cue for this, in which it jumps backward with a short twirl to reposition itself. Another move has the beast drag its fist on the ground, and then doing a quick half-circle motion, leaving a trace of lava.
Ajarakan’s ultimate attack causes a lava fissure to erupt on the ground, and it’ll plunge both fists in it, almost as if charging a move. The lava will expand and Ajarakan will lift both fists, causing an explosion. In case this wasn’t enough, the beast will also try to grab you if you’re in front of it. If this happens, button mash attacks to free yourself. If you manage to stun the creature, it will lose the enraged state. Keep dodging and look out for any visible wounds to exploit them using focus mode.
Unfortunately, that’s not all. If the fight drags on long enough for Ajarakan to head over to map area 6, you’ll get what I’d consider its second phase. Think of it as a cage match of sorts. Ajarakan will sometimes leap toward the “ceiling” part of the arena and move around it monkey-style before performing a ground slam in your direction. It’s fairly easy to see coming and dodge in time, unless you’re stunned or low on stamina.
Of course, the monster can also become enraged in this area. All of the aforementioned attacks might be present, adding a lot of piping hot lava into the mix. There’s one move in particular that you should be most wary of: If you’re in area 6 with an enraged Ajarakan, and it starts to carve a hole in the ground with lava, start moving. It plays out like this: Ajarakan spins over the lava, leaps into the air, and then proceeds to do a grand slam toward you.
The key here is to put as much distance between you and it as possible, following the “outer circle” of the area of impact, then once Ajarakan is in the air, run in a circle either clockwise or counterclockwise. Ajarakan will target you, but as long as you’re running, it shouldn’t land the attack directly on you. If you see it’s too close to comfort, get ready to dodge before it hits the ground.
Remember that Ajarakan’s weak point is its Arm. The game only mentions one arm in the weaknesses list as opposed to the pair, for some reason, but you should target either whenever possible. Also, it’s fairly easy to sever the tail if you focus on it for long enough. Lastly, be wary of Blastblight, which can be countered with Deodorant or Blast Resistance, and Fireblight, which is countered by Nulberry or either Fire or Blight Resistance. Blastblight triggers an explosion after a while, or if you take a hit that causes knockback. Fireblight makes it so your health depletes temporarily.
Ajarakan drops
Defeating Ajarakan in Monster Hunter Wilds rewards hunters with a variety of valuable materials essential for crafting specialized gear. Among the notable low-rank drops are the Ajarakan Tail, Ajarakan Jewel, Ajarakan Certificate, and Ajarakan Marrow, each with varying drop rates. These materials can be obtained through carving the monster’s body or tail, as well as receiving quest rewards. The drops are crucial for forging unique Ajarakan-themed armor and weapons, which offer enhanced resistance and abilities tailored for future encounters. Collecting these items is key for players looking to optimize their equipment and tackle tougher monsters throughout the game.

If you’re wondering what the Ajarakan drops in Monster Hunter Wilds are, you can find a handy list below:
Low Rank materials
Material |
Availability/Probability |
Frequency |
Source |
|---|---|---|---|
| Ajarakan Scale | Target rewards (x1/25%). Wound destroyed reward (x1/45%). Carving (x1/28%) | 3 stars | N/A |
| Ajarakan Shell | Target rewards (x1/25%). Wound destroyed reward (x1/43%). Carving (x1/23%) | 3 stars | N/A |
| Ajarakan Ridge | Target rewards (x1/11%). Broken part rewards (x1/100%). Carving (x1/13%) | 3 stars | Back |
| Ajarakan Tail | Target rewards (x1/11%). Carving (x1/11%). Carving Severed Part (x1/88%) | 3 stars | Tail |
| Ajarakan Jewel | Target rewards (x1/11%). Wound destroyed reward (x1/12%). Carving (x1/18%) | 2 stars | N/A |
| Ajarakan Certificate | Target rewards (x1/8%) | 1 star | N/A |
| Ajarakan Marrow | Target rewards (x1/5%). Carving (x1/7%). Carving Severed Part (x1/12%) | 1 star | Tail |
High Rank materials
Material |
Availability/Probability |
Frequency |
Source |
|---|---|---|---|
| Ajarakan Scale | Target rewards (x1/22%). Wound destroyed reward (x1/45%). Carving (x1/30%) | 3 stars | N/A |
| Ajarakan Ridge | Target rewards (x1/11%). Broken part rewards (x1/100%). Carving (x1/13%) | 3 stars | Back |
| Ajarakan Tail | Target rewards (x1/11%). Carving (x1/11%). Carving Severed Part (x1/93%) | 3 stars | Tail |
| Ajarakan Carapace | Target rewards (x1/22%). Wound destroyed reward (x1/43%). Carving (x1/23%) | 2 | N/A |
| Ajarakan Jewel | Target rewards (x1/16%). Wound destroyed reward (x1/12%). Carving (x1/18%) | 2 stars | N/A |
| Ajarakan Certificate S | Target rewards (x1/8%) | 1 star | N/A |
| Ajarakan Marrow | Target rewards (x1/7%) | 1 star | N/A |
| Ajarakan Medulla | Target rewards (x1/3%). Carving (x1/5%). Carving Severed Part (x1/7%) | 1 star | Tail |
What hidden weaknesses make Ajarakan vulnerable in Monster Hunter Wilds
Hidden Weaknesses of Ajarakan in Monster Hunter Wilds
Elemental Vulnerabilities
-
Ajarakan is most vulnerable to Water attacks, with Ice as a secondary elemental weakness.
-
Thunder also deals moderate damage, but Fire is highly ineffective against it.
Status Effect Susceptibility
-
Ajarakan is equally susceptible to all major status ailments: Poison, Sleep, Paralysis, Blast, and Stun. This means hunters can reliably inflict these effects to gain an advantage in battle.
Physical Weak Points
-
The monster’s most significant physical weak points are its head, forelegs (especially the arms), and tail tip, each rated as top-tier targets for damage.
-
Severing the tail and breaking the back can yield extra rewards and make the fight easier.
Environmental and Tactical Weaknesses
-
In certain arenas, environmental hazards like old forges can be triggered to deal massive damage and knock Ajarakan down. Using the Hook Slinger to activate these traps while Ajarakan is distracted is highly effective.
-
After Ajarakan performs its large-scale explosion attack (Overheat), its arm weak points are exposed for a few seconds, allowing for powerful Focus Strikes that can knock it down.
-
Dealing continuous damage during its enraged state can cancel its rage and cause a knockdown, creating a window for heavy attacks.
Additional Strategic Notes
-
Ajarakan is highly susceptible to aerial attacks due to its low posture, making mounting attacks particularly effective.
-
Staying at range and using ranged weapons can help avoid its powerful melee attacks while exploiting its slow recovery after certain moves.
Summary Table
| Weakness Type | Details |
|---|---|
| Elemental | Water (strongest), Ice (secondary), Thunder (moderate) |
| Status Effects | Poison, Sleep, Paralysis, Blast, Stun (all equally effective) |
| Physical Weak Points | Head, Forelegs (arms), Tail Tip (severable), Back (breakable) |
| Environmental | Old forges (massive damage), exposed arms post-explosion |
| Tactical | Damage during rage cancels it; aerial attacks and ranged weapons advised |
Exploiting these hidden weaknesses-especially with Water-based weapons, status effects, and environmental traps-will give you a significant edge against Ajarakan.
What makes Ajarakan’s water weakness more effective than other elements
Ajarakan’s pronounced weakness to Water is due to its fire-based physiology and molten metal armor, which are both highly susceptible to cooling and disruption by water-based attacks. Water element weapons and ammo inflict significantly more damage to Ajarakan than other elements, making them the most effective choice for this hunt.
This advantage is especially notable because:
-
Water attacks counteract Ajarakan’s heat: Water not only deals extra damage but also helps mitigate the monster’s fiery abilities, potentially cooling its armor and making it more vulnerable to subsequent strikes.
-
Water is more effective than Ice or Thunder: While Ice and Thunder also deal increased damage, Water consistently has the highest damage multiplier against Ajarakan’s weak points, particularly its arms and head.
-
Environmental synergy: Items like Watermoss or Puddle Pods can further amplify Water’s effectiveness by cooling Ajarakan’s exterior, softening its shell, and opening up additional attack opportunities.
In summary, Water’s elemental properties directly exploit Ajarakan’s core weaknesses, making it the optimal element for maximizing damage and controlling the flow of battle.