Hidden across Neomuna’s neon streets lie secret Region Chests packed with loot that can boost your Guardian’s progress. Here’s where to find each one and how to reach them without missing a single cache.
They’re worth tracking down for all of that alone, but finding all the Region Chests on Neomuna is additionally essential: You’ll need them to complete the “From Zero…” and “To Hero” questlines. Here’s a map that points out the general locations for each Neomuna Region Chest:
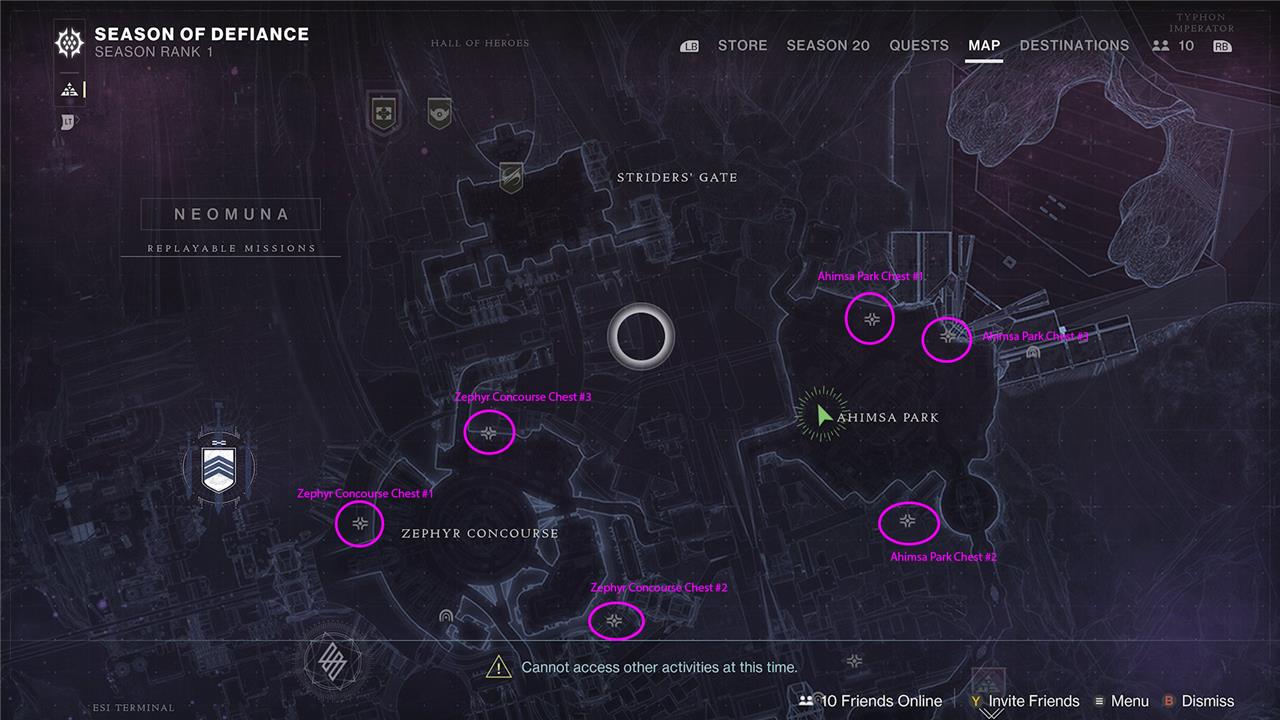
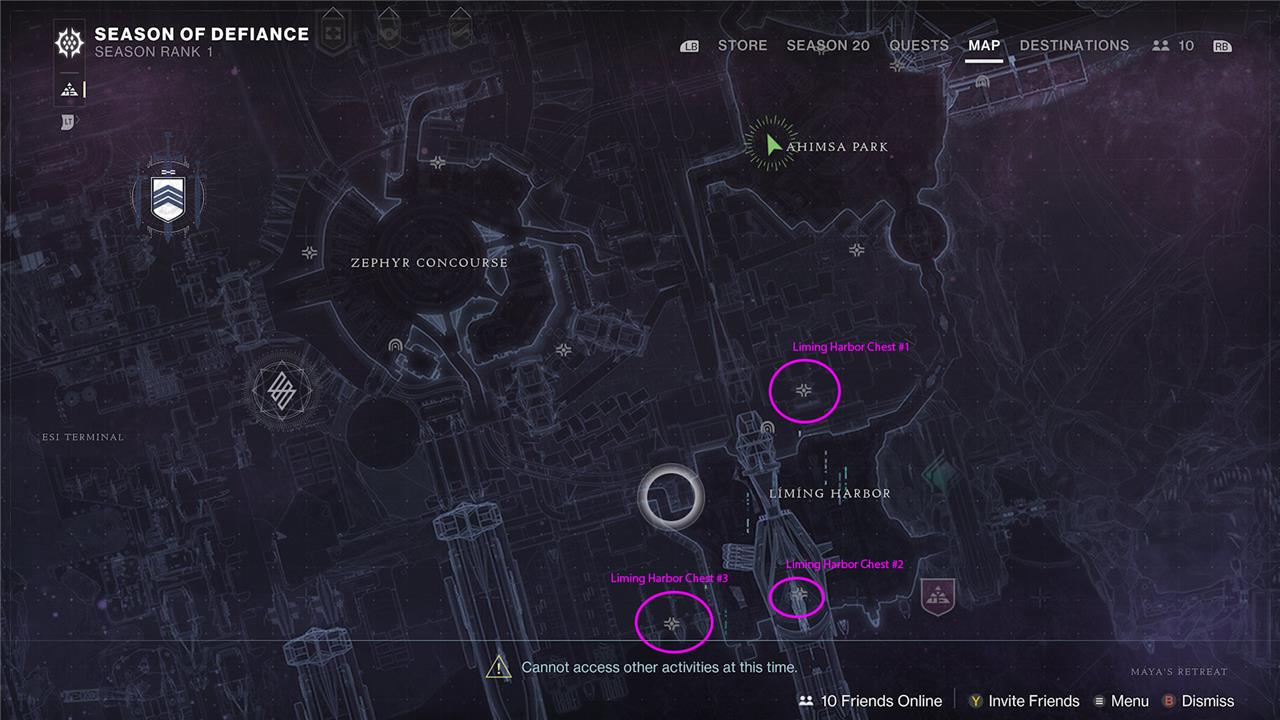
And if you’re looking for specifics on where to find all nine Neomuna region chests, read on.
Zephyr Concourse Region Chest #1
The first chest in Zephyr Concourse sits high above the area’s central plaza, tucked behind a cluster of ornamental platforms near the large holographic signs. To reach it, climb the nearby structures or use a strand grapple to swing across the upper ledges. The chest rests at the end of a narrow catwalk overlooking the main walkway, giving a clear view of the district below.
The first Zephyr Concourse Chest is relatively easy to get to. Keep to the right as you leave the spawn point on Neomuna, and you’ll come to a bridge that leads to the Zephyr Concourse.
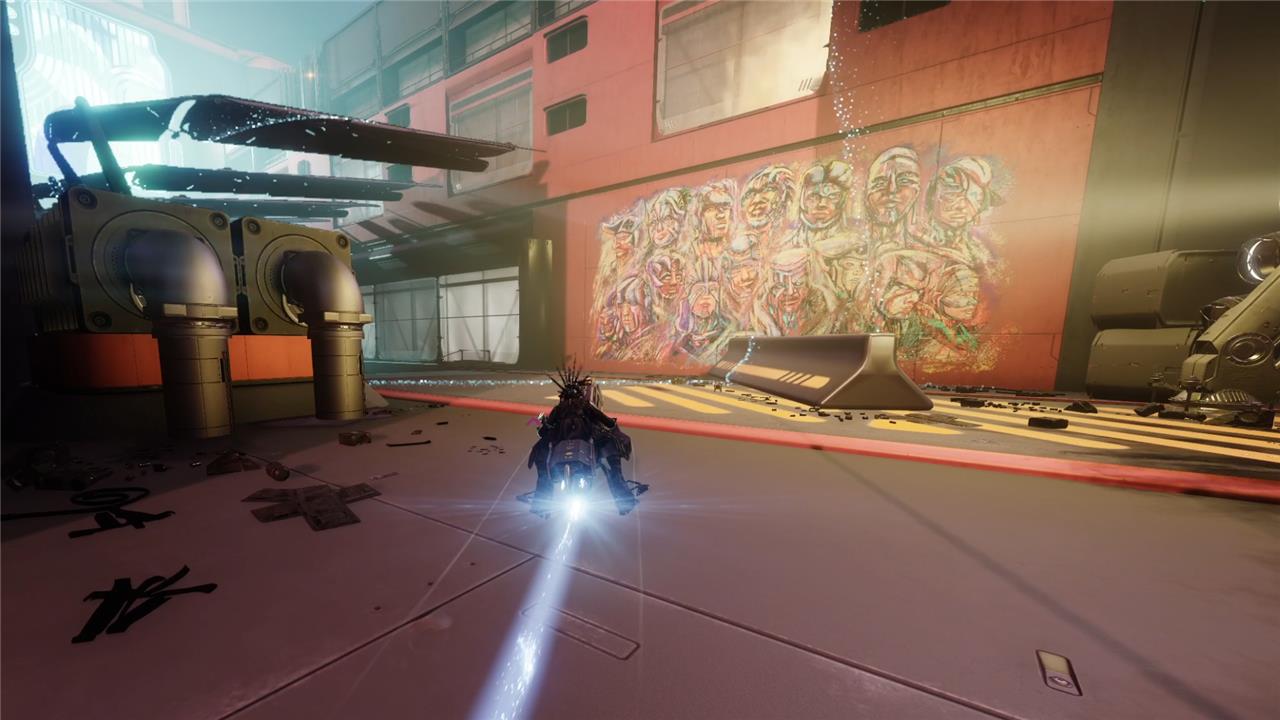
You’ll know you’re on the right track when you pass by a sick Cloudstrider mural. Keep following the road, and you’ll find yourself in Zephyr Concourse.
As soon as you enter the area, jump onto the building on your left. If you look up, you should see a glass awning, jump on the awning, turn around, and you’ll be able to access the roof in front of you.
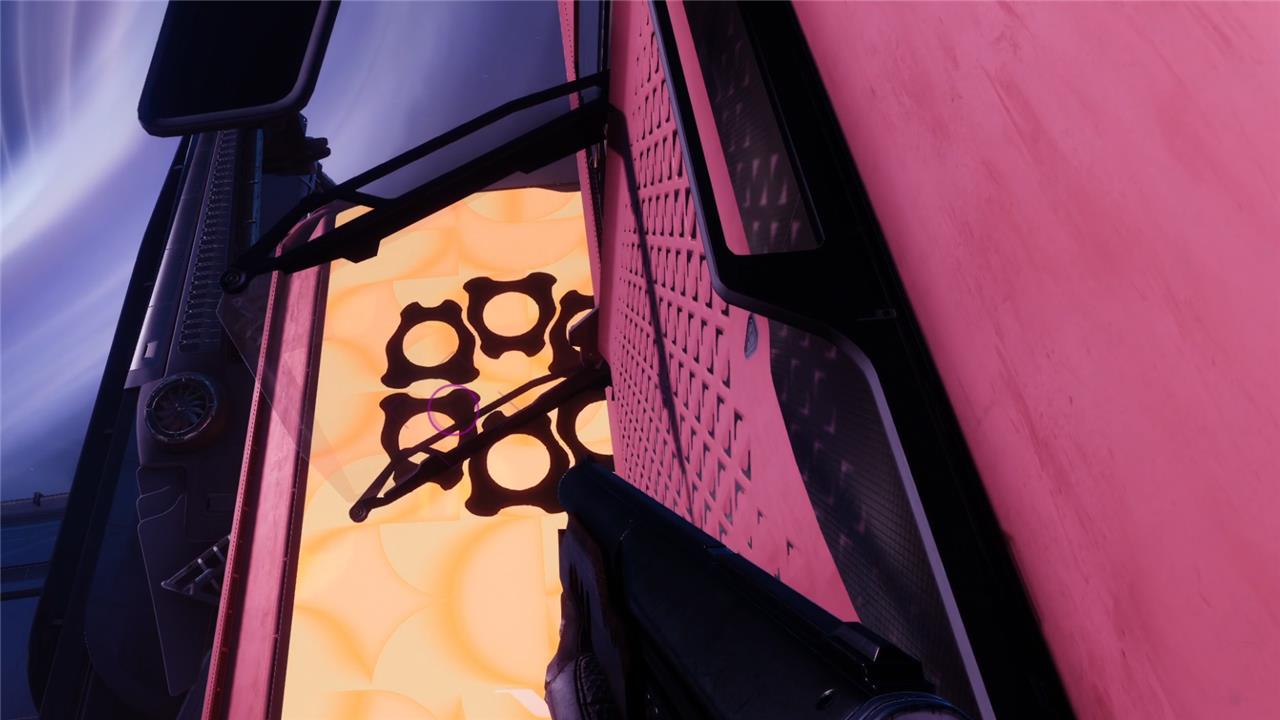
The Region Chest should be directly in front of you, tucked away in a gutter.
Zephyr Concourse Region Chest #2
The second region chest in Zephyr Concourse is tucked behind the large billboard near the northern walkway. Head to the area’s upper levels and follow the ledges until you reach a maintenance platform overlooking the plaza. From there, drop down carefully to the narrow ledge below the sign, and you’ll spot the chest along the outer edge of the building. Opening it grants you Glimmer and other useful loot.
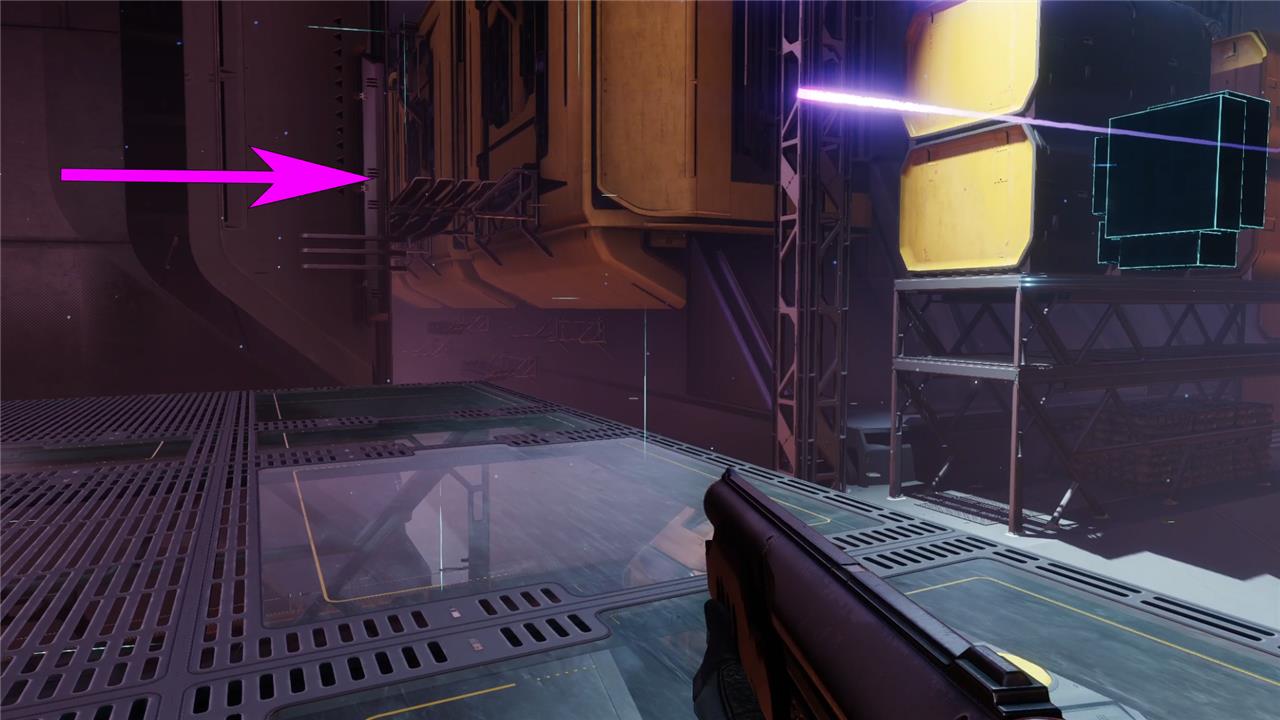
The second Region Chest in the Zephyr Concourse is in plain sight, behind glass in a display window with the only clear point of entry being an open air vent. To access this vent, you’ll want to point yourself toward the giant magenta billboard you’ll see once you enter the Concourse.

On the level below the billboard, you’ll find a smashed shop window that features a weight-lifting set and an open vent on the upper left.
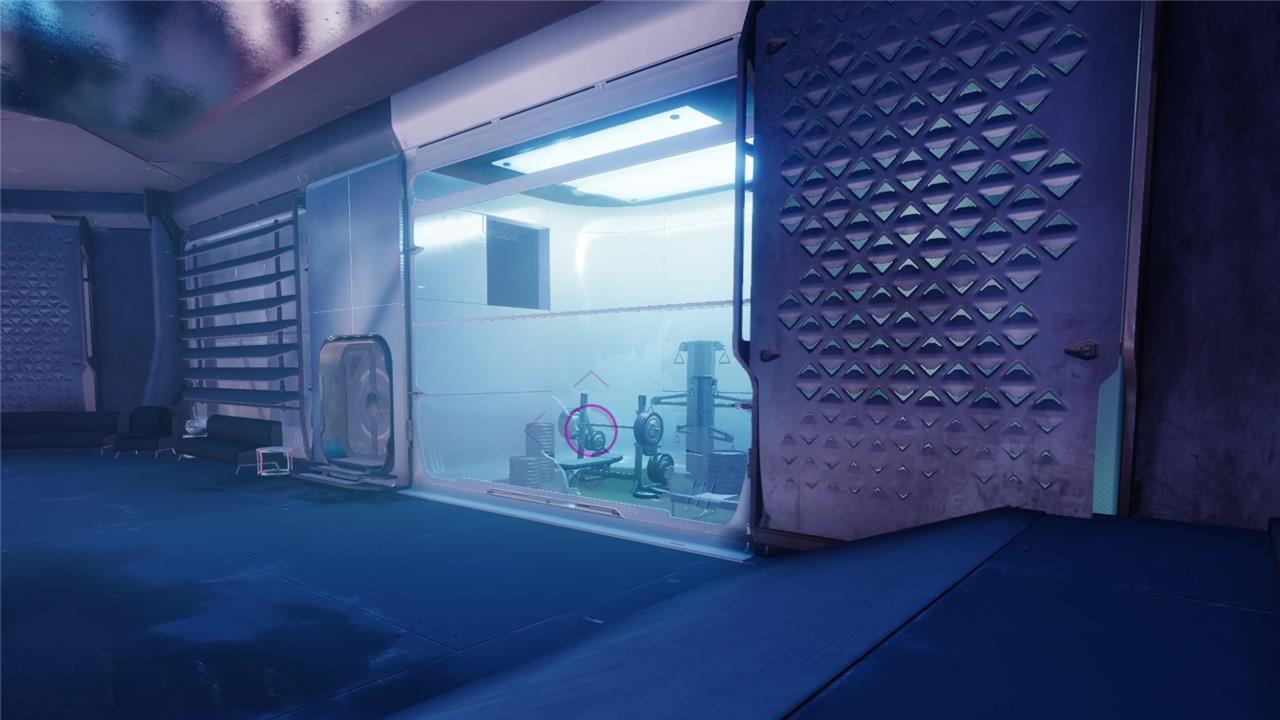
Head through that vent, and you’ll find the Region Chest.
Zephyr Concourse Region Chest #3
This chest is located on the upper walkways near the main circular area of Zephyr Concourse. Use the platforms along the walls to reach it, following the ledges behind the central shops. Watch for Cabal patrols in the area, as they can make the climb tricky. Once you reach the high balcony, the chest sits near a glowing sign overlooking the plaza.
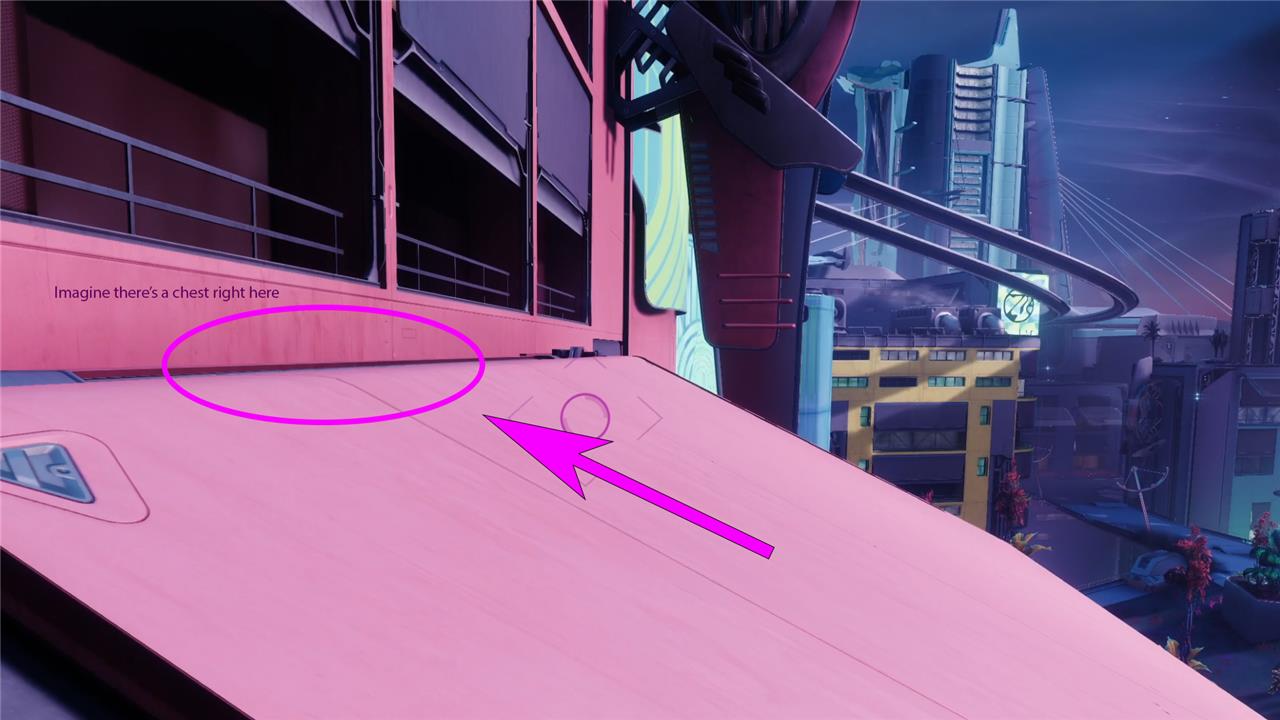
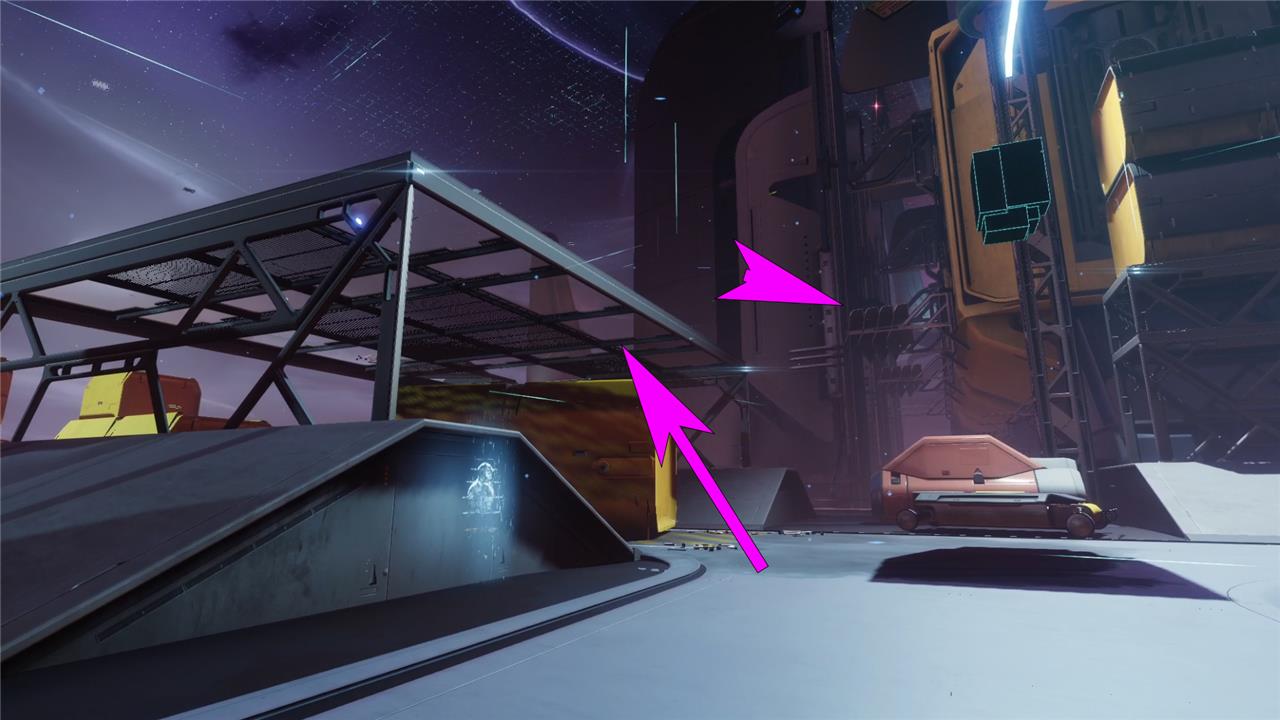
To get to the final Region Chest in Zephyr Concourse, you’ll need to go through the central hub you see as you enter the area (it’s the giant orange beehive-looking thing).
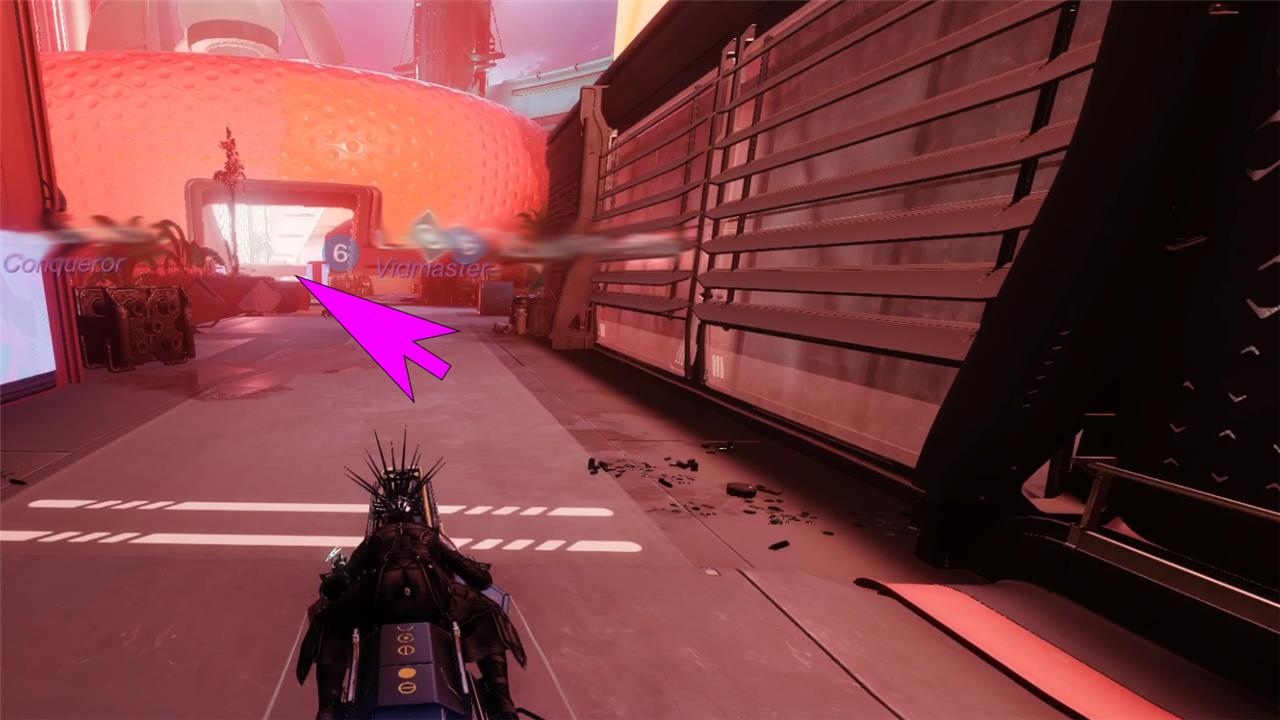
Keep to your left and go through the first opening on your left, and you’ll see some bollards in front of a set of stairs to your right that lead to a bar area.
If you head to the back of the bar, you’ll find another set of stairs that lead to a large pavilion. If you peer over the edge on your left, you should notice a long gantry and several glass awnings. First, you’ll want to land on the gantry and then jump onto the awning closest to you. You’ll find the Region Chest tucked into the attached alcove.
Ahimsa Park Region Chest #1
The first region chest in Ahimsa Park sits near the massive Veil Containment building. Head toward the main entrance and look for a narrow ledge along the right side of the structure. Jump across the small gap to reach the platform, and you’ll spot the golden chest tucked behind some crates. It’s easy to miss if you rush past, so check carefully before moving on.
To get to Ahimsa Park, you’ll want to keep to the left as you leave the spawn point on Neomuna.

Keep following the road until you stumble across a warzone full of Cabal.
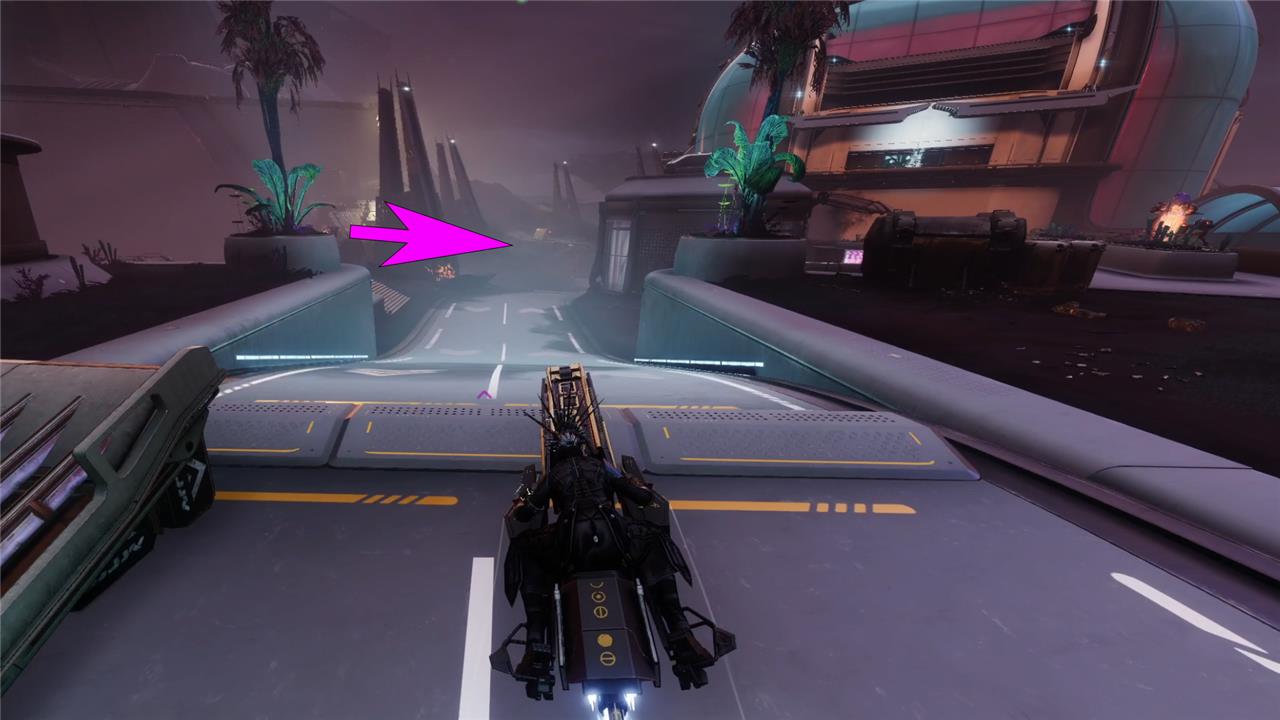
If you keep to the left as you enter Ahimsa Park, you’ll find a guardrail you can follow that eventually points to a small outcropping.
Jump onto that ledge, turn around, and head into the cave in front of you. You’ll find the first Region Chest for Ahimsa Park in there.
Ahimsa Park Region Chest #2
This chest sits near the Ahimsa Park fast travel point, positioned on a high platform overlooking the street-level area filled with Cabal troops. Use the nearby structures to climb up or glide from the adjacent rooftop to reach it. Watch for enemies patrolling the area, and you can claim the region reward once the small encounter zone is cleared.
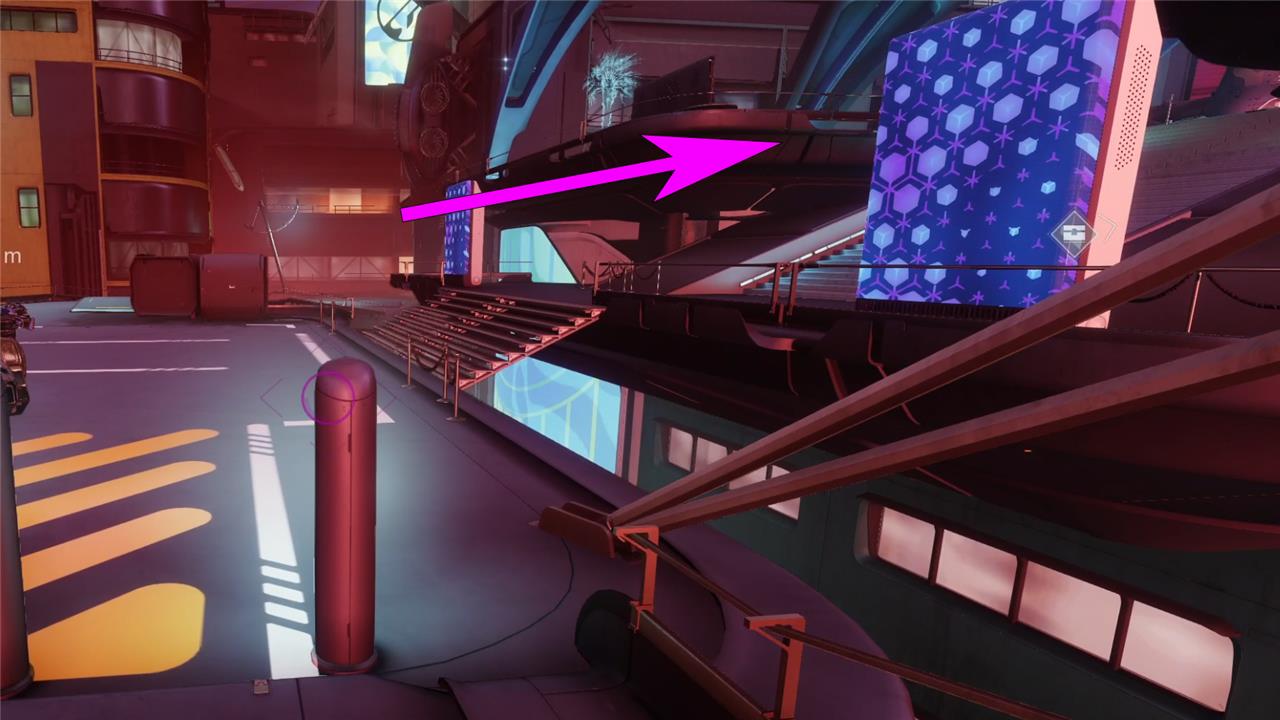
The second Region Chest in Ahimsa Park is arguably the most difficult to reach. Continue to follow the road into the area through a tunnel, and keep to your right. Hang a right once you see the small streetlamp and go forward past the small rock outcropping until you hit an area with a couple of planters overlooking an abyss.
If you look up and to your left, you’ll see a pair of glass awnings, the second Region Chest is perched on the far one.

To get there, you’ll want to jump on the awning that’s pointed downward and use that to get to the chest. This jumps isn’t exactly easy to pull off, so you may want to spec your gear into the mobility stat if you’re having too much trouble.
Ahimsa Park Region Chest #3
This chest is located near the center of Ahimsa Park, close to the large Vex Incursion Zone structure. Head toward the elevated platforms in the area and check the upper walkway along the outer edge. The chest is tucked behind a short barrier near the ledge, making it easy to miss if you move through too quickly. Use the nearby jump pads or ramps to reach it safely.
The final Region Chest for Ahimsa Park is located in front of that giant ship with Calus’ face on it.
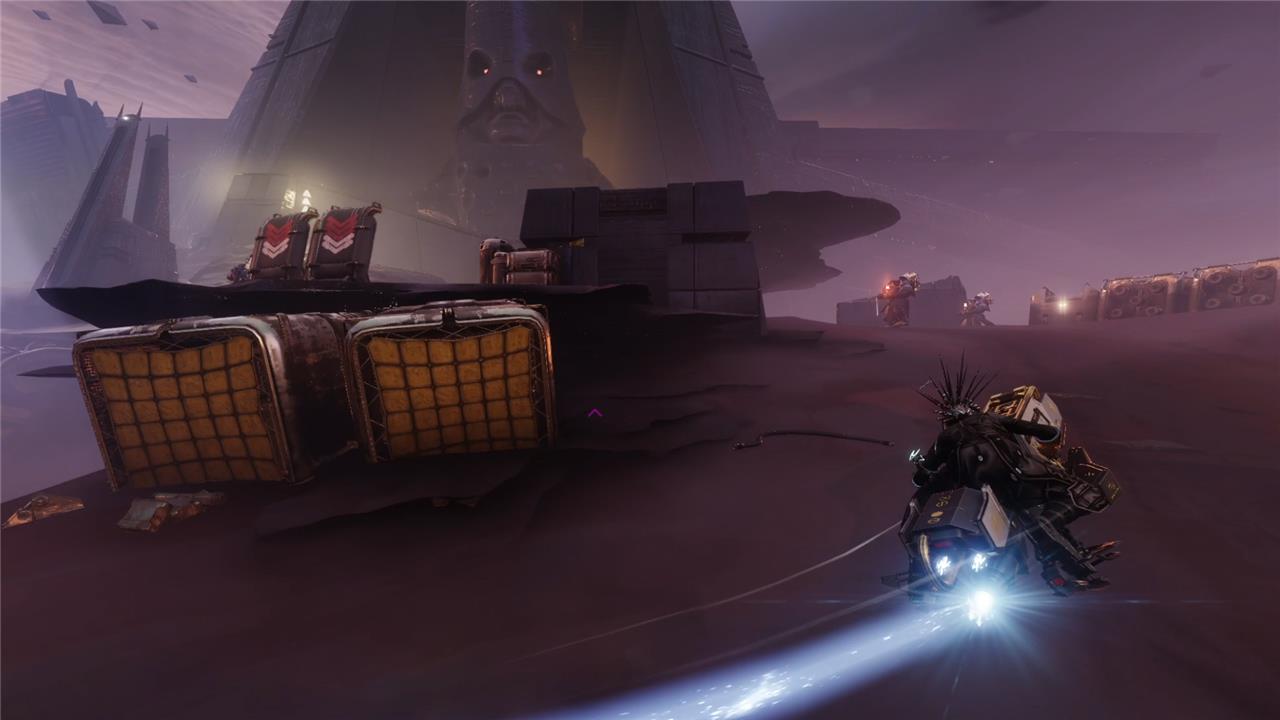
If you explore the rocky area in front of the ship, you’ll find a small opening almost exactly where the prow of the ship has dug itself into the ground. If you head into that opening you’ll find the last region chest in Ahimsa Park.
Liming Harbor Region Chest #1
This chest sits near the docks in the Liming Harbor area, close to where enemy patrols frequently gather. Head toward the large circular platform with shipping containers and cranes overhead. From the main central walkway, move along the outer edge until you spot a small building with neon lighting. The chest rests behind it, partly hidden by scaffolding and machinery. Keep an eye out for Cabal forces nearby, as they often patrol this section of the harbor.
The first Region Chest in Liming Harbor can be a little tricky to get to. Hang a right as soon as you get there, go forward a bit, and you’ll notice a pair of fans that resemble a giant turbine.
The chest is poised behind both blades. While it may look difficult, getting to this chest just requires some precise timing to jump onto the spoke while threading through both blades.

Thankfully, the blades are relatively harmless, and failing the jump doesn’t result in falling to your doom.
Liming Harbor Region Chest #2
This chest is on the western side of Liming Harbor, near the large Vex structure overlooking the water. Climb to the upper platforms using the sloped pipelines and ledges until you reach a narrow walkway with a strong orange glow nearby. The chest stands next to a small railing at the platform’s edge, partially hidden behind a cluster of cables and machinery.
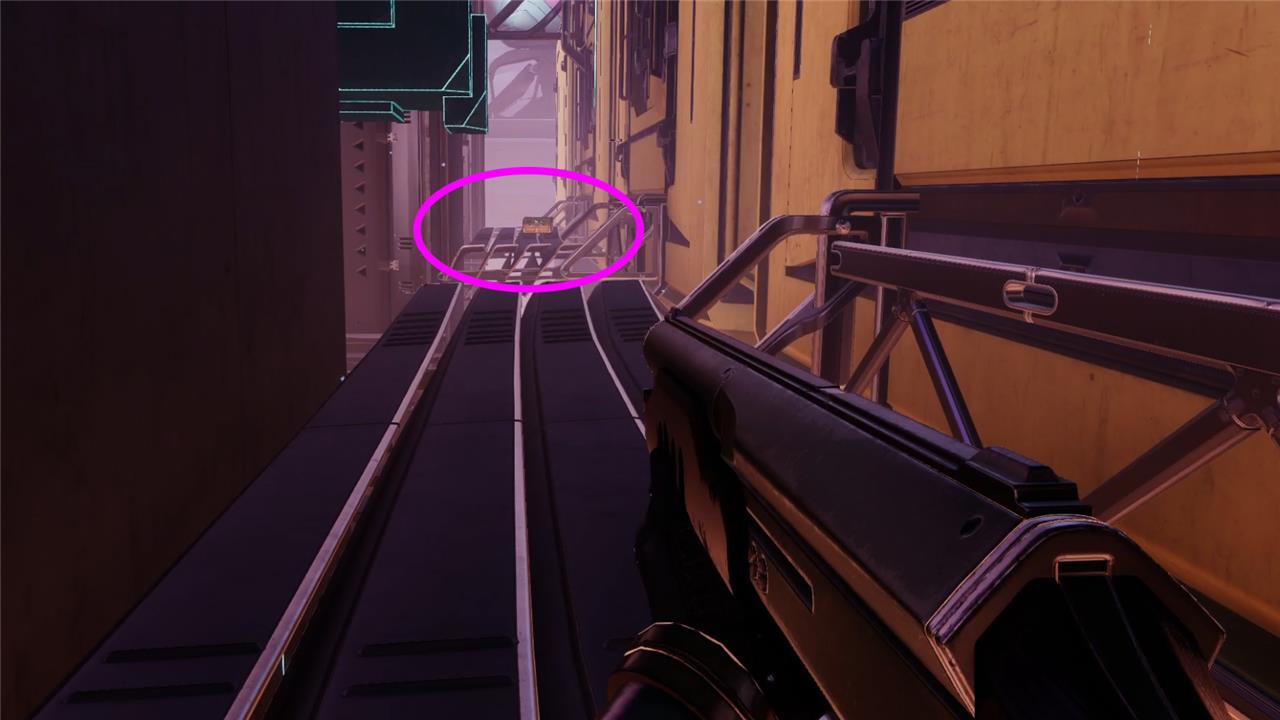
To find the second Region Chest in Liming Harbor, keep following the road until it veers to the right into a tunnel.
Inside the tunnel, you’ll find a few platforms if you follow the stairs on your right.
If you jump on the first platform, then the second, you should see the Region Chest just slightly above you if you turn around.
Liming Harbor Region Chest #3
This chest is located on the upper platforms near the docks of Liming Harbor. Head toward the large Vex structures on the eastern side and jump across the scaffolding to reach a ledge overlooking the water. The chest rests behind a cluster of crates close to a glowing terminal, partially hidden by shadows cast from the nearby machinery.
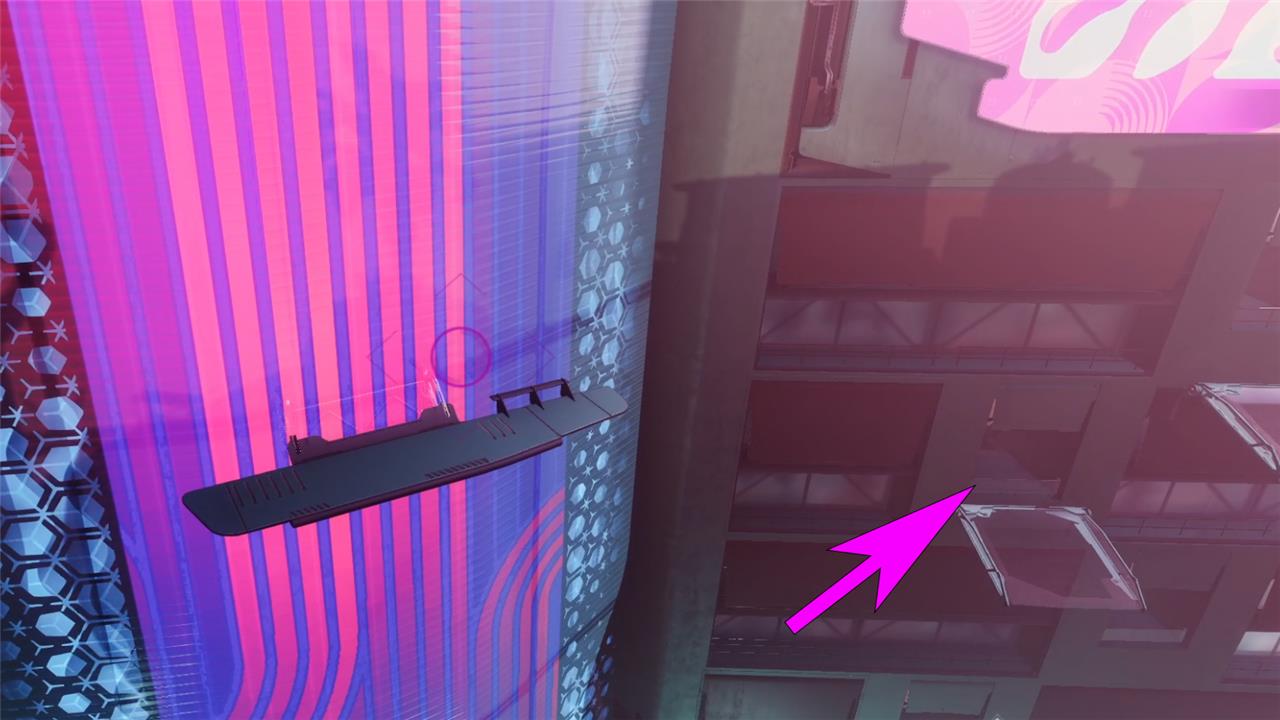
The Final Region chest in Liming Harbor is located just past the tunnel you were in.
If you follow the path out, you should see a series of catwalks, spanning the space between two buildings. You can reach them by hopping onto the structure on your left with the glass roof.
If you get a running start, you should be able to get to the top of the catwalk closest to you.
Once on top, you’ll see the Region Chest a little further down the alley on an adjacent catwalk.
Zephyr Concourse region chests step by step guide
Zephyr Concourse in Neomuna has three region chests, accessible via platforming from Striders’ Gate. Follow these step-by-step guides based on established Destiny 2 Lightfall locations.
Chest 1 (North/Near Entrance)
Enter Zephyr Concourse from Striders’ Gate and stop at the first building on your left.
Enter the building, climb to the second-story balcony (via stairs or jump).
Jump across to the sloped glass platform opposite the balcony, turn around, and follow the rooftop slope up to the chest.
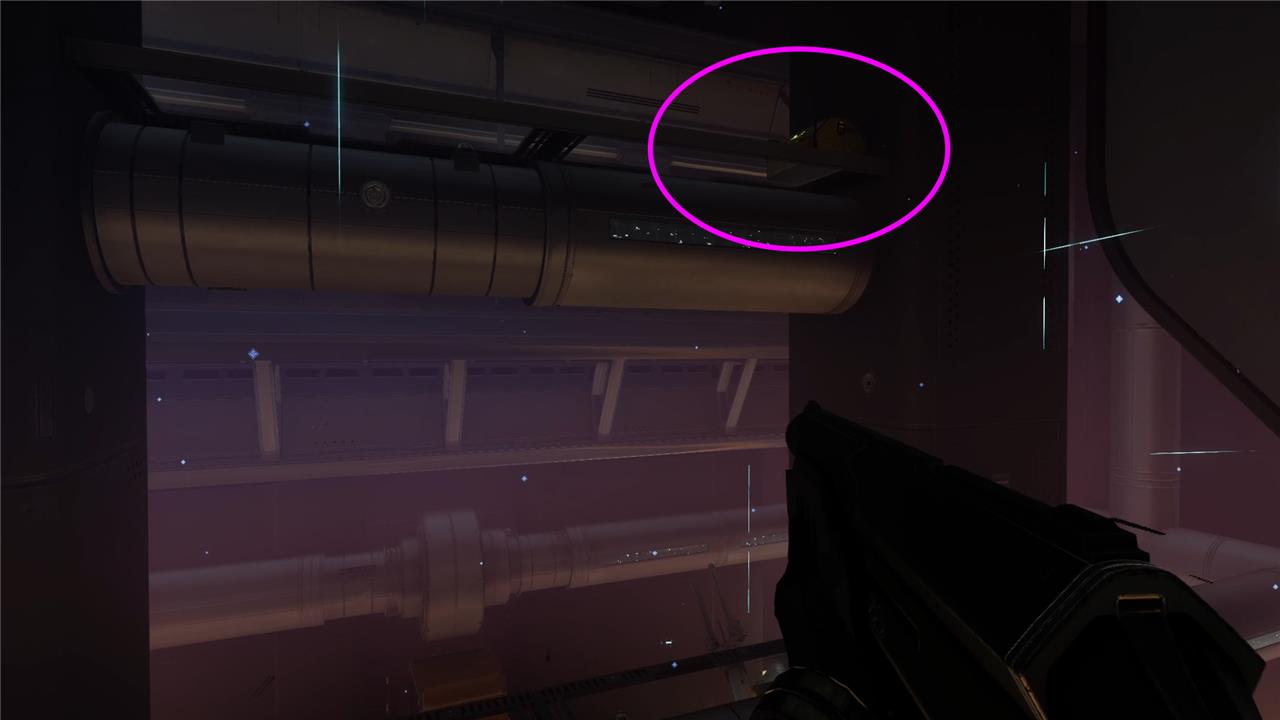
Chest 2 (West/Gym Area)
Head to the west side of Zephyr Concourse (gym-like room visible through glass panels).
Spot the room below with training weights and a cracked glass panel; drop down from the railing above and slip through the crack.
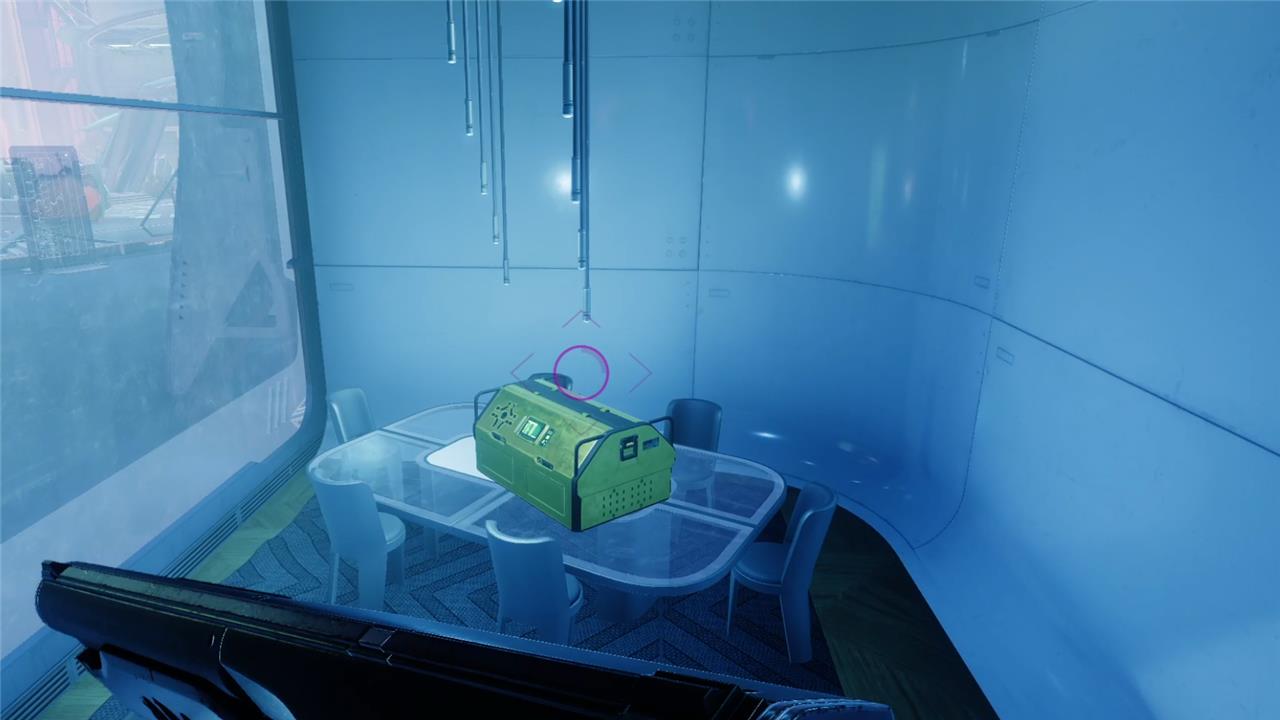
Jump into the vent above the gym equipment, crawl straight through the path (ignore side paths), and reach the chest on a table.
Chest 3 (Southeast/Entertainment Edge)
Go to the southeast corner near the entertainment center and skyscraper edge.
Look down at the sloped glass platforms hanging off the skyscraper; jump to the lowest one.
Follow the platforms or jump directly into the opening to grab the chest.
Ahimsa Park region chests step by step guide
Ahimsa Park in Destiny 2’s Neomuna has three region chests, often needed for quests like “From Zero…” and “…To Hero.” They require exploration around the central Calus pyramid area and some platforming.
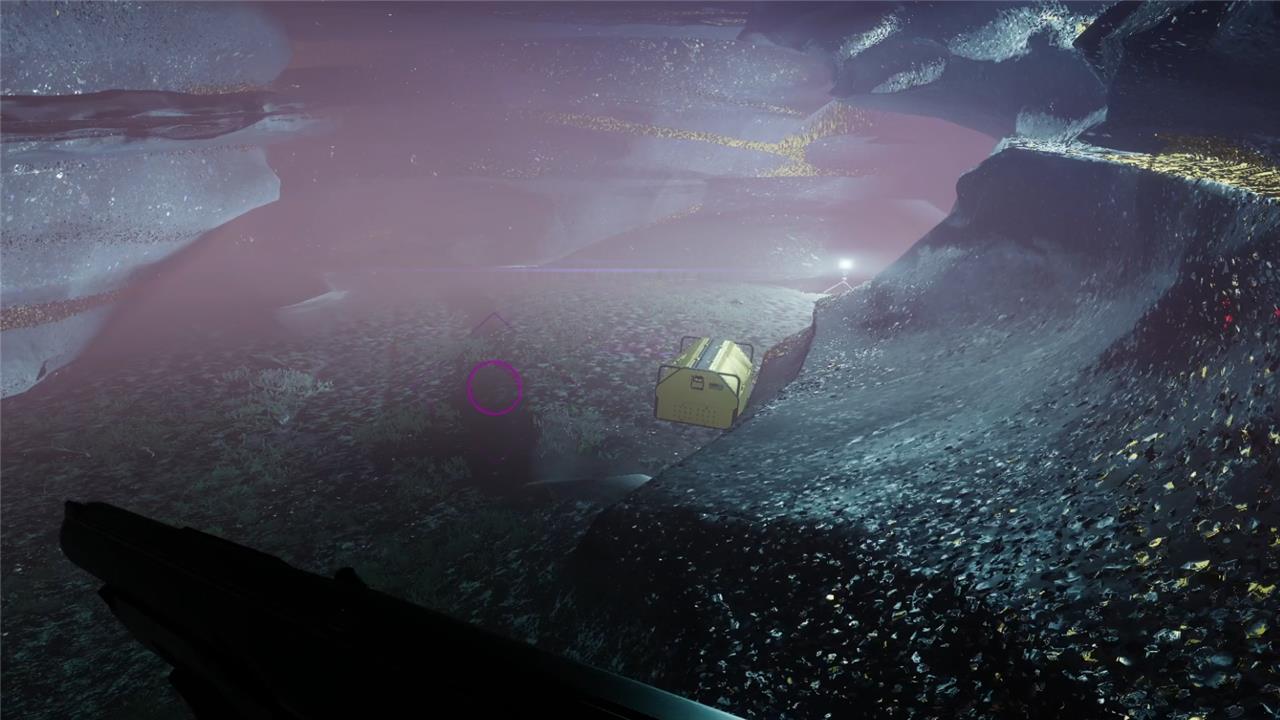
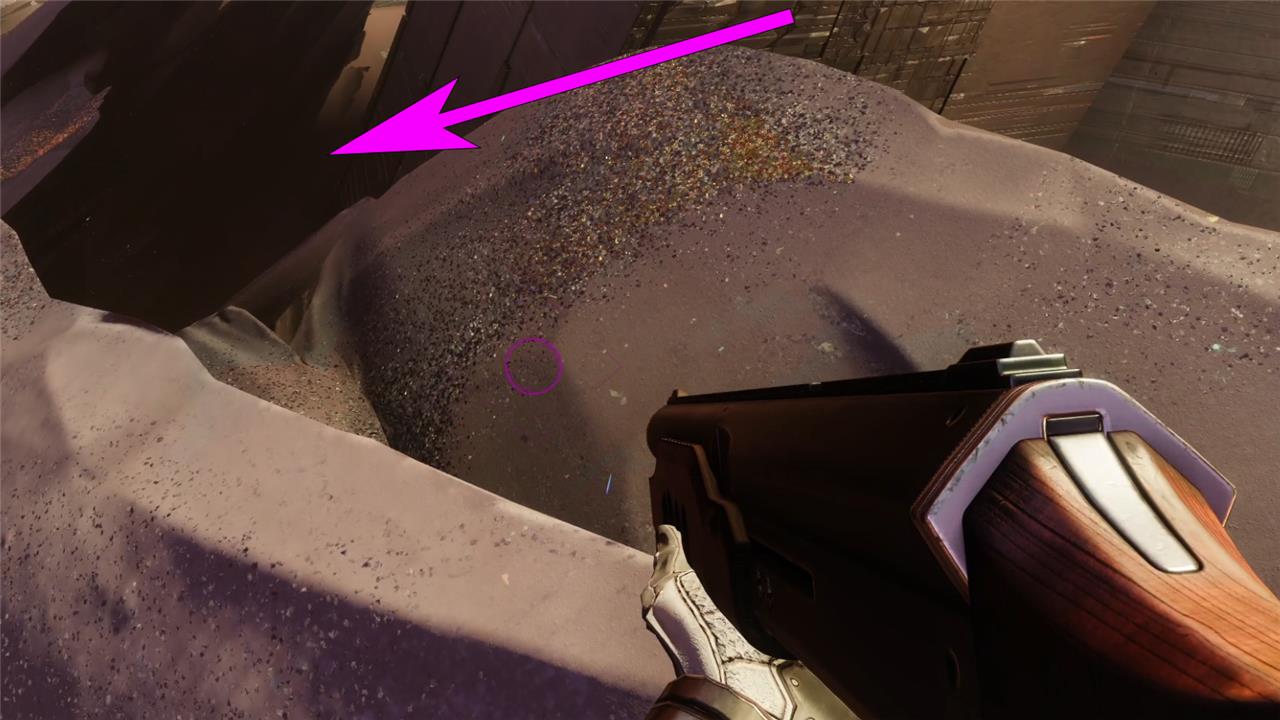
North Chest (Hidden Shoreline)
Head to the northeast corner near the Calus pyramid.
From the pyramid’s northern edge, drop down carefully to the hidden shoreline path below the map edge.
Follow the ledge into a small cave where the chest sits.
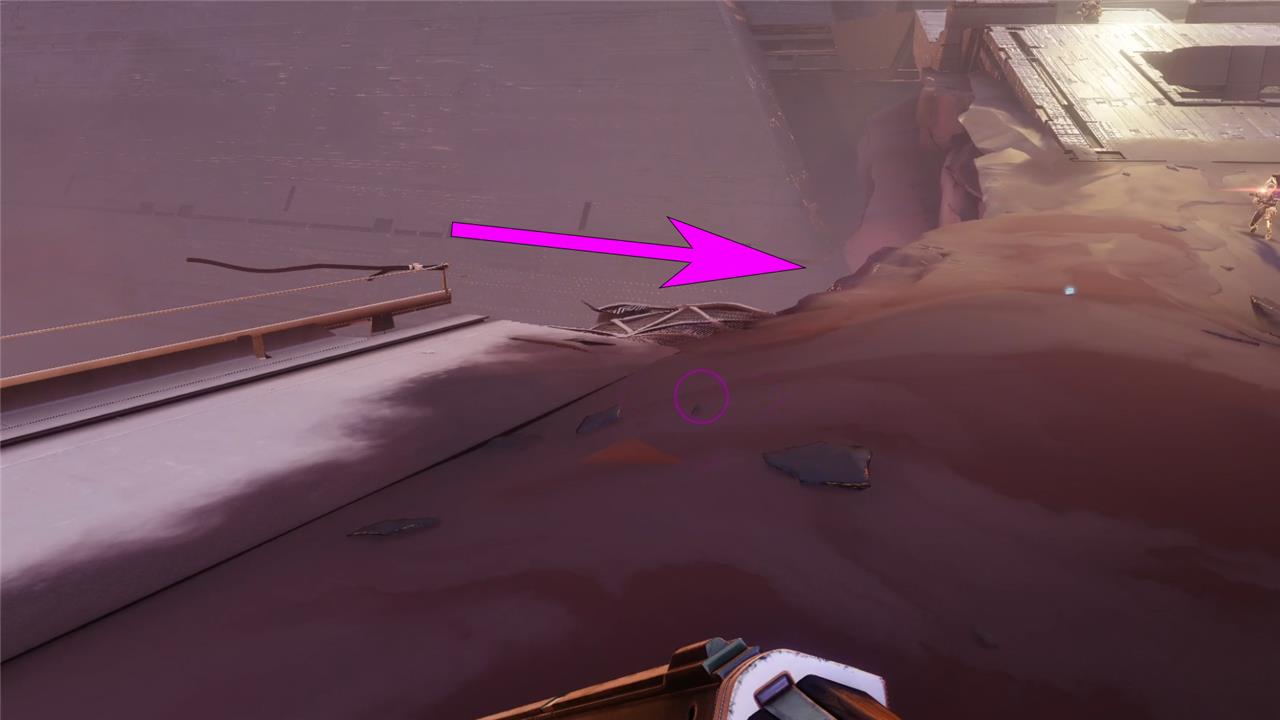
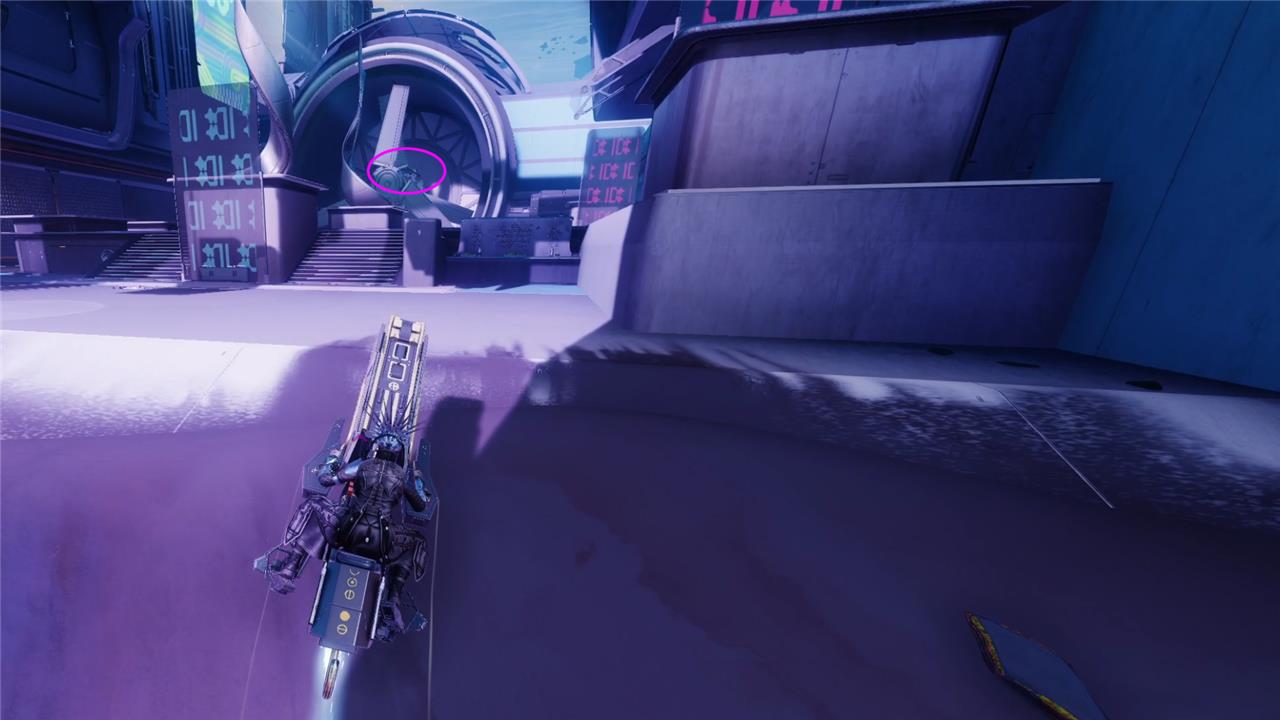
Northeast Chest (Sand Cavern)
Near the north chest, go to the diagonal sand slabs intersecting the pyramid’s southern end.
Spot the small gap where sand meets the ship and drop through.
Land on the ledge leading into a cavern; the chest is inside along the left wall.
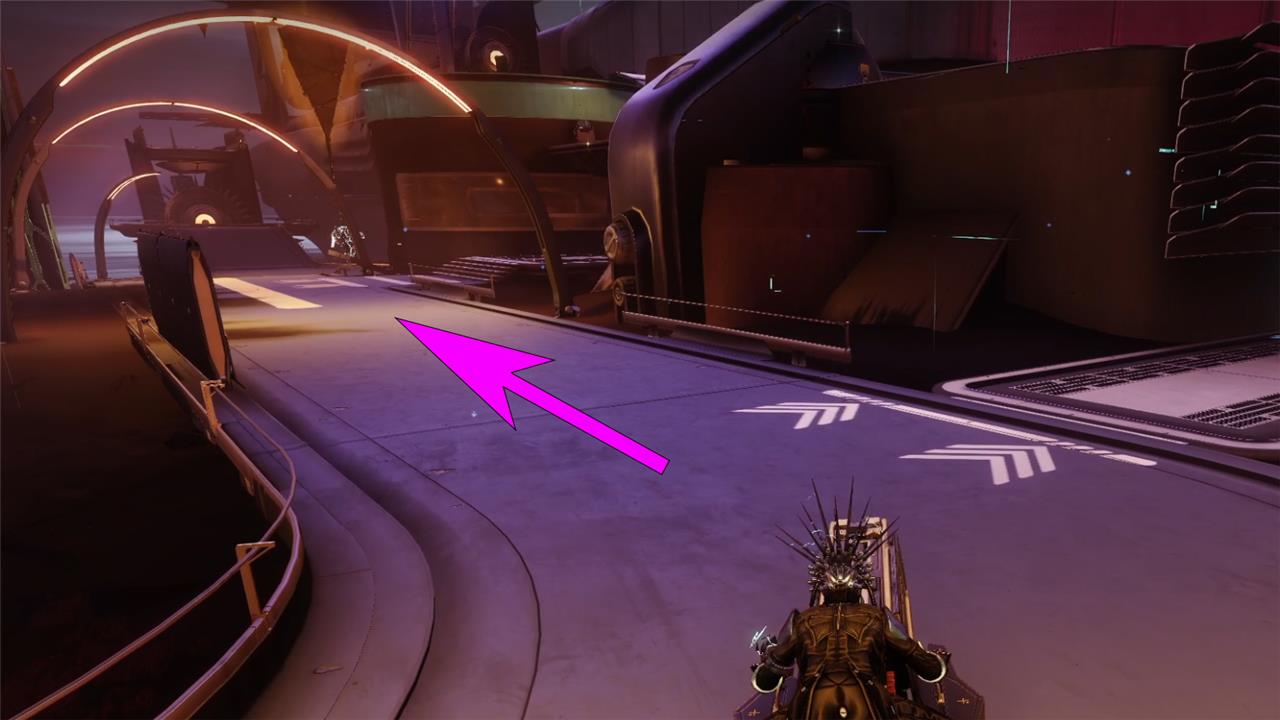
South Chest (Building Ledge)
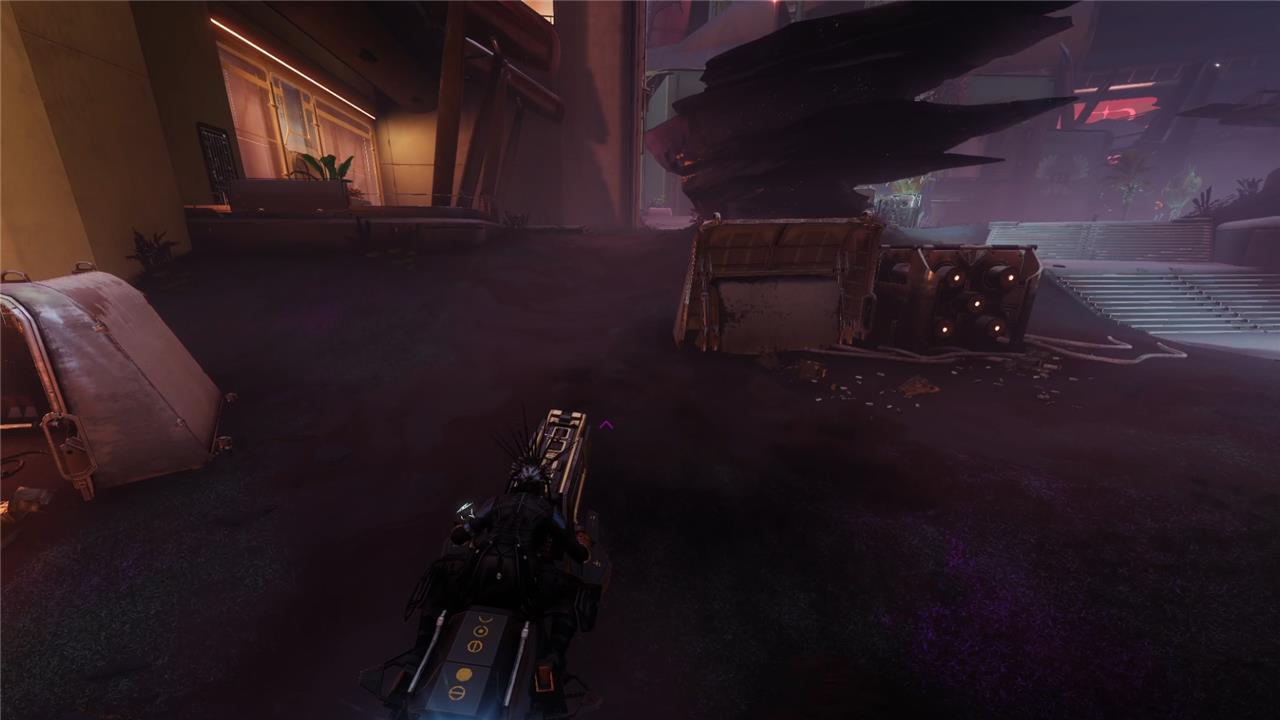
Spawn at the Ahimsa Park landing point and curve left around the large building.
Jump to the side windows or awnings on the building’s exterior to reach elevated platforms.
Climb or Strand-grapple along the series of platforms to the chest on the outer ledge (wall-climb works without Strand).