A hulking menace prowls the Plains and Forests of Monster Hunter Wilds: the Doshaguma, a bear-like beast whose massive frame and relentless aggression make it a nightmare for unprepared hunters. Its soft belly is a rare but critical weak point, best targeted when the monster rears up, while fire and thunder attacks to the head and torso can quickly turn the tide in your favor. Knowing where to find this formidable foe-and how to exploit its vulnerabilities-could be the difference between a triumphant hunt and a desperate retreat.
A recurring monster found across multiple biomes, Doshaguma is one target that you should always be prepared for. This guide covers the Doshaguma weaknesses and resistances to prepare accordingly, where to find it, and the best strategy to defeat one of the new foes introduced in Monster Hunter Wilds.
Doshaguma location
Doshaguma is primarily found in the Windward Plains biome in Monster Hunter Wilds, making it one of the earliest large monsters players will encounter during the main storyline. After progressing through Chapter 1, Doshaguma can also appear in the Scarlet Forest and the Ruins of Wyveria, especially in post-game content following Chapter 3. Within these biomes, Doshaguma tends to roam between multiple locations and may be seen traveling in packs or near riverbanks, often leading other monsters. To locate Doshaguma, players can check the Environment Overview screen for its presence or simply explore its known habitats, as tracking monsters is streamlined in Monster Hunter Wilds.

You’ll first encounter Doshaguma in Chapter 1, during the Forest Findings main mission. As such, all you need to do to unlock the monster is progress through the main questline.
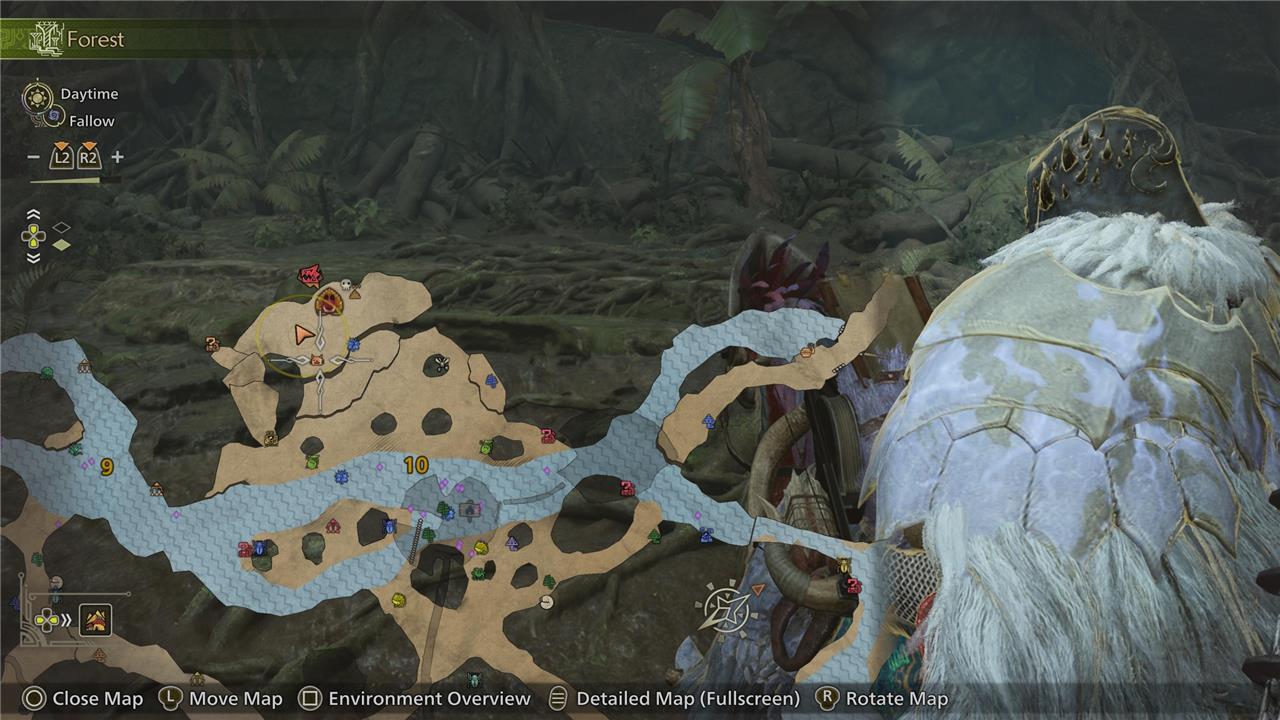
Doshaguma is usually found in the Plains biome, but there’s a chance of seeing it in the Forest and Wyveria during the post-game (once you finish Chapter 3). In the first chapter, the beast tends to roam around 8, 9, and 10, and can sometimes be leading a pack (which is the case when you encounter it in the story campaign). This varies in the Forest biome, but the monster’s “resting” place is the top of 10, and usually follows the river to either side.
Keep in mind that in Monster Hunter Wilds, tracking monsters isn’t really a prominent feature. Except for a few first-time exceptions, you can use the Environment Overview screen to see if your target is roaming around the map. If not, exploring its corresponding biome(s) for a few minutes usually does the trick – you’ll see a notification on screen announcing its appearance. Worst case scenario, you can speak to Alma and post a hunt for it. For better or worse, the process of finding a monster is much more streamlined now. If you find tracks or other monster residuals on the ground, you can loot them for materials.
How to prepare for Doshaguma
To prepare for Doshaguma in Monster Hunter Wilds, equip weapons with Fire or Thunder elements, as these exploit its primary weaknesses-Fire is effective on the head and torso, while Thunder works best on the head. Bring armor with high defense, such as the Lala Barina set, to withstand its aggressive attacks. Stock up on healing items and traps, especially rock and vine traps, to control the fight and create openings. If you expect to encounter a pack, carry Large Dung Pods to disperse them and avoid being overwhelmed. Finally, learn Doshaguma’s attack patterns, focusing on dodging its powerful slams and targeting exposed weak points like its belly when it stands on hind legs for maximum damage.
Doshaguma is part of the main story of Monster Hunter Wilds. As such, its encounter is likely to fit your Hunter Rank at that corresponding moment. It can be a tricky fight – however, your first smackdown with it is sort of orchestrated. The sequence serves as a showcase of harsh weather in Wilds, namely a lightning storm that takes place in the Plains biome. You’ll have to dodge lightning, but that also applies to Doshaguma, who isn’t as agile.
If your encounter goes similarly to mine, you’ll see that Doshaguma will have a few obstacles to contend with aside from lightning strikes. There’s a chance for a Balahara to show up and wrestle with the bear-like creature. And, toward the end, a sand pit will end the encounter prematurely.
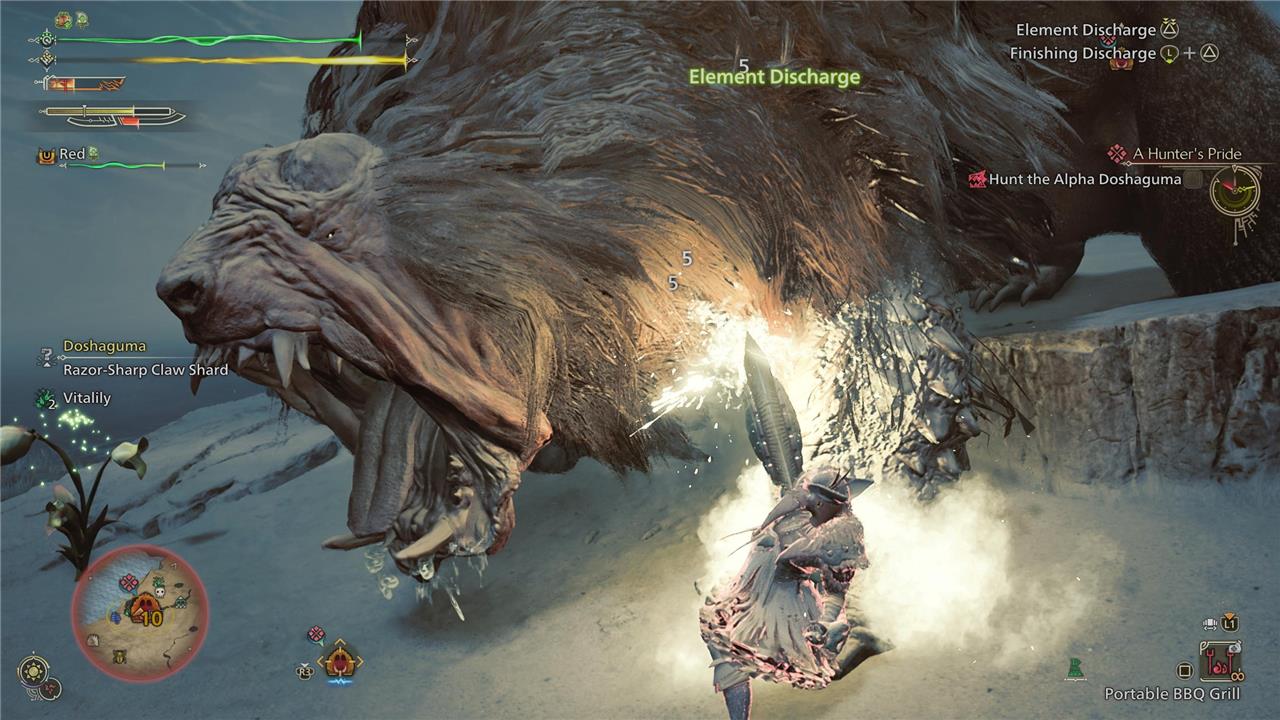
None of this means that Doshaguma won’t put up a fight, though. If you have a weapon with Fire or Thunder as its main element, you’ll have the advantage of targeting an elemental weakness. As for armor, I was using almost every piece of the Lala Barina set, if only for the higher defense available at that point in the campaign, but your mileage may vary.
Since the encounter occurs during a main mission, you’ll be thrust into the fray after the introductory cutscene. As per usual, whenever you’re asked if you’re ready to depart, make sure that you’re carrying regular and mega potions with you. If you’re short on the latter, take a lap around the biome and loot any honey you come across.
In addition, don’t forget to eat – you can use the portable BBQ to grill a meal if you didn’t eat at camp. Increasing your health and stamina is essential, as Doshaguma packs a punch. You can use ingredients like Wild Herb as finishing touches to boost your elemental resistance, helpful for the lightning strikes, but again, I wouldn’t worry too much about that specific aspect of the fight.
For later encounters, carrying a few Torch or Thunder Pods will be beneficial – if either you or one of your teammates have a ranged weapon with Flaming or Thunder Ammo, even better. I also recommend investing in defense as much as possible. Remember that you can not only craft better armor, but also upgrade your current pieces. Even if you don’t have new monsters left to hunt to unlock more powerful sets, take the time to improve your gear and boost its stats.
Doshaguma weakness
Doshaguma is most vulnerable to Fire and Thunder elements, with Fire being especially effective on its head and torso, and Thunder primarily on its head. It also has minor (1-star) weaknesses to Water, Ice, and Dragon elements, though its tail hair resists Dragon attacks. In terms of ailments, Doshaguma has a 2-star weakness to all major status effects, including Poison, Sleep, Paralysis, Blastblight, Stun, and Exhaust, making these strategies viable for disrupting its attacks. Physically, its head and forelegs are prime targets, taking the most damage, while its belly becomes a weak spot during certain attacks. Avoid focusing on its back legs, as they are heavily armored and resistant to damage.

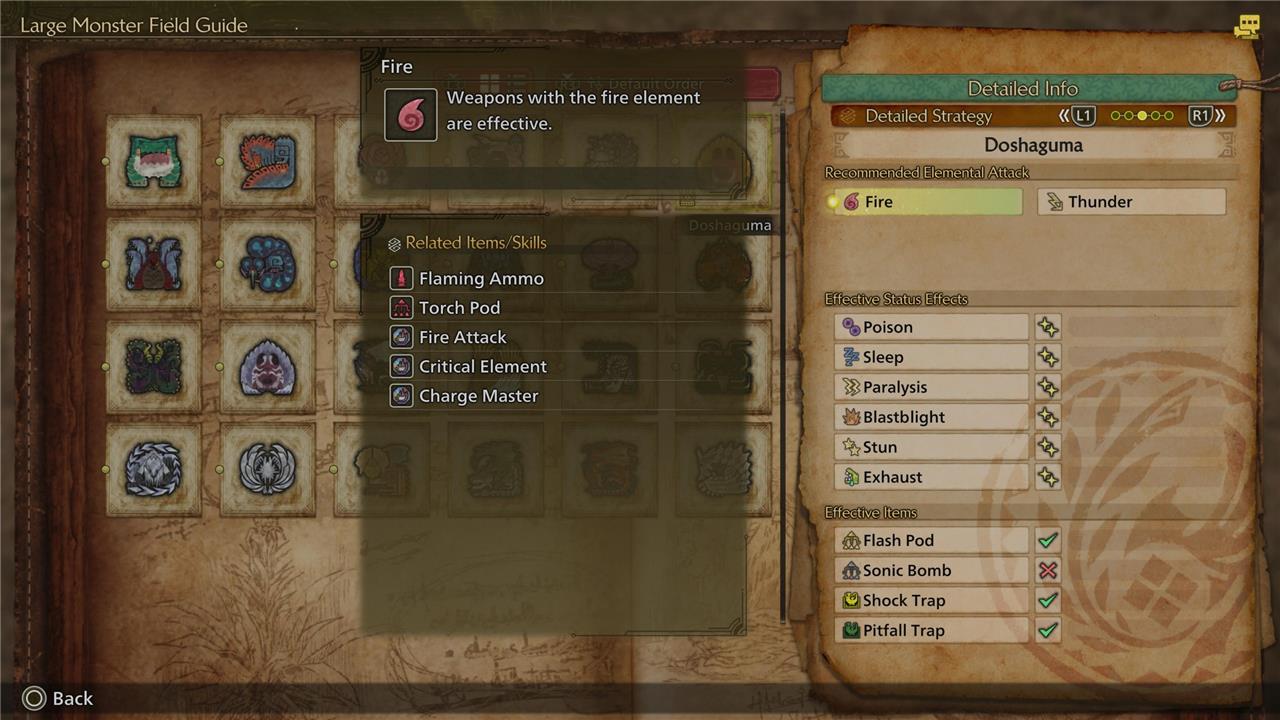
Doshaguma can be a hefty obstacle if you’re unprepared – thankfully, as one of the first “complex” mons in Monster Hunter Wilds, there are multiple ways to use that complexity to your advantage. Doshaguma’s recommended elemental attacks are Fire and Thunder. The first encompasses Flaming Ammo, Torch Pod, as well as skills like Fire Attack, Critical Element, and Charge Master. The second encompasses Thunder Ammo, Thunder pod, Thunder Attack, Critical Element, and Charge Master. Both are in addition to your own weapon’s properties.
You can find a breakdown of Doshaguma’s elemental weaknesses and resistances below:
Effective status effects
- Poison: 2 stars
- Sleep: 2 stars
- Paralysis: 2 stars
- Blastblight: 2 stars
- Stun: 2 stars
- Exhaust: 2 stars
Effective items
- Flash Pod: Effective
- Sonic Bomb: No effect
- Shock Trap: Effective
- Pitfall Trap: Effective
Weak points
Doshaguma’s weak point is its Belly. Both its Forelegs (x2) and Tail Hair can be broken as well.
Before diving deep into combat strategy, here’s the breakdown of Doshaguma’s weak points:
Doshaguma is a formidable, aggressive monster in Monster Hunter Wilds, most vulnerable to Fire and Thunder elements-Fire works best on its head and torso, while Thunder is especially effective at the head. Its primary weak points are the head and forelegs, which take the most damage, but its belly becomes a major weak spot when exposed during certain attacks, particularly when it rises on its hind legs or prepares a Ground Break attack. Doshaguma is also susceptible to ailments like Poison, Sleep, Paralysis, Blastblight, Stun, and Exhaust, each with high effectiveness. You’ll find Doshaguma in open areas where it uses powerful biting and slashing attacks; watch for its growl as a sign it’s about to strike, and use traps like Shock and Pitfall to your advantage. Target its weak points with heavy weapons for a chance to stun it, and be ready to exploit its exposed belly for maximum damage during its more vulnerable moments.
Part |
Sever |
Blunt |
Ranged |
Fire |
Water |
Thunder |
Ice |
Dragon |
|---|---|---|---|---|---|---|---|---|
| Head | 3 stars | 3 stars | 3 stars | 2 stars | 1 star | 2 stars | 1 star | 1 star |
| Torso | 2 stars | 3 stars | 2 stars | 2 stars | 1 star | 1 star | 1 star | 1 star |
| Left Foreleg | 3 stars | 3 stars | 3 stars | 1 star | 1 star | 1 star | 1 star | 1 star |
| Right Foreleg | 3 stars | 3 stars | 3 stars | 1 star | 1 star | 1 star | 1 star | 1 star |
| Left Hind Leg | 3 stars | 2 stars | 2 stars | 1 star | 1 star | 1 star | 1 star | 1 star |
| Right Hind Leg | 3 stars | 2 stars | 2 stars | 1 star | 1 star | 1 star | 1 star | 1 star |
| Tail Hair | 2 stars | 2 stars | 2 stars | 1 star | 1 star | 1 star | 1 star | No Effect |
For details about what to expect in terms of attacks and general behavior, the following section has you covered.
Doshaguma attacks and strategy
Doshaguma is a highly aggressive fanged beast known for its powerful melee attacks and unpredictable movement patterns. Its primary offensive moves include a baiting mouth attack-where it drags its mouth along the ground before lunging forward-a sweeping 360° spin with its claws, and devastating ground slams using its massive forelegs. The monster often signals its attacks with a growl or by showing its teeth and roaring, giving attentive hunters a brief window to dodge or counter. Doshaguma’s belly is its most vulnerable spot, especially when it rears up or is toppled, while the head and forelegs are also weak points susceptible to both blunt and severing weapons. To minimize risk, hunters should avoid lingering near its hind legs, as these are heavily armored and deal little damage. Breaking the forelegs can reduce incoming damage, and targeting the rear or sides is generally safer due to the reach of its frontal attacks. When Doshaguma grows more aggressive at low health, focus attacks on its exposed weak points and use traps like Shock or Pitfall Traps to create openings. Timing dodges, exploiting telegraphed attacks, and capitalizing on its moments of vulnerability are key to a successful hunt.

Doshaguma’s main traits are its aggressiveness and scale, which go hand in hand to be a major pain to deal with. When you’re facing it head on, it has a number of attack variations around biting and slashing with its massive paws. Some are quicker while others are slower but deal more damage. Here’s a rule of thumb that applies to almost everything Doshaguma does: If it opens its mouth to growl, that means it’s about to attack.
The head isn’t exactly a weak point, but it’s usually the area you’ll be hitting the most. Again, Doshaguma is quick to react, so it’ll be constantly trying to follow you. If you use quickstep to either side of the head, the monster usually scratches the ground for a quick hit – this is also one of the few attacks that isn’t prefaced by a growl.
Most of the time, the beast is going to stand up slightly and go for a slam attack, either with its paws or mouth. Remember that its forelegs can be broken, which are good areas to punish when you have a chance.
Fighting Doshaguma means constant dodging, to the point where it might take some time until you actually find an opening to strike back. It’s crucial to exploit any visible wounds whenever possible, which can give you the chance to stun it to the ground, exposing the belly, its weak point.
The enraged state basically amps up the aforementioned attacks, making them more frequent. One move in particular sees it spinning around in place before ending with a slam ground attack, so your best bet is to try and steer away from it – unless you can target a wound during the animation, which will potentially stop it altogether. To know when Doshaguma is enraged, look at its head, as it’ll be fuming from its nose.
Toward the second half of the encounter, there’s a “second” enraged state. The creature lets out a loud growl, and if you’re in focus mode, you’ll see multiple wounds appear on its body. This is good, but you shouldn’t attack it head-on. Now, most of its attacks involving slam grounds will create cracks on the surface of impact. They will usually happen in either pairs or trios, with the third being a bigger slam using both paws.
The last and probably the most dangerous move during this second enraged state is a reverse slam of sorts. Once Doshaguma creates these fisures, it sometimes does a lift animation that uses all that terrain against you for a huge attack. If you see it scratching the ground or spending too much time near ground cracks, try to put as much distance from it as possible. Whenever you see a window of opportunity, go for the wounds, but be mindful of how it’ll use the terrain to its advantage during this later phase. If you have traps in your inventory, this will be a good time to use them.
Doshaguma drops
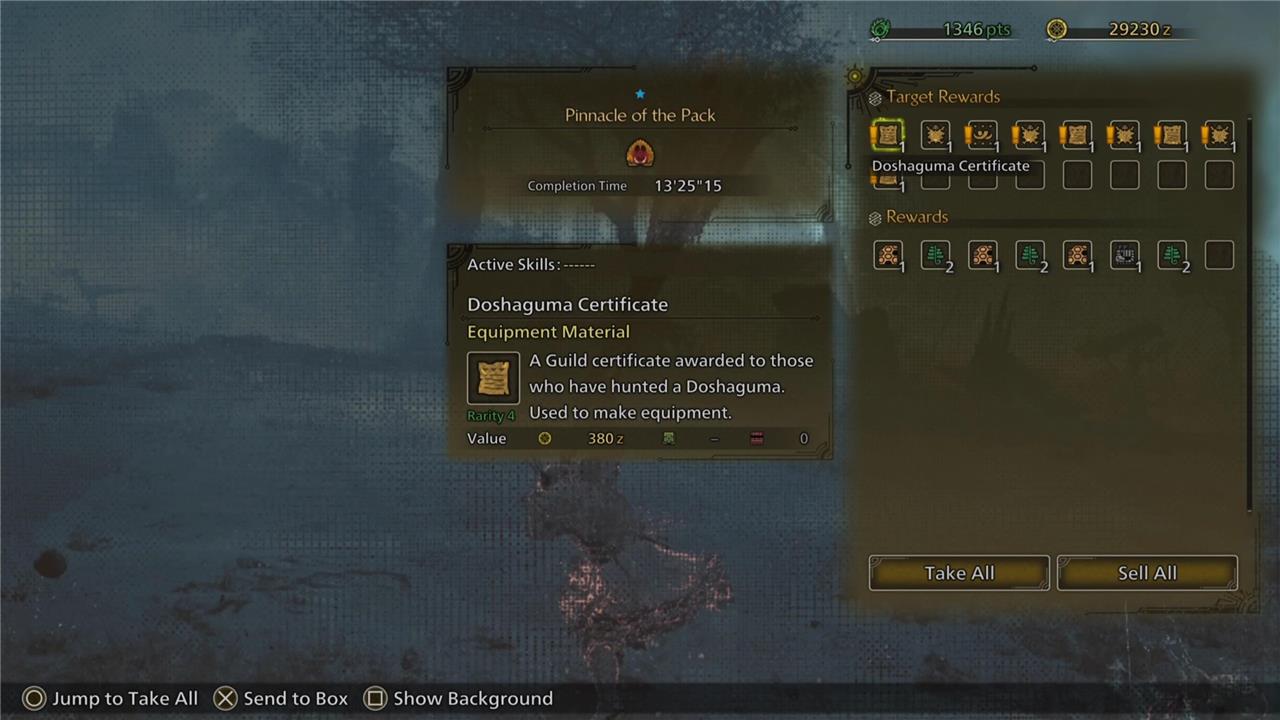
Doshaguma yields a variety of valuable materials depending on the quest rank and method of obtaining. In Low Rank hunts, you can expect to receive Doshaguma Fur (27%), Doshaguma Claw (15%), Doshaguma Hide (27%), Doshaguma Fang (20%), and the rare Doshaguma Certificate (11%), which is best farmed through Low-Rank Optional Missions such as “Forest Outlaw”. High Rank hunts introduce upgraded materials like Doshaguma Hide+, Doshaguma Fur+, Doshaguma Claw+, and Doshaguma Fang+, with the elusive Beast Gem appearing as the rarest drop-3% from target rewards and 5% from carves, totaling up to an 8% chance if you carve after every hunt. Breaking specific parts, such as the tail hair or forelegs, guarantees certain drops like Doshaguma Fur+ and Doshaguma Claw+. For Tempered Doshaguma, special rewards include Rusted Weapon Shards and Hunter Symbol II, while breaking tempered wounds can yield Wyverian Bloodstones of varying sizes, used in Relic Melding.

If you’re wondering what the Doshaguma drops in Monster Hunter Wilds are, you can find a handy list below:
Low Rank materials
Material |
Availability/Probability |
Frequency |
Source |
|---|---|---|---|
| Doshaguma Fur | Target rewards (x1/27%). Broken part rewards (x1/100%). Wound Destroyed reward (x1/50%). Carving (x1/30%) | 4 stars | Tail Hair |
| Doshaguma Claw | Target rewards (x1/15%). Broken part rewards (x2/100%). Carving (x1/15%) | 4 stars | Forelegs |
| Doshaguma Hide | Target rewards (x1/27%). Wound destroyed reward (x1/50%). Carving (x1/35%) | 3 stars | N/A |
| Doshaguma Fang | Target rewards (x1/20%). Carving (x1/20%) | 2 stars | N/A |
| Doshaguma Certificate | Target rewards (x1/11%) | 1 star | N/A |
High Rank materials
Material |
Availability/Probability |
Frequency |
Source |
|---|---|---|---|
| Doshaguma Fur | Target rewards (x1/27%). Broken part rewards (x1/100%). Wound Destroyed reward (x1/50%). Carving (x1/27%) | 4 stars | Tail Hair |
| Doshaguma Claw | Target rewards (x1/15%). Broken part rewards (x2/100%). Carving (x1/15%) | 4 stars | Forelegs |
| Doshaguma Hide | Target rewards (x1/27%). Wound destroyed reward (x1/50%). Carving (x1/33%) | 3 stars | N/A |
| Doshaguma Fang | Target rewards (x1/20%). Carving (x1/20%) | 2 stars | N/A |
| Doshaguma Certificate S | Target rewards (x1/8%) | 1 star | N/A |
How can I exploit Doshaguma’s fire and thunder weaknesses effectively
How to Exploit Doshaguma’s Fire and Thunder Weaknesses Effectively
Target the Right Body Parts
-
Fire and Thunder are Doshaguma’s primary elemental weaknesses, with Fire being especially effective on its head and torso, and Thunder also dealing significant damage to the head.
-
Aim for the head whenever possible, as it has the highest damage modifier for these elements, maximizing your attack potential.
Use Elemental Weapons and Ammo
-
Equip weapons or ammo with Fire or Thunder attributes to ensure every hit exploits these weaknesses.
-
Insect Glaive users can use Kinsect Extracts from the head to further boost Fire damage output.
Capitalize on Openings
-
Doshaguma’s belly is its main weak point, but it’s only exposed when the monster rears up or after certain attacks.
-
When the belly isn’t accessible, focus Fire and Thunder attacks on the head and forelegs, which are also breakable and yield high damage.
Use Traps and Status Effects
-
Utilize Flash Pods to disorient Doshaguma, creating safe windows to land elemental attacks.
-
Shock Traps can immobilize it, letting you unleash a barrage of Fire or Thunder hits, especially to the head or exposed wounds.
Exploit Wounds and Enraged States
-
When wounds appear on Doshaguma’s body, prioritize attacking these spots with Fire or Thunder for bonus damage and a higher chance to stun or stagger it.
-
During its enraged phases, watch for new wounds and increased openings after it performs powerful attacks.
Summary Table
| Element | Best Target Areas | Strategy |
|---|---|---|
| Fire | Head, Torso | Use Fire weapons; focus on head for max damage |
| Thunder | Head | Use Thunder weapons; prioritize head attacks |
By focusing your Fire and Thunder attacks on Doshaguma’s head and torso, using traps for openings, and exploiting wounds as they appear, you can efficiently break down this formidable monster’s defenses and secure a swift victory.
How can I time my attacks to exploit Doshaguma’s belly weakness effectively
Timing Attacks to Exploit Doshaguma’s Belly Weakness
Watch for Key Attack Animations
-
Doshaguma’s belly, its primary weak point, is only exposed during certain attack animations, especially when it rises on its hind legs to perform slam or Ground Break attacks.
-
When you see Doshaguma preparing to slam down or rear up, get ready to strike its belly. This window lasts only a few seconds, so prioritize quick, high-damage attacks rather than long combos.
Capitalize on Knockdowns and Wounds
-
If you manage to knock Doshaguma over, such as by breaking its forelegs or stunning it, its belly will be exposed for a longer period while it writhes on its side-this is the safest and most effective time to unload your strongest attacks on the weak spot.
-
As the fight progresses and visible wounds appear (especially when Doshaguma is enraged or low on health), focus your attacks on these wounds to increase your chances of exposing the belly again.
Dodge, Then Counterattack
-
When Doshaguma initiates a belly-exposing attack, time your dodge to the side or backward to avoid the slam, then immediately move in to land a few hits on the exposed belly before retreating.
-
Don’t overcommit-only attack as long as the belly is exposed, then reposition to avoid retaliation.
Weapon Choice Matters
-
Blunt weapons like the hammer or hunting horn are especially effective when hitting the belly, maximizing your damage output during these brief openings.
By recognizing Doshaguma’s attack patterns and patiently waiting for these belly-exposing moments, you can consistently exploit its greatest weakness for massive damage.
