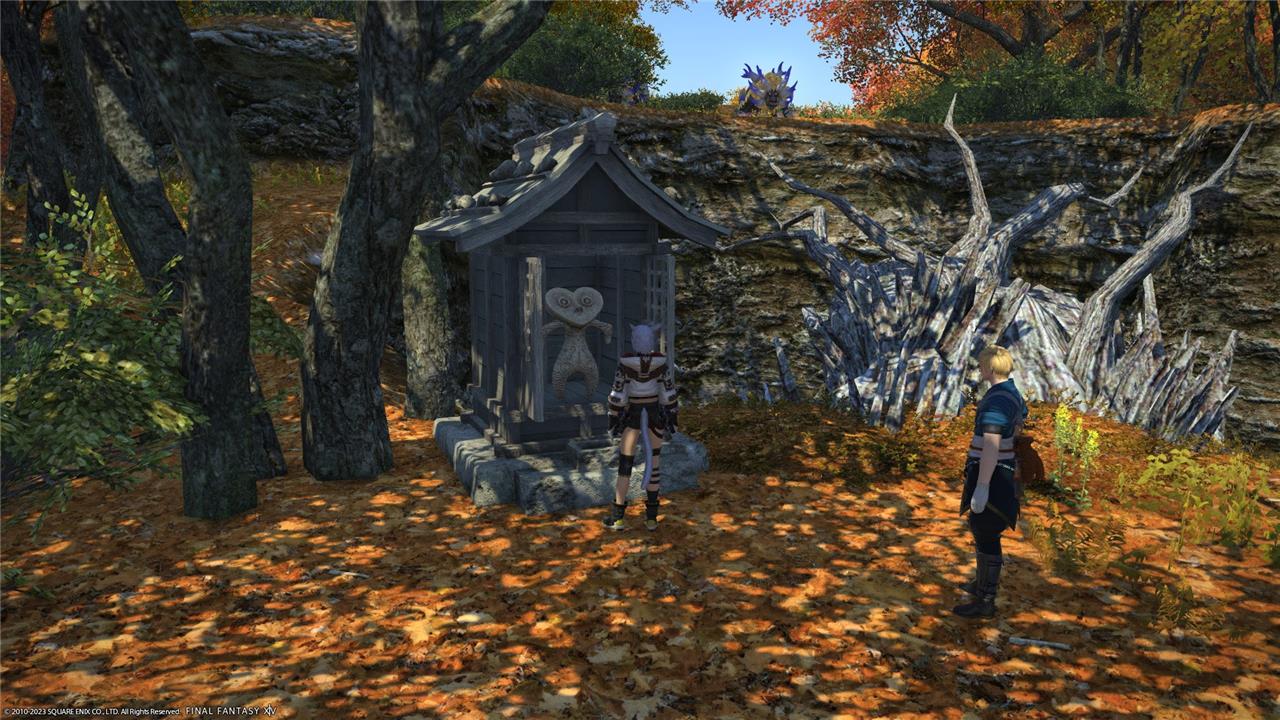
Hidden paths, secret bosses, and route choices shape every run through Mount Rokkon. Whether you want rare loot or aim for the fastest clears, this breakdown of all variant dungeon routes in FFXIV reveals every twist that determines your reward.
Play detective as you find your way up a mountain, where you must figure out what you must do to find all paths. From solving a puzzle to opening a hidden door to being smart to avoid an ambush, there are several ways to unlock a new path.
To get a chance to climb Mount Rokkon, you need a character at level 90 and have completed the “Endwalker” main scenario quest. Then, you must go to Old Sharlayan to talk to Shallow Moor at X: 12.0 Y: 13.3.
Shallow Moor gives you the quest “Mononoke Aware,” which unlocks Mount Rokkon. You can either run it solo or with a party. To party with other players you need at least an item level of 605.
By unlocking a new path, you get access to more than just a new piece of the place’s story. All the major fights are different, since all bosses perform different sequences of attacks and mechanics depending on which route you’re in.
With our Final Fantasy 14 Mount Rokkon route guide, you can find all the help you need when looking for the hidden paths that you need to complete to get the Burabura Chochin mount.
After completing all 12 paths, you just need to claim the Burabura Chochin Whistle in the Achievement menu to get the mount.
Path 1: Cut Above the Restless
Path 1: Cut Above the Restless leads players through a swift, direct route filled with precise mechanics and tight timing. This path begins by defeating the restless spirits guarding the old bridges, followed by a sequence of jumps and ranged-heavy encounters. Success depends on quick movement and proper use of mitigation, as enemies tend to strike in groups. Clearing this path rewards players with faster completion times and a smoother lead into the deeper sections of Mount Rokkon.
- Take the left portal.
- Defeat the three groups of enemies.
- Beat up Yozakura the Fleeting miniboss.
- Defeat more enemies.
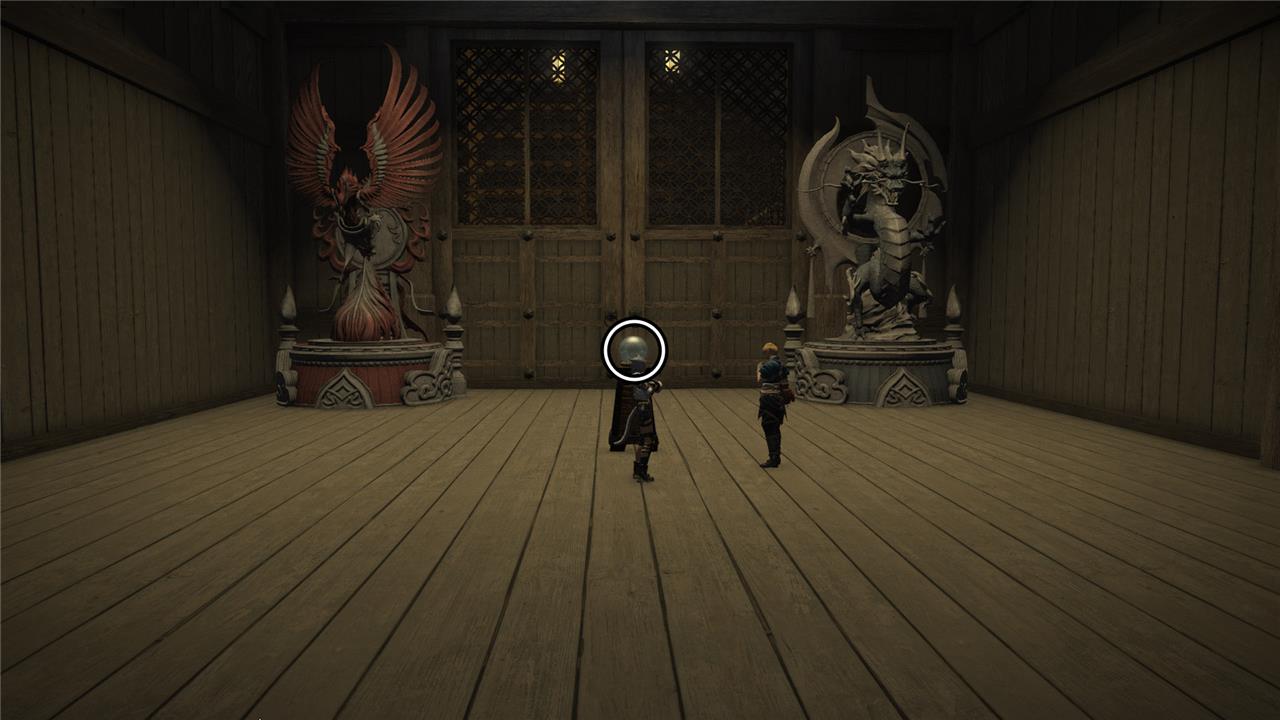
- In the room with the Suzaku and Seiryu statues, only interact with the Auspice Glass in the center.
- Fight more enemies in the next rooms
- Before going upstairs, interact with the katana case and choose the option to close its lid.
- In the next room, beat up Moko the Restless, the final boss of this dungeon.
Path 2: The Crimson Sword
Path 2: The Crimson Sword leads players through narrow wooden bridges and open courtyards filled with swift, aggressive foes. Quick reactions are needed to handle ambushes and environmental hazards, especially during multi-enemy pulls. The path’s main threat is the crimson spirit guarding a cursed blade, requiring precise timing to counter its wide slashes and reflected attacks. Finishing this route rewards treasures tied to the sword’s lore and offers a faster route for experienced groups.
- Take the left portal.
- Fight the three groups of enemies in your way.
- Beat up Yozakura the Fleeting. Depending on the weather, this boss’ mechanics change.
- Defeat more enemies to open the path for you.
- In the room where you find Suzaku and Seiryu statues, interact only with the Auspice Glass in the center.
- Go through the following rooms defeating the enemies you find.
- In the room with the staircase, ignore the Katana Case and keep going to the next area.
- Fight Moko the Restless to complete the dungeon.
Path 3: A Tale of Dead Men
Path 3: A Tale of Dead Men leads players through eerie halls filled with restless spirits and traps left by fallen warriors. This route tests awareness and timing, as environmental hazards and ghostly enemies demand quick reactions. Choosing the right switches alters the path ahead, offering different treasure rooms and encounters. The boss at the end requires careful positioning and coordination, rewarding those who adapt to shifting mechanics and learn from each failed attempt.
- Take the left portal.
- Go through the next section defeating the enemies to open the path.
- Beat up Yozakura the Fleeting. Depending on the weather, this boss’ mechanics change.
- Defeat more enemies.
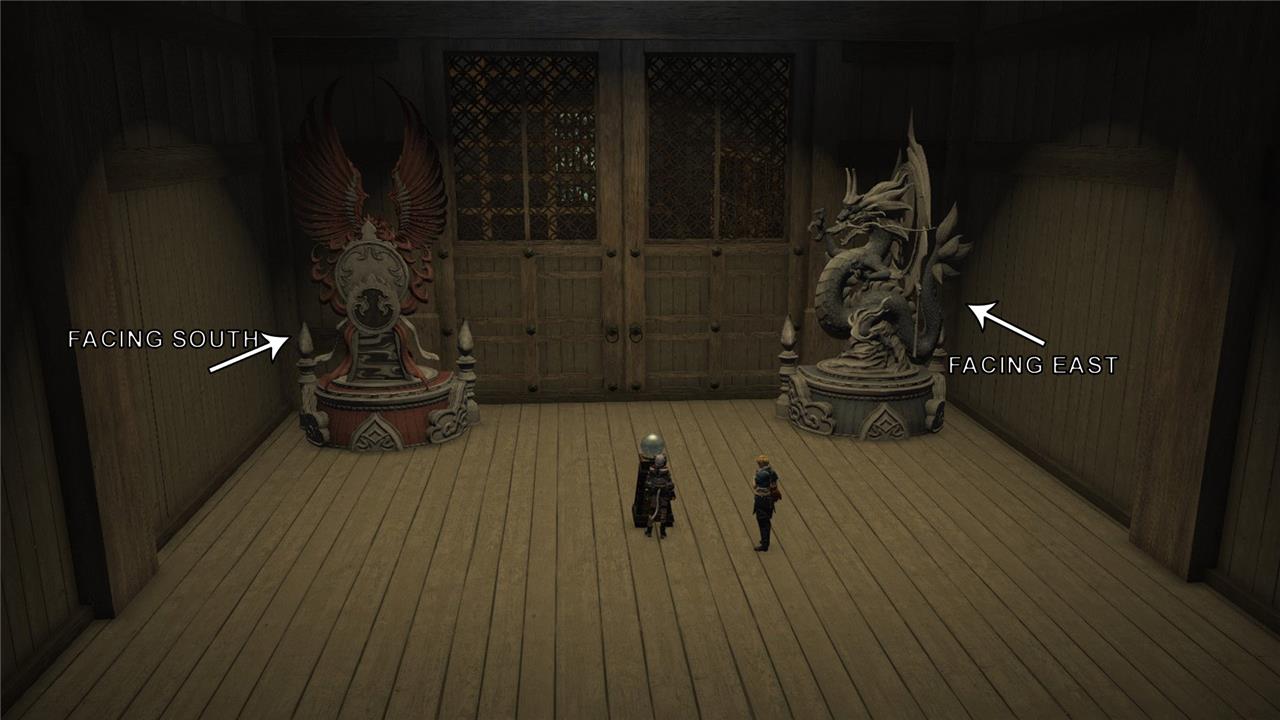
- In the room with the Suzaku Seiryu statues, you must rotate them so Suzaku is facing south and Seiryu east. Before you interact with the Auspice Glass, they must be positioned as shown in the image below.
- Leave using the door on your left and defeat the enemies on the roof.
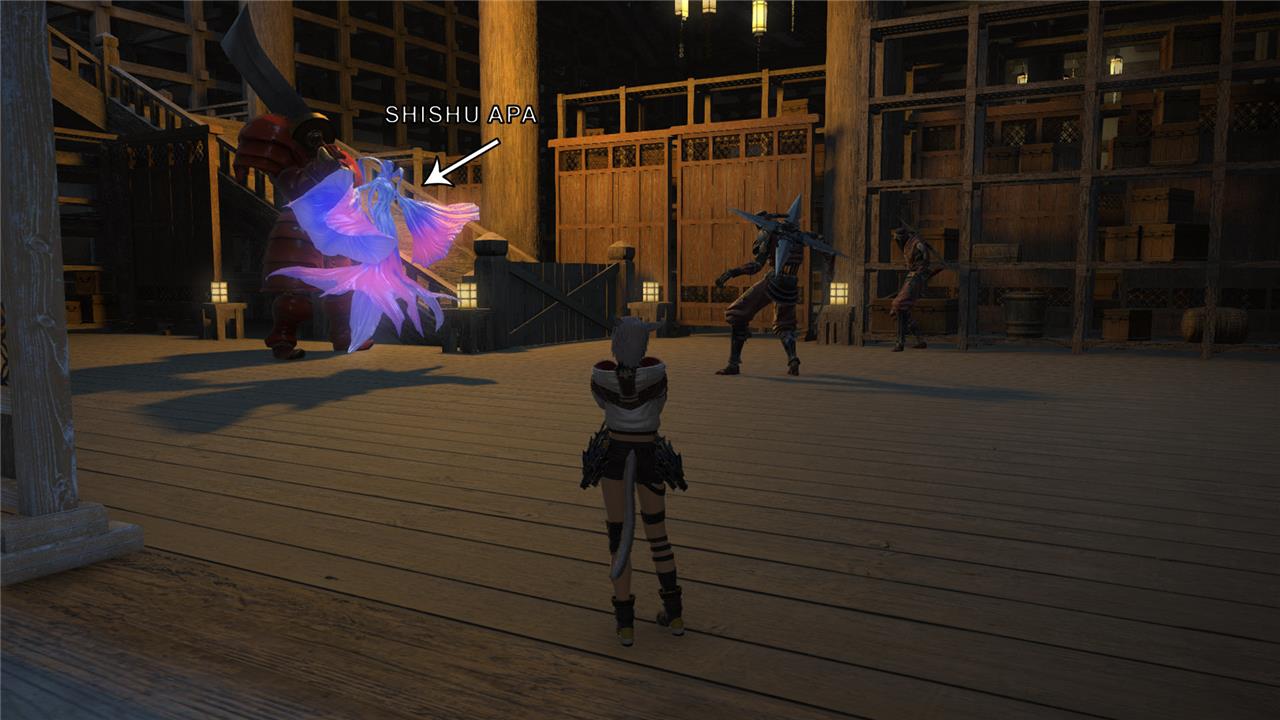
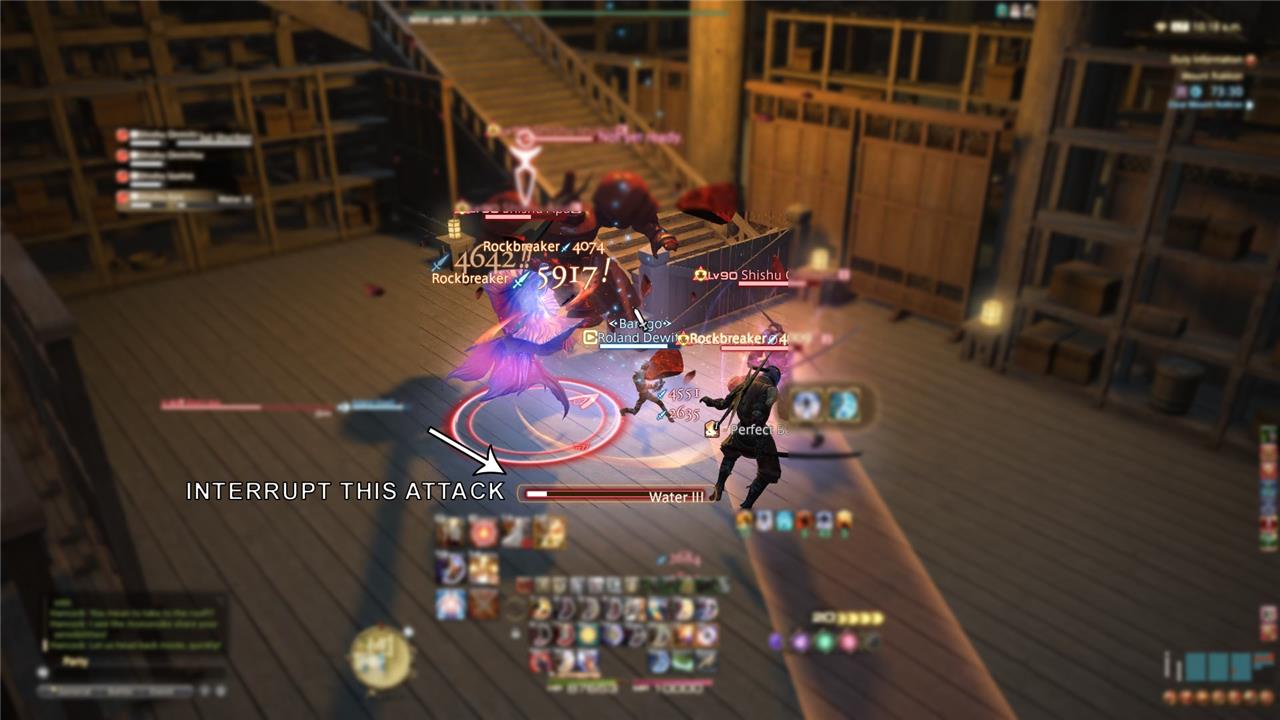
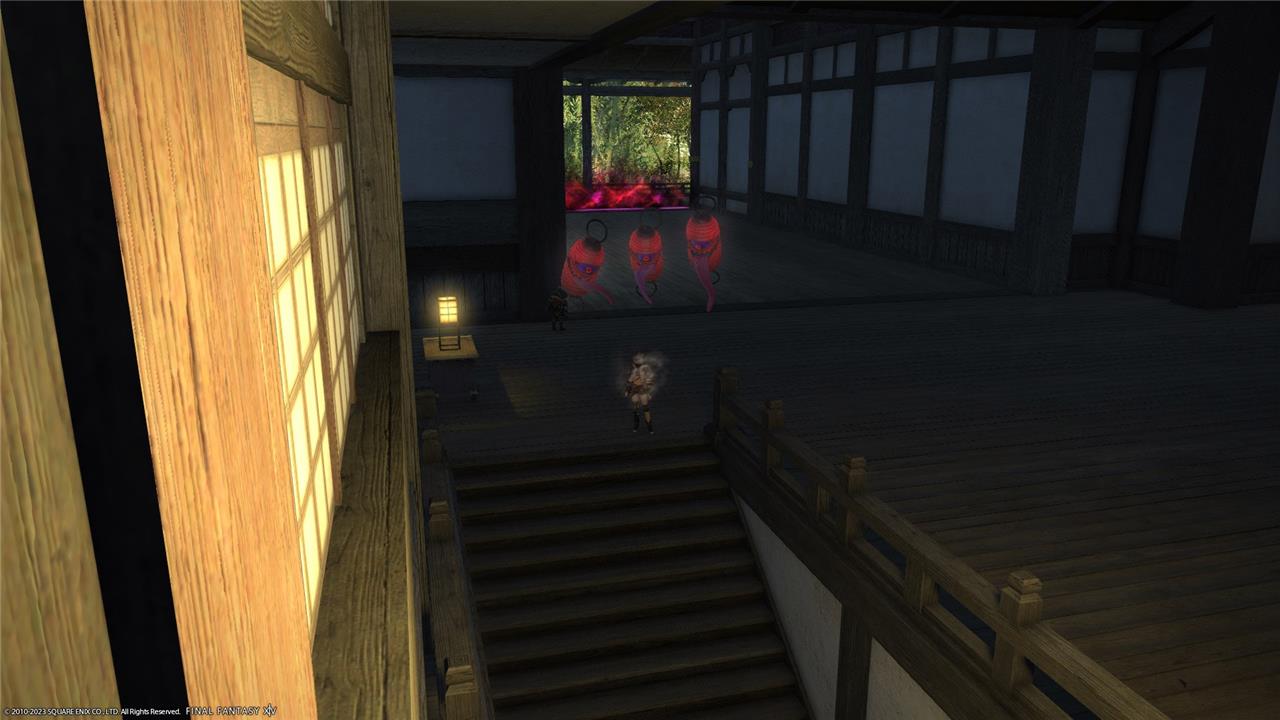
- In the next room, be sure to let Shishu Apa – the blue-floating enemy – finish casting Water III, putting the lanterns in the room out.
- Go upstairs to fight Moko the Restless.
Path 4: Forging a Legacy
Path 4 rewards players who have mastered Mount Rokkon’s mechanics with a route that balances speed and precision. Each encounter demands careful timing, from handling split enemy groups to managing tight movement patterns during boss fights. Collectibles and hidden chests are placed to reward sharp observation, encouraging players to refine their approach with each run and leave their mark through flawless execution and coordination.
- Take the left portal.
- Defeat the three groups of enemies that you come across.
- Fight Yozakura the Fleeting. This miniboss uses different attacks and mechanics depending on the weather.
- Defeat more enemies.
- In the room with the statues, you need to rotate them in order to leave Suzaku facing the south and Seiryu the east. Thus, interact with the Auspice Glass to open a door on your left.
- Fight the group of enemies on the roof.
- In the next room, you must interrupt Shishu Apa when it starts casting Water III, keeping all the lanterns lit.
- Keep going to fight Moko the Restless.
Path 5: The Luthier and the Songstress
This route features a quiet meeting between a wandering luthier and a mysterious songstress whose melody holds hidden power. Players must interpret musical cues and time their actions carefully to progress through the encounter. Choices made during their conversation influence the tone of the fight and determine how the duo’s tale concludes, offering both a challenge and a touch of melancholy artistry unique to Mount Rokkon.
- Take the portal in the middle.
- You need to fight three groups of enemies to get to the next area.
- In front of the Shojo Temple, pull the Woven Rope before opening the door.
- Beat up Yozakura the Fleeting.
- Move forward, defeating all enemies in your way.
- When you talk to Shishu White Baboon, choose the “Very well – we have a deal” dialogue option.
- Defeat Gorai the Uncaged in the next area to complete this path.
Path 6: Lost to Avarice
Greed corrupts the path within Mount Rokkon, turning allies against one another as treasure and temptation distort reason. In this route, players must balance risk and reward, as each decision can lead to hidden riches or ruin. Encounters emphasize indulgence and excess, with bosses drawing strength from stolen wealth and hoarded power. Careful attention to mechanics and restraint amid temptation mark the difference between triumph and downfall.
- Start by going through the portal in the middle.
- Defeat all the enemies in your way.
- Before opening the door to the Shojo Temple, pull the Woven Rope.
- Defeat Yozaruka the Fleeting.
- Keep going, defeating enemies.
- Now, when talking to Shishu White Baboon, you must select the “Give me a moment to think.” option. After defeating the Baboon, go to the next area.
- Beat up Gorai the Uncaged.
Path 7: Beyond the Lanterns’ Light
The final route in Mount Rokkon leads through dimly lit paths where the glow of lanterns fades into darkness. Players encounter stronger foes and must manage tight timing to survive ambushes from hidden spirits. Carefully using terrain and anticipating enemy attacks becomes key to progressing safely. Each choice influences the encounter ahead, making precision and awareness the difference between victory and defeat.
- Take the portal in the middle.
- Defeat the enemies.
- When you find yourself in front of the Shojo Temple, just open the door. Do not pull the Woven Rope.
- Beat up Yozaruka the Fleeting.
- Keep moving forward defeating enemies.
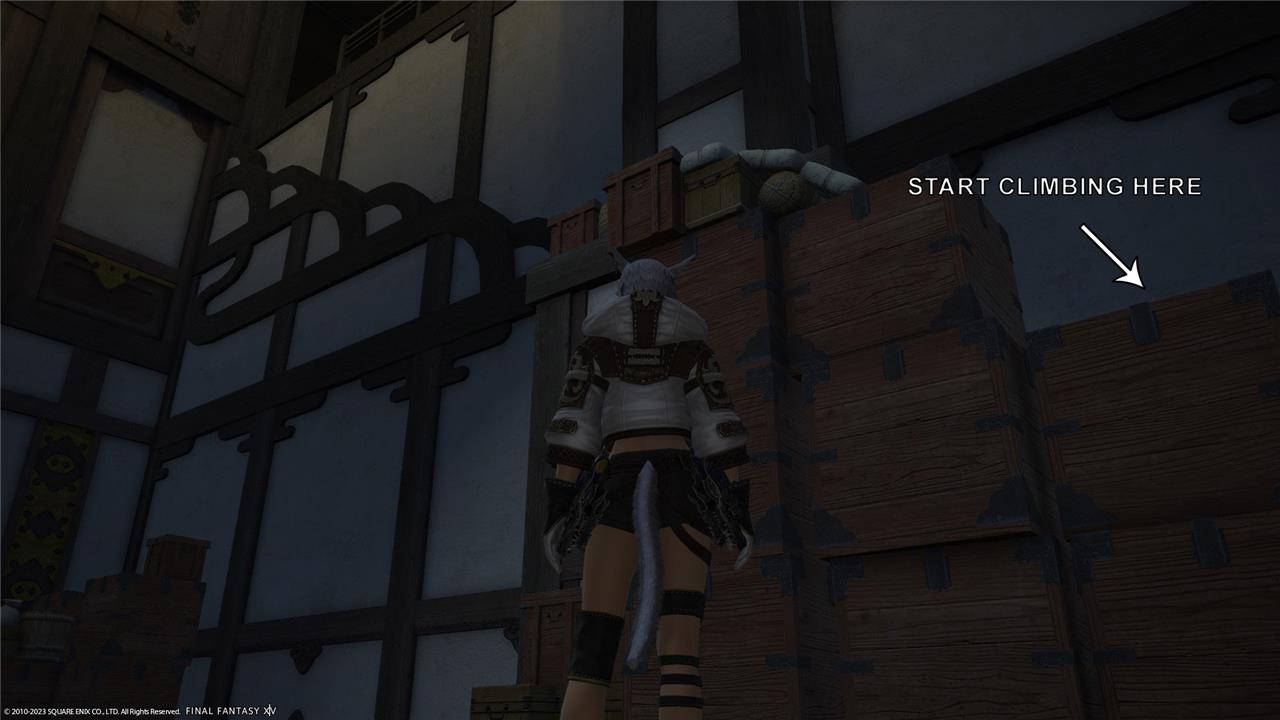
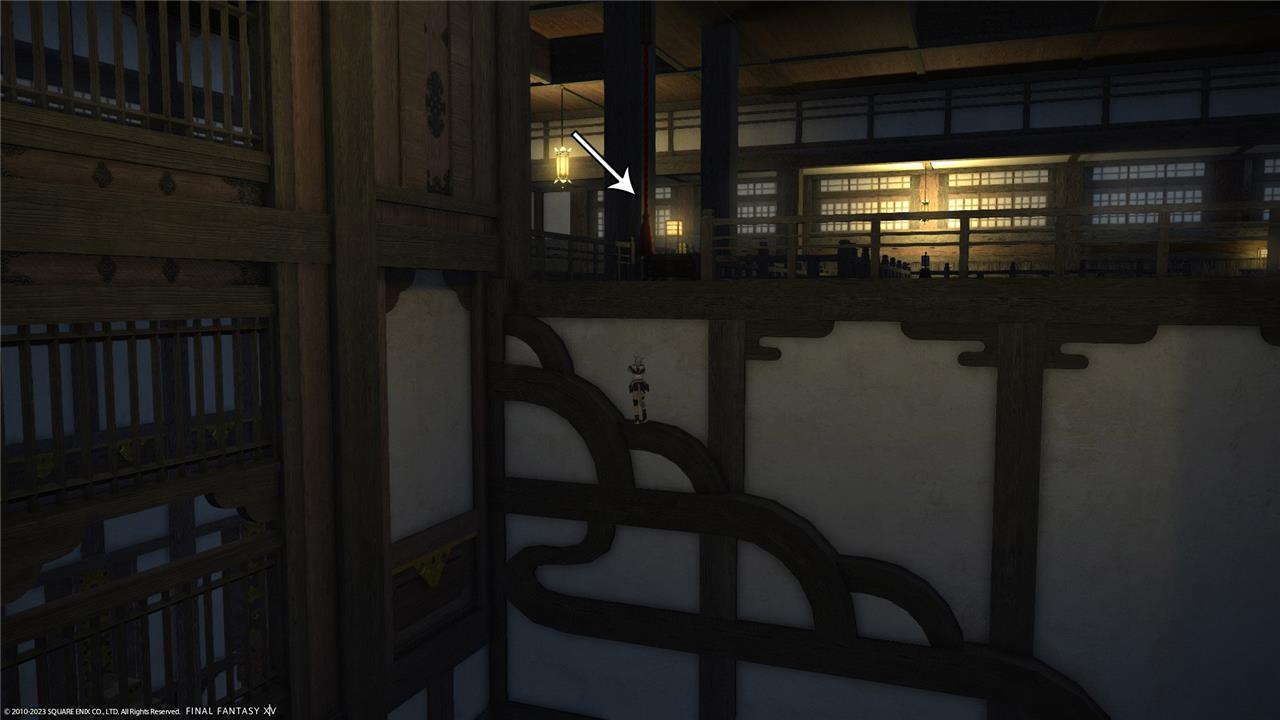
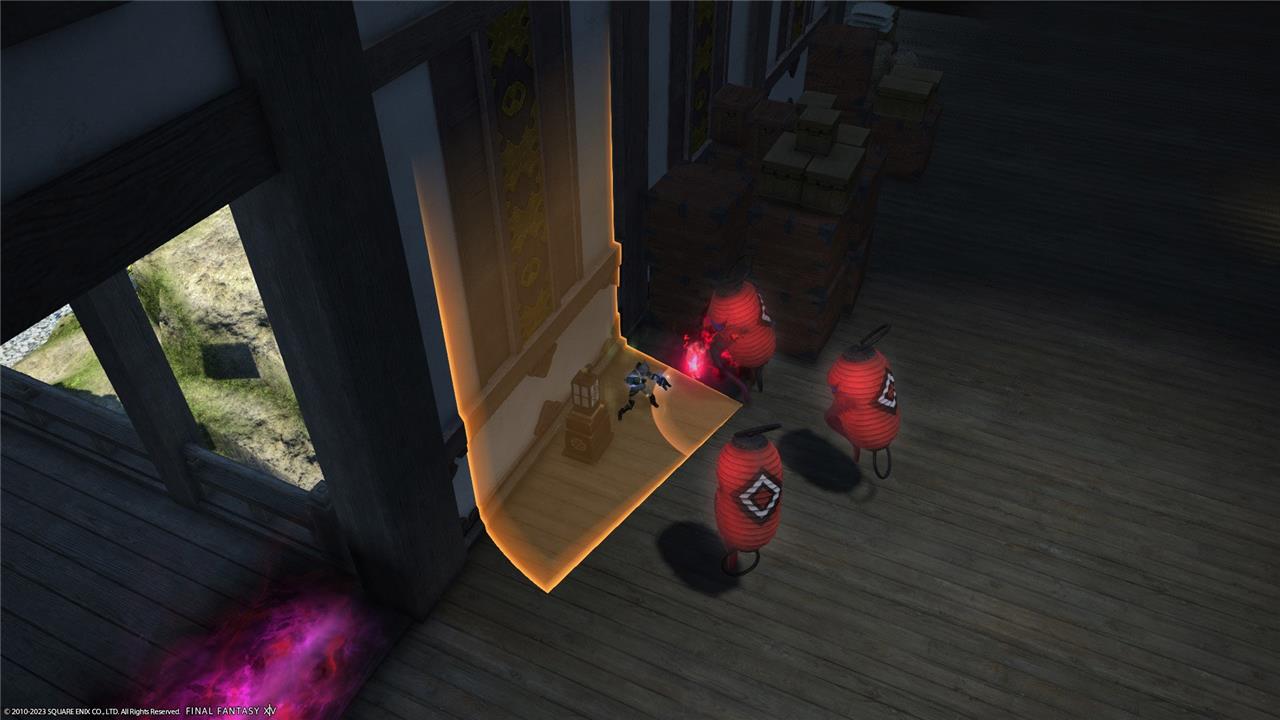
- After you have defeated Shishu Yoko, the white tiger, don’t open the door close to where Hancock goes to. Instead, you must climb the boxes on the left side of the room and keep going until you reach the upper level as shown in the image below.
- Pull the Woven Rope you find on the upper level.
- Fight the three lanterns.
- Defeat Gorai the Uncaged.
Path 8: The Common Man’s Courage
This route suits players who stick to basics and push through with grit. Face the initial foe head-on, then circle right to pull the roaming pack without aggroing extras. Stack the group at the second boss for easy AoE clears, hop the gaps swiftly, and burst down the final add waves before the big one lands. Straightforward pulls and solid positioning carry you to victory.
- Start taking the right portal.
- Defeat the enemies in your way.
- After the third group of enemies, you find the dogu. Do not interact with it. Just keep forward.
- Fight Yozakura the Fleeting.
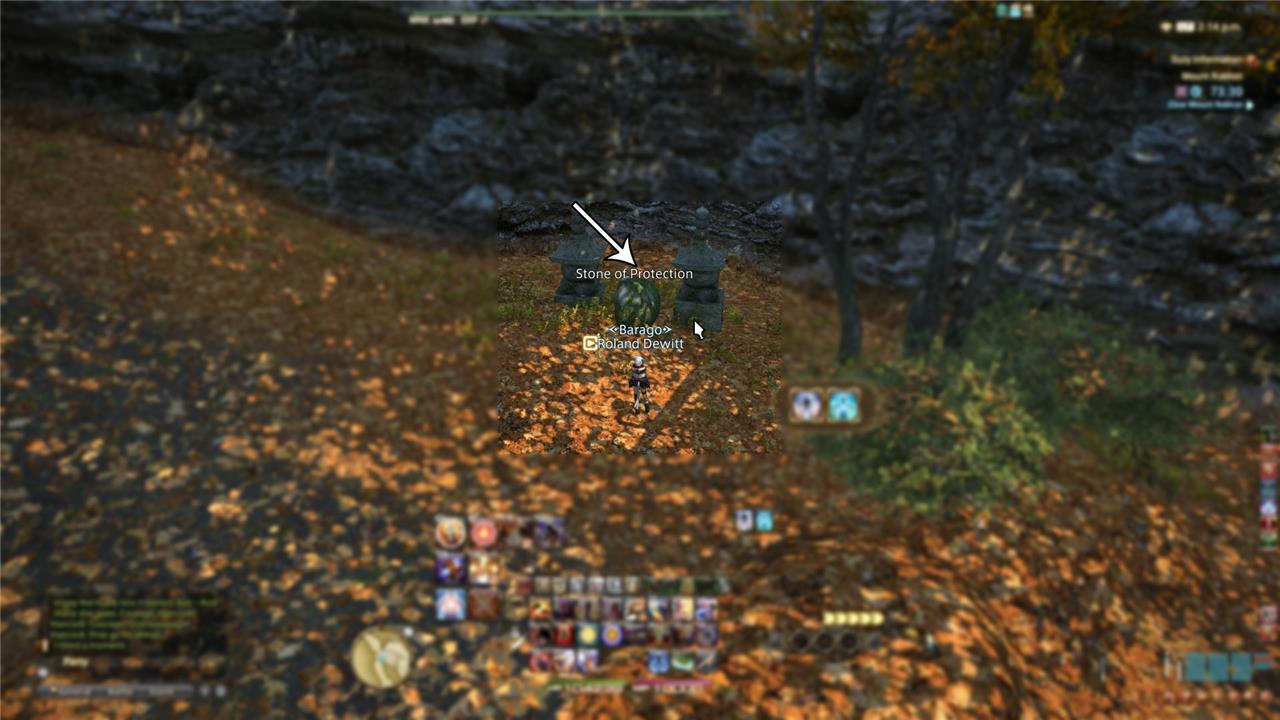
- As you walk on the next path, you will find four Stones of Protection. Interact with them to brush away the moss and detritus.
- Defeat more enemies.
- Beat up Shishio, the final boss of this path.
Path 9: Sound of the Stone
Path 9: Sound of the Stone challenges players to stay alert as they face echoing attacks that bounce through narrow corridors. Each enemy’s strike resonates across the chamber, forcing precise timing and smart positioning. Environmental cues and subtle sound hints help track enemy movements, creating a fight that rewards awareness and quick reactions.
- Take the right portal.
- Defeat some groups of enemies.
- Ignore dogu when it’s found by Hancock. Just keep going to the next area.
- Beat up Yozakura the Fleeting.
- As you progress through the next section, do not interact with the Stones of Protection.
- Clear the area defeating all the enemies.
- Fight Shishio.
Path 10: The Seal of Silence
Path 10 leads through shadowed halls where whispering winds carry faint echoes of ancient pacts. Players pull levers to shift barriers, timing pulls precisely against patrolling yokai that circle tight corners. Collect three seals from hidden alcoves while avoiding spectral guardians, then align them at the central pedestal to break the final barrier and claim the route’s treasure chest.
- Take the right portal.
- Defeat the enemies found in the following sections.
- You need to pick dogu, the clay figure, up when Hancock finds it after the third group of enemies.
- Beat up Yozaruka the Fleeting.
- Fight more enemies.
- After you find a Fence with a small shrine right beside it, you must ignore the former and use theEastern Bow emote (/easternbow or /ebow) in front of the latter.
- Defeat more enemies.
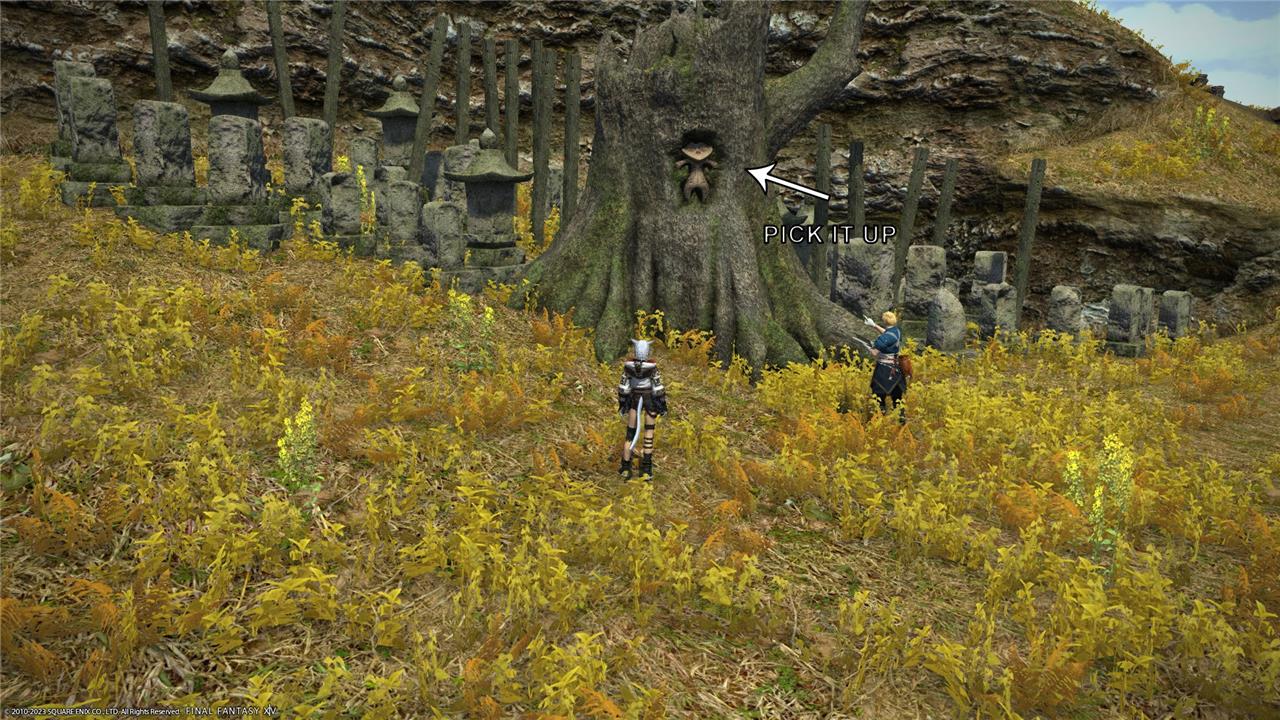
- After reaching a dead end, there is an Ancient Tree and an Iwakura in front of you. Interact with the Iwakura to use it as a bridge.
- Beat up Shishio.
Path 11: Seasons of the Fleeting
Path 11: Seasons of the Fleeting challenges players with shifting mechanics tied to elemental changes that mirror the passing seasons. Each section introduces unique hazards and enemy patterns, requiring sharp awareness and timing to progress safely. Success depends on adapting your tactics to new environmental cues, from blistering heat to frozen terrain, ensuring your party stays coordinated as you advance through this visually striking and unpredictable route.
- Start with the right portal.
- Fight the enemies you find in the first few sections.
- When you find dogu, you must interact with it to pick it up.
- Defeat Yozaruka the Fleeting.
- Keep going through the next section defeating enemies in your way.
- When you come upon a Rickety Fence, you should ignore it. Instead, go to the small shrine beside it and use the Eastern Bow emote (/easternbow or /ebow) in front of it.
- Fight more enemies.
- When the path comes to a dead end, interact with the Ancient Tree to use it to reach the other side.
- Defeat Shishio.
Path 12: The Ogiseru’s Fate
Path 12 follows the story of the Ogiseru, revealing how fate twists for this once-proud warrior spirit. Players must face challenging encounters that test timing and precision, especially during the later boss phase where mechanics combine in unpredictable patterns. Completing this route rewards insight into the Ogiseru’s downfall and connects thematic threads shared across the Mount Rokkon variants.
- Go for the portal in the middle.
- Fight the groups of enemies in your way.
- Don’t pull the Woven Rope that is in front of the Shojo Temple. Just open the door to proceed.
- Defeat Yozaruka the Fleeting.
- Defeat more enemies.
- Now, after defeating the Shishu Yoko, the white tiger, you should not open the next door that Hancock stays in front of. You must repeat the process of climbing the boxes as you did in Path 7.
- Once in the upper level, pull the Woven Rope.
- In the next section, when the three lanterns spawn, do not kill them. You need to lure them to the room where you fought the white tiger.
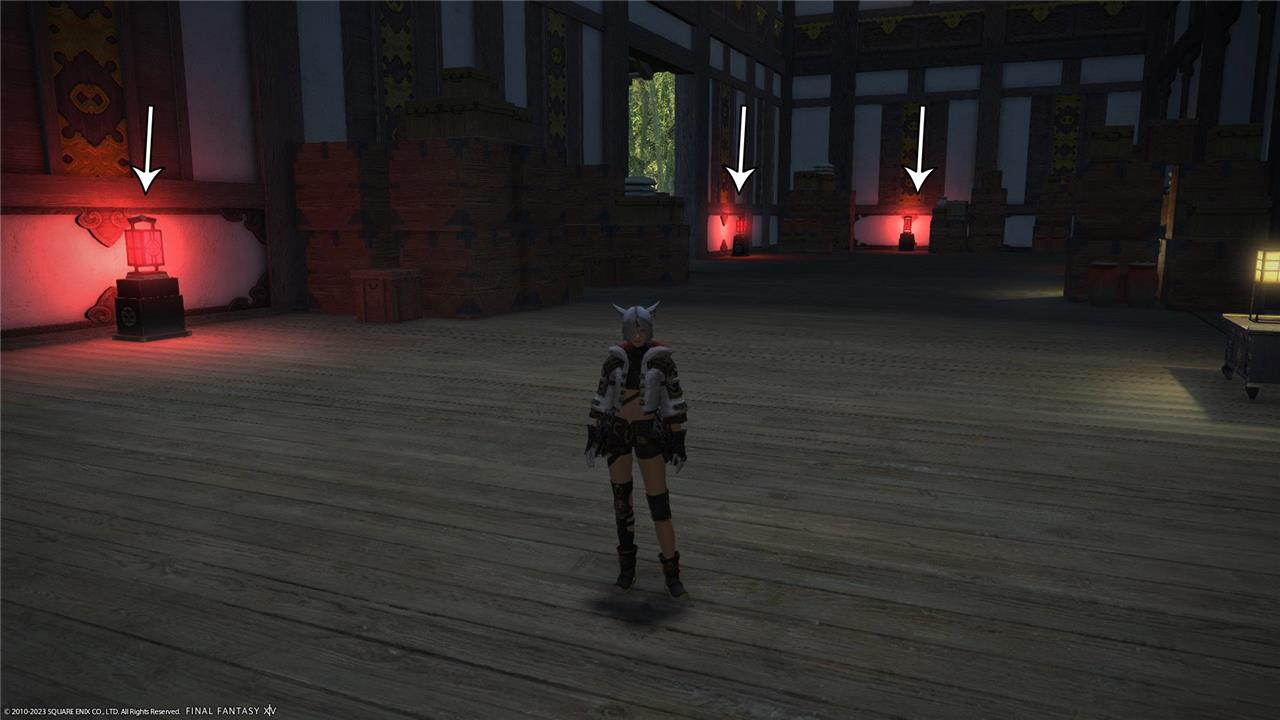
- In this room, there are three lanterns on the ground that are in front of golden tapestries as shown in the image below. You can light them by killing one of the enemies you lured while it is facing the lantern. Remember to position them correctly and avoid hitting more than one enemy.
- After the three lanterns are lit, take the new portal to face off the final boss of Mount Rokkon.
If you’re just starting out in the massive world of Final Fantasy 14, we have tons of guides to help you. We have a beginner’s guide to get you started, along with guides detailing when you’ll get your mount and which Grand Company you should join.
Which path order is fastest to unlock the mount
The fastest path order to unlock the Rakshasa mount in Mount Rokkon requires completing all 12 routes, as each grants a unique token exchanged with Trisassant. No single route skips others; efficiency comes from short solo runs (under 15 minutes each) and grouping similar starts to minimize resets. Prioritize routes sharing prefixes to save time on repeated early sections.
Recommended Order
Start with middle portal routes (quickest overall), then left, and end with right. Total time: 2-3 hours for experienced players.
-
Routes 5-7: Middle portal; share initial Hancock fight. Spare/kill monkey variants branch early (Routes 5/6), then boxes/ropes (Route 7).
-
Route 12: Middle continuation; light specific tiger-room lanterns after ropes.
-
Routes 1-4: Left portal; statue rotations diverge fast (e.g., Route 1 katana inspect vs. Route 2 skip).
-
Routes 8-11: Right portal; tree figurine/dogu doll choices split quickly.
Time-Saving Tips
Play solo or with 1-2 friends for speed; matchmaking adds delays. Memorize interactions (e.g., /ebow at shrines) via video guides. Use Party Finder for practice runs first.
Should I prioritize Path of Fire story or map completion first
Prioritize the Path of Fire story first in Guild Wars 2. It unlocks key masteries like mounts (Springer, Raptor) and progression gates needed for efficient map completion later.
Story Benefits
Completing the story in order provides narrative context, relevant rewards scaled to your progress, and access to mounts that trivialize exploration. Skipping ahead risks missing these tools, making maps harder without flight or jumps.
Map Completion Role
Maps offer minor rewards like achievement points and loot, but lack story gates. Do them alongside or after story chapters for variety, using new mounts to speed up hearts, vistas, and POIs.
Combined Approach
Tackle story missions sequentially, pausing for nearby events or 50-70% map progress per zone. This balances fun, efficiency, and unlocks without burnout.