Lost amid Gerudo’s fiery canyons, Ihen-a Shrine hides a blaze mechanic that scorches standard puzzle logic.
When you’re done, our shrine locations page or interactive Hyrule map can direct you toward something else to do.
Ihen-a Shrine location and how to enter
Ihen-a Shrine sits in the Lanayru Great Spring region at Mipha Court on the peak of Ploymus Mountain, around coordinates 3784, 0579, 0485. You can reach it by heading east from Zora’s Domain toward Lulu Lake, then continuing up to Mipha Court, or by launching from the Upland Zorana Skyview Tower and gliding toward the mountaintop. The entrance is coated in sludge, so fuse a Splash Fruit to an arrow and shoot the goop to wash it away and reveal the green sigil that lets you enter.
The Ihen-a Shrine is found within the Lanayru Great Spring region at the coordinates of (3784, 0579, 0485). You won’t immediately see the glowing green sigil that typically lets you into shrines. Instead of the sigil, there’s some moving goop in the way. Fuse some splash fruit to an arrow, then shoot it at the goop; that’ll reveal the sigil, which allows you to enter the shrine.
Ihen-a Shrine walkthrough
The Ihen-a Shrine challenges players with a puzzle centered on controlling water and momentum. Use the Hydrant device to create stable platforms, allowing you to cross gaps and move spheres into position. Timing and precision are key-adjust water flow carefully to guide objects where they need to go. Once the mechanisms align, the final gate opens, rewarding you with the shrine’s treasure and completion.
After you clear the blockage to the Ihen-a Shrine, you’ll start the “Midair Perch” puzzle.
Here’s how to solve it:
1. Head down the stairs and into the shrine’s main chamber.
2. Use Ultrahand to assemble the flat, square stones into a stair shape leading onto the raised platform. Climb the stairs and head into the next chamber.
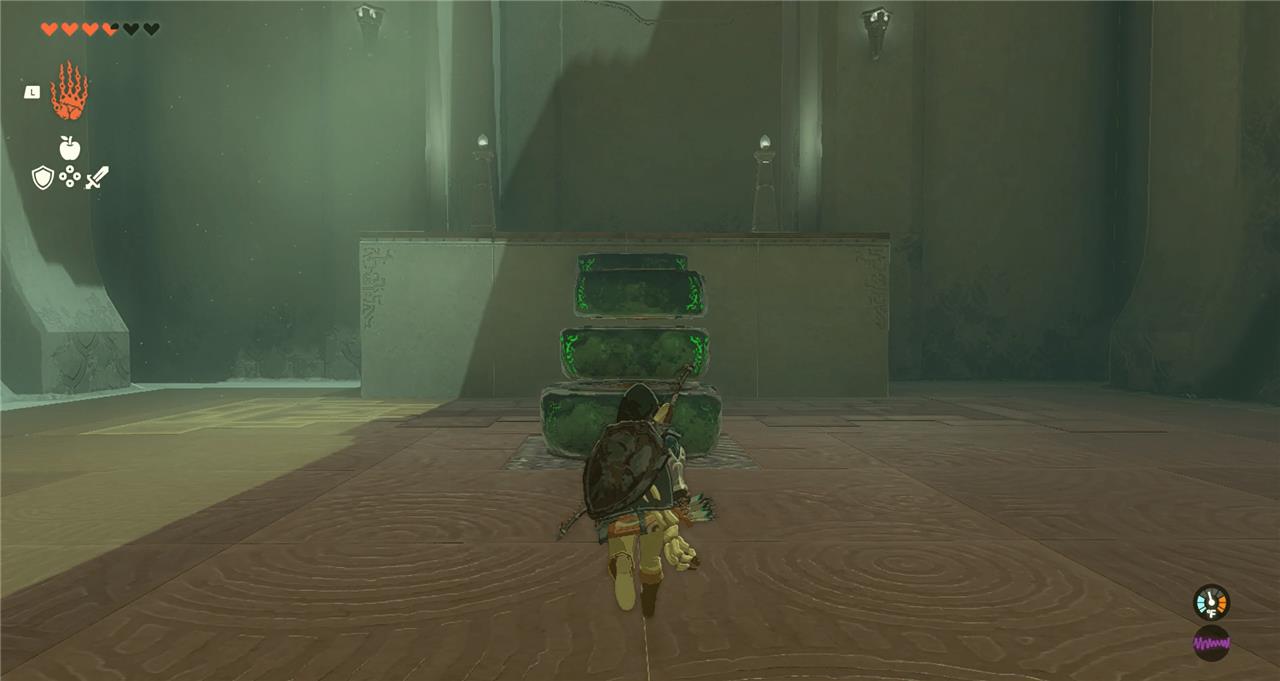
3. You’ll see a chasm. Right in front you’ll see one of those Zonai stone squares, and to the right, there’s a large metal grate. This is what you need to pass over the gap.
4. Hit the square stone to activate the Zonai charge. Place it into the gap. If you don’t activate the Zonai charge, it’ll drop into the chasm. (Another will pop up in its original spot, though.)
5. Grab the metal grate and place it on top of the Zonai-charged square. Use this combination like a bridge.
6. You’ll need both of these metal grates again, so you may as well move them further into the room once you’ve crossed over.
7. Place the stone Zonai-charged square in the gap, about halfway to the top of the raised platform and at an angle.
8. Place the grate onto the stone, also at an angle. Confused? It should look like this:
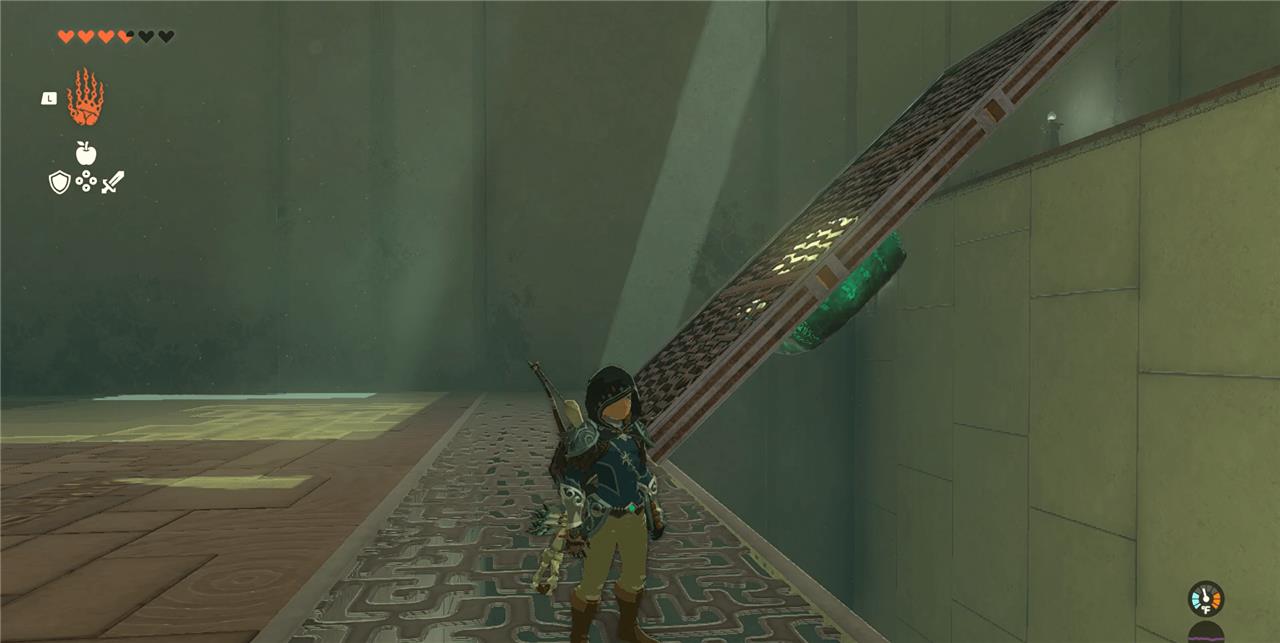
9. Use the makeshift bridge to reach the higher platform. If you still have to cross a bit of a gap at the top, leap and use your glider to close the distance.
10. Head left into the next chamber. On the left-side wall of that platform, there’s a chest on a platform. Use the floating square stones to make a staircase to access it. You’ll get five arrows for your troubles.
11. You’ll see a ball, which you’ll need to move across the wide gap. You’ll have to use the square stones to get over there and to bring the ball with you. Use three stones for a moving bridge, and one stone to move the ball.
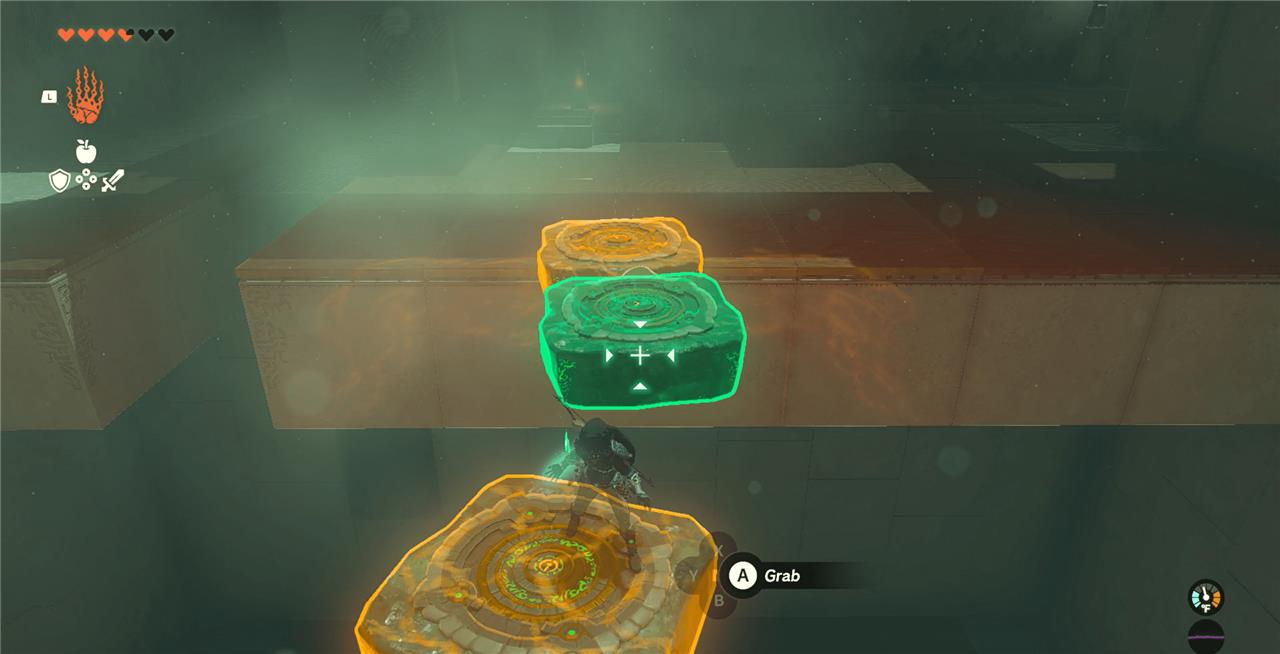
12. Attach two squares and place them into the chasm, right by the cliff face. Place the third stone ahead of it, but separate.
13. Grab the ball and attach it to the fourth stone, then use Ultrahand to move that stone as far as you can across the gap. It’ll stay there on its own while we cross.
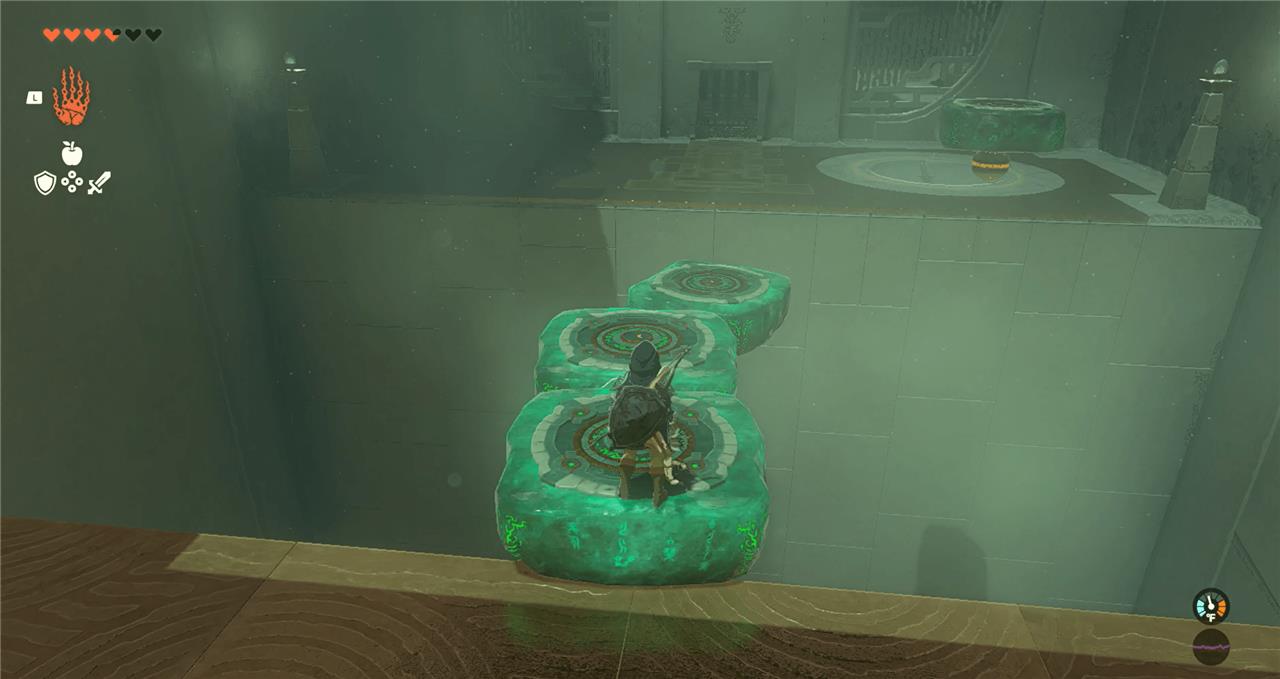
14. Hop onto your first two squares, then leap to the third square.
15. Turn around and grab those two squares and place them ahead of you. Here’s what that looked like for us:
16. Hop onto those squares and grab the single square and do the same – move it ahead of you to complete the bridge. You should be able to make it to the other side, but if not, keep doing this motion in moving the squares as you progress.
How to reach Ploymus Mountain summit from Zora’s Domain
To reach Ploymus Mountain summit from Zora’s Domain in The Legend of Zelda: Tears of the Kingdom, equip the Zora Armor (obtained earlier in Zora’s Domain) to swim up waterfalls horizontally and vertically.
Step-by-Step Route
Exit Zora’s Domain to the east toward the shortcut sign for Ploymus Mountain.
-
Jump into the water near the first waterfall and swim straight up through it using Zora Armor.
-
Emerge in a cave; bomb the breakable rocks if needed, then swim up the second waterfall ahead.
-
Continue running to the third waterfall and swim up it to reach higher ledges.
Final Ascent
Follow the path upward along the cliffs, using waterfalls as needed during rain. You’ll arrive at Mipha Court on the summit (coordinates around 3784, 0579, 0485), near Ihen-a Shrine. Sidon waits here for the “Sidon of the Zora” quest. Avoid or fight enemies like the Lynel if present.
How to defeat the Red-Maned Lynel on Ploymus Mountain summit
Reaching and defeating the Red-Maned Lynel at Ploymus Mountain summit in The Legend of Zelda: Tears of the Kingdom (or its predecessor Breath of the Wild, where it’s prominent during the Zora questline) requires preparation, as it’s a mid-game challenge guarding Shock Arrows.
Preparation
Equip high-defense armor upgraded for stealth (like the Stealth Set from Kakariko Village) or attack boosts. Stock strong bows (multi-shot like Royal or Lynel Bows if available), arrows (including Shock or Bomb Arrows), and melee weapons (two-handed for stun potential). Bring plenty of healing food like Hearty Durians or Tough dishes; aim for at least 10 hearts. Use the Camera to scout its type from afar.
Stealth Bypass Option
Sneak around the edges of Mipha Court at night or in rain (common here due to Vah Ruta). Collect 20+ Shock Arrows from trees and ground without fighting-perfect for the Sidon quest. Crouch, eat Sneaky Foods, and avoid detection.
Combat Strategy
Stay mobile on the rainy, slippery summit; circle-strafe to dodge charges.
-
Stun and Mount: Use Stasis+ on its face, then headshot with a bow during/after (aim for eyes). Rush in (A button), mount, and spam attacks (your weapons take no durability damage here-use your strongest). Repeat 3-5 times.
-
Flurry Rush: Perfect-dodge (backflip with X or sidestep) its swings/charges to slow time and unleash combos. Practice timing on easier enemies first.
-
Arrows and Counters: Bomb Arrow barrages during roars; shield-parry (ZL) uncharged rushes. Ice Arrows or Stasis freeze it for free hits.
-
Phases: It powers up mid-fight-keep distance during meteor showers or shockwaves, then resume mounting.
Rewards
Drops include Lynel weapons (e.g., Crusher or Sword), bows, guts for upgrades, and extra Shock Arrows. In TOTK, fuse its parts for powerful gear. Practice on weaker foes; if overwhelmed, glide away and retry.