Hidden deep within Hyrule’s most secret corners lies the Yiga Armor set-a disguise powerful enough to turn enemies into allies. This guide reveals how to locate each piece, complete the armor upgrade process, and harness the stealthy speed boost that makes this outfit one of the most sought-after in Zelda: Tears of the Kingdom.
It’s likely that you’ll receive hints on where to find the Yiga Armor from NPCs or Old Maps scattered across Hyrule. Or just by stumbling upon the wrong cave at the wrong time. But if you want to skip the busywork and get straight to the treasure, we’ll explain where to find it as quickly as possible – detailing the locations for the Yiga Armor, Yiga Tights, and Yiga Mask.
Yiga Armor location
The Yiga Armor pieces are found in different hidden bases scattered across Hyrule. The Yiga Mask can be obtained in the Akkala region, the Yiga Armor in the Gerudo Highlands, and the Yiga Tights in the Lanayru area. Each base requires Link to sneak past or defeat Yiga Clan members before claiming the armor chest inside. Wearing the full set lets Link disguise himself as a Yiga member, allowing free access to their hideouts and sparing him from attacks by clan members.
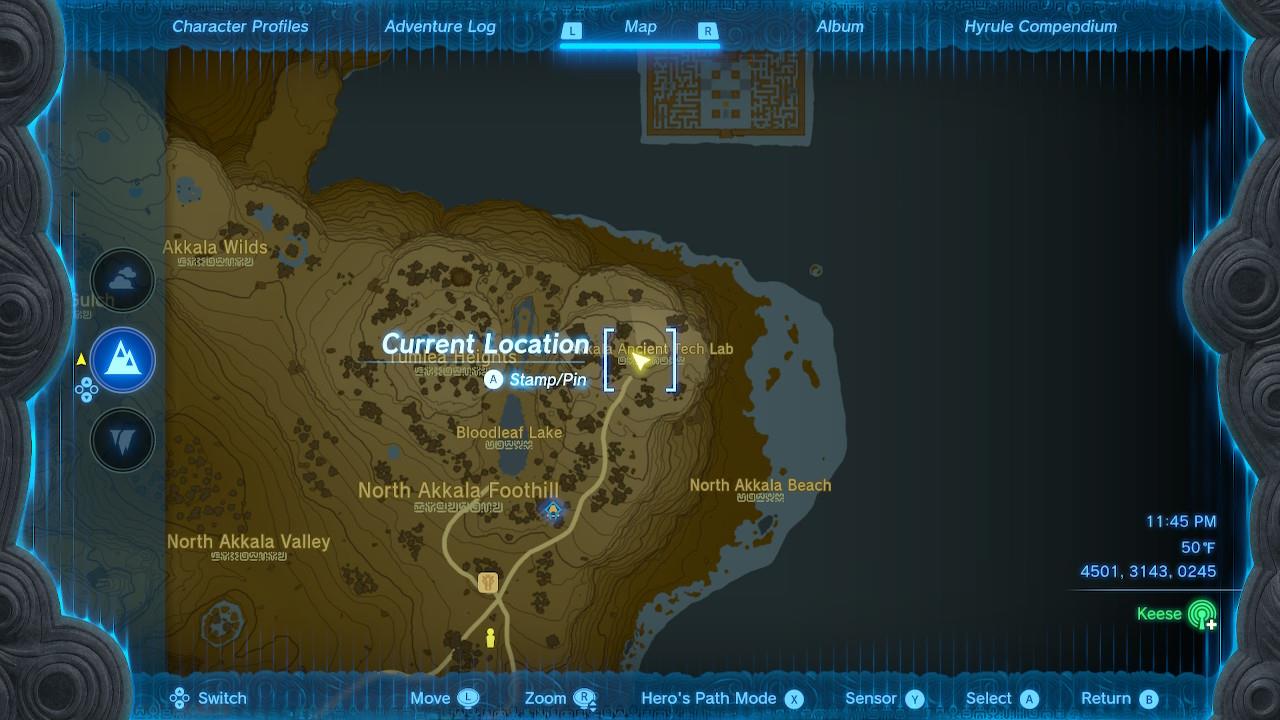
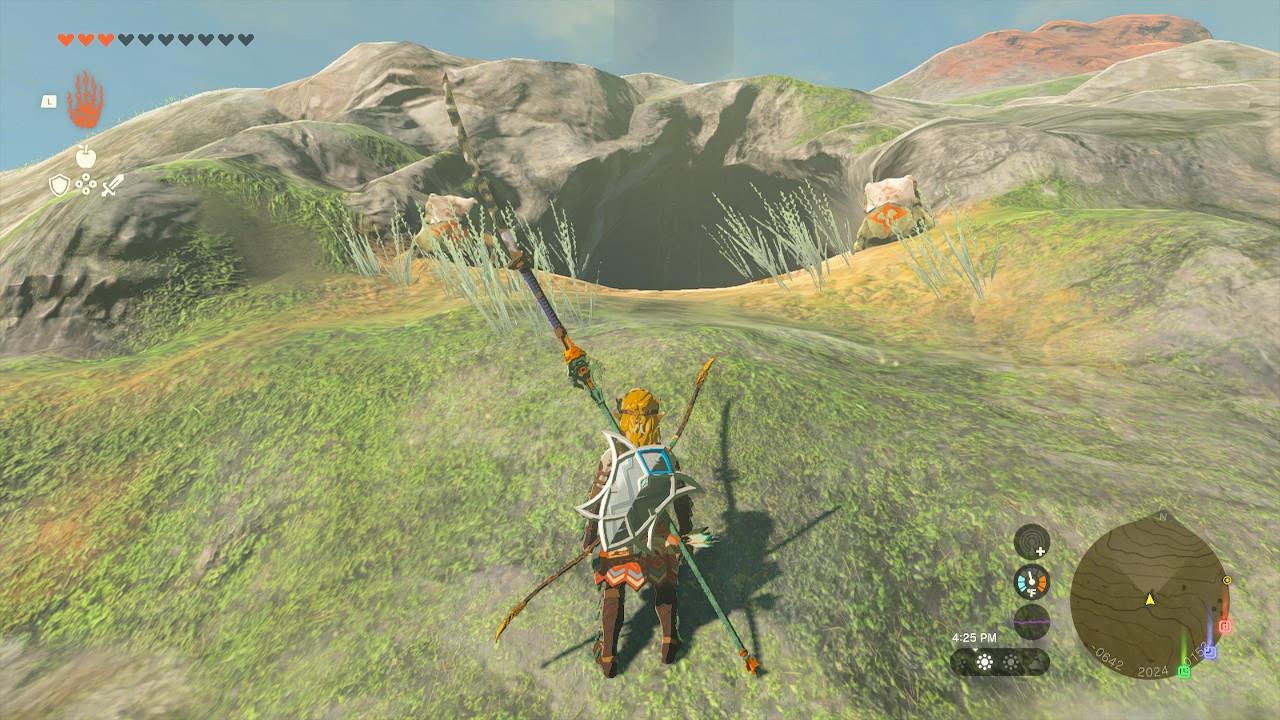
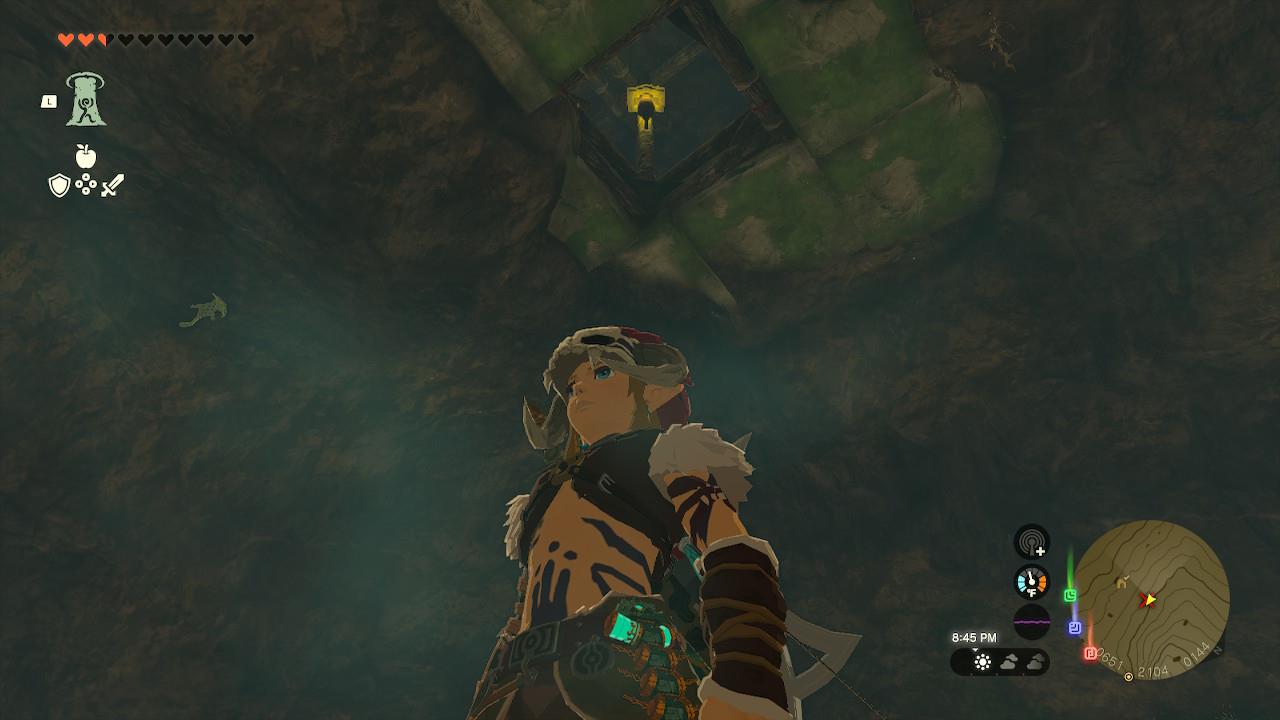
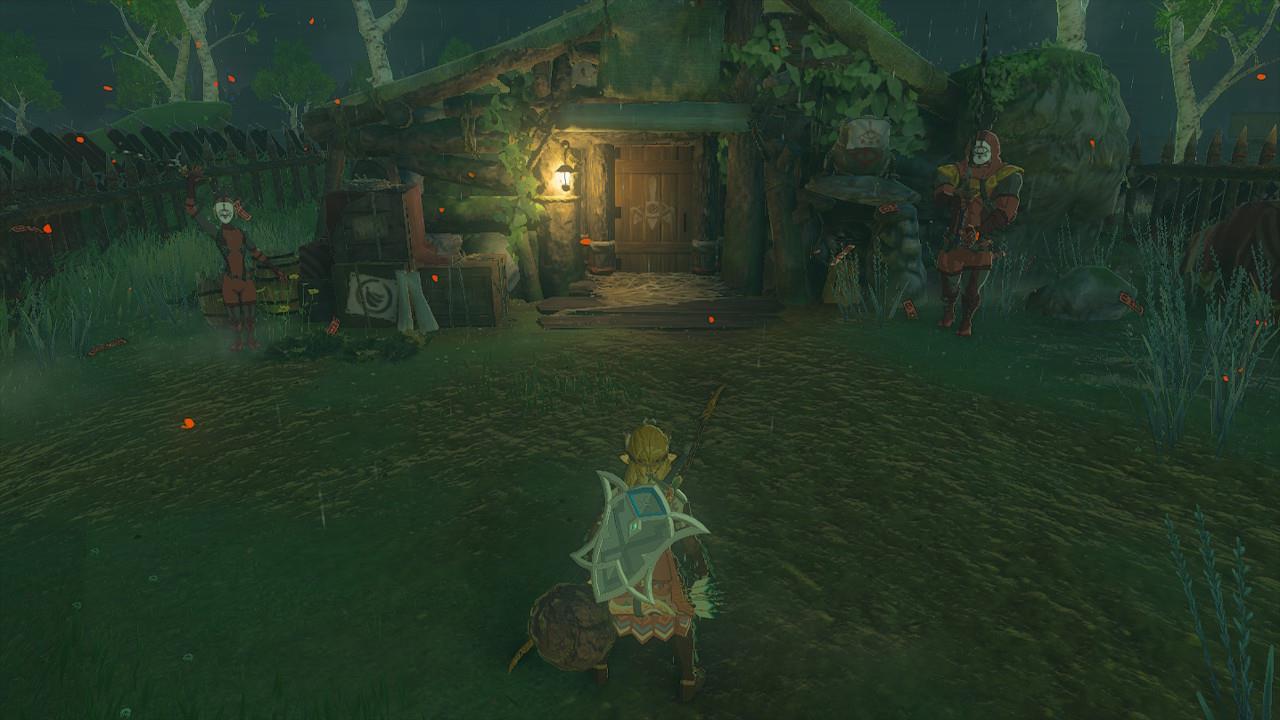
You can find the Yiga Armor inside a Yiga Clan hideout in Akkala Highlands at the coordinates (4501, 3143, 0245). While you can get to it through the Depths by ascending from underneath, there’s an easier method.
First, you can use the Ulri Mountain Skyview Tower nearby to get closer. If you’ve gained access to the Jochi-iu Shrine and its fast travel point, even better.
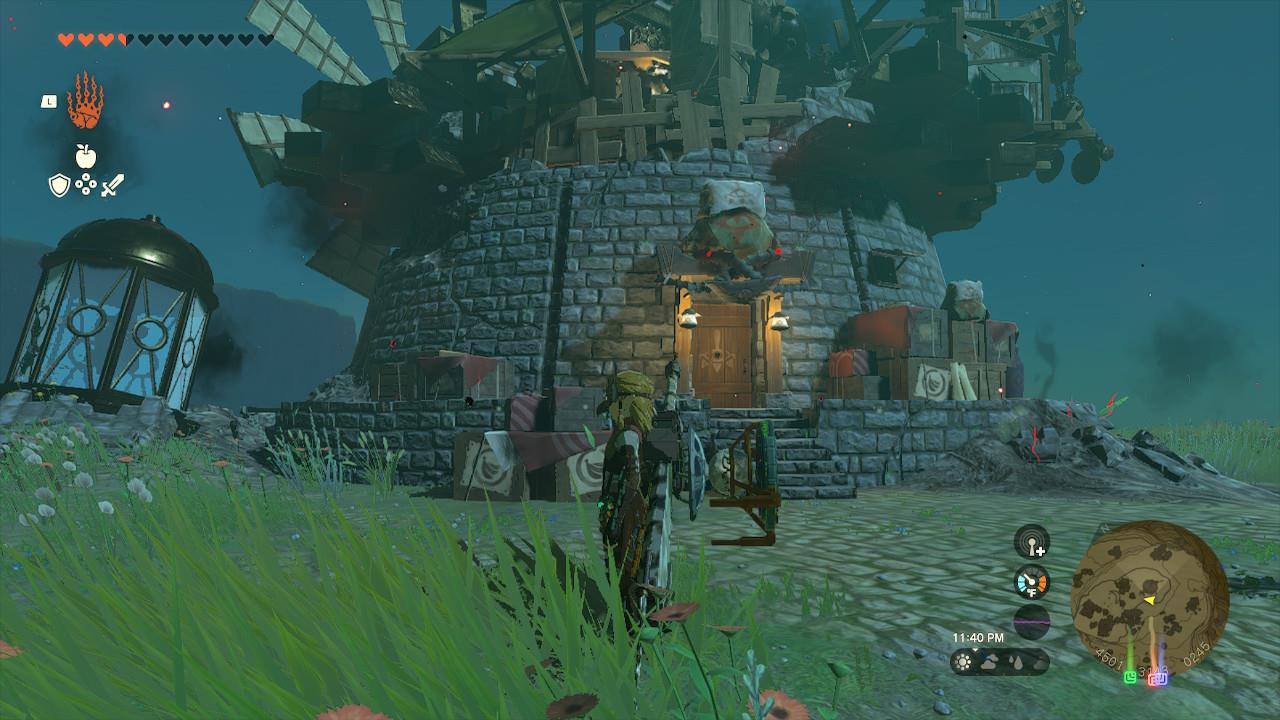
The key is to follow the main road that sprawls from East Akkala Stable. Instead of heading west toward North Akkala Foothill, take the path to the right up to Akkala Ancient Tech Lab up north.
It’s a fairly straightforward trip. There are stones with Yiga markings paving the way, too, so you won’t get lost. Once you arrive at the hideout, simply knock on the door, and get ready to rumble.
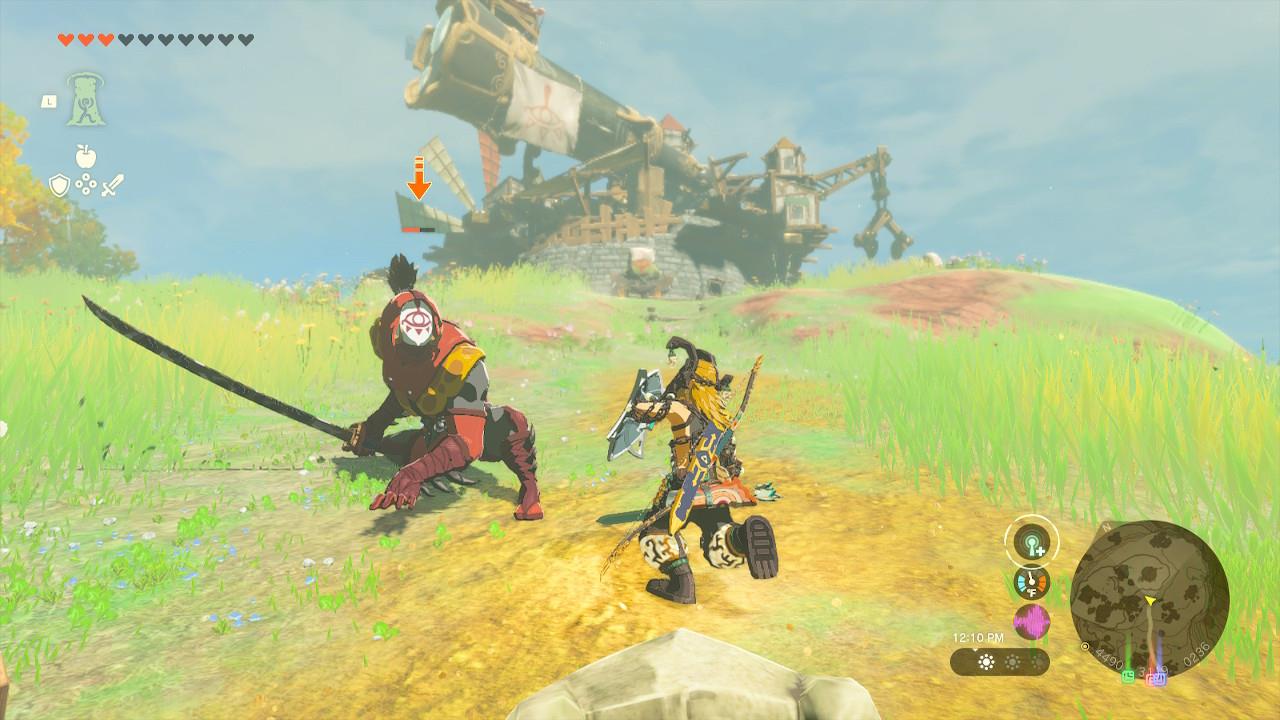
You only need to fight two of them. Honestly, it’s not a tough fight. I focused on the smaller Yiga member first, and then switched my attention on the bigger one. He has a two-handed weapon that can hit hard, so try your best to dodge it.
If you have arrows on you, keeping your distance with ranged attacks is a good tactic as well.
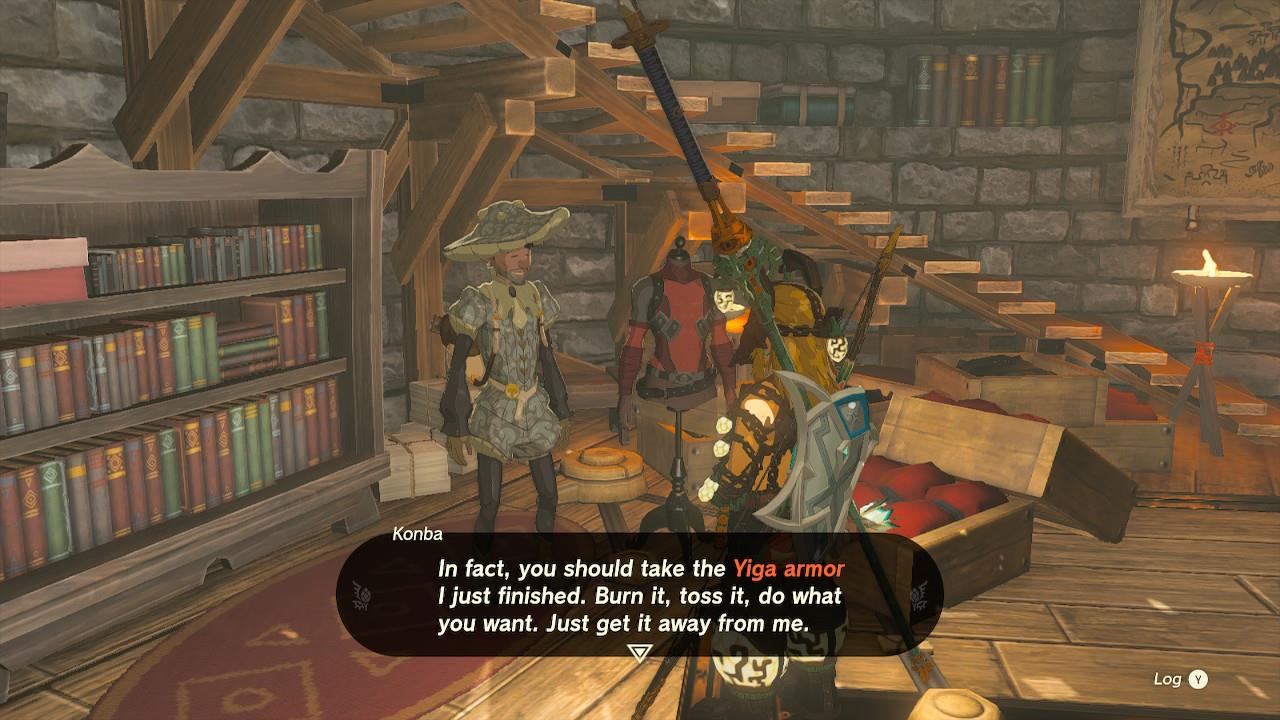
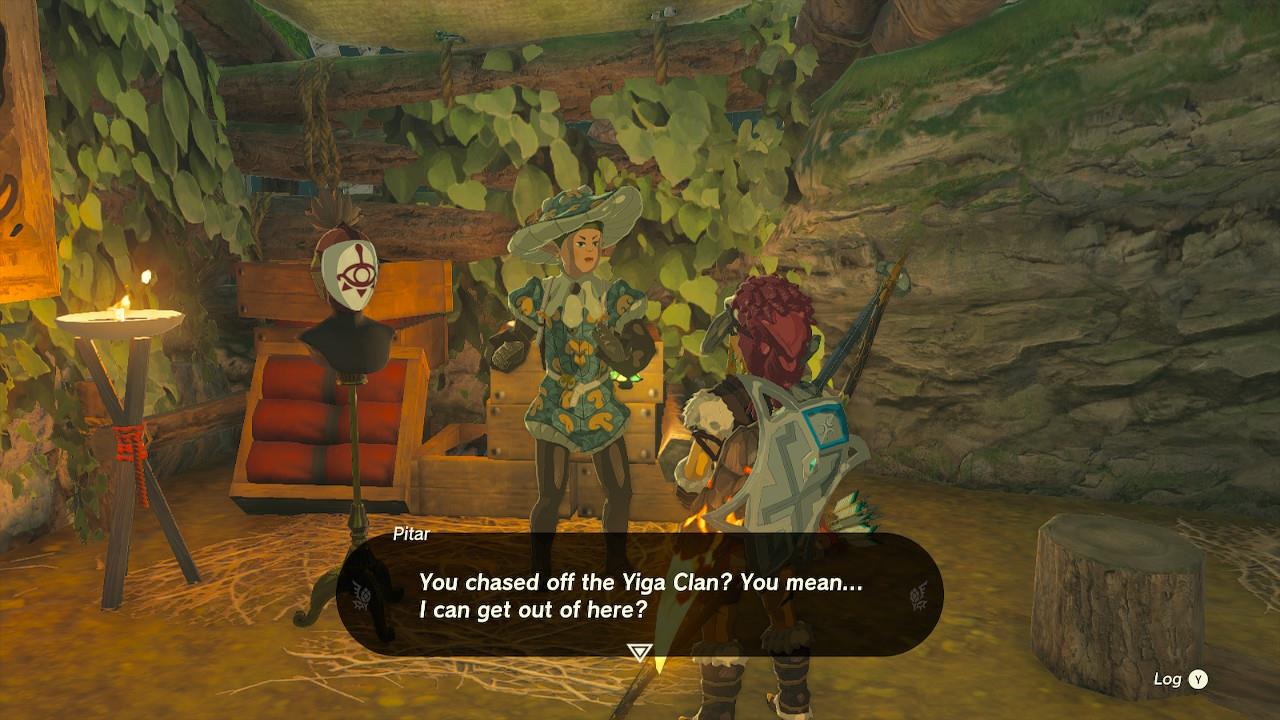
After you’re done, get inside the hideout again, and speak to Konba. After a brief chat, you’ll get the Yiga Armor. This armor piece adds 1 defense and grants you a stealth boost.
Yiga Tights location
The Yiga Tights can be found inside the Yiga Blademaster Station, located in the Gerudo Highlands at coordinates (-3338, -3568, 0043). To access the station, Link must have completed the “Defeat the Yiga Clan!” side adventure and wear at least one piece of Yiga armor to avoid being attacked. Inside, open the chest in the main chamber to obtain the Yiga Tights, which increase stealth and are required for full disguise as a Yiga Clan member.
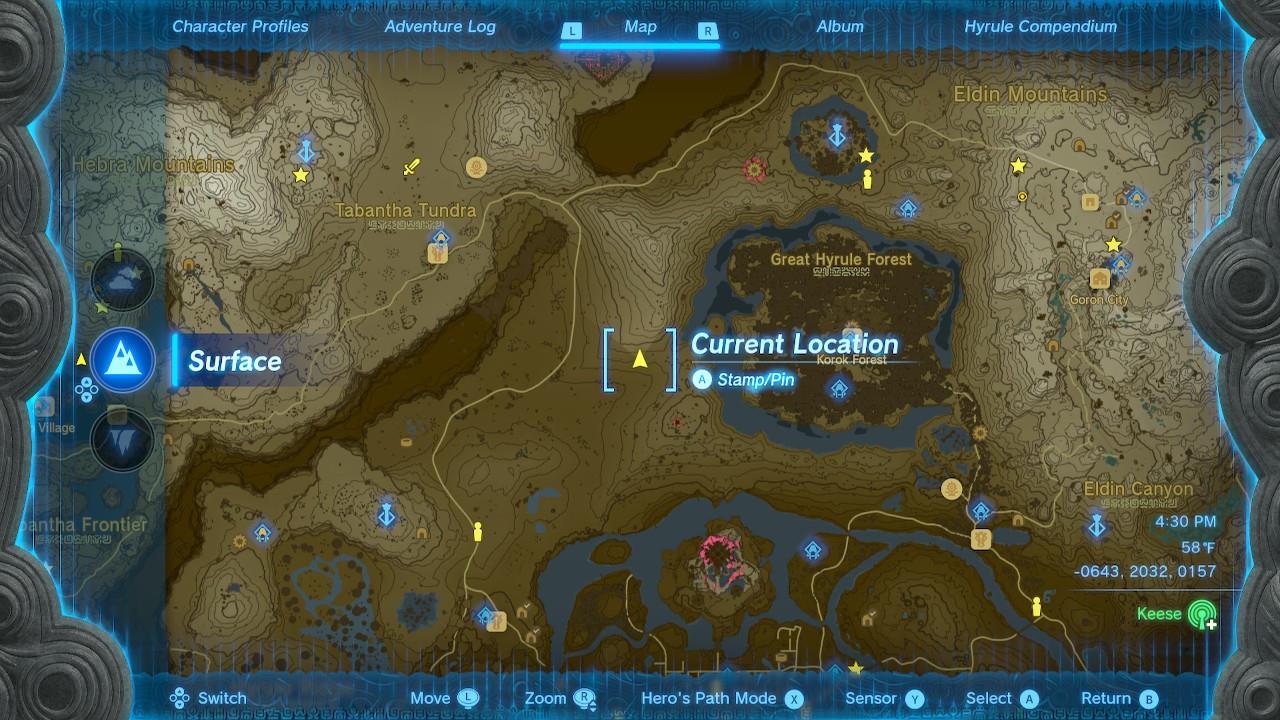
You can find the Yiga Tights in the Yiga Clan Maritta Branch, which is a cave located in Aldor Foothills at the coordinates (-0643, 2032, 0157), located southeast of the Snowfield Stable at the Tabantha Tundra and west of the Great Hyrule Forest. There isn’t a direct tower for the location, but either Lindor’s Brow Skyview Tower or Thyphlo Ruins Skyview Tower will get you close enough.
Once you’re inside the cave, you’ll find two Yiga Clan members to wrestle with. If you got the chest piece first, the fight is pretty much the same.
After you take both of them down, you’ll have to use Ascend to get to a secret room where the kidnapped tailor is waiting to be rescued.
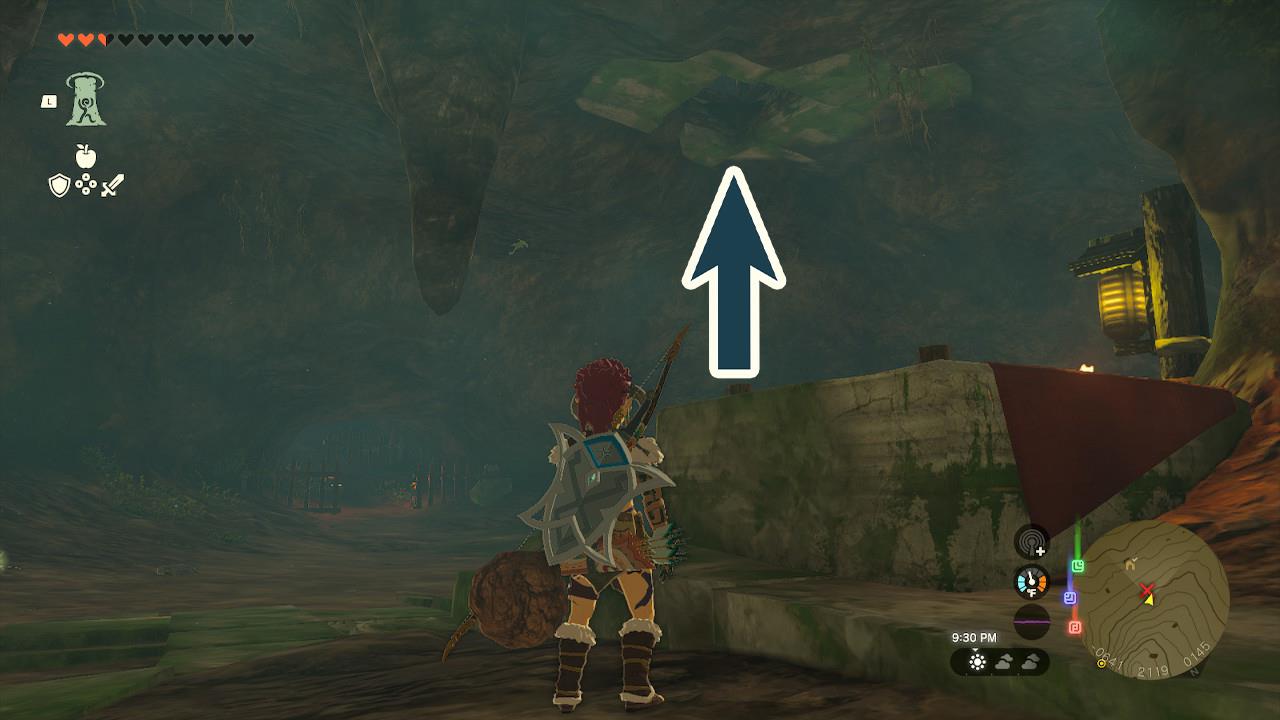
Standing next to the table with materials in the center of the cave, where the Yiga Clan enemies were standing when you first entered, look towards the entrance and aim at the ceiling.
You’ll notice a hole that leads to an attic of sorts. There are some stones with markings on the ground, too, signaling the spot. Use Ascend in any spot around the hole, and get to the tailor.
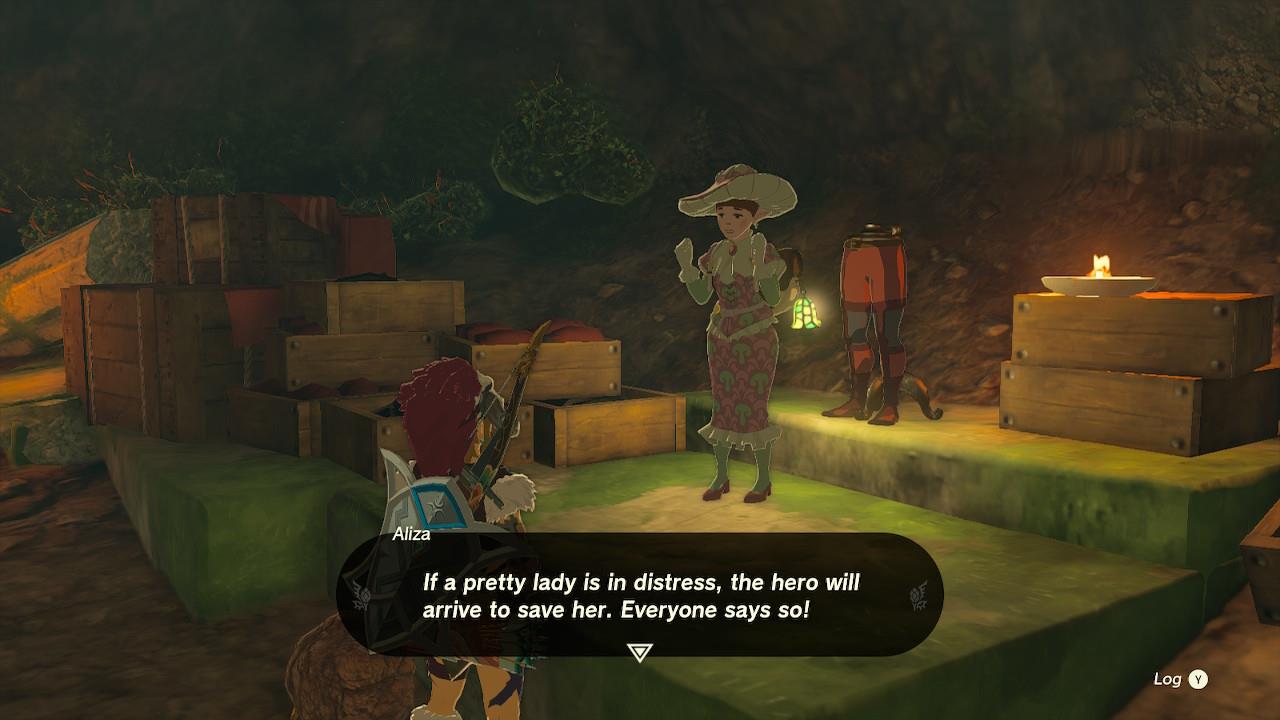
After a brief chat, you’ll obtain the Yiga Tights. This armor piece adds 1 defense and grants stealth up to Link.
Yiga Mask location
The Yiga Mask can be found inside the Yiga Hideout, located in the Gerudo region’s northern cliffs. To access it, you’ll need to wear the full Yiga disguise or have previously joined the Yiga Clan during the main quest. Inside the hideout, solve a few minor puzzles and defeat a group of Yiga members guarding the inner chamber. The mask sits in a chest near the training area, completing the first piece of the Yiga Armor set.
You can find the Yiga Mask in an unnamed Yiga Clan shack at the coordinates (-0800, -2255, 0087), located northwest of Lake Hylia in the Faron region. You can use either the Hyrule Field Skyview Tower or Popla Foothills Skyview Tower to get closer. Taking a closer look at the map, you can find the shack south of the Temple of Time Ruins, which is close to the Great Plateau. If you’ve crossed paths with the Great Plateau South Chasm, it’s northeast of its location, too.
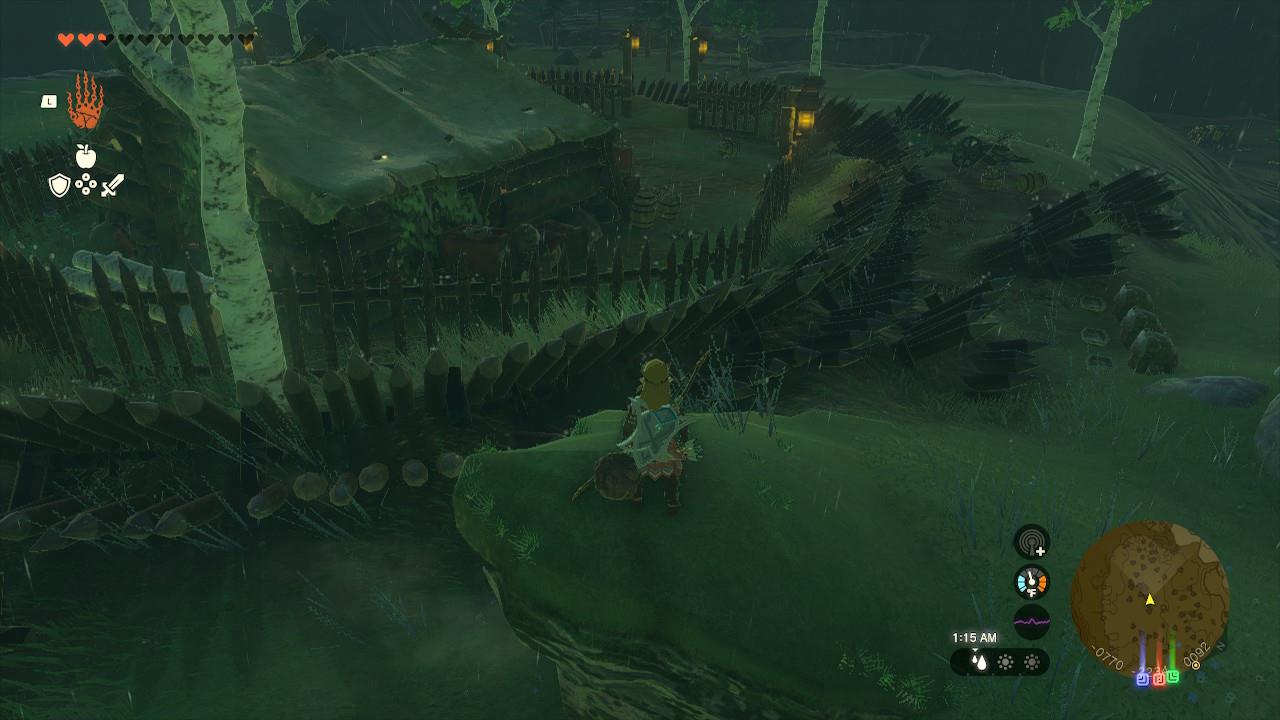
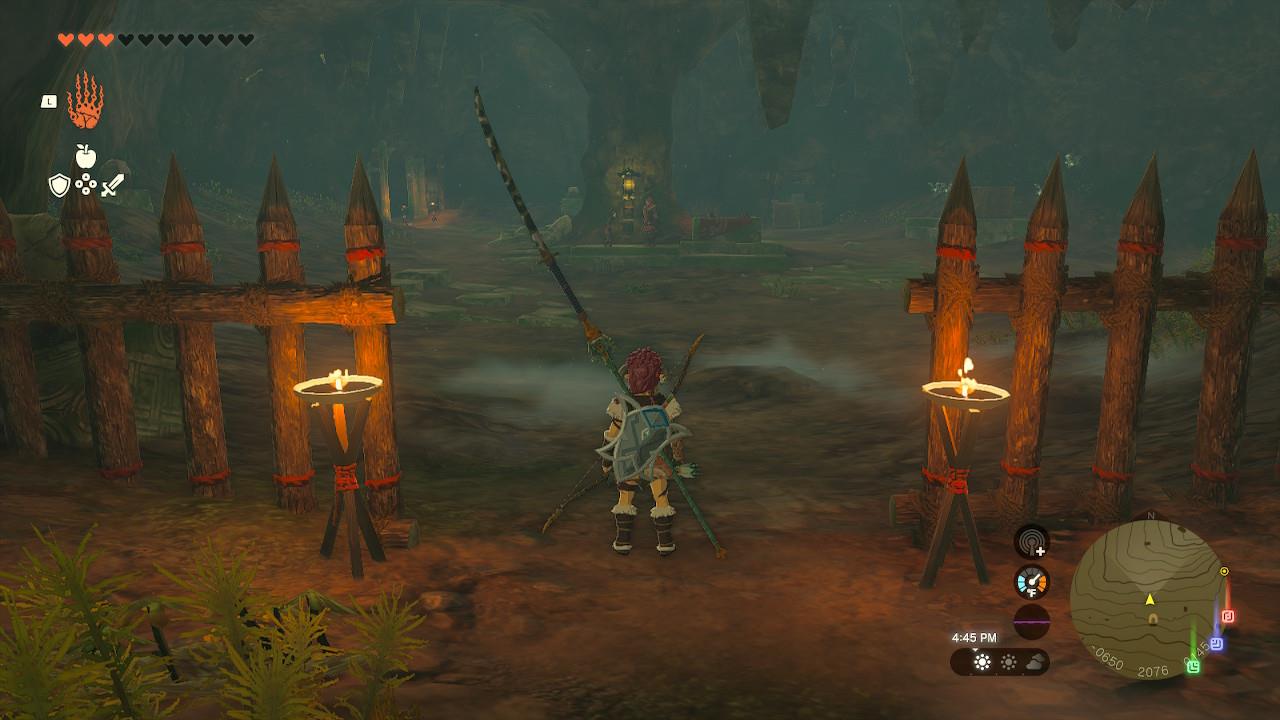
The hideout (which isn’t exactly hidden…) is protected by two spiked fences. There are plateaus all around it that you can use to at least bypass one of the fences with a quick jump and the help of your paraglider.

Then, there are entrances open around the second fence. Just use any of them, and try to avoid any of the spikes. They hurt.
From here, you need to go ahead and knock on the shack’s door. If you need a moment to switch your armor or heal yourself, don’t interact with the door until you’re all set.
Once more, two Yiga Clan members will show up. Take them down and, when you’re ready, head inside the shack.
You’ll find the third and last tailor. After a brief chat, you’ll be in possession of the Yiga Mask. This armor adds 1 defense and grants stealth up to Link.
That’s all for the Yiga Armor set! From now on, you’ll be able to mask yourself amongst other members of the clan whenever you’re wearing the full set.
Yiga Armor upgrade costs and set bonus
Upgrading the Yiga Armor set requires visiting a Great Fairy and using specific materials dropped by Yiga Clan members along with rupees. Each piece-Mask, Armor, and Tights-can be upgraded to increase defense and enhance stealth. After upgrading all three pieces twice, wearing the full set grants the Yiga set bonus, which slightly boosts your movement speed while disguised as a Yiga, making it easier to blend in and explore their bases undetected.
Each piece of the Yiga set gives you a little bit of stealth up. When each piece upgraded to two-star or higher and worn together, you will get the Night Speed Up set bonus, making it so you run faster at night.
You can upgrade the armor set at Great Fairy Fountains, and the costs per item is as follows:
- 1-star (3 defense): 2 Octorok eyeballs, 10 rupees
- 2-star (5 defense): 3 Fire-Breath Lizalfos tails, 3 puffshrooms, 50 rupees
- 3-star (7 defense): 5 Ice-Breath Lizalfos tails, 5 Keese eyeballs, 200 rupees
- 4-star (12 defense): 5 Electric Lizalfos tails, 3 Black Hinox horns, 10 mighty bananas, 500 rupees
The total cost of upgrading all three pieces to max will be 6 Octorok eyeballs, 9 Fire-Breath Lizalfos tails, 15 Ice-Breath Lizalfos tails, 15 Electric Lizalfos tails, 9 puffshrooms, 15 Keese eyeballs, 9 Black Hinox horns, 30 mighty bananas, and 2,280 rupees.
Once you’ve found all three pieces of the Yiga Armor, consult our list of all armor sets and set bonuses to see what to find next, or check out our recommendations for the best armor.
Where to find each Yiga Armor piece locations map
Yiga Armor pieces appear on in-game maps at Yiga hideouts marked by black-and-red sketches found inside each location.
In-Game Map Hints
After obtaining one piece, such as the Yiga Armor from Akkala Ancient Tech Lab, check the wall inside for a painted map showing all three Yiga outposts on Hyrule’s surface: one in Akkala Highlands, one near Great Plateau by Lake Hylia, and one cave in Aldor Foothills west of Great Hyrule Forest. This map uses skull-like markers and Yiga symbols to pinpoint exact spots, guiding players between sites.
Precise Coordinates
Use these coordinates directly on your Purah Pad map for navigation (fast-travel via nearby Skyview Towers like Ulri Mountain, Lindor’s Brow, or Hyrule Field):
| Piece | Location | Map Coordinates | Nearest Landmark |
|---|---|---|---|
| Yiga Armor | Akkala Ancient Tech Lab | 4562, 3177, 0211 | Ulri Mountain Skyview Tower |
| Yiga Mask | Yiga shack near Great Plateau | 0407, -1081, 0089 | Lake Hylia / Popla Foothills Skyview Tower |
| Yiga Tights | Yiga Clan Maritta Branch cave | -0643, 2032, 0157 | Kiuyoyou Shrine / Snowfield Stable |
Visual Guides
Interactive maps on sites like IGN and ZeldaDungeon.net overlay these spots; IGN’s guide includes a skull-marked image for the cave entrance near Mount Drena. YouTube videos (e.g., search “Yiga Armor map TOTK”) show flyovers with pins from the in-game wall map.
Show a map with all Yiga Armor piece locations marked
Yiga Armor piece locations in The Legend of Zelda: Tears of the Kingdom are marked on in-game wall maps found inside each Yiga hideout, using skull icons and Yiga symbols on Hyrule’s surface level.
In-Game Map Feature
Each Yiga outpost contains a painted sketch on the wall showing all three locations: Akkala Highlands (chestpiece), near Great Plateau south of Lake Hylia (mask), and Aldor Foothills cave west of Great Hyrule Forest (tights). Take a photo with the Purah Pad for your album reference.
Marked Locations Table
These coordinates plot directly on your in-game map; no external image needed as sites like IGN and Polygon embed static Hyrule overlays with pins.
| Piece | Region | Coordinates | Map Marker Description |
|---|---|---|---|
| Yiga Armor | Akkala Highlands | 4562, 3177, 0211 | Northeast lab near Ulri Skyview Tower |
| Yiga Mask | Faron Grasslands | 0407, -1081, 0089 | Shack southeast of Great Plateau |
| Yiga Tights | Aldor Foothills | -0643, 2032, 0157 | Cave east of Gerudo Highlands Skyview |
External Map Resources
IGN’s armor sets page displays an interactive Hyrule map with Yiga pins (search “IGN TOTK Armor Sets and Locations”). Zelda Dungeon’s tool marks all armor precisely. Polygon guide screenshots show wall map close-ups with labels.