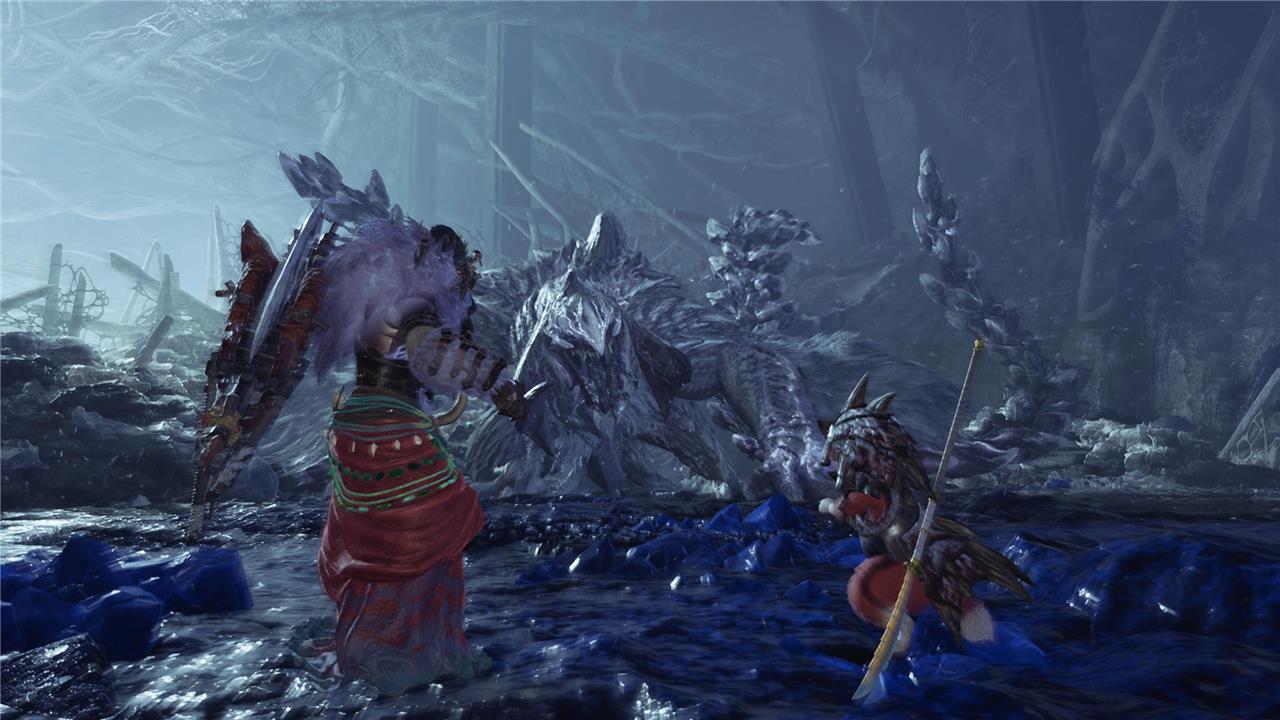
Guardian Arkveld stands as the towering, relentless flagship monster of Monster Hunter Wilds, wielding massive chainblades and an uncanny ability to absorb elemental energy, making it a fearsome foe in the Ruins of Wyveria. To conquer this artificial beast, hunters must exploit its vulnerabilities-most notably its head, tail, and chainblades-while wielding Dragon-element weapons and employing status effects like Poison and Paralysis to gain the upper hand. Mastering its attack patterns and using strategic tools such as Flash Pods and Pitfall Traps can turn the tide in this epic battle.
While you’ll get a taste of the fight before the actual confrontation, you should prepare accordingly, learning what to expect and how to act against the new monster. This guide covers the Guardian Arkveld weaknesses and resistances so you can prepare accordingly, where to find it, and the best strategy to defeat the signature monster in Monster Hunter Wilds.
Guardian Arkveldlocation
Guardian Arkveld is exclusively found in the Ruins of Wyveria biome in Monster Hunter Wilds, making this location its natural habitat where players will encounter it during the main story quest “Broken Chains” in Chapter 3. This artificial monster, created by an ancient civilization, relies on Wyvern Milk for energy and can absorb elemental energy through its chainblades, which it uses in combat. The Ruins of Wyveria is a large area, so familiarity with its terrain can significantly aid hunters in tracking and battling this formidable foe.
You’ll first encounter Guardian Arkveld in Chapter 3, during “The Faithful Keepers” main mission. The definitive fight won’t take place until the “Broken Chains” mission. As such, all you need to do to unlock the monster is progress through the main questline.
Guardian Arkveld only roams around the Wyveria biome. At the time of publication, there isn’t a High Rank version of Guardian Arkveld – only Arkveld and its tempered variant.
Keep in mind that in Monster Hunter Wilds, tracking monsters isn’t really a prominent feature. Except for a few first-time exceptions, you can use the Environment Overview screen to see if your target is roaming around the map. If not, exploring its corresponding biome(s) for a few minutes usually does the trick – you’ll see a notification on screen announcing its appearance. Worst case scenario, you can speak to Alma and post a hunt for it. For better or worse, the process of finding a monster is much more streamlined now. If you find tracks or other monster residuals on the ground, you can loot them for materials.
How to prepare for Guardian Arkveld
To prepare for the Guardian Arkveld fight in Monster Hunter Wilds, prioritize crafting and equipping the highest defense gear available to withstand its powerful Dragon attacks. Since Arkveld deals Dragon damage and can inflict Dragonblight, having strong physical defense and healing items like standard and mega potions is essential. Study the battle arena beforehand to identify environmental advantages such as falling rocks or stun opportunities. Bring weapons that deal raw physical damage or Dragon elemental damage, focusing on high-tier options for maximum impact. Additionally, stock up on status effect items like Poison, Sleep, Paralysis, Blastblight, and Stun to slow or immobilize Arkveld, and consider traps like Pitfall and Shock Traps to control its movement. Eating a meal before the fight to boost health and stamina is also recommended to improve survivability during the encounter.
Guardian Arkveld is part of the main story of Monster Hunter Wilds. As such, its encounter is likely to fit your Hunter Rank at that corresponding moment. Since the encounter occurs during a main mission, you’ll be thrust into the fray after the introductory cutscene. As per usual, whenever you’re asked if you’re ready to depart, make sure that you’re carrying regular and mega potions with you. If you’re short on the latter, take a lap around the biome and loot any honey you come across.
In addition, don’t forget to eat – you can use the portable BBQ to grill a meal. Increasing your health and stamina is essential, as Guardian Arkveld packs a punch. Investing in offense is a good strategy for this encounter, and you can find some recommendations in our list of best food buffs.
For later encounters, carrying a few Dragon Pods will be beneficial – if either you or one of your teammates have a ranged weapon with Dragon Ammo, even better. In terms of armor, invest in the set with the highest defense available for you at that point in the game, regardless of resistances.
Guardian Arkveld weakness
Guardian Arkveld’s primary weaknesses lie in its head, tail, and chainblades, with the head and tail being vulnerable to Dragon elemental attacks, while the chainblades are immune to elemental damage and require strong physical attacks to break. It is particularly susceptible to status ailments such as Stun, Sleep, Poison, Paralysis, and Blastblight, which can immobilize or hinder it during battle. Dragon elemental weapons are the most effective choice, but focusing on slashing and bludgeoning damage is also recommended. Additionally, using Flash Pods to blind the monster can interrupt its actions temporarily. Avoiding its head during combat is advised due to the risk of heavy damage when attacking up close. Overall, targeting its weak points with physical damage and exploiting its status vulnerabilities is key to defeating Guardian Arkveld efficiently.
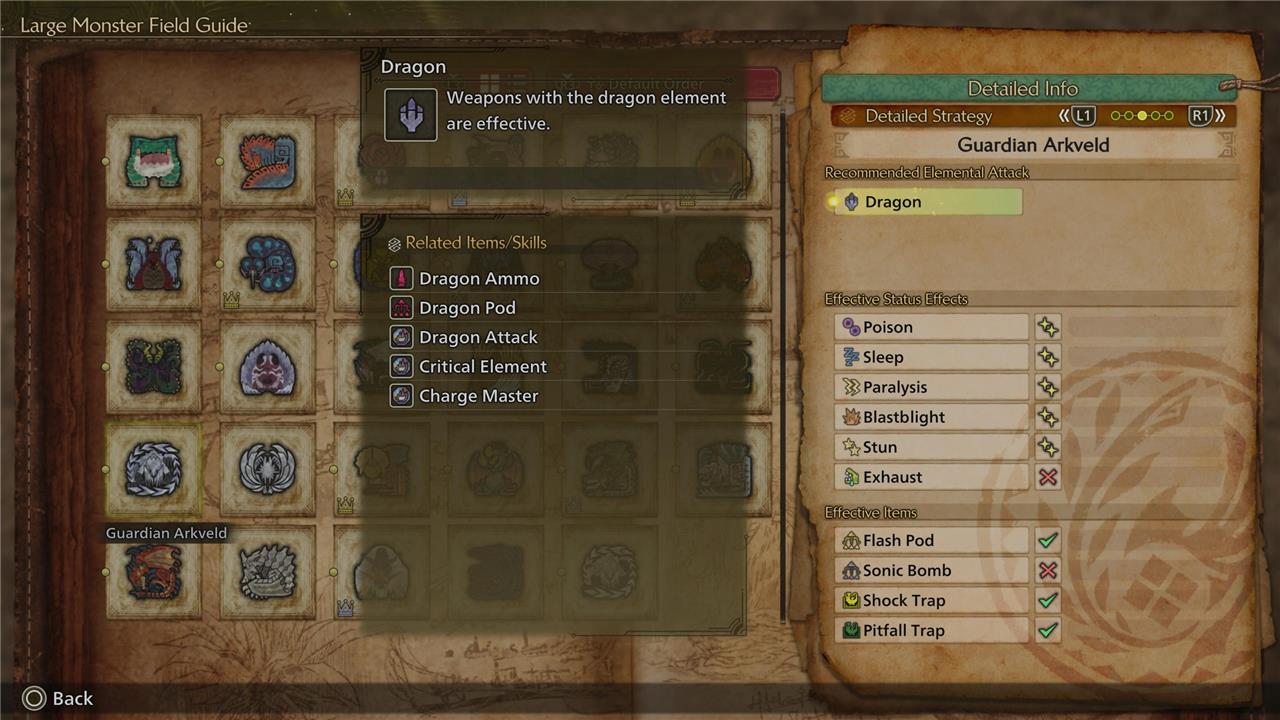
Guardian Arkveld’s recommended elemental attack is Dragon. This includes Dragon Ammo, Dragon Pod, Dragon Attack, Critical Element, and Charge Master, in addition to your own weapon’s properties.
You can find a breakdown of Guardian Arkveld’s elemental weaknesses and resistances below:
Effective status effects
- Poison: 2 stars
- Sleep: 2 stars
- Paralysis: 2 stars
- Blastblight: 2 stars
- Stun: 2 stars
- Exhaust: 1 star
Effective items
- Flash Pod: Effective
- Sonic Bomb: No effect
- Shock Trap: Effective
- Pitfall Trap: Effective
As for the creature’s weak points and breakable parts, Guardian Arkveld’s weak point is its Chainblades (x2), which are also breakable. In addition, its Head can also be broken, and its Tail can be severed.
Before diving deep into combat strategy, here’s the breakdown of Guardian Arkveld’s weak points:
Guardian Arkveld is a formidable artificial monster encountered in the Ruins of Wyveria during the Broken Chains quest in Monster Hunter Wilds. Its primary weaknesses are the Dragon element and status effects like poison, sleep, paralysis, blastblight, and stun, while it is immune to exhaustion. Key weak points include its head, tail, and chainblades, with the latter being resistant to elemental damage but vulnerable to physical attacks. Breaking the chainblades is crucial as it reduces the monster’s attack options. Effective strategies involve using Dragon elemental weapons, status ailments to immobilize or weaken it, and items like Flash Pods and Pitfall Traps to disrupt its powerful chainblade attacks. Preparing with high defense armor and skills like Wylk Burst can help mitigate its strong physical and blast damage in battle.
Part |
Sever |
Blunt |
Ranged |
Fire |
Water |
Thunder |
Ice |
Dragon |
|---|---|---|---|---|---|---|---|---|
| Head | 3 stars | 3 stars | 3 stars | 1 star | 1 star | 1 star | 1 star | 1 star |
| Torso | 2 stars | 2 stars | 2 stars | 1 star | 1 star | 1 star | 1 star | 1 star |
| Left Wing | 3 stars | 3 stars | 2 stars | 1 star | 1 star | 1 star | 1 star | 1 star |
| Right Wing | 3 stars | 3 stars | 2 stars | 1 star | 1 star | 1 star | 1 star | 1 star |
| Left Chainblade | 3 stars | 3 stars | 3 stars | No Effect | No Effect | No Effect | No Effect | No Effect |
| Right Chainblade | 3 stars | 3 stars | 3 stars | No Effect | No Effect | No Effect | No Effect | No Effect |
| Left Leg | 2 stars | 2 stars | 2 stars | 1 star | 1 star | 1 star | 1 star | 1 star |
| Right Leg | 2 stars | 2 stars | 2 stars | 1 star | 1 star | 1 star | 1 star | 1 star |
| Tail | 3 stars | 3 stars | 3 stars | 1 star | 1 star | 1 star | 1 star | 1 star |
For details about what to expect in terms of attacks and general behavior, the following section has you covered.
Guardian Arkveld attacks and strategy
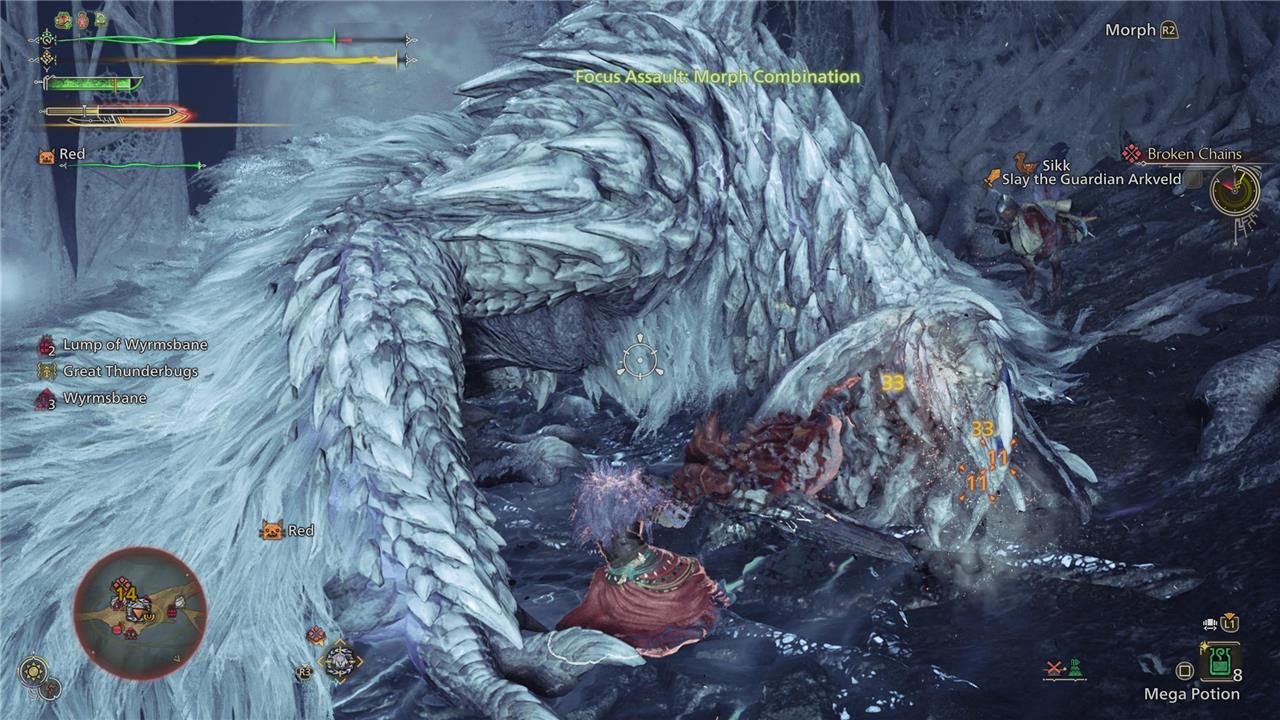
Guardian Arkveld employs a variety of powerful attacks that require careful observation and timing to counter. Its moves include a tail whip, a 360-degree tail spin, dual claw slams, and a devastating “nuclear wyvern strike” that charges and unleashes three large explosions in a frontal arc. The monster also performs aerial dive maneuvers and arm sweeps with its chainblades, which are its most dangerous weapons. To avoid damage, players should dodge forward or get behind it to evade its AoE attacks, stay clear of its head during attacks, and be cautious of its charge-up signals. Severing its tail reduces its attack range, and breaking its chainblades lowers its offensive power. The best strategy involves targeting these weak points, especially the head, tail, and chainblades, while keeping mobile to avoid combos and exploiting openings after its big attacks, such as the nuclear wyvern strike. Using slashing attacks to sever the tail and focus strikes on glowing red wounds can stagger and weaken the Guardian Arkveld effectively.
Guardian Arkveld has one major trick up its sleeve, and it uses it constantly. The chainblades on both sides of its body are the main event, and you can expect all sorts of attacks surrounding them.
Whenever you’re at a distance from the monster, it will likely try to use the chainblades to close the gap. This is indicated by Arkveld turning its head slightly and raising its arm before slamming the ground. Be careful, as this move is usually followed up by a similar attack with the other chainblade. If you managed to dodge the first, prepare to evade again shortly after. There’s a short window after each attack in which you can potentially target a wound, but it’s best to just avoid altogether and reposition yourself instead.
One attack that you’ll see often also involves the chainblades, but in a slightly different manner. If its chainblades start glowing white and Arkveld does a small jump while standing in place, it means it’s about to do a vertical swipe using both arms. You’ll do good to memorize this move, as it’s a go-to for the creature. There is a kinder variant in which it only uses one arm for a weaker attack, but in general, expect the heavy one just in case.
Arkveld makes use of the rest of its body in a more regular form. If you’re attacking its face, it’ll try to bite you, sometimes repeating the action in quick succession. Other times, it’ll use its claws in conjunction with the chainblades, almost as if it were holding a dagger that it drags through the ground. You can expect at least one movement with the tail, although it doesn’t occur as often, where it’ll try to hit you if you’re close to its rear end, rotating in place.
For the most part, you’ll encounter tiny variations of the aforementioned attacks throughout the whole fight. One in particular that’s worth keeping in mind is Arkveld using both chainblades for a ground slam. It covers a large area when doing so, but if you manage to dodge it, use focus mode to aim at the blades. You’re likely to see an attack opportunity. It’s not quite like targeting a wound, but it can incapacitate the monster if struck on time.
Throughout the fight, it’s key to focus on weak points as much as possible. The chainblades, as deadly as they are, are also its weakness, so try to counter attack them whenever possible. The head isn’t an easy target, but it’s one you should be focusing on when the opportunity arises. If the tail is proving to be a nuisance, remember that you can sever it.
Alongside the usual wound control and dodging the chainblades as much as possible, remember to use traps. The key is to try and get the monster to ground as often as possible to make it easier to attack. If it’s spending a long time in the air, set up a trap and bait it toward you. If you can time a dodge just right, they’ll hit the trap instead.
Guardian Arkveld drops
Guardian Arkveld drops generic Guardian Materials that are common to Low Rank Guardian monsters. These materials include Guardian Scale, Guardian Pelt, Guardian Blood, Tough Guardian Bone, and Nourishing Extract, which are necessary for crafting various weapons and armor. To obtain higher-rank materials for High Rank Guardian Arkveld equipment, players must hunt regular or tempered Arkveld variants. The drops are primarily gathered from breaking parts like the head, chainblades, and tail during the fight.
If you’re wondering what the Guardian Arkveld drops in Monster Hunter Wilds are, you can find a handy list below:
Low Rank materials
Material |
Availability/Probability |
Frequency |
Source |
|---|---|---|---|
| Guardian Scale | Target rewards (x1/20%). Broken part rewards (x1/100%). Wound destroyed reward (x1/45%). Carving (x1/50%) | 4 stars | Head |
| Guardian Pelt | Target rewards (x1/20%). Broken part rewards (x2/100%). Wound destroyed reward (x1/43%). Carving (x1/30%) | 4 stars | Chainblades |
| Guardian Blood | Target rewards (x1/10%). Wound destroyed reward (x1/12%). Carving (x1/20%). Carving severed part (x1/100%) | 3 stars | Tail |
| Nourishing Extract | Target rewards (x1/30%) | 3 stars | N/A |
| Tough Guardian Bone | Target rewards (x1/20%) | 2 stars | N/A |
How can I exploit Guardian Arkveld’s Dragon weakness effectively in battle
To exploit Guardian Arkveld’s Dragon weakness effectively in battle, focus on using Dragon-element weapons, as Arkveld has no elemental resistances and is especially vulnerable to Dragon damage. Target its wings to drain its energy and prevent it from entering its enhanced Dragon-infused state, which causes powerful explosive attacks. When Arkveld does enter this state and its chainblades glow red, hit it repeatedly with elemental attacks to overload and break it out of the enhanced mode. Position yourself mostly behind or to the side of Arkveld to avoid many of its forward chainblade attacks, but remain alert for tail strikes and spin attacks. Use status effects like Poison and Paralysis to further hinder it, and take advantage of moments after its heavy chain slam or chainblade combos to land your Dragon-element hits safely. Employ Flash Pods to interrupt aerial attacks and traps to control its movement, maximizing your damage windows with Dragon-element weapons.
How do I position myself to avoid Arkveld’s Dragon Chain Explosion
To avoid Guardian Arkveld’s Dragon Chain Explosion effectively, position yourself either directly under its head or slightly behind it during the charge-up phase. The explosion primarily targets the frontal arc extending forward, so standing close to its face or underneath it allows you to completely avoid the blast while also putting you in an optimal spot to deal damage. If you are farther away, running to the side can help you dodge the explosion since it extends forward in a line, but this requires precise timing. Additionally, performing a well-timed Superman dive (invulnerable dodge) can also help you evade the blast if your timing is perfect. Avoid staying in front of Arkveld at a medium distance during the charge-up, as the explosion will cover that area extensively.