Unravel the mystery of Dragon’s Dogma 2 with our definitive guide to all Sphinx riddles and their solutions. From the elusive Mountain Shrine to the enigmatic Frontier Shrine, each riddle challenges your wit and rewards your cunning with rare treasures and gold. Whether you’re dodging traps for the Sealing Phial or recalling statues to unlock the Unmaking Arrow, this guide ensures no puzzle goes unsolved in your epic quest for glory.
Before we begin, some good and bad news. The good news is that you can start “A Game of Wits” at any point in your playthrough. The bad news is that completing all Sphinx riddles can be a long and arduous process, especially if you approach the mission at a low level.
Don’t fret, though, as we’ve detailed the step-by-step process below. If you’re wondering how to complete “A Game of Wits, here’s everything you need to know, including where to find the Sphinx (both times!) and how to solve all Sphinx riddles.
’A Game of Wits’ walkthrough in Dragon’s Dogma 2
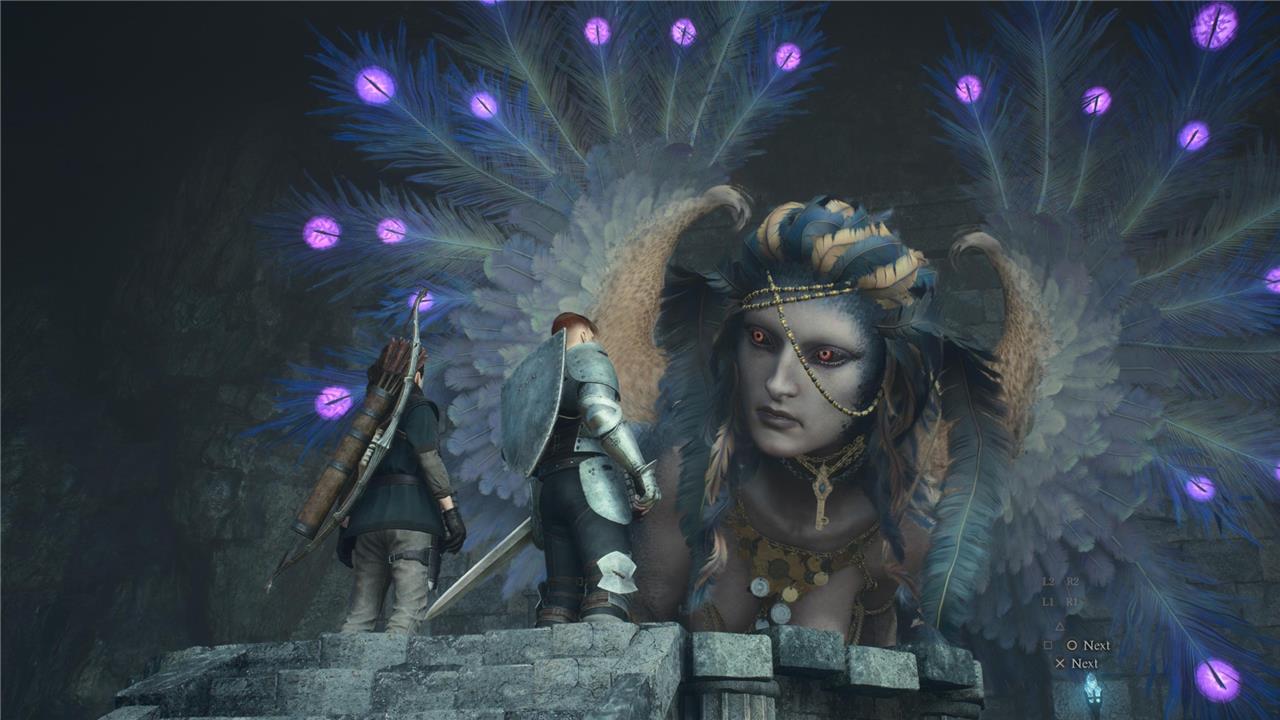
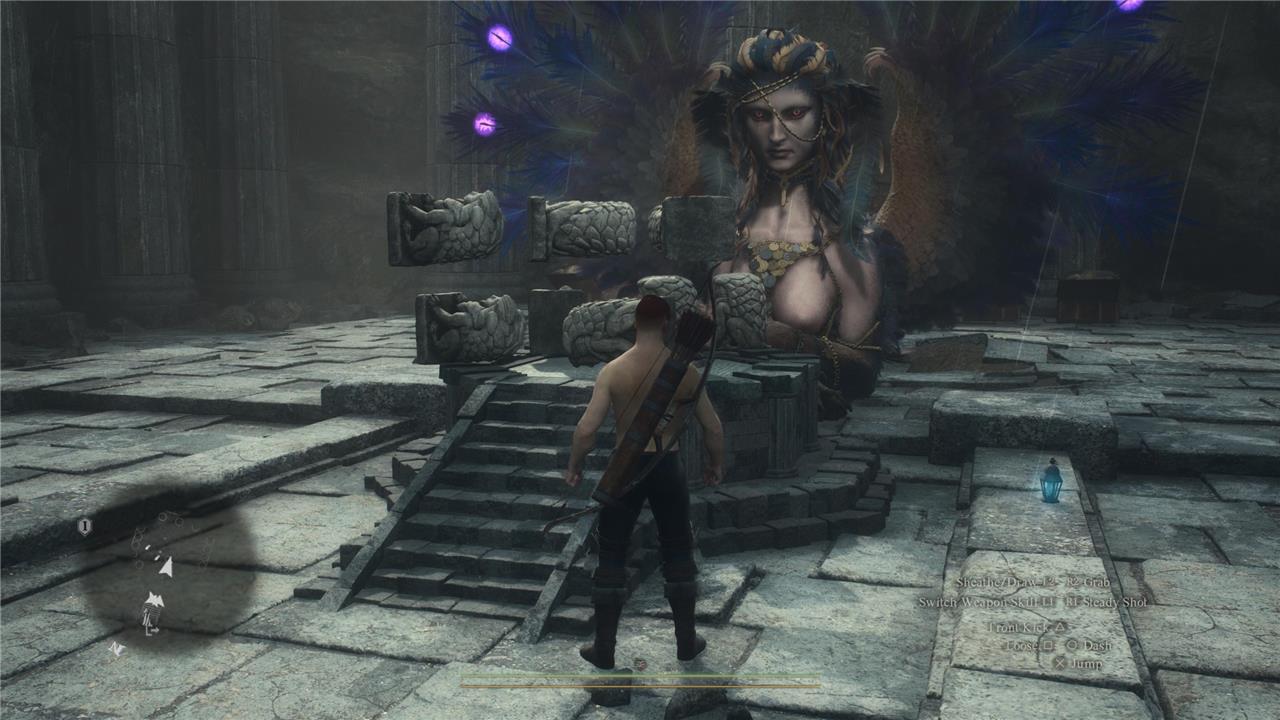
The “A Game of Wits” quest in Dragon’s Dogma 2 begins at the Mountain Shrine, where the Arisen encounters the Sphinx, a creature of great intellect who challenges you to solve a series of ten riddles. To progress, you must correctly answer the first five riddles in any order, which involves tasks such as retrieving special items and bringing specific pawns or NPCs to the Sphinx. After completing these, the Sphinx relocates to the Frontier Shrine, where you solve the remaining riddles presented in a random sequence. Successfully answering all riddles culminates in a final battle against the Sphinx, where using the Unmaking Arrow is key to victory. Completing this quest rewards you with valuable items including the Eternal Wakestone.
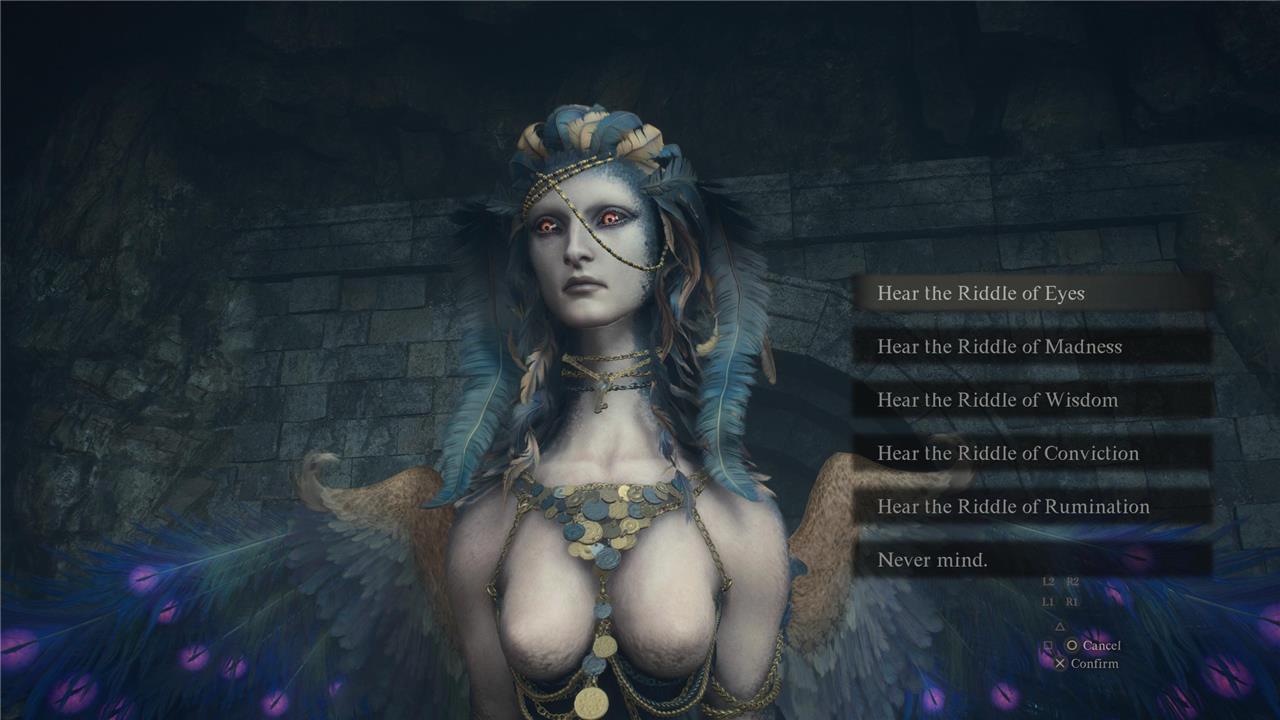
“A Game Of Wits” is an optional quest in Dragon’s Dogma 2. You can start it by meeting the Sphinx up in the Mountain Shrine. At a glance, here are the steps you’ll need to complete to finish “A Game of Wits”:
- Meet the Sphinx in the Mountain Shrine
- Talk to her, then listen to and solve the first five riddles (there are ten total)
- Once you complete the fifth puzzle, the Sphinx will fly toward a second location
- Reunite with the Sphinx in the Frontier Shrine
- Listen to and then solve the second batch of riddles, which will appear to you in random order
- Once you complete the tenth riddle, you’ll officially “finish” the “A Game of Wits” side quest
- But if you want to open the final chest, you’ll have to fight the Sphinx, which demands a specific strategy (more on this later, but you should change vocation to Archer once you’re on your eight or ninth riddle).
An important note is that failing a riddle will prevent you from unlocking its corresponding award. Or, in the worst-case scenario, the Sphinx will simply fly away, preventing you from completing the quest. You should rest at an inn (or your house) before you visit the Sphinx.
Below, we explain in detail how to solve all Sphinx riddles. Or, if you’re having trouble on a particular riddle, you can use this table of contents to navigate directly to the solution for the exact riddle you’re stuck on. Good luck.
Sphinx Location #1 in Dragon’s Dogma 2 (Mountain Shrine)
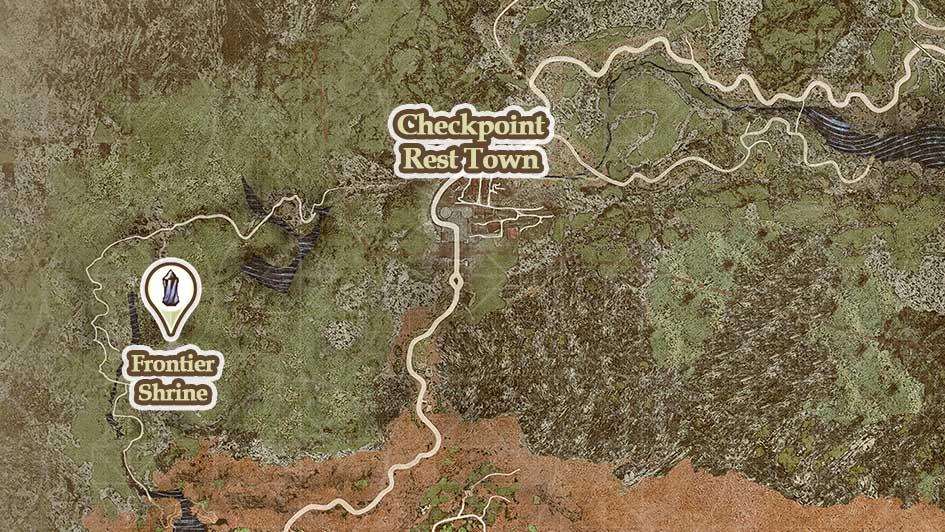
The Sphinx Location #1 in Dragon’s Dogma 2 is found at the Mountain Shrine, situated northeast of Checkpoint Rest Town and northwest of the Ancient Battlegrounds. To reach this hidden area, players must navigate through the Ancient Battleground, avoid or defeat a sleeping Cyclops, and traverse the Worldsend Cavern. After passing through the cavern and dealing with a Stone Golem, you ascend the Shrine Corridor and stairs to finally encounter the Sphinx. This location serves as the starting point for the Sphinx’s riddle questline “A Game of Wits,” where players face five challenging riddles to earn unique rewards.
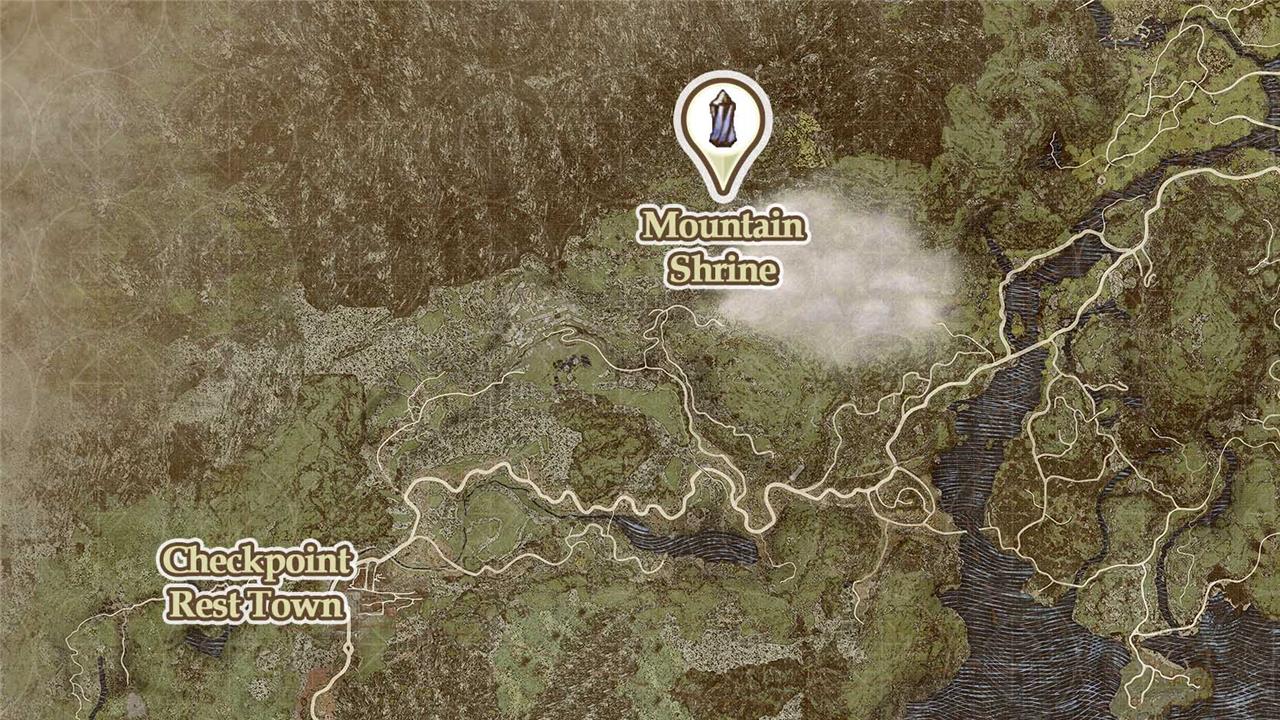
The first Sphinx location in Dragon’s Dogma 2 is in the Mountain Shrine. To get there, use Checkpoint Rest Town (near Battahl) as a base camp. From there, you’ll have to follow a path up north, sticking to the western side of the map.
From Checkpoint Rest Town, exit through the northern entrance and follow the main path until you stumble upon the first road to the left. Take that through a valley with enemies, rolling boulders, and, thankfully, a campsite.
You’ll eventually be out in the open and into the Ancient Battleground. (You’ll know you’re in the right spot if you see a dragon and a cyclops fighting each other.) Proceed down the “main road” on your map, using the path with the rocks on the left side as a safe passage to avoid unnecessary confrontations. Continue moving through the castle walls, and you’ll eventually see an open gate covered with rocks. That’s your entrance.
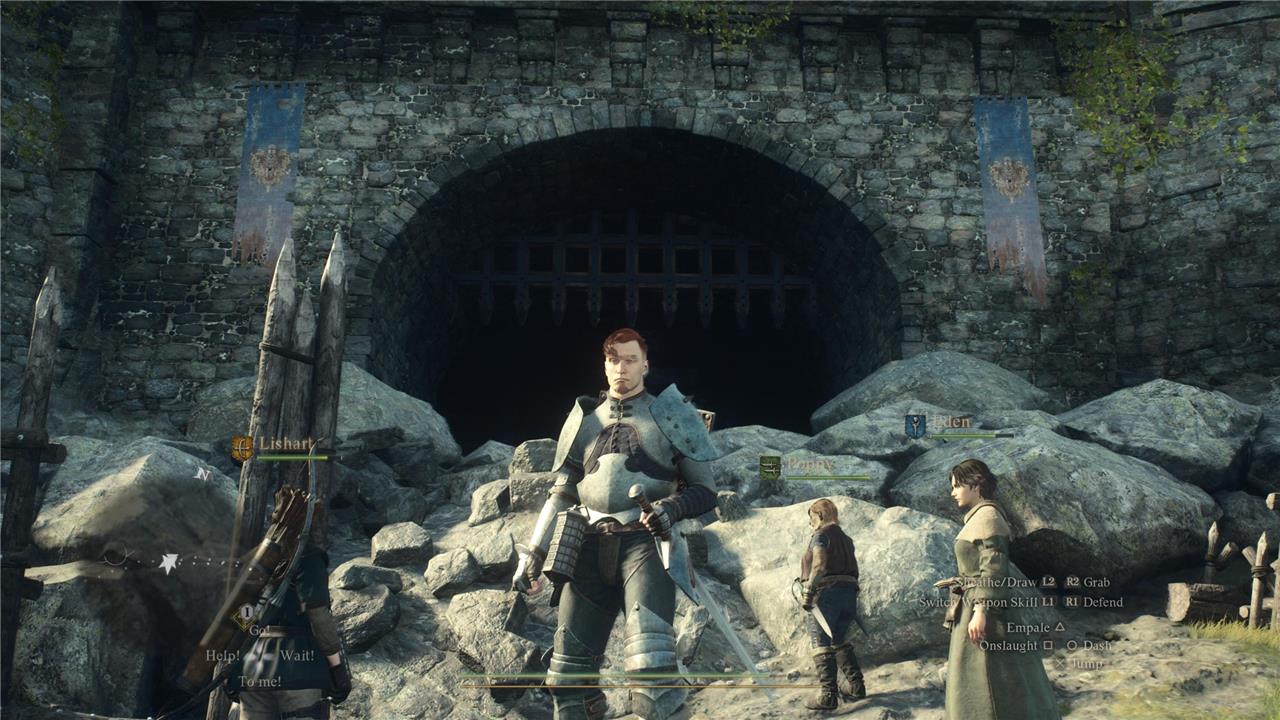
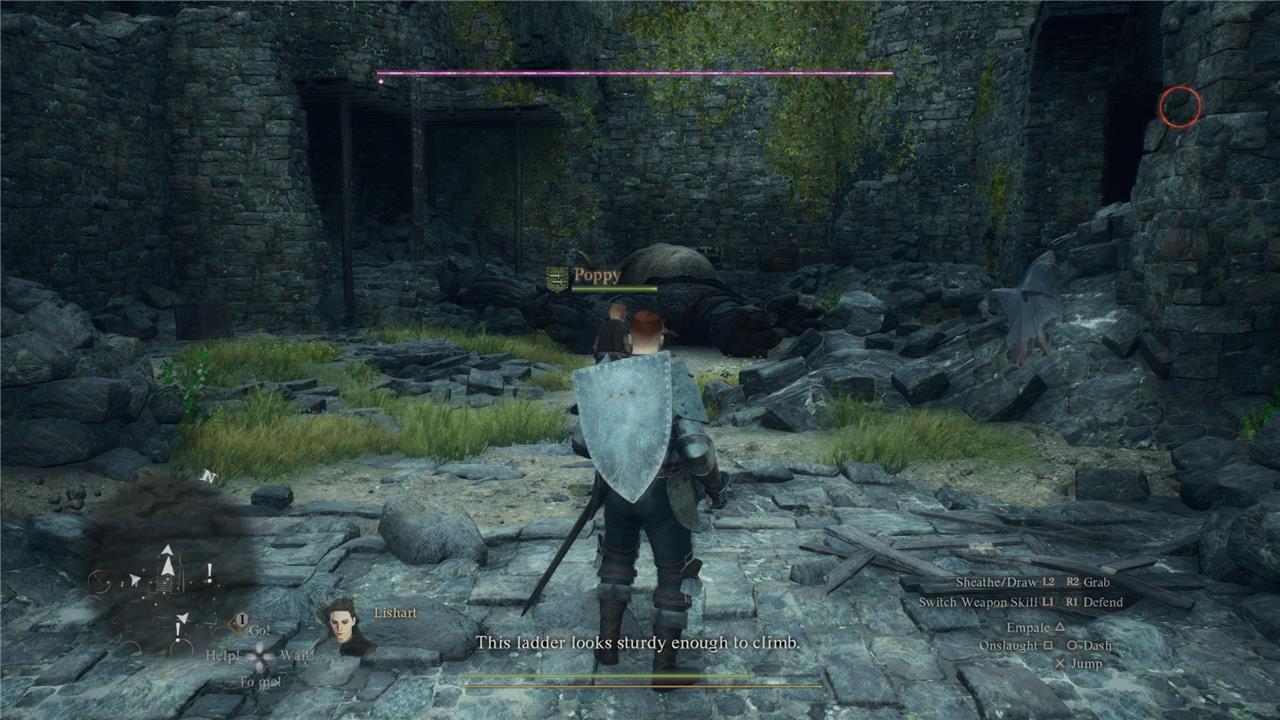
Once inside, head toward your left, ignore or fight the skeletons, and go up the circular staircase. Continue moving forward, past the ballista, and you’ll find a hole in the ground with a ladder, which looks like a Minecraft cave entrance with a hyperrealistic texture mod. Once you’re on the ground again, prepare to attack or ignore skeletons once more, and then follow the corridor with the stairs until you’re out in the open.
You’ll come across another staircase that leads to what seems to be a dead end. There’s a sleeping cyclops resting next to a ladder on the left, which is where we need to go next. Again, it’s up to you if you want to engage in a smackdown or not.
Then, use the staircase, follow the path toward the cave entrance, and you’ll be inside the Worldsend Cavern. Expect a few bandits and other enemies here, and a Seeker’s Token, which you’ll need for this mission.
Once outside the cavern, keep moving toward the next entrance. You’ll see a large enemy; feel free to ignore them.
After you’re through the second, more straightforward cavern, you’ll exit to Mountain Shrine. All you need to do is climb up the staircases to meet the Sphinx in all her glory. If you have any on-hand, you should temporarily place a portcrystal here – you’ll need to return to this spot for the first five Sphinx riddles.
Riddle of Eyes solution
The solution to the Riddle of Eyes in Dragon’s Dogma 2 is straightforward yet easily overlooked. When the Sphinx asks you to retrieve the “item of greatest value” behind a nearby door, enter the cave she points to and immediately turn around upon entering. Look up above the doorway to find a chest perched on the wall. Climb the rocks to reach and open the chest to obtain the Sealing Phial. Return this item to the Sphinx to complete the riddle and receive a Wakestone as a reward.
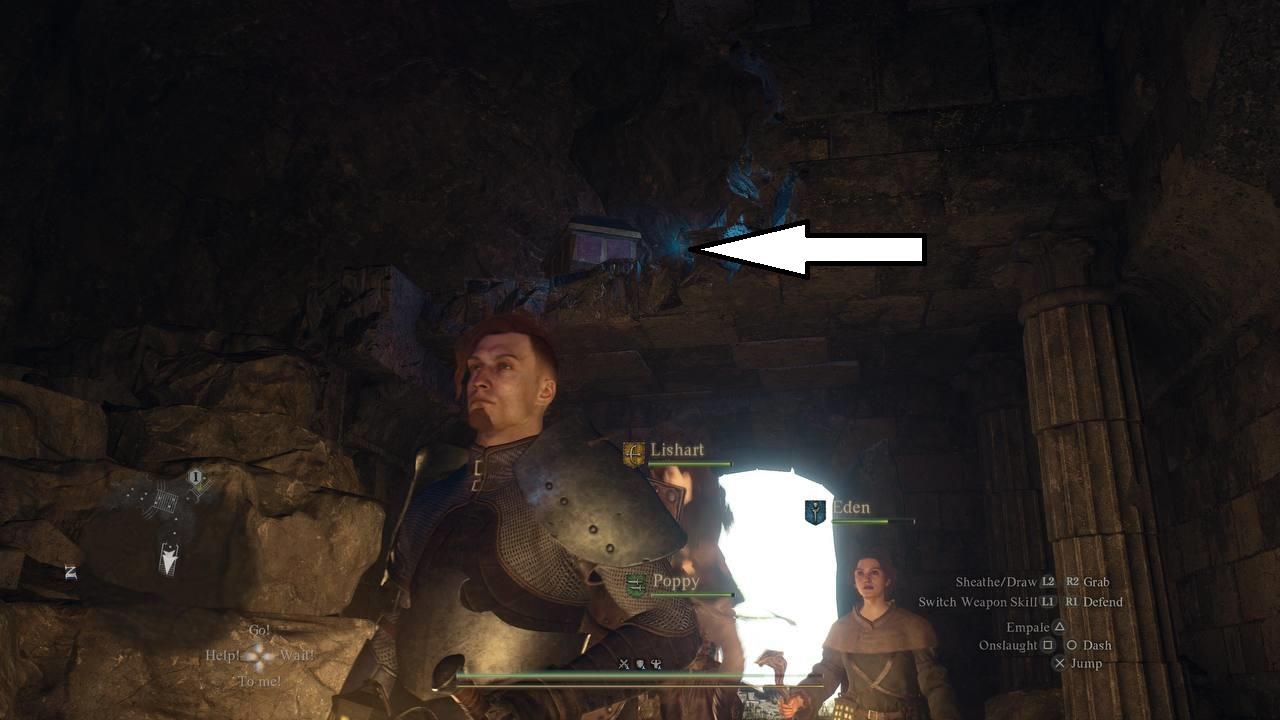
You can tackle the first five riddles in any other, but the Riddle of Eyes is so straightforward that you might as well complete it first. The Sphinx will point you toward a cave close to her location, and ask to retrieve an item.
To complete the Riddle of Eyes in Dragon’s Dogma 2, enter the cave that the Sphinx points toward, take a few steps in, and look behind you. There’s a chest located above the door, next to the wall (as show in the screenshot above). Climb the rocks to get to it, grab the Sealing Phial, and return to the Sphinx. Give her the Sealing Phial to complete the riddle.
Riddle of Eyes reward: A Wakestone
Riddle of Madness solution
The solution to the Riddle of Madness in Dragon’s Dogma 2 is straightforward despite its complex-sounding name. To solve it, you need to carefully interpret the riddle’s clues as the Sphinx’s challenge does not require combat but rather keen observation and puzzle-solving skills. The riddle involves understanding the Sphinx’s hints and interacting with the environment or items she points out, often requiring you to locate a specific object or perform a particular action that aligns with the riddle’s theme. Successfully solving the Riddle of Madness, like the other Sphinx riddles, rewards you with valuable items and progress in the questline.
The Riddle of Madness sounds complex, but it’s quite straightforward. The Sphinx asks you to bring “your most beloved” to her, which hints at a character with whom you have a high affinity. But you can complete the Riddle of Madness by offering your main pawn.
To complete the Riddle of Madness in Dragon’s Dogma 2, approach your main pawn and press the grab button to lift them on your shoulders. Then, take them to the altar in front of the Sphinx, and talk to her.
Confirm all the dialogue queries, and you’ll be set. (The Sphinx did mention something to me about being disappointed for only bringing one person, or “beloved,” in this case. But this didn’t hinder my progress nor affect the reward in any way.)
Riddle of Madness reward: A portcrystal (if this is your first portcrystal, place it near or just outside the Sphinx’s location)
Riddle of Wisdom solution
The solution to the Riddle of Wisdom in Dragon’s Dogma 2 involves bringing the Sphinx its “parent,” which is a Capcom-made pawn bearing the moniker “Sphinx.” The riddle states: “The parent knows the child, yet the reverse is far from true. The child knows not the parent; such is the parent’s due. I am a lost child, for kinship do I yearn. So bring to me my parent, that I may learn.” To solve it, you must locate and bring this specific pawn to the Sphinx, fulfilling the riddle’s requirement and progressing the quest.
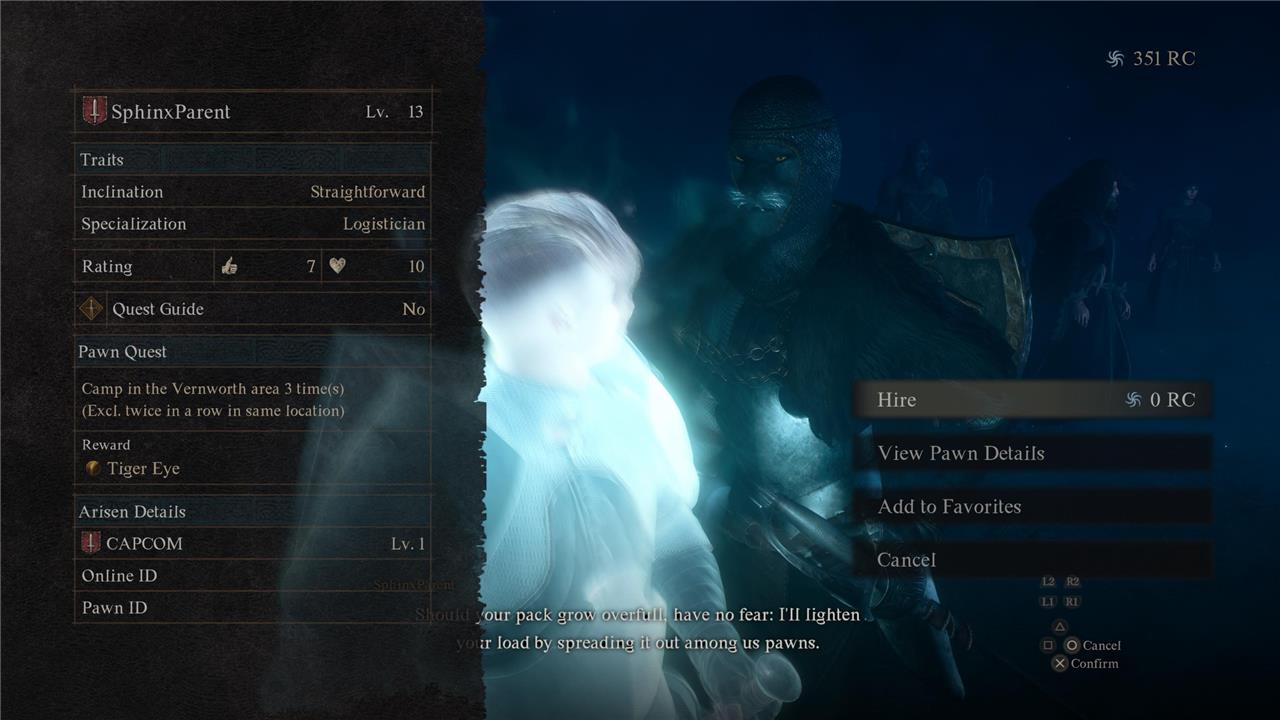
The Riddle of Wisdom requires you to recruit a specific pawn. The Sphinx is quite vague about the objective, but she will ask to show her a “parent.”
To complete the Riddle of Wisdom in Dragon’s Dogma 2, you have to recruit a Pawn named “SphinxParent” from a Riftstone of Fellowship. If you find one with said name, make sure to inspect the profile first and verify that the creator is Capcom. That way, you avoid dupes.
If you haven’t come across a Riftstone of Fellowship yet, you’ll find one northeast of Checkpoint Rest Town, in a tower at the fork in the road. There’s a Riftstone of Fellowship inside; I found a “SphinxParent” pawn there. (Remember that, once you’re inside the rift, you can interact with the riftstone again to check the list of pawns at that stone.)
Some users have reported that pawns named “SphinxMother” and “SphinxFather” also work, but if you want to be 100% certain you have one who will do the trick, I’d recommend holding off until you come across SphinxParent. Once you find them, then recruit them and return to the Sphinx.
Back in the shrine, guide the pawn to the altar in front of the Sphinx, talk to her, and you’ll be set.
Riddle of Wisdom reward: 1,200 RC
Riddle of Conviction solution
The Riddle of Conviction in Dragon’s Dogma 2 involves the Sphinx asking you to give what you most prize in the world. Despite the seemingly serious request, you can hand over literally any item to complete the riddle. The key benefit is that the Sphinx will duplicate the item you give her, placing a copy in a chest for you to claim. This means you won’t lose your prized possession and can even use this to duplicate rare or valuable items such as Portcrystals or unique arrows. Choosing a valuable item maximizes the reward, making this riddle a clever way to gain duplicates of important gear or consumables.

The Riddle of Conviction has the Sphinx asking you for what “you most prize” in the world. Literally any item will do the trick, but you should put some thought into your choice.
To complete the Riddle of Conviction in Dragon’s Dogma 2, I offered the Sphinx a Golden Trove Beetle (those items that marginally increase your inventory size). They’re simultaneously beneficial and plentiful – in fact, I found one near the first campsite you see as you’re traveling from Checkpoint Rest Town to Mountain Shrine.
According to both user reports and our own testing, you can give any item to the Sphinx to complete the Riddle of Conviction. The only difference in outcome is that’ll get a copy of whatever you give her, so it’s best to give her something rare (like, say, a portcrystal or Unmaking Arrow).
Riddle of Conviction reward: A copy of whatever you give the Sphinx (for me, it was another Golden Trove Beetle)
Riddle of Rumination solution
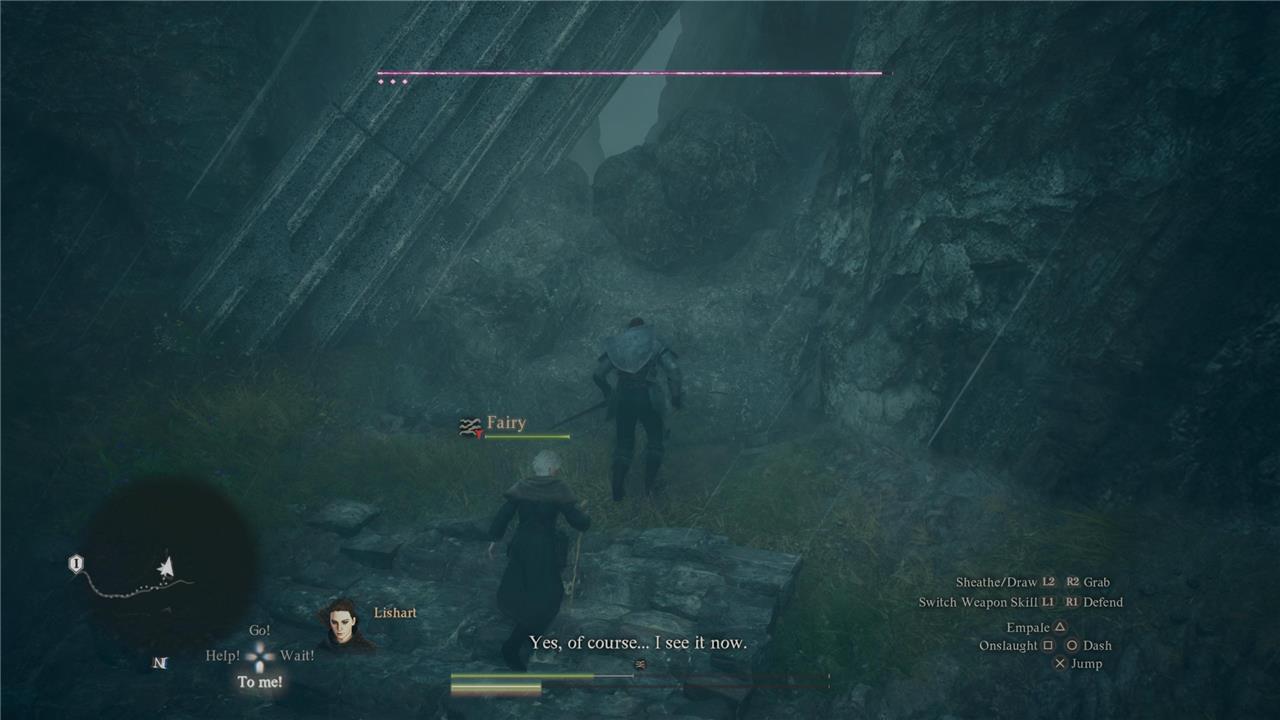
The solution to the Riddle of Rumination in Dragon’s Dogma 2 requires you to return to the exact location where you found your first Seeker’s Token. At this spot, you will find a Finder’s Token. Once you bring this Finder’s Token back to the Sphinx, the riddle is solved. This riddle can be challenging because there are no in-game indicators to guide you, so it relies heavily on your memory or external maps to recall the location. You have seven in-game days to complete this task. Successfully solving the Riddle of Rumination rewards you with 3 Ferrystones.
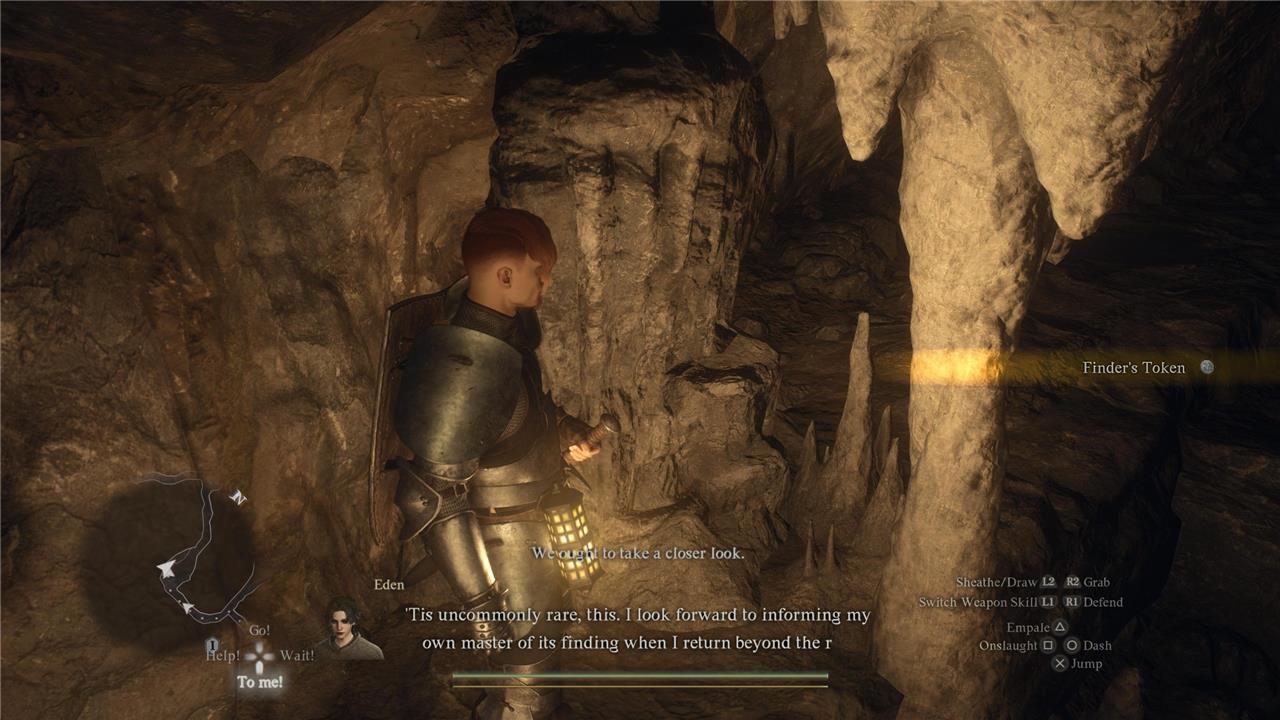
The Riddle of Rumination is the trickiest of puzzle in the first batch of Sphinx riddles. I hope you remember where you found your first Seeker’s Token, as you’ll have to return to that location.
To complete the Riddle of Rumination, you have to revisit the spot where you found your first Seeker’s Token, and retrieve the Finder’s Token, which will be in the same place. Then, all you need to do is return to the Sphinx and give her the new token. Like The Ring, you have seven (in-game) days to tackle this quest, so beware of dozing off too many times after hearing this riddle the first time.
This riddle is a tricky one that doesn’t have a catch-all solution, as everybody’s experience is different. If you found a Seeker’s Token early on in the game, chances are, it was around the Vernworth, Melve, Northeastern Vermund, or Western Vermund regions. (Our guide to early Seeker’s Tokens can point you in the right direction.)
Now, how do you complete the Riddle of Rumination if you haven’t found a Seeker’s Token yet? This was my experience, and yes, there’s a trick to it if you’re stuck. The first one I found was inside the Worldsend Cavern. After hearing the riddle, I went back to the spot in the cavern, but the Finder’s Token wasn’t there.
If you’re trying to complete the Riddle of Rumination and you can’t find the Founder’s Token even though the location is the correct one, the next steps should help:
- I searched for a second Seeker’s Token
- I went to the Vocation Guild in Checkpoint Rest Town and bought a ferrystone for one Seeker’s Token
- I slept until morning at the local inn
- I then returned to the Worldsend Cavern and found the Finder’s Token
Riddle of Rumination reward: Three ferrystones
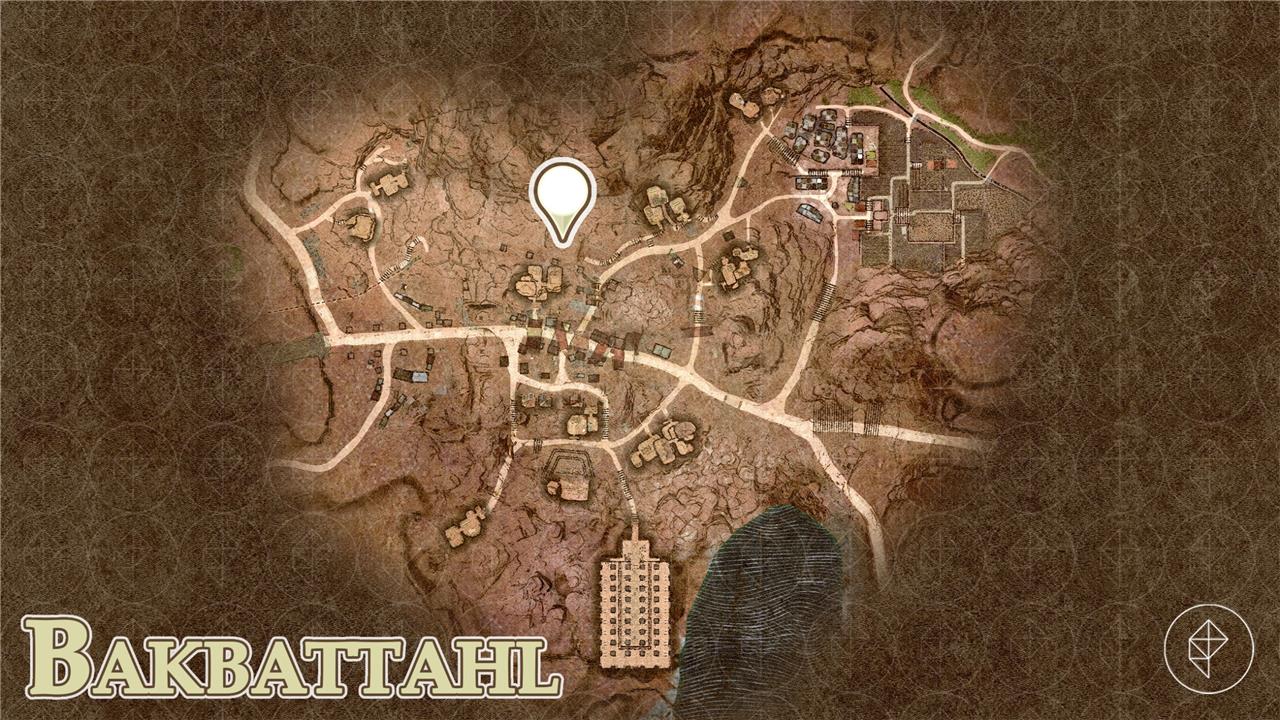
Sphinx Location #2 in Dragon’s Dogma 2 (Frontier Shrine)
The Sphinx’s second location in Dragon’s Dogma 2 is at the Frontier Shrine, situated southwest of Checkpoint Rest Town. To reach this area, players can follow the river west from Rest Town, then head south along a path that leads through a cave guarded by a Chimera and other formidable monsters. The Frontier Shrine offers a challenging environment where the Sphinx presents a new set of five riddles in a random order, requiring careful attention to solve. It is recommended to place a Portcrystal nearby to facilitate quick travel, as failing a riddle here ends the encounter immediately. Successfully solving these riddles rewards players with valuable items and gold, making the journey to the Frontier Shrine a crucial part of completing the Sphinx questline.
Once you’ve completed the first five Sphinx riddles, she’ll fly away, kickstarting the second part of the quest. (It’s technically possible to make a run for it and grab onto the Sphinx before she takes off to fly on top of her – all the way to her second location – though you’ll leave a portcrystal and the fifth chest behind.)
The second Sphinx location in Dragon’s Dogma 2 is in the Frontier Shrine.
Once more, use the Checkpoint Rest Town as a base camp. Look at the map, and you’ll notice a riverside that cuts through the main road. This is a river found underneath the bridge outside of town. Follow it toward the western side of the map.
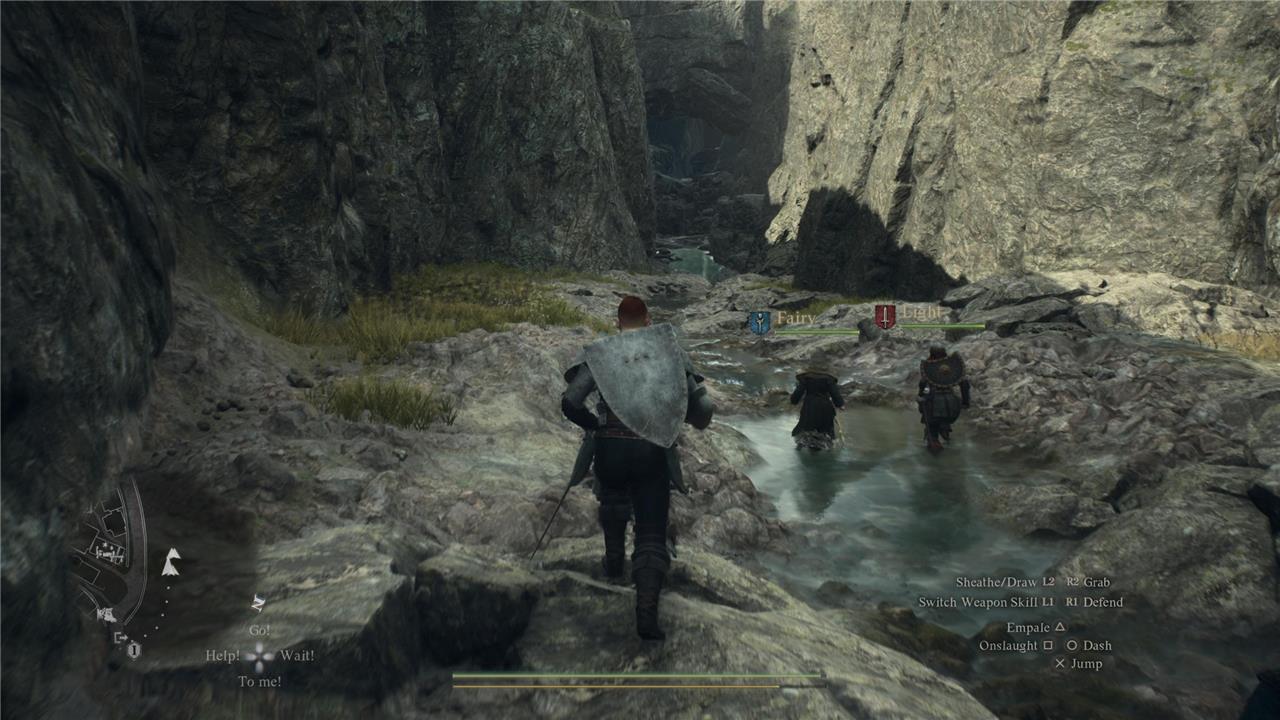
This route will take you through an open cave. I recommend sticking to the right side, climbing any rocks that you come across, until you’re on the path to the right. You don’t want to plunge deep into the cave, but rather use it as a passage to continue venturing west.
Things will be fairly straightforward from here. The catch is that the road is filled with all sorts of powerful enemies. I’m talking hard boys, real biscuit boxers, including a Minotaur and a Chimera. I recommend making a run for it sticking to the main road as often as you can so you don’t get lost (or obliterated).
You’ll eventually come across a path to the left (which heads south, using the map as reference), which is the road that leads to Frontier Shrine. You’ll easily recognize it because there’s a fallen pillar next to it. Prepare to smash the rocks blocking the entrance (a few hits with your weapon will do) and then make another sprint out of danger. The Sphinx is waiting for you on the far end.
Now, it’s time to solve the last five Sphinx riddles.
Riddle of Reunion solution
To solve the Riddle of Reunion in Dragon’s Dogma 2, you simply need to reach the Sphinx’s second location at the Frontier Shrine. Upon arriving there and speaking with the Sphinx, the riddle is automatically completed, rewarding you with 100,000 gold. This riddle acts as a transition to a new set of four additional riddles, which the Sphinx will present in a random order after the Reunion is solved.
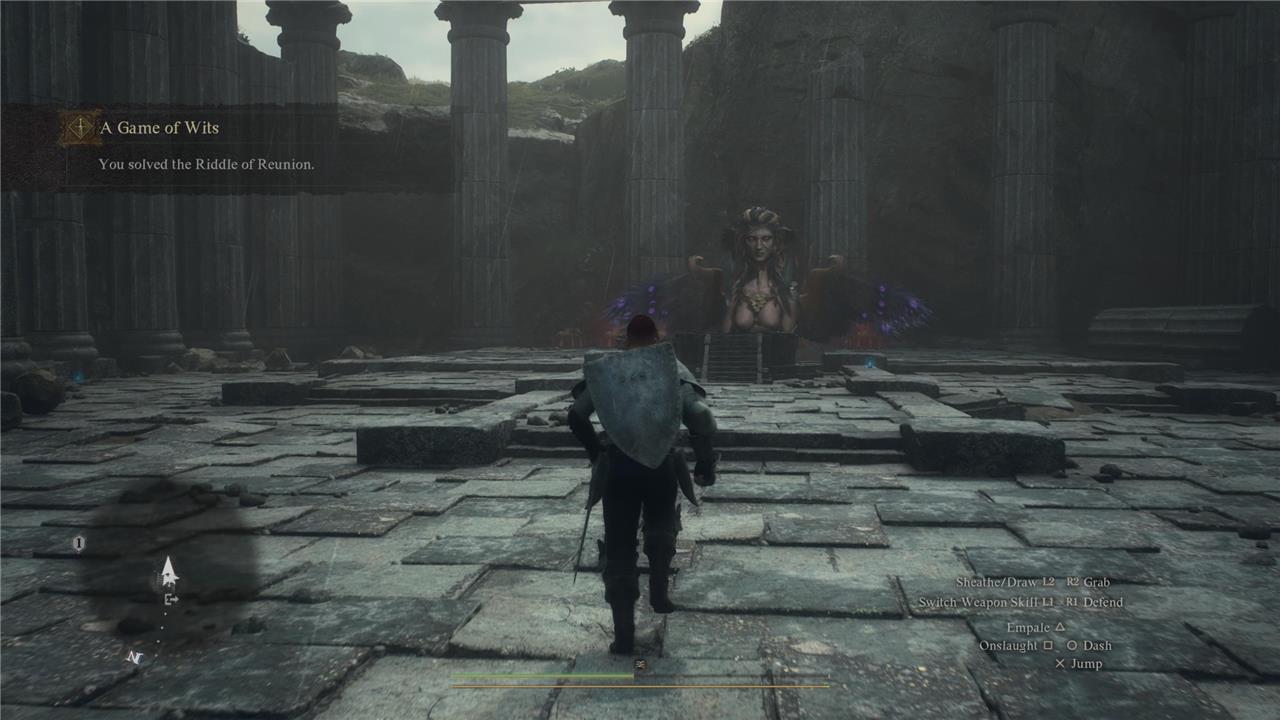
Hey, a freebie! Even if that Chimera kicked your ass a few times getting here. To complete the Riddle of Reunion in Dragon’s Dogma 2, you need to get to the second Sphinx location and talk to her. Yep, it’s as straightforward as it sounds. (If you have one, place a portcrystal here, as you’ll need to return a few times.)
Riddle of Reunion reward: 100,000 gold
A word before you continue to the next few riddles. The order for the second batch of Sphinx riddles in Dragon’s Dogma 2 is randomized. As such, it’s impossible to guess which riddle you’ll be getting next.
I’ll list the last few riddles as they appeared to me, but if you suddenly get a different one, don’t fret. Just scroll through the page (or use the table of contents near the top of this guide) to find the answers to your questions.
Without further ado.
Riddle of Contest solution
The Riddle of Contest in Dragon’s Dogma 2 presents a unique challenge where the Sphinx summons a soldier for you to defeat in combat. However, your character is automatically equipped with the Ring of Derision, drastically lowering your stats and making direct fighting nearly impossible. The key to solving this riddle is to stagger the opponent, which varies depending on your vocation, or to use the environment to your advantage. One effective strategy is to pick up the enemy and throw them off a nearby cliff into the ocean, instantly completing the riddle without prolonged combat. This approach allows you to bypass the stat debuff and secure the reward efficiently.
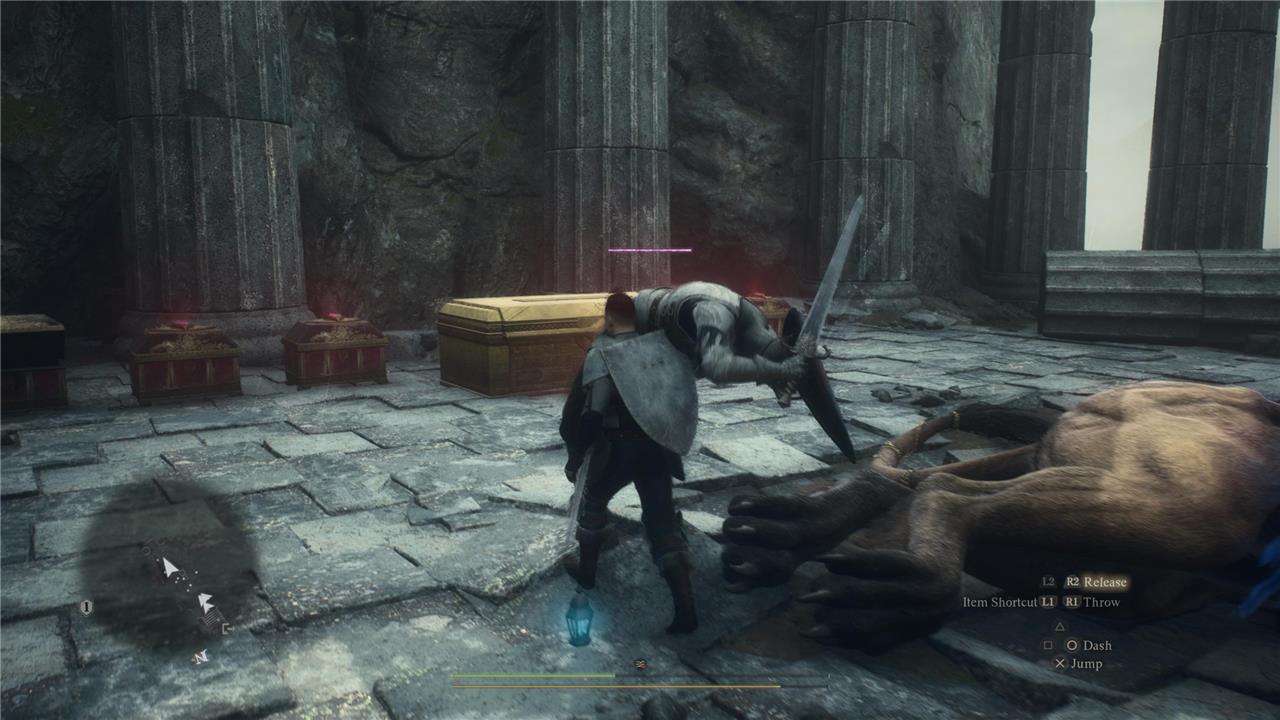
When you get the Riddle of Contest from the Sphinx, prepare for a fight. She will propose a duel, but one where you’ll be at a disadvantage.
As soon as the encounter begins, the game will automatically equip the Ring of Derision to your character, which lowers your stats to an absurd degree. Simply put, you must find another way to deal with the enemy.
To complete the Riddle of Contest in Dragon’s Dogma 2, you first have to stagger your opponent. How you do this will vary greatly on the vocation you’re using. As a Fighter myself, I used the Blink Strike skill a few times until the enemy was staggered. Whatever vocation you choose, play aggressively here, as you don’t want to lose the duel and fail the riddle.
Once the opponent is staggered, get close to them and grab them. Take them to the edge located to the right of the Sphinx, where all the pillars are, and toss them into the abyss. (R.I.P., they’d have loved the Eyrie.)
Riddle of Contest reward: The Ring of Ambition, which slightly boosts experience gained from defeating foes
Riddle of Futility solution
The solution to the Riddle of Futility in Dragon’s Dogma 2 requires you to deliver an Amphora to an NPC named Maurits. Completing this task will reward you with the Eternal Bond item. This riddle is part of the second set of Sphinx riddles encountered at the Frontier Shrine, where the order of riddles can vary. Make sure to bring the Amphora and find Maurits to solve this riddle successfully.
The Riddle of Futility is one of the tougher Sphinx riddles. For this one, she’ll ask you to take a vase to a character in Bakbattahl without breaking it. Yeah, no. Not dealing with that. If anything touches the vase, it’ll automatically break, causing you to fail the riddle. And yes, the road is full of enemies.
Before continuing, if you haven’t yet, you should seriously place a portcrystal near the Sphinx.
To complete the Riddle of Futility in Dragon’s Dogma 2, you’ll need to head to the Mural Byway (north of the Mercantile Ward and west of the Residential Ward) in Bakbattahl, and talk to Maurits in the location above. Then, take Maurits back with you to the Sphinx. Drop the character close to the vase (not on top of it!!!) and the dialogue should play itself.
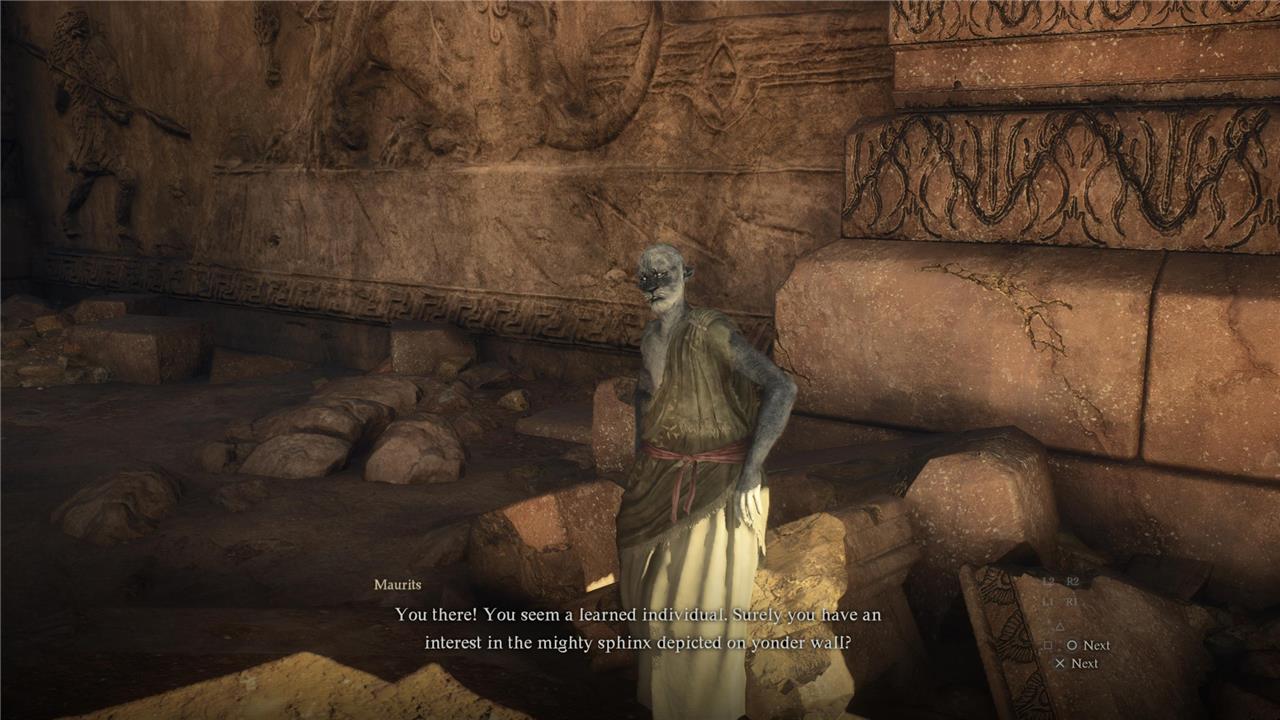
In order to teleport Maurits to the Sphinx, you can either use the Sealing Phial to capture them inside it, or grab them and fast travel to the Portcrystal outside the shrine.
Riddle of Futility reward: the Eternal Bond ring, which, when offered as a gift, itdeepens the bond between the giver and the receiver
Riddle of Differentiation solution
The solution to the Riddle of Differentiation in Dragon’s Dogma 2 involves identifying one specific NPC among two very similar-looking characters. The Sphinx shows an image of a tubby red-haired man in a white robe, and you must distinguish between two NPCs named Dante and Virgil, who look alike but have subtle differences such as hair style-Dante has straight hair, while Virgil’s is longer and wavy. Dante is found in Checkpoint Rest Town, while Virgil is near the battlement side of the town’s border. Once you find the correct NPC, pick them up and bring them back to the Sphinx to complete the riddle and unlock the next treasure chest reward.
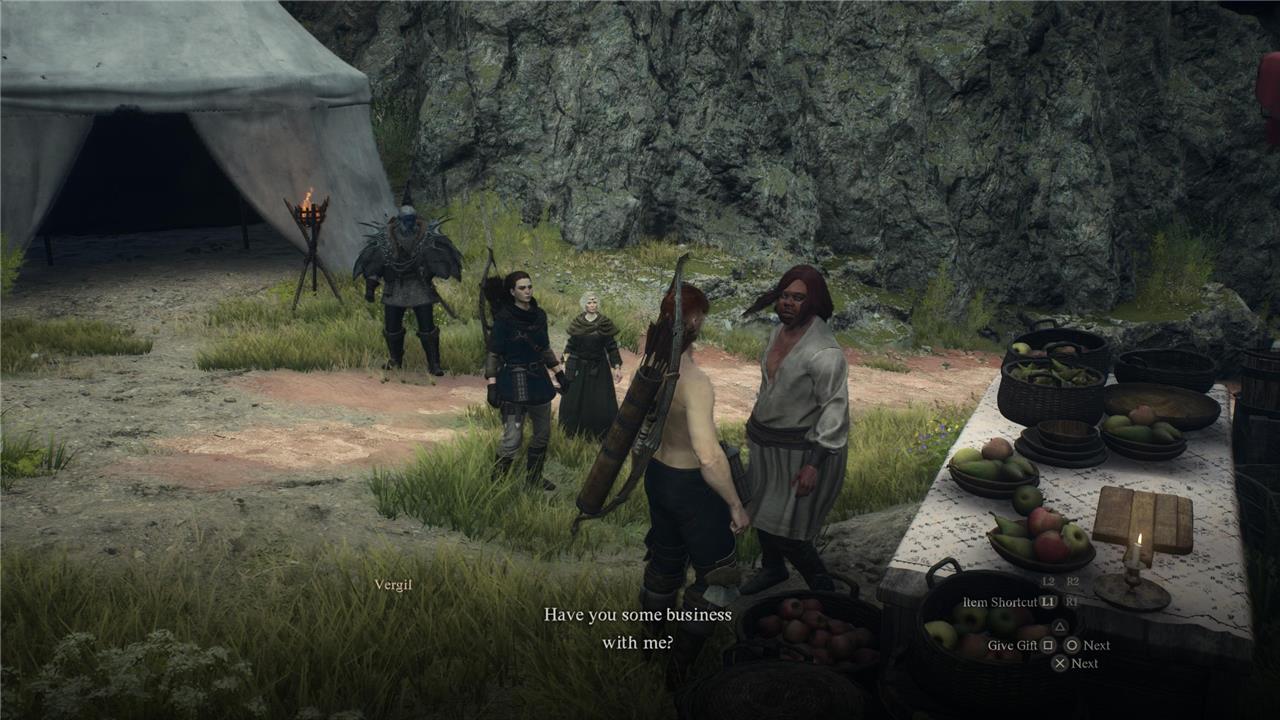
Is the Riddle of Differentiation a Devil May Cry reference? Yes, it is. The Sphinx will show you a character for you to find and take to her. According to our testing, you’ll be shown either Dante or Vergil. And they look identical save for hair type: Dante has straight hair, Vergil has some mild waves.
To complete the Riddle of Differentiation in Dragon’s Dogma 2, find the NPC you’re shown and bring them back to the Sphinx.
Snap a screenshot of whoever the Sphinx shows you and use it as reference. Dante is in Checkpoint Rest Town on the Vermund side, while Vergil is located on the Battahl side. Capture your target with a Sealing Phial or grab them and use a ferrystone to teleport back to the portcrystal you placed near the Frontier Shrine (if you heeded our advice to place one there, that is).
Once you’re back at the Sphinx, drop Dante or Vergil on the altar in front of her and just chat to finish the riddle.
Riddle of Differentiation reward: Whimsical Daydream, a weapon for the Trickster vocation
Riddle of Recollection solution
The solution to the Riddle of Recollection in Dragon’s Dogma 2 requires you to recall how many riddles you have successfully solved so far. The Sphinx asks you to place a corresponding number of statues on or near the dais in front of her. For example, if you have answered nine riddles correctly, you must place nine statues. This riddle tests your memory of your progress through the Sphinx’s challenges. Completing it rewards you with the Unmaking Arrow, a powerful arrow that can kill instantly and triggers an automatic save upon use, so it should be used strategically near the quest’s end.
While the Riddle of Recollection might sound simple, don’t let it deceive you. The Sphinx will ask you to tell her how many challenges you’ve completed thus far. If you’ve been following the guide closely, you shouldn’t have failed any. But, in case you did and the Sphinx is still around in your game, take that into consideration.
In order to complete the Riddle of Recollection, you must deliver the Sphinx as many statues as riddles you’d solved up to that point.
I had completed nine riddles by this point, so I grabbed nine statues and took them to the altar in front of the Sphinx. It’s likely that the statues won’t all fit on top of the altar – this is fine, and the Sphinx will consider them anyway as long as they’re in front of her.
If you completed the first five riddles but are unsure about the second batch, you can look at the chests you’ve unlocked so far to complete the number. In case it’s worth repeating, the Riddle of Reunion does count for this, as it’s part of the ten riddles and, as such, has its own chest.
Riddle of Recollection reward: Unmaking Arrow, an arrow that kills anything in one hit, but automatically saves the game (unless you have a spare, do not use this, since you’ll use it to finish the “A Game of Wits” side quest)
How to open the final Sphinx chest in Dragon’s Dogma 2
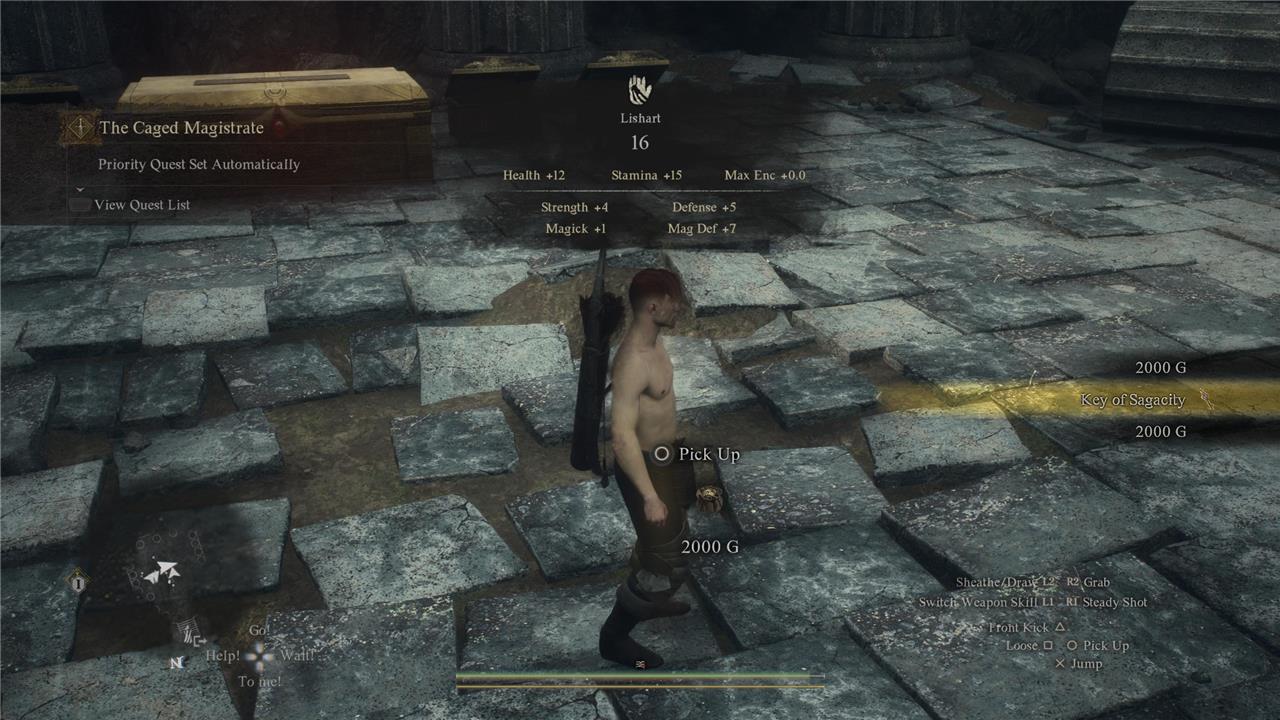
To open the final Sphinx chest in Dragon’s Dogma 2, you first need to complete all ten of the Sphinx’s riddles and defeat the Sphinx in the subsequent boss fight. After the final riddle, the Sphinx will flee the shrine, leaving behind a large gold chest that requires a special key to open. This key, known as the Sagacity Key, is obtained by defeating the Sphinx in combat. It is highly recommended to be in the Archer vocation and use the Unmaking Arrow to instantly defeat the Sphinx during the fight. Once defeated, use the Sagacity Key to unlock the final chest and claim your reward, which includes valuable items like the Eternal Wakestone.
Once you complete the tenth and final Sphinx riddle, you’ll have a short chat with the Sphinx, and she will flee the shrine shortly after. You’re likely to get an achievement or trophy for completing the quest, but this isn’t the end of it.
By this point, you should be using the Archer vocation. If you aren’t, reload to a previous save, look for a Vocation Guild, and then repeat the steps toward the last phase with the Sphinx.
To open the final Sphinx chest in Dragon’s Dogma 2, you have to kill the Sphinx. I had the bad luck of having the Riddle of Recollection as my last challenge, since this demanded me to run to the chest, grab the Unmaking Arrow, equip it, turn around, and shoot the Sphinx before she fled.
In any case, you’ll want to make sure the Sphinx has a visible health bar before you fire the Unmaking Arrow. Then go ahead and equip it – you should see a glowing arrow as soon as you start aiming with the bow. Shoot at the Sphinx.
She will be momentarily staggered, and reappear in spirit form. You’ll have another short convo with her, and after a moment, she will leave at last, but not without dropping a few items first. Between them is the Key of Sagacity. This, as you might have guessed, is used to open the golden chest.
Your reward for completing all riddles for “A Game of Wits” and defeating the Sphinx afterward is the Eternal Wakestone. This item can revive multiple NPCs in a single use, as opposed to a regular Wakestone, which revives one NPC at a time. The Eternal Wakestone is also the best way to combat a Dragonsplague epidemic in your game.
What are the most challenging Sphinx riddles in Dragon’s Dogma 2 and their solutions
The most challenging Sphinx riddles in Dragon’s Dogma 2 include:
-
Riddle of Futility: You must deliver a fragile vase to an NPC at the Mural Byway without breaking it. The vase is very delicate, and breaking it locks you out of this and future riddles for the playthrough, forcing a redo from earlier riddles. A clever workaround is to teleport the NPC to the vase using a Ferrystone, then carry the vase to the NPC to complete the riddle safely.
-
Riddle of Differentiation: The Sphinx shows you an image of an NPC (either Dante or Vergil) and you must identify the correct one by carefully noting details like hair style and the scar on the eye. Then you must bring that NPC to the Sphinx to solve the riddle.
-
Riddle of Contest: This riddle requires defeating an enemy summoned by the Sphinx. While straightforward, the challenge lies in combat, and you can exploit the environment by staggering the enemy and pushing it off a cliff for an easy victory.
-
Riddle of Recollection: You must bring a number of stone statues corresponding to the number of riddles you have solved so far. This requires careful tracking of your progress and proper statue placement to succeed and earn the Unmaking Arrow reward.
These riddles test a mix of precision, observation, and combat skills, making them some of the toughest puzzles in the game’s “A Game of Wits” questline.
Which Sphinx riddles are considered the most difficult to solve in Dragon’s Dogma 2
The most difficult Sphinx riddles in Dragon’s Dogma 2 are widely considered to be the Riddle of Rumination (Remembrance) and the Riddle of Wisdom.
-
Riddle of Rumination challenges players to return to the exact location where they found their first Seeker’s Token within seven in-game days. This riddle is particularly tough because there are 240 Seeker’s Tokens scattered across the world, and each player’s first token is unique to their playthrough. It tests players’ memory and attention to detail in a way no guide can fully assist with, making it a true test of engagement with the game world.
-
Riddle of Wisdom requires players to find the Sphinx’s “parent,” which cryptically means hiring a specific Pawn named “Sphinx Parent” from a rare Rift of Fellowship. The rarity and specificity of this requirement make the riddle frustrating and difficult, as players must know exactly where and how to summon this Pawn, which is not intuitive and can be very confusing.
Other riddles, such as the Riddle of Eyes, are straightforward, while some later riddles involve tedious fetch quests or sacrifices that some players find annoying rather than challenging. However, the Riddle of Rumination and the Riddle of Wisdom stand out for their difficulty due to their reliance on player knowledge, memory, and specific game mechanics rather than simple puzzle-solving.