Monoco’s Break-focused setup in Act 3 turns every clash into a spectacle of timing and precision, where one well-placed hit can decide the flow of battle. Here’s how to shape her build for devastating breaks and relentless momentum.
Best Monoco build overview
Monoco’s best build in Act 3 focuses on maximizing Break damage while maintaining consistent support for team combos. Prioritize equipping gear and skills that boost Break Power, such as abilities enhancing stagger duration or damage bonuses on broken enemies. Pair Monoco with allies who can quickly exploit Break states, allowing her to cycle between heavy Break attacks and recovery phases smoothly. Balancing offensive stats with a moderate amount of defense ensures she can stay active through extended fights without losing efficiency.

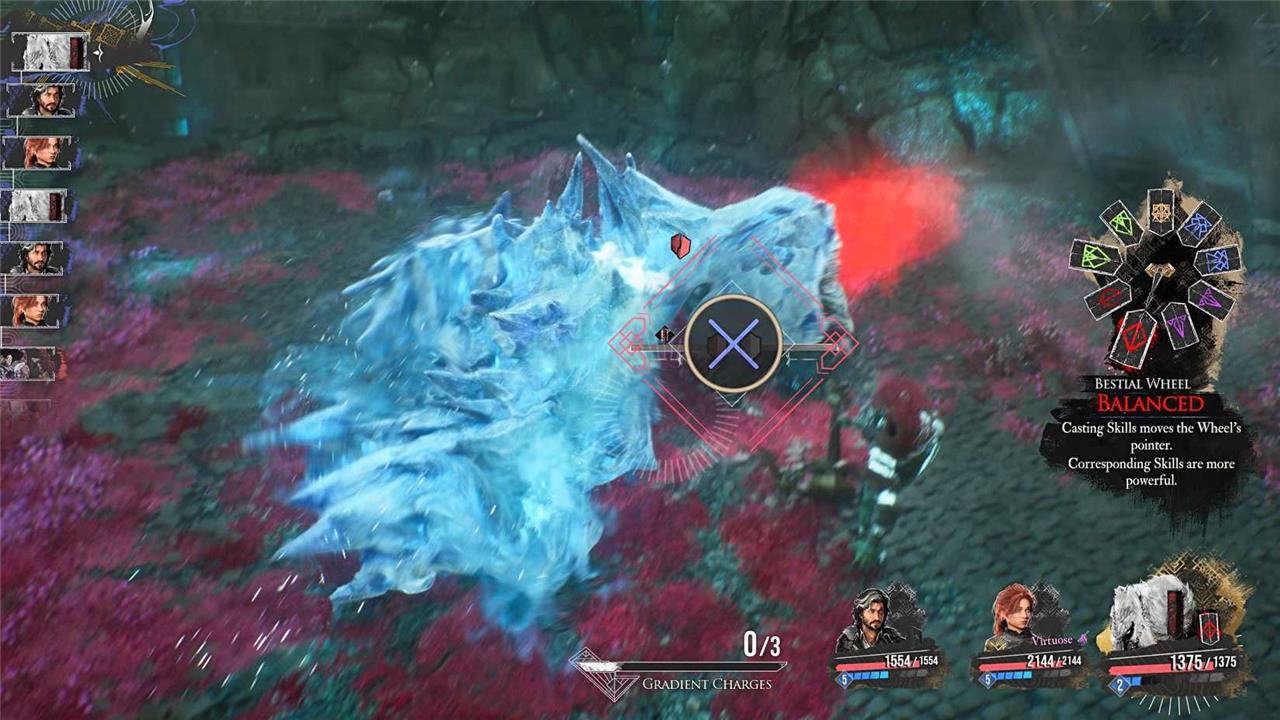
Monoco has an overwhelming number of possible builds, and you can really get lost in the weeds putting something together that manipulates his Bestial Wheel and leans into specific mask types. We aren’t doing that. Instead, our Monoco build opts for something more universally useful (and less reliant on counting wheel skips to function properly). It puts Monoco in a supporting role that gives something back to the party and lets you deal heavy damage and even apply debuffs without having to wait for the right turn of the wheel to pull it off effectively.
Until the start of Act 3, this build relies on Monoco’s starting weapon, the Monocaro, thanks to its helpful start-of-battle buffs. And while you could continue using it after Act 3, there’s another one locked behind an optional boss that makes this build sing: Urnaro. Urnaro pushes Monoco into a break role and puts the wheel on Almighty more frequently, which means any skill Monoco uses in that state, whether it breaks or not, is more powerful regardless of its mask alignment.
Best weapon for Monoco
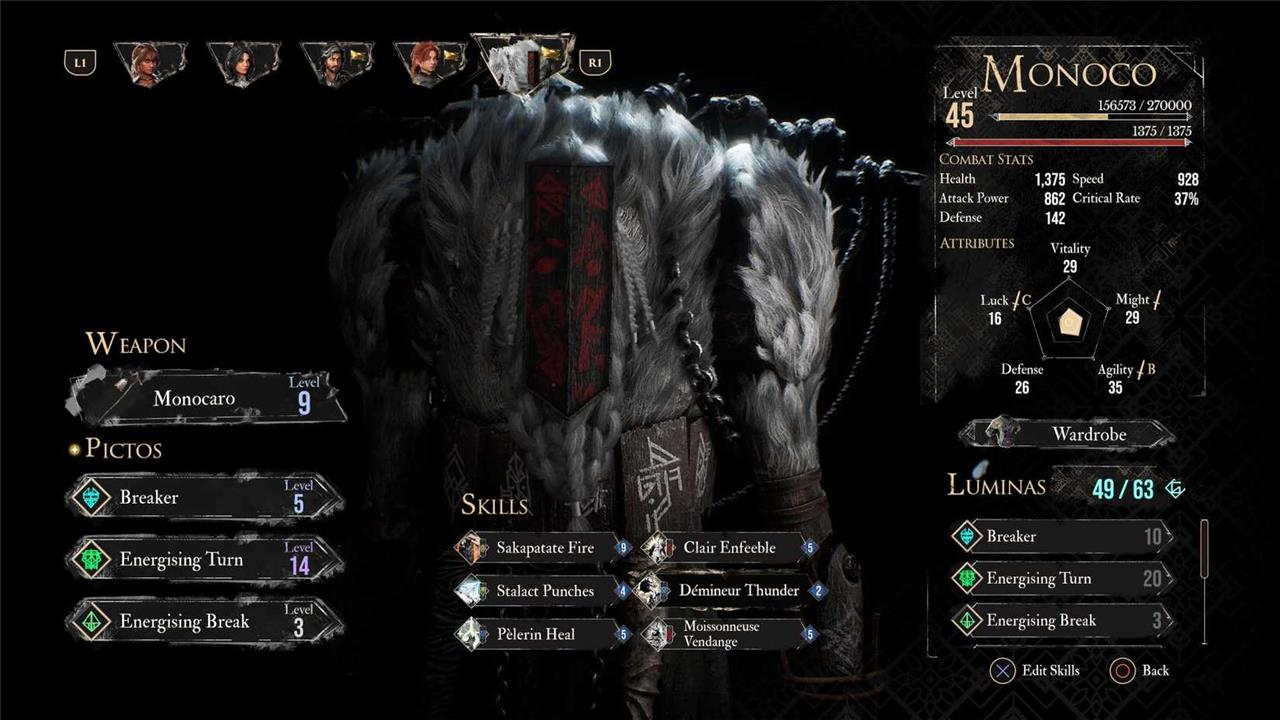
Monoco joins the party with his best, and easiest, weapon to use for the remainder of Act 2, Monocaro.
- Element: Physical
- Scaling: Agility (S), Luck (A)
- Level 4: Begin battle with the Bestial Wheel set to Balanced
- Level 10: Balanced Mask provides the Powerful buff to Monoco for three turns
- Level 20: Critical hits deal 30% more damage while the wheel is set to Balanced
This weapon is a general-use one that lets you get good mileage out of pretty much any skills you stick on Monoco. It’s also one of the only weapons that lets you start a fight with a buff that helps you end that fight more quickly and boosts any skill Monoco uses, whether it’s a Balanced one or not.
Once Act 3 begins, and you can travel to previously out-of-reach areas, head to Sky Island (in the air, east of the Forgotten Battlefield) and defeat the boss there. You’ll get Monoco’s Urnaro weapon for your trouble.
- Element: Earth
- Scaling: Vitality (S), Luck (A)
- Level 4: Set the wheel to Almighty after Monoco breaks an enemy
- Level 10: Almighty Mask gives two AP to all allies
- Level 20: Monoco deals 50% increased break damage
Just don’t forget to respec your chosen attributes if you do swap weapons.
Monoco has access to several powerful skills that deal high break damage, so you’ll be setting the wheel to Almighty on a regular basis with this weapon. Granting allies extra AP is always a good thing and lets you take more risks even with AP-plentiful setups like our Verso build, and all of Monoco’s skills deal increased damage when the wheel is set to Almighty. Everybody wins, except your enemies.
Best skills for Monoco

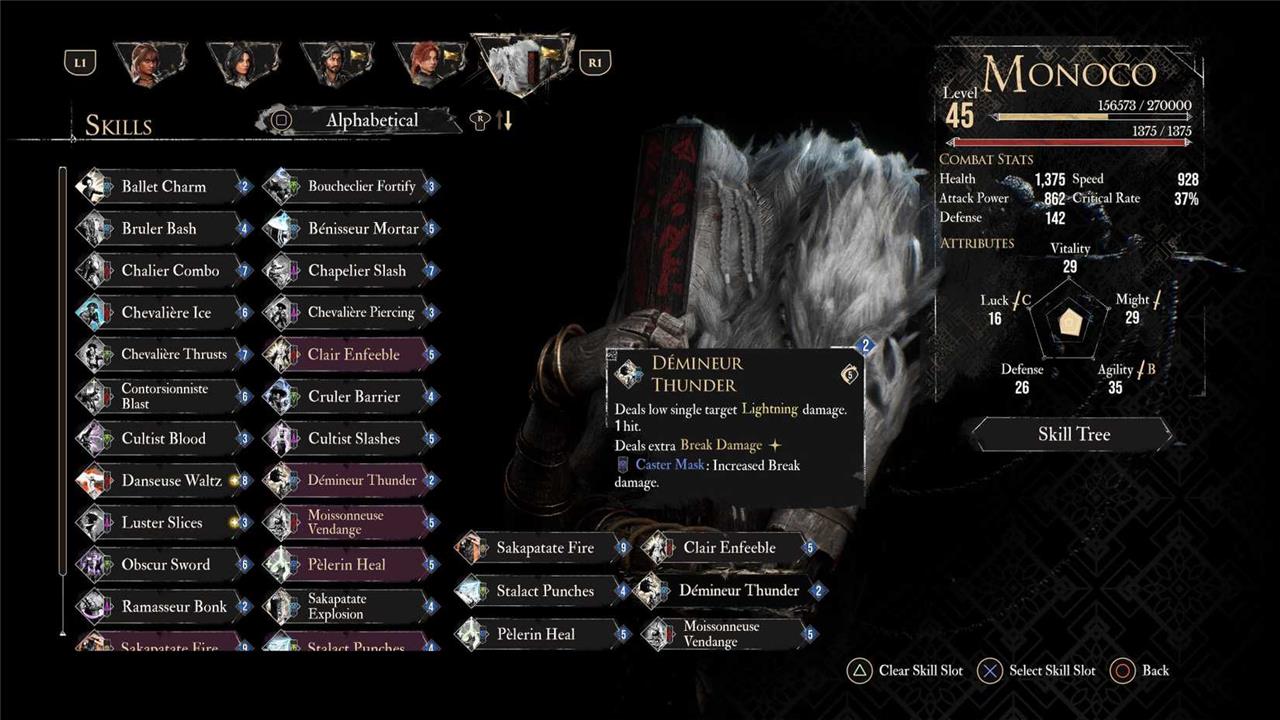
This build is break-focused, but there’s still room for Monoco’s non-break damage and support skills. Remember that Monoco must be active in the party (not just in the backup party) when you defeat an enemy for him to acquire a foot and learn that enemy’s special skill.
- Stalact Punches (Monoco joins with this skill)
- Moissonneuse Vendage (defeat a Moissonneuse enemy, found in the Visages area)
- Sakapatate Fire (Defeat the Ultimate Sakapatate, found in The Monolith)
- Clair Enfeeble (Defeat a Clair enemy in The Monolith)
- Demineur Thunder (defeat a Demineur in Flying Waters or The Monolith)
- Pelerin Heal (defeat a Pelerin in Frozen Hearts)
Stalact Punches is this build’s cornerstone, since it hits hard, costs comparatively few AP, and doesn’t require you to hunt down random enemies in hard-to-find places. Portier Crash gives you some extra oomph when the wheel is on Heavy, though, as a one-hit skill, it’s only worth using after you acquire the Picto that breaks the 9,999 damage cap.
Moissonneuse Vendage deals a lot of break damage several times and ignores elemental resistances, but the main reason it’s here is that it keeps AP costs down. This one costs five AP, so while you might get a bit more damage out of something like Portier Crash, Moissonneuse Vendage won’t stop you from using Monoco’s other powerful attacks.
Keeping AP costs down is a good thing, seeing as Sakapatate Fire costs a whopping nine AP. It’s worth the trouble, though. The skill deals extreme fire damage to all enemies several times, and applies three stacks of burn per hit – handy, if you’re not using a burn-based Lune or she’s using another skill that turn. If you’re struggling to maintain enough AP to use Sakapatate Fire regularly, consider swapping it for Braseleur Smash. It’s less explosive, but still burns enemies and only costs four AP.

Clair Enfeeble is an essential debuff that applies Powerless to all enemies, including bosses, and reduces the damage they deal. You’ll encounter an absolutely massive amount of Clair enemies in the last stretch of The Monolith, so it’s almost impossible to miss that. Almost all of Monoco’s Pictos and Luminas are for AP recovery and break damage, too, so this skill is a handy way to apply debuffs without having to rely on other character builds or give up Monoco’s slots.
Demineur Thunder is our pick since it doesn’t clash with anyone else in your party, and lightning resistance is comparatively rare. It does the same thing as Ramasseur Bonk, a popular choice for a low-cost break skill, but the latter’s usefulness depends on your party setup. If Sciel is part of Monoco’s party, she’s got dark damage covered, and with the number of enemies that resist darkness, you don’t need two dark attackers on the same team.
Pelerin Heal is a low-cost way to keep the party’s health up. Verso likely won’t need it if he’s on Monoco’s team, but it’s very helpful for Maelle and frees an extra skill slot for Lune (if she’s present).
Best Pictos for Monoco
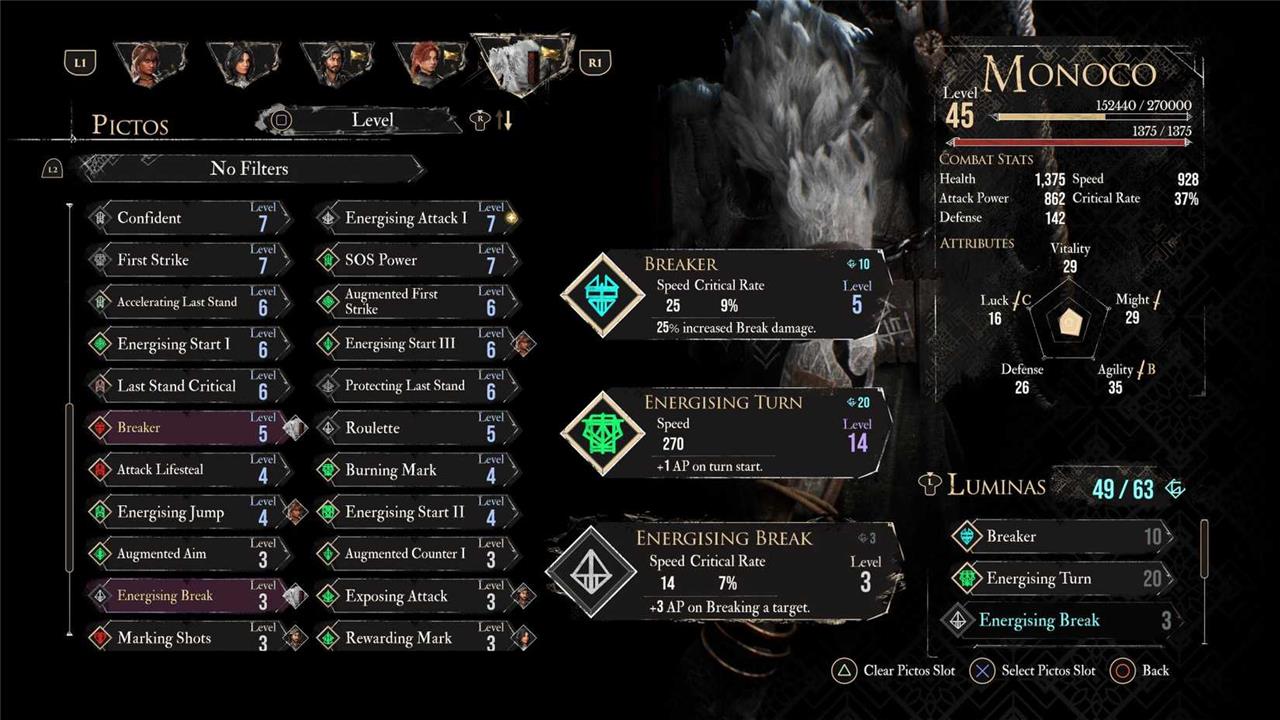
- Breaker
- Energizing Break
- Quick Break
These three increase Monoco’s break damage and give him buffs when he breaks a foe. Breaker is the most important to get early, since it bumps break damage by 25%. Quick Break lets you act again after breaking a foe, and Energizing Break’s two additional AP granted upon breaking a foe means you can use that extra turn to use a high-powered attack, even if you just used one to break said foe.
It’s also worth noting that, before the endgame, it doesn’t really matter if you have, for example, Energizing Break as a Picto or a Lumina. By the start of Act 3, the important thing is just having the abilities available.

Best Luminas for Monoco
- Painted Power
- Dodger
- Break Specialist
- Critical Break
- Dead Energy
- Energizing Turn
- Stay Marked
- Rewarding Mark
- Recovery
- Breaking Burn
- Burning Mark
Painted Power is essential, since it lets you deal more than 9,999 damage, though you won’t acquire it until the start of Expedition 33‘s third act. The break Luminas are fairly self-explanatory – more break damage is the core of this build – but we also added Breaking Burn to help apply burn without having to use Monoco’s fire skills. If he’s in a team with Verso, there’s a high chance at least one enemy will always be marked, hence why Burning Mark, Rewarding Mark, and Stay Mark are on the list.
How to optimize Monoco’s mask cycling in Act 3 builds
Optimizing Monoco’s mask cycling in Act 3 of Clair Obscur: Expedition 33 centers on the Bestial Wheel mechanic, which rotates through Balanced, Caster, Heavy, Agile, and Almighty masks to unlock upgraded skills with bonuses like doubled damage, extra AP, and break boosts.
Core Cycling Skills
Use low-cost skills to spin the wheel efficiently without wasting AP. Abbest Wind advances the wheel quickly for bypassing weak masks, while Benisseur Mortar shifts to Almighty Mask on marked targets. Chapelier Slash and Bruler Bash provide stable rotations with added Defenseless or mark applications.
Weapon and Attribute Synergy
Joyaro starts turns in Almighty Mask and rewards parries with faster wheel advancement plus 30% skill-matching damage. Prioritize Agility for speed in cycling and Defense for survivability during rotations.
Pictos and Luminas
Incorporate Energy Master for AP on turn starts and Powerful Shield for burst after maintaining shields. Breaking Shock and Critical Break amplify outputs once in optimal masks like Almighty or Heavy.
Combat Rotation Tips
Begin with Energising Shell or free aim shots to position the wheel, then chain matching skills (e.g., Creation Void in Almighty) for AP gain and stuns. Leverage team marks from Maelle to force Almighty access; avoid damage to stack Joyaro’s 100% damage ramps over 5 turns.
What are the best skills for each Monoco mask in Act 3 builds
Monoco’s masks in Act 3 of Clair Obscur: Expedition 33-Balanced, Agile, Heavy, Caster, and Almighty-each enhance specific skills for optimal break-focused builds, enabling efficient cycling via the Bestial Wheel.
Balanced Mask Skills
Moissonneuse Vendange delivers high single-target physical damage over 3 hits and excels at breaking. Gault Fury offers low physical damage with Mark application to set up team synergy. Danseuse Waltz provides high fire damage boosted against burning targets.
Agile Mask Skills
Chevaliere Piercing pierces shields with 6 hits, scaling damage per shield on the target. Chapelier Slash deals high physical damage to all enemies while applying Mark.
Heavy Mask Skills
Stalact Punches unleashes medium ice damage in 4 hits with high break potential. Portier Crash hits all enemies with high physical damage and break capability. Sakapatate Slam ramps damage against marked foes.
Caster Mask Skills
Sakapatate Explosion scatters medium lightning damage to random enemies, adding hits on crits. Benisseur Mortar deals medium ice in 3 hits and shifts to Almighty on marked targets.
Almighty Mask Skills
Creation Void stands out for devastating AoE damage and break synergy. All skills gain upgrades here, like doubled effects, making it ideal for finishers after cycling.
