Step into the shattered skies of Crumbling Farum Azula, Elden Ring’s final Legacy Dungeon, where ancient ruins hover in a maze of peril and mystery. From the moment you awaken on the broken bridge, every leap, shadowed corridor, and dragon’s roar tests your resolve. This guide will lead you through the labyrinthine paths, reveal hidden treasures, and prepare you for the epic confrontations that await in this breathtaking, treacherous realm-your ultimate challenge before the endgame.
In this Elden Ring guide, you find a thorough walkthrough of Crumbling Farum Azula, detailing the locations of items and enemies locations as well as where you find the arena to fight Maliketh, the Black Blade.
Crumbling Farum Azula walkthrough steps
To navigate Crumbling Farum Azula in Elden Ring, start at the Forge of the Giants Site of Grace after defeating the Fire Giant. Cross the initial bridge and drop down on the right side to enter the dungeon, picking up key items like Smithing Stones and Golden Runes along the way. Activate the Crumbling Beast Grave Site of Grace inside to enable fast travel. Progress carefully through the maze-like ruins, dealing with Azula Beastmen and avoiding or fighting the Farum Azula Dragon, which guards valuable smithing materials. Use the multiple Sites of Grace scattered throughout to rest and plan your approach. Continue through the Dragon Temple area by navigating floating ruins and defeating skeleton enemies, collecting important upgrade materials and talismans. The path leads toward the final bosses, Dragonlord Placidusax and Maliketh, the Black Blade, marking the climax of this challenging Legacy Dungeon.
The Crumbling Farum Azula area of Elden Ring consists of multiple segments. In brief, you’ll need to navigate the following:
- Reach Crumbling Farum Azula
- Navigate the Crumbling Beast Grave Depths
- Explore the Temple-Facing Balcony and surrounding environs
- Reach the Dragon Temple Altar
- Take the Dragon Temple Lift
- Follow the corridor through the Dragon Temple Altar
- Make your way to the Dragon Temple Rooftop
- Head beside the Great Bridge
- Reach and defeat Maliketh, the Black Blade
Below, we break down every step in detail.
Crumbling Farum Azula location and how to access
Crumbling Farum Azula is a late-game Legacy Dungeon in Elden Ring, located far to the east of the main continent. To access it, players must first defeat the Fire Giant boss in the Mountaintops of the Giants region. After defeating the Fire Giant, head to the Forge of the Giants Site of Grace, rest there, and speak to Melina. Choose the option to burn the Erdtree, which triggers a cutscene and transports you directly to Crumbling Farum Azula. This area is a floating, challenging dungeon filled with powerful enemies and bosses, so it is recommended for well-prepared players at higher levels. Alternatively, a small detached section of Crumbling Farum Azula can be accessed earlier via a teleporter at the Four Belfries in Liurnia, but this only allows access to a limited portion of the island and not the full dungeon.
The Crumbling Farum Azula is a late-game region that you can only access after having defeated the Fire Giant at Flame Peak and going through a short dialogue with Milena.
(You technically pay a visit to this dungeon through one of the Three Belfries portals, but that’s to a side area and not full access as outlined in this guide.)
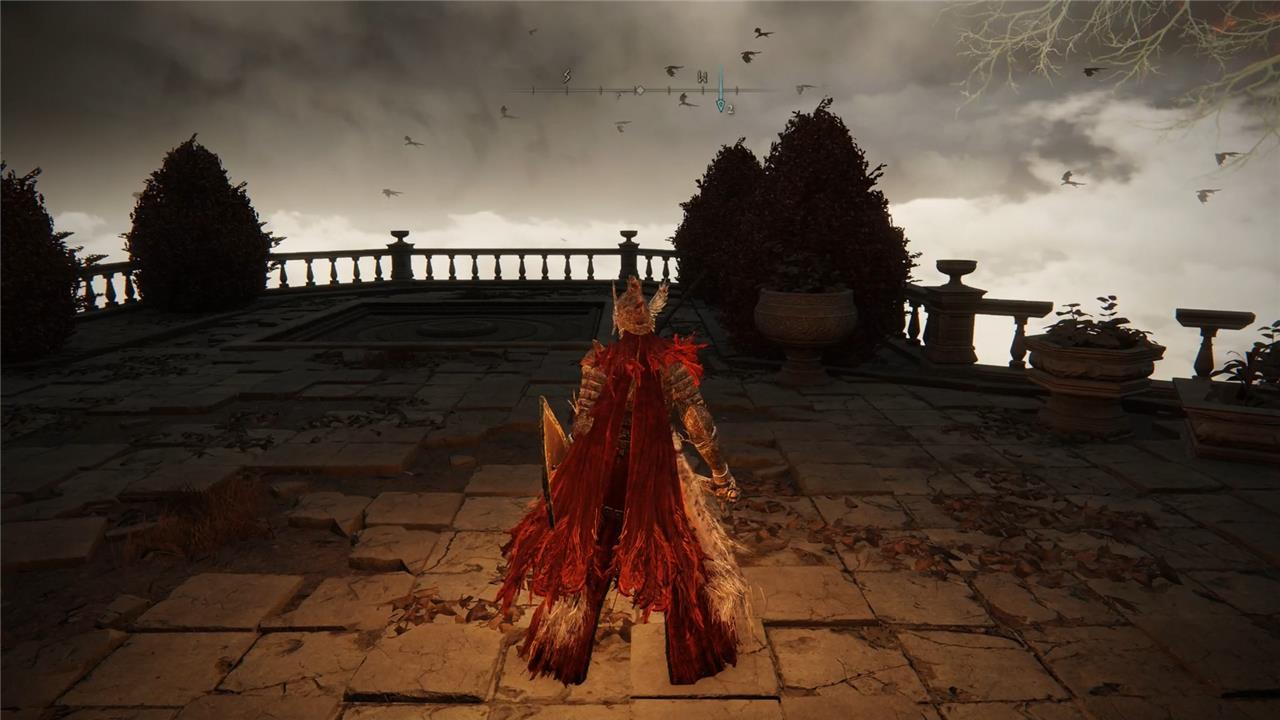
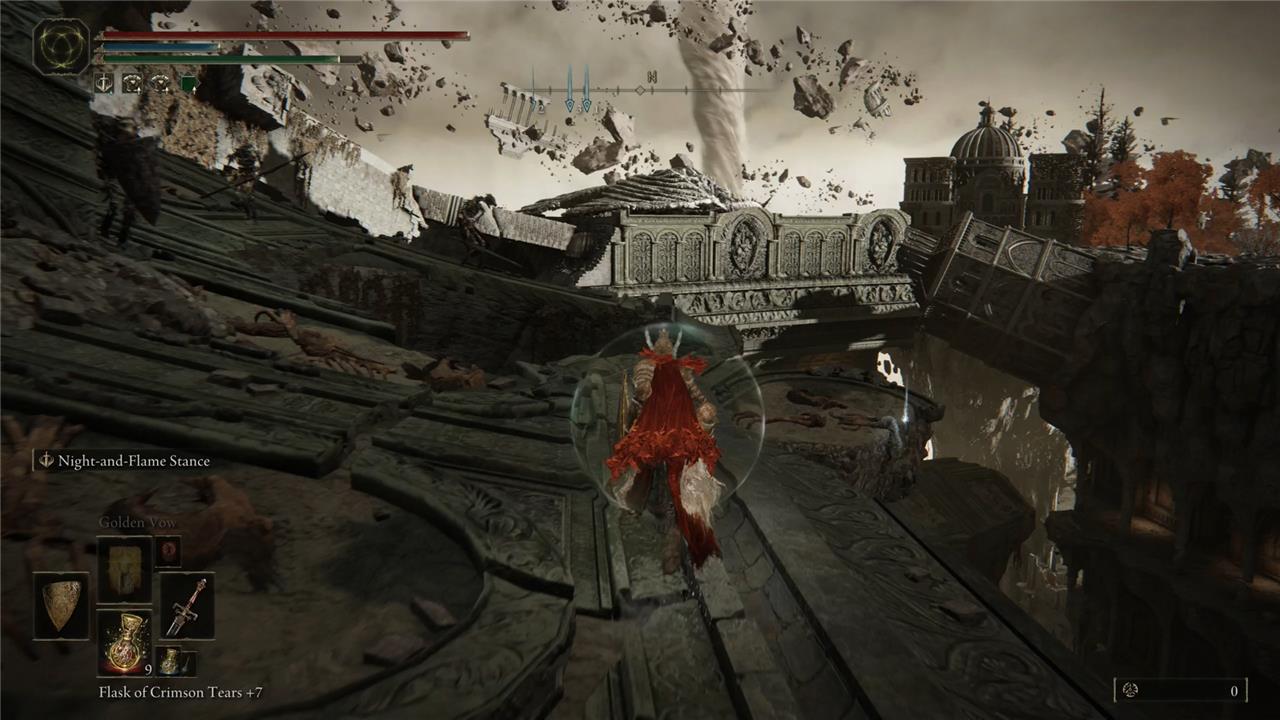
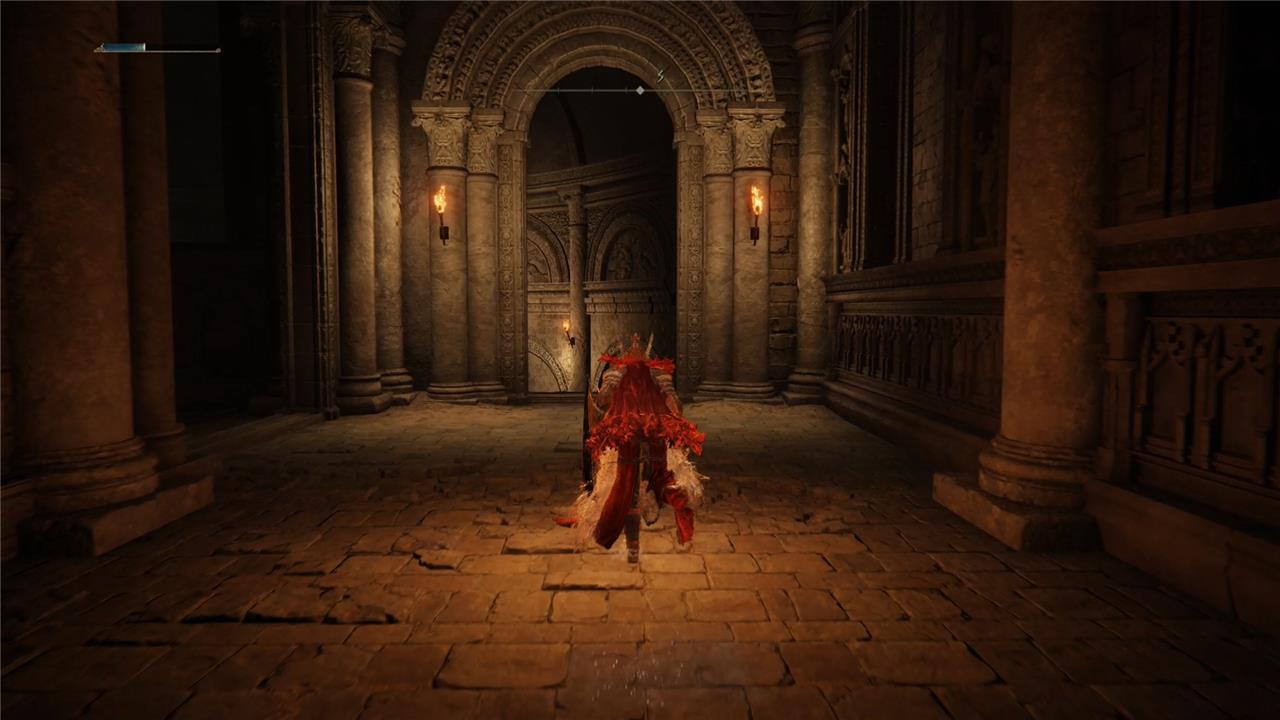
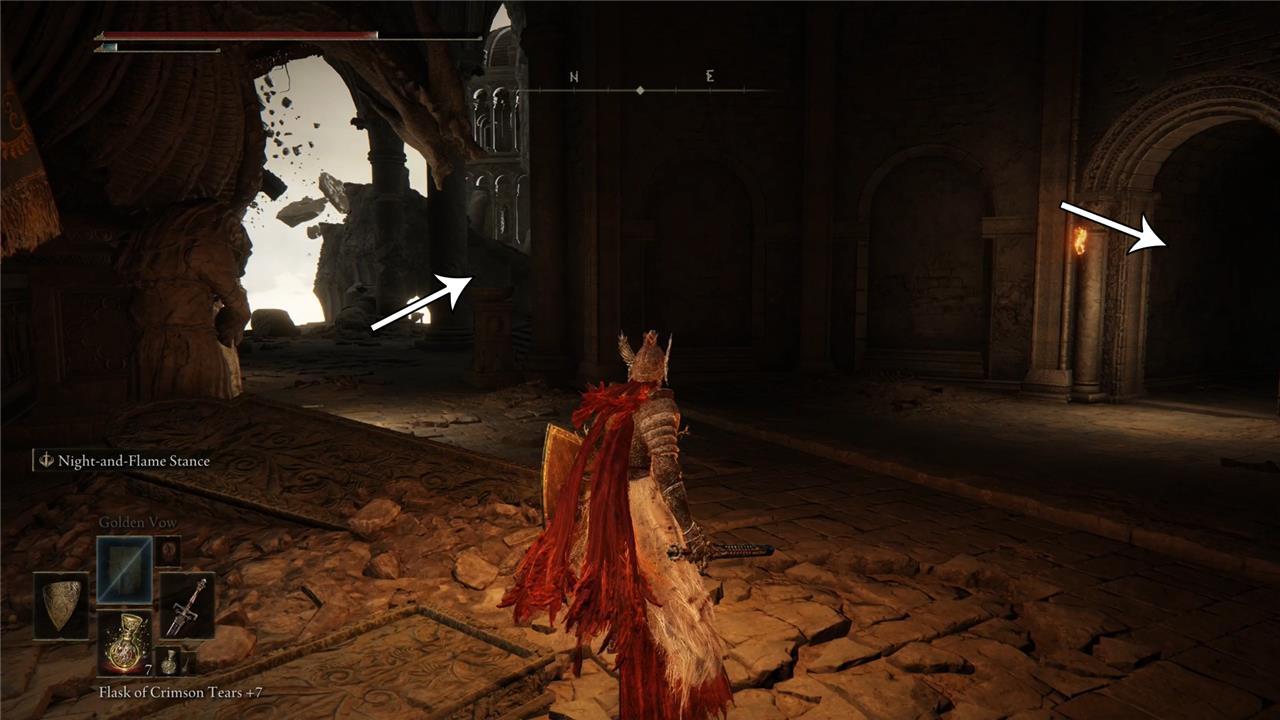
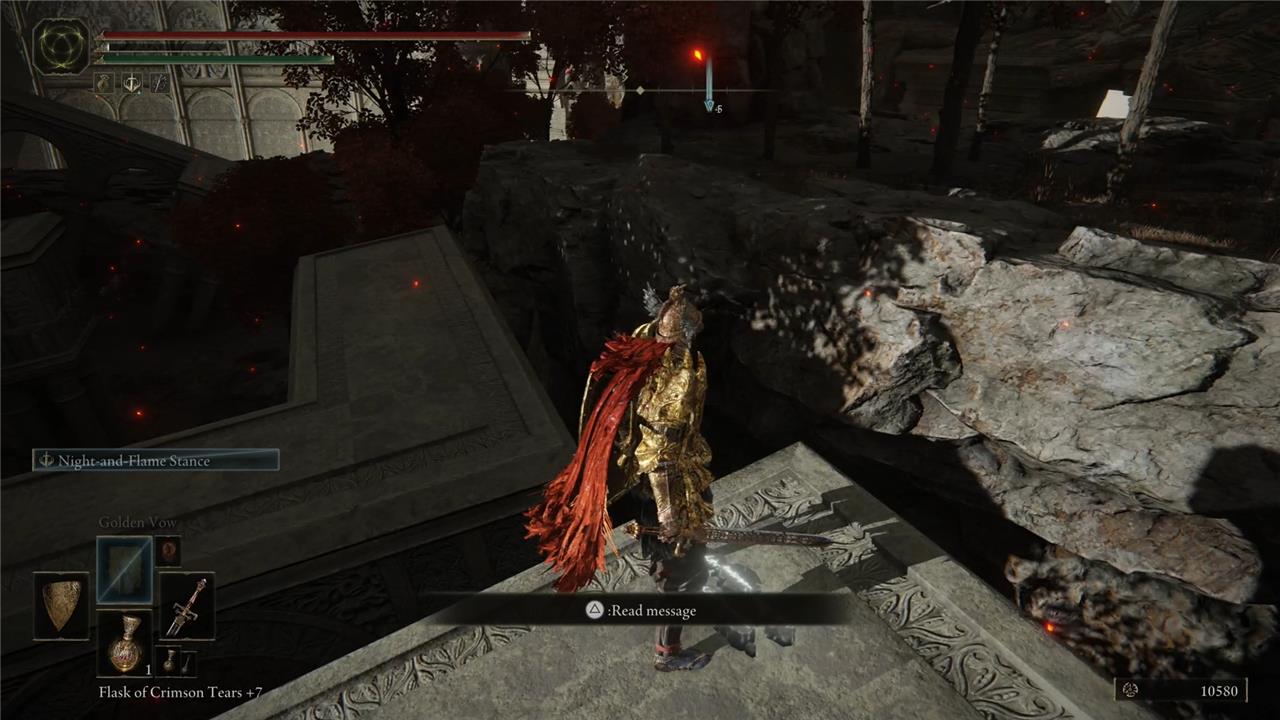
Once you awake after the cutscene with Milena, you will find yourself in Crumbling Farum Azula.
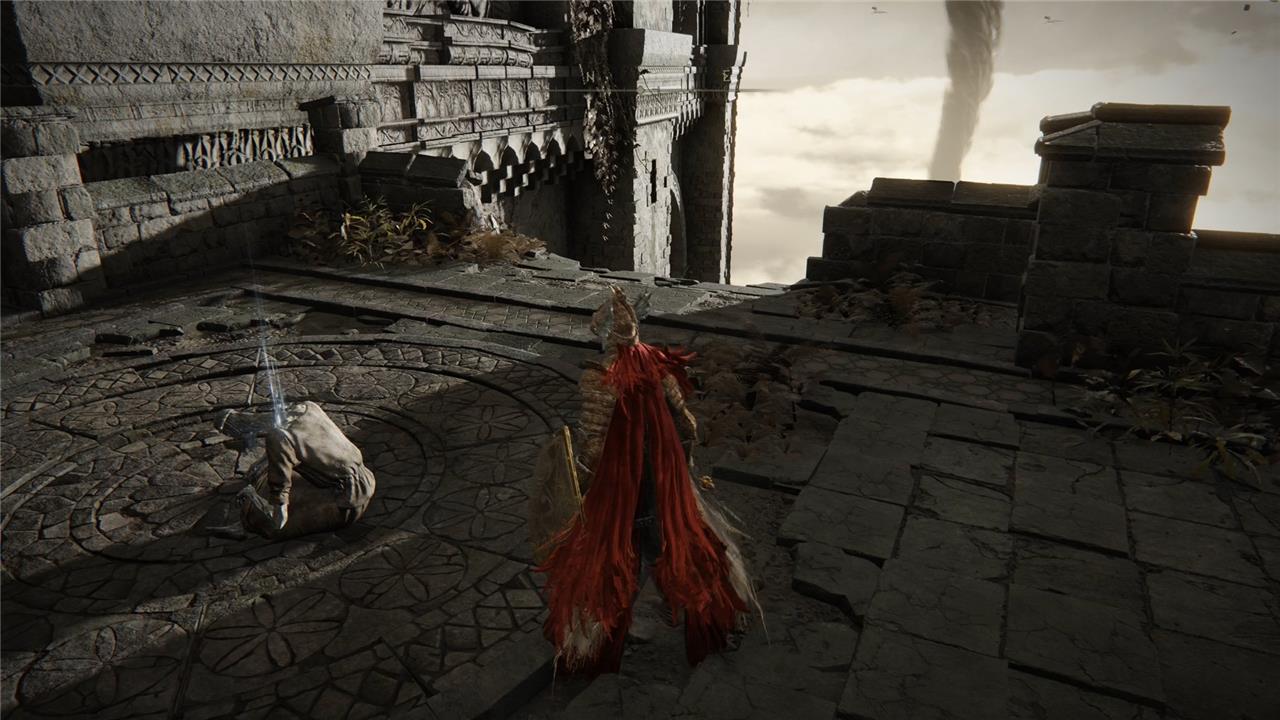
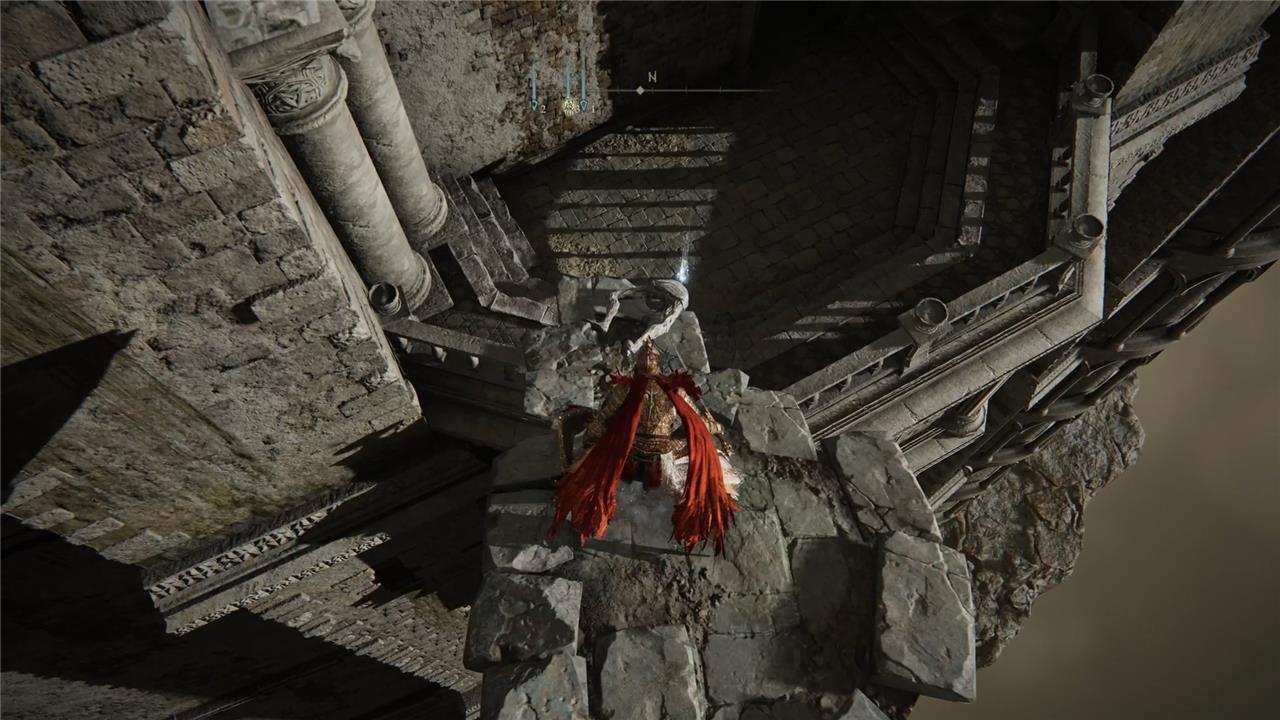
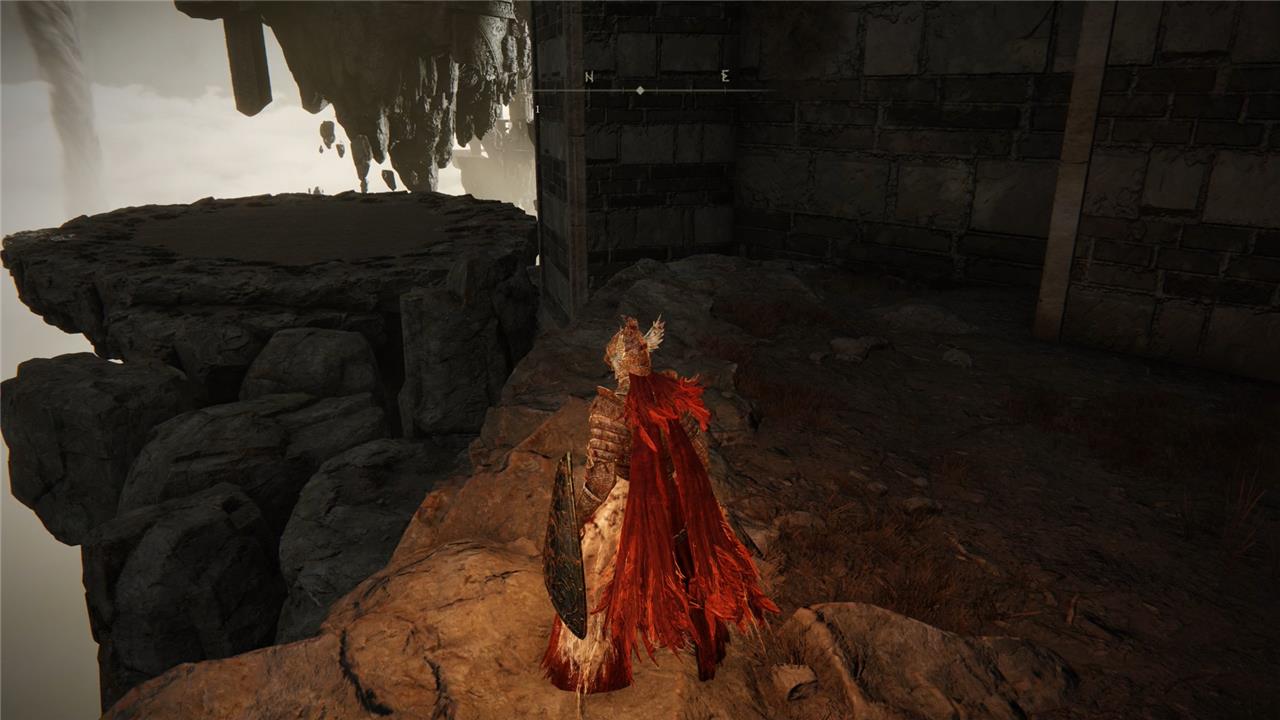
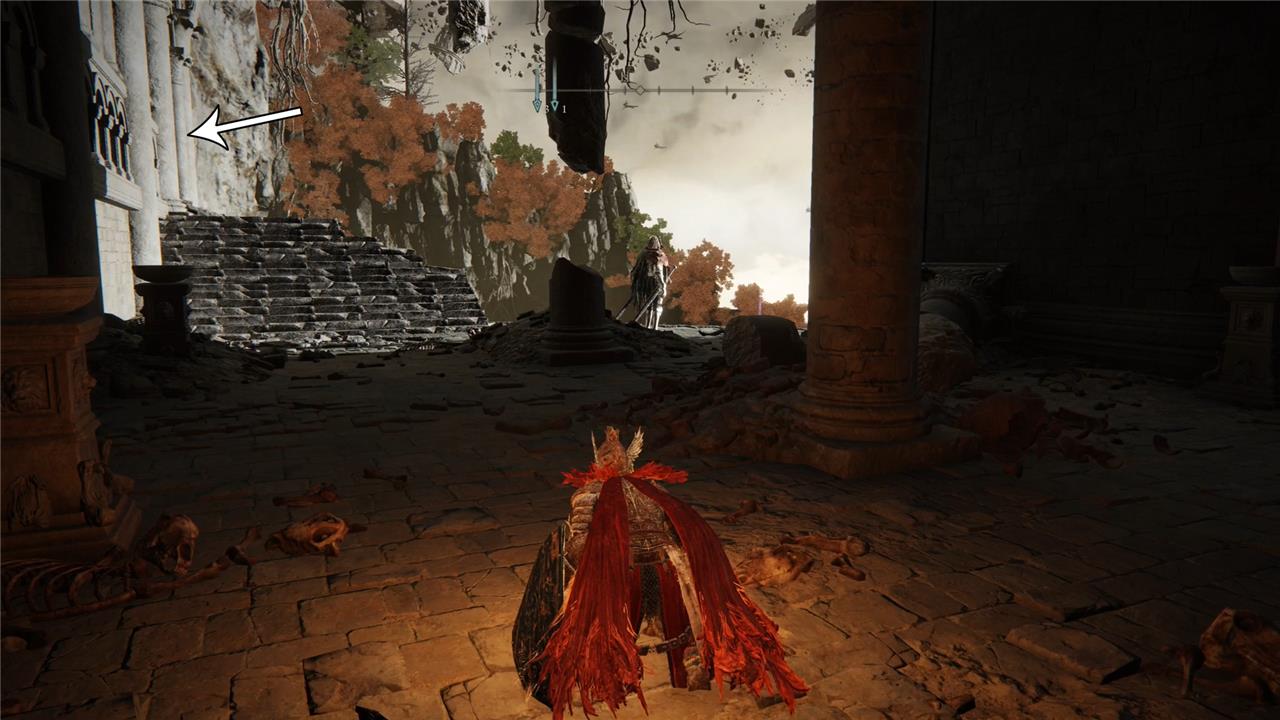
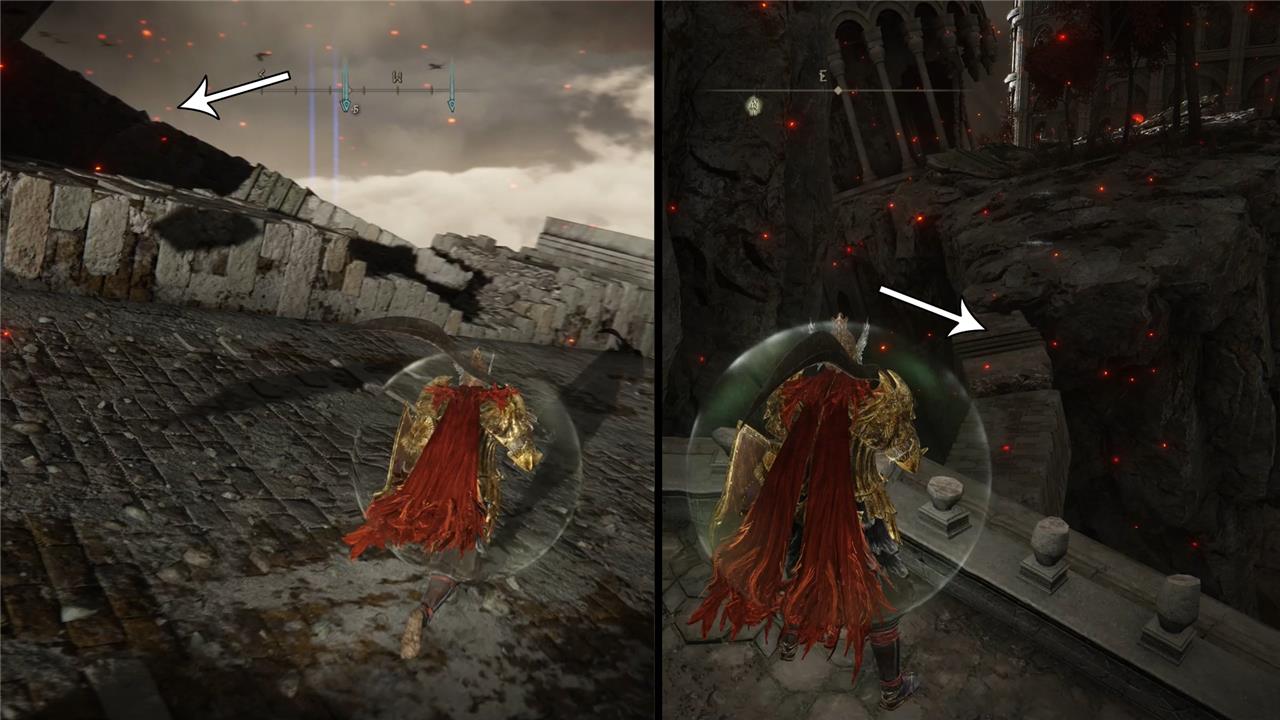
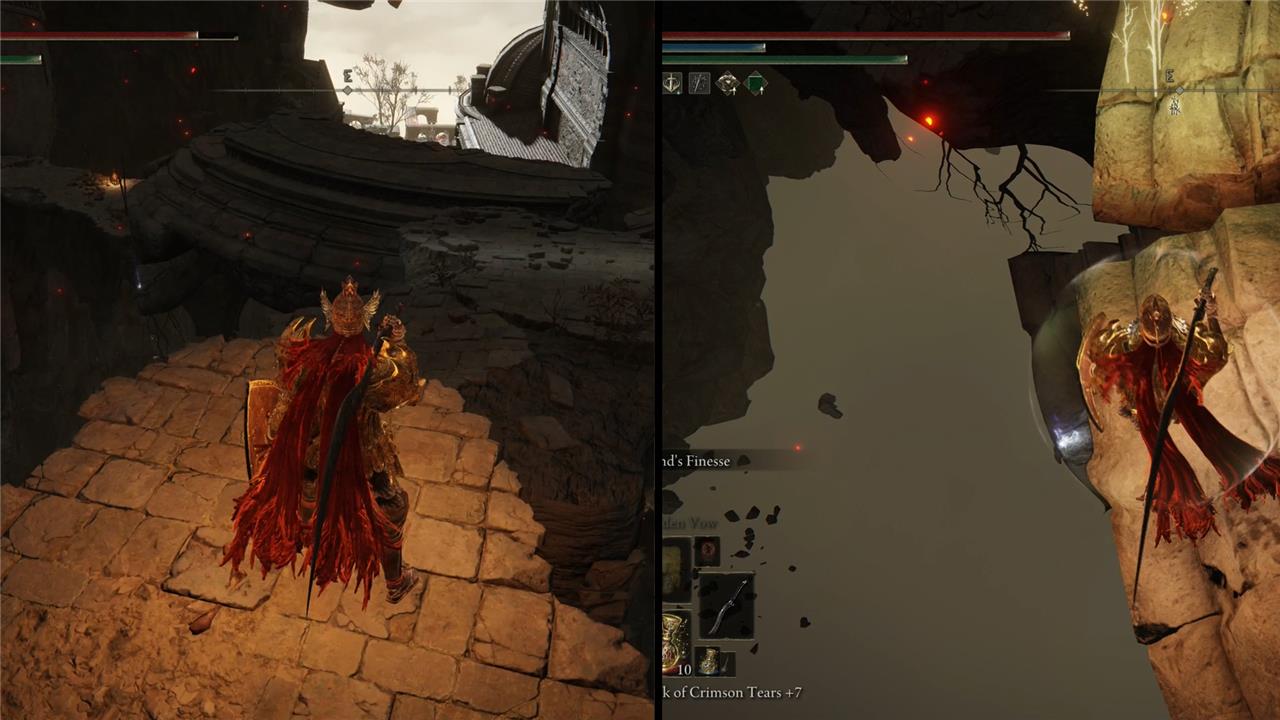
At the end of the path, you’ll find a body with a Smithing Stone [8]. There isn’t a straight path to move forward, so jump over the edge on the right side and jump your way to the entrance a little below. On your way, find a Golden Rune [9] on the last platform.
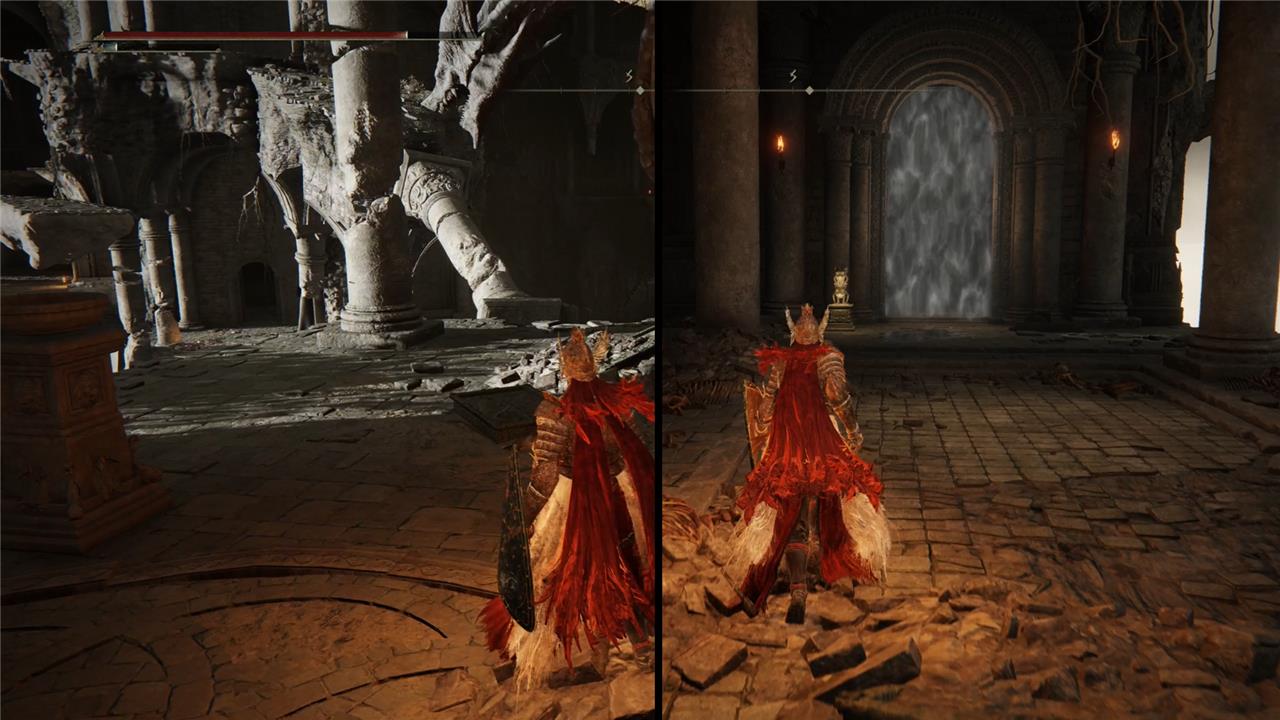
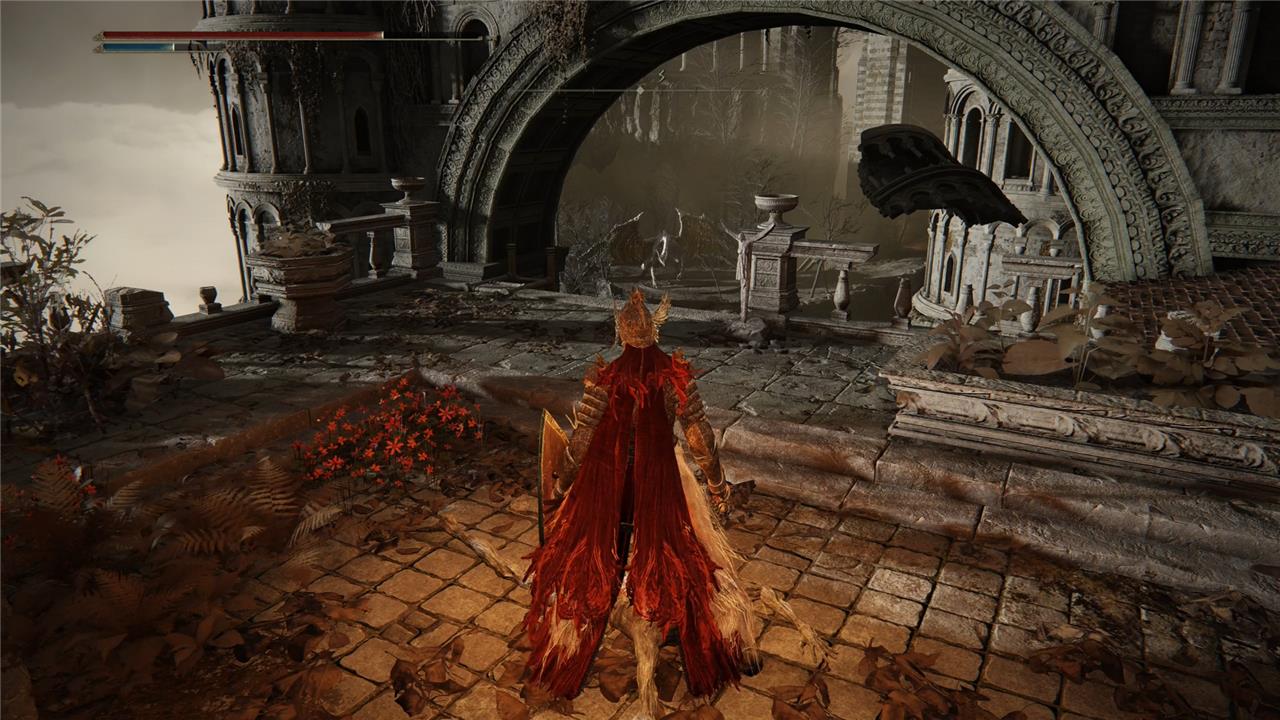
Keep following the only available path through a short corridor and descending some stairs. You eventually arrive in a room with five beastmen. While most of them won’t pay attention to you, one patrols the area. You can lure it to the path you came from, so you don’t have to face all of them at the same time.
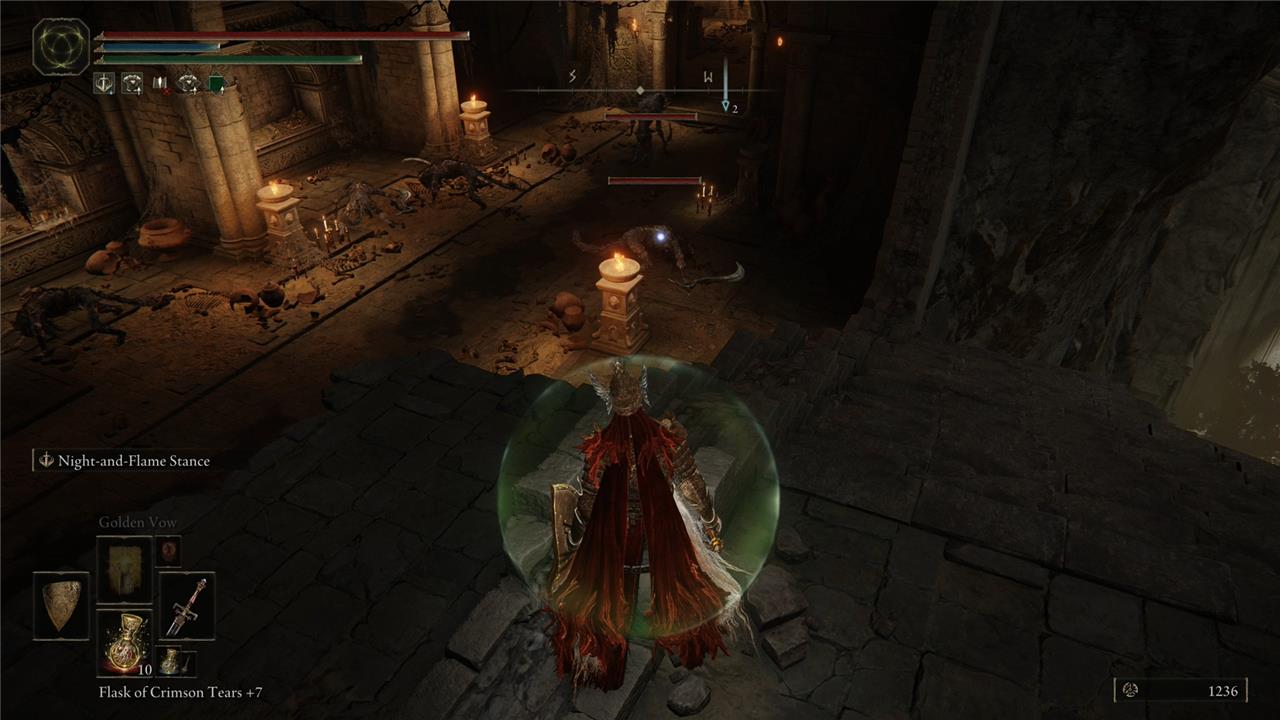
Beastmen are the most common enemy type in the region. While there are some variations that cast magic or throw boomerang-like weapons at you, most are capable of fast slashing sequences of attacks that can kill you pretty quickly. On the other hand, they are quite squishy, so the best strategy is to approach them from behind and quickly kill them.
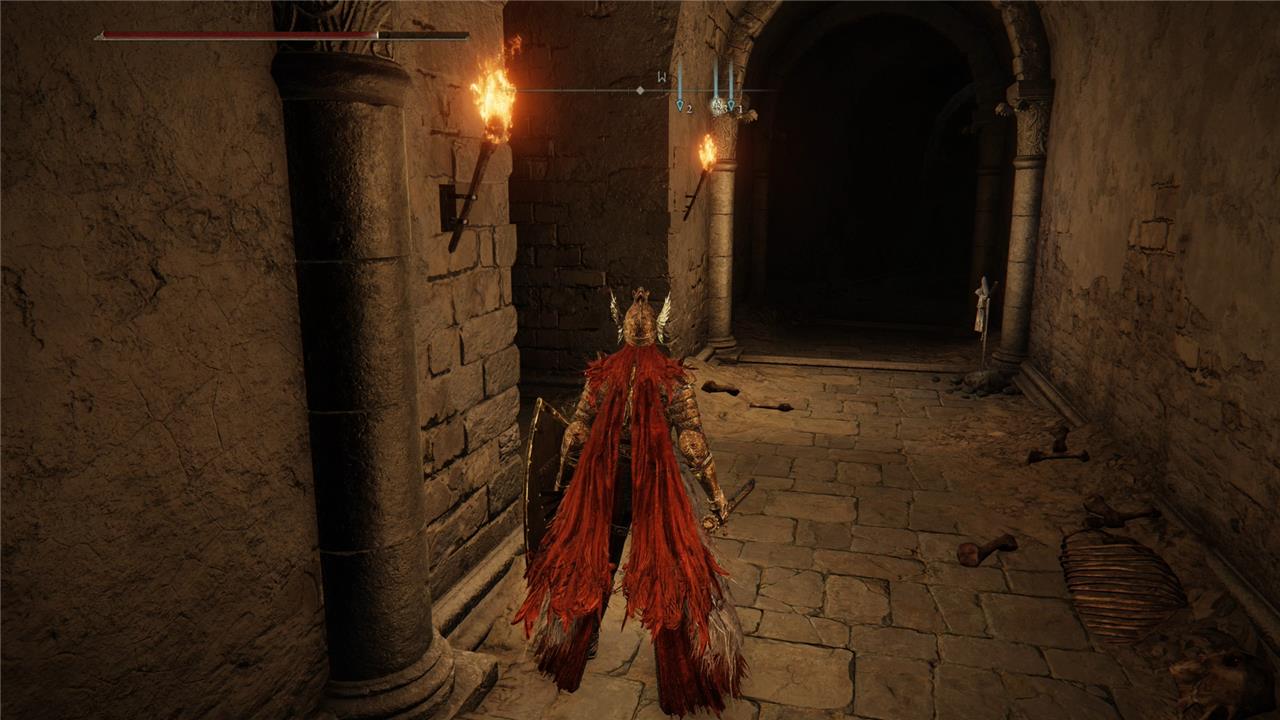
Once the room is clear, don’t forget to grab the Old Fang from a corpse.
Proceed to the next room where you find two beastmen and a Lightningproof Dried Liver on the right side of the room. Now, before you go ahead in the next corridor, turn left to find the Crumbling Beast Grave Site of Grace in Farum Azula where you should rest a bit.
Go back to the corridor and down the stairs to arrive at an opening area facing the tornado. Along the way, you will find a Smithing Stone [6], Smithing Stone [8] and a Dragonwound Grease at the edge. You need to reach the furthest side of it, but, as soon as you get to the middle of the way, an Ancient Dragon lands in front of you.
This is a tough enemy that not only attacks you with massive limbs but with powerful magic. Since defeating this enemy is not obligatory, you can just run past it toward an entrance on the left side that leads you to a corpse with a Smithing Stone [8] and the Crumbling Beast Grave Depths Site of Grace.
On the other hand, in case you feel like you’re ready to face the dragon – and you’ll end up finding more than one in Farum Azula – here are some tips.
First, they are strong against elemental damage and considerably resistant against physical damage. Staying below the dragon is the most safe strategy since it helps you avoid most of its attacks. While focusing on the hind legs makes it easier to avoid frontal moves, the ancient dragon has other attacks that can still hit you. Luckily, you can summon your Spirit Ashes to help you.
Crumbling Beast Grave Depths
The Crumbling Beast Grave Depths in Elden Ring’s Crumbling Farum Azula is a treacherous area filled with hostile Azula Beastmen and Lesser Wormface enemies. After descending to this lower level, players must navigate through a maze-like environment featuring ambushes and a lake guarded by multiple Lesser Wormface, including a larger, more dangerous one. Stealth and ranged combat are effective strategies here, as enemies can be lured or avoided to prevent overwhelming encounters. Key loot such as Smithing Stones, Golden Runes, and the Glovewort Picker’s Bell Bearing can be found throughout this area, making careful exploration rewarding. The Depths also serve as a critical progression point, leading toward the Dragon Temple and further challenges in the dungeon.
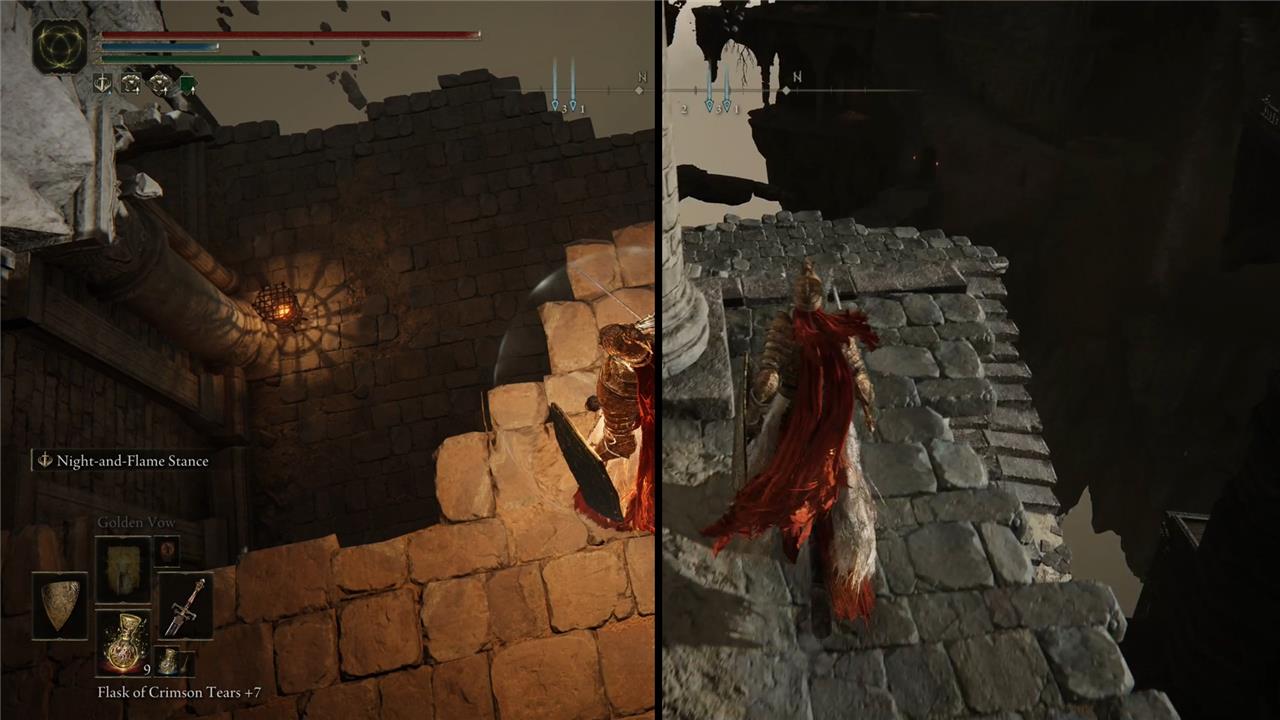
Leave the room with the site of grace and move forward to the next room to find a Smithing Stone [7], one patrolling beastmen, and another one lying on the ground. Proceed after dealing with the enemies by entering the corridor that will take you to the lower floor or use the window on the left side to access the upper floor by climbing the roof. We advise you to take the latter first.
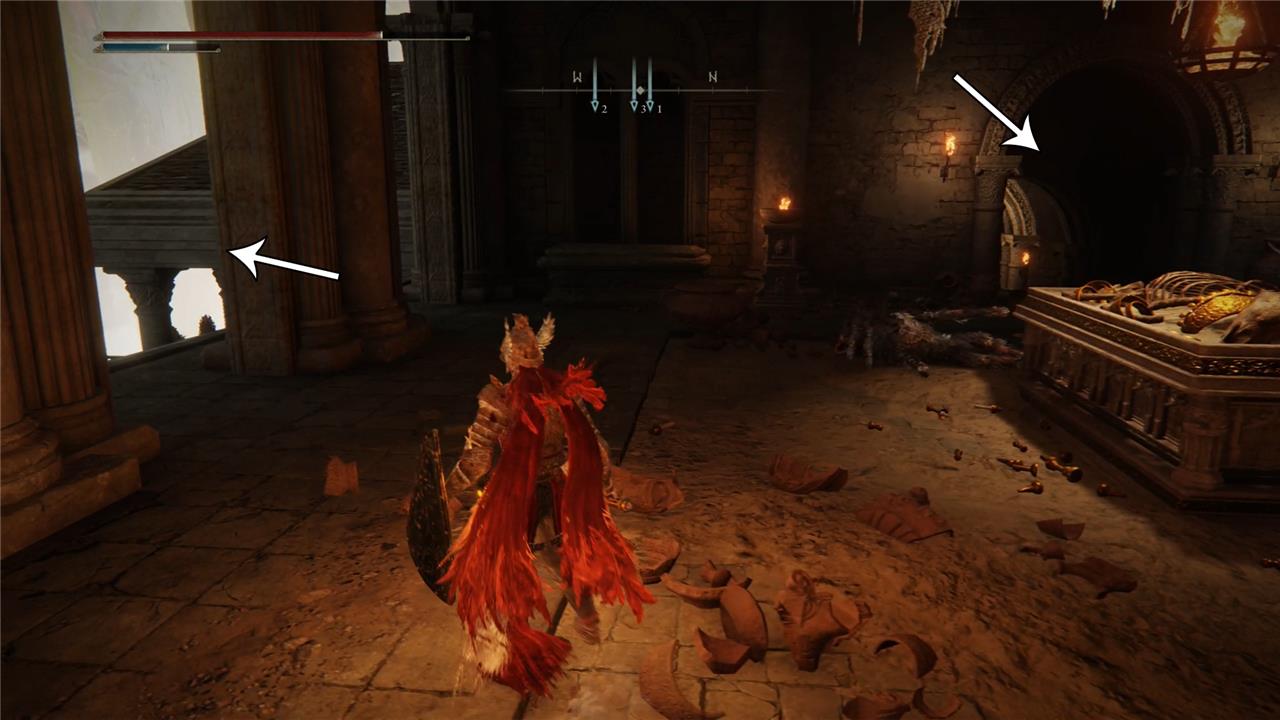
Through the window
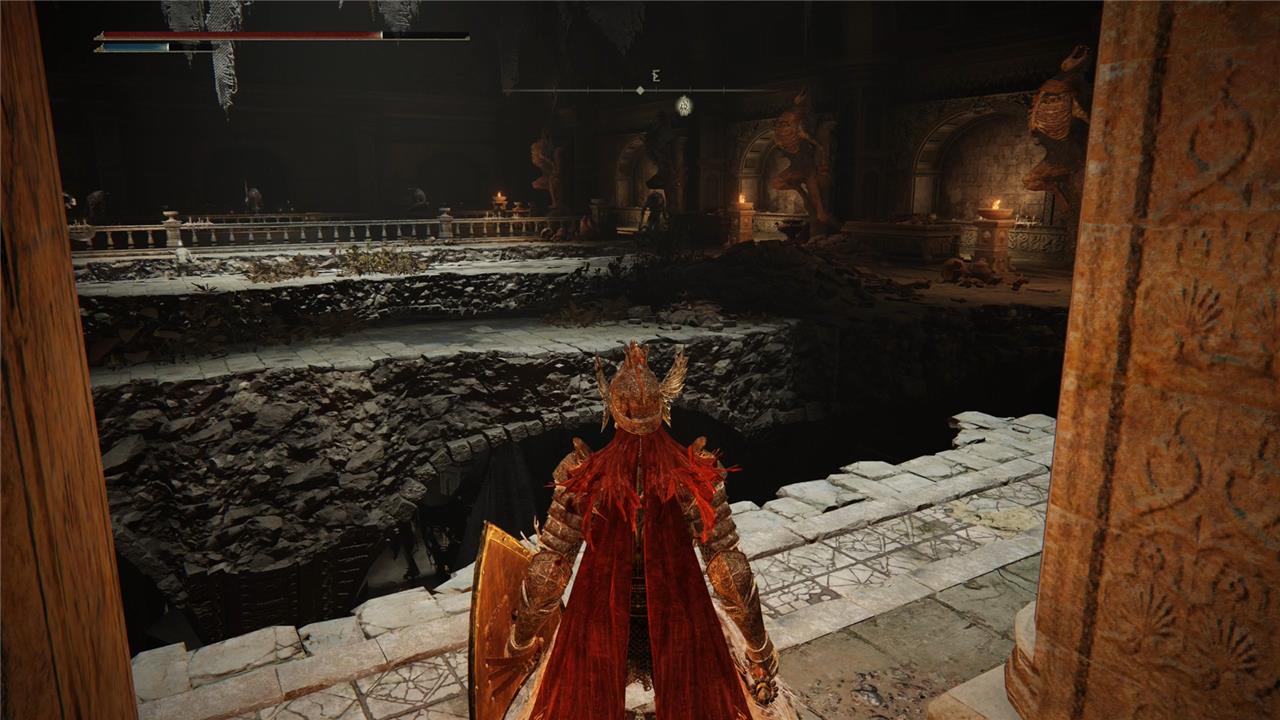
Get on the ledge of the large window and follow it to climb the roof right beside it. From there, access the upper floor. This room has two big openings on the floor that give access to the lower floor. Although you want to go there after grabbing all the loot in this room, beware of them so you don’t fall before you’re prepared.
There are six beastmen in this room. Watch out for their magic. After killing them, get the Gravel Stone on the left side of the room, a Smithing Stone [6] near to the edge of one of the openings, and a Great Grave Glovewort at the farthest side of the room.
Down the corridor
You can get to the lower floor using the short corridor in the room after the site of grace or via the second opening on the upper floor, from where you can jump to a bridge with two beastmen. We suggest starting from the initial room and following the corridor.
Once you leave the corridor, you’ll find some stairs that will take you to the lower part. Going right and following the corridors will take you to that bridge you saw from the upper floor, where you’ll have to fight a few beastmen. Going straight and descending the stairs will lead to 14x Lightning Greatbolts and get to the lower area.
The lower area is a large chamber with four beastmen, an Ancient Dragon Prayerbook, and three exits.
- The northwest exit leads to a body with a Golden Rune [12].
- The northeast exit leads you outside to the Tempest-Facing Balcony Site of Grace.
- The southwest exit leads you to an elevator and a body hidden on the right side with a Hero’s Rune [2].
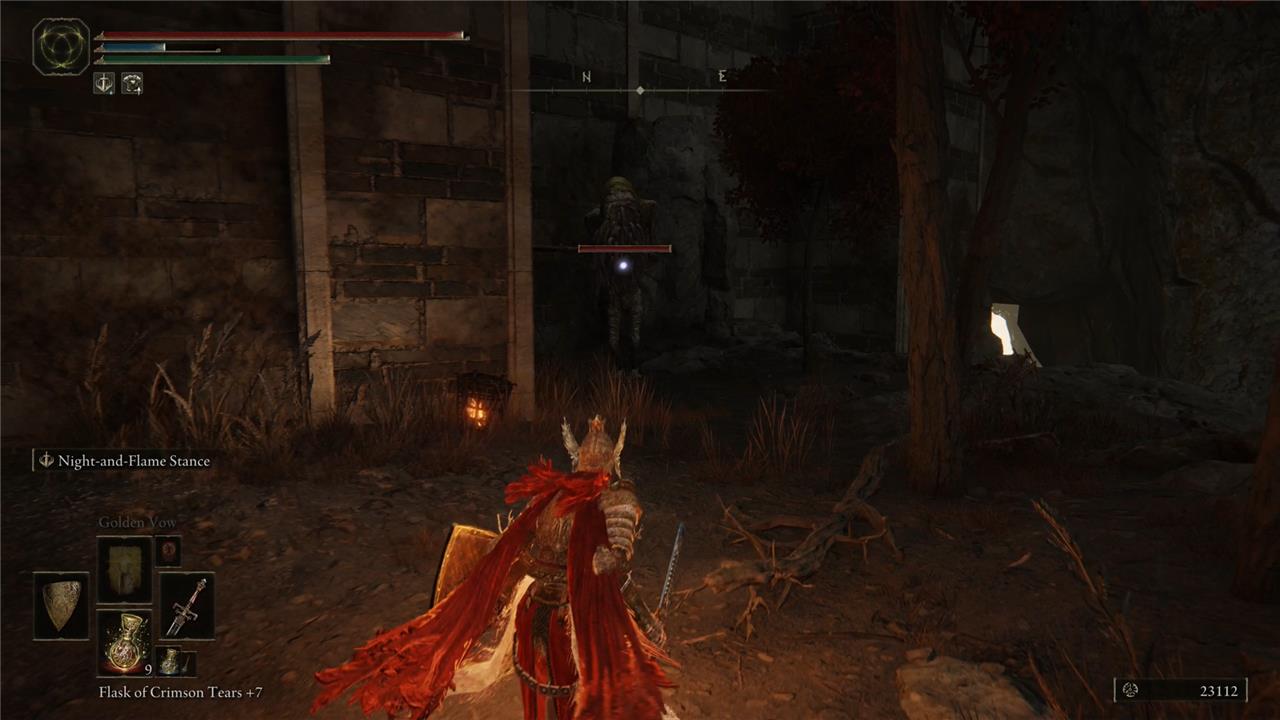
After leaving the elevator, you can go right or left. While the former takes you to an arena where there’s a Smithing Stone [8] – and a fight with an Ancient Dragon – the latter leads you to an area filled with Lesser Wormfaces, enemies that can afflict you with Blight, which kills you instantaneously if the bar is filled.
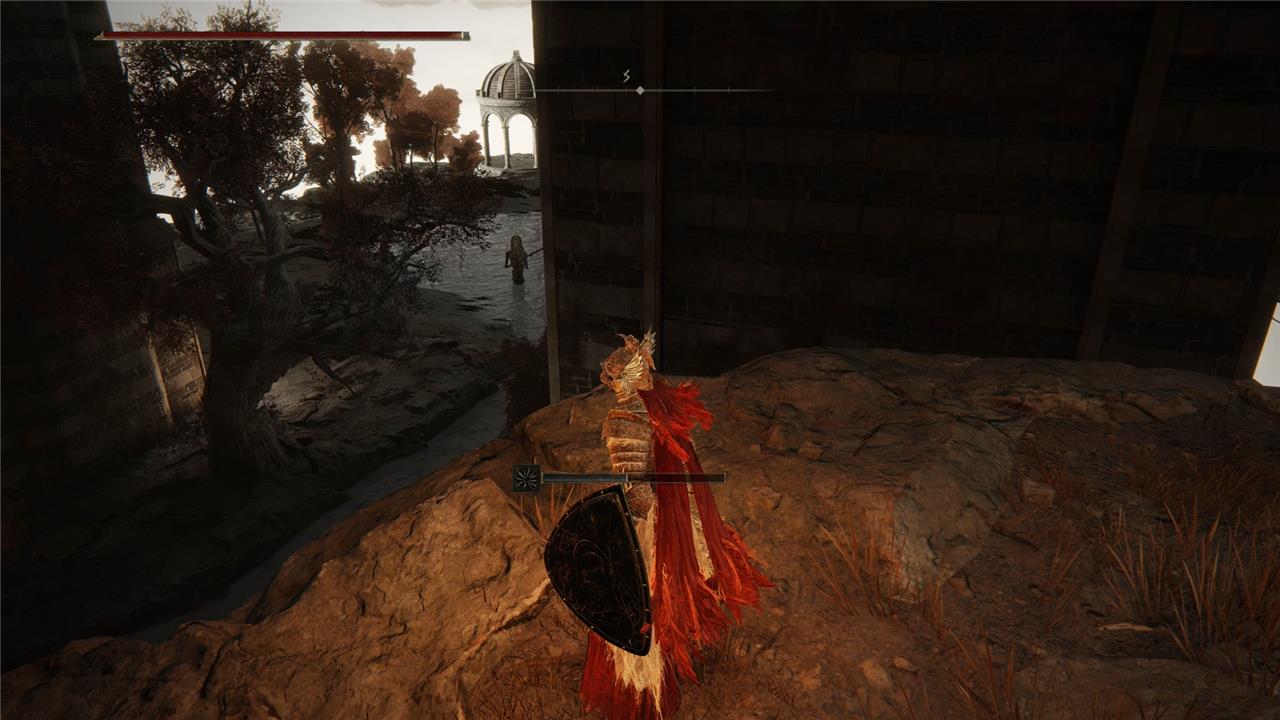
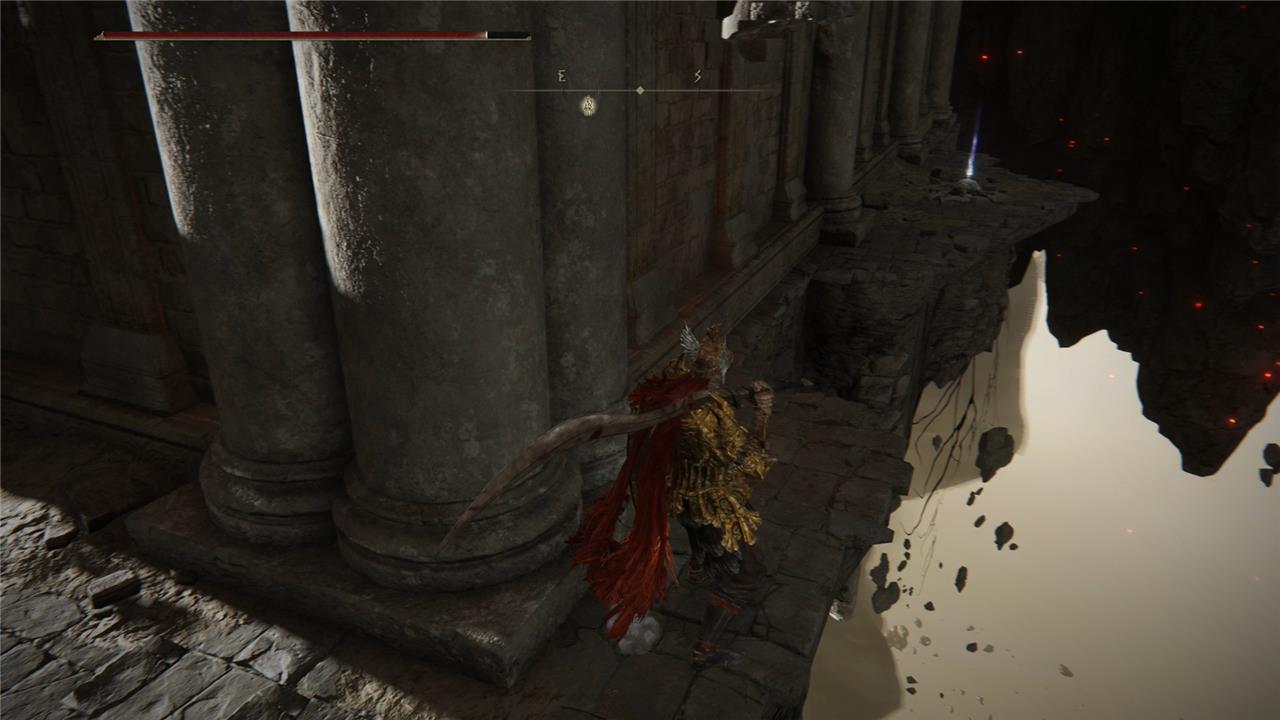
By following the left route, going south, keep close to the wall to avoid the enemies. Eventually, you get to a small lake with three Lesser Wormfaces, a Rejuvenating Boluses in the middle of it, and a gazebo on the farthest side of the area.
Stick to the left side of the area so you can reach the gazebo without being noticed. There, you find a Glovewort Picker’s Bell Bearing [3]. Keep going south to find a Lesser Wormfaces in front of a body with 5x Gravel Stones.
Tempest-Facing Balcony
The Tempest-Facing Balcony in Crumbling Farum Azula serves as a crucial Site of Grace and a strategic vantage point. Upon arrival, players can find the Somberstone Miner’s Bell Bearing nearby and must carefully navigate floating debris and rocky cliffs to reach a large platform below. This area is populated by numerous undead enemies wielding melee and ranged weapons, requiring players to ensure they finish off foes completely to prevent them from reviving. After clearing the enemies, players can explore the platform further for valuable loot and prepare for the next stages of the dungeon, making the Tempest-Facing Balcony a key checkpoint in the Crumbling Farum Azula walkthrough.
Now, back at the Tempest-Facing Balcony Site of Grace, go ahead, grab the Somberstone Miner’s Bell Bearing [4], and follow the path to your left. You will be walking over a sequence of floating structures to reach an entrance on the north side.

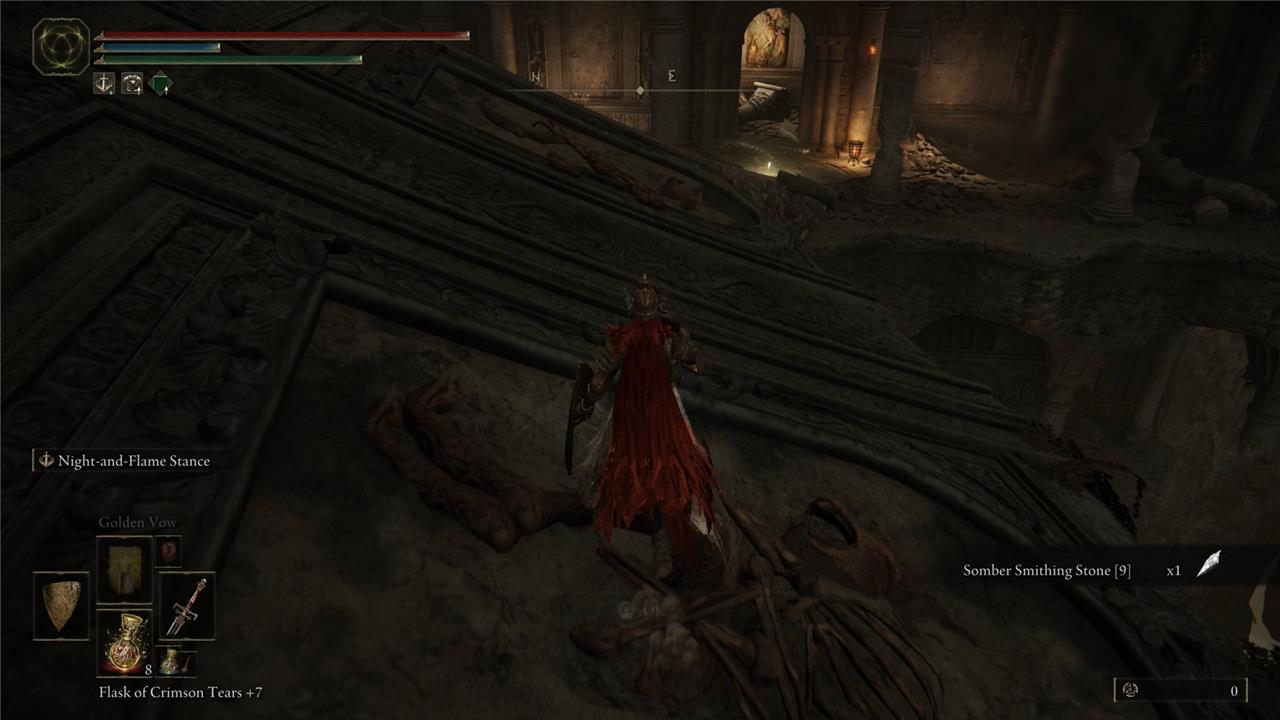
Jump to the lower area and keep going north. This area is filled with skeletons which you can simply ignore – but if you’re fighting them, don’t forget to hit them after they dismantle. There is a Somber Smithing Stone [7] on a platform ahead of you, and a Golden Rune [9] on the left side of this area, behind some pillars.
Take the improvised bridge – where you find 14x Golden Arrows – made of debris to the next area. Jump down and, before you keep moving on, go right and get into an opening on the floor. Look back and you will find a Golden Rune [10].

There are two corridors on the left for you to explore, some stairs to descend, and a skeleton waiting to ambush you.
Focusing on the main objective
In case you just want to progress through this area as quickly as possible, then you should take the first route. It’s a corridor that takes you to a balcony where you can sneak attack another skeleton and find a path on the left. Following it will take you to another platform with a ladder. Climb it, defeat the skeleton at the top of it, and look northeast to find another corridor where there is a Great Grave Glovewort But, grabbing the item triggers an ambush and three skeletons come from the ceiling. After defeating them, you should go back, stick to the wall on your left, and jump on the lower platforms.
You will get to a corridor where there’s a patrolling skeleton and 3x Gravel Stones at the end of it. You can now leave the corridor and you will be back to the segment before jumping in the hole. Take a Somber Smithing Stone [9] that is near the end of the corridor, and make your way to the Dragon Temple Site of Grace right in front of you.
Exploring the optional paths
If you want to completely explore this lower part of the area, go back to the hole. In the second door, there is a skeleton and a Golden Rune [2]. Go back and jump from the stairs to the next area. Once you have landed, you can go left to find a Banished Knight and a Rune Arc.

When it comes to the path on the right, first you go through a corridor where there is a patrolling Banished Knight. Kill it and get to the next room where you will find two Banished Knights and the Azula Beastman Ashes. If you leave the room using the door on the west side, there is a Somber Smithing Stone [9] to grab. On the opposite side of the room, you get to the Dragon Temple Transept Site of Grace, which is just beside the boss arena.
Back on track
From the Dragon Temple grace, in the next corridor, there’s a Smithing Stone [6] and stairs that take you to a new section from where you start facing Banished Knights. Around Farum Azula, you find three types of these enemies, each with unique abilities: Dual Blades, Lancers, and Sword & Shield. They are pretty tough foes, who can use skills similar to weapons arts, so try to face one at a time.
Once you descend the stairs, turn right. There are two paths for you to go here. First, go left, and enter a corridor with another Banished Knight. Up ahead, a second Banished Knight is standing still close to a body with a Stone Key. By entering the room next door, prepare to face a third Banished Knight in a short dead-end corridor where you can grab 2x Dragonwound Grease.
With all the loot collected, you should go back and take the stairs in the corridor instead of turning left. At the bottom of the stairs, there is a patrolling Banished Knight and another one in a room to your left. You won’t find items there, so you can simply ignore them and enter the room of the first boss encounter in Crumbling Farum Azula, the Godskin Duo.
Defeating them will unlock the Dragon Temple Altar Site of Grace.
Dragon Temple Altar
The Dragon Temple Altar in Crumbling Farum Azula serves as a key transitional area where players descend deeper into the ruins while encountering formidable enemies such as skeletal beastmen and Crucible Knights. From this altar, you can unlock the Dragon Temple Lift, which provides access to higher and lower sections of the temple complex. The area also offers valuable loot including Ancient Dragon Smithing Stones and Great Grave Gloveworts. Navigating through the Dragon Temple Altar leads you toward the Dragon Temple Rooftop Site of Grace, an important checkpoint before facing further challenges in the dungeon.
With the first boss encounter finished you can follow three different paths. On the south side of the room, you’ll find the Dragon Temple Transept Site of Grace. The northwest entrance takes you to a room with a Banished Knight and a body with a Golden Rune [12]. Explore both places before heading north.
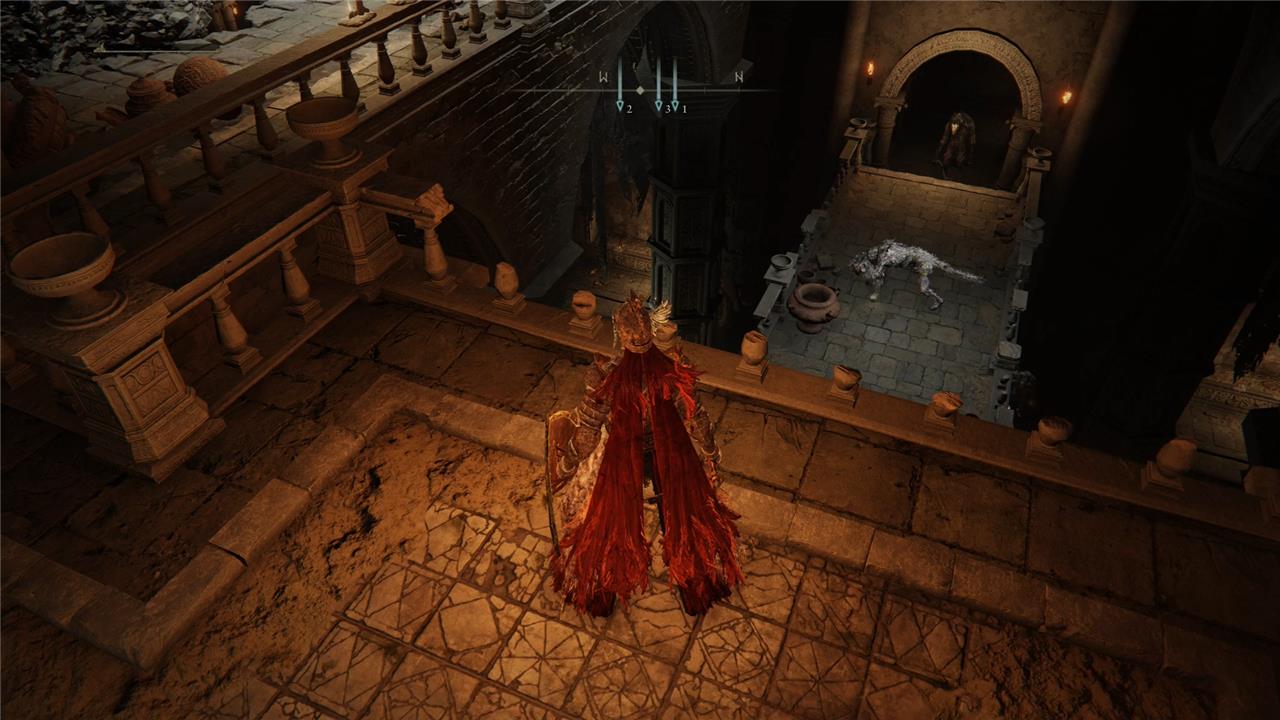
From this exit, you get to what seems to have been a room that now has no ceiling and only a part of the floor where you are at. To keep moving on, you need to access the lower floor. You can jump to the lower level or descend the stairs to your right. In either case, two beastmen await for you there. Defeat them and go to the next room with a dog and a Golden Rune [11].
In the next segment, you’re still walking around the remains of buildings and rooms. To proceed, you need to use the windows on the left. There are two dogs and one beastman in this area. Near them, an Old Fang. Before you go ahead, when you’re facing the next corridor, instead turn left and follow the tight ledge to find a Hero’s Rune [5].
Now you can go ahead, jump to the next area, and enter a corridor with dragon statues. Be careful with the patrolling beastmen. At the end of this corridor, you find a Smithing Stone [7]. And you have more paths to choose from.
Taking the stairs
If you take the stairs at the end of the corridor, you will access the upper part of this building, where there are some beastmen, a pillar on the left side that helps you reach another platform with a beastmen and an Ancient Dragon Scale Smithing Stone; and by going straight ahead, to your left, you find a Stonesword Key door.
In case you have one of these items with you, we advise using it to get to an elevator that takes you to the Dragon Temple Lift Site of Grace, which gives you access to a whole new area that you may want to explore before moving on.
Dragon Temple Lift
The Dragon Temple Lift in Crumbling Farum Azula serves as a key transition point within the dungeon. After reaching the Dragon Temple Site of Grace, players descend a set of stairs and enter a door leading to a terrace where the lift is located. Taking this elevator transports you to the Beside the Great Bridge Site of Grace, positioning you at the midpoint of the Great Bridge. Although advancing forward from the lift may seem like progress, it often leads in a loop back to earlier areas, so careful navigation is required to find the correct path toward the Dragon Temple Rooftop and further into the dungeon. The lift thus acts as both a shortcut and a strategic waypoint for exploring Crumbling Farum Azula’s complex layout.
Leave the room where the grace is located and head east. Right in front of you, there are some skeletons and a Lord’s Rune on a fountain. The same rule applies to these skeletons, so hit them after they are defeated or they will resurrect. Now, go left around the building to find more skeletons, a Smithing Stone [7], and a Golden Rune [12].
You eventually arrive at the other side of the building. Take the stairs to get to the upper part and go east to find a skeleton near to Smithing Stone [8]. Come back and go west, where you find a Golden Seed and a Rune Arc. If you follow the path on the left, you go down to an arena with a sleeping Ancient Dragon. In front of them, there’s a Smithing Stone [8]. Keep in mind that you don’t have to fight the dragon but they will leave if you get too far from the arena.
By going straight up ahead from where you got the Golden Seed, you can walk over two structures to reach the other side. Move on until you get to another sleeping Ancient Dragon. This one is way too tired to fight you if not attacked. Walk around it to find a Golden Rune [12] at their back and a walkway to the next platform. Go toward the southeast to find a Smithing Stone [7]. To get to the next platform, you need to use the walkway behind the large structure at the southwest of the platform. Once there, you need to jump onto a bridge a little bit lower to move on.
In this new area, there is an old building where you find the Ancient Dragon Apostle’s Cookbook [4]. But be careful! There’s a skeleton just waiting to ambush you on the right side of the building. From the left side of the building, you can jump to grab a Somber Smithing Stone [8] from a body on the edge. Below where you are, there is another platform with a Smithing Stone [8]. With that, we finish exploring the area from the lift. Teleport back to the Dragon’s Temple Lift grace, use the elevator and descend the stairs we took in the last section. It’s time to follow the corridor
Dragon Temple Altar corridor
The Dragon Temple Altar corridor in Crumbling Farum Azula is a key passage that leads players through a ruined section of the temple with several challenges and valuable loot. As you proceed north through the hallway, you enter an open area featuring a dragon corpse guarded by a Crucible Knight, who can be fought or bypassed. From here, you navigate floating platforms behind the dragon to reach the rooftop, where the Dragon Temple Rooftop Site of Grace is located. Along the way, you must carefully jump across broken structures and watch for roaming Azula Beastmen, making this corridor both a strategic and rewarding part of the dungeon’s progression.
Once you leave the short corridor, ahead of you, there is a sequence of debris that you must use to platform your way to the next building. By getting to the second platform, you can get pretty close to the edge to fall to a platform where you find the Dragoncrest Shield Talisman 2 right below it. This is the most safe strategy since it’s difficult to land in the correct place by jumping. On the right side, before the last platform, you also find a Golden Rune [12].
The next building splits into three paths. To the left, there are two beastmen, which you can ignore. Go right, and follow the stairs to the upper floor, where you find a spell-casting beastmen, a dog, and a Dappled Cured Meat. Get back to the lower floor and head to the north path that takes you to an arena where you must face a Crucible Knight. At the beginning of the battle, they only use their sword and shield to attack you. However, after losing some HP, they will start using a flying attack and breathe fire at you.
Although beating them is not mandatory, you will have a hard time trying to escape. Whether you defeat it or are capable of running, you want to jump on the platform on the north side of the arena – where you also find a Smithing Stone [8] – and make your way to the next site of grace.
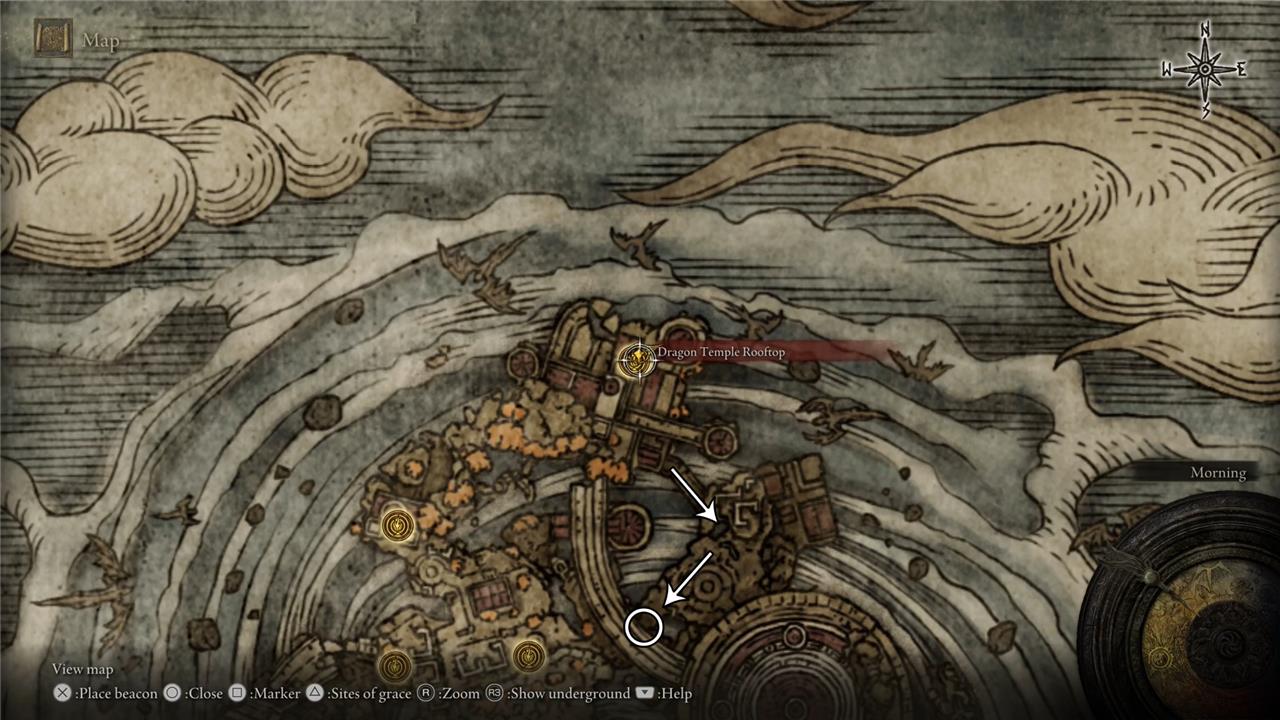
Dragon Temple Rooftop
The Dragon Temple Rooftop in Crumbling Farum Azula is a key area accessed by leaping to the rooftop from a balcony within the dungeon. It features a Site of Grace that serves as a crucial checkpoint for players progressing through this challenging region. The rooftop is notable for its strategic vantage points and the presence of tough enemies, including the Draconic Tree Sentinel guarding a boss door. Navigating to this area involves careful platforming and combat, making it a significant step in the Elden Ring Crumbling Farum Azula walkthrough.
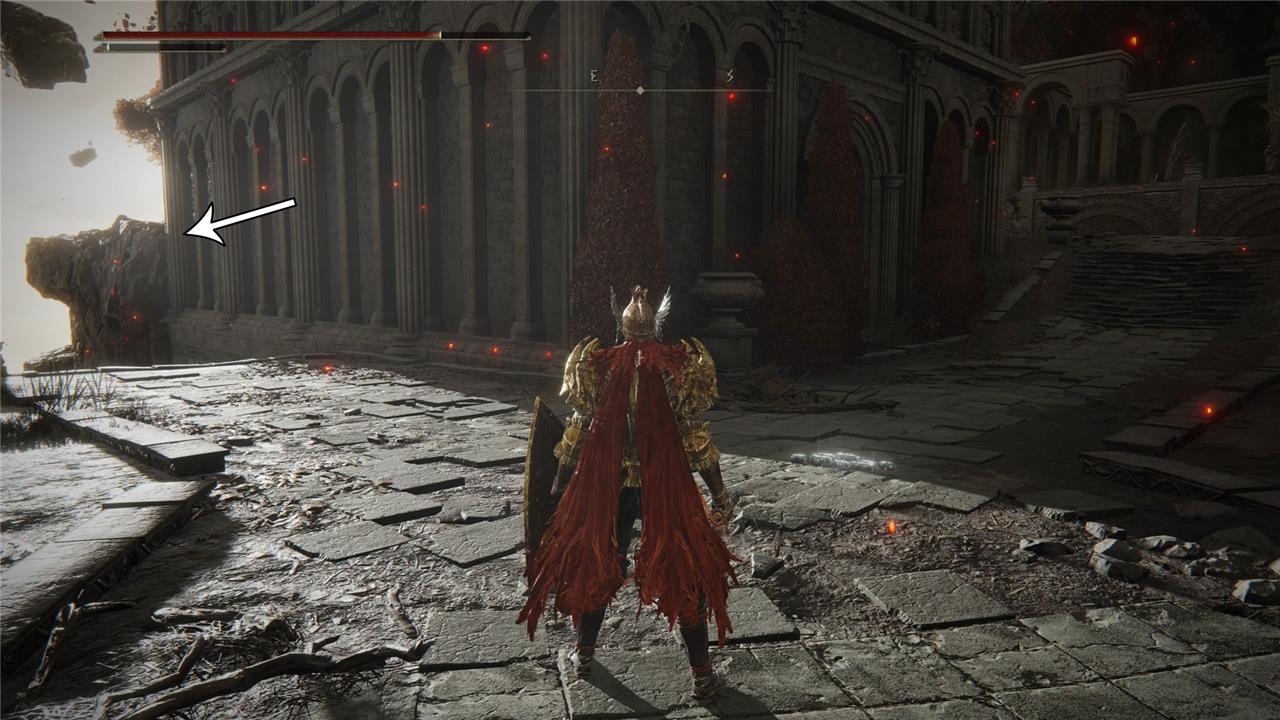
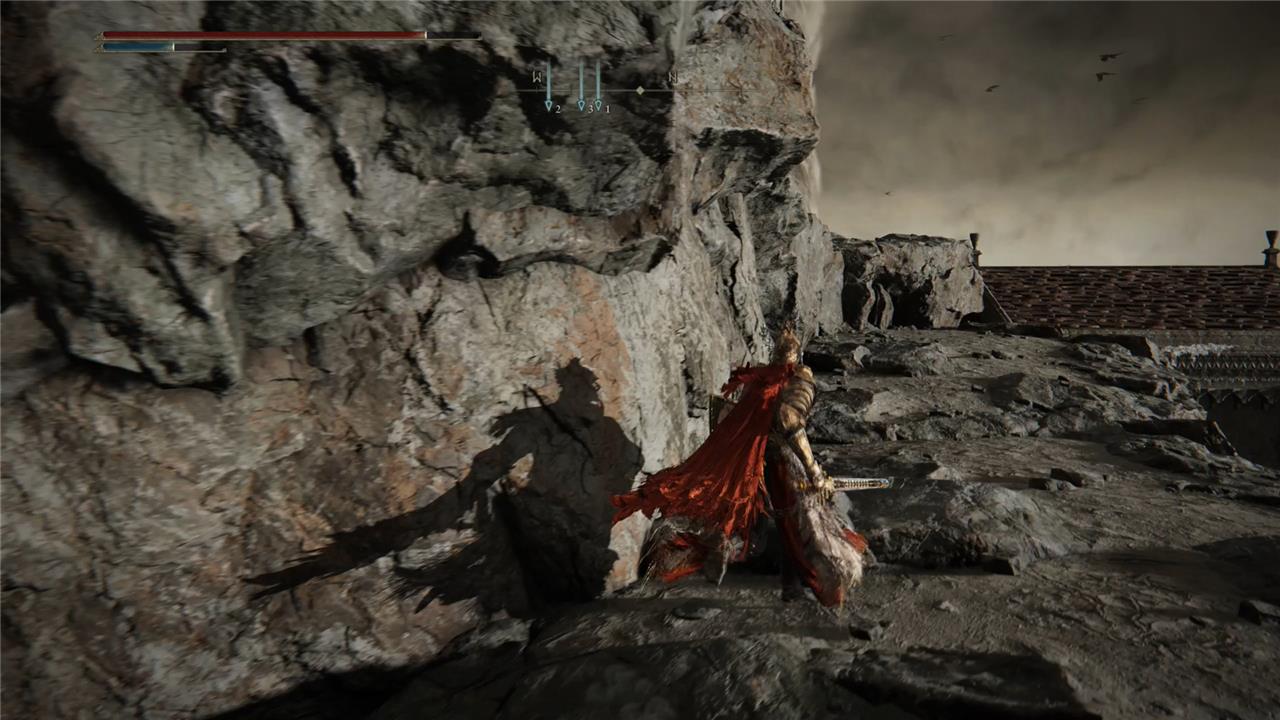
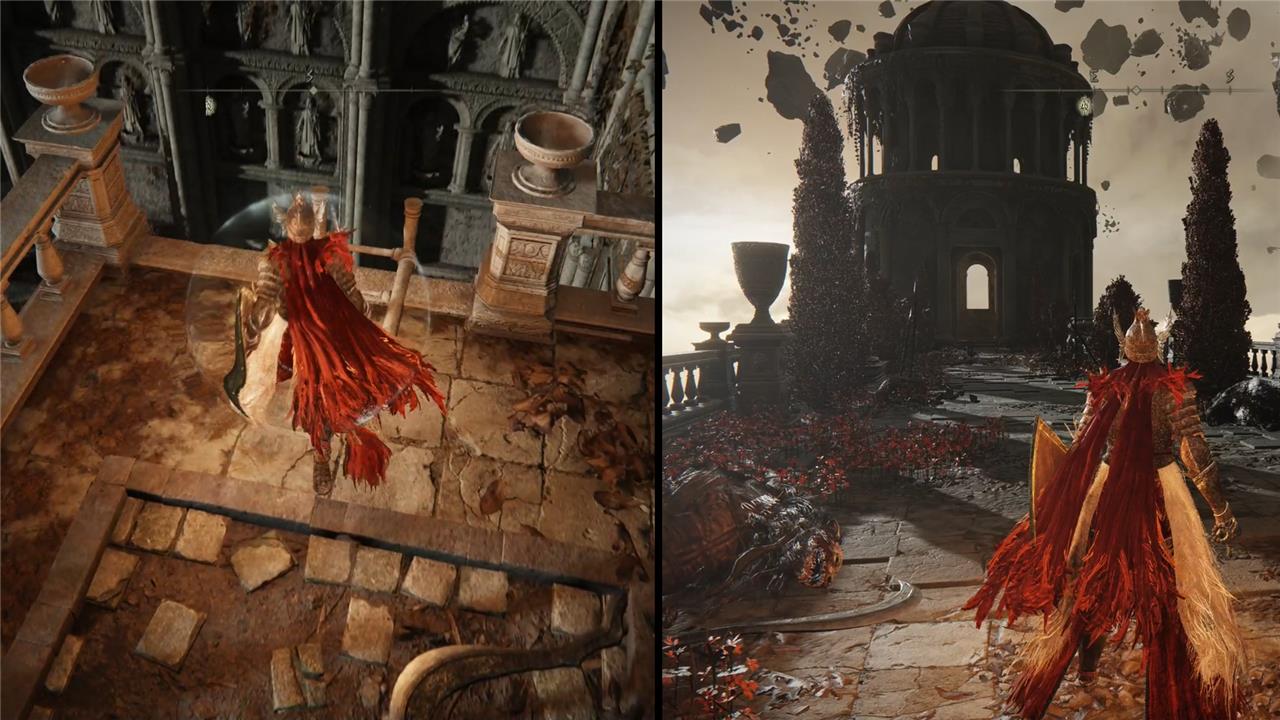
You’re about to enter one of the last areas in Crumbling Farum Azula. Leave the site of grace then go down the roofs on the left until you’re in front of a tower with two Warhawkes and a body with a Smithing Stone [6].
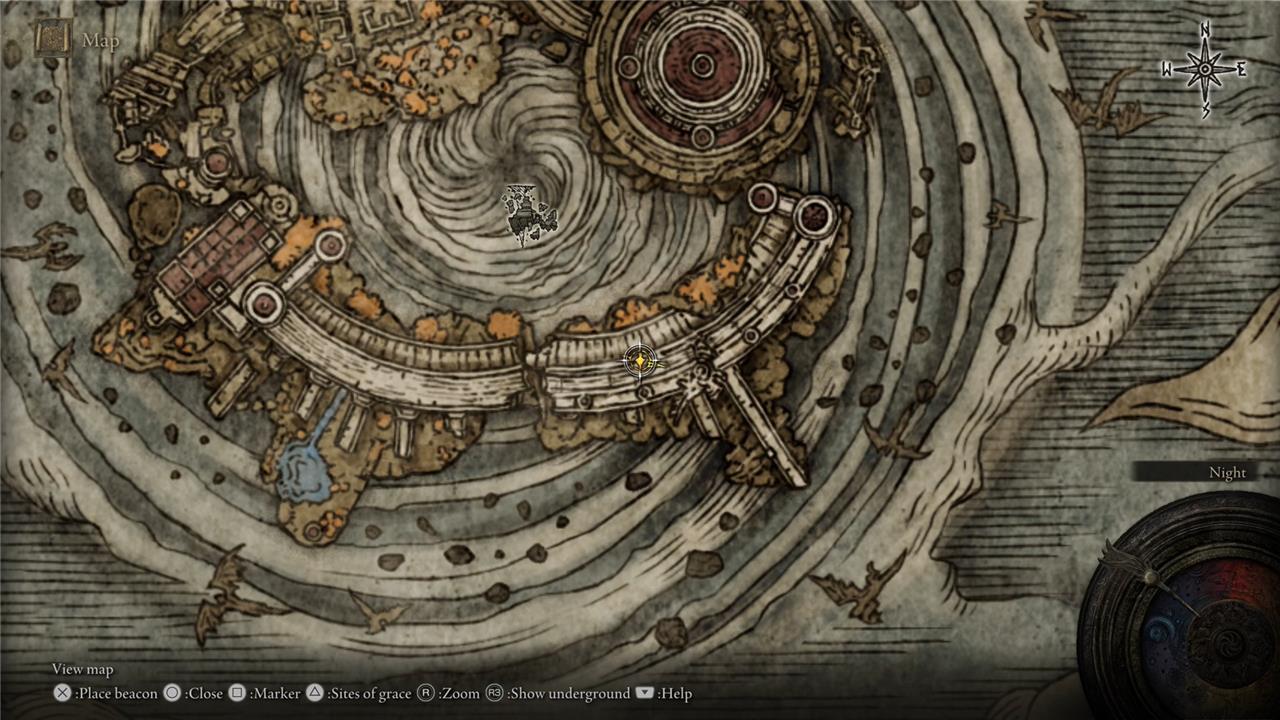
From where you are, it’s possible to see an Ancient Dragon on the south side of the area. Once they see you, the dragon will start casting magic attacks at you. Since exploring the area – which is filled with Warhawkes – is difficult while trying to avoid the dragon’s attacks, the best strategy is to run straight to where they are and right up until the point marked on the map below. After you’ve done that, they will fly away leaving the area a little bit less dangerous to you.
With the dragon out of the way, it’s time to properly explore and collect the loot. First, there is a Somber Ancient Dragon Smithing Stone in a gazebo behind where the dragon was. In the middle of the arena, you find a Golden Rune [12] and a Fulgurbloom. Now, instead of going back using the bridge you came from, go northeast, and jump on the rooftop of a building to reach a higher area. Besides some warhawkes trying to kill you, this area has a Golden Seed and a Smithing Stone [7].
The next step is to go southwest to where we ran from the dragon and keep going right. You need to fight a couple of beastmen as you go a little bit further. When you arrive at a collapsed tower that serves as a walkway that you need to traverse to progress, you need to be extremely careful. There is a beastmen on the other side throwing boomerangs at you which can easily make you fall. When it comes to actually crossing over, start on the right side then move to the left.
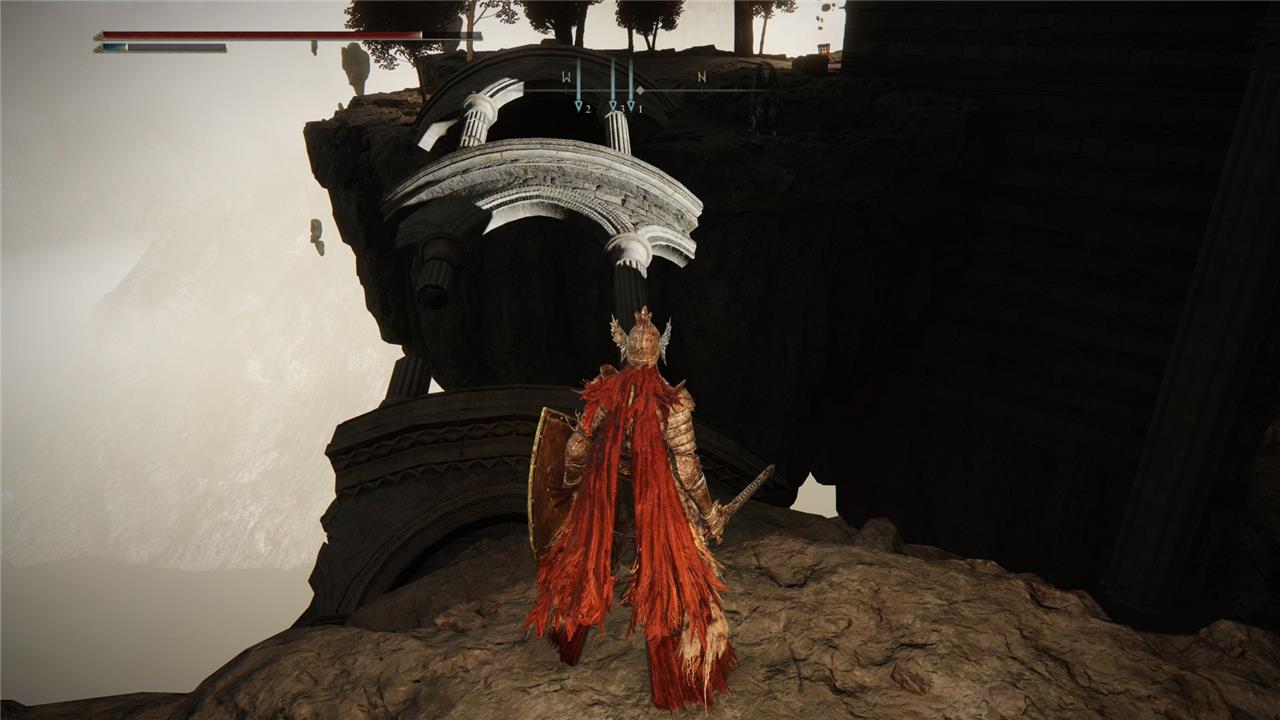
Go ahead and enter the building. Defeat the three beastmen inside and grab the Somberstone Miner’s Bell Bearing [5]. By taking the door on the right side, you get to the stairs that will take you to an elevator and, consequently, to the Beside the Great Bridge Site of Grace. We advise doing so to save your progress. However, go back to the previous building in case you want to explore a new area and perform a quick time travel. If not, move on to the Besides the Great Bridge section of this guide.
It’s time to travel to the past
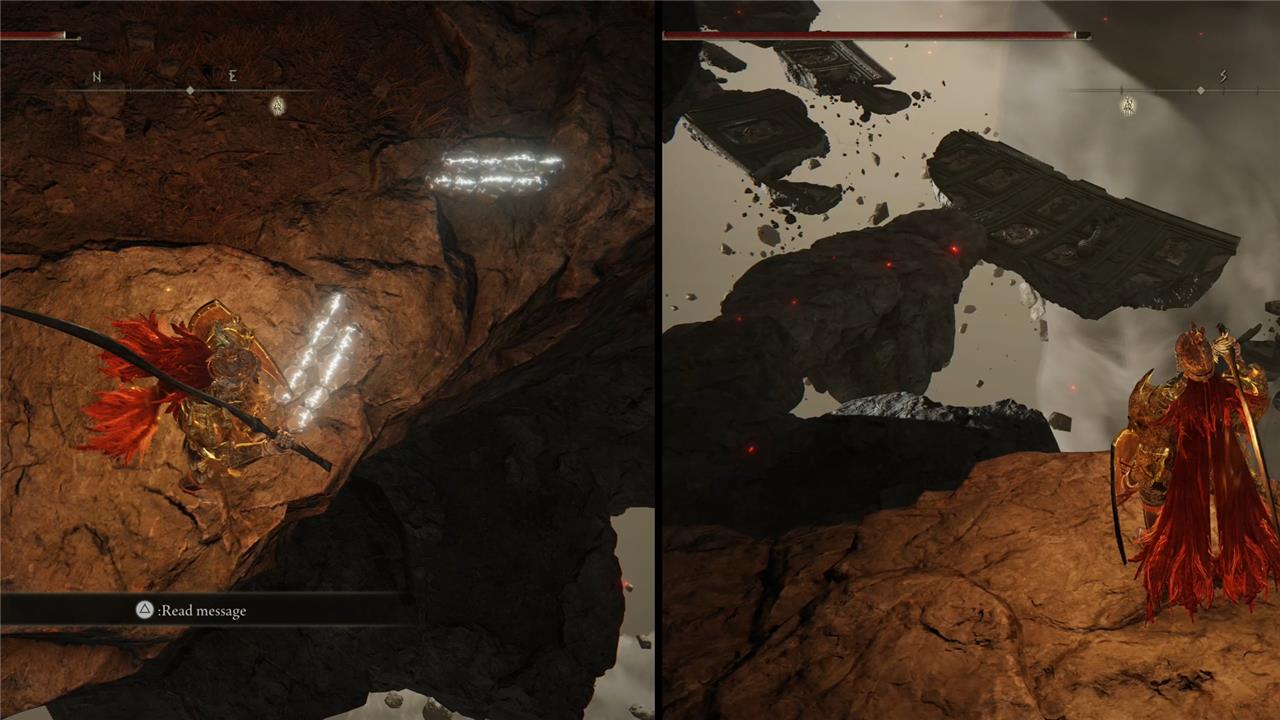
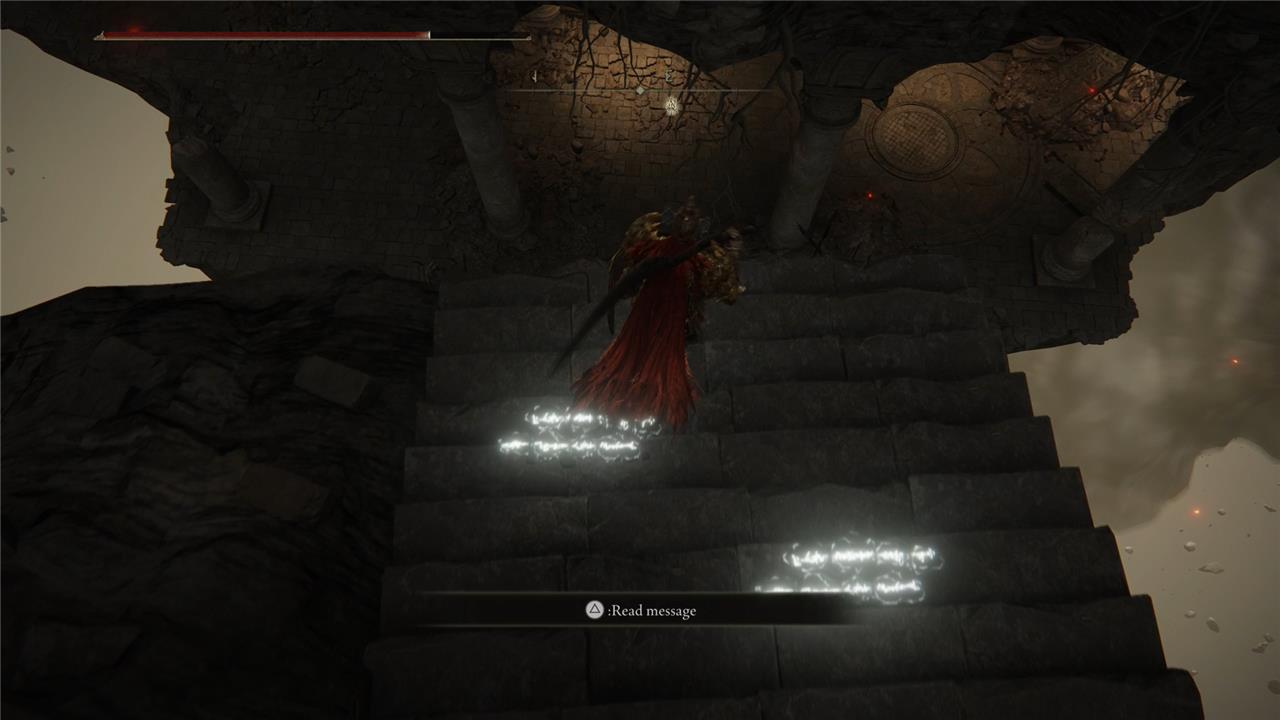
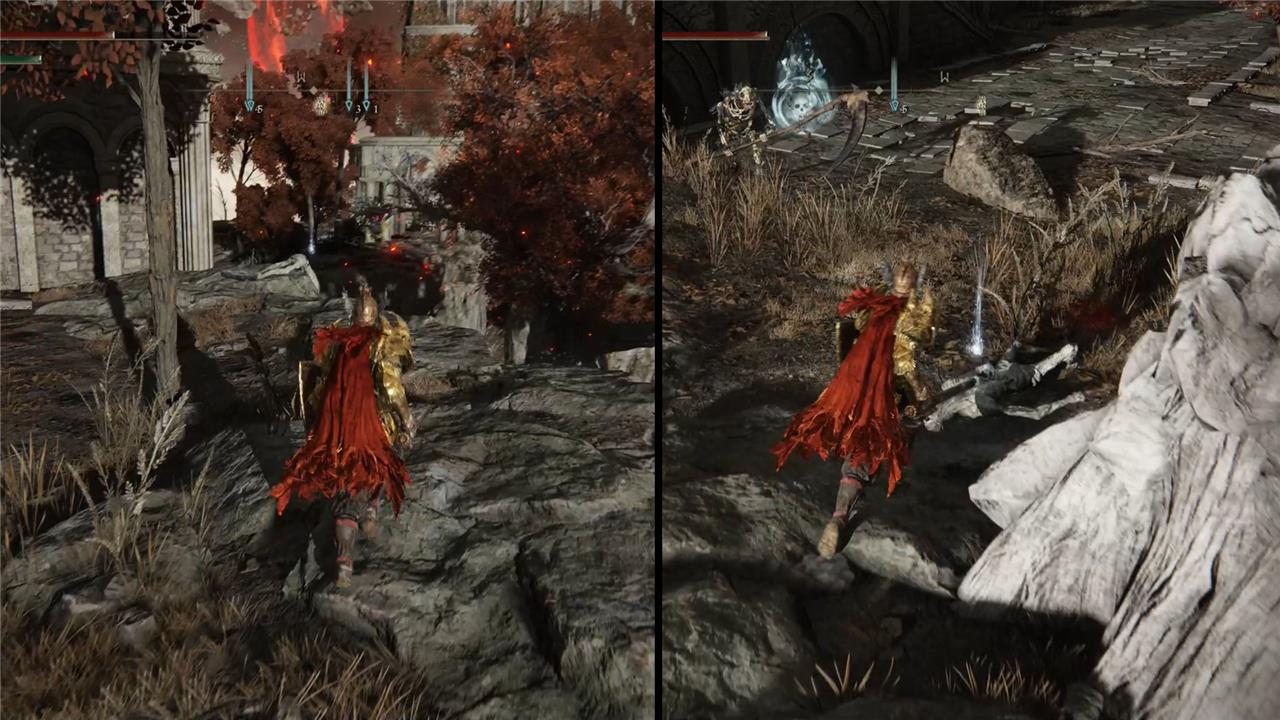
Instead of using the elevator, you will get back to the entrance of the building and walk toward the south side until you get to the edge of the area. From there, you can fall to a platform below you and keep following the path, jumping to the other platforms.
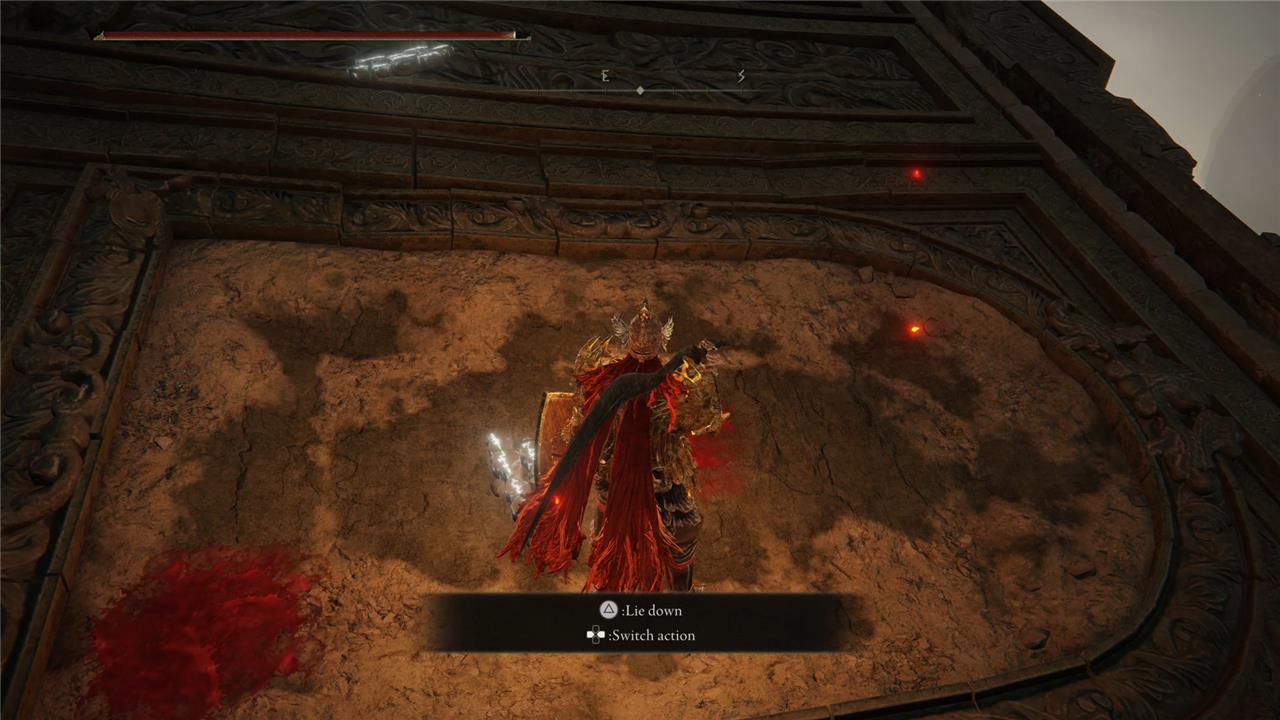
When you get to the major platform, go to the sand-like place without the skeleton present in the others and the option to “Lie Down” will pop up. By doing so, a cutscene will play and you will get to the arena of a secret boss, the mighty Dragonlord Placidusax. You don’t have to defeat it to finish the game, so it’s up to you whether you want to face this challenge or not.
Beside the Great Bridge
Beside the Great Bridge in Crumbling Farum Azula serves as a crucial Site of Grace and a strategic waypoint for players navigating this challenging legacy dungeon in Elden Ring. Reached after ascending stairs and using an elevator from the Dragon Temple area, this location places you at the middle of a large, crumbling bridge, offering a choice to head north towards the Dragon Temple or south towards the coliseum-like structure where the next major boss fight awaits. From here, players can explore multiple paths, gather valuable loot such as Somber Smithing Stones and the Old Lord’s Talisman, and prepare for intense battles including an optional boss fight with Dragonlord Placidusax accessed by descending the elevator. The area is also notable for encounters with powerful enemies and key items that aid progression through the dungeon.
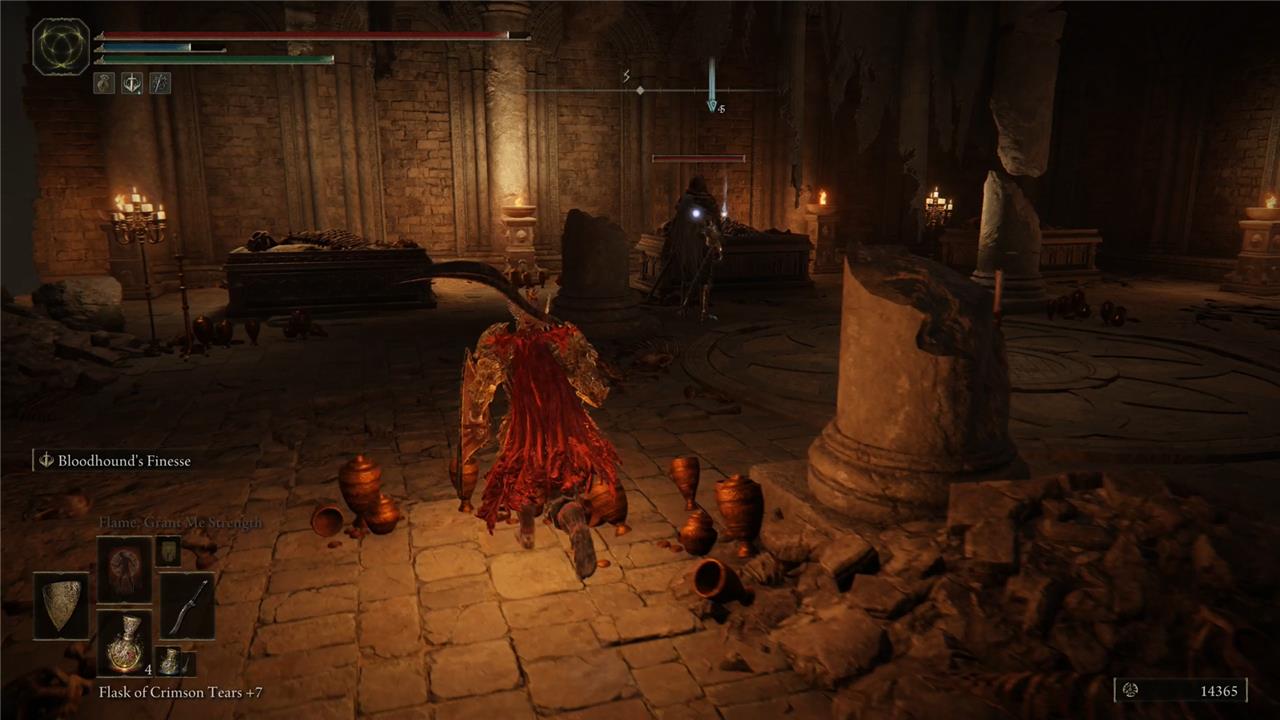
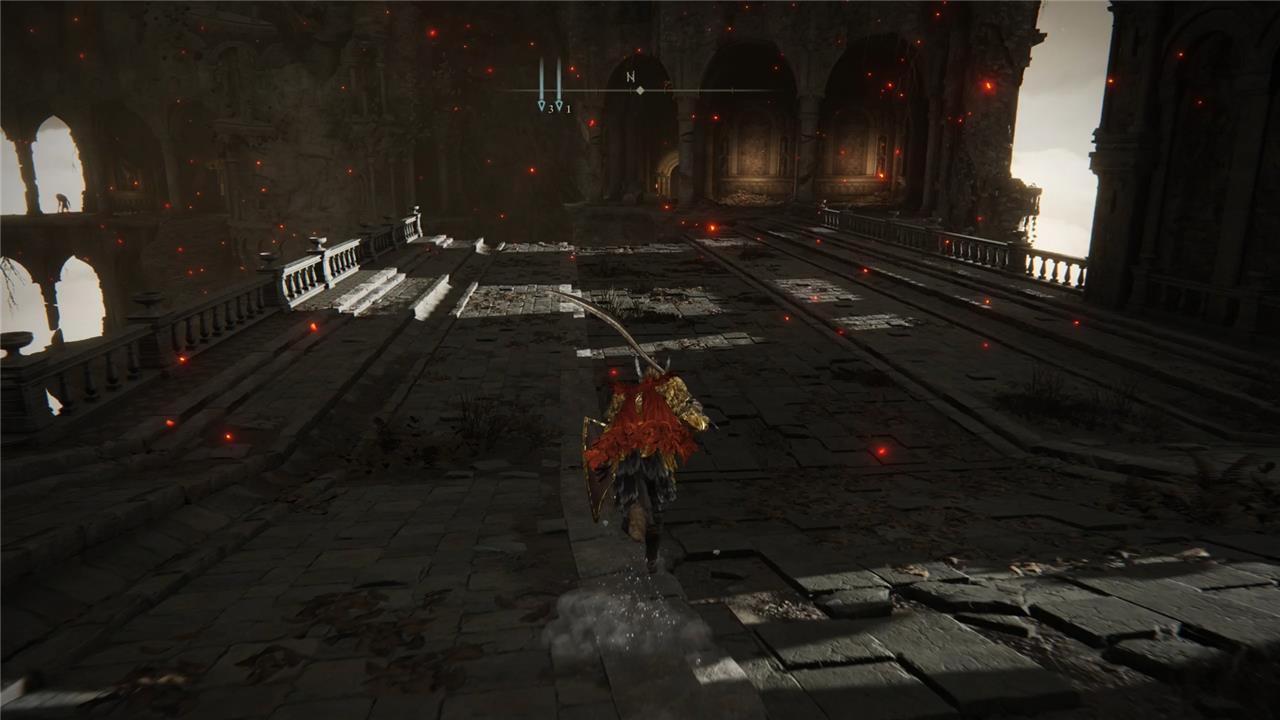
This is the final area in Farum Azula. By leaving the grace room, go up the stairs to get to a large bridge. First, head north and enter the building following the single available path. The door takes you to an outside area with lots of bodies of beastmen on the ground. Among them, there are some alive that are just sleeping. A good way of spotting them is by pressing the targeting command.
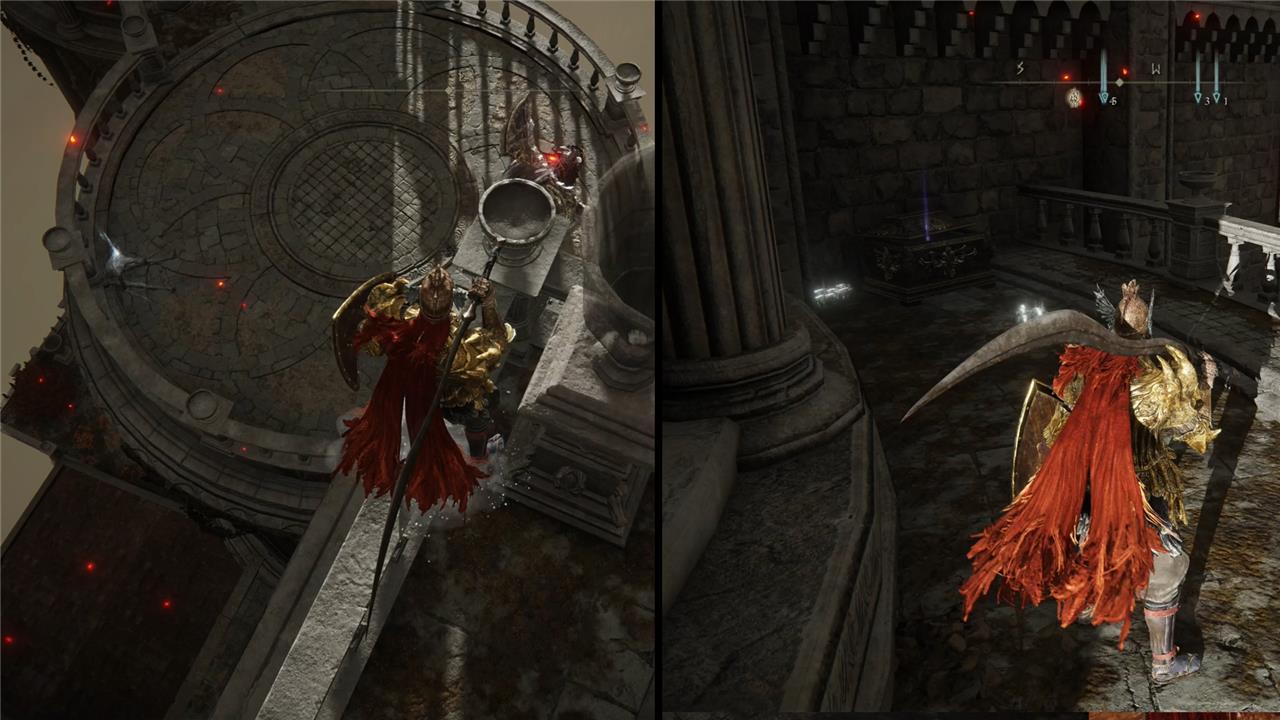
Now, go right and climb down the ladder to reach a new path that leads to a tower. While inside you will find a chest with the Old Lord’s Talisman, three beastmen will jump at you once you enter the tower. Fight them, grab the item, and climb back to the previous area.
After you’re back, go north, kill the sleeping beastmen, and get the Somber Smithing Stone [8] on the ground. Right in front of you, there is another tower. To reach it, you need to get closer to the edge on the east side and jump to the platform right below you, where there is a beastmen and 5x Lightning Greatbolt.
Inside the tower, you can activate the lever to call the lift. Go to the bottom of the tower and go left to find a chest with the Drake Knight armor set. Having explored this whole area, teleport back to the Beside the Great Bridge grace.
Back to the bridge, on the south side of it, you find the boss arena where you need to face Maliketh, the Black Blade. On the way to the gate, you will find a Golden Rune [12] and a Somber Smithing Stone [7]. In front of the gate to the arena, there is a Draconic Tree Sentinel. While their move set is similar to the one you fought to enter Leyndell, this one is weaker. You can, however, simply ignore it and enter the arena. On the other hand, once you kill it, they don’t respawn, and drop the Malformed Dragon armor set.
To complete Crumbling Farum Azula, you need only beat the final boss of the area, Maliketh, the Black Blade. After that, it’s time to pay a visit to Leyndell, Ashen Capital and see the game to its conclusion.
What are the key secrets hidden in Crumbling Farum Azula
Crumbling Farum Azula conceals numerous key secrets that enrich both gameplay and lore:
-
Hidden Hero’s Runes and Golden Runes scattered in concealed corpses and behind pots, offering valuable upgrade materials and buffs.
-
Multiple rare Smithing Stones, including Ancient Dragon Smithing Stones and Somber Smithing Stones, found in secret areas and guarded spots, essential for weapon enhancement.
-
The Crumbling Beast Grave Site of Grace, which unlocks quick travel and is located inside a building accessed early in the area.
-
Stealth and ranged tactics reveal hidden loot and allow players to isolate dangerous Azula Beastmen and Lesser Wormface enemies, who guard valuable items like Old Fangs and Fulgurbloom.
-
The Dragon Temple area holds the Ancient Dragon Apostle’s Cookbook, a rare crafting recipe guarded by powerful undead beastmen.
-
The presence of a massive mausoleum-like structure housing remains of beastmen, dragons, and horses, hinting at deep lore about the area’s past under the rule of the ancient dragon Placidusax and the necropolis nature of the ruins.
-
The area includes hidden Bell Bearings for Glovewort Pickers and Somberstone Miners, which allow players to summon helpful Spirit Ashes.
-
A hidden duel with Iron Fist Alexander, rewarding unique items like the Shard of Alexander and Alexander’s Innards, is found near the fire-breathing Farum Azula Dragon encounter.
These secrets combine challenging combat, exploration, and rich storytelling, making Crumbling Farum Azula a complex and rewarding final dungeon in Elden Ring.
What hidden items or secrets are tucked away in the Crumbling Beast Grave
The Crumbling Beast Grave in Elden Ring hides several valuable secrets and items:
-
A Great Grave Glovewort on an altar, guarded by an Azula Beastman Mage flanked by two melee Beastmen, useful for upgrading Spirit Ashes.
-
Multiple Smithing Stones scattered throughout the crypt and adjacent areas, including Smithing Stone (6), Smithing Stone (7), Smithing Stone (8), and Somber Smithing Stones, essential for weapon upgrades.
-
A Hero’s Rune hidden on a corpse behind pots near the stairs.
-
A Golden Rune on a corpse dangling off the left side of an outdoor balcony.
-
The Crumbling Beast Grave Depths Site of Grace, which unlocks fast travel and access to further exploration.
-
The Ancient Dragon Prayerbook, a rare crafting recipe found deeper in the area.
-
The Glovewort Picker’s Bell Bearing and Somberstone Miner’s Bell Bearing, which allow summoning helpful Spirit Ashes.
-
A hidden elevator secret that leads to lower exterior levels with additional loot and enemies.
-
A challenging area with Lesser Wormface enemies guarding Fulgurbloom and other consumables.
-
Access to the Dragon Temple area, where more rare items like Dragonwound Grease and the Ancient Dragon Apostle’s Cookbook can be found.
-
The possibility to confront a fire-breathing Farum Azula Dragon, which drops an Ancient Dragon Smithing Stone upon defeat.
These secrets combine exploration, combat, and valuable rewards, making the Crumbling Beast Grave a rich and rewarding area within Crumbling Farum Azula.