Hidden deep beneath Hyrule’s surface, the Jojon Shrine tests both your balance and precision with a clever puzzle set among shifting platforms and moving lights. This guide shows you where to find it and how to master every trick within its metallic maze.
Jojon Shrine location
Jojon Shrine is located in the deep underground area of The Depths beneath Hyrule Field. You can reach it by entering the nearby Hyrule Field Chasm, then heading southwest once you surface at the bottom. The shrine sits close to a large rock formation surrounded by glowing flora, making it easier to spot in the dim light. Activate nearby lightroots along the way to mark your path and make travel safer as you approach the shrine’s entrance.
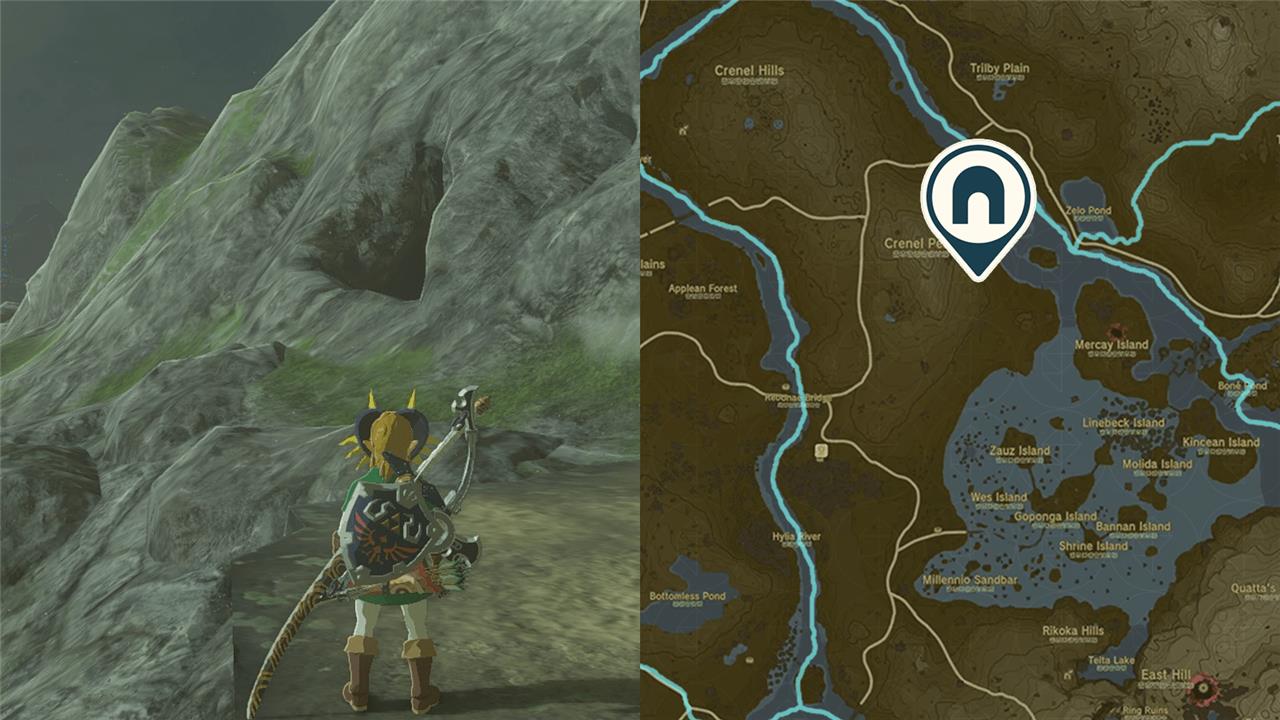
The Jojon Shrine is found within the Hyrule Fields region. The exact coordinates for the shrine are (1202, 0329, 0027). The Jojon Shrine is located inside of the Crenel Peak Cave, whose entrance can be a little difficult to find. Find out the cave’s location in the section below.
How to get to the Jojon Shrine in Zelda: TOTK
To reach the Jojon Shrine in Zelda: Tears of the Kingdom, head to Jojilon Shrine location on the map, follow the quest markers through the surrounding forest, climb the ledges to the rope bridge, and solve the shrine’s puzzle gate to enter.
Before heading into the cave, we recommend you bring a few weapons or ingredients that are capable of destroying rocks.
1. Travel to the coast to the north of the Moor Garrison Ruins, which can be found to the west of Mercay Island.
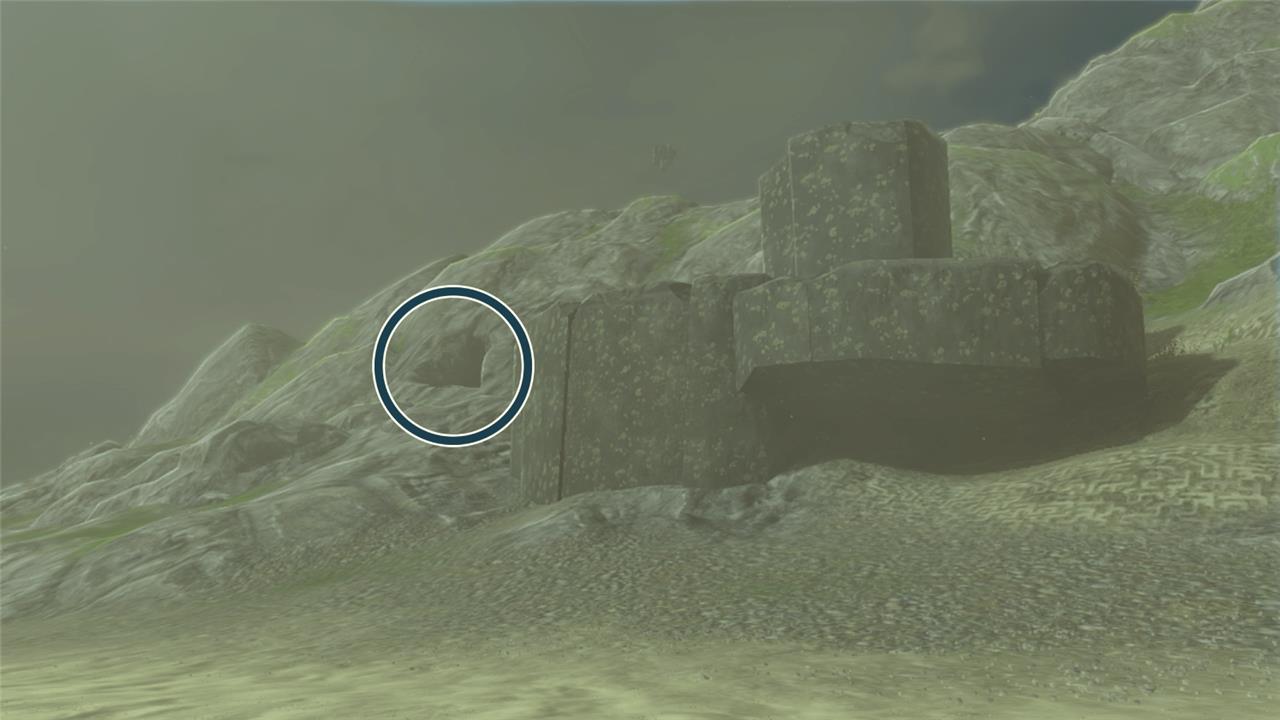
2. Head north until you can find a large piece of rubble embedded into the side of the hill.
3. Look to the left of the rubble to find the Crenel Peak Cave’s entrance, and enter the cave.
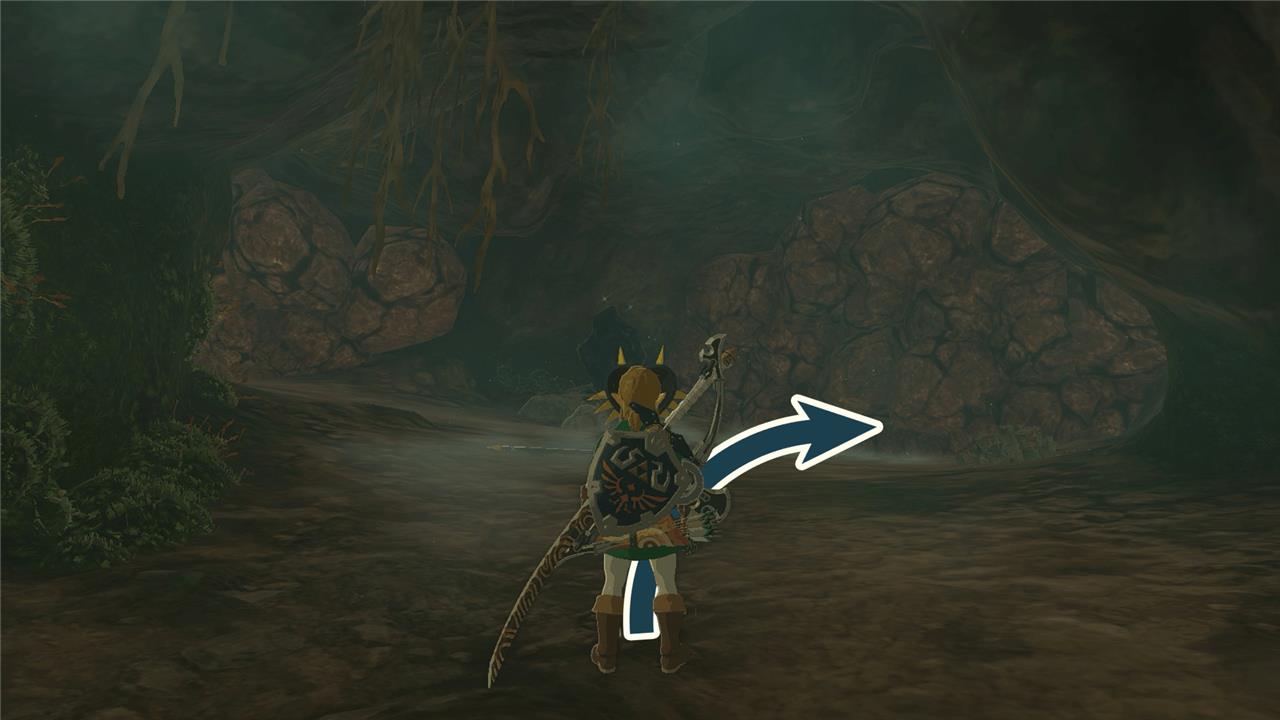
4. Defeat the Horriblin inside to find a rock wall on your left and right.
5. Destroy the rock wall on the right to find a pool of water and another rock wall across from you.
6. Start breaking the rock wall, but focus on the right side of the wall – you’re going to head in that direction.
7. Once you’ve broken through the rock wall, you will find another passageway that will lead you directly to the Jojon Shrine.
Jojon Shrine walkthrough
The Jojon Shrine features a series of puzzles that test your control over motion and timing. Use Ultrahand to move platforms and align pathways while avoiding hazards along the route. The key challenge lies in manipulating moving mechanisms precisely to reach higher levels and access the final chamber. Once the puzzles are solved, activate the terminal to claim your reward and complete the shrine.
In the “Proving Grounds: Rotation” challenge, you’ll need to eliminate a total of five Constructs to complete the shrine. You’ll be stripped of your equipment, and must use the materials given to you to defeat all of the Constructs inside.
1. Drop down to the bottom floor to find a lone Construct.
2. Defeat them and Fuse their horn to your weapon of choice.
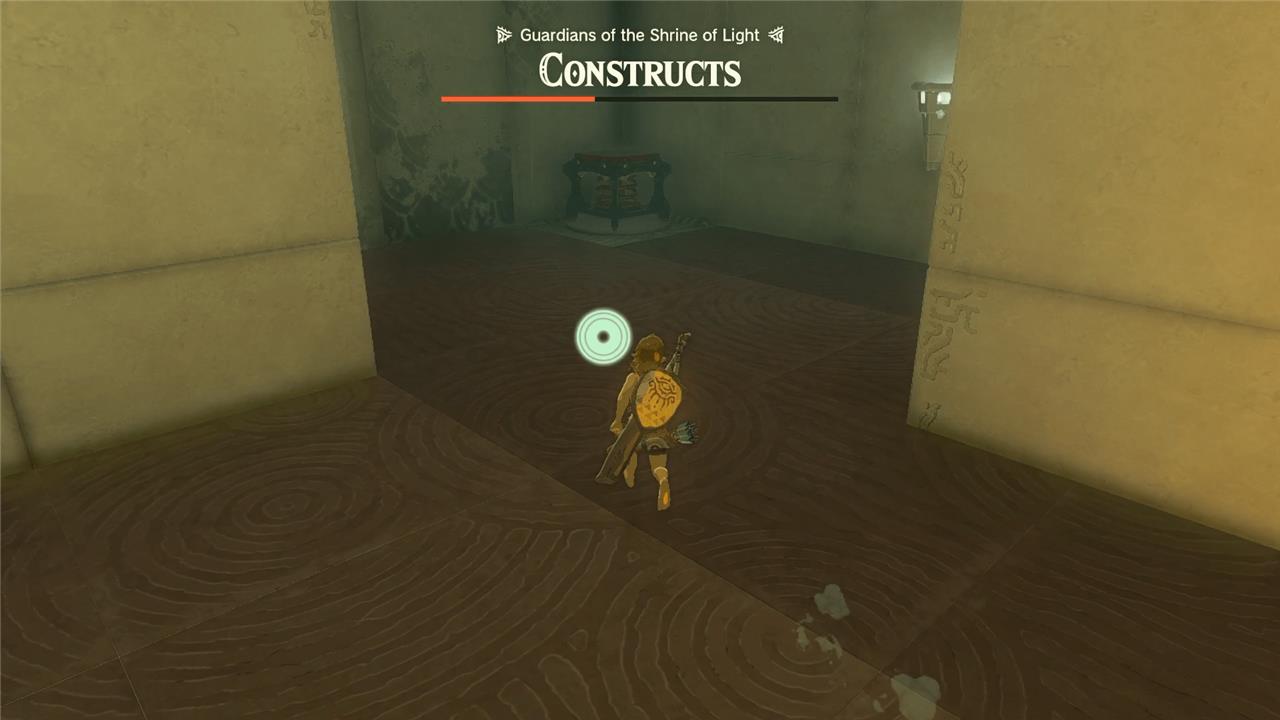
3. Return to the middle floor by using the spring in the bottom left hand corner of the bottom floor. To use the spring, stand on top of it and then swing at it with your weapon.
4. Defeat the two Constructs on the first floor using the weapons given to you.
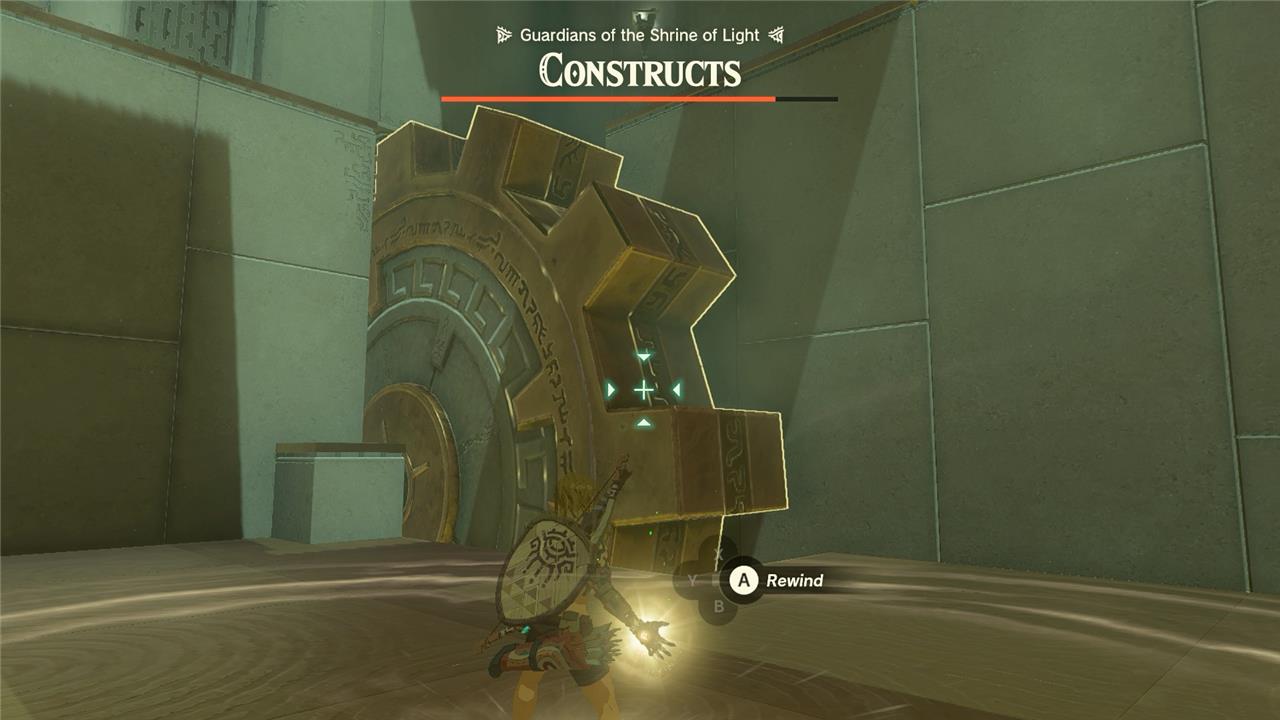
5. Proceed to the right side of the room to find a large cog wheel.
6. Use Recall on the cog wheel, and ride it up to the next floor.
Best route to Crenel Peak Cave entrance from Lookout Landing
From Lookout Landing, head east toward Moor Garrison Ruins for the easiest access to Crenel Peak Cave’s southern entrance, which leads straightforwardly to Jojon Shrine.
Best Route Overview
Travel northeast from Lookout Landing Skyview Tower along the main road past the ruins (around coordinates 1144, 0247, 0058), then veer slightly north up the slope of Crenel Peak. This path avoids heavy combat compared to the western entrance off the main road (near 1355, 0298, 0033), which has enemies right at the mouth. Use a horse or paraglider for speed across Hyrule Field’s open terrain.
Inside the Cave
Enter the southern mouth, clear any initial Bokoblins, and fuse Bomb Flowers (found nearby) to smash rock walls ahead. At forks, stick to the right path through boulders and water crossings for the shortest route north to Jojon Shrine at 1203, 0328, 0027-going left or straight leads to tougher enemies or dead ends.
Travel Tips
Launch from Lookout Landing’s Skyview Tower for a direct glide eastward, landing near Moor Garrison Ruins to minimize ground time. Stock rocksmashing tools and brightbloom seeds for visibility; the cave loops but rightward progress is fastest.
Fastest path from Lookout Landing to the 1144,0247 cave entrance
From Lookout Landing, the fastest path to the Crenel Peak Cave southern entrance at 1144, 0247, 0058 heads directly east-northeast across Hyrule Field toward Moor Garrison Ruins.
Optimal Ground Route
Follow the main dirt road northeast from the Lookout Landing Skyview Tower past sparse enemies and ruins, covering roughly 1,200 units in open terrain. Stay on or near the path until spotting the cave mouth on Crenel Peak’s lower slope just beyond the garrison (veer slightly north after 1144, 0247); expect 2-3 minutes on horseback without detours.
Skyview Tower Shortcut
Activate Lookout Landing Skyview Tower and launch eastward, gliding straight to land near Moor Garrison Ruins or the cave entrance itself in under 90 seconds. This aerial path skips ground hazards entirely and aligns perfectly with the coordinates.
Speed Tips
Summon a horse at the stable for ground traversal, or use stamina boosts/Tulin’s gust for extended glides; avoid western detours or chasms en route. Coordinates confirm the spot north of the ruins on the peak’s base.