Hidden beneath the cliffs of West Necluda, Ikatak Shrine challenges players with rotating platforms and precise timing-but finding it first requires solving the nearby crystal puzzle that blocks your path to this Rauru’s Blessing.
The Ikatak Shrine will be unlocked after completing the “The Gisa Crater Crystal” shrine quest, which will start in the Gisa Crater Cave.
When you’re done, our shrine locations page or interactive Hyrule map can direct you toward something else to do.
Ikatak Shrine location
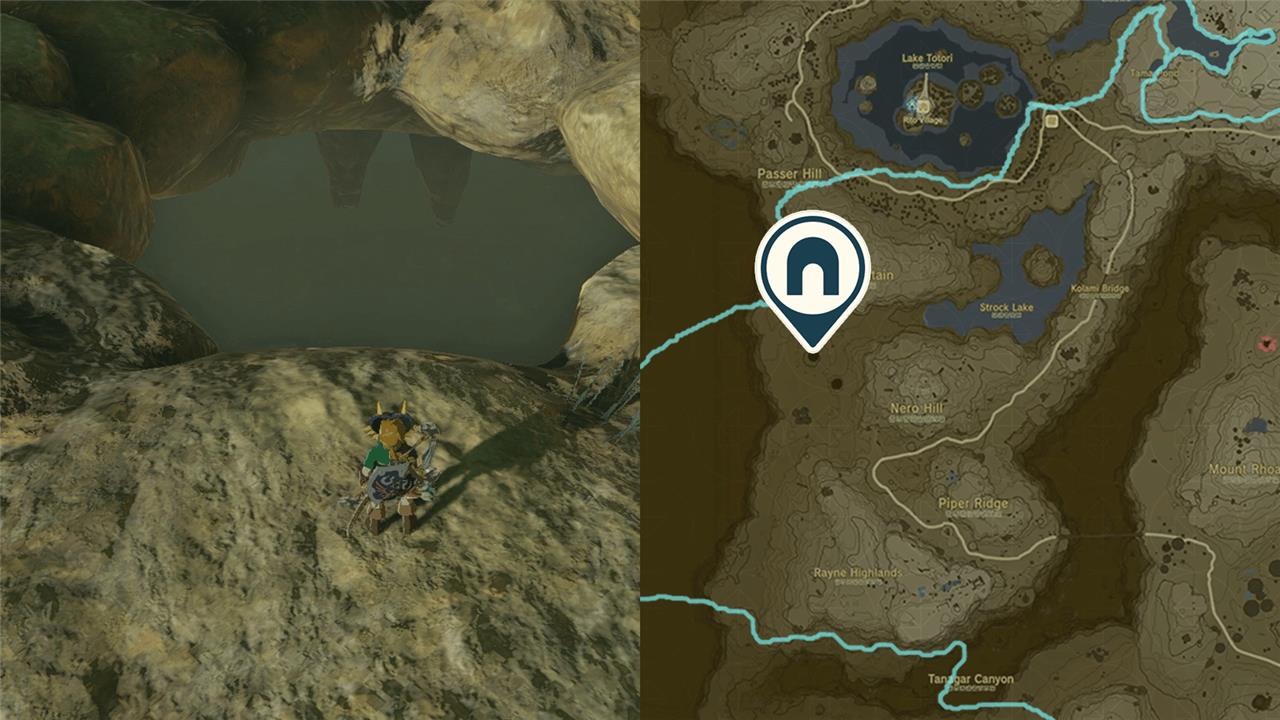
Ikatak Shrine is located in the South Tabantha Sky Archipelago, directly above the Tabantha Frontier region. To reach it, travel to the Rospro Pass Skyview Tower and launch into the air, gliding northwest toward the floating islands. Use Zonai devices or platforms to cross the gaps between islands until you reach the shrine’s coordinates at approximately (-4391, 2164, 1416). The shrine is visible from the surrounding area, making it easier to spot once you’re in the sky.
The Ikatak Shrine is found within the Tabantha Frontier region. The exact coordinates for the Ikatak Shrine are (-3950, 1138, 0112). The Ikatak Shrine is a “Rauru’s Blessing” shrine that must be unlocked by its crystal. Return the crystal to its rightful home and complete the “The Gisa Crater Crystal” shrine quest to unlock the Ikatak Shrine.
‘The Gisa Crater Crystal’ shrine quest walkthrough
To begin “The Gisa Crater Crystal” shrine quest, speak with Nazbi near the crater in the Hebra region. He will point out a green crystal that needs to be returned to the Ikatak Shrine location nearby. Pick up the crystal and follow the beam of light that leads upward along the cliffside. You must clear ice and fight a few enemies along the path while keeping the crystal intact. Once you reach the shrine pedestal, place the crystal inside to activate the entrance to the Ikatak Shrine and complete the quest.
“The Gisa Crater Crystal” shrine quest will test your ability to use rockets to transport crystals.
1. Glide into the Gisa Crater Cave, which can be found in the Tabantha Frontier at the coordinates (-3931, 1090, 0092).
2. Defeat the two Ice Likes beside the crystal inside the cave.
3. Bring the crystal to the center of the cave, just below the opening in the ceiling.
4. Head to the northwest section of the cave to find two rockets on the floor.
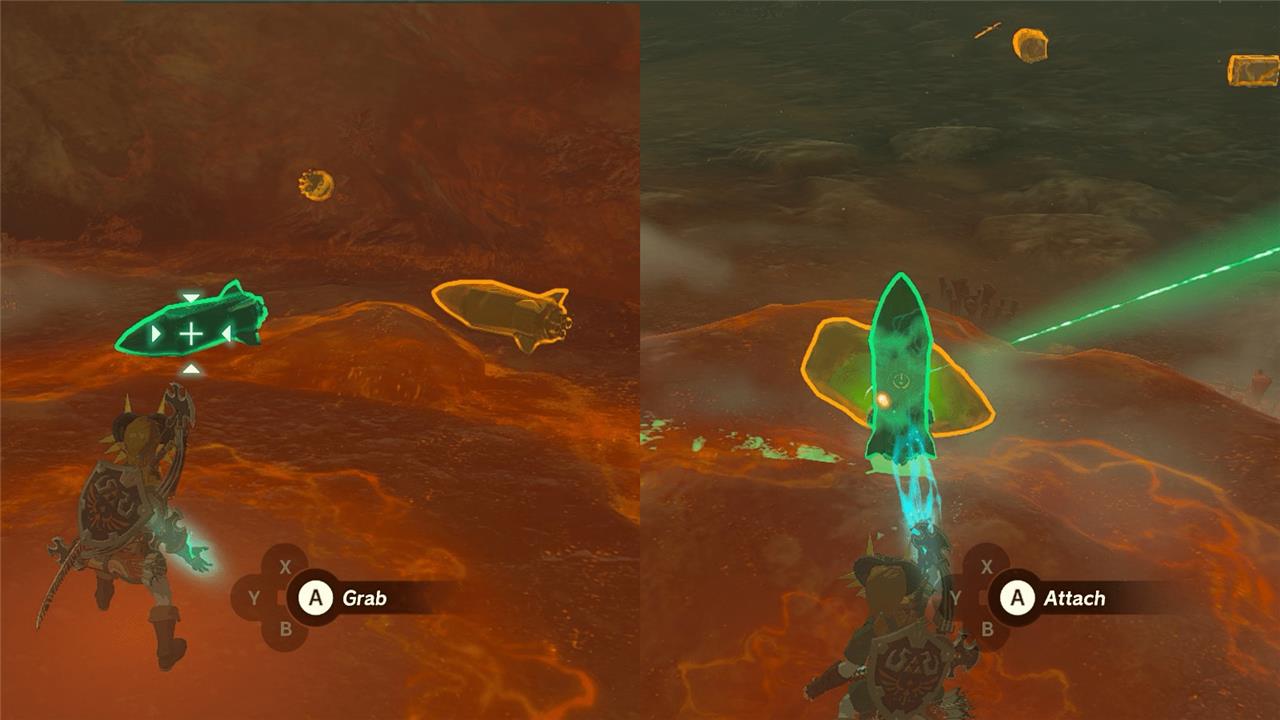
5. Attach one of the rockets to the crystal in the center of the cave, but make sure that the crystal rocket combination is stable as you want it to launch out of the opening in the ceiling.
6. Activate the rocket to launch the crystal out of the cave, and use Ascend to return to the Surface.
How to reach the Gisa Crater crystal without dropping it
Gisa Crater Crystal is retrieved from Gisa Crater Cave southeast of the main crater, and players often drop it due to the steep climb out. A reliable method avoids dropping it by using a tunnel exit instead of launching it with rockets.
Tunnel Exit Method
Enter the cave as usual by paragliding into the smaller southeast crater entrance, defeat enemies like Ice Likes and Stalkoblins, and grab the crystal with Ultrahand. Instead of rocketing it up the main hole, drag the crystal through the tunnel in the cave wall, which leads directly to the surface without height risks.
Stabilized Rocket Backup
If using rockets, position the crystal under the central mound beneath the cave’s ceiling hole, fuse one rocket sideways (slightly angled outward to prevent straight drop-back), and shoot it with an arrow. Attach a stabilizing chest or extra weight first to prevent tipping, then use Ascend yourself; the green light from the shrine guides you to its landing spot if it drifts. Fast-travel away and back to respawn rockets if they fail.
Best method to move the crystal using rockets only
The best rocket-only method to transport the Gisa Crater Crystal involves precise placement and firing to launch it straight out of the cave without dropping.
Rocket Setup
Position the crystal directly under the ceiling hole in Gisa Crater Cave using Ultrahand, ensuring it’s stable on flat ground. Attach one rocket to the side of the crystal (not the bottom) at a slight upward angle to prevent tipping or falling back-this sideways thrust provides reliable lift.
Firing and Retrieval
Hit the rocket with a regular arrow to ignite it, sending the crystal upward through the hole to the surface. Follow immediately with Ascend to exit the cave yourself, then follow the green laser beam from the crystal to its landing spot outside (it may take 1-2 tries if it drifts or lands near the entrance).