Hidden beneath the glittering waters of Zora’s Domain lies the Ancient Zora Waterworks-a maze of flooded chambers, shifting gates, and slippery secrets. This guide breaks down every puzzle, pathway, and enemy encounter, helping you restore the ancient flow and claim your reward deep within Hyrule’s forgotten aqueducts.
There isn’t much to the Ancient Zora Waterworks, as it relies on one gimmick repeatedly. There are a bunch of rocks clogging up pipes, which you need to free by using either bomb flowers or hammer-like weapons. (Any weapon with a stone fused to it will work.)
Starting the Ancient Zora Waterworks
Head to the Ancient Zora Waterworks east of Zora’s Domain, and speak with Sidon at the entrance to trigger the cutscene. Swim upstream through the sludge-filled waters using your newly acquired Zora Armor to avoid damage from the gunk. After the scene with the corrupted King Dorephan, use Ultrahand to lift and rotate the large stone slab blocking the path ahead, revealing the main water channels inside.
Once you get down there, you’ll notice the first clog directly ahead. Hit it with your rock weapon or bomb flower to open up the pipes, raising the water level. You’ll be able to proceed once the water rises up.
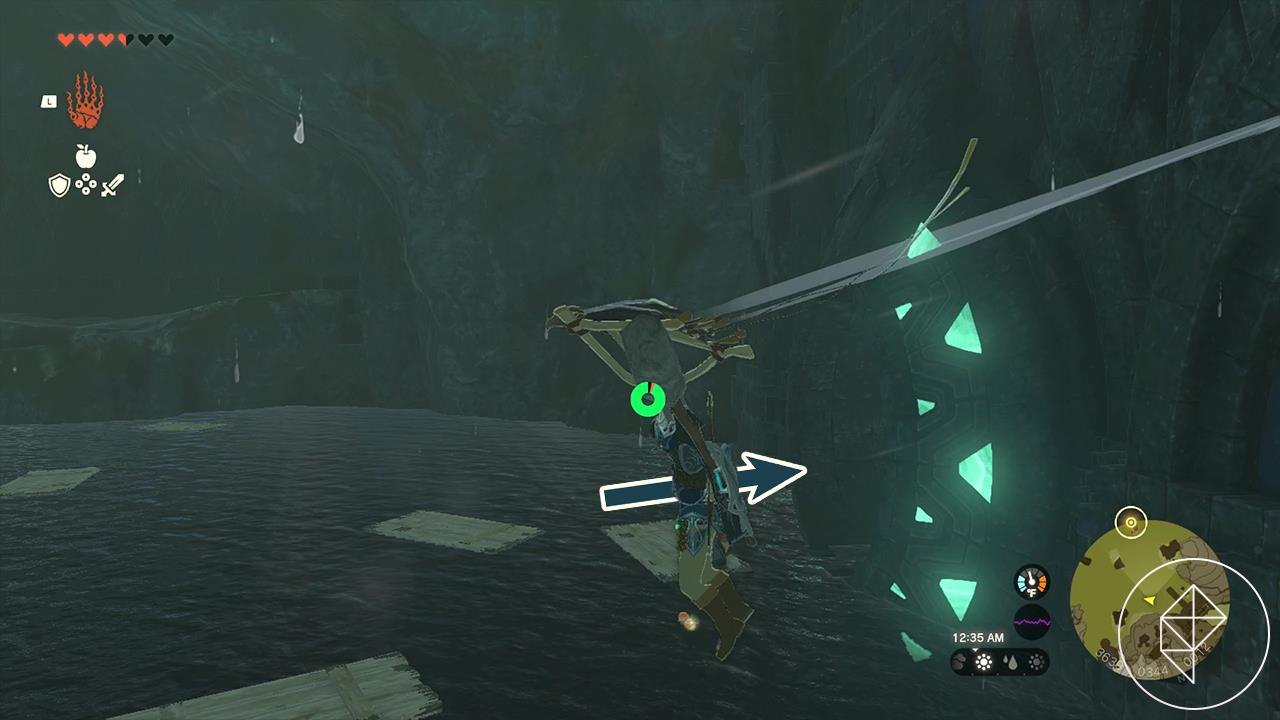
A chest will also float in the water, which you can grab and place on the ground to claim a Zora sword.
Continue on and you’ll be greeted with the main area and the actual text that says “Ancient Zora Waterworks” across your screen. You’ll need to fill up the room almost entirely in order to proceed.
Opening the first pipe
The first pipe lies beneath the Waterworks’ main chamber, half-buried under layers of sludge. Clear the mud using a splash fruit or a similar water source to expose the valve. Once clean, attach a nearby wheel mechanism or redirect the water flow by striking the valve handle. Watch the stream burst through the pipe-this signals that the initial section of the Waterworks is active, setting the stage for restoring the rest of the system.
Starting at the bottom, the first clogged pipe will be on your left as you follow the broken bridge in front of you.
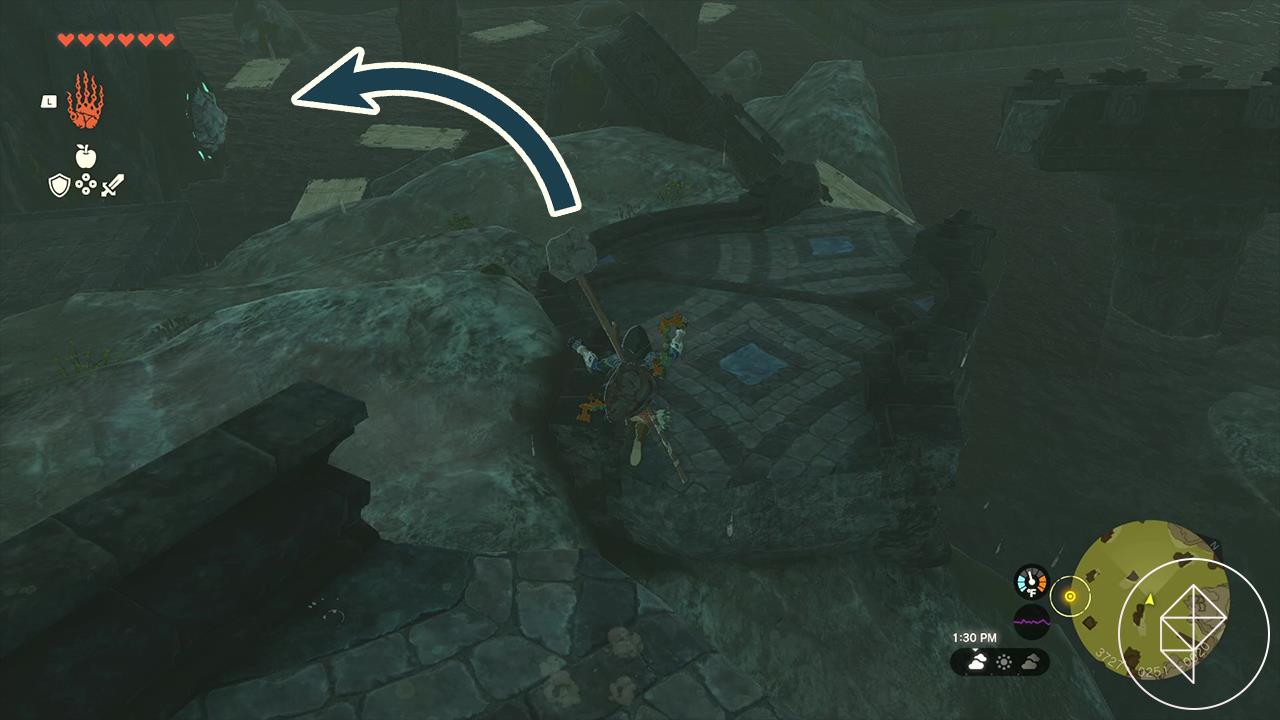
Use Ultrahand on the large wooden planks to give yourself some footing to break open the rocks.
Opening the second pipe
After draining the first chamber, move through the newly opened pathway to find the second pipe. Use Ultrahand to manipulate the nearby water wheels and adjust the flow gate on the wall. Once the water aligns correctly, the pressure will increase, clearing the blockage inside the pipe. Watch for enemies patrolling the area and use ranged attacks to take them out before adjusting the mechanisms. When the stream runs smoothly, you’ll hear the machinery activate, signaling that the second pipe is now fully operational.
Once the rocks are broken and the water levels rise, turn towards the northeast to head to another broken bridge you can now access.
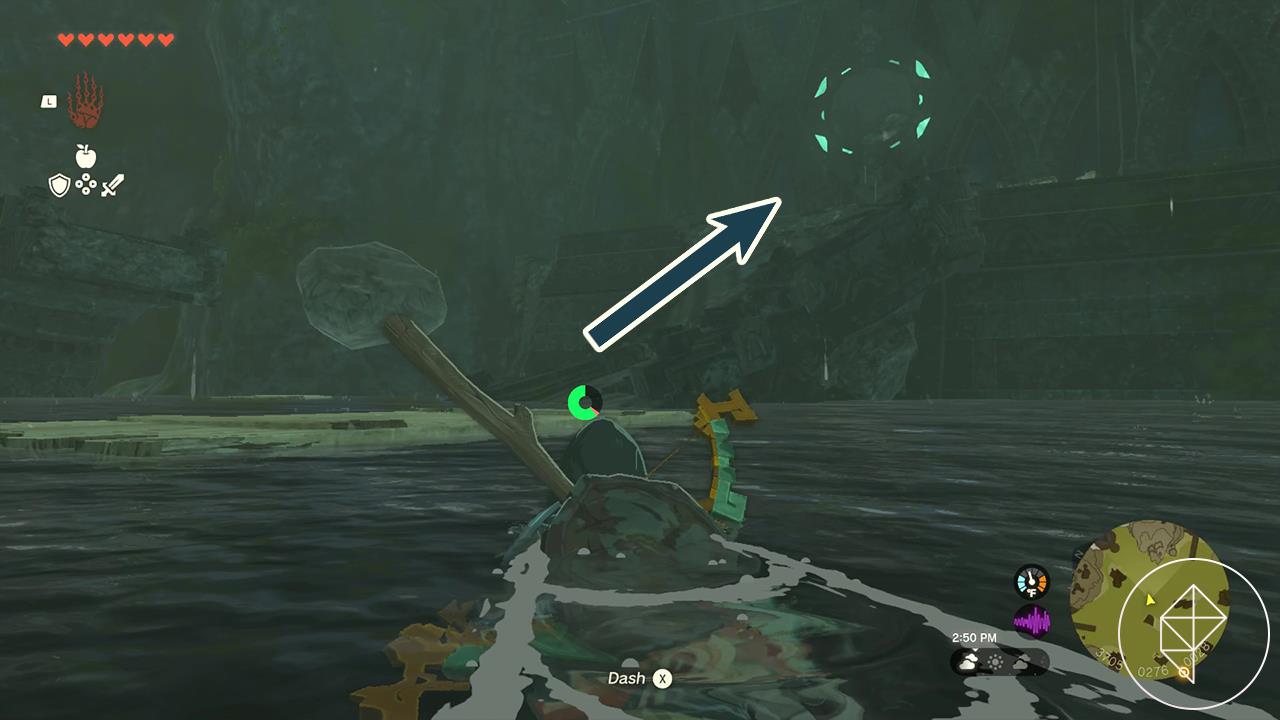
Head up the walkway, making sure to use Ultrahand on the wooden chest in the water on your left for a Zora shield.
Use the nearby large wooden planks to create a ramp that allows you to enter the hole in the wall. Break the rocks inside to raise the water level yet again.
Optional: fight an Ice Like and Bubbulfrog
If you want an extra challenge, you can fight the Ice Like near the entrance and the Bubbulfrog hidden behind a breakable wall in one of the side chambers. Make sure to bring a fire weapon or use fire fruit to melt the Ice Like’s icy armor quickly. The Bubbulfrog can be defeated easily with ranged attacks, and defeating it rewards you with a Bubbul Gem that can later be traded for special items.
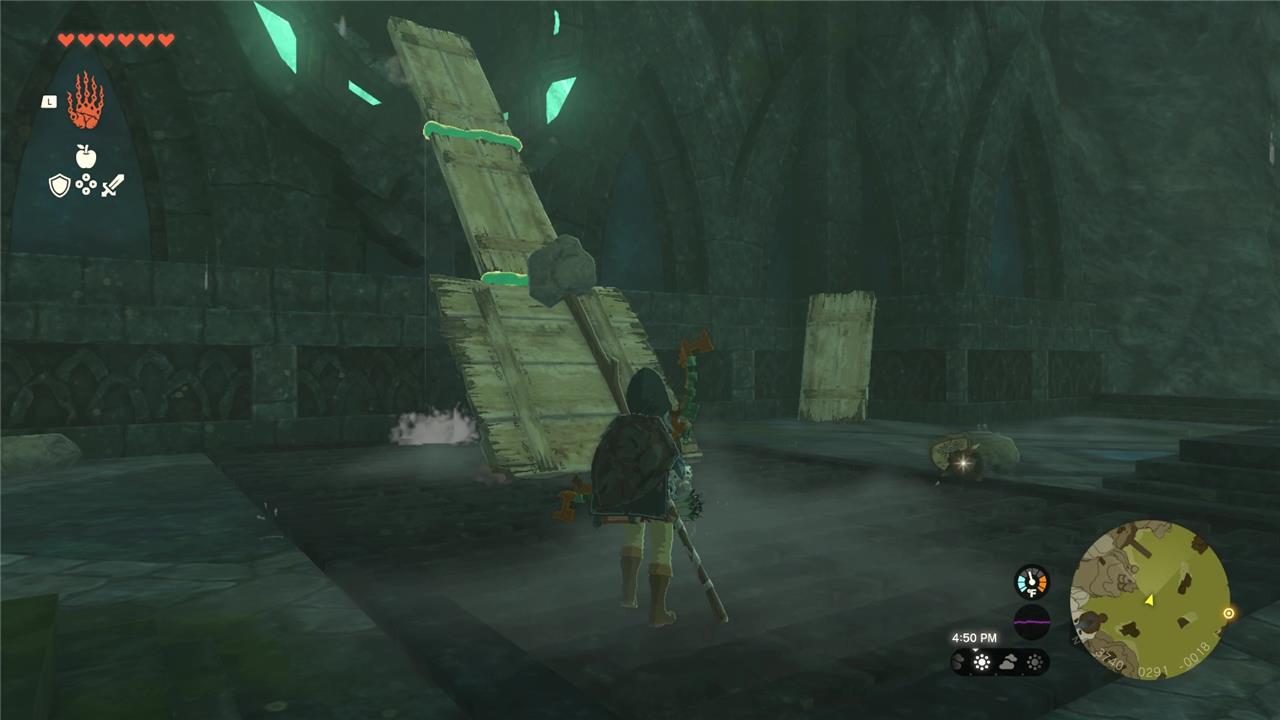
Head to the new bridge you can now access in the northwest.
Head up the broken bridge, using Ultrahand on planks to climb up broken parts when necessary. At the end of the bridge, enter the cave on the right.
An enemy similar to the Sludge Like, called an Ice Like, will be inside, spitting clouds of ice at you. Between rounds of ice clouds, run up the slope past the Ice Like. The ice clouds will always travel towards the entrance of this cavern, so it’s best to be on high ground to kill it. If you don’t want to fight it, you can ignore it, but it’ll give you some materials and another Zora shield for your time.
At the end of the cave, there will be a Bubbulfrog, which you can take out for a Bubbul Gem. That’s it for this cavern and optional segment.
Opening the last pipe
The last pipe lies deeper within the Ancient Zora Waterworks, guarded by strong water pressure and a few Sludge Like enemies. Use Sidon’s water shield to block their attacks while activating nearby mechanisms to drain excess water. Once the lower chamber is clear, use your paraglider to reach the final valve and open it, allowing the water to flow freely through the structure.
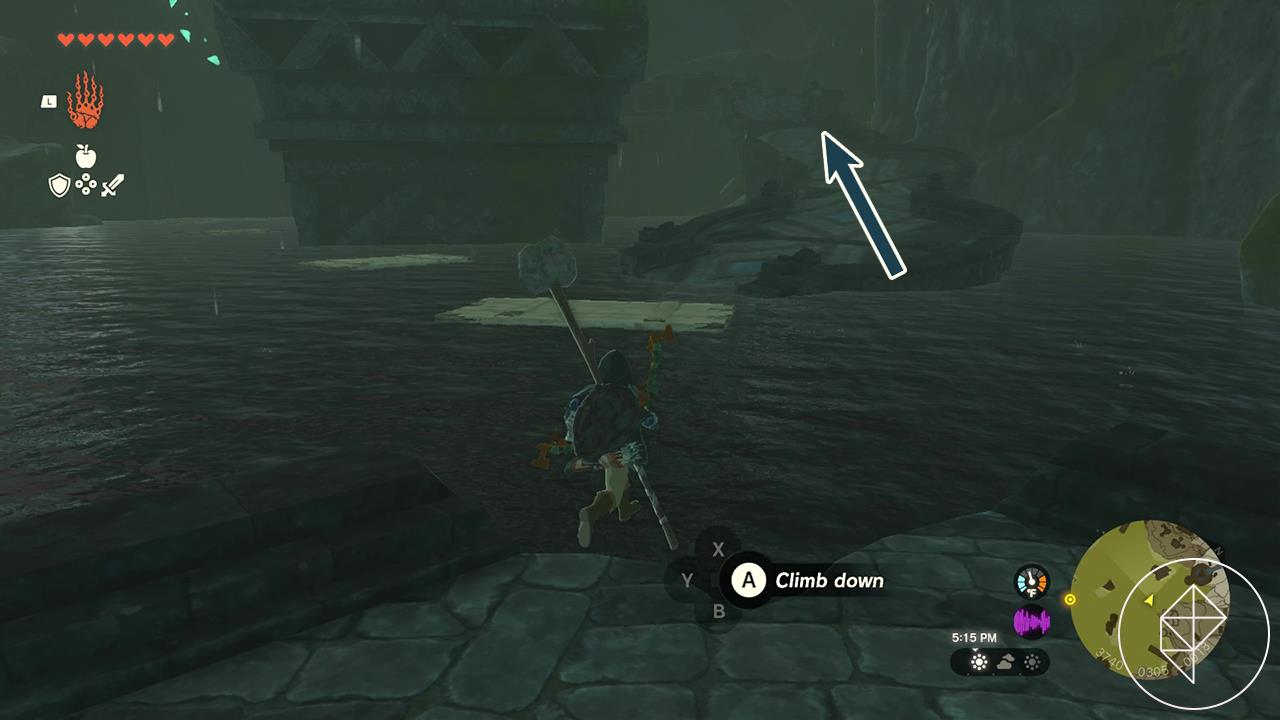
Swim to the broken bridge in the west and enter the sewer-like pipe. There’ll be a few keese and chuchu inside, so take those out. If you keep following the pipes, it’ll spit you out on the other side of the waterworks near the optional Bubbulfrog cave mentioned above. However, you want to head towards the back of the pipe, where you can see water leaking through a grate.
Stand under the grate and use Ascend. Break the boulders directly in front of you to finish flooding the waterworks and climb up the ladder. Use Ultrahand on the lever to flip it to the other side.
Jump or glide down the opening and u-turn to enter a pipe with a chest inside. Open it for an opal.
Swim towards the lit up platform in the middle and interact with it. Link will chat a bit with Sidon, who will jump up the new waterfall spouting in the center of the lake.
How to defeat Ice Like and Bubbulfrog in Ancient Zora Waterworks
You’ll fight the Ice Like and then the Bubbulfrog in the same optional side cave, so you can handle both in one short run.
Reaching the Ice Like and Bubbulfrog
-
From the main Ancient Zora Waterworks chamber, go to the high tunnel in the north/northeast wall that leads to a side cave; this is the one that contains an Ice Like and, deeper in, the Bubbulfrog.
-
Follow the tunnel until you see the Ice Like hanging from the ceiling; past it (same tunnel) is the cavern with the Bubbulfrog on the wall.
How to defeat the Ice Like
-
Stay mobile and off the very front line: the Ice Like spits slow ice projectiles straight ahead, so keep moving sideways or stand at mid-range where you can react.
-
When it opens its mouth and charges an attack, shoot the glowing weak point inside with an arrow (normal or fire-type) or throw a weapon at it to stun it and knock it down.
-
Once it falls, rush in and hit its body with melee attacks until it recovers; repeat this “bait shot → stun → punish” loop until it dies, then pick up the Ice-type materials and any shield it drops.
-
If you struggle to aim, you can also block or sidestep its ice, wait for the mouth to stay open a bit longer, and then fire; elemental arrows are not required, just helpful.
How to defeat the Bubbulfrog
-
Go past the Ice Like into the deeper part of the cave; the Bubbulfrog is a glowing lizard-like creature stuck high on the wall or ceiling.
-
Lock on and shoot it with arrows; each hit makes it flinch and may cause it to move, but it only has a few hits’ worth of health.
-
You can also climb closer and swing a melee weapon, but arrows are safer and faster since the arena is cramped and slippery.
-
When it dies, it drops a Bubbul Gem on the ground-grab this, as these gems are used later with Koltin for monster-themed rewards.
If you tell me what gear you’re using (hearts, armor, bow strength), I can suggest an exact arrow/weapon setup to one-cycle the Ice Like.
Where to find Zora Greaves in Ancient Zora Waterworks
You can only get the Zora Greaves in the Ancient Zora Waterworks after finishing the Water Temple and starting the side quest “A Token of Friendship,” then returning to a drained version of the area.
Step 1 – Unlock the quest
-
Complete the “Sidon of the Zora” main story quest, including the Water Temple. After this, Zora’s Domain returns to normal and the Waterworks will later be drained.
-
Talk to Yona in Zora’s Domain by the king’s throne room; she mentions the Zora Greaves were once offered at the Ancient Zora Waterworks and starts the “A Token of Friendship” side quest.
Step 2 – Return to the Ancient Zora Waterworks
-
Go back to East Reservoir Lake (east of Zora’s Domain) and dive into the big whirlpool again, the same way you did during Sidon’s quest.
-
This time, the Ancient Zora Waterworks is mostly drained; in the main central chamber, circle the base of the big central pillar and look for a large new hole in the ground on the left/southwest side.
Step 3 – Reach the Stone Talus cavern
-
Drop down that hole into a lower cave and follow the tunnel; it opens into a large cavern with a Luminous Stone Talus in the middle and lots of ore deposits.
-
You do not have to kill the Stone Talus, but defeating it gives extra ore and a Luminous Stone Talus Heart if you want the loot.
Step 4 – Find the hidden waterfall room
-
In this big cavern, look for a waterfall along the wall (often described as to the back/southwest side of the room); behind this waterfall is the hidden room with the greaves.
-
Run or dodge around the Talus, slip behind the waterfall, and you’ll find a short passage with stairs leading up to a platform.
Step 5 – Open the chest with the Zora Greaves
-
At the top of the short staircase, there’s a treasure chest; open it to obtain the Zora Greaves, which boost your swim speed and complete the “A Token of Friendship” quest.
-
Guides list coordinates for the chest roughly in the mid-3000s east, low 00s north, and negative depth (for example around 3585, 0247, -0103), but using the “hole near the pillar → big Talus cave → waterfall → stairs → chest” path is usually enough.
If you describe what you currently see (water drained or not, whether you’ve met Yona after the temple), I can pinpoint exactly which step you’re missing.