Hyrule has changed, and so have the rules. Before you glide off a sky island or fuse your first weapon, here are ten things every adventurer should know to survive-and thrive-in The Legend of Zelda: Tears of the Kingdom.
After spending dozens of hours diving from the skies and fusing swords with bananas, we’ve gathered a list of things you should know before diving into Tears of the Kingdom‘s pool of challenges and mysteries.
Adjust these settings
Fine-tune your controls and graphics options right away. Map the camera to your preferred button for quick aiming during combat or climbing. Set the minimap to north-up if directional confusion hits hard in Hyrule’s skies. Lower dynamic resolution if frame rates stutter on your hardware. Switch off motion controls unless you want precise aiming with Joy-Con tilt. These tweaks make traversal smoother from the Great Sky Island onward.
Zelda: Tears of the Kingdom doesn’t have an extensive list of options to tweak, but there are some settings worth trying. If you head over to System and open the Options menu, you should consider changing the following:
- Lock minimap to north: The minimap is an essential tool, but it’s easy to get lost with it rotating all the same. This setting makes it so it’ll always face north, regardless of where Link is looking, so you can keep your orientation in place and avoid confusion. Characters tend to give you directions based on cardinal points, too, so this option will help to stay on track.
- Message-window transparency: You’ll see pop-up messages all the time, some of which can have extensive text blurbs. If you want some added clarity to help with legibility, setting the message-window transparency to Dark can help. Sadly, there isn’t a way to increase font size, but having a solid color in the background for dialogue can help during long nights of playing, especially if you’re sitting far from the TV and playing with your Switch docked.
- Aim with motion controls: This option comes down to personal preference, but unless you’re used to motion controls in games like Splatoon 3, I recommend turning them off. Drawing your bow in the midst of combat or throwing items across the room are actions that demand precision, and you won’t always be in an ideal position for a quick shot depending on how you’re holding your console playing handheld or your joy-cons while docked. In short, landing an arrow on a Hinox’s eye is daunting enough, so use the option that best suits your preferences.
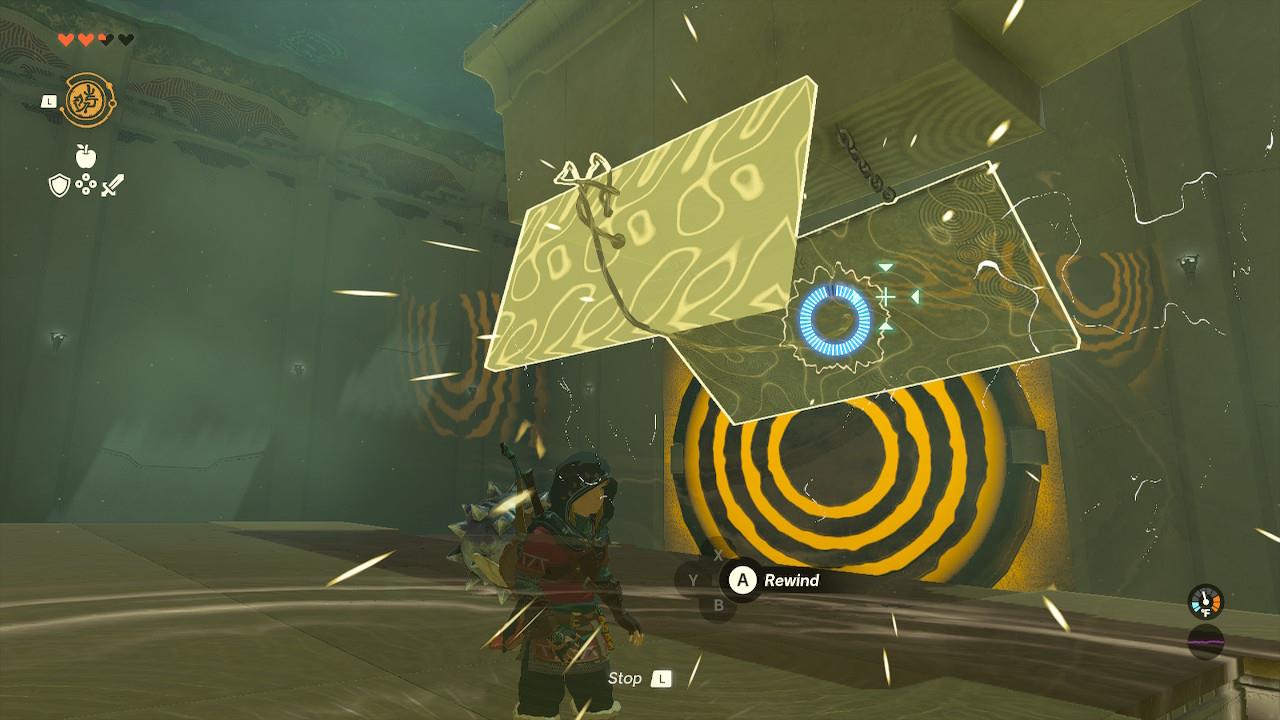
Rewind is (basically) a Stasis replacement
Rewind lets you reverse your character’s actions and those of objects around you, much like Stasis from Breath of the Wild let you freeze and manipulate items. Use it to undo falls, fix mistakes in building contraptions, or rewind thrown objects back to your hand. It fills the same role by giving control over physics and motion, but with the added flexibility of time reversal instead of halting it. Practice it early to master quick recoveries during exploration and combat.
There is an array of new abilities to learn and experiment with in Zelda: Tears of the Kingdom. While you might miss some of the ones from Breath of the Wild, such as Stasis, it’s worth knowing that Rewind gets fairly close.
In essence, it’s likely that you’ll be primarily using the Recall action of the ability to throw rocks and other hazards back at enemies. But Rewind can also freeze objects if you, for example, grab one with Ultrahand and keep it somewhere in place for a few seconds, and then you let it go.
Using Recall, the object will return to that holding position to repeat your action. This can be of help when going through shrines, for example.
Open your scope while diving down from the skies
While falling from the sky islands, open your paraglider early and take a moment to scan the terrain below for shrines, camps, or hidden caves. Use the freefall to plan your path and mark points of interest before touching down. Adjusting your descent angle can also help you reach distant areas or glide toward resources that are otherwise hard to reach. This approach saves time and turns every descent into a chance to spot new opportunities.
Placing pins in the world to signalize places of interest remains a central mechanic in Tears of the Kingdom. Of course, you can do this at any time by pressing down the right analog stick – but especially in the early hours of the game, there’s only so much you can mark down from ground level.
Whenever you’re diving down from a Sky Island, I recommend opening your scope. This freezes Link’s movement, so take your time and pin away. This can also be helpful to plan your landing ahead of time, and double-check that you’re not about to fall into a dangerous situation.
The only caveat: While Link will stay in place, it doesn’t mean the game is frozen. If there are flying enemies nearby, they might attack you. And if you’re diving in an area with extreme weather conditions, you’ll continue to be exposed to the elements, potentially losing health if you’re not careful.
Grab every bomb flower you see
Bomb Flowers are scattered across caves and along cliff walls, and collecting them early will save you trouble later. They act as portable explosives for breaking rocks, defeating stronger enemies, or triggering environmental effects from a safe distance. Since they’re consumed quickly, stash as many as you can whenever you spot them. Keeping your supply stocked means you’ll always have a quick solution for blocked paths or tough battles.
I can’t stress enough how useful bomb flowers are. The item has inherent potential, of course, but even more so now that you can combine it with arrows. Throwing bomb flowers is useful if the distance is short enough, but if you want to get a head start in a combat encounter, a few explosive arrows will give you a huge advantage.
What’s more, once you start exploring Tears of the Kingdom‘s many caves, you’ll quickly encounter rock walls that impede your progress. There are multiple ways to destroy them, but bomb flowers can be useful in these cases, too.
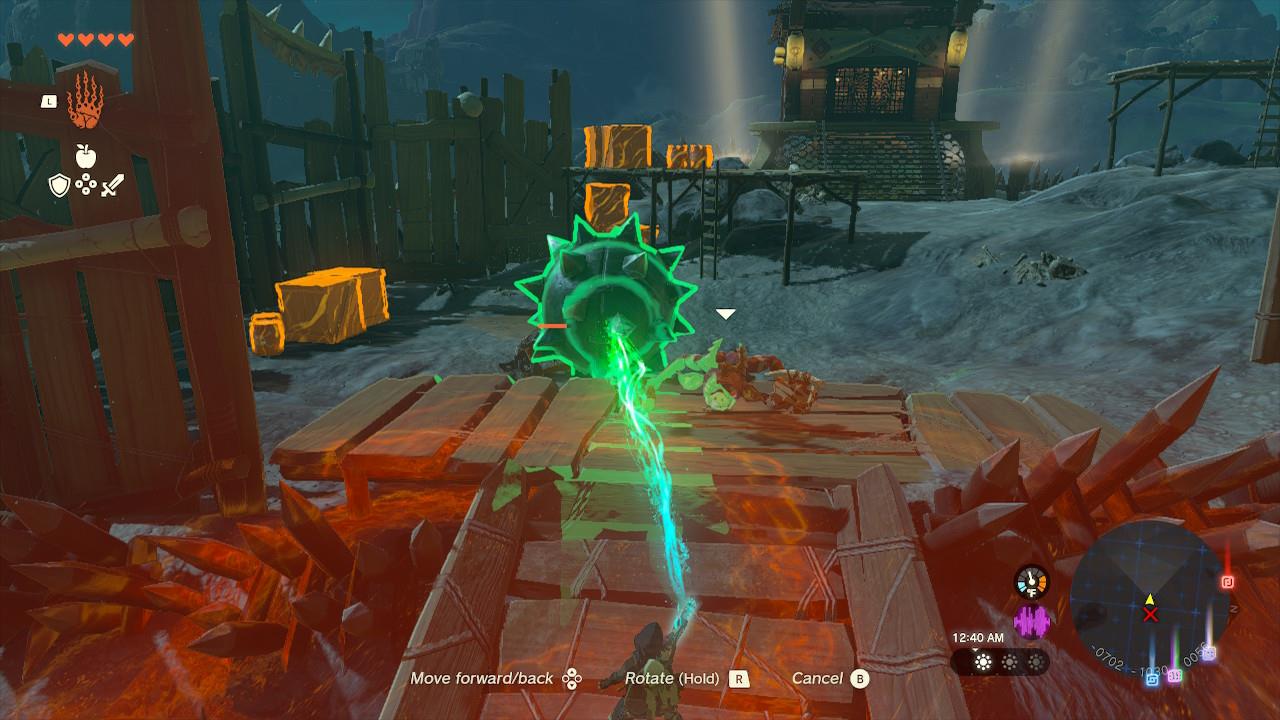
Fuse weapons often and freely
Fuse weapons without hesitation in Tears of the Kingdom. They break after a few swings or hits, so combine materials like sticks with rocks, tree branches, or enemy parts right away to craft stronger tools. This keeps you armed through combat and puzzles. Experiment constantly-mix a rusty sword with a fire fruit for flames or a spear with wings for ranged attacks. Stock up on spare parts from the environment to stay prepared.
Yes, increasing your inventory isn’t an easy ordeal, especially early on. You’re likely to run out of space fast, which can be frustrating. But instead of leaving multiple weapons behind every 20 yards, remember that you can Fuse them together.
The act of Fuse will always enhance the weapon you’re using, to a lesser or higher degree, so Fuse often! If you’re torn between two or more options when you don’t have any inventory slots left, try fusing them and experimenting with that combination.
If you want some ideas, we have a dedicated page for the best early Fuse combinations in the game.
Cook elemental resistance meals and elixirs
Elemental resistance food and elixirs keep Link alive in scorching deserts, freezing mountains, and stormy skies, so experiment with ingredients early. Combine spicy peppers or warm safflina for cold resistance, use hydromelons or chillshrooms for heat, and mix shock-resistant critters like thunderwing butterflies with monster parts for lightning protection. Cooking higher-quality dishes with multiple matching ingredients boosts both duration and strength, and keeping a few different resistances in your pouch lets you swap quickly as the weather or region changes.
Even if you’re wearing clothing that helps with elemental resistances, there are places around Hyrule where the weather can be unbearable for Link. You’ll get an alert on the bottom right corner of your screen when it happens, and unless you either exit the area or use a consumable to help, you’ll slowly lose hearts.
As such, prepping meals with spicy peppers, or creating elixirs that can counter specific weather conditions will go a long way. If you’re ever in doubt, open your character screen and take a peek at your current resistances. If you only have one bar instead of two, you’re going to need some extra protection before embarking into the desert or the peak of a mountain.
Stock up on Zonai Devices
Zonai Devices are incredibly useful for exploring, solving puzzles, and creating vehicles or contraptions. Collect as many as you can from Device Dispensers scattered across Sky Islands and other regions. They include tools like fans, rockets, and stabilizers, which help you travel faster or overcome tricky obstacles. Keeping a healthy supply makes it easier to experiment with different builds and tackle challenges creatively on your adventure.
Zonai Devices can be overwhelming to parse through, but are quite essential for the adventure at large. You should always stock up on them whenever you come across a Zonai Dispenser.
If you’re stumped on a puzzle or can’t get inside a cave, you can usually use some sort of Zonai Device. That said, if you happen to build something using Zonai Devices or materials from the environment, and you’re defeated, that construction you created is reset. (Yes, even if you reload an autosave prior to that instance!)
Having capsules from a Zonai Dispenser in my inventory has gotten me out of trouble more times than I can count, as I could always rebuild what I needed after loading a previous save. If you spot a Zonai Dispenser, make sure to grab a few of them – not having to depend on what’s around you in order to build is always a plus.
Scan for chests with Ultrahand
Use the Ultrahand ability to lift and move objects around you-it can do more than build contraptions. Many treasure chests are buried, stuck underwater, or hidden under rubble, and highlighting nearby items with Ultrahand’s glow helps you spot them easily. Try sweeping areas slowly, especially ruins or caves, where chests can blend into the surroundings. This method often reveals hidden loot you might miss with normal exploration.
Ultrahand is a complex ability with a few secondary uses beyond its ostensible purpose. If you see a chest stuck in the ground, you can grab it and hold the analog stick up to retrieve it. This also applies to items that might be far from Link’s grasp, such as bomb flowers on walls or ceilings. Instead of climbing to them, you can just use Ultrahand and bring them closer to you.
What’s more, don’t underestimate Ultrahand’s potential as a scanner for the environment. It will highlight any object that you can grab with a brighter color tone. Whenever you’re near a lake or a waterfall, scan your surroundings. Who knows? You might spot a hidden chest.
Explore small Sky Islands when you can
Small Sky Islands often hide materials, treasure chests, or shrines that can make a big difference early on. They’re quick to reach with the right tools, and many reward creative use of Zonai devices or smart gliding. Spending time on these floating islets helps you practice aerial movement while collecting valuable gear and resources before facing tougher challenges on the surface.
As you trek through Hyrule in Zelda: Tears of the Kingdom, you’ll come across plenty of Sky Island rocks falling to the ground. While you might not be interested in a detour to a large island, it’s worth taking a look at the sky and seeing if it’s a small island.
Small Sky Islands often have a chest, which can have anything from a treasure map indicating leads to armor sets like the Barbarian Armor, or useful Zonai-related items. You’ll also find no shortage of lootable materials. And if you see a Fairy, sneak up on it by crouching and moving slowly – they’ll bring you back on your feet by reviving you after a fatal blow.
The Purah Pad has hidden features to unlock
The Purah Pad holds more than just a map and camera-it hides several functions that players can easily miss early on. Features like sensor tracking, detailed map pins, and fast travel points expand as you progress through quests and upgrades. Experimenting with its menu options can reveal powerful tools for exploration and puzzle-solving. Keeping an eye on new abilities added by Purah or Robbie can make navigating Hyrule smoother and far more rewarding.
The Purah Pad, the definitely-not-a-Switch device that Link carries, might seem a tad barebones at first. This is because there are some hidden features that you need to unlock through quest progress.
Robbie, who can be found in Lookout Landing alongside Josha, knows his way around the Purah Pad better than anyone. If you want the device to have a sensor to pinpoint shrines in close proximity, as well as a few other returning mechanics from Breath of the Wild, make sure to progress through his quests. Luckily for you, paying Robbie a visit is one of the things to do first in the game.
Best early game weapons to fuse
Here are some of the best early-game fuse ideas to make your weapons and arrows hit much harder without needing rare materials.
Core early rules
-
Put your highest-damage monster part on your most durable weapon (avoid wasting strong parts on brittle bases like bone arms).
-
Always keep at least one “utility” fuse (rock hammer, bomb-arrow setup, etc.) instead of turning everything into pure DPS.
Great early melee fuses
-
One-handed sword + Bokoblin (or similar) horn: Simple, very efficient early power boost, and you still get a shield.
-
Any melee weapon + rock or boulder: Makes a durable mining/breaking tool for ore and cracked walls that still does okay combat damage.
-
Spear + spear (or halberd): Huge reach lets you poke enemies from a safer distance, perfect while you’re still squishy.
-
Decent base weapon + Stal enemy arm (Bokoblin arm, etc.): Arms have high early attack, so fusing them onto a sturdier base gives strong burst damage without the arm’s terrible durability.
-
Long spear + Lizalfos Tail: Creates a whip-like weapon with extended range, great for spacing and crowd control.
Monster parts to prioritize
-
Early horns (Bokoblin, Blue Bokoblin, Moblin, Captain Construct I, Horriblin, Lizalfos) give big flat attack bonuses when fused.
-
Sort your materials by Fuse Attack Power (press Y in the materials tab) and use the top items on your best non-rusted, non-bone weapons.
Shields and utility fuses
-
Shield + Zonai Flame Emitter: Blocks and breathes fire; amazing for tight caves and crowd control.
-
Shield + Rocket: Quick vertical launch for reaching cliffs and towers; costs the rocket after one use but is fantastic mobility.
-
Shield + Puffshroom: When enemies hit it, you create a smokescreen, letting you sneakstrike or reposition safely.
Arrows you should set up early
-
Arrow + Bomb Flower: High damage, big AoE, and doubles as a remote bomb for cracked walls or groups.
-
Arrow + Keese (or other) eyeball: Homing arrows that trivialize flying or fast enemies and help if your aim is shaky.
-
Arrow + wings (especially Aerocuda wings): Super long-range, straight-flying “sniper” shots for picking off camps from afar.
If you tell me what you’re using most (sword-and-shield, spears, or bows), I can give you 2-3 specific early fuse “loadouts” to aim for.
Where to farm Bokoblin Arms and monster horns early
Bokoblin Arms and horns both come from Bokoblin-type enemies, but the best way to farm them early is slightly different between “arms” (Stalkoblins) and regular monster horns.
Bokoblin Arms (Stalkoblin arms)
-
Fight Stalkoblins at night: Bokoblin skeletons (Stalkoblins) only appear after dark, often in or near regular Bokoblin camps you’ve already seen in the day.
-
Clear small night camps repeatedly: Look for low-tier camps near central areas (Hyrule Field, around Lookout Landing, or along early roads). Run a loop at night, kill the Stalkoblins, grab their dropped arms, then move to the next camp.
-
Sleep to reset: If you want more arms, rest at a fire or inn to skip to the next night and repeat the same route for consistent drops.
Regular monster horns (Bokoblin, Blue, Moblin, etc.)
-
Hit every early Bokoblin camp you see: Any living Bokoblin type (red, blue, black, Boss Bokoblin) drops its horn, so you’ll passively farm horns just by clearing camps while exploring.
-
Prioritize low-risk, high-density spots: Early on, focus on small camps near roads and stables, which usually have 3-6 Bokoblins you can pick off safely from range or with sneakstrikes.
-
Force respawns over time: Enemies naturally respawn after a Blood Moon, so if you find a cluster of easy camps you like, mark them on your map; every Blood Moon refills your horn farm.
Early-game practical loop
-
Choose a “day route” of 2-4 easy Bokoblin camps for general horns (red and blue).
-
At night, run a shorter loop that passes through those same camps to catch Stalkoblins and collect Bokoblin Arms.
-
Use strong horns (Blue Bokoblin, Moblin, Captain Construct) on your best melee weapons, and keep some spare arms just for quick burst-damage fuses.
If you tell me which region you’ve unlocked (just Great Sky Island, or already at Lookout Landing / Hyrule Field), I can suggest a specific little farming circuit that fits where you are.