Hidden upgrades on your Purah Pad can change the way you explore Hyrule. Here’s how to track your steps with the Hero’s Path, pinpoint Shrines with the Sensor, and warp anywhere using the Travel Medallion-all without missing a single secret.
To start upgrading the Purah Pad – which includes the Travel Medallion, Hero’s Path, and Shrine Sensor – you need to complete the “A Mystery in the Depths” questline. This will unlock the Hateno Village Research Lab, which is where the (upgrade) magic happens. This quest begins and ends in Hyrule Field’s Lookout Landing with researcher Josha.
How to start the Hateno Village Research Lab quest
Head to Hateno Village’s Ancient Tech Lab on the hilltop after finishing A Mystery in the Depths. Speak with Robbie to receive the shrine sensor, then test it by approaching the Mayahisik Shrine cave at the hill’s base. Return to Robbie to verify functionality and complete the quest.
Once you’ve finished up with Josha in Lookout Landing during the “A Mystery in the Depths” quest, Robbie will appear near the balloon you just fixed and instruct you to head over to East Necluda, where the Hateno Ancient Tech Lab is located. You can teleport to Zanmik Shrine to reach the village quickly. The lab is just east of Hateno Village.
How to get the Shrine Sensor
Complete “Camera Work in the Depths” and “A Mystery in the Depths” to repair Robbie’s hot air balloon at Lookout Landing using the Autobuild ability. Speak to Robbie afterward to receive the “Hateno Village Research Lab” side adventure, then travel to Hateno Ancient Tech Lab atop the hill in Hateno Village. Talk to Robbie inside; he installs the Shrine Sensor on your Purah Pad and asks you to test it by locating Mayahisik Shrine in a nearby cave blocked by rocks-clear the rocks, follow the sensor’s beeps to the shrine, and return to claim the upgrade.
The Shrine Sensor is a tool used to find Shrines of Light in Hyrule. The sensor will react with beeping noise when you’re heading toward a shrine – following that means locating a shrine. The Sensor emblem is located on the right-hand side of the Tears of the Kingdom user interface. It’ll blink (and make the sound) more rapidly as you approach a shrine. It can be toggled on through the map screen with the Y button.
Robbie will have you test out the Sensor by running around in his home and, later, outside in Hateno Village. Follow the Sensor to get a feel for how it works.
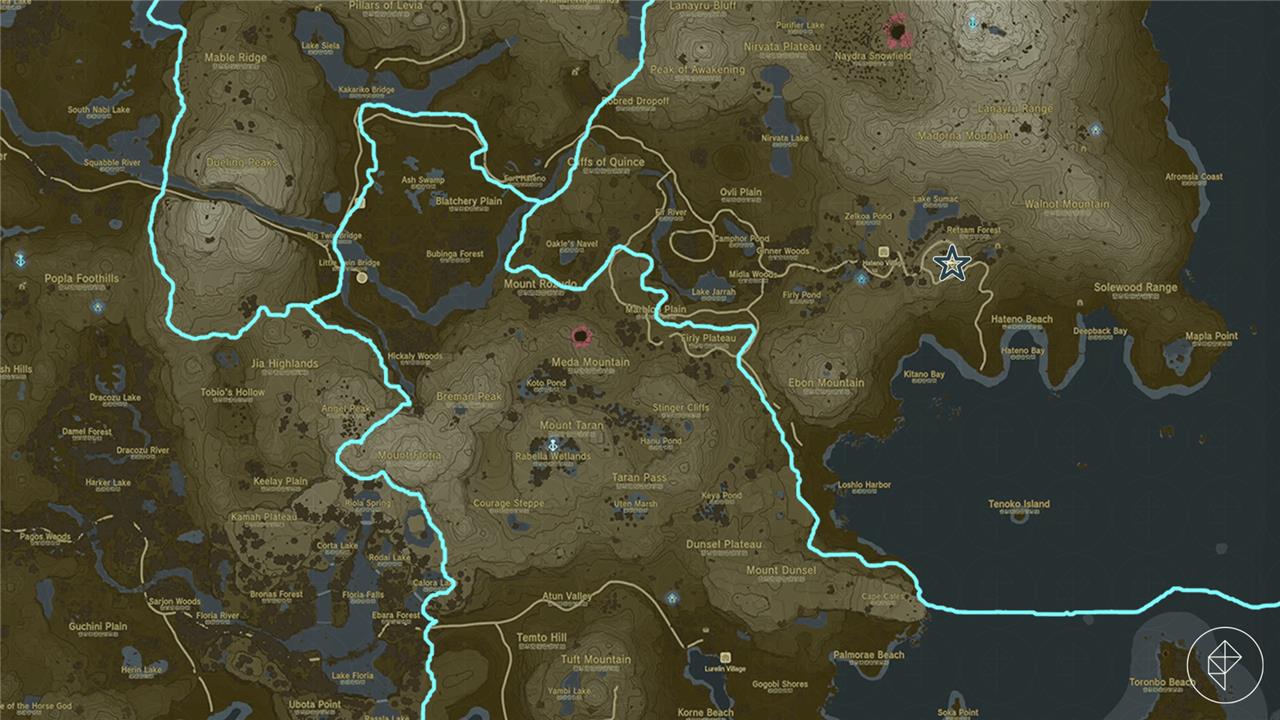
It’ll lead you to the Mayahisik Shrine, which is hidden inside a cave with its entrance blocked. You’ll need to blow up the rocks to get in. The entrance to the cave is at coordinates (3741, -2085, 0208). We used a bomb flower to get it – stand back!

Head into the cave and glide down the hole to the right, then follow the cave system to reach the Mayahisik Shrine at coordinates (3730, -2058, 0189). Head back to Robbie and the Hateno Ancient Tech Lab.
How to get the Travel Medallion
To get the Travel Medallion, talk to Robbie at the Hateno Village Research Lab after completing his earlier Purah Pad quests, including the ones that send you into the Depths and fully set up the lab at Hateno. Accept the “Presenting: The Travel Medallion!” side adventure, then follow his objective marker to the Akkala Ancient Tech Lab in the far northeast and clear out the Yiga Clan ambush at the door. Once the lab is safe, head inside and open the chest by the map board to claim the Travel Medallion prototype, then return to Robbie so he can finish the upgrade and add the Travel Medallion feature to your Purah Pad, initially letting you place one custom fast travel point that he can later upgrade to three.
Once you’ve got the Sensor installed, Robbie will offer to help with another upgrade for the Purah Pad; you can choose the order, but for ease of explanation, we’ll go in order they’re listed.
Robbie will send you off to the Akkala Ancient Tech Lab in Akkala to seek out prototypes for the Travel Medallion, which lets you set up fast travel gates anywhere. Using it is as easy as opening your inventory and marking the current location to place the medallion and make a gate. In total, the Travel Medallion can make three gates, but it needs to be upgraded to max it out. Let’s start, first, with just unlocking the feature.
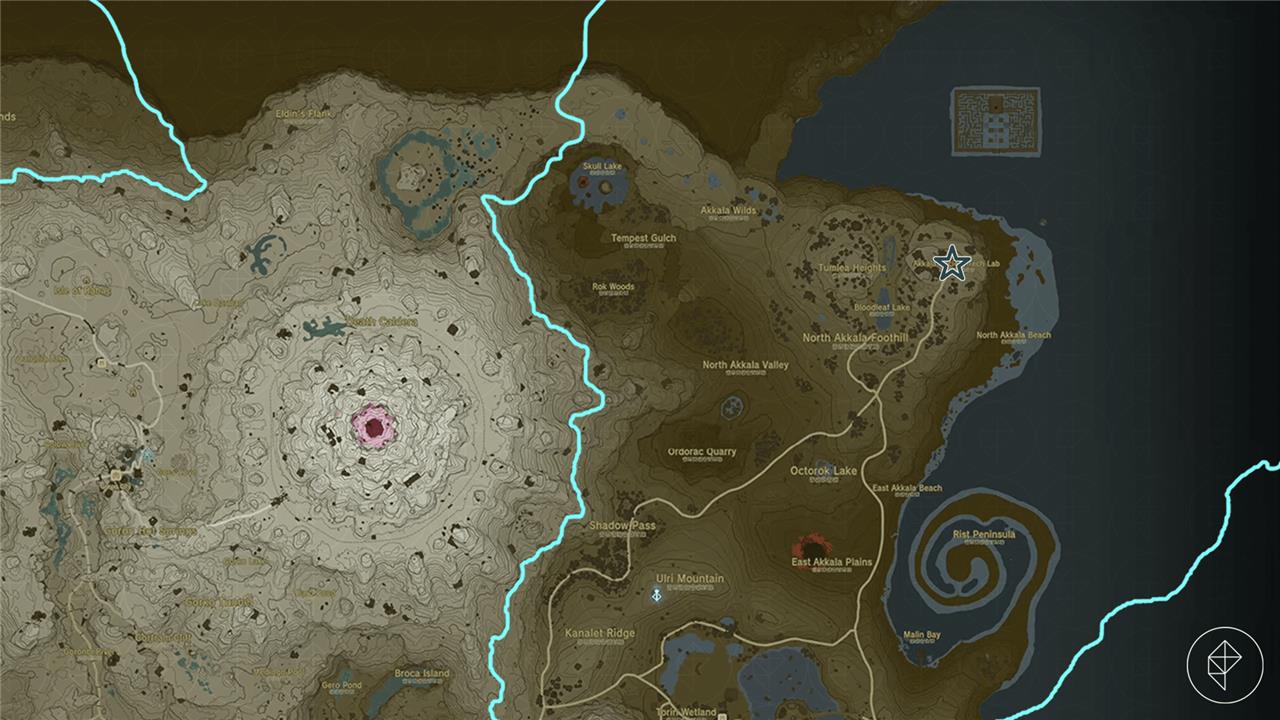
The Akkala Ancient Tech Lab is located at the top right-hand side of Hyrule. You’ll probably want to fast travel as close as you can get before making your way from there. The Ulri Mountain Skyview Tower is a good spot, and you can cover a lot of distance with your paraglider from there. Though it’s a long journey, you can use that travel time to seek out shrines or monsters to meet Robbie’s other upgrade requirements.
Once you find the Akkala Ancient Tech Lab, located at coordinates (4510, 3153, 0247), be ready for battle. Trying to enter through the door will kick off a fight against Yiga Clan enemies who shoot red projectiles, which you’ll need to dodge, then hit away with a sword.
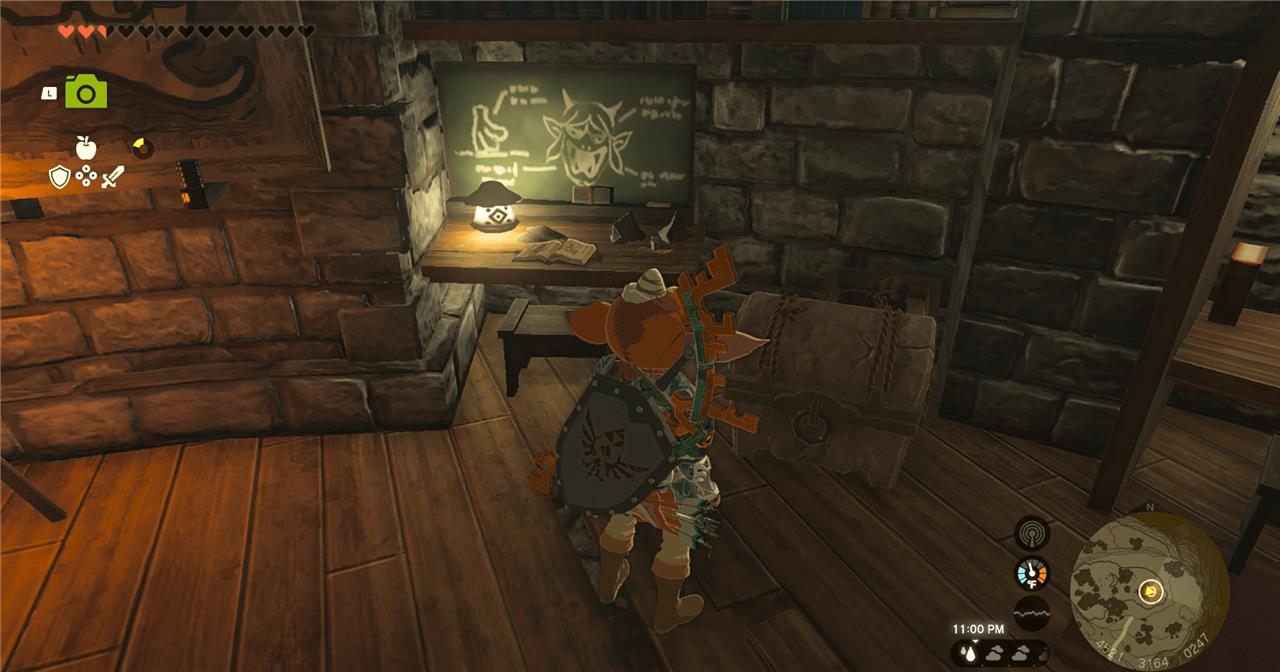
Once you’ve dispatched them, enter the lab to meet Konba, a fashion designer, who will give you Yiga Armor. He’ll leave, then search for a chest that holds the Travel Medallion prototype.
If you’re up for exploring, the Rasiwak Shrine is nearby. Once you’re ready, head back to Robbie at the Hateno Ancient Tech Lab. He’ll unlock the medallion and start offering you upgrades – 10 map-data locations for a second gate and 15 for a third. Now you’ll be able to drop three gates, and delete and reuse the medallions as needed.
How to get the Hero’s Path
To get the Hero’s Path, first visit Robbie at the Hateno Ancient Tech Lab after completing a few main objectives in the Depths. Speak with him once the map feature for the Purah Pad is restored, and he will offer to upgrade your device. The Hero’s Path upgrade lets you see your recent travel routes on the map, highlighting areas you’ve already explored. Bring the required materials and enough Zonaite charges to complete the enhancement before returning to Robbie, who will install the feature on your Purah Pad.
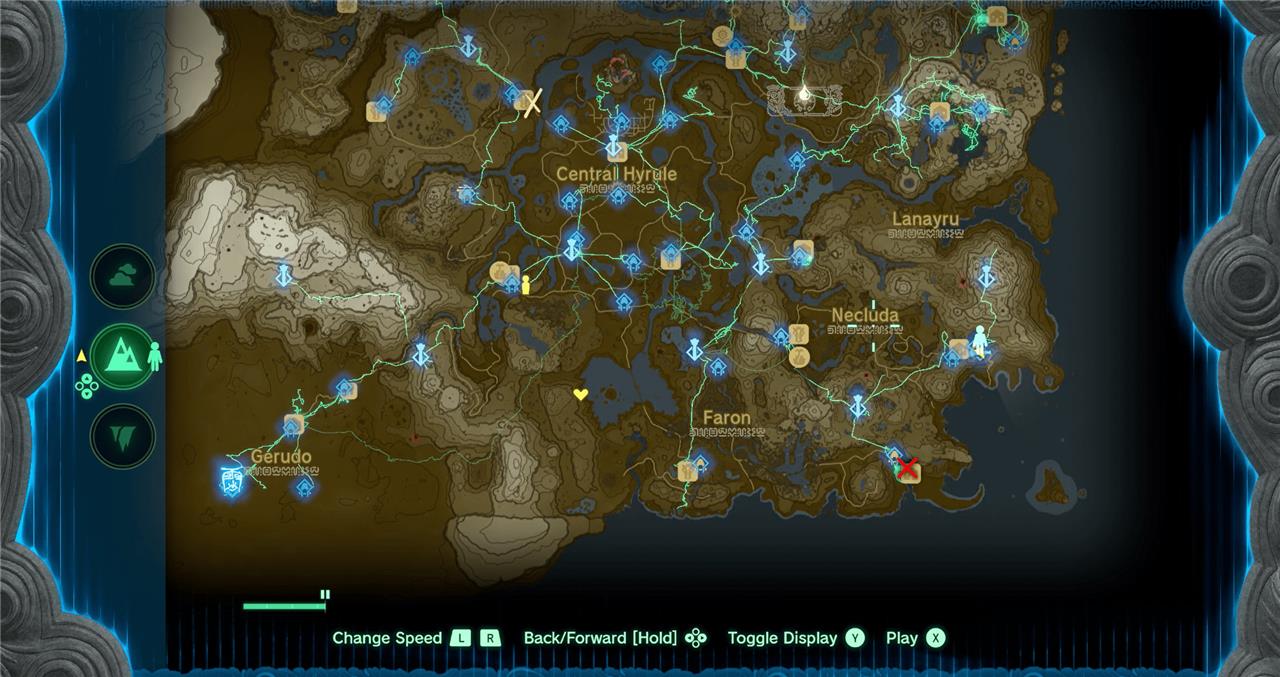
The Hero’s Path gives the ability to see the exact path of your journey through Hyrule, up to 256 hours of gameplay. On the map screen, push the X button to switch on Hero’s Path mode. Do the same to switch it off. The button on the bottom of the screen lets you simple toggle Hero’s Path on and off, but also lets you watch the path unravel from the start – it’s a very cool feature, and it tracks deaths, too.
Robbie will ask you for data from 15 shrines. If you’ve already got that, you’re all set – he’ll immediately take the Purah Pad and start setting things up. Otherwise, head out and find more shrines before proceeding. Our list of shrine locations can help point you toward some shrines close by.
How to get Sensor
Head to Hateno Ancient Tech Lab after finishing “A Mystery in the Depths.” Speak to Robbie, who adds the Shrine Sensor to your Purah Pad and asks you to test it by locating Mayahisik Shrine in the cave below the lab, behind destructible rocks near apple trees. Return to him upon completion to claim the upgrade, which beeps faster when nearing undiscovered Shrines of Light.
Sensor is like an upgraded version of the Shrine Sensor you unlocked earlier – it can detect more than just shrines.
To unlock it, Robbie wants you to fill the compendium with five different types of monsters. You add monsters to the compendium by grabbing their attention and taking a photo. Once you’ve got five different monsters in there, head back to Robbie in the Hateno Ancient Tech Lab.
You can set the Sensor to search for anything available in the Hyrule Compendium.
Filling out the Compendium quest
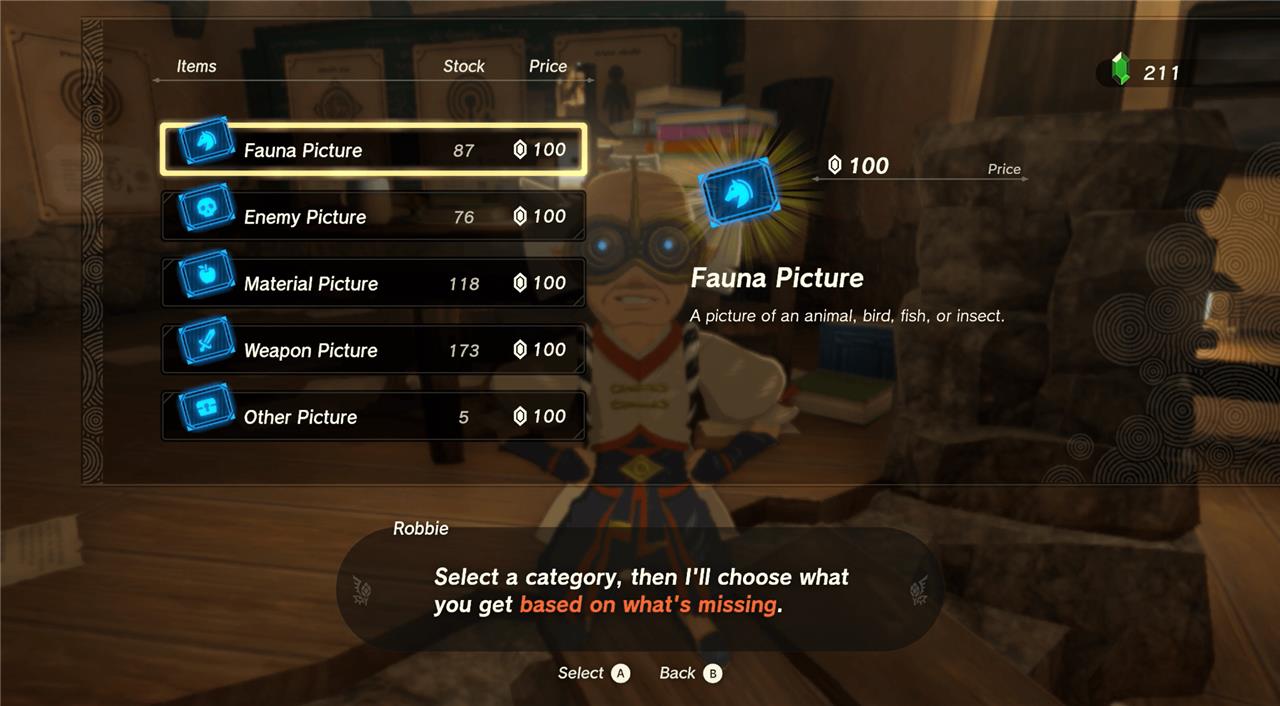
To progress the Compendium quest, speak with Robbie at the Hateno Ancient Tech Lab after meeting him at Lookout Landing. He’ll ask you to take photos of specific creatures, weapons, and materials using the Purah Pad’s camera. Each new entry helps expand your Compendium and moves the quest forward. Completing his requests not only fills your Compendium but also leads to further upgrades for your Purah Pad, including useful exploration tools like the Shrine Sensor.
How to upgrade to Sensor+ after Shrine Sensor
To upgrade the basic Shrine Sensor to Sensor+, you need to talk to Robbie again at the Hateno Ancient Tech Lab and complete his short monster-photo request.
Step-by-step to get Sensor+
-
Make sure you have already:
-
Finished “A Mystery in the Depths” and “Hateno Village Research Lab.”
-
Unlocked the regular Shrine Sensor from Robbie.
-
-
Return to Robbie at the Hateno Ancient Tech Lab and choose the dialogue option about Sensor+ (the side adventure is usually called “Presenting: Sensor +”).
-
Robbie will ask you to fill your Hyrule Compendium with at least 5 different types of monsters using the Camera on your Purah Pad.
-
Find any enemies (e.g., Bokoblin, Lizalfos, Chuchu, Keese, Construct), aim the Camera, and take a picture until the game confirms it’s registered to the Compendium.
-
You only need 5 distinct monster entries; if you already had 5+ before talking to him, the requirement is instantly met.
-
-
Once you have at least 5 monster entries, go back to Robbie and talk to him again to complete “Presenting: Sensor +” and install Sensor+ on your Purah Pad.
Using Sensor+
-
Open the map, press the button shown for the sensor settings (Y), and choose what the sensor tracks.
-
With Sensor+, you can set it to any entry you’ve registered in the Hyrule Compendium (materials, monsters, etc.), not just shrines, and it will beep and flash when you are near that target.
If you tell me where you are in the story, I can suggest a quick set of 5 easy monsters to photo near your current area.
How to unlock Hero’s Path after Sensor
You unlock Hero’s Path from Robbie at the Hateno Ancient Tech Lab once you’ve got the basic Shrine Sensor and enough shrines recorded.
Requirements
-
Complete the quests that lead to the Purah Pad upgrades: “Camera Work in the Depths,” “A Mystery in the Depths,” and “Hateno Village Research Lab,” which gives you the Shrine Sensor.
-
Have at least 15 Shrines of Light activated (they just need to be discovered and completed, anywhere in Hyrule).
Steps to unlock Hero’s Path
-
Go to the Hateno Village Research Lab (hill above Hateno Village) and talk to Robbie after you already have the Shrine Sensor.
-
When he offers further Purah Pad upgrades, pick “Hero’s Path Mode” (starts the quest usually titled “Presenting: Hero’s Path Mode”).
-
If you already have data from 15 shrines, the quest completes immediately; otherwise, just clear shrines until you reach 15, then speak to Robbie again to have him install Hero’s Path.
How to use Hero’s Path
-
Open the map and press X to toggle Hero’s Path Mode on and off.
-
A green line will show your movement route for up to about 256 hours of gameplay, and you can replay it forward and backward to see everywhere you’ve been (including deaths).
If you tell me how many shrines you’ve done, I can suggest a quick route to hit 15 and finish the upgrade fast.