Beneath the Shattered Moon, every chest hides a heartbeat of the galaxy, and the echoes of Force tears awaken what lurks in the shadows.
Star Wars Jedi: Survivor features literally hundreds of collectibles. We’re only focusing on those that have a tangible impact on how you play the game: essences (which power you up), Force tears (trials that reward you with a skill point), and chests (which contain cosmetics that make Cal and BD-1 look worthy of an Coruscant Daily Newsfeed cover shoot). Some chests contain the same cosmetic item – the first unlocks the item, and the second unlocks materials (color options) for it.
Over dozens of hours, you’ll visit each planet in Star Wars Jedi: Survivor multiple times. This guide covers collectibles you can get during your first visit.
Our Star Wars Jedi: Survivor Shattered Moon collectibles guide will help you find every chest, Force tear, Perk, and essence on the Shattered Moon in the Cargo Loading Deck, Automated Forge, Assembly Staging, and Superstructure Fabricators areas.
Shattered Moon Cargo Loading Deck collectibles
The Cargo Loading Deck on the Shattered Moon contains several collectibles scattered around its industrial platforms and machinery. Players can find chests with cosmetics and upgrades, Force tears that test combat and traversal skills, and essences that boost Cal’s abilities. Many items are hidden behind magnetic walls, beam puzzles, or require precise use of the ascension cable to reach higher areas. Exploring each section carefully ensures nothing is missed before moving deeper into the facility.
There is one collectible in the Cargo Loading Deck region of the Shattered Moon: one treasure.
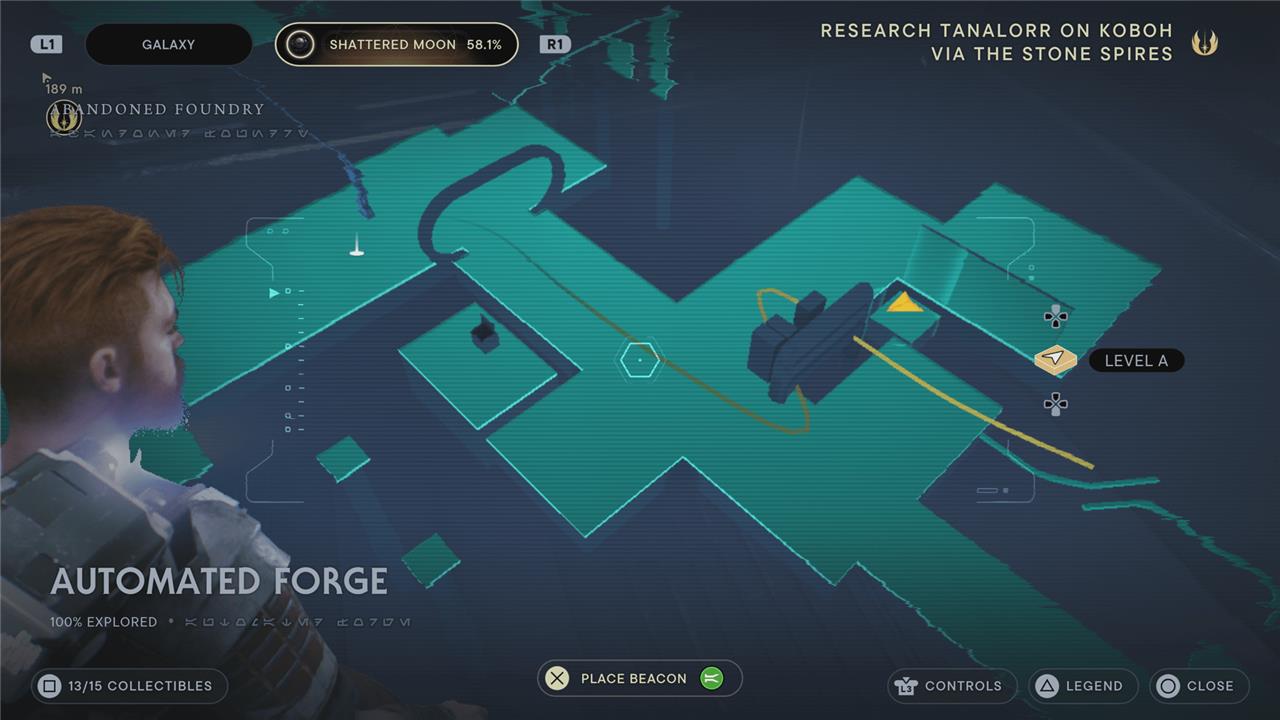
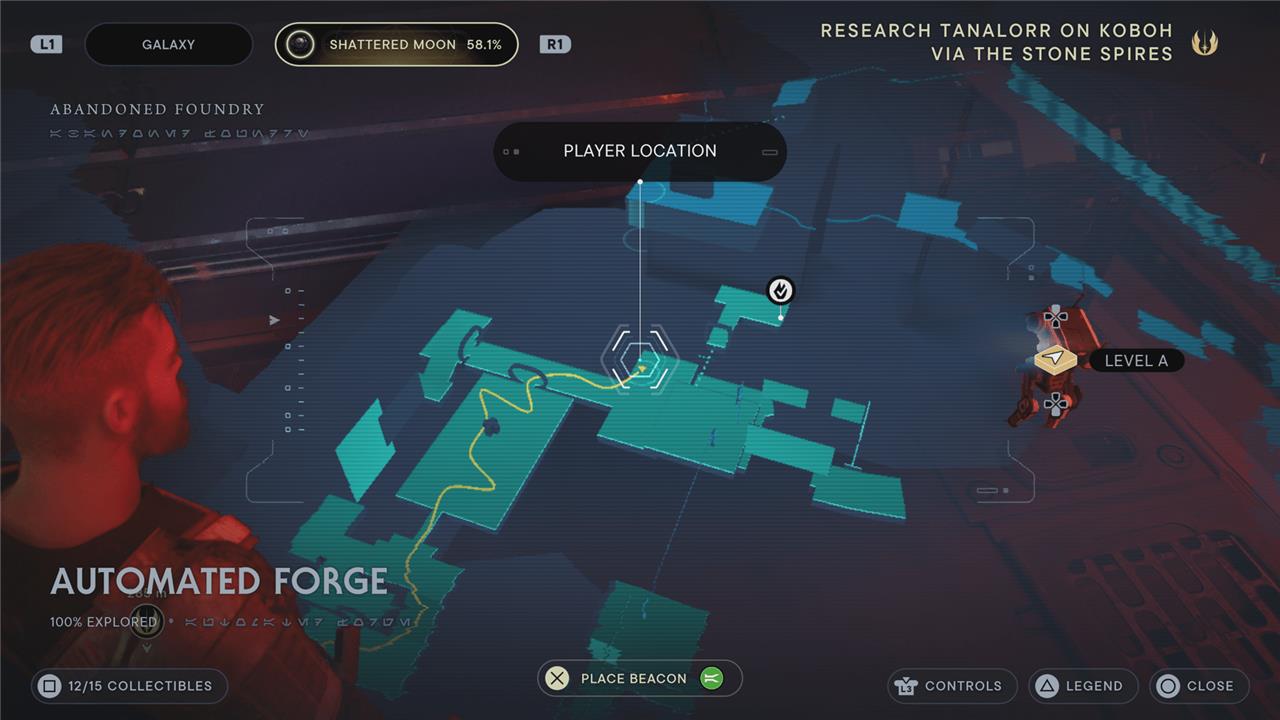
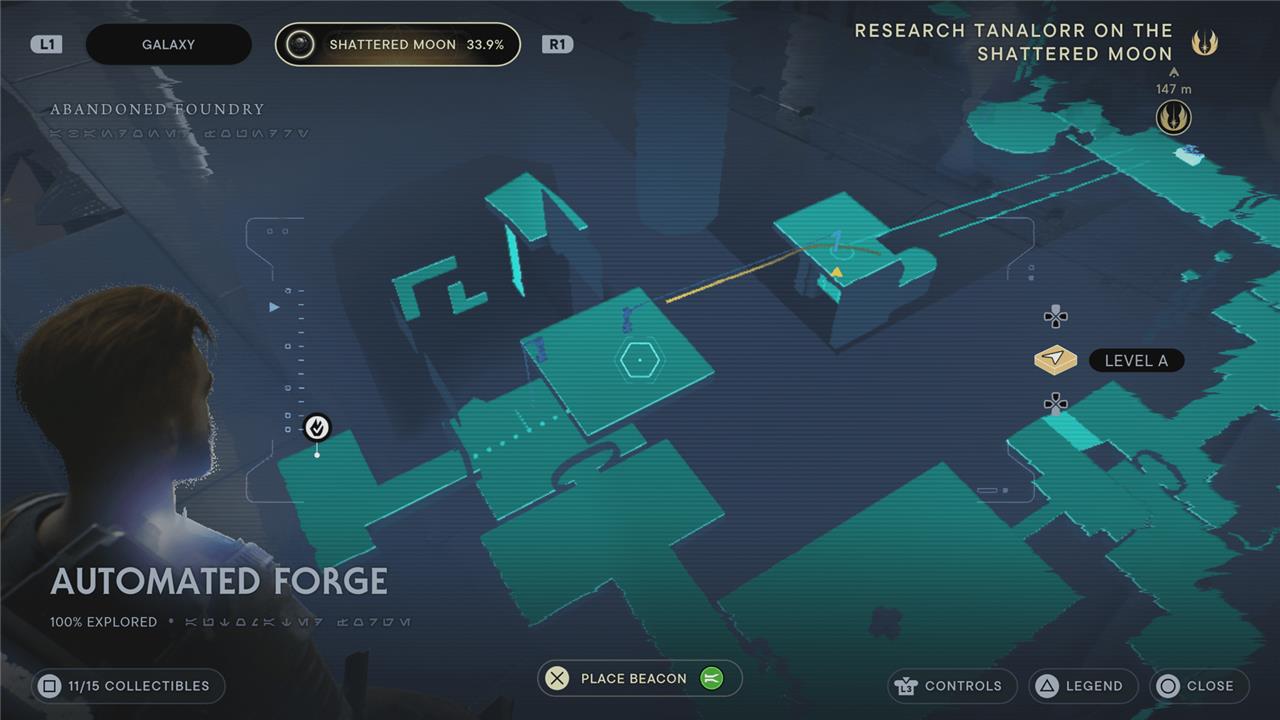
Shattered Moon Automated Forge collectibles
The Shattered Moon Automated Forge presents a curated set of collectibles scattered across its ruins, inviting thorough exploration of hidden chests, force tears, and essences that reward curiosity and precision.
There are 15collectibles in the Automated Forge region of the Shattered Moon: three chests, two essences, four databank entries, one Force tear, and five treasures.
Chest 1 – Harmony grip lightsaber component
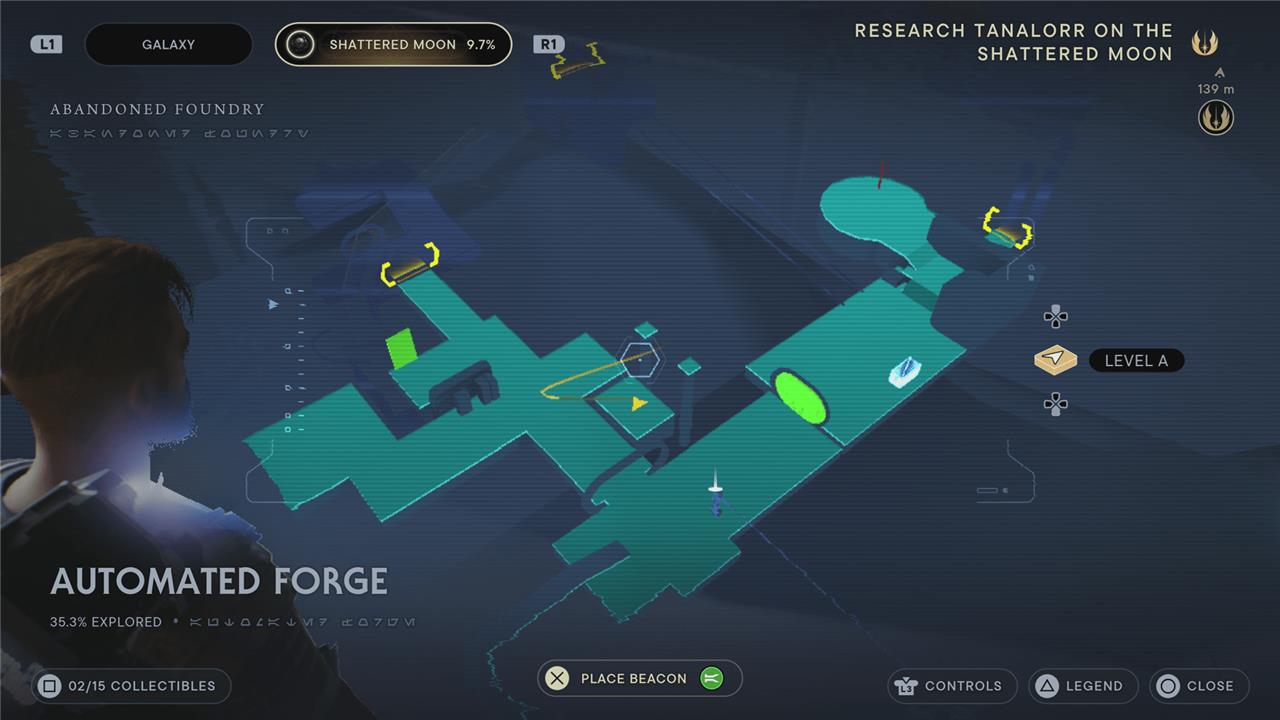
Once you work you way around to the Automated Forge’s meditation point, head inside. You’ll meet a maintenance droid at an intersection. Take the right to the opening behind the droid. Wait for the sparks on the platform ahead of you to die down, and then jump to it. Jump to the platform to your right, turn right, and jump into the alcove there to find the chest with the Harmony grip lightsaber component.
Essence 1 – Health
Back inside, you’ll get jumped by a Bedlam Raider just past that first maintenance droid. In the alcove they were hiding in, use Force Pull to yank a cover off the wall in the corner. Squeeze through, and you’ll be standing on a pipe (if you continue straight, you’ll get to sneak up behind some more Bedlam Raiders). From that first pipe, look to the left. Double jump over to the runnable wall, and you’ll land on a small platform with this healthessence.
Chest 2 – Unique metal weapon material
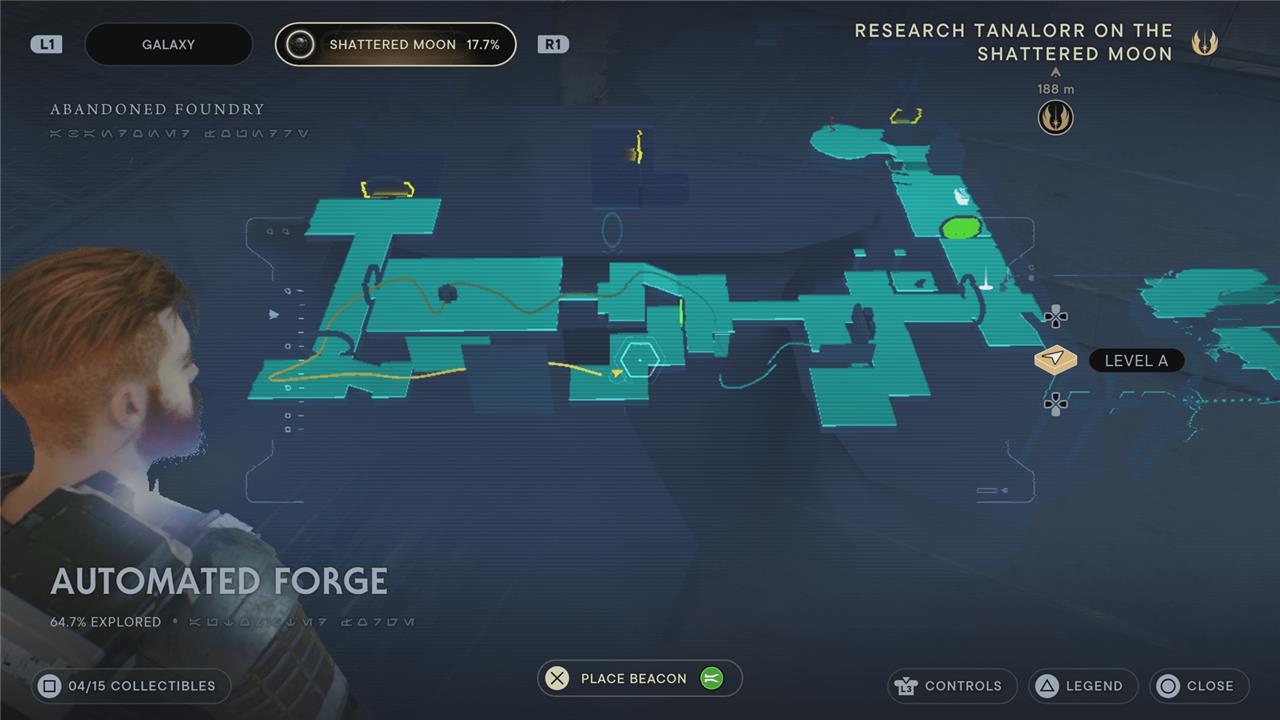
After you pass through the room with all the droid recharging stations – and fight off a crowd of battle droids and Bedlam Raiders – you’ll come to a T-intersection. Take the left and then another left outside. Wall run along the two walls to reach a chest with the unique metal weapon material inside.
Chest 3 – Harmony emitter lightsaber component
Back at the T-intersection, take the right. The chest with the Harmony emitter lightsaber component is immediately on your left around the first corner (it’s really obvious and equally easy to walk right past).
Force Tear 1 – Fractured Endurance

You’ll do some wall running and climbing (and getting electrocuted), and then unlock a shortcut and a zip line to the next area. To the left of the shortcut, jump to the pole and swing into the hallway across from you – you’ll have to time it carefully to avoid getting burned. In the next room, you’ll find the Force tear.
For this one, you’ll have to defeat a horde of battle droids (which is kind of fun, to be honest). You’ll be rewarded with a skill point when you’re done.
Essence 2 – Skill Point
Back at the zip line you just unlocked, riding it will take you to a platform with two more (electrified) zip lines. This essence is on a ledge below that platform. Just before you reach the edge of the platform, drop off of the zip line, and then double jump to catch the grating there. Climb up to grab this skill point.
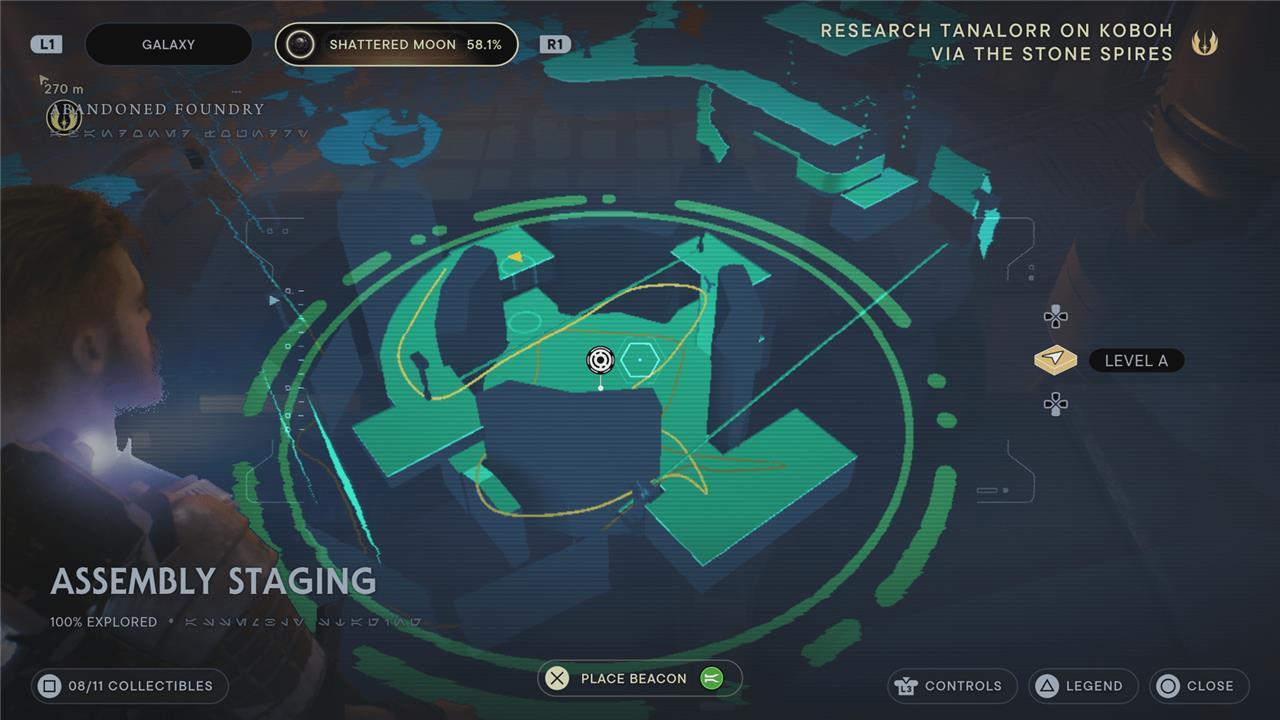
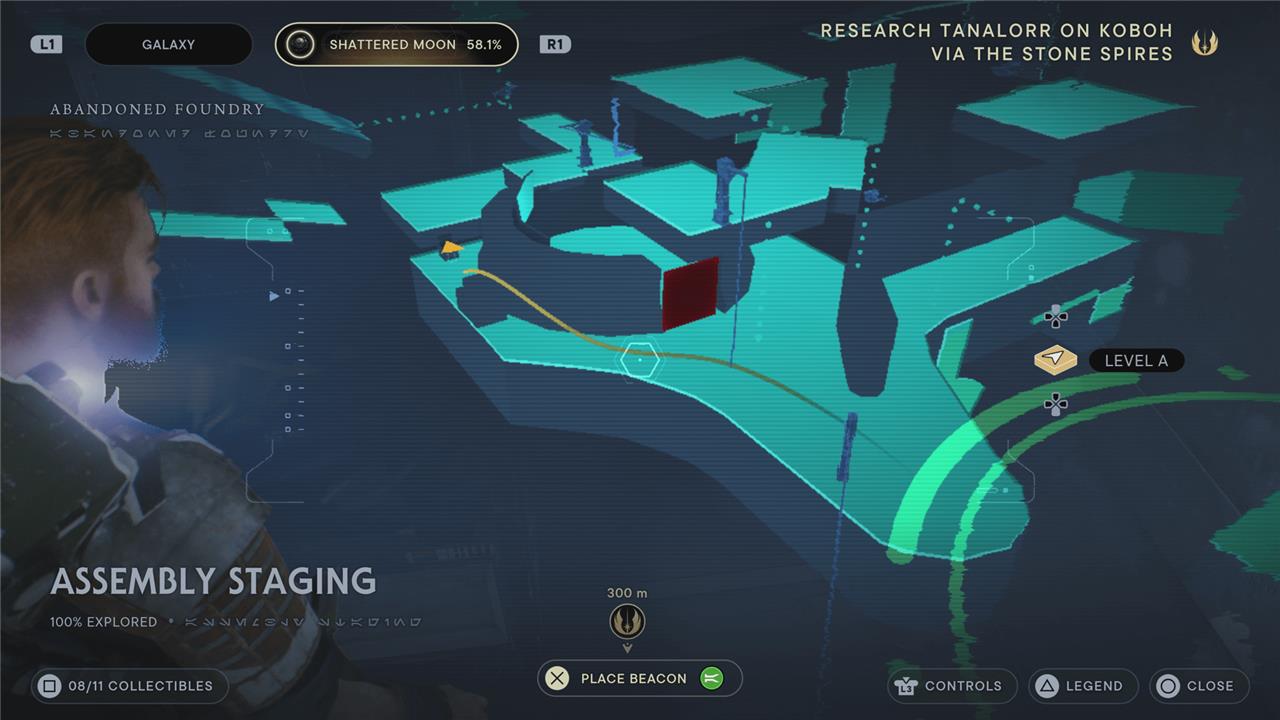
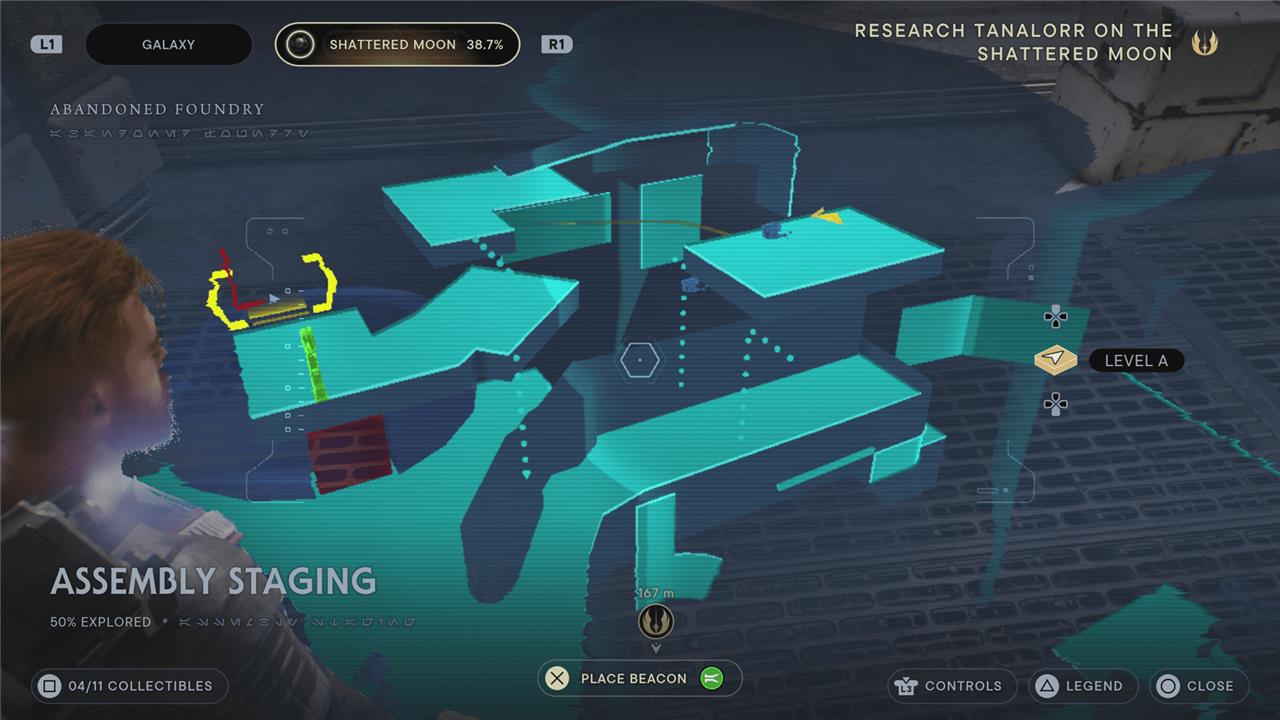
Shattered Moon Assembly Staging collectibles
The Shattered Moon Assembly Staging area holds several collectibles for players to claim. Two chests sit near the main platform, one guarded by enemies and another tucked behind debris. A Force Tear appears after clearing foes in the upper section, offering combat trials. One Essence sits close to the meditation point, while another requires sliding down a chute from the nearby ledge. Check ledges and corners to grab them all without missing spots.
There are 11collectibles in the Assembly Staging region of the Shattered Moon: two chests, one essence, three databank entries, and five treasures.
Chest 1 – Stim
At the bottom of the zip line (where you just picked up the skill point essence), you’ll meet a maintenance droid who gives you the “Investigate the Factory Lower Levels” rumor (and you’ll unlock the shortcut back to the meditation point on your right). To the left, you’ll climb some electrified grating around until you come to a hanging platform with a zip line attached. A couple more zip lines and some wall running later, you’ll get a prompt to Ascension Cable to one more zip line. As soon as you grab it, drop off. (If you miss it here, you’ll have to wait until you loop all the way around and return to the meditation point later.)
In the round room, Ascension Cable up to the ledge on your right where you’ll meet another maintenance droid. Hop onto the zip line and double jump over the electrified spot in the middle. Take the right on the far side and follow the walkway around to a chest with a stim inside.
Chest 2 – Ground Pulse music track
After grabbing the stim, head back to the main room. Take the stairs on the left this time, and you’ll find a place to wall run and Ascension Cable back onto that original zip line. After some more climbing, you’ll eventually come to a green shield door in Assembly Staging. Over to the left, hop over the crates to find this chest containing the Ground Pulse music track (for DD-EC back on Koboh) behind them.
Essence 1 – Force
To the right of the green shield, you’ll fall into a trash pit full of shiverpedes. Once they’re dealt with, use your Ascension Cable on the lifter droids to climb out. This Forceessence is waiting for you at the top.
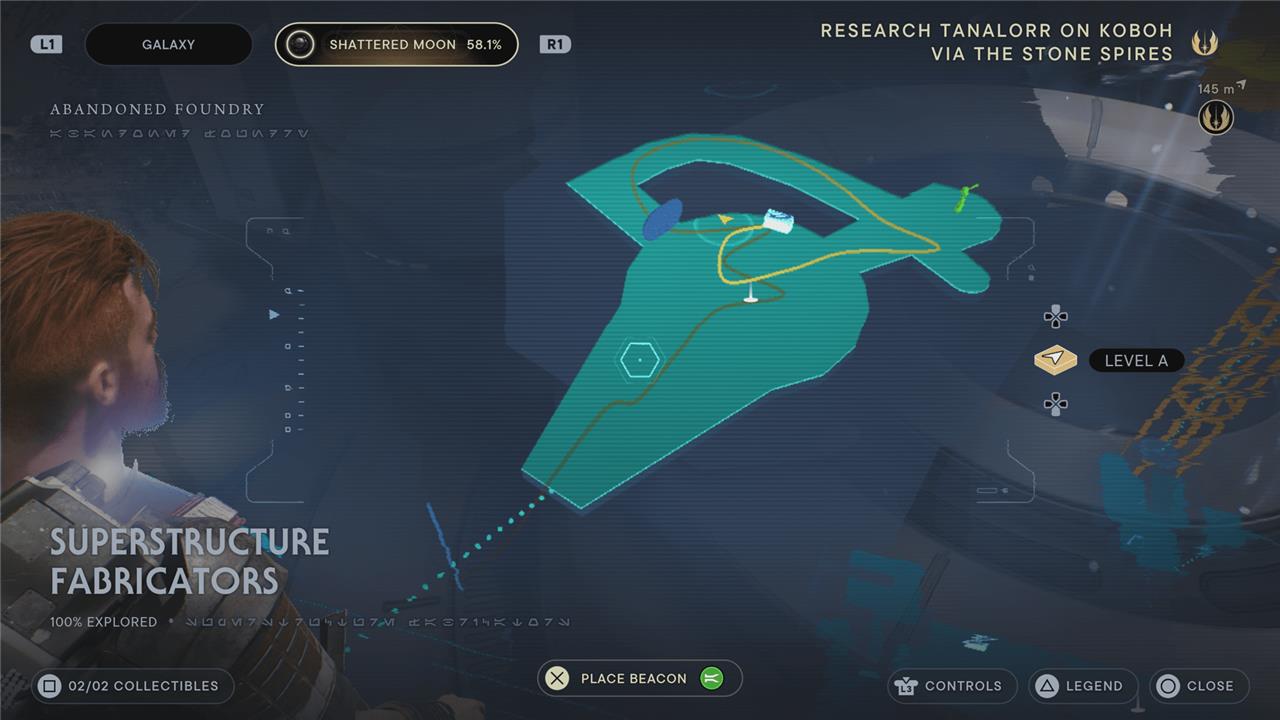
Shattered Moon Superstructure Fabricators collectibles
The Superstructure Fabricators area on the Shattered Moon contains several collectibles hidden across elevated platforms, narrow walkways, and dim maintenance tunnels. Players can find chests with cosmetic items, Force tears that test precision and timing, and essences that strengthen Cal’s abilities. Careful exploration using wall runs, grapple points, and zip lines is key to reaching each collectible without missing any along the complex industrial paths.
There are twocollectibles in the Superstructure Fabricators region of the Shattered Moon: two databank entries. There are also two non-collectible-but-still-important items to find.
High Republic device
While it’s not a collectible, per se, you will pick up an important object in this area. The High Republic device is on a console to the left of the workbench in the room at the top of Superstructure Fabricators. Picking it up will trigger the boss fight against Drya Thornne.
Crossguard Stance
After you defeat Drya Thornne, you’ll also pick up a new lightsaber stance: the crossguard stance. This adds vents to your lightsaber’s components and gives Cal a much stronger (albeit slower) attack.
Shattered Moon required abilities for all collectibles
Shattered Moon collectibles in Star Wars Jedi: Survivor require progressively unlocked traversal abilities, starting with basic jumps during your first visit and needing later upgrades for full completion. Most are accessible early with core moves like double jump, dash, and wall run, but a few demand mid-to-late game skills.
Early Visit Abilities (Cargo Deck, Automated Forge, Assembly Staging)
These cover ~80% of chests, essences, Force Tears, and treasures during initial story progression.
-
Double Jump, Force Pull/Slow, Wall Run, and basic climbing for most indoor paths, alcoves, and pipes (e.g., Health Essence in Forge via pipe to wall run).
-
Ziplines and electrified grates (timed dodges) for Skill Point Essences and the single Force Tear (Fractured Endurance) in Automated Forge-no advanced tools needed.
Mid-Game Requirements (Superstructure Fabricators, full cleanup)
Return after Koboh/Jedha for these; all Shattered Moon is completable without endgame powers.
-
Ascension Cable (unlocked mid-game on Koboh) for Stim Canister chest in Assembly Staging (shoot lifter droids from trash pit) and Force Essence access.
-
No Nekko stomach traversal, balloons, or Crossguard-specific jumps needed here-unlike planets like Koboh Spires.
| Area | Key Collectibles Locked | Required Ability |
|---|---|---|
| Automated Forge | 2 Skill Essences, Force Tear | Ziplines, Wall Run |
| Assembly Staging | Health Stim, Force Essence | Ascension Cable |
| Superstructure Fabricators | Databank, Perk Essence | None beyond basics |
Full 100% needs 5-7 hours total across visits; check Polygon/IGN for paths if missing one (e.g., drop from zipline ledge for Forge Essence).
Automated Forge collectibles step by step guide
Automated Forge in Star Wars Jedi: Survivor holds 15 collectibles: 5 treasures, 4 databank entries, 3 chests, 2 essences (1 skill point, 1 health), and 1 Force Tear-accessible early with wall run, double jump, ziplines, and Force Pull. Follow this step-by-step path from the Meditation Point (elevator descent from Cargo Loading Deck), moving clockwise then upward.
Entry & Lower Level (Treasures 1-2, Databank 1-2, Chest 1)
-
Descend stairs from Meditation Point; scan droid husk immediately on right (Databank 1).
-
Turn right to zipline (activate if first time); left into hallway, then left into room-Treasure 1 in back-right corner.
-
Backtrack hallway, go right; dash across electrified platforms (time electricity cycles); left through pipe, wall-run, drop to Treasure 2 alcove.
-
Lower pipe climb (dodge wall steam); up stairs to droid room-defeat enemies, scan panel (Databank 2).
-
Back room corner after door opens: Chest 1 (priorities).
Mid-Level Platforms (Chest 2, Force Tear, Databank 3, Treasure 3)
-
Continue path; wall-run fireworks door (time sparks), dash electrified platforms to Chest 2.
-
Right into red-lit room: Treasure 3 corner.
-
Zipline up (jump electrified sections); drop early at first platform for Databank 3 scan on ledge.
-
Back cylinders: Force Tear (Fractured Endurance) behind. Complete platforming challenge inside.
Upper Ziplines & Forge Core (Essences, Remaining Treasures 4-5, Databank 4, Chest 3)
-
Full zipline to top (activate shortcut); climb ledges opposite cylinders for Skill Point Essence 1.
-
Progress main path; drop edge near scalable grates, wall-run sequence to zipline apex-right for Chest 3.
-
Lower drop post-zipline: Databank 4 scan, then Treasure 4.
-
Pipe climb nearby (dodge mechanisms): Treasure 5, Health Essence nearby.
-
Final Skill Point Essence 2 via upper zipline drop-off ledge (7-minute detour possible).
All fit early visit; no Ascension Cable needed (unlike Assembly Staging). Use video timestamps for visuals: (15-collectible run, 8 mins).