Lost in the overgrown ruins of the University, Ellie and Joel chase whispers of hope amid infected hordes and hidden relics-track every artifact with these precise locations.
You’ll arrive at “The University” after leaving the Hydroelectric Dam on horseback. In the seventh chapter of The Last of Us Part 1, you’ll need to find nine artifacts, five Firefly pendants, three optional conversations, two training manuals, and one comic. The collectibles are spread out across two sections: Go Big Horns and Science Building. The game does not indicate to you when you’re moving onto a new section, but you can select and begin playing any section from the Chapters option on the main menu.
Read on to find out when each section begins and ends, and where all of the collectibles can be found in “The University.”
Go Big Horns Collectibles
Go Big Horns Collectibles: A concise guide highlighting the hidden caches and standout items tucked away in The University area, with clear directions to help you nab the best rewards without backtracking.
The “Go Big Horns” section starts when Joel and Ellie approach the University on horseback, and ends when you enter the science building.
Free Radicals Comic Location
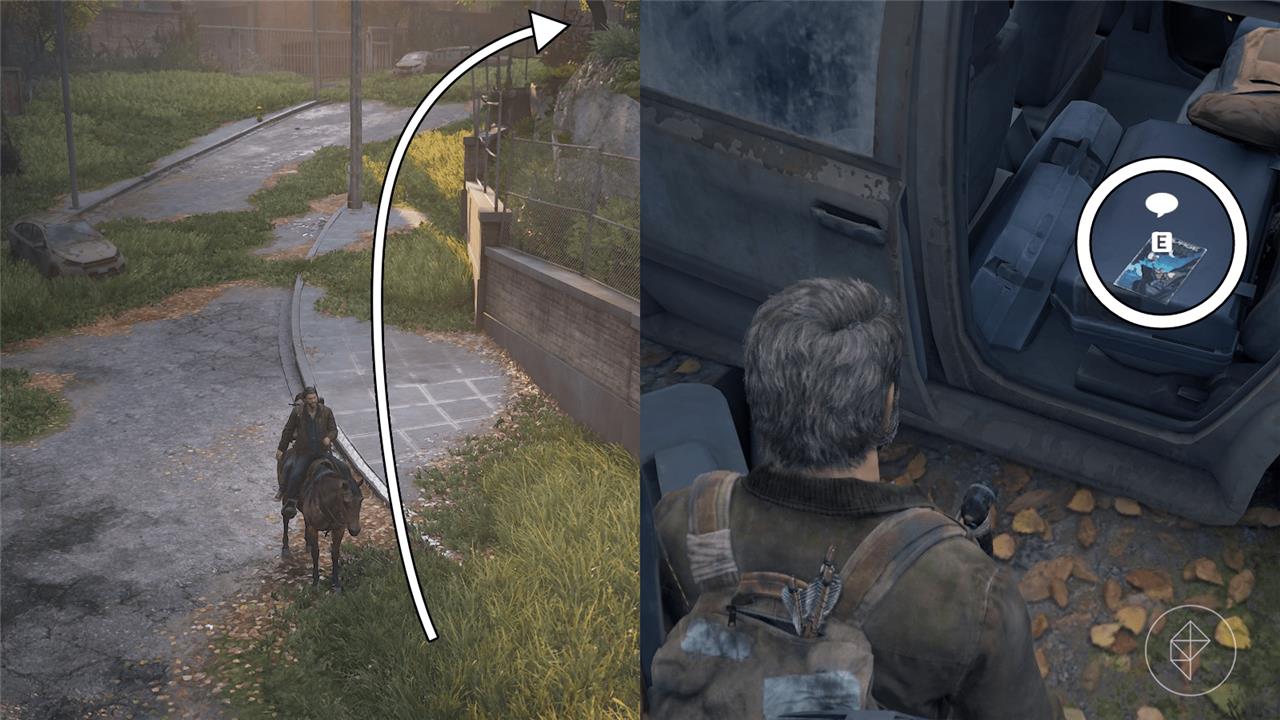
When you gain control of Joel after the initial cutscene, turn around and head back up the road. Beside a white box truck, you’ll find an abandoned car missing a door that has the Free Radicals comic in the back seat.
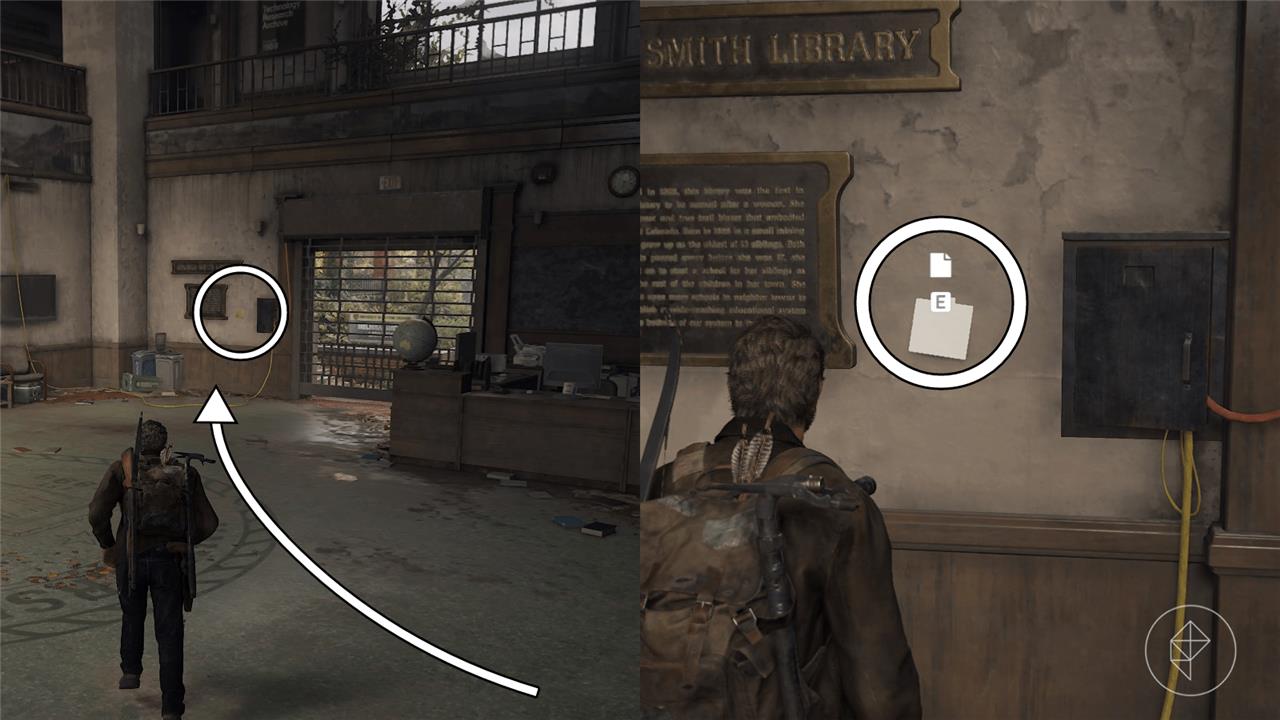
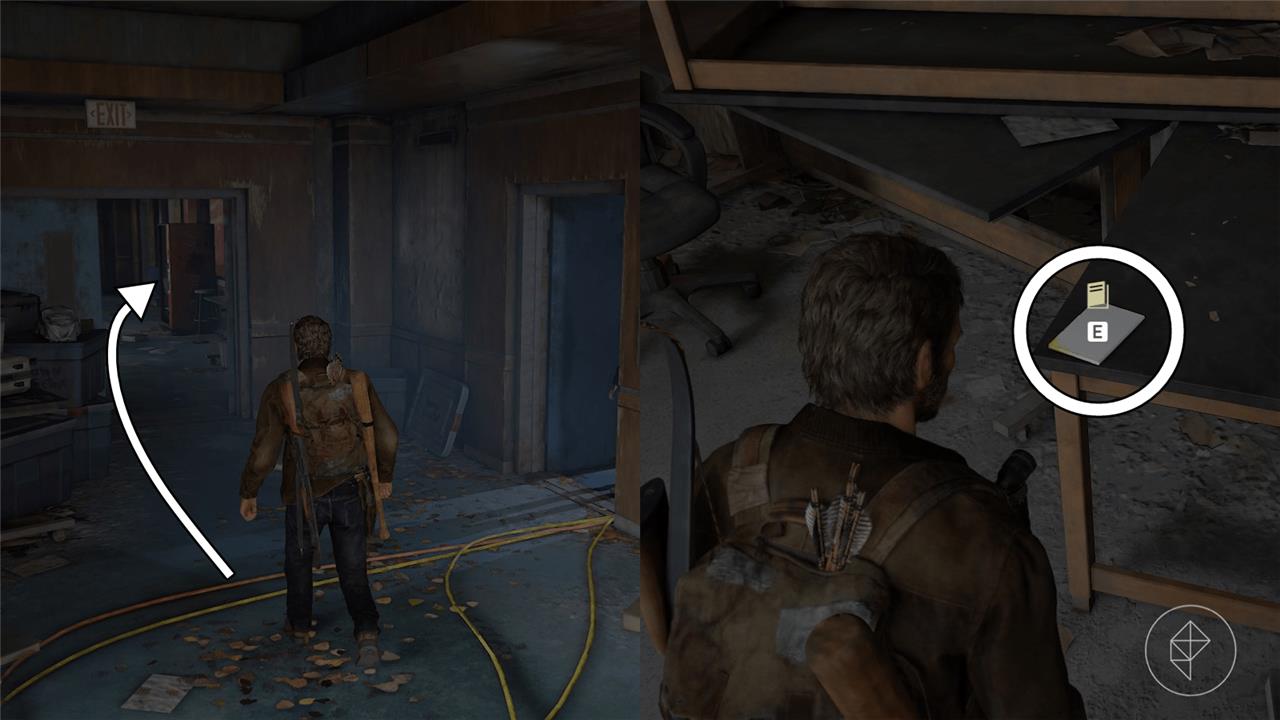
Sniper’s Nest Log Artifact Location
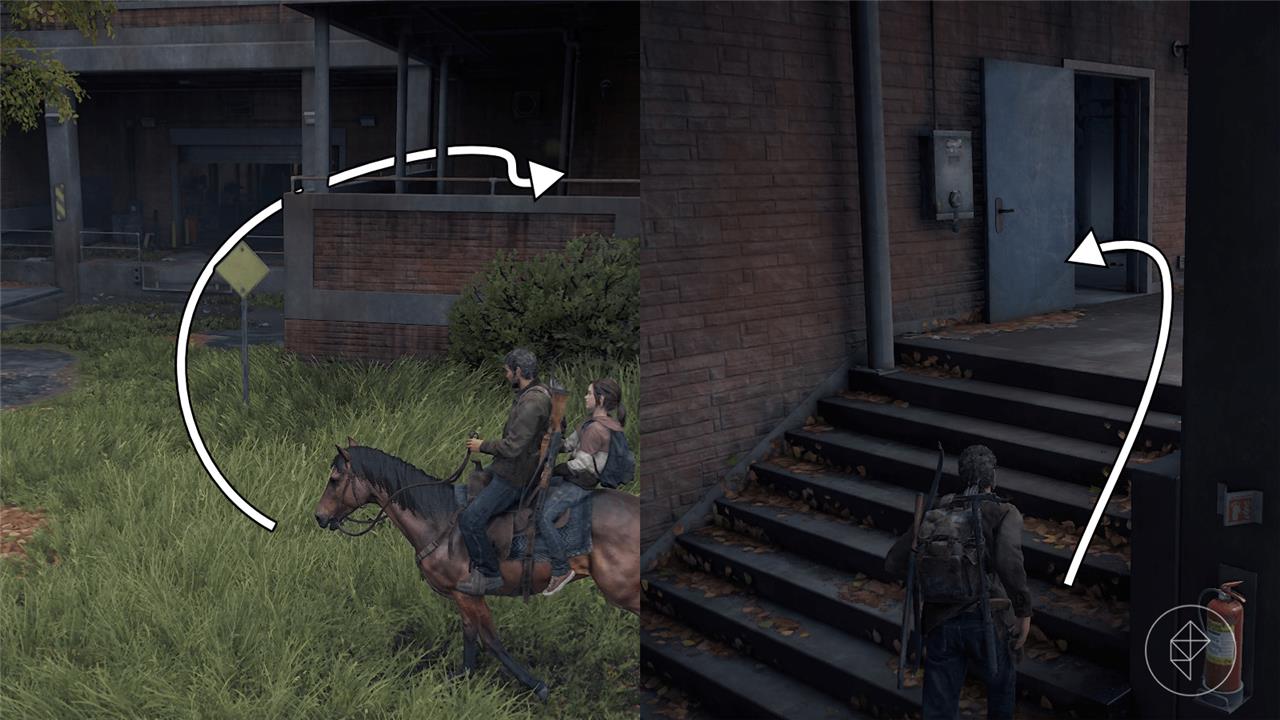
Enter the university’s front entrance and continue through the gate ahead of you until you reach a barricade. Turn right toward the loading bay and go up the stairs on your right. Enter the first door on your left to find another door on your left. Enter that door to reveal another stair case to climb. Go up the stairs to the top floor and go through the first door on your right to a balcony. Turn left toward the corner of the balcony to find the Sniper’s Nest Log on the floor beside a chair and some materials.
Optional Conversation 37 Location
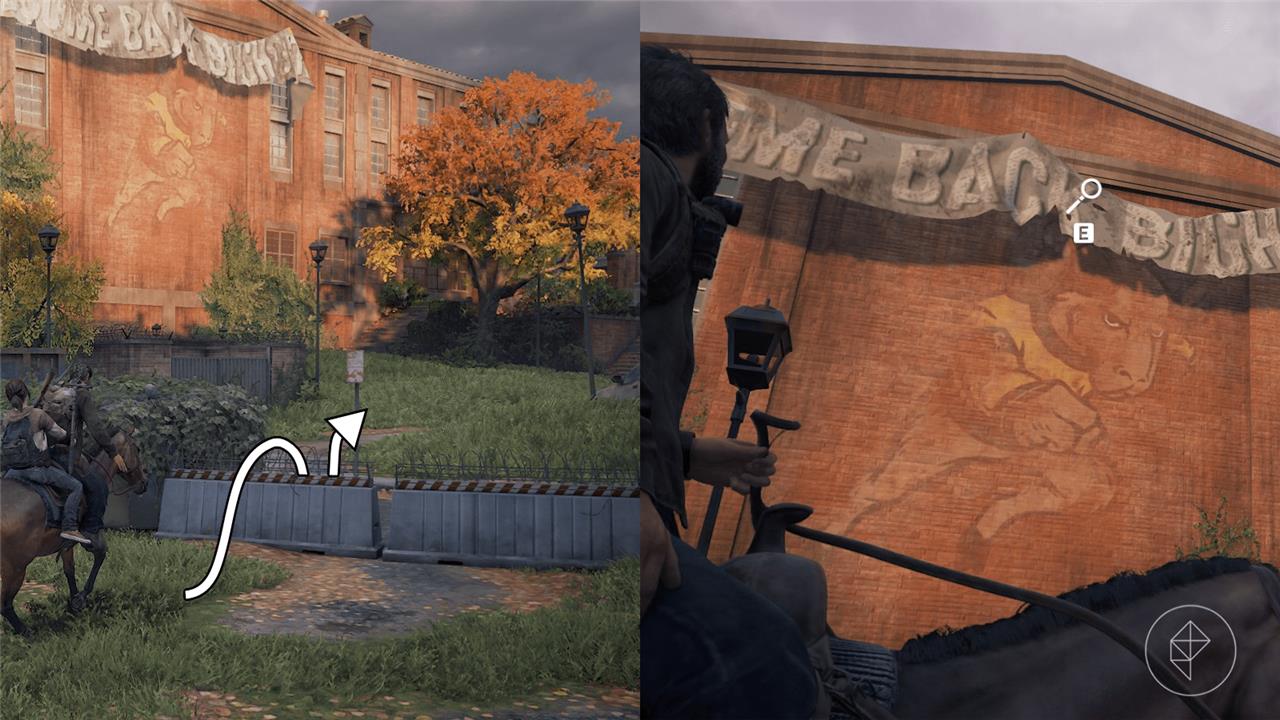
Vault over the barriers to see a huge painting of the University of Eastern Colorado’s mascot on the side of a building. Interact with it to start an optional conversation.
Hope Pino Firefly Pendant Location
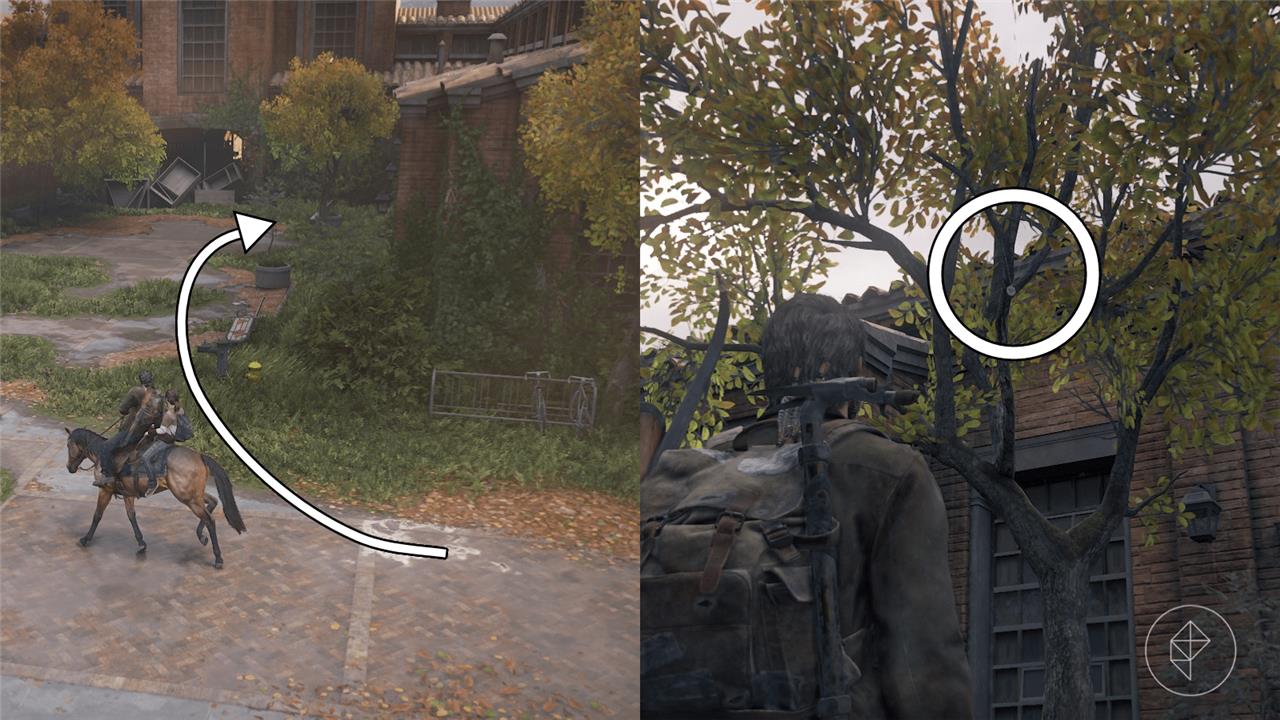
Once you’ve passed the roadblock, head up the stairs and turn right. Make your way to the tree in the right corner to find the Hope Pino Firefly pendant stuck in the branches. Knock it down by tossing a bottle (which can be found on the right along the wall of the building) at it, or shoot it off of the branch – if you have bullets to spare.
Wall Panel Note Artifact Location
From the top of the stairs, turn left and go up the small flight of stairs. Turn left into the open double doors and continue down the hallway until reach a gate on your right. Open the gate to start a cutscene where you can hear runners in the distance. After the cutscene is over, move to the right wall to find a Wall Panel Note beside another gate.
Alex Rohner Firefly Pendant Location
After you make it past the gates, walk down the stairs and climb the staircase on your left until you reach a roadblock. Instead of vaulting over the barricade, look to your right to see an open window with a dumpster in front of it. Climb inside and turn to the right to find the Alex Rohner Firefly pendant on a desk inside the corner of the room.
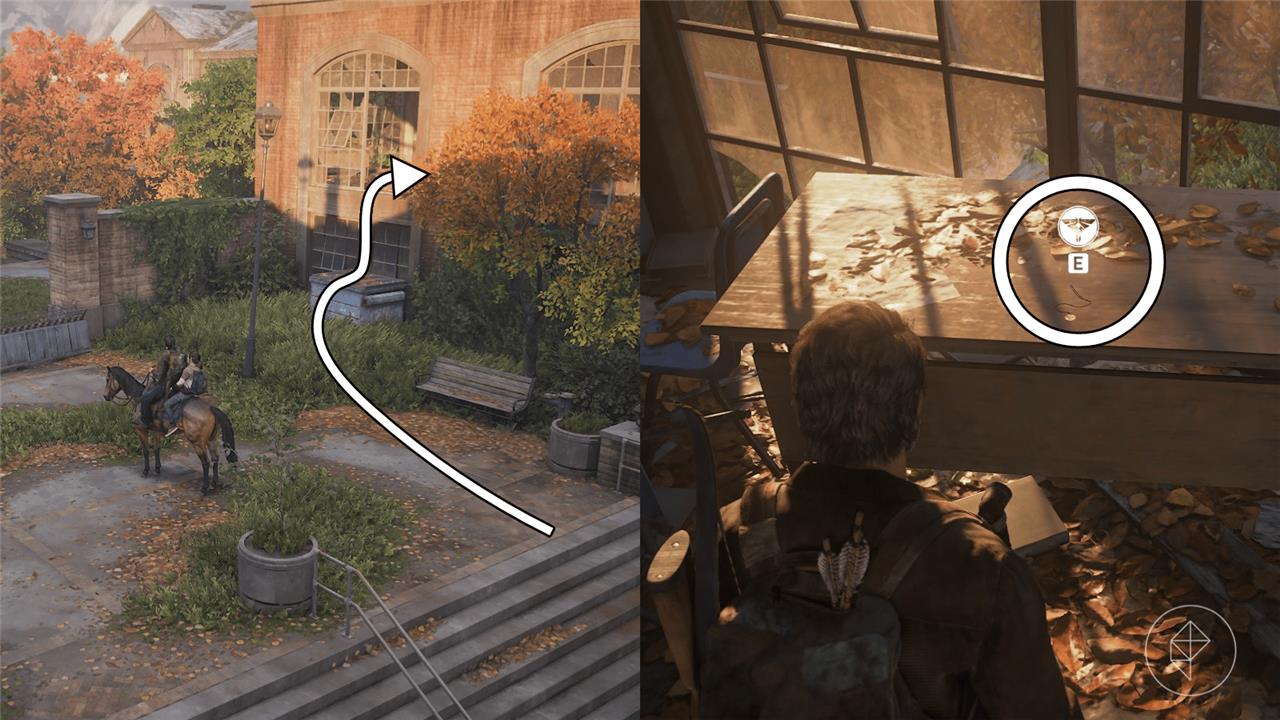
Health: Sterilization Training Manual Location
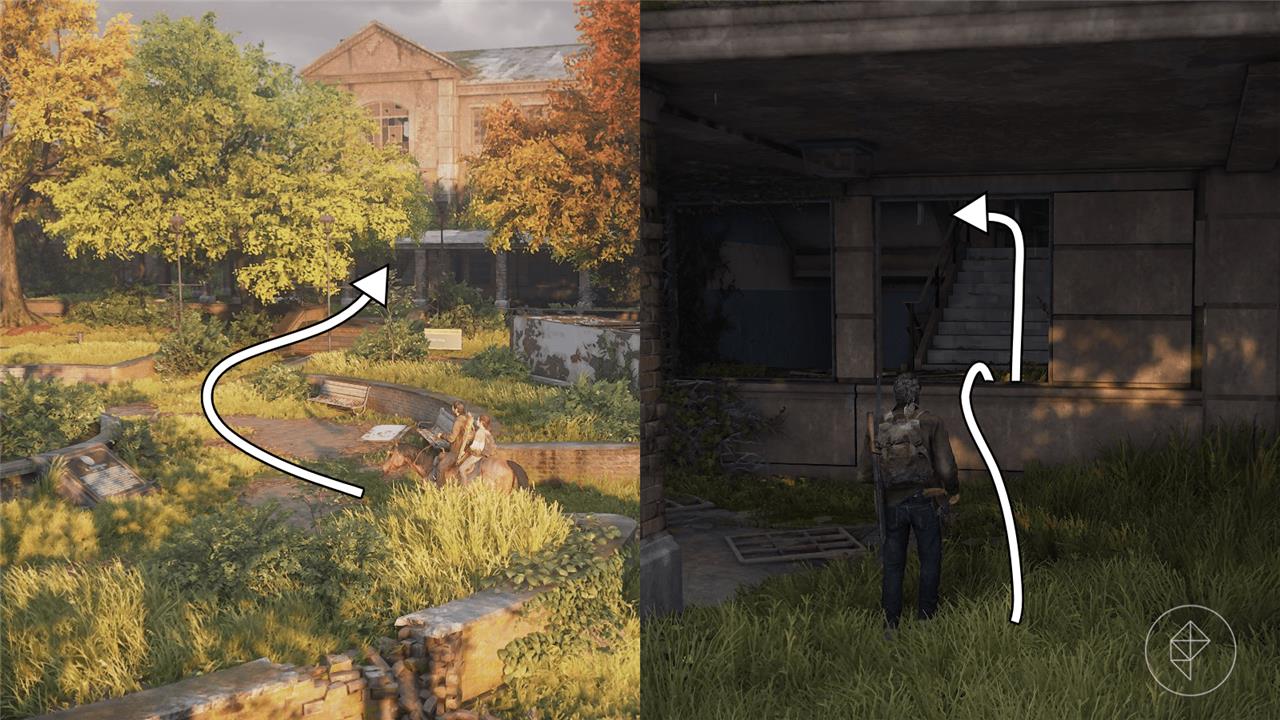
Once you hop over the barrier, head down the stairs into the large circle area. Turn right at the statue and enter the building ahead of you by jumping into the broken window. Climb up the stairs and hop out of the broken window onto the roof. Turn left and enter the window into a classroom to find the Health: Sterilzation training manual on a desk beside a computer.
Optional Conversation 38 Location
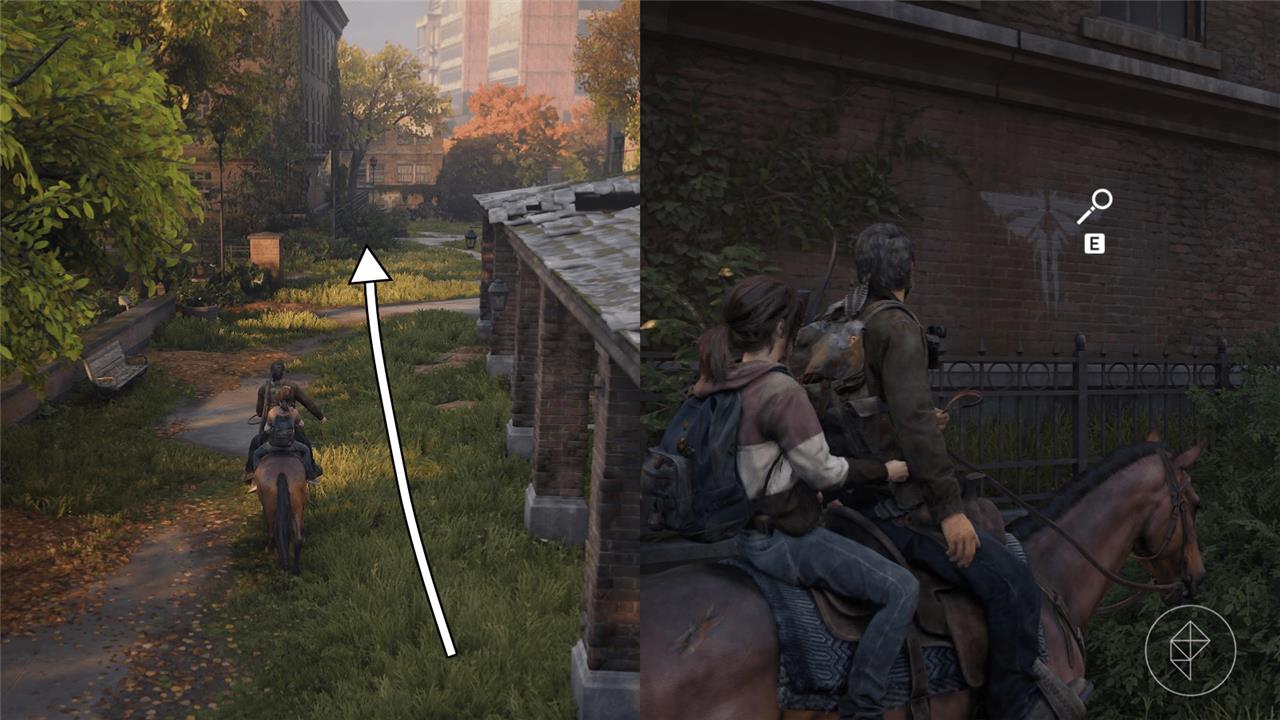
After leaving the building to the right of the statue, turn right and continue down this path. On the wall of the building ahead of you, you’ll see a Firefly symbol, triggering an optional conversation.
UEC Campus Map Artifact Location
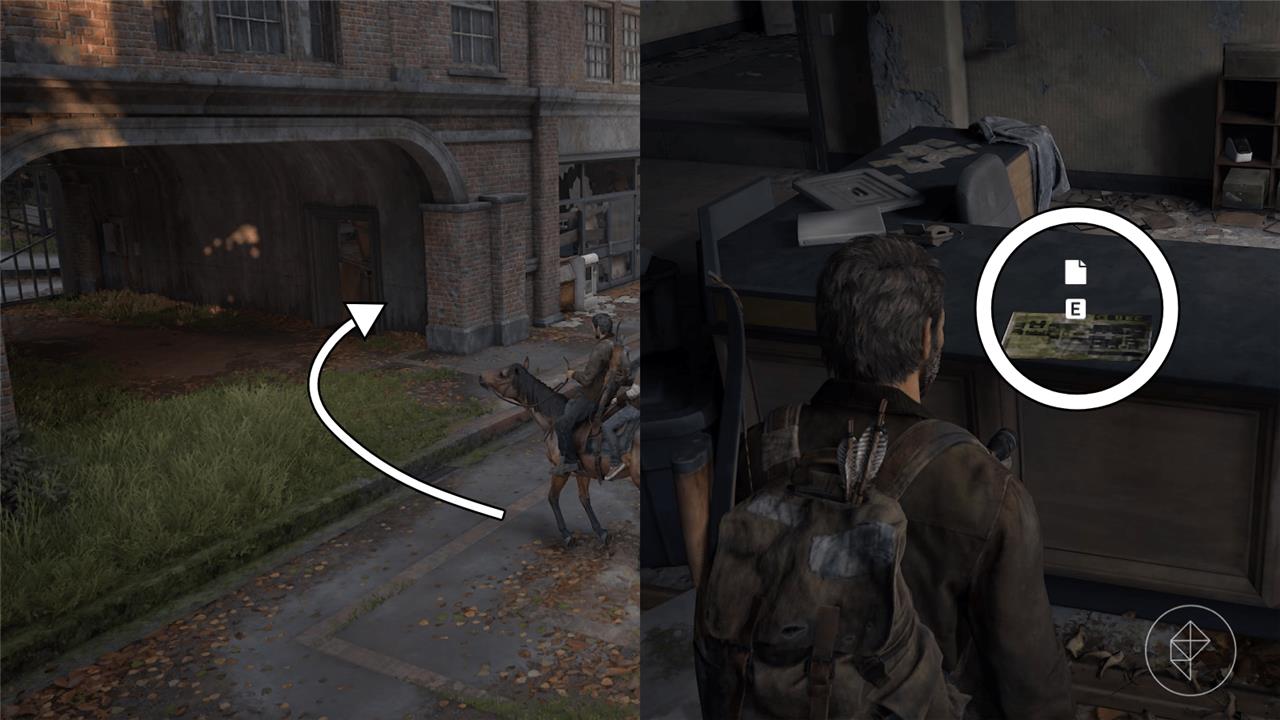
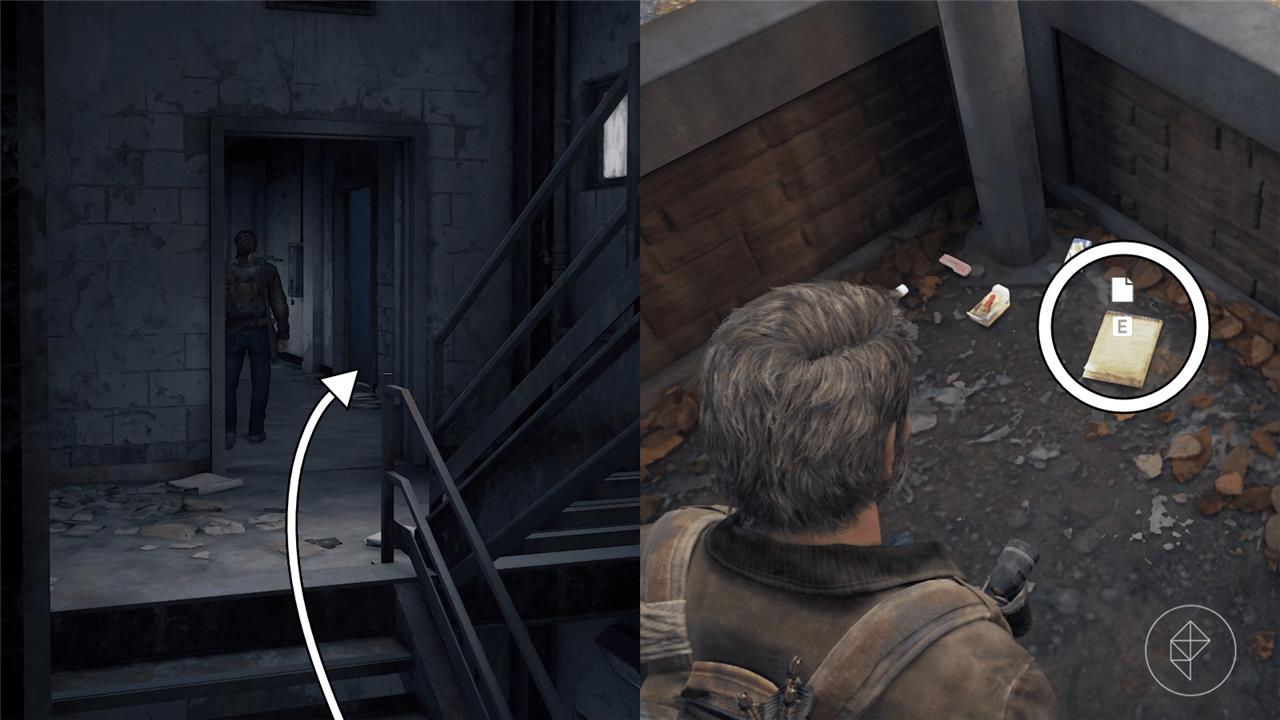
Behind the building behind the statue in the center of the circle, you’ll find a tunnel that is blocked off by a gate. Head into the door on the right side of the tunnel to find the UEC Campus Map on the desk inside.
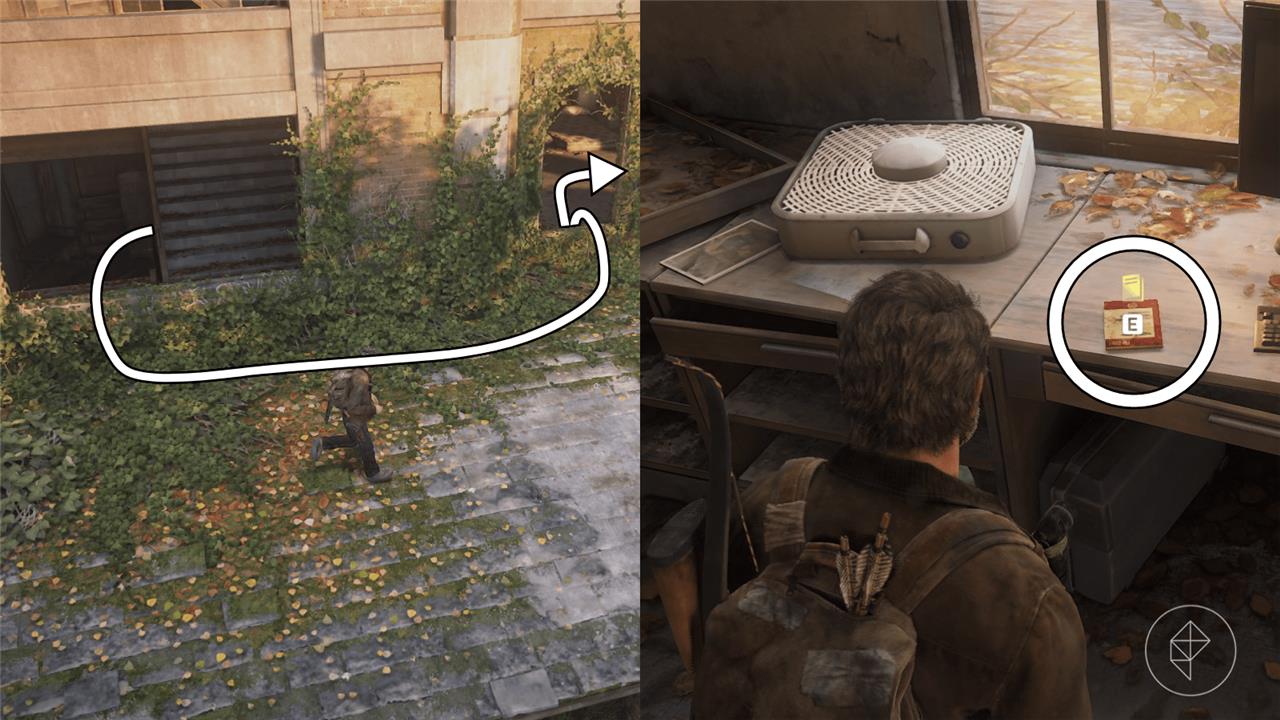
Student’s Journal Artifact Location
Continue past the desk and head up stairs to the second floor. Enter the second room on your left to find yourself in a dorm room. Open the desk drawer and collect the Student’s Journal.
Joe Warren Firefly Pendant Location
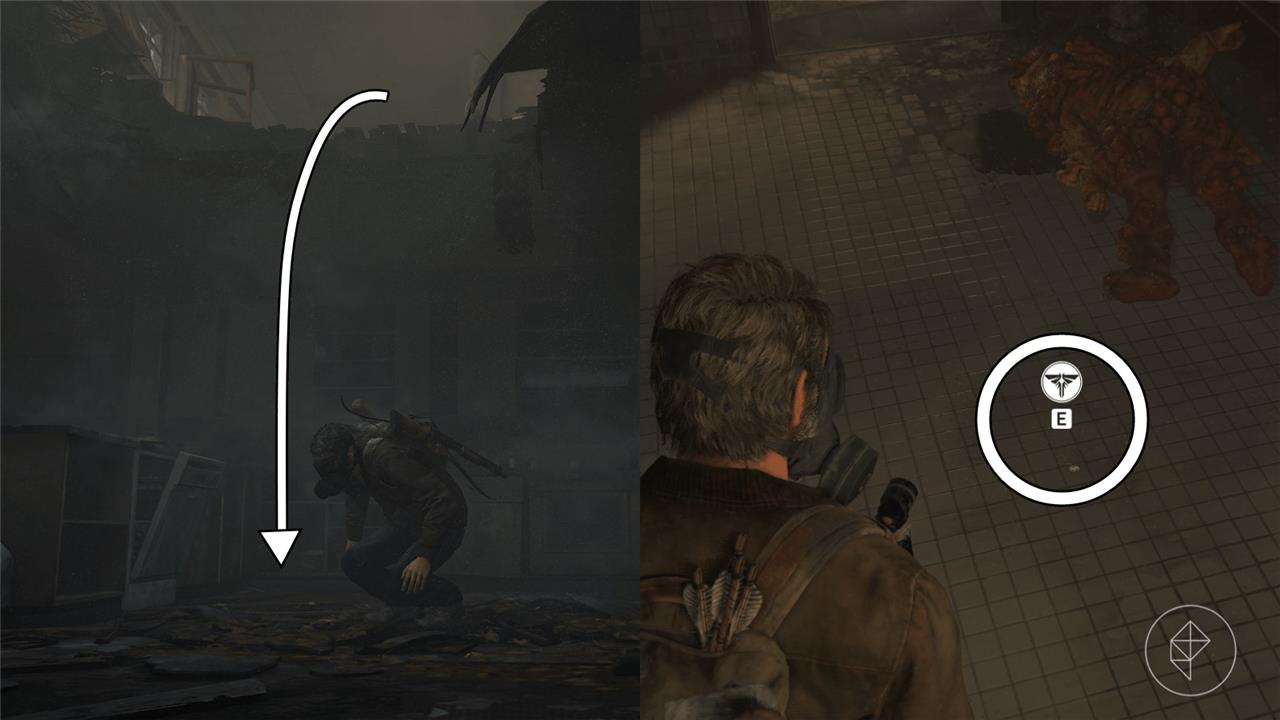
At the end of the hall on the second floor, you’ll reach a spore infested area where you must drop into a hole in the floor. There are multiple clickers and one bloater in this area. The bloater will be standing at the end of the hallway, but will drop the Joe Warren Firefly pendant once defeated.
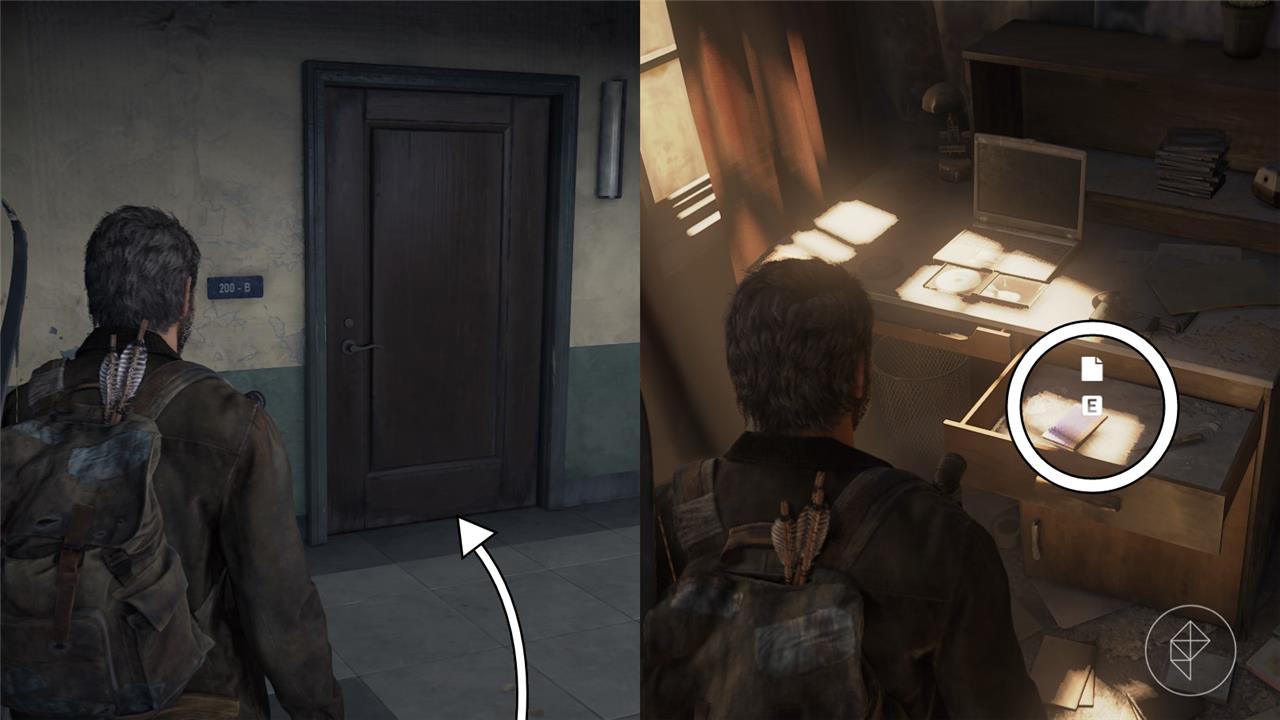
Newspaper Clipping Artifact Location
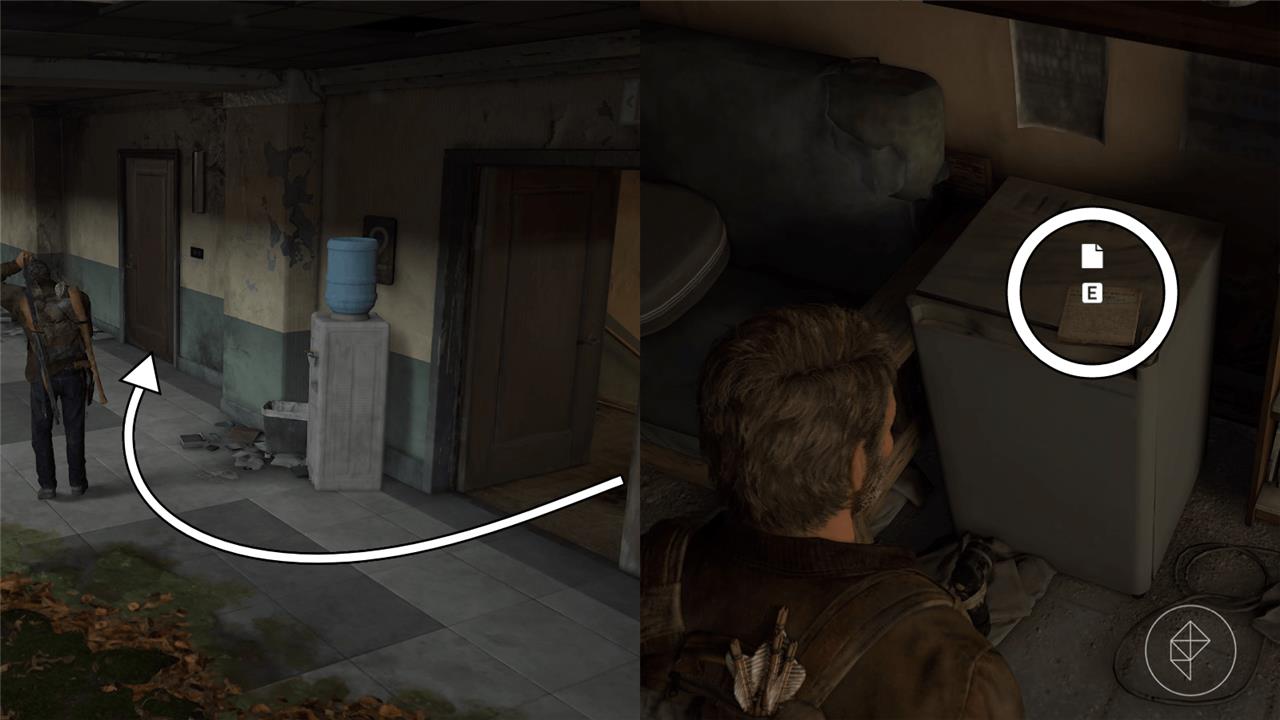
Once you’ve made it past the spore-infested hallway, head up to the second floor by pushing a vending machine-blocked door open. On the second floor, enter the first dorm room on your right to find the Newspaper Clipping on the mini fridge inside.
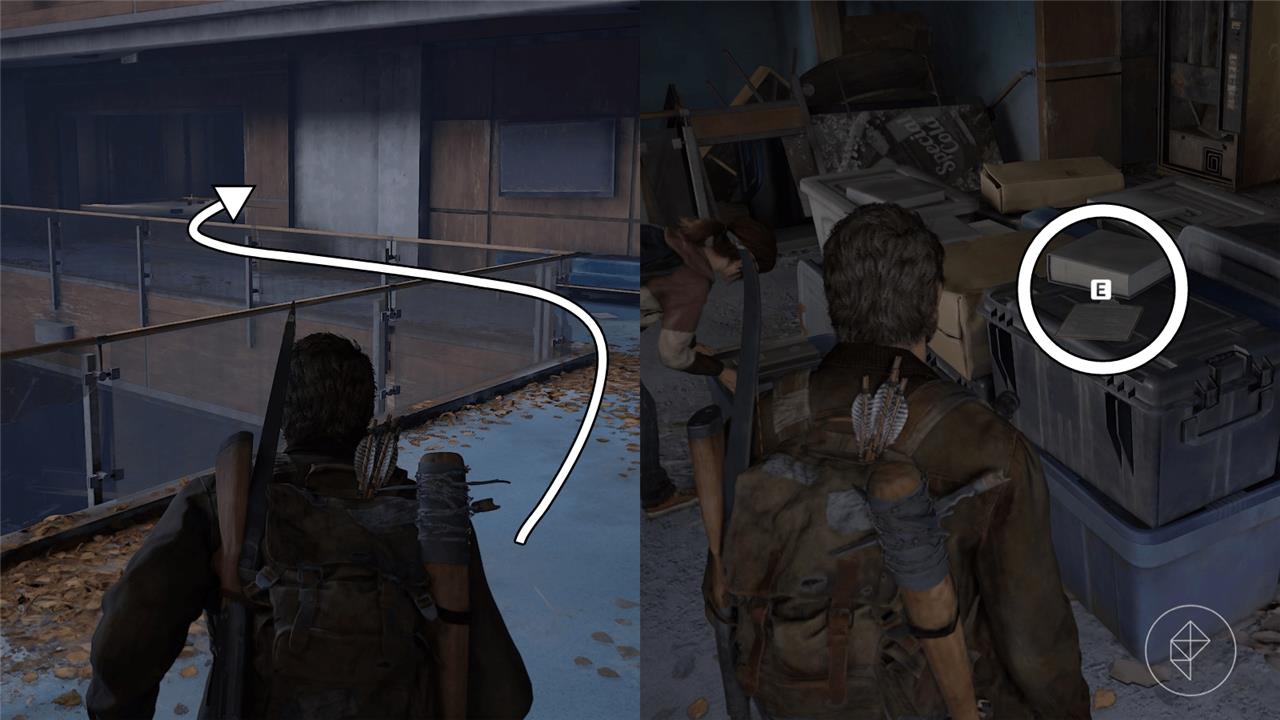
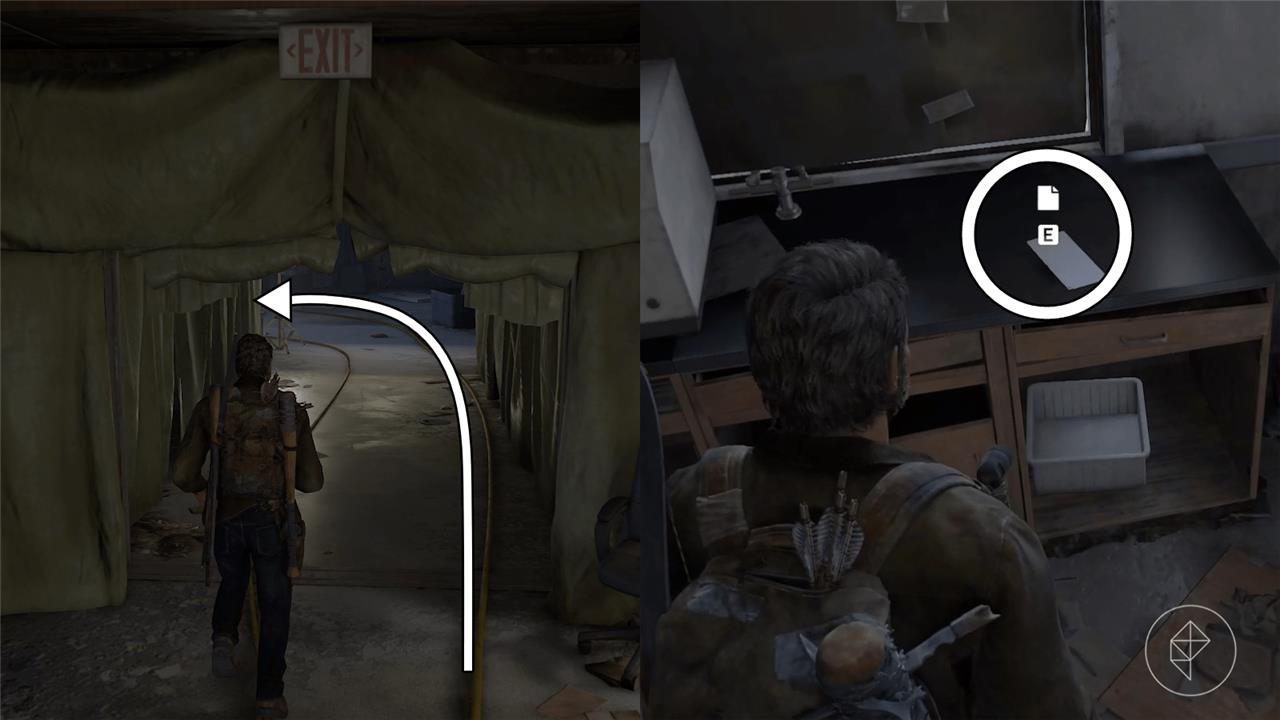
Erik Griggs Firefly Pendant Location
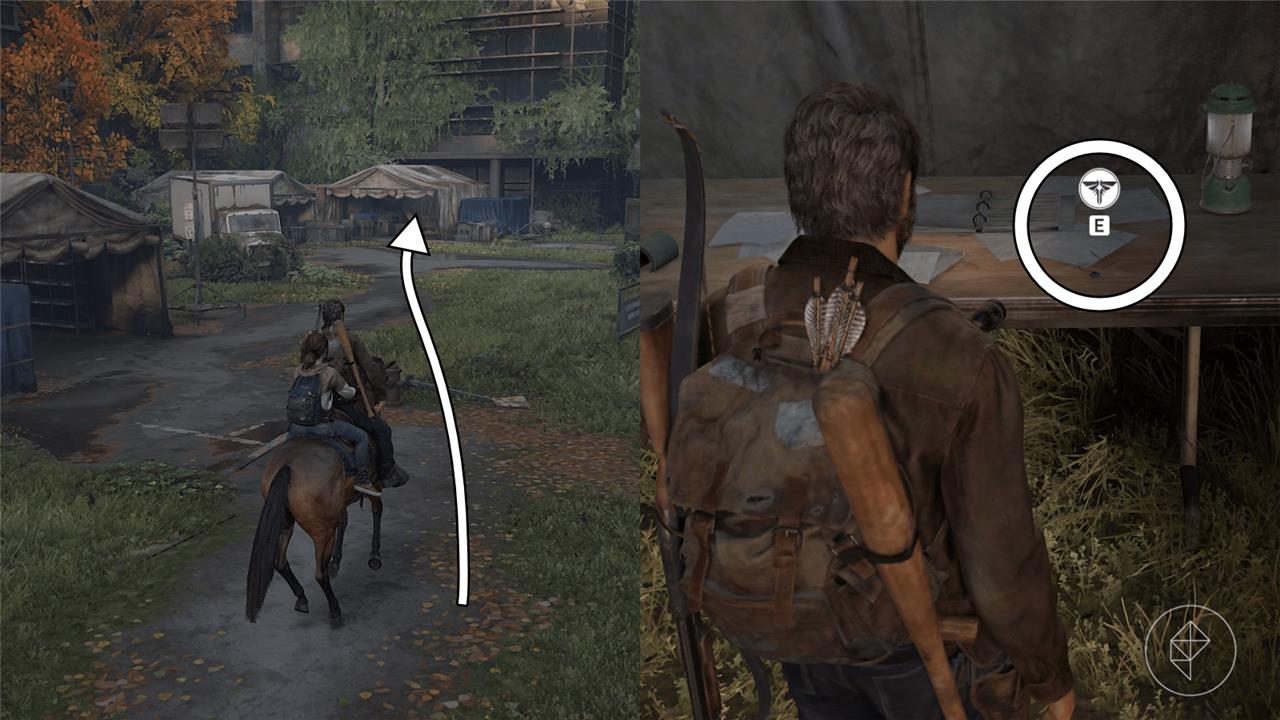
After you reunite with Ellie, get back onto the horse and follow the path to an area filled with tents. Stick to the left side of the area until you reach the back left corner with two tents beside a white box truck. In the tent on the right, you’ll find the Erik Griggs Firefly pendant on the table with the lamp.
Science Building Collectibles
The Science Building section contains several collectibles you can grab before leaving the area. Check the main lecture hall for a Firefly Pendant near the projector. A recorder can be found on a desk inside the lab where the Fireflies were working. Don’t miss the Artifact in the corner office on the upper floor-it offers insight into what happened here. Before heading to the next zone, sweep the smaller lab rooms for a few scattered supplements and parts.
The “Science Building” section begins when you enter the science building through the broken window, and ends when Ellie and an injured Joel escape the attack on the science building.
Tools Level 4 Location
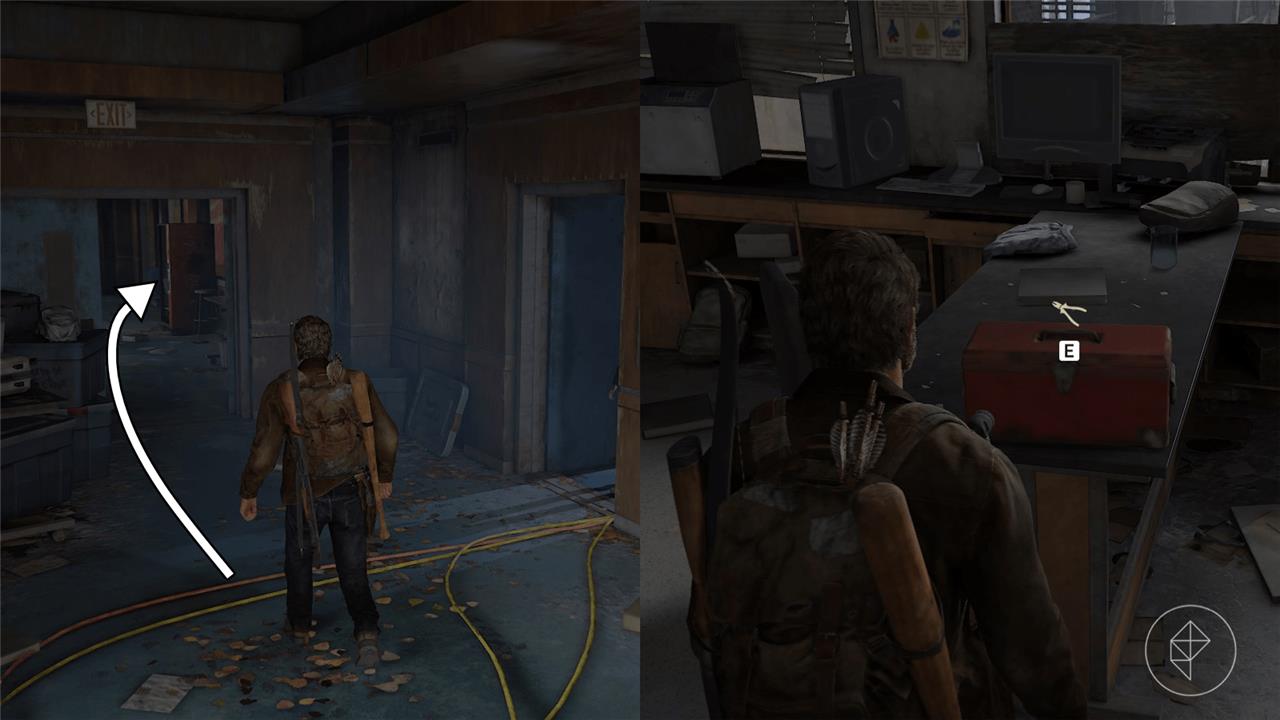
After you enter the science building, head to the end of the hall until you reach Room 205. Use a shiv to open the door, and you’ll find the level 4 tools on a lab table on the left side of the room.
Molotov: Development Training Manual
In Room 205, the same location as the level 4 tools, you’ll find the Molotov: Development training manual on the lab table on the right side of the room.
Optional Conversation 39 Location
Walk into the open door, Room 251 – Main Atrium, and follow along the path to another open area with a stack of boxes beside a couch. On top of the boxes, there’ll be a clipboard that you can interact with which will prompt an optional conversation.
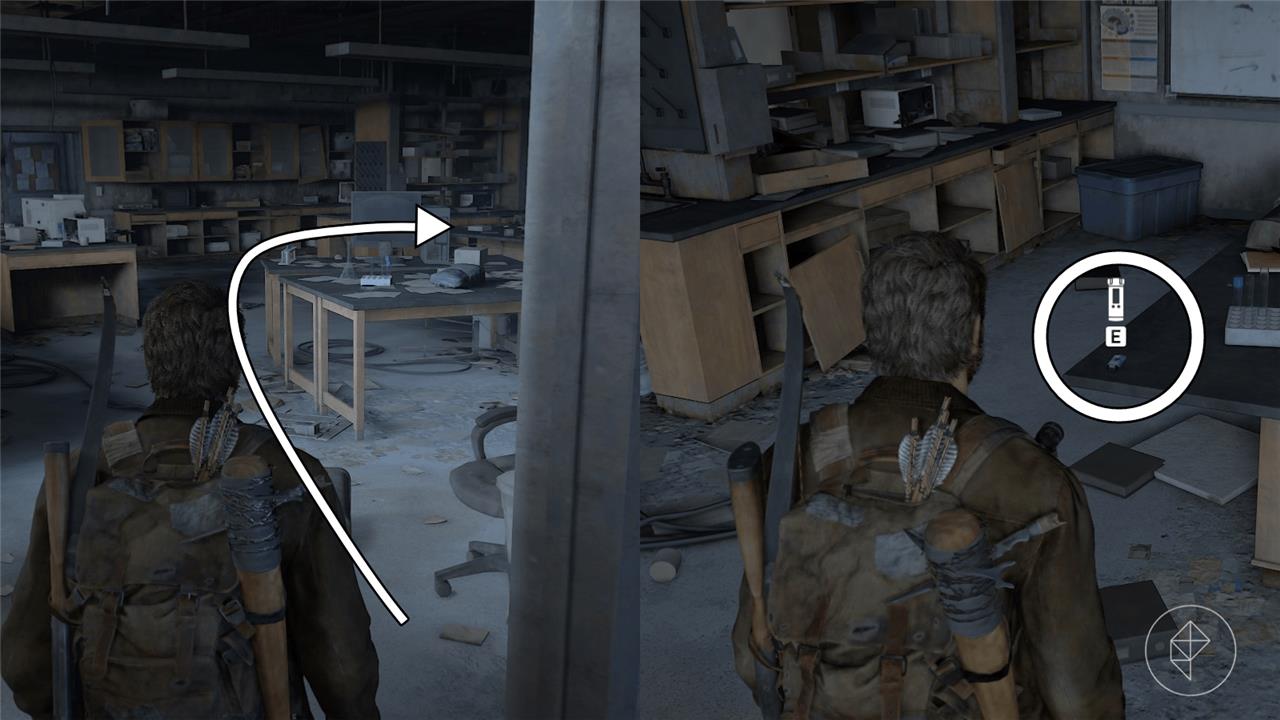
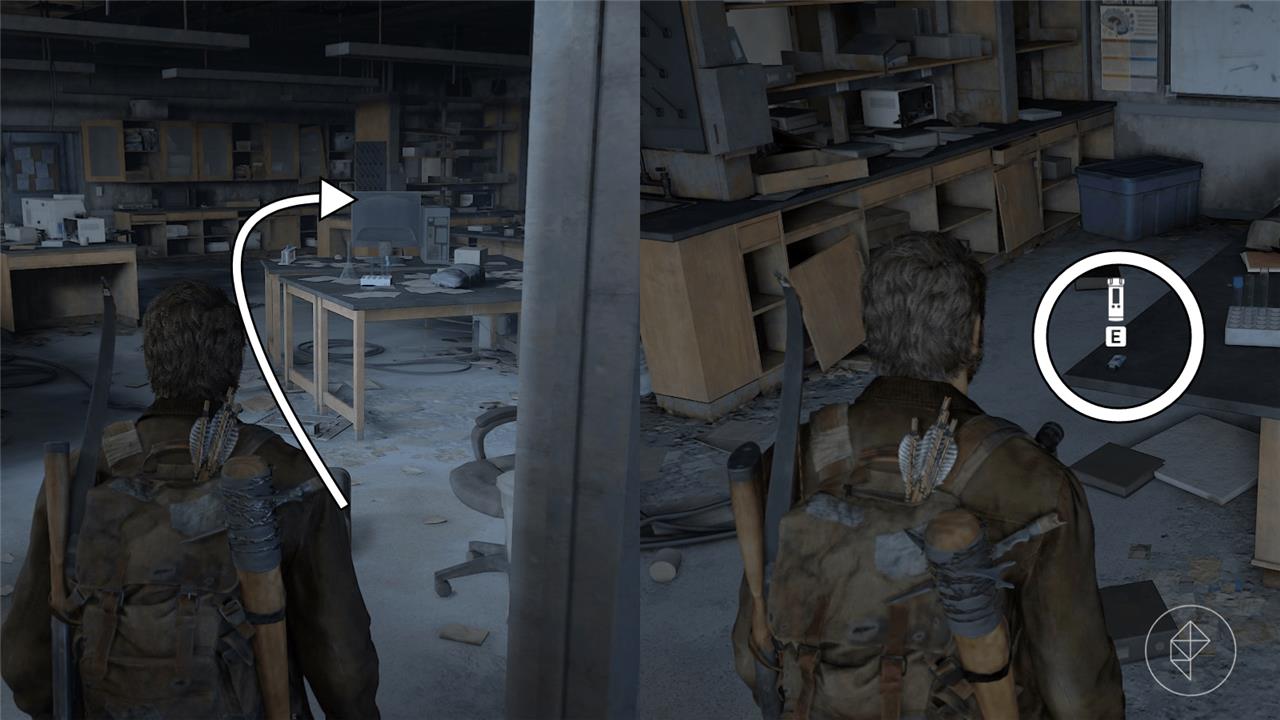
Office Recorder Artifact Location
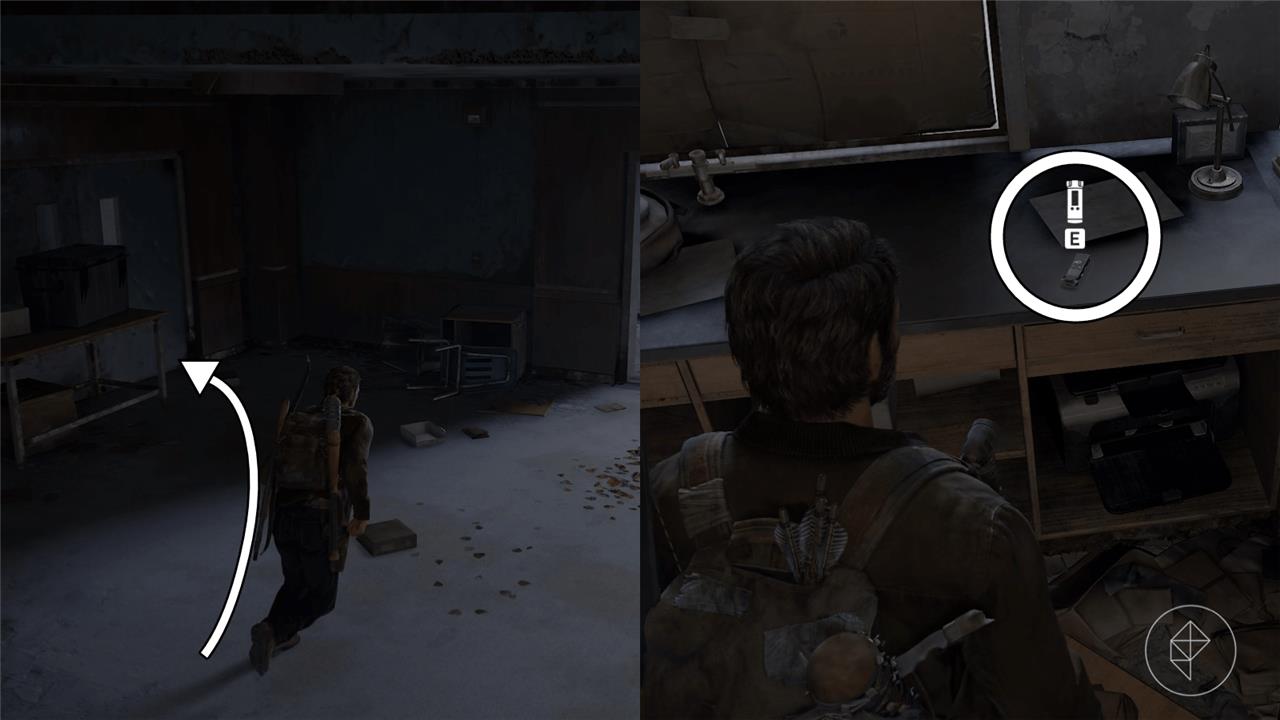
Head up the stairs to the third floor and enter the double doors on the left. Immediately take a left turn into the open door and find the Office Recorder on the counter by the window.
Fungal X-Rays Artifact Location
Continue to the end of the hallway and pass through the plastic sheeted section of the hall. You’ll arrive in a lab where you can find the Fungal X-Rays on a counter on the left side of the room.
Lab Recorder Artifact Location
In the next room, Room 308, you’ll discover that the cacophonous culprits were actually monkeys. You’ll find the Lab Recorder on a table in the center of this room.
Sadie Pearle Hickman Firefly Pendant Location
In the back right corner of Room 308, you’ll find the Sadie Pearle Hickman Firefly pendant on a counter beside a microscope.
Firefly’s Recorder Artifact Location

After you’re done looting the labs, enter the open doorway at the other side of Room 308 and push open the door of Room 311 on the right. A cutscene will start showing a deceased Firefly and the Firefly’s Recorder that was left behind. The artifact will automatically be added to your inventory after the cutscene is over.
That marks the end of “The University” in The Last of Us Part 1. If you’re ready to take on the next chapter, check out our guide on where to find all “Lakeside Resort” collectibles.
Science Building collectibles locations The Last of Us Part 1
In The Last of Us Part 1, the Science Building segment of “The University” chapter contains 6 key collectibles: Tools Level 4, Molotov: Deployment Training Manual (also called Development in some guides), Office Recorder artifact, Fungal X-Rays artifact, Lab Recorder artifact, and Sadie Pearle Hickman Firefly Pendant.
Collectible Locations
These are found sequentially after entering through the broken window, before the chapter-ending attack.
-
Tools Level 4: End of starting corridor, Room 205 (shiv door); inside lab on the left side.
-
Molotov: Deployment Training Manual: Same Room 205 lab, on table right side.
-
Office Recorder (Artifact): Upstairs to third floor, left doors, first open door on counter by window.
-
Fungal X-Rays (Artifact): Past plastic sheets into lab; counter left of door.
-
Lab Recorder (Artifact): Room 308 (monkey area), table in room center.
-
Sadie Pearle Hickman Firefly Pendant: Room 308 back corner, counter by microscope.
Tips
Use chapter select for “Science Building” to backtrack if missed. A workbench is nearby the start for upgrades.
Go Big Horns collectibles locations The Last of Us Part 1
Go Big Horns is the first segment of The Last of Us Part 1’s “The University” chapter, starting on horseback at the campus gate and ending at the science building entrance. It features 9 artifacts, 4 Firefly pendants, 1 training manual, 1 comic, and extras like a workbench and optional conversations.
Collectible Locations
Found in sequence from the chapter start; use chapter select to backtrack if missed.
| Collectible | Location Details |
|---|---|
| Free Radicals (Comic) | Start: Turn back up road by white box truck; inside doorless car backseat. |
| Sniper’s Nest Log (Artifact) | Main gate to loading bay stairs; left door, left again up balcony stairs; floor by chair. |
| Health: Sterilization Training Manual | After statue area barrier vault; right past statue, broken window up stairs to rooftop desk. |
| Hope Pino Firefly Pendant | Post-roadblock stairs, right to tree corner; shoot or throw bottle to dislodge from branches. |
| Wall Panel Note (Artifact) | Top stairs left to small stairs; open double doors, corridor right gate; right wall post-cutscene. |
| Alex Rohner Firefly Pendant | Post-gates stairs left barricade; right open window dumpster room corner shelf. |
| Student’s Journal (Artifact) | Second floor dorms past desk; second left door desk drawer. |
| Joe Warren Firefly Pendant | Spore hallway end (clickers/bloater fight); drops from defeated bloater. |
| Newspaper Clipping (Artifact) | Post-spores, push vending machine door; first dorm right on mini-fridge. |
| Erik Griggs Firefly Pendant | Post-Ellie reunion on horse, left tents by white truck; right tent table by lamp. |
A flamethrower and workbench are also nearby the dorm area for upgrades.