Ryoma’s life as a samurai may be defined by steel and honor, but his quiet hours in Another Life reveal something else entirely – a farming system so layered it could double as its own simulation game, complete with crop cycles, cooking, pets, and unexpected profits.
If you’re wondering how Another Life works in Like a Dragon: Ishin! as well as its many inner systems, this guide will serve as a catch-all explainer. Mainly, we cover how Haruka’s debt payments work, how to make the most out of farming and cooking, and how to adopt pets, plus some other tips and tricks.
How to unlock Another Life in Like a Dragon: Ishin!
Access Another Life mode after completing the main story’s chapter 3. Finish the Virtuous Lady side mission from the courtesan at the bathhouse in Rakunai, southeast of the river. She tasks you with retrieving her stolen hairpin from the Silk Rank gambling den in the Pleasure District. Sneak inside at night, grab the item from the back room, and return it to trigger a cutscene that opens the farmhouse hub for farming and animal care.
To unlock Another Life in Like a Dragon: Ishin!, all you need to do is follow through the main story up to chapter three. You’ll stumble upon Haruka as you’re walking down Fushimi, and a series of cutscenes will slowly unveil the mechanic for you.
Here’s the gist: Haruka has lost her parents, and now a shitty landlord is threatening to kick her out of her home – unless she pays a 100 ryo debt. Ryoma, as per usual, steps in and offers to help. From this moment on, you’ll be able to travel to the house via an NPC in south Fushimi, near the docks, who can take you to “Ryoma’s Villa” at any point.
How Another Life in Like a Dragon: Ishin! works, and what the benefits are
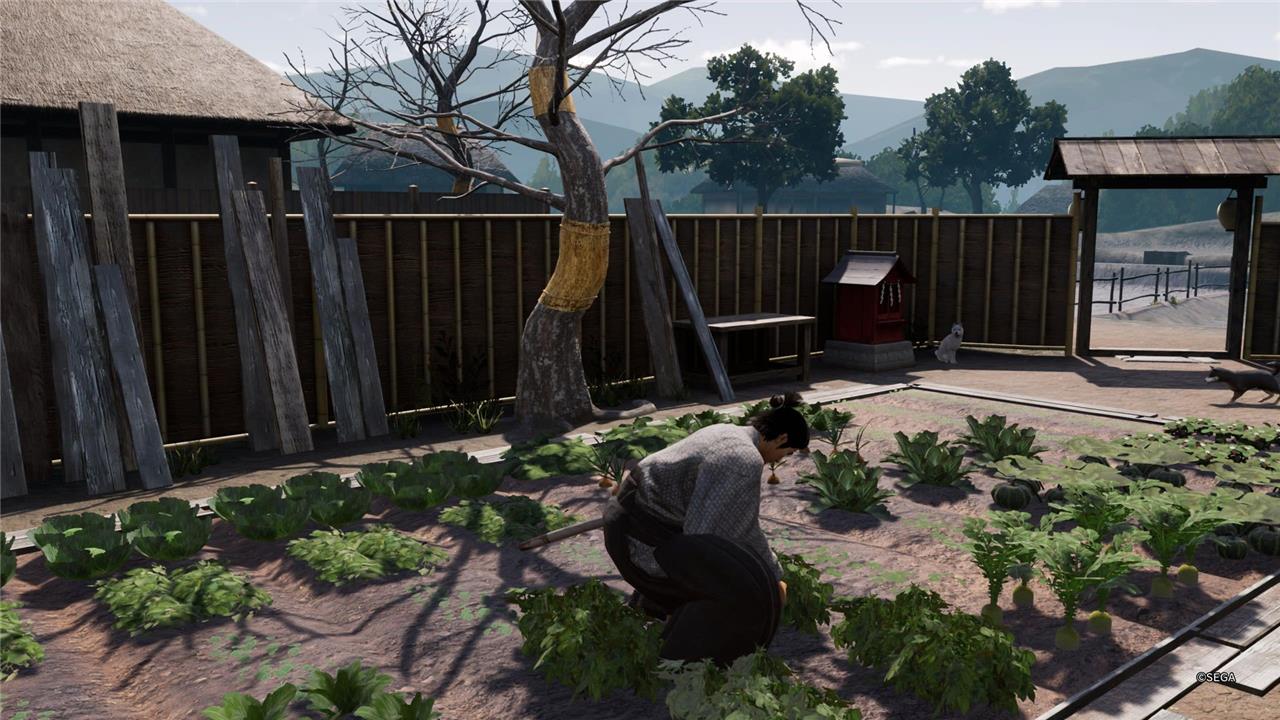
Another Life in Like a Dragon: Ishin! lets players slow down and manage a small farmhouse where they can grow crops, cook meals, and care for rescued animals. The system adds a peaceful contrast to the game’s combat-heavy story, offering steady income through selling produce and dishes at markets. Progress in farming improves over time as players plant new crops seasonally, upgrade tools, and bond with Haruka, who helps around the home. It’s a rewarding break that ties emotional storytelling to practical resource management, giving purpose to every harvest and recipe.
Another Life encompasses many systems, which all intertwine to varying degrees with your time in the main story of Like a Dragon: Ishin!, as well as the endgame grind. Here, you’re able to plant and harvest on a farm, have dogs and cats as pets, cook meals, fulfill orders to obtain money and items, and increase Haruka’s trust.
If you’re wondering, you can mostly ignore Another Life, especially if you’re only focused on the main story. That said, if you’re planning on tackling aspects like bonds and substories, you’ll eventually need to spend at least some time taking care of your home.
In short, here are the benefits of Another life in Like a Dragon: Ishin! and how it can help throughout the story:
- You can plant and harvest items that are otherwise hard to find in shops and elsewhere, unless you’re lucky with loot.
- You can obtain useful crafting items, either by fulfilling orders or having your dogs fetch you items if you’re taking proper care of them (pet, play, or feed them whenever you’re in the house and they have a dialogue prompt).
- Meals are useful as healing items, but also serve as key items for some substories and bonds.
- It’s a great source of Virtue, as well as helping you tackle a ton of Diligence Records’ tasks, in case you’re aiming to pursue trophies.
If you want to know more about how to tackle Haruka’s debt, and how intrusive it is, head down to our next section.

Do you need to pay Haruka’s debt in Another Life?
You don’t actually have to pay off Haruka’s debt to progress through Another Life, but doing so adds extra story scenes and a sense of closure to her character arc. The debt acts as a long-term goal tied to your farming profits and side activities, giving more purpose to raising crops and crafting goods for sale. Paying it off rewards you with new interactions and helps develop Haruka’s relationship with Ryoma, though it isn’t required to enjoy everything the mode offers.
The prospect of five payments of 20 ryo each at some point in the future without a clear indication of when or how that’s going to happen is a scary one. But don’t fret. If you’re wondering whether or not you need to pay Haruka’s Debt in the Like a Dragon: Ishin! Another Life mode, the answer is no.
I was able to pretty much ignore Another Life altogether and reach the end of the main story without paying a single penny. In fact, I never actually got the prompt to do so, and unless you spend some time fulfilling orders, you won’t see it either.
Here’s how it works: After you’ve reached a certain amount of ryo collected in total for fulfilling Another Life orders, you’ll receive a letter from an NPC (which happens automatically with a cutscene) stating that the landlord is expecting the payment.
Does something happen if you don’t pay in Another Life? Well, not really, as far as I know. Tackling the first payment gave me a kimono for Haruka, so in essence, unless you want to customize her outfit with different cosmetic options, you don’t have to worry about a story event or character randomly appearing at some point and taking 20 ryo out of you.
How to increase Haruka’s Trust in Like a Dragon: Ishin!
Haruka’s Trust increases as you spend time improving the Another Life home and helping her with daily activities. Cooking meals with harvested produce, completing requests she gives you, and selling farm goods for profit all raise her affection. Keeping the farm tidy, interacting with pets, and regularly speaking with her also contribute to progress. Reaching higher trust levels rewards you with new scenes, dialogue, and upgrades for your farm life experience.
Haruka has a number of ranks to level up if you want to gain her utmost trust. Plenty of actions in Another Life contribute to this, thankfully, so it’ll only be a time-consuming task once you know what to do.
You can increase Haruka’s Trust in Another Life with the following actions:
- Visit your Another Life home: It’s a small amount, but Haruka’s trust will improve almost every time she sees Ryoma in the villa.
- Fulfill orders: A great way to increase Haruka’s trust is by fulfilling orders.
- Cook meals: It doesn’t matter if you repeat the same dish, Haruka will always give them a taste and you’ll improve her trust as a result.
- Give Haruka gifts: You’ll get kimonos after making the 20 ryo payments, but you can also purchase them in the Shinto Priest’s store using Virtue. For this, you have to purchase the “Shinto Priest’s Exchange, now open!” upgrade in an Altar with 500 Virtue.
As you’re gaining new ranks, make sure to interact with the objects inside your home – the one in the living room, the futon, and the door that leads to the bath, as you’ll sometimes have cutscenes with Haruka. Again, these are all optional, but if you’re looking to trigger them, make sure to check on these objects, as they won’t happen automatically.
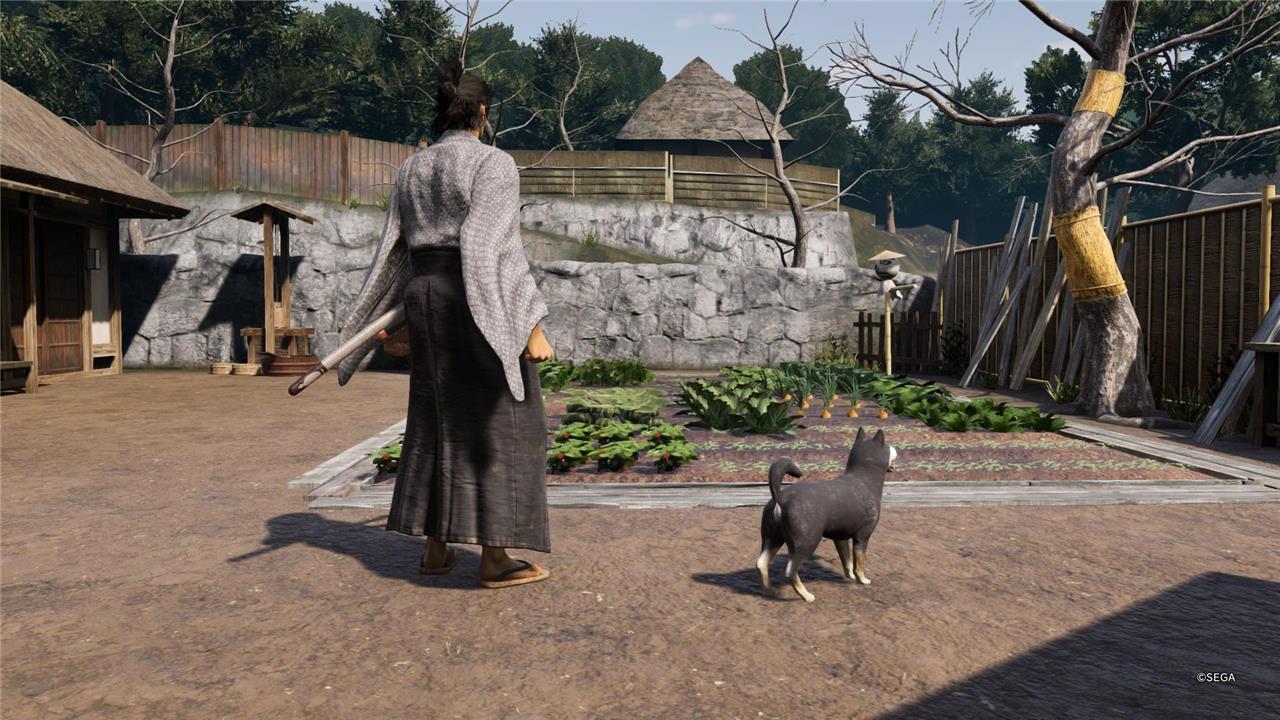
Where to find pets for Another Life in Like a Dragon: Ishin!
You can recruit animals for Another Life by checking notice boards in Kyo, talking to NPCs with pet-related side requests, and completing certain substories tied to strays. Cats and dogs you feed or help during these events may later appear as adoptees for Haruka’s house, while rarer pets are tied to specific side missions in the city. Keep an eye on streets, alleys, and near food stalls for interactable animals, and regularly revisit areas where you triggered earlier encounters, since some pets only become available after story or chapter progress.
If you’re paying attention to substories in Like a Dragon: Ishin!, you will eventually stumble upon the pets for Another Life. You’re going to have to complete their bonds, however, which can take some time. But all in all, I can’t recommend doing this enough, especially if you can tackle them as soon as possible. This will guarantee that you’re making the most out of your visits to your countryside home.
You can find all six pets in Like a Dragon: Ishin! as part of the following substories:
- Substory 54: The Patient Dog
- Substory 36: Injured Dog
- Substory 16: Barking Dog
- Substory 28: The Hungry Cat
- Substory 55: The Filthy Cat
- Substory 17: The Lucky Cat
After you’ve completed both the substory and the bond for a pet, you’ll get to choose between three nicknames. They will appear on your Another Life home from that moment on.
Whenever you visit, there is a chance that the pets will have a conversation prompt. Always make time for these events, as doing so will ensure that you’re making the most out of their benefits (dogs fetch items, cats improve luck with orders.)
The best Altar upgrades for Another Life
For Another Life’s altar, prioritize the Golden Watering Can upgrade first to boost crop growth speed across all fields, followed by the Silver Bell for summoning rare animals that drop premium fertilizer. The Jade Incense Burner ranks next, accelerating animal reproduction rates and ensuring steady meat supplies. Round out the setup with the Bronze Lantern to enhance fertilizer potency, maximizing yields without constant micromanagement. These picks balance output and sustainability in Ishin!’s farming loop.
As I mentioned in the beginner’s guide, you should save up as much Virtue as possible for Another Life. If you’re interested in committing to this optional mode, there are a few upgrades that will make your (another) life easier. As such, I recommend getting them as soon as possible. There are many ways to get Virtue back afterward, so don’t worry about the large sums for some of the upgrades.
Here are the best altar upgrades for Another Life:
- Kitchen upgrades: You should get the Typical Kitchen Upgrade, Home Cook’s Kitchen Upgrade, and True Chef’s Kitchen Upgrade options as soon as possible to access the full catalogue of recipes. The more you progress with orders, the more complex they’ll get, so there’s a chance you’ll be seeing these recipes more often than not.
- Dog House and Cat Bed: You should get the base upgrade, as well as the deluxe and ultra deluxe versions of the dog house and cat bad as early as you can. These will greatly improve their capabilities.
- Chicken Coop Setup: Having a source for eggs is helpful. You can leave the deluxe upgrade for later, but do make sure to purchase the first to unlock the coop in your house.
- Farm Expansion: Purchase as many of these as you can. If you can get to at least level 3, you will be set for planting quite a lot at once.
- Farm Level: Intertwined with the above, this upgrade improves cultivation speed and chances of a good harvest, so make sure to get at least three levels ASAP.
- Scarecrow: Get at least level 1 of the Scarecrow, which will help to prevent your harvest from being damaged.
- Green Thumb: This one is a bit subjective, as it will depend on your current needs. Grabbing as many new ingredients to plant is never a wrong choice, but if you don’t have your farm’s size fully upgraded yet, I recommend holding off until you do. In the meantime, if you happen to stumble upon a substory or bond that asks for a specific vegetable, that’s usually a good cue to purchase the corresponding Green Thumb upgrade and plant it on your farm.
There are other upgrades as well, such as River Classic and Sea Classic Expertise, but it will depend on how much time you want to dedicate to fishing. As for the interior decoration upgrades, they’re all cosmetic, so don’t worry about having to purchase them to access new tools and the like, as that’s not the case.
Best crop rotation strategy for maximum profit
For real-world farming, the most profitable crop rotation is usually one that balances three things: cash crops, soil-building crops, and pest/disease breaks.
Core Principles
-
Rotate crop families, not just species, so you never grow the same family in the same field in consecutive seasons (e.g., don’t follow wheat with barley; don’t follow potatoes with tomatoes).
-
Alternate “heavy feeders” (crops that use lots of nutrients, especially nitrogen) with legumes that fix nitrogen (beans, peas, soybeans, clover), which cuts fertilizer costs and boosts yield.
-
Plan at least a 3-4 year rotation so pests, diseases, and weeds specific to one crop don’t build up, making yields more stable and input costs lower.
High-Profit Rotation Templates
Below are simple, proven sequences you can adapt to your climate and market.
-
Two-year cereal-legume (simple, high profit)
-
Year 1: Corn (maize) or another cereal (wheat, sorghum).
-
Year 2: Soybean or another grain legume.
-
Why it works: Corn/other cereals use a lot of nitrogen; soybeans fix nitrogen, reducing fertilizer needs and improving corn yield the next cycle.
-
-
Three-year cereal-legume-cereal (more resilient)
-
Year 1: Wheat or barley.
-
Year 2: Legume (peas, lentils, soybeans, vetch).
-
Year 3: Corn or another cereal.
-
Benefits: Rebuilds fertility, improves soil structure and organic matter, and spreads risk across crops and markets.
-
-
Maize-potato-legume (cash + soil health)
-
Year 1: Maize for deep rooting and high energy yield.
-
Year 2: Potato, using loosened soil for a strong cash crop.
-
Year 3: Legume (beans/peas) to restore nitrogen and organic matter.
-
This three-year plan gives three strong harvests, good soil structure, and reduced disease pressure for each crop.
-
-
Rice-vegetable rotation (for paddy regions)
-
Year 1: Rice (wet season).
-
Year 2: High-value vegetables (tomato, okra, leafy greens, onions) in the drier season.
-
Outcome: Better land use year-round, diversified income, and improved soil balance.
-
Evidence on Profit and Yield
-
Large global studies show that rotating crops instead of monocropping increases total yield, energy, protein, micronutrients, and farm revenue by about 14-27% on average.
-
Cereal-legume rotations, especially maize-soybean and sorghum-soybean, often produce “win-win-win” outcomes: higher yields, better nutrition, and more income compared to continuous monoculture.
Practical Tips to Maximize Profit
-
Choose your cash crops first (what sells best locally), then slot in legumes and a “break” crop to interrupt pests and diseases.
-
Keep simple records of which crop family was in each field each year so you avoid back-to-back planting of the same family.
-
Use cover crops (e.g., clover, vetch, rye) in off-seasons to protect soil, add organic matter, and further reduce fertilizer needs.
-
Stay flexible: if a pest or disease spikes, adjust the next year’s crop choice to lengthen the break for that crop family.
If you tell me your climate, soil type, and which crops you can sell easily, I can lay out a concrete 3-4 year rotation plan tailored to your farm.
How to adapt crop rotations to my specific climate and soil type
You adapt crop rotations by matching crops to your climate limits and your soil strengths/weaknesses, then updating the plan as you see how fields actually perform.
Step 1 – Read your climate
Think in terms of heat, rain, and extremes rather than just “temperate” or “tropical”.
-
Hot, drier climates: Favor drought-tolerant crops (sorghum, millet, cowpea, chickpea), longer fallows or cover crops that improve water infiltration, and rotations that avoid thirsty crops back-to-back.
-
Cool or short-season climates: Choose short-maturity cereals and legumes, and keep rotations simple (e.g., 3-4 crops) so each fits the growing window reliably.
-
Flood-prone or heavy-rain areas: Include flood-tolerant crops (rice in suitable areas), deep-rooted cover crops, and rotations aimed at improving drainage and soil structure.
-
Areas with rising climate variability: Build redundancy with more species in the rotation and “backup” crops you can switch to if a season turns too dry, too wet, or too hot.
Step 2 – Read your soil
Match rotations to what your soil already does well or poorly.
-
Light/sandy soils:
-
Strength: Warm up quickly, easy to work.
-
Weakness: Poor water and nutrient holding.
-
Rotation focus: More legumes and high-residue cover crops (e.g., clover, vetch, rye), avoid long runs of hungry crops like continuous maize or vegetables without organic matter returns.
-
-
Heavy/clay or compacted soils:
-
Strength: High potential fertility.
-
Weakness: Poor drainage, risk of waterlogging and compaction.
-
Rotation focus: Deep-rooted crops and covers to break up compaction (e.g., deep-rooted grasses, certain brassicas), avoid repeated root crops that worsen structure, use perennials or long covers on slopes.
-
-
Low-fertility soils:
-
Rotation focus: Legumes as frequent as possible (cash and cover), crop sequences that leave a lot of residue, reduced tillage so organic matter can build up.
-
Step 3 – Choose climate/soil-fit crop groups
Instead of picking random crops, group them by function and fit.
-
Nutrient-demanding cash crops (e.g., maize, wheat, potatoes, many vegetables).
-
Nitrogen-fixing legumes (soybean, peas, beans, cowpea, clover, vetch) for soil fertility.
-
Structural/cover crops (rye, oats, vetch, clover, deep-rooted grasses, some brassicas) for soil structure, erosion control, and resilience.
-
Stress-tolerant crops specific to your risks: sorghum/millet for drought; rice or flood-tolerant varieties in wet zones; heat-tolerant maize or okra where heatwaves are common.
Then build a rotation that alternates functions, such as:
-
Heavy feeder → legume → cover/structural crop → different heavy feeder, ensuring each slot is filled by a species that suits your local climate and soil.
Step 4 – Bake in climate resilience
Because weather is now more erratic, you want rotations that can flex without breaking.
-
Plan “swappable” crops: e.g., in a drought-risk slot, choose between maize (normal year) or sorghum/millet (if forecasts look dry).
-
Use covers and green manures to buffer extremes by improving soil organic matter and water holding, which reduces damage from both droughts and heavy rain.
-
Consider heat and flood stress explicitly:
-
Shift planting dates so sensitive crops avoid peak heat.
-
In flood-prone fields, use rotations that gradually improve structure and drainage (e.g., cereals and deep-rooted covers) and keep very sensitive crops on better-drained land.
-
Step 5 – Monitor and adjust locally
There is no one perfect rotation; you refine it using your own field results.
-
Track: yield, visible soil condition, weed pressure, and pest/disease problems in each field and year.
-
If a crop consistently fails or struggles in a field (e.g., too wet, too dry, disease-prone), switch it for a better-adapted species in that slot.
-
Lengthen or diversify rotations where a pest or disease is becoming a problem, and use resistant varieties as part of the sequence.
-
Re-test soil every few years; if organic matter and structure are improving, your rotation is headed the right way, and you can gradually lean into more demanding crops.
If you tell me:
-
your country/region,
-
whether your soil is mostly light/sandy, loamy, or heavy/clay, and
-
which main crops you want to grow,
I can sketch a concrete 3-4 year rotation adapted to your exact conditi