Bonding becomes a chess match: every choice rewrites the board, and a single misstep costs you more than gold.
Considering how much there is in the game to do and discover, spending time with bonds might seem trivial at first. This guide dives into all the rewards you can get from bonds in Like a Dragon: Ishin!, so you can know what these friendships will offer you in the long run without having to spend the money or the time. We’ve also highlighted the bonds in Ishin that you shouldn’t miss.
How bonds work in Like a Dragon: Ishin!
Bonds in Like a Dragon: Ishin! are a side activity you can build and improve by giving characters gifts that boost their bond level. Each character has a preferred set of items; giving these items increases trust, unlocks special conversations, and can grant access to unique abilities or bonuses during battles. Bonds grow through repetition-participating in missions, sharing meals, and exchanging gifts accelerates the process. Once you reach higher bond levels, you’ll unlock powerful passive effects and more cinematic scenes that deepen the story and your party’s synergy.
Bonds, which are also labeled as friendships in Like a Dragon: Ishin!, allow you to get to know the locals a bit further. Some have extended storylines, others are related to systems such as Another Life, and so on. In essence, there are quite a few substories that might feel short at first, but once completed, they unlock a bond for you to complete afterward.
Bonds are completely optional. They can’t be missed during the main story either, so you can always tackle them during Premium Adventure after the credits have rolled. If you’re looking to gain some Virtue, however, they can be a good source for that. But all in all, unless there is a specific reward that might be worth the time investment, these friendships are more of a completionist checklist item than anything super deep.
The 8 Like a Dragon: Ishin! bonds you should complete
Building bonds in Like a Dragon: Ishin! adds depth to Ryoma’s experience, offering access to unique items, upgrades, and heartfelt side stories. The eight standout bonds-such as the Barking Dog, Virtuous Wife, and Hungry Sumo-stand out for their satisfying narratives and useful rewards. Completing these connections often requires helping townsfolk or fulfilling small requests that reveal more of the game’s charm. Taking the time to finish these bonds not only strengthens Ryoma’s ties across Kyoto but also brings valuable benefits in combat and daily life.
Amid the sheer variance of bonds, there are a few that you should complete as soon as possible. As a general rule, if you’re trying to speed up the process of increasing the friendship level of a bond, you can always exit the area that you’re in and come back again. If that doesn’t work, performing an activity – such as a battle dungeon, a karaoke song, or eating at a restaurant – might do the trick. But in any case, if you’re still doing the main story, progressing through your current main objective is always likely to reset an NPC so they’ll talk to you again.
In order to equip yourself with the best tools for the mid- to endgame grinds, here are the Like a Dragon: Ishin! bonds you shouldn’t miss. And for details about where to start these bonds and how to strengthen them (and, most importantly, what you get for doing so), scroll onto the next section:
- Ecchudo Apothecary
- Arms Dealer
- Patient Dog
- Injured Dog
- Barking Dog
- Hungry Cat
- Filthy Cat
- Lucky Cat
Like a Dragon: Ishin! bonds – all rewards and locations
Bonding with characters in Like a Dragon: Ishin! rewards you with unique items, recipes, and upgrades that improve gameplay and deepen your connection to Kyoto’s residents. Each bond has a specific location-often tied to shops, side quests, or mini-games-where you can meet and interact with NPCs like vendors, farmers, and dojo trainers. Completing these relationships grants practical bonuses such as discounted prices, new crafting materials, or special food and weapon options, making them worthwhile for anyone aiming to strengthen Ryoma’s abilities and access hidden content across the city.
Bonds are divided into two categories: Friendships and Friendships (Shops). The latter are far more common to encounter, as they generally just require you to purchase or dine at some place once. The rest tend to be related to substories. Keep in mind that the list below is in progress for the time being. We’ll update it in the coming days to include the remaining few bonds.
Below are all the Like a Dragon: Ishin! bond rewards and locations:
Friendships
Wood Cutter
- Location: Near the Fushimi Palanquin spot.
- Rewards: Ancient Amulet, Broken Compass, 1,500 Virtue
- Task: Complete the wood-cutting minigame a few times until you’ve reached the numbers the NPC asks for.
Palanquin Bearer
- Location: Any Palanquin spot.
- Rewards: 1,500 Virtue
- Task: Just do Palanquin trips until you trigger a combat sequence. Afterward, the friendship will be completed.
Servile Beggar
- Location: Talk to a Beggar on the first floor of Mukurogai, who’s sitting in the corner diagonally to the door that goes to Rakugai, northeast of the Arms Dealer.
- Rewards: Precise Machinery 1,500 Virtue
- Task: Fetch him food items. Once he stops appearing in the usual spot, find him on East Umekojicho in Rakugai.
Hungry Sumo Wrestler
- Location: In Rakunai, you’ll find a sumo in distress on South Teramachi street, which is southeast of Don Quijote. If you don’t see this yet, try progressing through the main story until after you’ve met Yamazaki.
- Rewards: 1,500 Virtue
- Task: Bring him food items.
Revolutionary Chef
- Location: Gion, in the first street where the Palanquin drops you off.
- Rewards: Revolutionary Croquettes recipe, 1,500 Virtue
- Task: Prepare meals in Another Life and then bring them to him – you can repeat them!
Love-Starved Husband
- Location: Heading down to the riverbank from East Shijo Street, right before the bridge, down to Teramachi. There’s a man looking at the river.
- Rewards: Manly Love Bento, 1,500 Virtue
- Task: Bring him meals prepped in Another Life.
Sword Nut
- Location: Heading down to the riverbank from East Shijo Street, right before the bridge, down to Teramachi. There’s a man looking at the river.
- Rewards: Tunasmith (katana), 1,500 Virtue
- Task: You have to have some weapons to show him – these are Ebony Sword, Yaksha Blade, Vulpecula, and King of Beasts. You can craft them at the blacksmith, but if King of Beasts is a bit tough, you can get one towards the end of the main story, you can leave this bond on the backburner until then.
Battered Defender
- Location: As you’re heading to Rakugai taking South Umekojicho from North Fushimi Ichibangai, you’ll see a guy standing on the corner.
- Rewards: 1,500 Virtue
- Task: You have to fetch him quite a few health items during subsequent visits.
Amnesiac
- Location: As you’re progressing through the main story in chapter four, you’ll be tasked to go to Kiyomizu Temple. On your way there as you’re trekking in that long path after the bridge, you’ll find a man on the ground.
- Rewards: Sturdy Lumber, Thousand-Year Tree Branch, Sacred Wood, 1,500 Virtue
- Task: You have to fetch him a few health items during subsequent visits.
Oblivious Woman
- Location: As you’re walking down Karasuma Street in Rakunai, right before stumbling upon Teramachi Street, a woman will ask you if you’ve seen her purse.
- Rewards: Health items, 3 ryo, and 1,500 Virtue
- Task: You have to fetch her any vegetables during subsequent visits.
Veggie-Loving Boy
- Location: Towards the eastern corner of Mibu, heading to the exit.
- Rewards: 1,500 Virtue
- Task: You have to fetch him any vegetables during subsequent visits. Then, he’ll give you a prompt to prepare a recipe in Another Life, which only asks for a few vegetables, so it shouldn’t be too hard to cook.
Desperate Fisherman
- Location: Found in Shinmachi, southeastern corner of Fushimi, overlooking the river.
- Rewards: 1,500 Virtue
- Task: You have to fetch him any fishes (which can be store-bought) you have during subsequent visits.
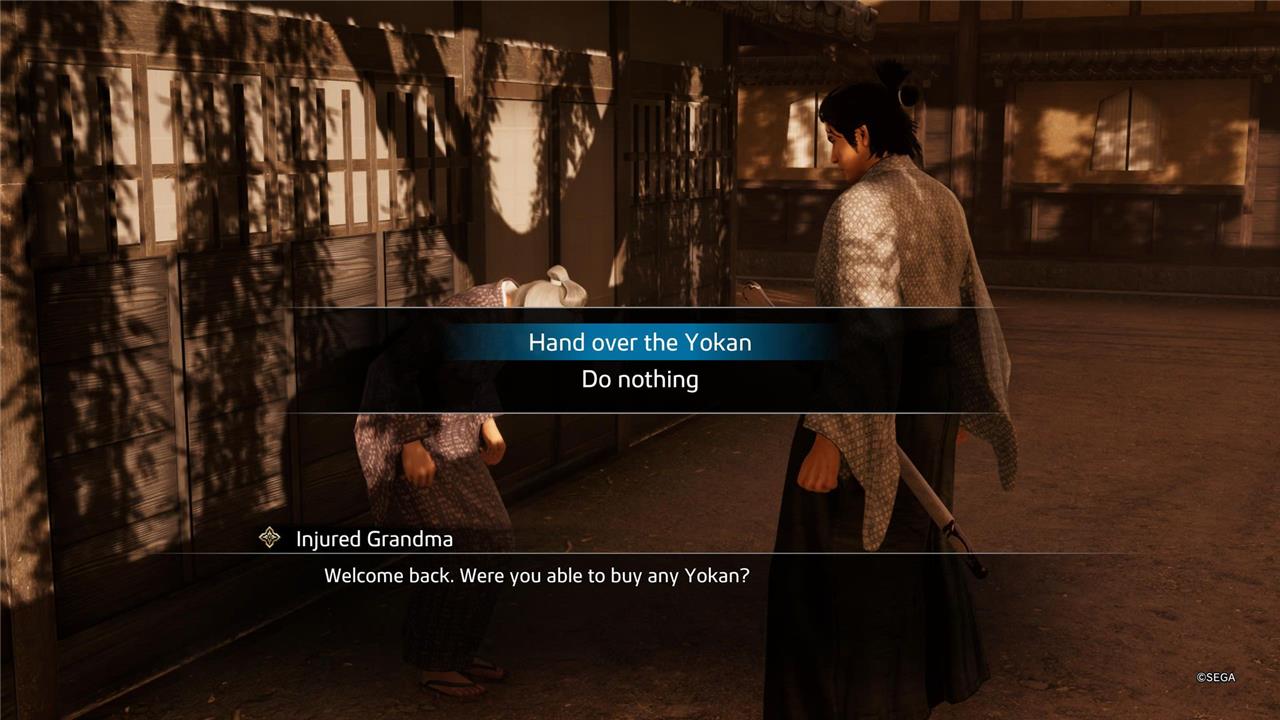
Injured Grandma
- Location: In Teramachi, Rakugai, there’s an injured old lady next to the riverbank. The easier way to get to her is to head over to the Sannocho bridge that leads to the eastern side of the map, and then head down to the riverbank facing north.
- Rewards: 1,500 Virtue
- Task: You have to fetch her medicine items, as well as some other items requested by her.
Mysterious Merchant
- Location: In Teramachi, Rakugai, there’s an injured old lady next to the riverbank. The easier way to get to her is to head over to the Sannocho bridge that leads to the eastern side of the map, and then head down to the riverbank facing north.
- Rewards: Access to his shop, a few ryo, 1,500 Virtue
- Task: You have to fetch him a few quite ordinary items. Ginseng is a rare one, but you can actually plant it on your farm if you’ve gotten the upgrade in the altar using Virtue.
Sexy Madam
- Location: Gion, in the southern plaza next to a tree.
- Rewards: Health items, Gold Plate, 1,500 Virtue
- Task: Fetch her the following vegetables: Cucumber, carrot, eggplant, daikon, and a pumpkin.
Junk Boy
- Location: Found in Kuramachi, in between the two large structures on the map that are right above the Teradaya inn.
- Rewards: 1,500 Virtue
- Task: Fetch him any items you have, as the boy will use them as toys. Oh to have that childlike wonder gain.
Trash Dealer
- Location: On the first floor of Mukurogai, head all the way north towards the closed door that leads to Rakugai to find a bald man on the left side.
- Rewards: 1,500 Virtue
- Task: Fetch him any items during subsequent visits.
Frequently Lost Courier
- Location: In the southeastern side of Fushimi, close to the ferry man that takes you to Mukurogai.
- Rewards: A couple ryo, 1,500 Virtue
- Task: You have to complete a few deliveries. These seem to be random, but as long as you pay attention to what the courier says to you, it’s fairly straightforward. Just head over to that district and look for any NPCs that are standing out, usually close to a corner or a backstreet, and have the dialogue prompt.
Patient Dog
- Location: In Yashikimachi, Fushimi, south of the dojo while looking at the map, as you’re heading toward the Sengoku Residence.
- Rewards: Pet for Another Life, which fetches items for you, as well as 1,500 Virtue
- Task: Throughout subsequent visits, you have to deliver some food items to the dog (ingredients count as per usual). Then, Ryoma will invite them to his home in Another Life, and you’ll get to name them.
Injured Dog
- Location: In the first floor of Mukurogai, you’ll see an injured dog on the top street, right at the center of the map and at the northern end of the path in the middle of the town, to the left of Paradise.
- Rewards: Pet for Another Life, which fetches items for you, as well as 1,500 Virtue
- Task: Throughout subsequent visits, you have to deliver some health items to the dog. Then, Ryoma will invite them to his home in Another Life, and you’ll get to name them.
Barking Dog
- Location: As you’re walking down Tearamachi in Rakunai, heading down from East Shijo Street, around the corner of Ebisu Pawn Rakunai, a cutscene will automatically play featuring a barking dog.
- Rewards: Pet for Another Life, which fetches items for you, as well as 1,500 Virtue
- Task: Throughout subsequent visits, you have to deliver bones to the dog. You can purchase bones in the Pawn Shop in Rakunai if you don’t have them. Then, Ryoma will invite them to his home in Another Life, and you’ll get to name them.
Hungry Cat
- Location: East Umekojicho, in the alleyway in the center of the district, northeast of Unyuan.
- Rewards: Pet for Another Life, which improves the loot you can get for completing Another Life orders, as well as 1,500 Virtue
Task: Throughout subsequent visits, you have to deliver them some fish. At one point the cat will ask for a sea bream. You can purchase this from the fish shop in Fushimi’s street market.
The cat will then ask for a tuna, which you can’t buy from the store. For this, you’re going to need the Peerless Pole (purchase all Fishing upgrades in the altar using Virtue), and some Top-grade Bait to make it easier. Then, head over to the fisherman next to the dock in Fushimi, and ask him to take you to fish to the east coast.
Once there, equip the Peerless Pole, throw some Top-grade Bait, and aim at the bigger fish that are farthest in the water. I caught a Great White Shark and a Marlin before getting a Bluefin Tuna, so you know, proceed with patience.
Once you’re done, take the tuna to the cat. Ryoma will invite them to his home in Another Life, and you’ll get to name them.
Filthy Cat
- Location: In the southwestern side of Fushimi, sitting in one of the ports over the river.
- Rewards: Pet for Another Life, which improves the loot you can get for completing Another Life orders, as well as 1,500 Virtue
- Task: Throughout subsequent visits, you just need to check on the cat. Ryoma will take them with him to the bathhouse a few times.
Lucky Cat
- Location: In Karasuma Street, over at Rakunai, you’ll find a man bowing to a cat in the top corner, adjacent to the Ginryu Dojo.
- Rewards: Pet for Another Life, which improves the loot you can get for completing Another Life orders, as well as 5 ryo and 1,500 Virtue
- Task: Throughout subsequent visits, you’ll have to fetch the cat a few thousand mon. Don’t worry as you’ll gain back all of that money plus some nice additional change once you’re done with the bond.
Friendships (Shops)
Utamaruya Owner
- Location: In the southeastern side of Fushimi, close to the ferry man that takes you to Mukurogai.
- Rewards: A few ryo, 1,500 Virtue
- Task: You have to complete a few deliveries. These seem to be random, but as long as you pay attention to what the courier says to you, it’s fairly straightforward. Just head over to that district and look for any NPCs that are standing out, usually close to a corner or a backstreet, and have the dialogue prompt.
Umai Udon Owner
- Location: In the southeastern side of Fushimi, close to the ferryman who takes you to Mukurogai.
- Rewards: 1,500 Virtue
- Task: You have to complete a few deliveries. These seem to be random, but as long as you pay attention to what the courier says to you, it’s fairly straightforward. Just head over to that district and look for any NPCs that are standing out, usually close to a corner or a backstreet, and have the dialogue prompt.
Maijo-sensei
- Location: In the southeastern side of Fushimi, close to the ferry man that takes you to Mukurogai.
- Rewards: Solid Wood, 1,500 Virtue
- Task: You have to complete a few deliveries. These seem to be random, but as long as you pay attention to what the courier says to you, it’s fairly straightforward. Just head over to that district and look for any NPCs that are standing out, usually close to a corner or a backstreet, and have the dialogue prompt.
Shinto Priest
- Location: You have to purchase the “Shinto Priest’s Exchange, now open!” upgrade in an Altar with 500 Virtue.
- Rewards: 1,700 Virtue total
- Task: Purchase the cheapest item you can find several times.
Akari
- Location: Akari appears next to the Shinto Priest in Rakunai after you’ve made progress with the main story (around chapter four) and Another Life (I was rank 4 of Haruka’s Trust, as a reference).
- Rewards: Akari’s Omosubi, 1,500 Virtue total.
- Task: Visit her during subsequent visits.
Ecchudo Apothecary
- Location: Ecchudo in Rakunai
- Rewards: Unlocks the Longevity Pill, which is a health item that replenishes both health and heat significantly. It costs 8,000 mon a pop, but you get a freebie for maxing out the bond. You also get 1,500 Virtue.
- Task: This one is fairly straightforward, as you only need to visit the character a few times while being the subject of tests. They’re just cutscenes, but make sure to go in with full health.
Arms Dealer
- Location: Arms Dealer in Rakugai
- Rewards: Dragon Fang (a rare crafting item) as well as new items in the store and 1,500 Virtue
- Task: Purchase items repeatedly until the friendship is maxed out. I’d recommend going for the cheapest options, then donating them to the blacksmith to increase the shop’s level. This specific bond has two question prompts, too – I chose the third and the second option, respectively, but it may not make too much of a difference. As long as you get the Dragon Fang, you’ll be set.
Anna
- Location: Yamabuki Brothel in Gion.
- Rewards: 1,500 Virtue total
- Task: So, this is a particular bond. Yamabuki has three unique minigames: Sake Showdown, Rock, Paper, Scissors, and Sensual Healing. They can be tough at first, but the upside is that you don’t need to excel at them. Even if you fail, it will still count towards the bond gauge.
Sake Showdown has you mashing two buttons to balance a bowl with sake. For this one, try to keep it in the middle ground of the line – if it starts accelerating towards either side, that’s usually your cue to star mashing the opposite button.
For Rock, Paper Scissors, pay attention to Anna’s right hand. She will signalize which one of the three she’s going to show close to when the timer is about to end. She might tease a different one during the first few seconds, so once more, try to keep an eye on the hand until the very end to know exactly what to expect. You can also use Third Eye, but I recommend saving it for the latter rounds.
Sensual Healing is. a whole thing. In essence, you’ll have to play a shoot ’em up of sorts while destroying words to make your way towards a floating heart that goes from side to side. For this one, try and move alongside the heart whenever possible. But once the minigame starts getting more intense, stay in the middle and don’t stop shooting. You’re bound to damage the heart either way, albeit slower than you’d do otherwise, but it will still count.
Once you’ve completed the full course at least once, you’ll be able to select to repeat all three of them together, or pick a minigame individually. Repeat either until you’ve maxed the bond.Visit her during subsequent visits?
Chicken Race Receptionist
- Location: Chicken Racing den.
- Rewards: Broken Compass, 1,500 Virtue total
- Task: You don’t need to win any races here or anything. Talk to the NPC upon entering the den and select the option the play. Then, select “Start Race” directly without betting (although you can bet if you want) and let the race unfold. Once done, exit the screen. Get inside the den again, rinse and repeat.
After some events, you’ll have to choose between betting on Wondercrest or Tosan Pride. Pick either of them.
Ichikura Owner
- Location: Ichikura, the general goods store in Fushimi.hukura.
- Rewards: Crystal, 1,500 Virtue total.
- Task: Keep on shopping during subsequent visits
Uji Tea Parlor Girl
- Location: Uji Tea Parlor
- Rewards: 1,500 Virtue
- Task: Dine several times until the bond is complete.
Don Quijote Employee
- Location: Don Quijote up north
- Rewards: Gold Plate, 1,500 Virtue
- Task: Purchase items until the bond is complete. As always, go for the cheapest, and purchase one each time.
Kasuga Okami
- Location: Kasuga Okami
- Rewards: Fine Silk Fabric, 1,500 Virtue
- Task: Dine several times until the bond is complete.
Kitchen Aoba Chef
- Location: Kitchen Aoba
- Rewards: 1,500 Virtue
- Task: Dine several times until the bond is complete.
Momokawa Brothers
- Location: Shippoku Momokawa
- Rewards: Broken Compass, 1,500 Virtue
- Task: Dine several times. Then, a competition will ensue, as well as a conversation prompt, but the answer doesn’t matter: The result is the same.
Sushi Zanmai Chef
- Location: Sushi Zanmai
- Rewards: 1,500 Virtue
- Task: Dine several times until the bond is complete.
Hanamaru Udon Employee
- Location: Hanamaru Udon
- Rewards: Beef Udon available to purchase, 1,500 Virtue
- Task: Dine several times until the bond is complete.
Pawnbroker
- Location: Ebisu Pawn.
- Rewards: Platinum Chunk, 1,500 Virtue
- Task: Purchase items until the bond is complete. Go for the cheapest.
Greengrocer
- Location: Greengrocer in Fushimi.
- Rewards: Sturdy Lumber, 1,500 Virtue
- Task: Purchase any vegetables throughout subsequent visits.
Shogi Parlor Owner
- Location: Shogi Parlor in Rakunai.
- Rewards: Tear of the Dragon, 1,500 Virtue
- Task: You have to play a few matches of Shogi. if you want. Alternatively, you can start marches and then quit them as soon as you’re able to. It won’t affect the bond.
Karaoke Bar (Utamaruya)
- Location: Fushimi, as you get close to the northern gate.
- Rewards: Phoenix Feather, 1,500 Virtue
- Task: Prepare those vocal chords cause you’re gonna have to sing a lot. If you want to save time, I recommend choosing “Harapeko Biyori (A Fine Day for Food)” and opting for Casual Backup. Once you’re done, don’t pay for another song. Exit and then start the prompt again. After a while, some events will unfold, and the owner will ask you to return later. Spend some time elsewhere (you can eat an udon nearby and it should count!) and return for a fight.
Cho-Han Dealer
- Location: Gambling Den in Rakugai.
- Rewards: 20 ryo, 1,500 Virtue
- Task: Purchase some wooden tags, and then head towards the large room inside with the rows of people on each side – you’ll be playing Cho-Han. I did one match and then left. Once I was getting close to the door, a cutscene played out, and the Cho-Han Dealer challenged Ryoma, creating the bond.
You’ll have to play matches to increase the friendship. You can just do one round per match and repeat them a few times. Eventually, the dealer will propose Ryoma a higher stakes game for 10 ryo. In your next visit, select “10 ryo showdown.”
I saved the game beforehand, and chose Even. I lost that first match, but I still completed the bond. I then reloaded and tried two more times: Went with Even and got the same result, so I tried Odd for the third time and won. In essence, you can lose the match if you want, but you’re going to miss the ryo as reward.
Fukufuku Pub Owner
- Location: Fushimi Ichibangai, in the southwestern corner of the street.
- Rewards: Nada Refined Sake, 1,500 Virtue
- Task: Dine at the place during subsequent visits. An event will take place over time, and then you’ll have to kill some time elsewhere. Entering and then exiting the karaoke bar did the trick for me. Upon your return, a cutscene will play out, and you’ll have two conversation prompts:
- No, it’s fine – Correct answer
- It’s kind of pathetic, yeah
And then.
- Don’t you goddamn dare!
- Water would taste better – Correct answer
Mahjong House Residents
- Location: The Mahjong Spot in Mukurogai’s first floor.
- Rewards: Charming Doll, 1,500 Virtue
- Task: You’ll have to purchase Mahjong Sticks to play. Then, go to the Beginner’s Table, enter the minigame, and exit as soon as your turn rolls in (alternatively, you can go ahead and play normally!). Then head towards the other and a cutscene will play out.
Repeat this process to build the bond gauge. Unlike the dice minigame, you have to manually head towards the door for it to count. At one point towards finishing the gauge, leaving won’t activate a cutscene. You have to actually leave the parlor, and then return to get an invitation to play in the advanced table. Repeat the process to finish the bond.
Best bond options and how to unlock them faster in Ishin bonds guide
The most valuable bonds are the ones that unlock strong gear, farming helpers (dogs/cats), and easy Virtue/money; you can speed all of them up by abusing area resets and “start-quit” loops in their related activities.
Best bonds to prioritize
These give the best long-term rewards for combat and Another Life:
-
Ecchudo Apothecary (Rakunai): Gives a Longevity Pill and solid healing/medicine access, plus Virtue; just visit a few times and do his tests when available.
-
Arms Dealer (Rakugai): Unlocks Dragon Fang and special weapon stock; expensive but great for crafting and late-game builds.
-
Patient Dog, Injured Dog, Barking Dog (Fushimi): Turn into pets for Another Life and improve item orders; they also give Virtue and some consumables.
-
Hungry Cat, Filthy Cat, Lucky Cat: Become pets that buff Another Life loot and give Virtue and money-related rewards; Lucky Cat in particular is great for cash/loot flow.
-
Wood Cutter, Palanquin Bearer, Sword Nut, Frequently Lost Courier: These give decent items, Virtue, and are tied to minigames or exploration you’ll do anyway, making them efficient to clear while progressing the story.
-
Gambling/mini-game bonds (Cho-Han Dealer, Chicken Race Receptionist, Mahjong House, Karaoke, Buyo Dance, Umai Udon Owner): Good for Virtue and dovetail with completion requirements and minigame trophies, so you “double dip” progress.
Fast leveling tricks (general)
Use these habits to speed every bond:
-
Reset areas constantly: Leave and re-enter the district, rest at Teradaya, or advance the main story to refresh NPC states so their next bond step is available sooner.
-
Always interact when you pass: Talk, buy a cheap item, or hand over one piece of food whenever you run by a bond NPC; this passively maxes a lot of them over the game.
-
“Over-grind” the linked activity once: For minigame bonds (udon, karaoke, dance, gambling, chicken race, mahjong), do a big focused session to finish both their completion requirement and most/all of their bond in one sitting.
-
Keep cheap items and food on you: Bonds like beggars, dogs, and some friendship NPCs only need basic food or low-value items, so carry a stack of the cheapest convenience-store food and use it to spam progress when you see them.
Specific speed-up methods (by bond type)
-
Shop/merchant bonds (Arms Dealer, Shinto Priest, Ecchudo, etc.):
-
Always buy the cheapest item in the shop; you just need the purchase count, not value.
-
Do a burst of 10-20 quick buys in one visit to push the gauge, then leave and re-enter the area if the dialogue/bond scenes stop triggering.
-
-
Minigame hosts (Umai Udon, Karaoke, Buyo, Cho-Han, Chicken Race, Mahjong):
-
Udon: Play until you get your minigame rank/trophy, then just buy bowls repeatedly to finish the bond.
-
Karaoke/Buyo: Each song completion raises the bond; you’re kicked out after songs, so you naturally don’t miss bond opportunities-just run 5-10 songs in a row.
-
Cho-Han Dealer: After unlocking the bond, you can make a single small bet, then quit the game to raise bond; repeat this loop instead of playing full matches.
-
Chicken Race Receptionist: Enter the race, then immediately quit; you don’t even need to bet for later steps, so you can spam entries to max her quickly.
-
Mahjong House: Start at Beginner table, immediately quit, and leave the building; repeat until ~80%, then follow the prompt to do a quick Advanced table game to cap the bond.
-
-
Beggars/strays/”feed me” NPCs (Servile Beggar, dogs, cats):
-
Give any cheap food, then force a reset (e.g., go up to the arena/another room and back or change districts) and repeat.
-
For cats and dogs destined for Another Life, focus them early so you benefit from their loot and order bonuses across mor
-
Best bond rewards and their benefits
I’m temporarily blocked from checking the in-depth Ishin bond guides I was using earlier, so I can’t pull a precise, ranked reward list this turn. I can still outline the kinds of bond rewards generally considered “best” and why they matter.
Categories of top-tier rewards
In Like a Dragon: Ishin!, the strongest bonds tend to give you one or more of these:
-
Strong gear or rare upgrade materials (especially from weapon/armour related NPCs).
-
Permanent access to better shop stock or cheaper/easier healing.
-
Pets and helpers that boost Another Life income and item gain.
-
Large chunks of Virtue, which you convert into shrine upgrades (sprint, harvesting, inventory, etc.).
Examples of especially valuable bond rewards
Without exact names and locations in front of me, these are the reward “types” you should focus on:
-
Weapon shop / Arms Dealer bonds
-
Benefit: Unlock stronger weapons, special materials, or better enhancement options.
-
Why it’s good: Directly raises your combat power and lets you experiment with multiple styles without being gear-starved.
-
-
Apothecary / medicine-seller bonds
-
Benefit: Better healing items, sometimes unique medicines or discounts.
-
Why it’s good: Makes boss fights and dungeons safer, and reduces money pressure by cutting potion costs.
-
-
Shrine or priest-type bonds
-
Benefit: More ways to spend Virtue or extra Virtue rewards.
-
Why it’s good: Virtue feeds core QoL upgrades (movement, farming, inventory, drop boosts), which then speed up the rest of your completion.
-
-
Gambling / minigame host bonds (udon, gambling den, mahjong, chicken race, karaoke/dance)
-
Benefit: Virtue, money, and sometimes unique items or titles while you’re also clearing minigame completion goals.
-
Why it’s good: You “double dip” – you’d be in those minigames for completion anyway, so the bond rewards are basically free extras.
-
-
Dog and cat bonds that turn them into pets
-
Benefit: Pets in Another Life that improve crop returns, item orders, and passive income.
-
Why it’s good: The sooner you get these, the more time they have to pay back in materials and money over the rest of the game.
-
How those rewards translate to benefits
-
More damage and survivability: Weapon/armour and medicine bonds make story and post-game fights easier and faster.
-
Faster completion: High-Virtue bonds and shrine-related rewards cut later grind by giving you movement, farming, and inventory perks earlier.
-
Economic snowball: Pet and shop bonds improve your cash flow (cheaper healing, better shop stock, better Another Life orders), which then lets you buy more gear, food, and upgrade mats.
-
Minigame synergy: Bonds tied to gambling and minigames naturally complete as you chase trophies/100%, so their rewards are efficient “bonus value” for time you’d already planned to spend.
If you tell me which chapter you’re on and roughly what bonds you’ve already cleared, I can, from memory, suggest a practical “next 5 bonds” to aim for and explain the concrete payoff of each.