Step into the haunting and vast Shadow of the Erdtree expansion, where every corner of the Shadow Land hides perilous foes, ancient secrets, and powerful legacies. Our streamlined walkthrough guides you through the main story’s critical path-from the eerie Gravesite Plain to the towering Belurat Settlement and beyond-cutting through optional detours to keep you focused on your quest to confront Miquella’s followers and face the ultimate challenge. Whether you’re on PC, PlayStation, or Xbox, this route ensures you never lose your way in Elden Ring’s darkest realm.
Before launch, it was said to be about the same size as Elden Ring’s Limgrave, but the Realm of Shadow is definitely much bigger. It’s easy to lose track of your original plan as you explore, so let us help remind you where to go next.
Read on to learn how to progress the Elden Ring DLC’s main story, and what to do once the story wraps.
What this Shadow of the Erdtree walkthrough will cover
This Shadow of the Erdtree walkthrough will cover the main story progression of Elden Ring’s expansive DLC, guiding you through key locations, major bosses, and essential story beats without detouring into side quests or optional content. It provides a clear route to follow in the vast and complex Shadow Land, helping you stay on track as you navigate areas like Belurat Tower Settlement, Shadow Keep, and Rauh Ruins, while also explaining the significance of optional areas and how to approach them if desired. This guide is designed to assist players in completing the main narrative efficiently while offering useful tips on important items, enemies, and NPC interactions encountered along the way.
Since you’ve played Elden Ring prior to starting the Shadow of the Erdtree DLC, you’ll know how easy it is to get lost in your adventure. You see a castle in the distance, you go to the castle in the distance. A blue witch sends you on a quest, you complete that quest.
Shadow of the Erdtree will be no different (other than that there are no blue witches). and this walkthrough will help you on your journey by telling you how to complete the main path of the DLC – no side quests, no exploration, and no optional bosses.
You’re more than welcome to get sidetracked and explore, but if you’re ever wondering what you should do next, you’ll have this walkthrough to help you get back on track.
Elden Ring DLC walkthrough steps
The Elden Ring DLC walkthrough steps for Shadow of the Erdtree guide players through the vast and complex Realm of Shadow, helping them stay on track with the main story progression without getting lost in exploration or side quests. The walkthrough provides a clear route through key areas such as Gravesite Plain and Belurat Tower Settlement, detailing important objectives, boss fights, and critical items to collect. It also highlights the significance of gathering Scadutree Fragments to enhance character power and advises on the order of tackling regions and legacy dungeons to match player progression. This structured approach ensures players can efficiently navigate the expansive DLC world while focusing on the main narrative and major challenges.
In brief, here’s the steps of how to complete the main story in Shadow of the Erdtree:
- Reach the Three-Path Cross Site of Grace
- Proceed through Belurat, Tower Settlement (optional)
- Defeat the boss at Castle Ensis (optional)
- Reach the Shadow Keep and defeat the boss
- Burn the sealing tree in the Rauh Ruins
- Face Miquella’s followers in Enir-Ilim
- Defeat the final boss of Shadow of the Erdtree
As noted, Belurat and Castle Ensis are technically optional, despite the game pointing you in their direction. We will cover how to reach them in this walkthrough, as they feature useful story beats and offer a more natural transition into the wilder map – but know you can skip them entirely if you wish (which this walkthrough will also explain).
And, before you can begin any of the above, you need to access the DLC – a tall order in itself – before you can start exploring the Realm of Shadow.
Starting Shadow of the Erdtree
To start the Shadow of the Erdtree DLC in Elden Ring, players must first defeat two key bosses in the base game: Starscourge Radahn and Mohg, Lord of Blood. Once these prerequisites are met, the DLC content becomes accessible, leading players into the expansive Shadow Land. The initial phase involves reaching the Three-Path Cross Site of Grace, which serves as a central hub for progressing through the DLC’s main story. From there, players can explore significant locations such as Belurat Tower Settlement and the Shadow Keep, encountering new enemies, bosses, and questlines that deepen the narrative and challenge. This starting route sets the stage for the journey to confront Miquella’s followers and ultimately face the final boss of Shadow of the Erdtree.
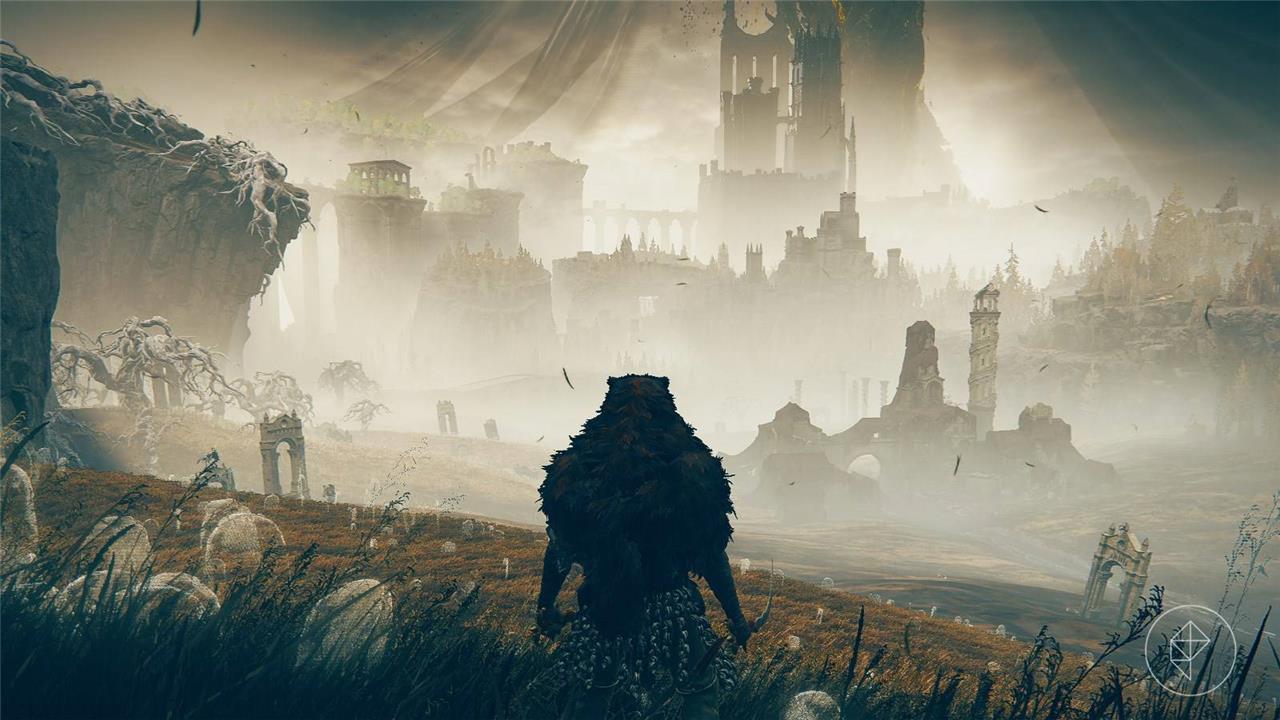
Congratulations, you’ve made it to the Realm of Shadow! As a fair warning, this is a very unforgiving land. A lot of enemies will two-shot you regardless of their stature, so be careful out there!
We strongly recommend to explore as much as possible and pick up as many Scadutree Fragments and Revered Spirit Ashes as you can because they can buff your character in the DLC. With that all said and done, let’s make our way through the starting area, the Gravesite Plains.
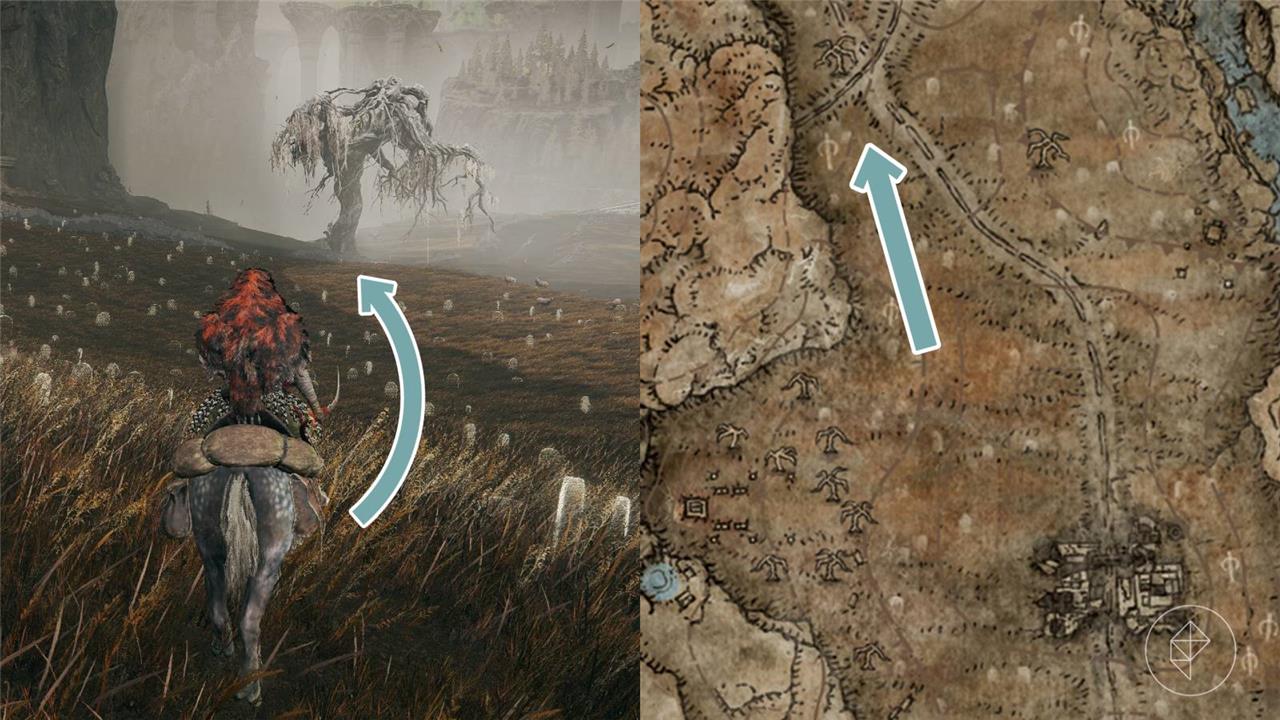
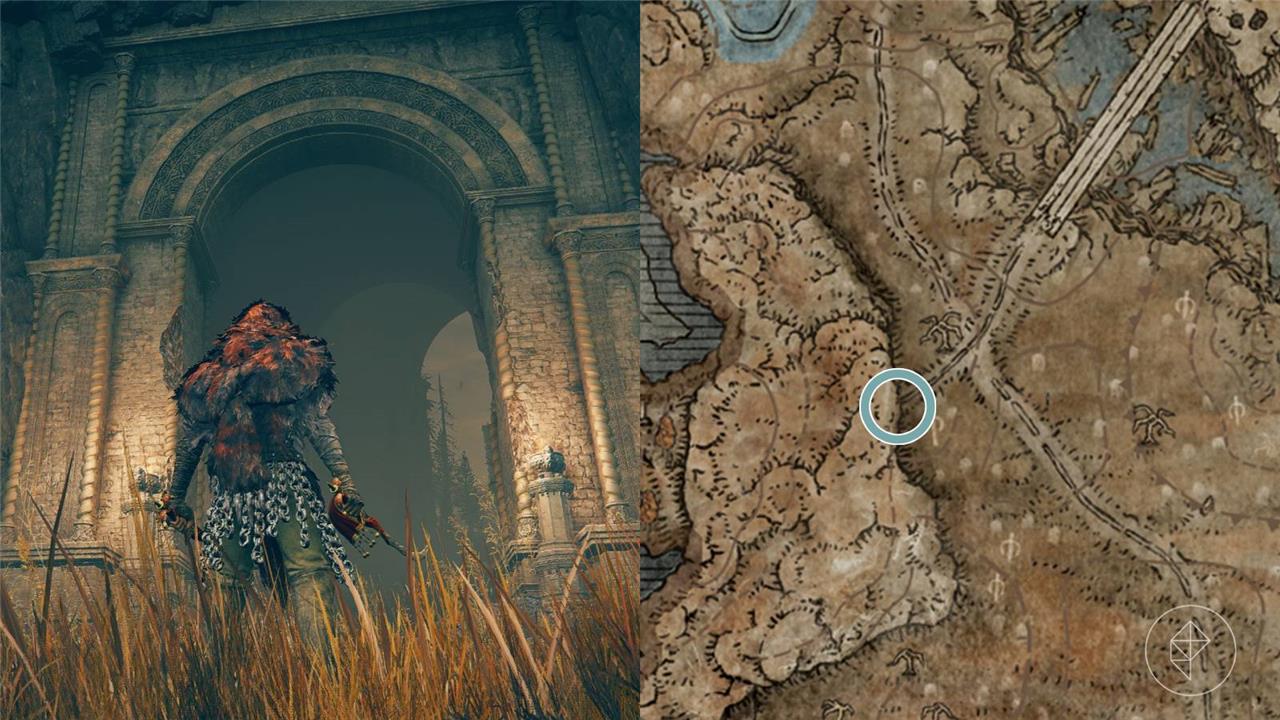
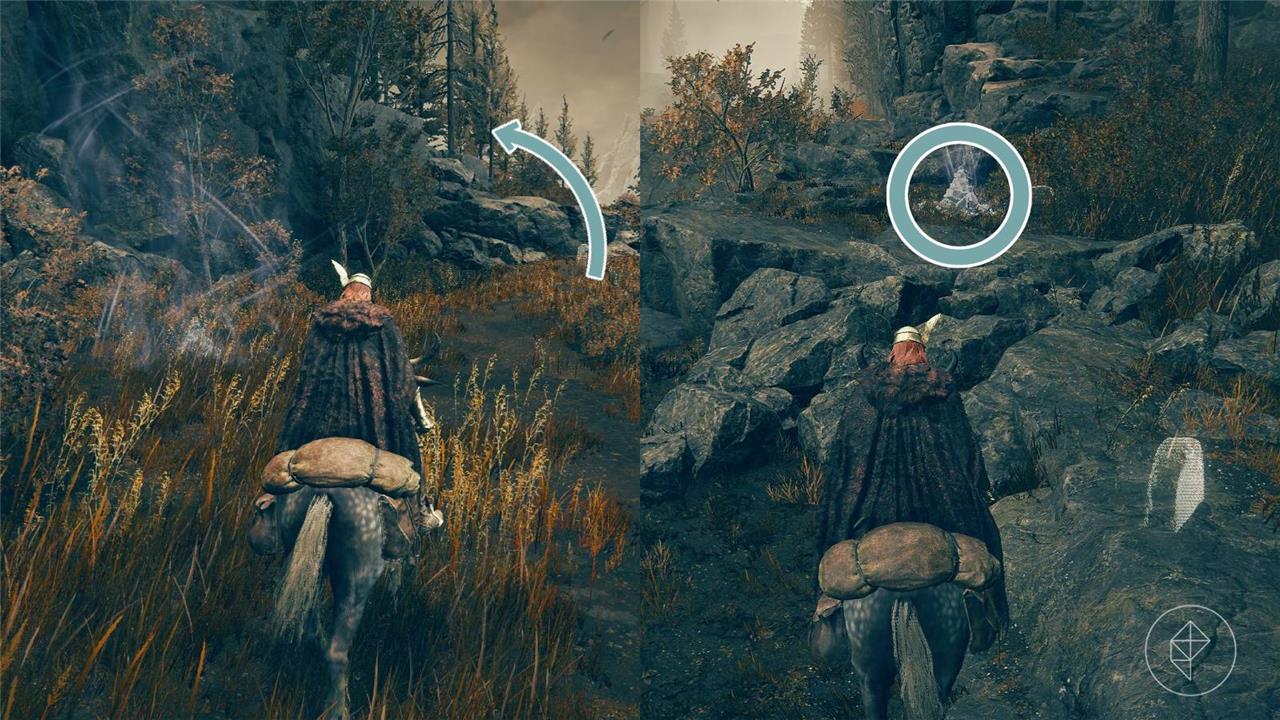
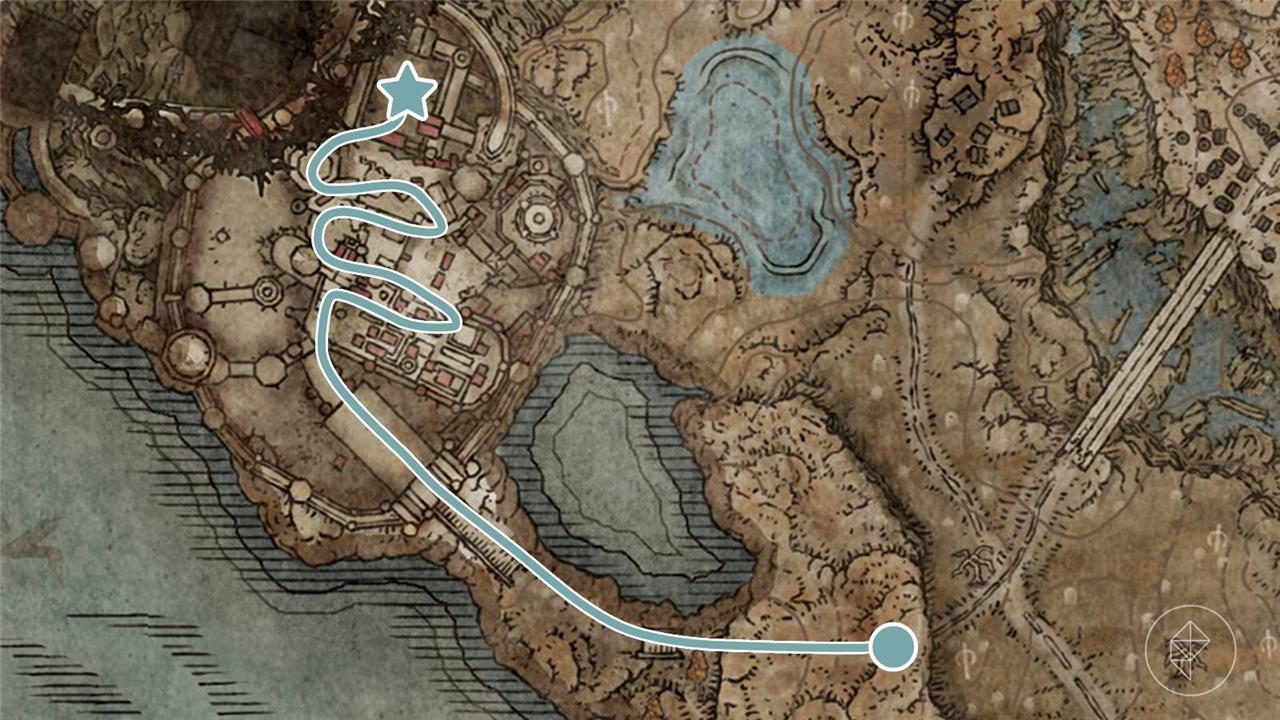
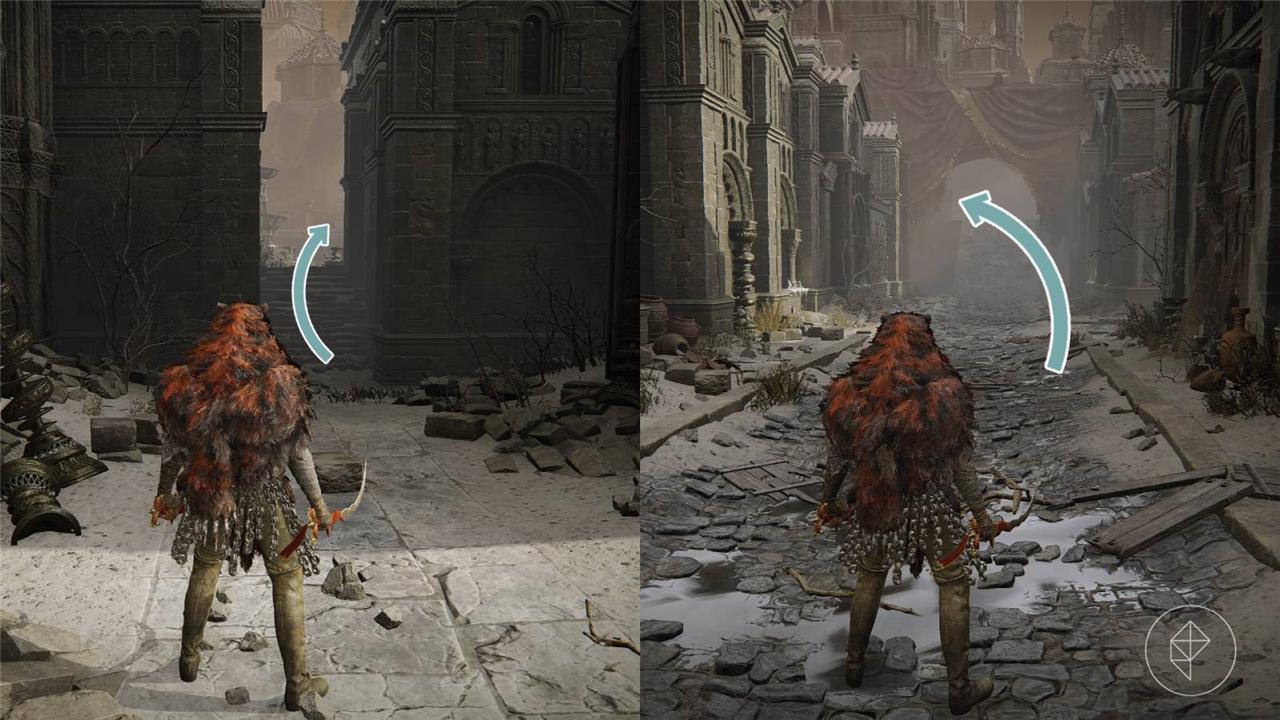
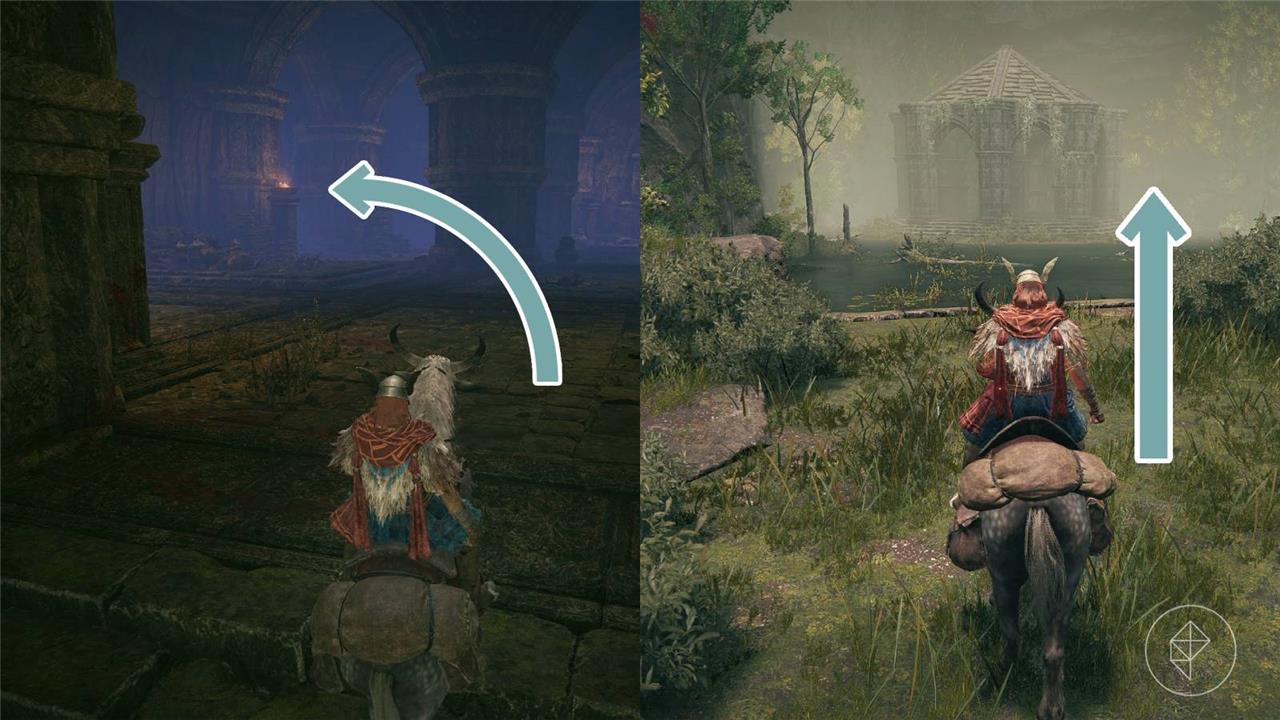
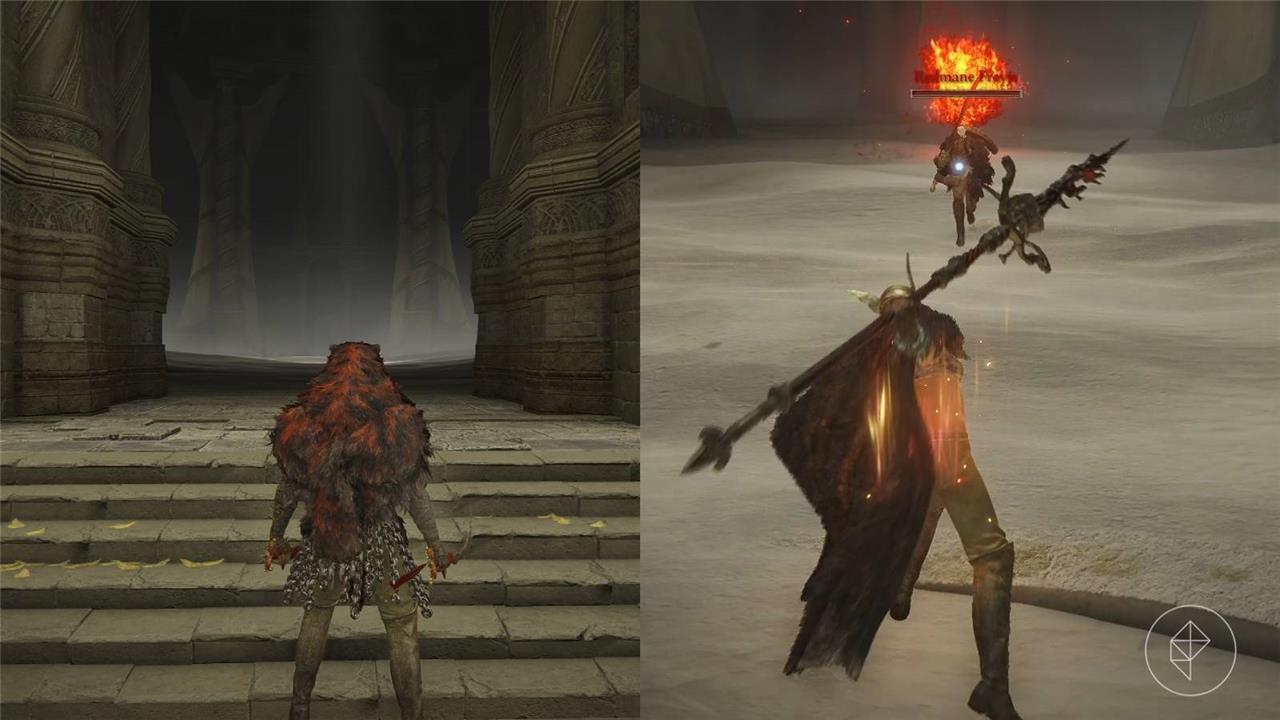
Walk out into the Gravesite Plains to be greeted with hundreds of tombstones and castles looming in the distance. Interact with the site of grace ahead of you then go northeast towards the ruins to find the Gravesite Plains Map Fragment. Hop onto your trusty steed, Torrent, and head north to the Three-Path CrossSite of Grace where you’ll find your first Miquella’s Cross and a couple of Miquella’s Followers, Redmane Freyja and Hornsent.
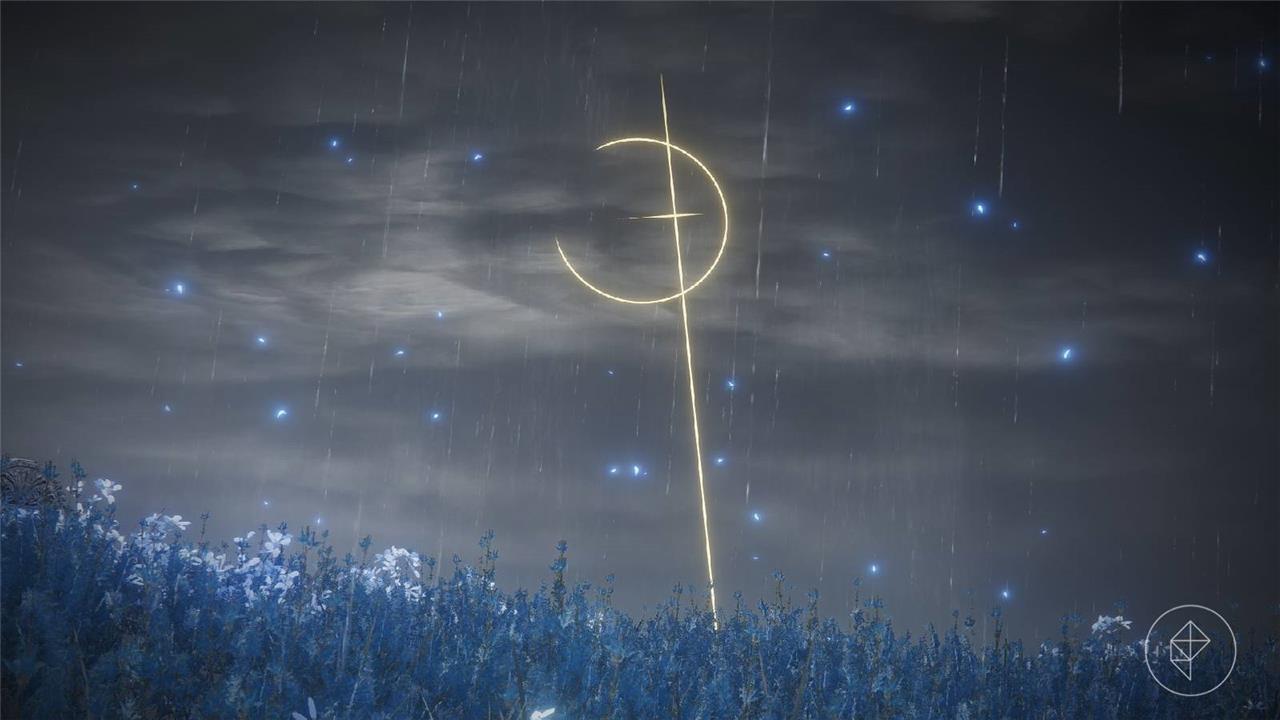
Miquella’s Crosses are used as markers that indicate where Miquella has let go of an aspect of himself that bind him to the Golden Order. They’re clues that will point you in the right direction of where Miquella has gone, and Hornsent just happens to give you a map of said clues.
After you’ve activated the grace and spoken to the NPCs, head west through the giant archway to find the Main Gate Cross Site of Grace, where you’ll find a Miquella’s Cross and two more of Miquella’s Followers, Sir Ansbach and Moore.
Before you head up the stairs, you should know that there are two routes you can take from here – throughBeluratandCastle Ensis, or skip them both. It’s entirely optional to go through Belurat and Castle Ensis, as you can still reach the ending of the DLC without them, but we recommend that you go through Belurat and Castle Ensis to get a better feel for the DLC’s difficulty, collect some Scadutree Fragments, and have a better understanding of the story.
With that in mind:
- For those heading up the stairs into Belurat, please move onto the Belurat section.
- For those who want to skip Belurat and Castle Ensis, please move onto the “How to skip Belurat and Castle Ensis” section.
How to skip Belurat, Castle Ensis, and Rellana
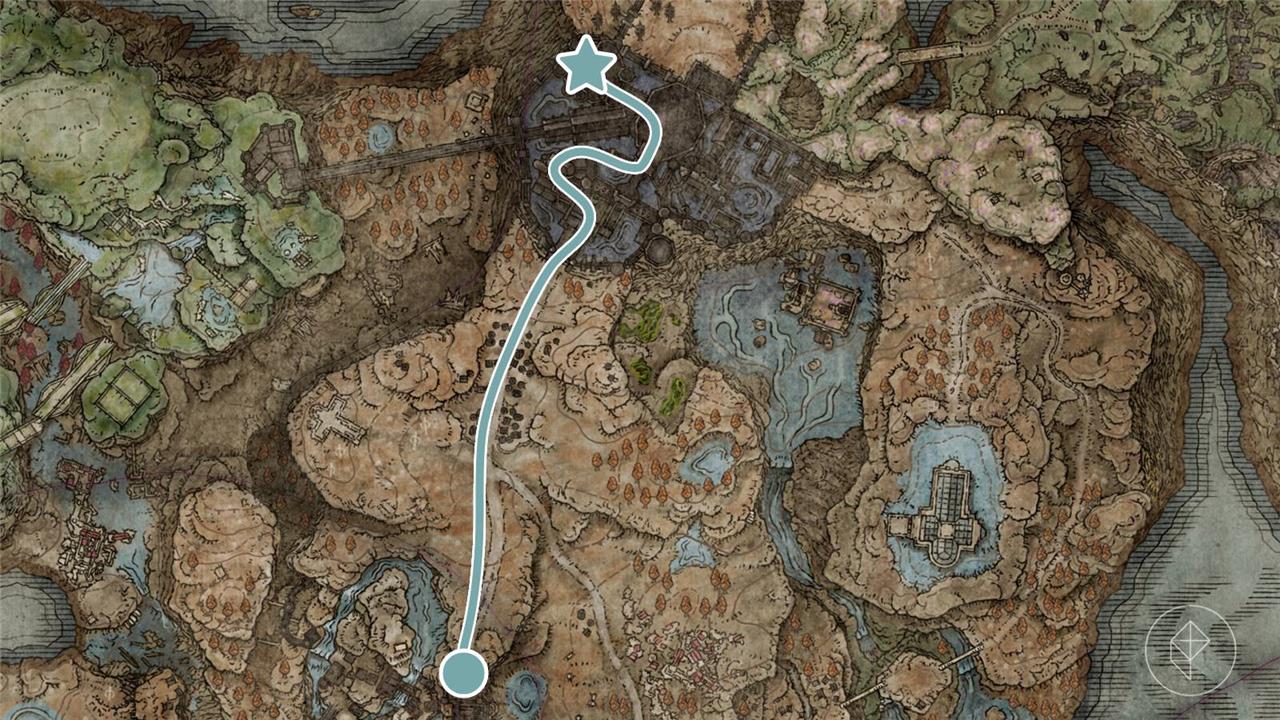
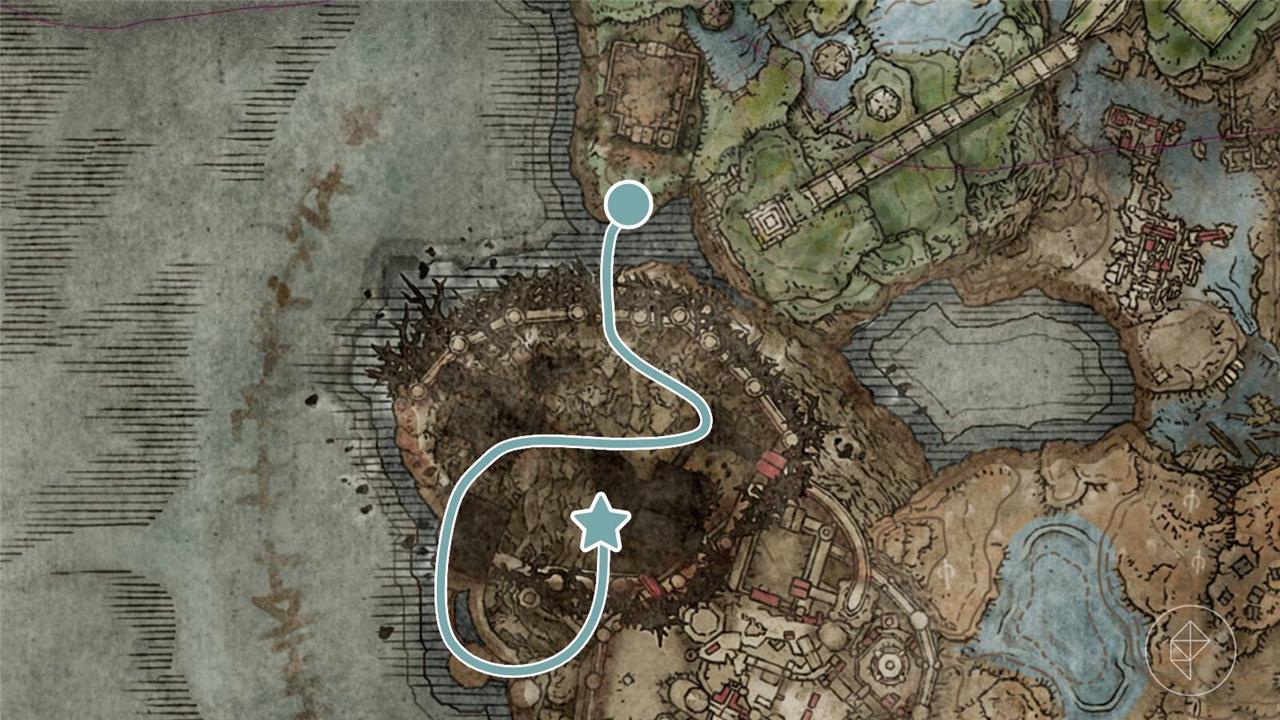
You can skip Belurat, Castle Ensis, and the boss Rellana in Elden Ring: Shadow of the Erdtree by using a hidden route through the Fort of Reprimand. Starting from the Castle Front Site of Grace, head southeast through the poison swamp and east to find a sealed spiritspring. Destroy the nearby rockpile to unseal it, then use the spiritspring to launch yourself to a higher area that leads directly to the Fort of Reprimand. This bypasses the need to fight Rellana and enter Castle Ensis, allowing you to reach Scadu Altus faster. Skipping these areas is optional and does not negatively affect your progression, making it a good choice if you want to speed through the main story or avoid difficult bosses early on.
If you prefer, it’s possible to skip both Belurat and Castle Ensis, and proceed straight to the Scadu Altus.
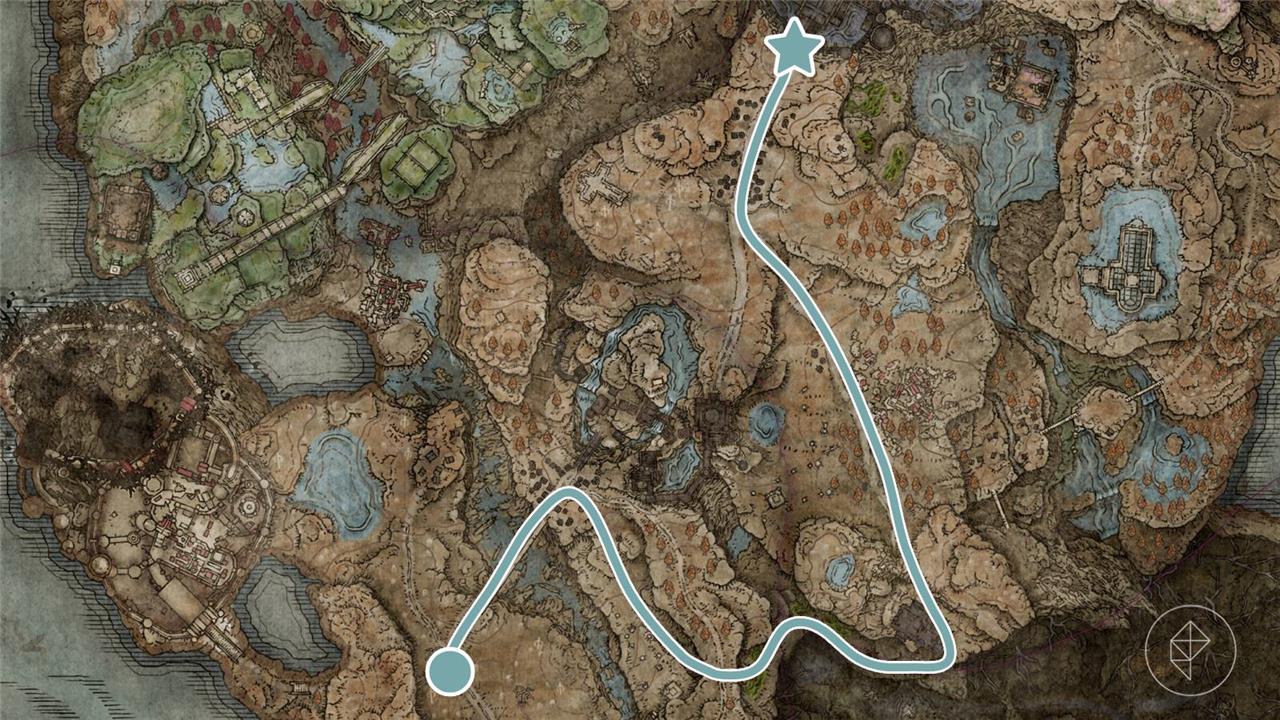
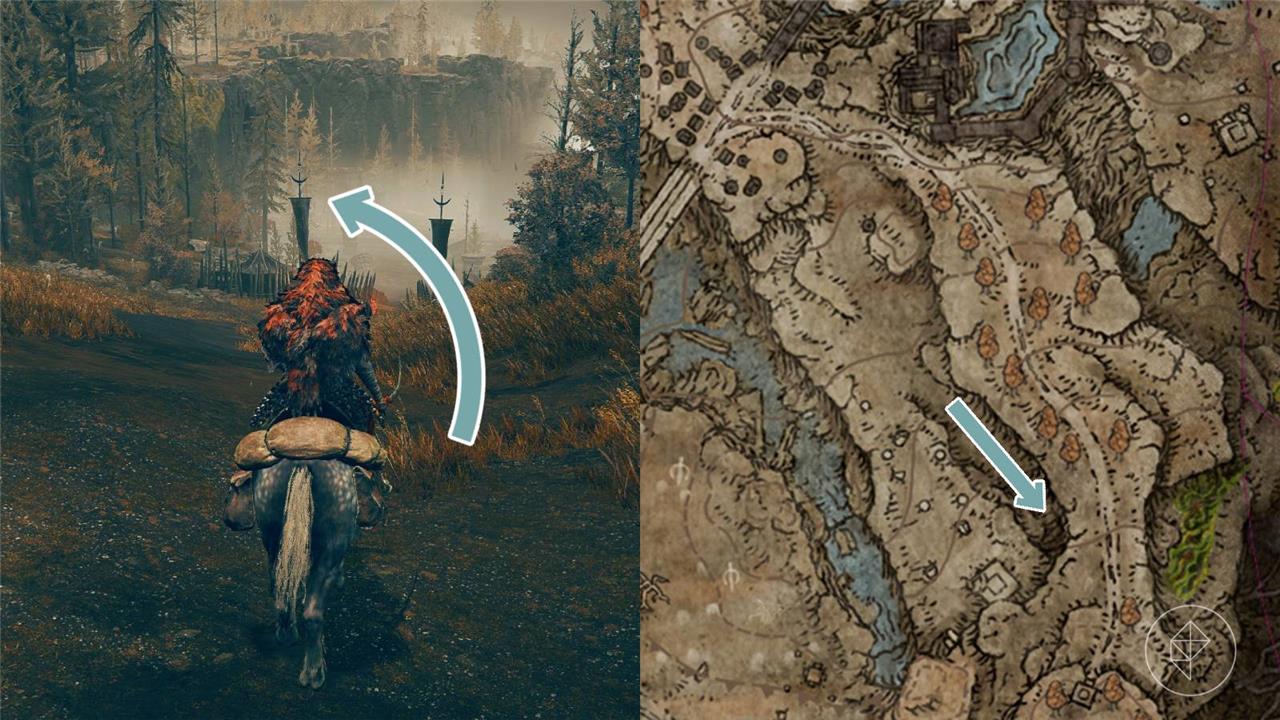
Return to the Three-Path Cross Site of Grace and head northeast across the bridge. Grab the Castle Front Site of Grace, then run southeast to find a huge rock archway at the bottom of the hill.
Follow the path to the east until you reach a sealed spiritspring. To use it, you’ll need to continue east to find a ghostly pile of rocks and hit them with a melee attack. Climb up the cliff using the two spiritsprings, but make sure to stick to the right to land outside of the castle. Go around the castle to find the Moorth Highway, South Site of Grace.
Go through the rock formation to the northeast to encounter a Ghostflame Dragon, which we’ll be skipping for now, and run north to find the Moorth Ruins Site of Grace on the eastern side of the path. Follow the path to pick up the Scadu Altus Map Fragment and encounter another strong enemy, the Furnace Golem, which we’ll also skip!
Run past them to enter the Shadow Keep, which will lead to a prompt telling you that “Somewhere a great rune has broken.”, but we’ll keep that in the back of our heads for now.
You’ve made it to the Shadow Keep, so please continue to the “Shadow Keep” section of the walkthrough.
Until then, here’s what to do in Belurat and Castle Ensis for those who want to tick them off first.
What to do in Belurat, Tower Settlement (optional)
Belurat, Tower Settlement is the first major legacy dungeon in Elden Ring’s Shadow of the Erdtree DLC, located in the northwest of the Gravesite Plain. Players can explore its complex layout filled with hostile spirits and large spider-scorpion enemies while uncovering valuable items such as Revered Spirit Ashes, Scadutree Fragments, and smithing stones. Key activities include defeating the Divine Beast Dancing Lion boss, interacting with NPCs like Moore and Sir Ansbach, and collecting important quest items like the Tower of Shadow Message. After completing the dungeon, players should speak with Redmane Freyja at the Three-Path Cross Site of Grace to progress the story. While Belurat is optional, it offers essential lore, challenging combat, and useful rewards that enrich the Shadow of the Erdtree experience.
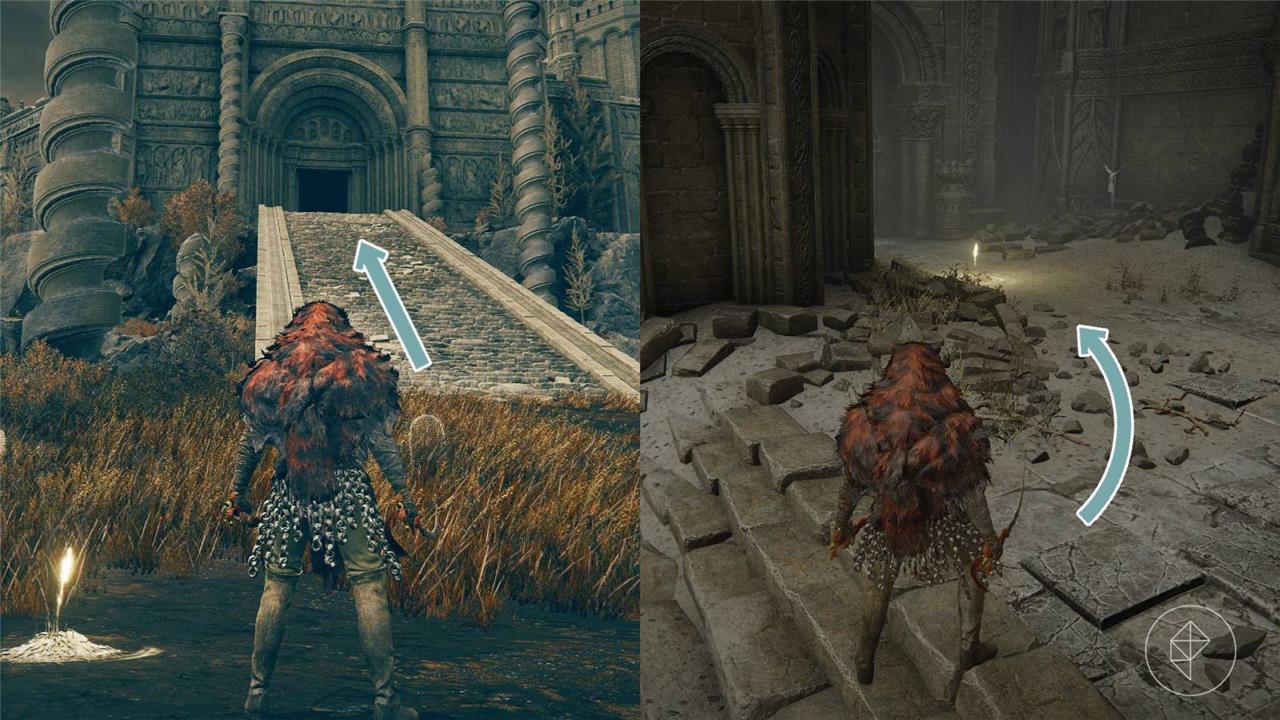
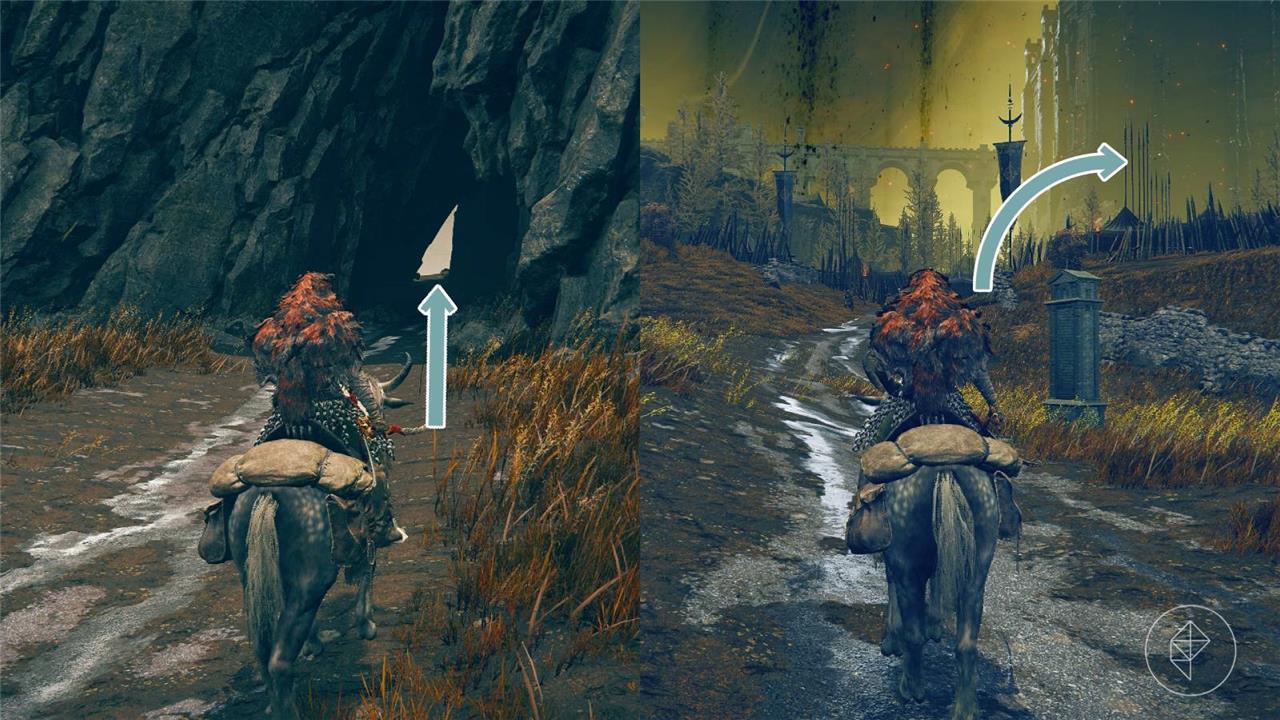
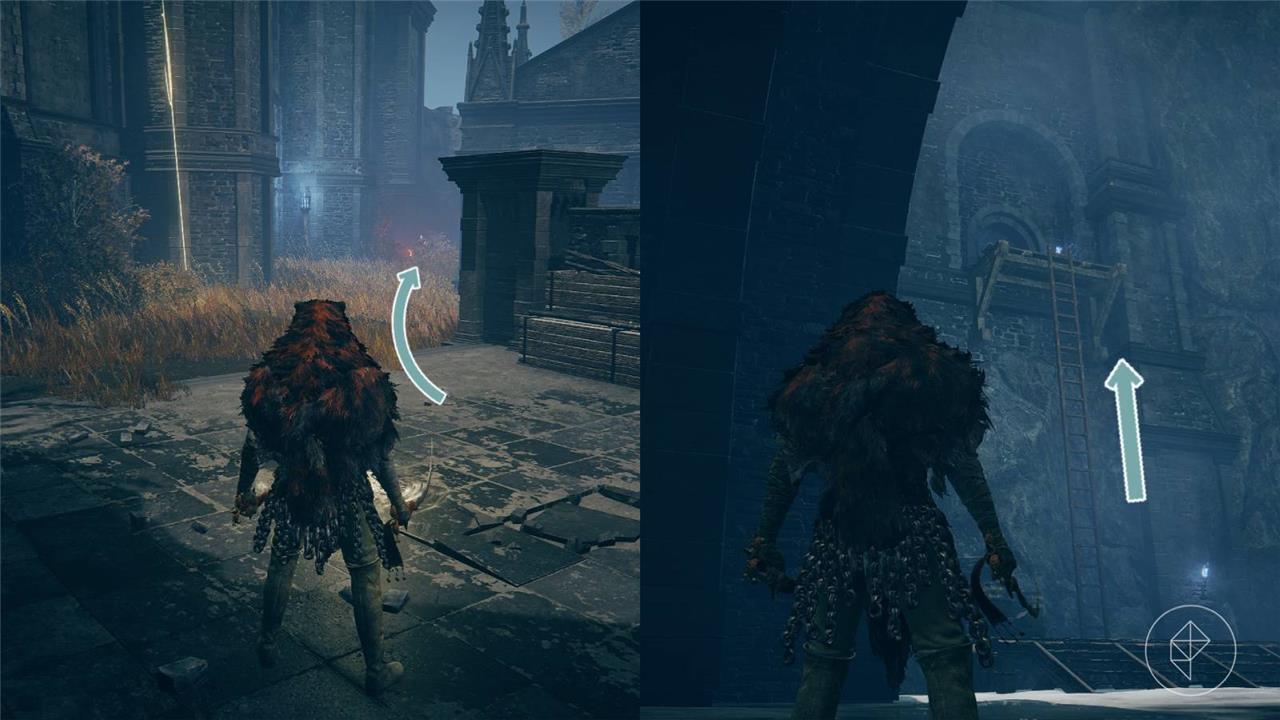
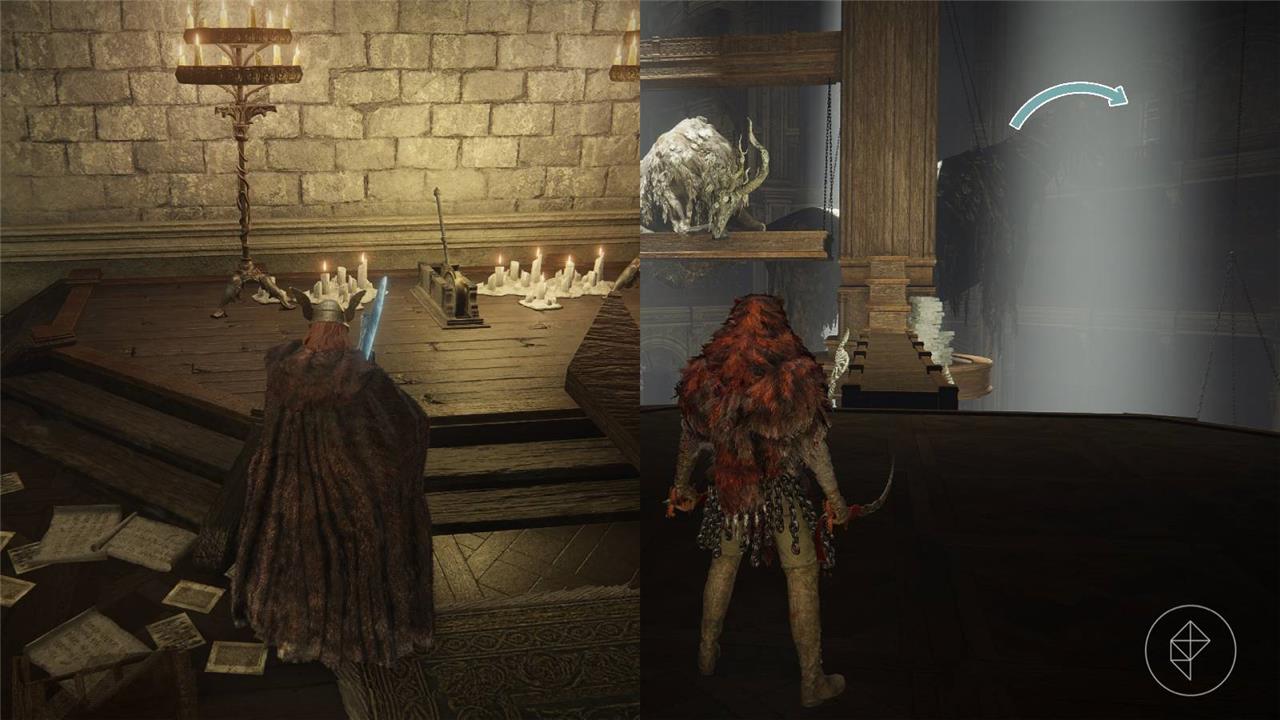
For those not fond of bugs, I’ll warn you now because you are about to encounter some terrifying Spider Scorpions. Head up the stairs into Belarut to instantly meet a HUGE Spider Scorpion and continue up the stairs to find a golden statue of an omen, which will have two Revered Spirit Ashes. Proceed up the scorpion-ridden stairs until you reach the Belurat, Tower Settlement Site of Grace at the top.
Head northeast through the small passage between the building and head up the stairs by the water fountain. Turn to the left to find two shadow undeads slinging golden spirals at you from atop the draped arch. Quickly run underneath the arch and into the doorway on your left. Go up the stairs to find the Small Private Altar Site of Grace.
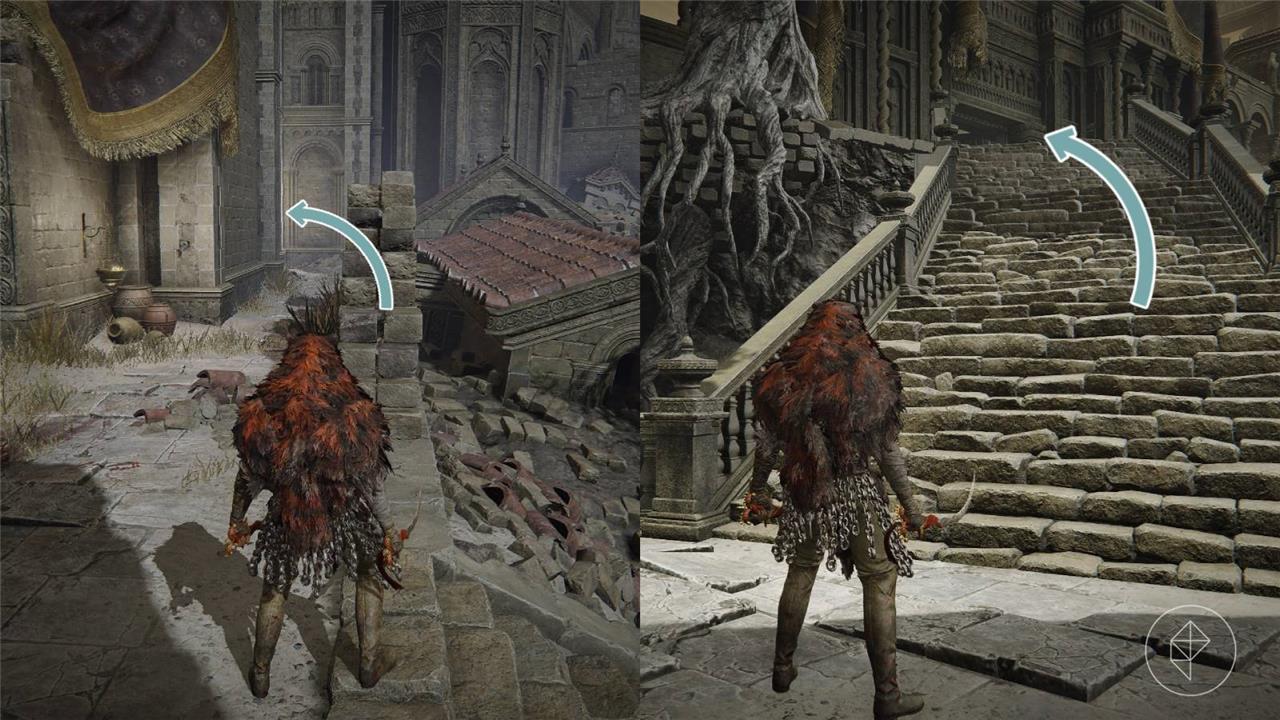
Follow the path up the stairs and continue through the narrow corridor full of shadow undeads until you reach a room with a ladder. Climb the ladder and head up the stairs on your right. Continue along this path, where you’ll traverse rooftops with Gravebirds, a bridge with a dangerous foe, and a spiral staircase with a spinning Curseblade, until you reach the Stagefront Site of Grace.
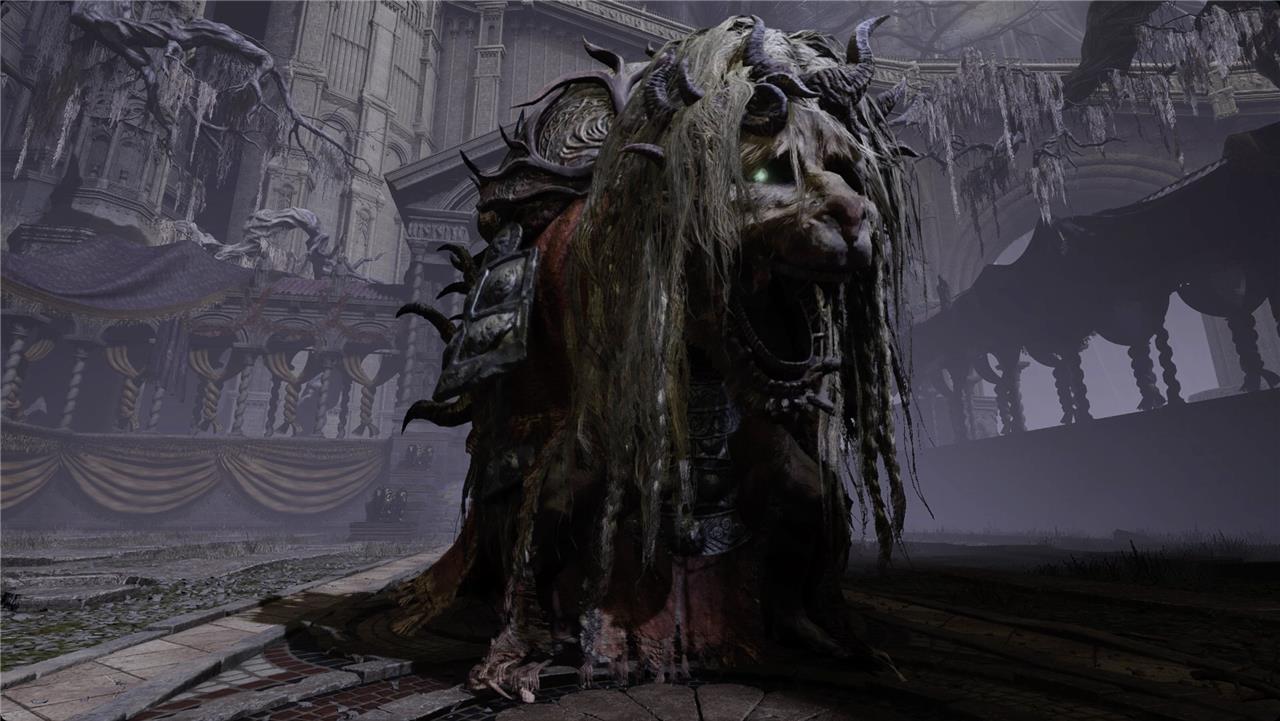
Through the doors, you’ll face off against Divine Beast Dancing Lion, the first major boss of Shadow of the Erdtree. As the first major boss, the Dancing Lion can be extremely difficult, so we recommend to search for some Scadutree Fragments to improve how much damage you deal and negate.
Once you’ve beaten the Dancing Lion, ride the elevator and head up the stairs to find that the path is blocked, which is why we’ll have to find another way – and that’s through Castle Ensis.
Where to go after Dancing Lion and Belarut (optional)
After defeating the Divine Beast Dancing Lion in Elden Ring: Shadow of the Erdtree, you have a couple of key options on where to go next. The direct path forward is initially blocked by shadowy tendrils, so you’ll want to head to the Castle Ensis area, where you can face the boss Rellana, Twin Moon Knight. Alternatively, you can explore the Belurat, Tower Settlement, which is technically optional but offers valuable story content, items, and a more gradual difficulty curve before progressing to Castle Ensis. From there, you continue toward the Shadow Keep and eventually the Tower of Shadow (Enir-Ilim), following the main story route that leads you deeper into the DLC’s challenges and narrative.
With Belarut completed, let’s return to the Three-Path Cross Site of Grace and make our way across the bridge to Castle Ensis, which you can still skip if you like (see the previous section in this guide for specifics on how).
Follow the path ahead until you reach the Castle Ensis Checkpoint Site of Grace where you’ll find a locked gate.
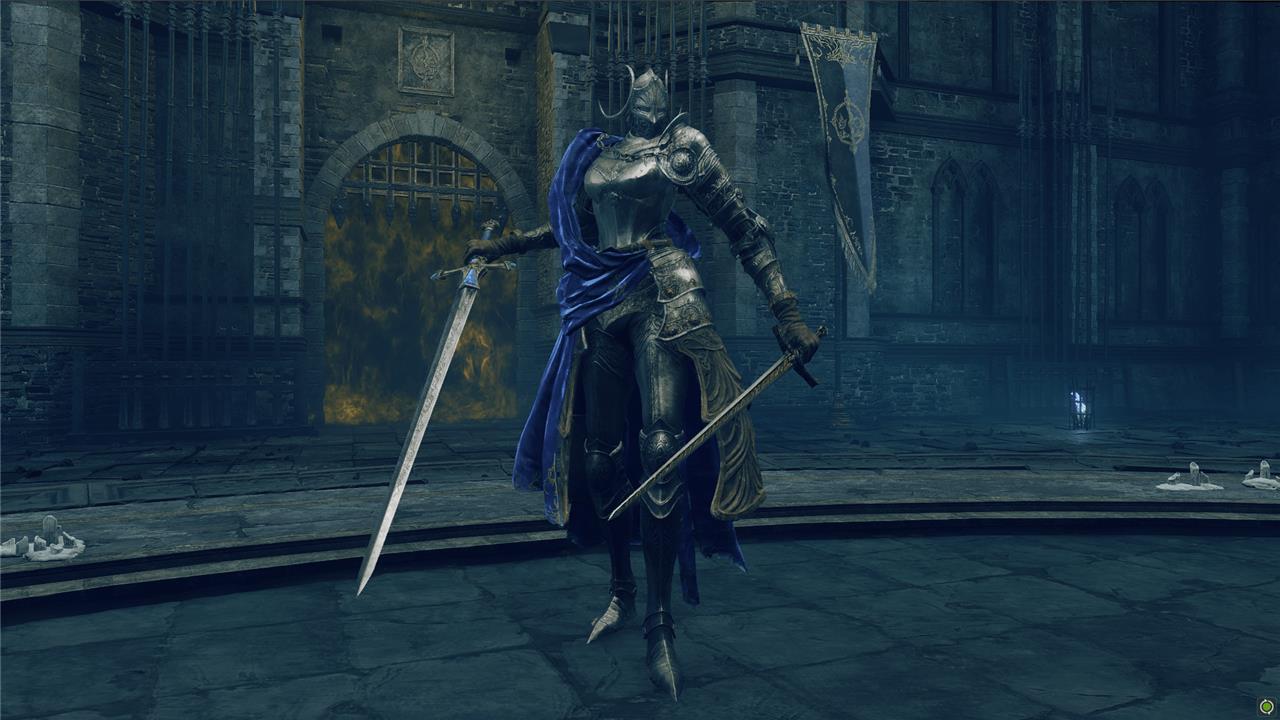
You’ll need to drop down into the hole to the south and climb up the ladder by the waterfall. This will put you on the other side of the gate where you’ll follow the path until you reach an elevator that takes you to the Castle-Lord’s Chamber Site of Grace. At the top of the stairs, you’ll find the fog door that’ll take you to Rellana, Twin Moon Knight.
Once you’ve defeated them, exit from the northern side to find the Highroad Cross Site of Grace and a few familiar faces. From here, follow the path north to the Shadow Keep, but don’t forget to collect the map fragment and the Scadutree Fragment along the way.
Where to go after Rellana and Castle Ensis
After defeating Rellana, Twin Moon Knight, in Castle Ensis, exit through the newly opened gate to enter the Scadu Altus region, the next major area in the Shadow of the Erdtree DLC. From the Castle Ensis area, head north toward the Highroad Cross Site of Grace and then follow the path north to reach the Shadow Keep. Along the way, be sure to collect important items like the map fragment and the Scadutree Fragment to aid your journey. This progression naturally leads you deeper into the DLC’s story and challenges, setting the stage for confronting Miquella’s followers and ultimately facing the final boss of Shadow of the Erdtree.
As you near the Shadow Keep, you’ll get a prompt saying, “Somewhere a great rune has broken.” and “and so too has a powerful charm,” but we’ll ignore those for now.
Head up the elevator to be instantly greeted by a fog door, which holds the Golden Hippopotamus. If you’re struggling, now might be a good time to search for the broken great rune and gather some more Scadutree Fragments.
Once defeated, go through the door on the left and follow the path until you ride an elevator to the Specimen Storehouse. Head up to the second floor to find a large omen statue with its feet beside the railing. Get on top of the omen statue and jump from its head to the fourth floor to find the Storehouse, Fourth FloorSite of Grace.
Proceed up to the seventh floor where you’ll find the Storehouse, Seventh Floor Site of Grace, and activate it so you don’t need to run through all of those enemies again. Drop down to the sixth floor and activate the lever along the southern wall that will move the statues in the center. Hop along the statues to the next floor and progress along the path to find a Fire Knight blocking a large black door, which leads to Messmer the Impaler.
Where do you go after Messmer and Shadow Keep
After defeating Messmer the Impaler and clearing the Shadow Keep, your next step is to return to the Storehouse, First Floor Site of Grace. From there, enter the northwest room and take the elevator down to progress through the castle. Cross the fiery bridge to reach the Rauh Ruins, where you will continue the main story by burning the sealing tree and facing Miquella’s followers in Enir-Ilim. This route leads you deeper into the Shadow of the Erdtree DLC’s critical path, setting you up for the final challenges ahead. Optional detours like Belurat Tower Settlement and Castle Ensis are available for additional story content and upgrades but can be skipped if you prefer a more direct progression.
Once you’ve defeated them and received Messmer’s Kindling, return to the Storehouse, First Floor Site of Grace. Enter the room to the northwest and ride the elevator down. Progress through the castle and cross the bridge with raining fire to reach the Rauh Ruins.
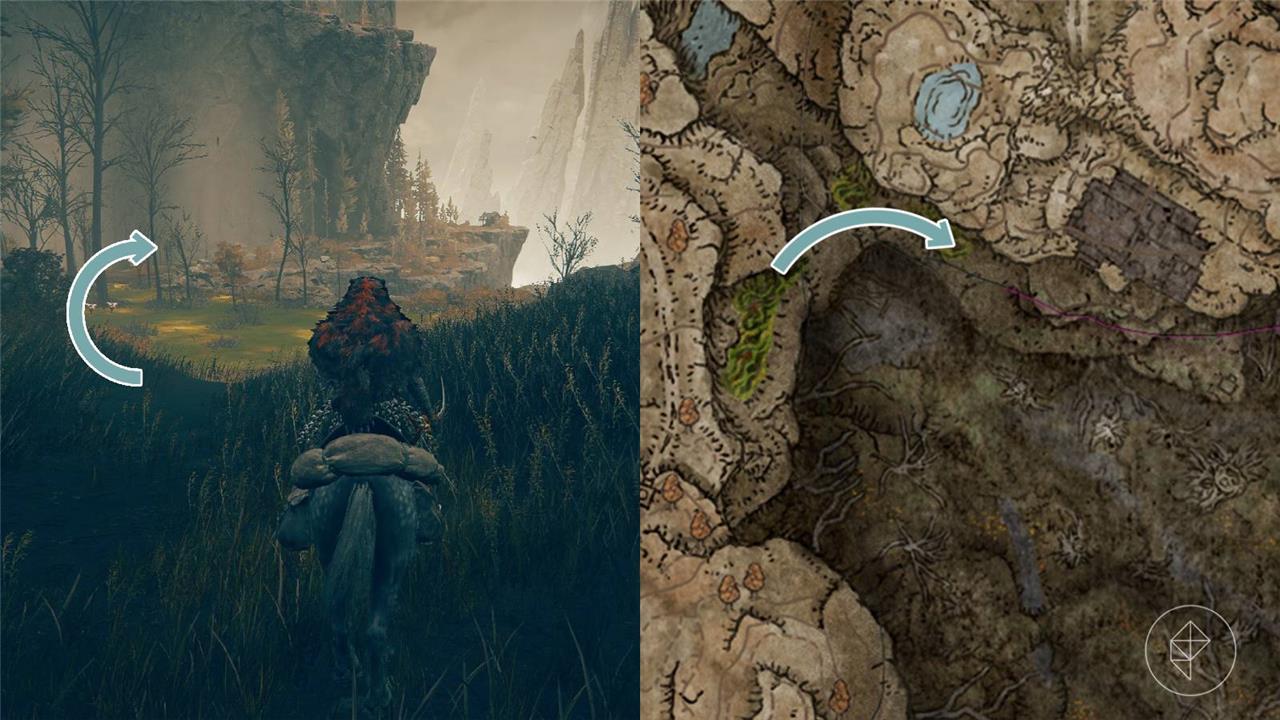
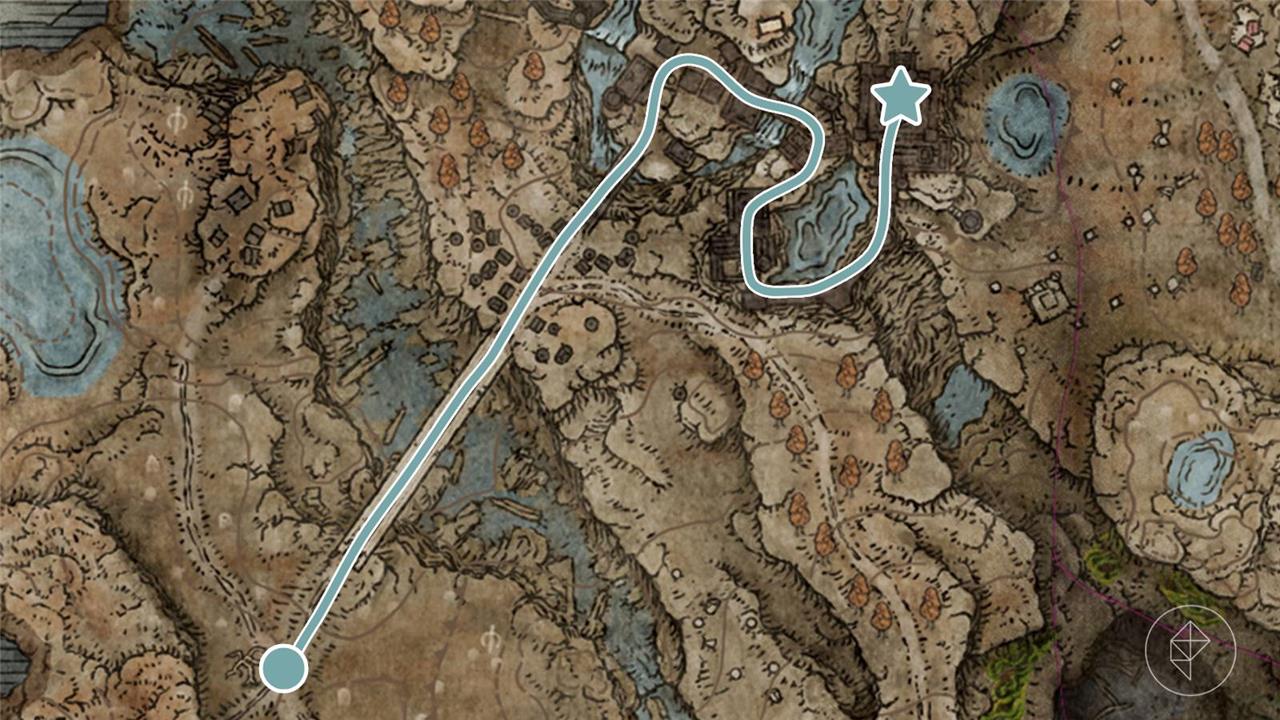
Hop onto Torrent and follow the path to the right to enter the ruins. You’ll go through rooms full of shadow undeads, Spider Scorpions, more shadow undeads, and lastly some snails to reach a spiritspring leading to a lower floor. Head northwest and follow the path until you find the Rauh Ancient Ruins, East Site of Grace.
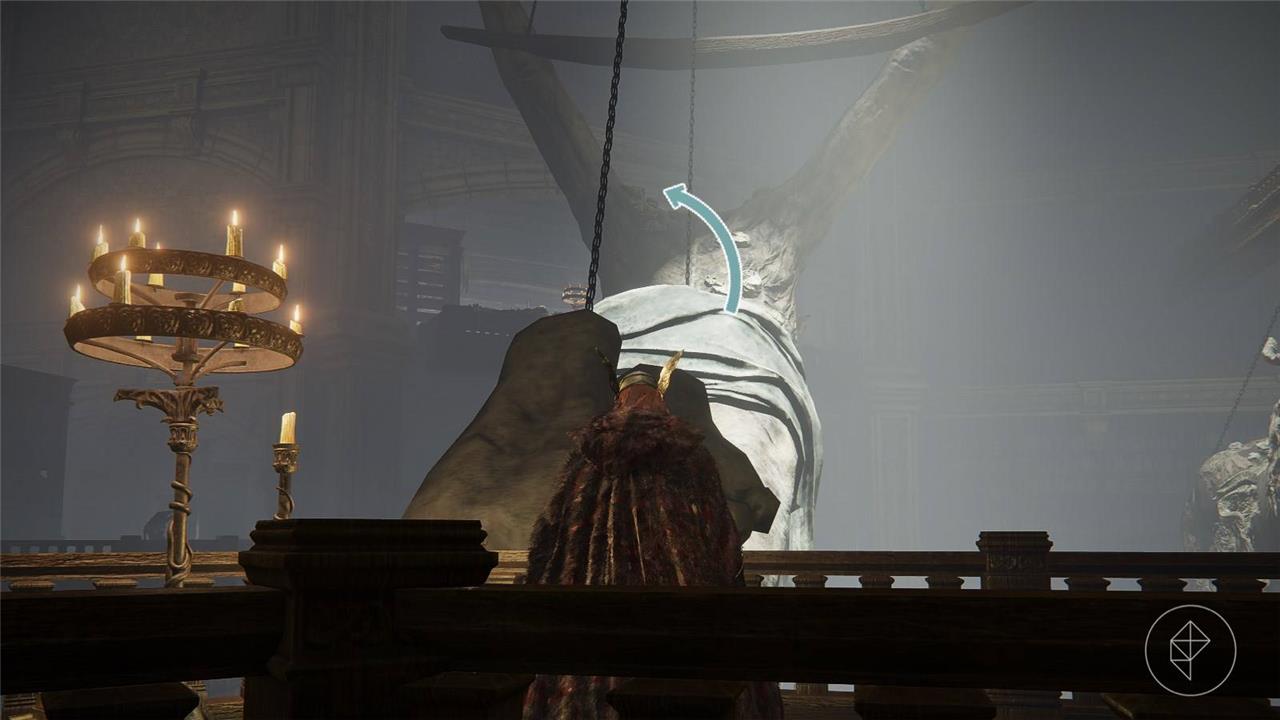
Cross the broken bridge and go under the hidden rock archway to the south to unlock the Rauh Ancient Ruins, West Site of Grace. Head southwest to find an entrance to more ruins and stick to the left to find an elevator. Ride the elevator up then go northwest through the gazebo to find another ruin site full of scarlet rot. Head up the ramp to reach the Church of the Bud, where you’ll face Romina, Saint of the Bud. After you’ve defeated Romina, you’re ready to burn the sealing tree, which will automatically take you to Enir-Ilim.
Where do you go after Romina and Rauh Ruins
After defeating Romina, Saint of the Bud, in the Rauh Ruins, your next step is to burn the Sealing Tree located behind her arena using Messmer’s Kindling. This action will automatically transport you to Enir-Ilim, where you will face Miquella’s followers and continue the main story progression. There is no alternative path at this point, so progressing to Enir-Ilim is mandatory to advance toward the final stages of Shadow of the Erdtree.
Well, you don’t really have a choice as to where you go as you’re automatically sent to Enir-Ilim after burning the sealing tree. Enir-Ilim follows a rather linear approach as following the main path will take you straight to the next boss. Feel free to explore the branching paths to grab Scadutree Fragments and Revered Spirit Ashes as this is the final area.
Progress until you reach a large circular room where Leda will stop you in your tracks and confront you for going against Miquella. Here, you’ll need to defeat Leda and her allies, which may vary depending on how you interacted with Miquella’s followers.
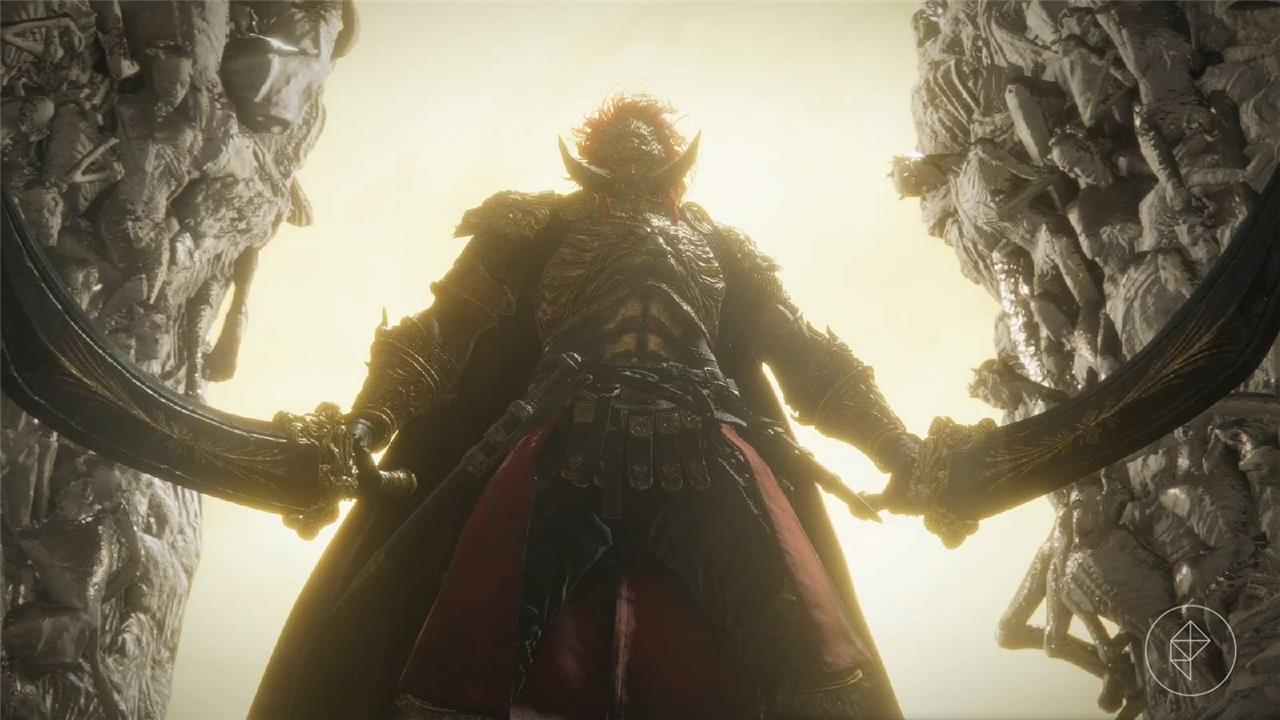
Once they’ve been dealt with, continue forth to find the fog door to the final boss –Radahn and kinda Miquella. If there was ever a time to explore the rest of the map, it would be now. If you thought Radahn from the base game was bad, wait until you see this guy. You’ll want to increase your Scadutree Blessing as much as you can before taking him on.
Once you’ve defeated them, you’ll be able to access one of Miquella’s memories – providing a little more backstory to their relationship.
What to do after the final boss in Shadow of the Erdtree
After defeating the final boss of Shadow of the Erdtree, the main story of the DLC concludes with receiving Miquella’s crown and the Remembrance of Miquella and his consort, followed by a final cutscene that wraps up the narrative arc. Beyond this, the game does not significantly change the Shadow Realm or NPC interactions, leaving the world largely as it was before the final fight. However, players can continue exploring optional areas within the Land of Shadow, such as the Cerulean Coast, and pursue remaining NPC quests like Igon’s, which leads to additional challenging boss fights. This post-final boss phase also opens the path to New Game+ runs, allowing for further playthroughs with increased difficulty and new challenges.
After you’ve watched the memory, you might be wondering, “is it over?” The answer is yes – well, at least for the critical path. If you’re looking for a little more insight into the plot, we recommend to check out the Stone Coffin Fissure in its entirety. Other than that, there are no end credits for the DLC, so you’re free to explore the realm of shadow!
With all of Miquella’s followers dead, you’re somewhat limited in what you can do when it comes to quests, but here’s some inspiration of other things you can do in the Realm of Shadow if you haven’t already
- Fully flesh out the map by collecting all of the map fragments
- Meet Count Ymir at the Cathedral of Manus Metyr and complete their quest, which involves Ruins Map locations and finding the Shadow Keep Back Gate
- Explore Midra’s Manse in the Abyssal Woods
- Take on Bayle the Dread at the top of the Jagged Peaks
- Collect every Scadutree Fragment and Revered Spirit Ash
- Deck out your character with DLC armor and test DLC weapons
- Complete your build with some of the DLC talismans
What secrets does the Shadow of the Erdtree main route hide for my journey
The main route of Elden Ring: Shadow of the Erdtree conceals numerous secrets that enrich your journey and unlock vital rewards. Notably, the Shadow Keep area hides illusory walls and secret passages, including a hidden entrance to a coffin teleporter that grants access to the Castle Watering Hole and further secret dungeons like the Darklight Catacombs and Eastern Nameless Mausoleum, each containing rare loot and gear. In the Church District, a mechanism allows you to drain flooded areas, revealing the Sunken Chapel with powerful Tree Spirits and valuable items crucial for NPC interactions and quest progression. Additionally, a sleeping Furnace Golem blocks access to the Ruins of Unte, which you can awaken using special crafted items found nearby, unlocking new challenges and treasures. Other secrets include hidden paths behind paintings, secret graves, and optional boss areas that require careful exploration and puzzle-solving to uncover. These hidden elements not only deepen the lore but also provide strategic advantages and unique gear essential for mastering the DLC’s toughest encounters.
What hidden passages and illusory walls will I discover along the main route
Along the main route in Elden Ring: Shadow of the Erdtree, you will uncover several notable hidden passages and illusory walls that reveal secret paths, valuable loot, and shortcuts. In the Shadow Keep area, after defeating the Golden Hippopotamus and reaching the Main Gate Plaza Site of Grace, you can find an illusory wall behind a gap between wooden boxes and barrels near a “Domain of Dragons” painting. Striking this wall opens a passage leading down to the Castle Watering Hole and onward to the Darklight Catacombs, a secret dungeon with a boss guarding access to the Abyssal Woods.
Additionally, throughout the DLC, illusory walls often hide hidden rooms or corridors that provide access to optional bosses, rare items, and shortcuts. These walls are usually found by striking suspicious-looking walls or objects such as crates, barrels, or discolored flagstones, revealing paths that are otherwise invisible. Exploring these hidden passages is essential to fully experience the DLC’s secrets and gain strategic advantages on your journey.