Hidden behind Hogwarts’ moving staircases lies a customizable haven few students truly master. Here’s how to access the mysterious Room of Requirement and reshape it to suit your magical style in Hogwarts Legacy.
When do you unlock the Room of Requirement in Hogwarts Legacy?
You gain access to the Room of Requirement partway through the main story, during a mission given by Professor Weasley called “The Room of Requirement.” This quest becomes available after completing a series of earlier main story tasks, usually around level 6 or 7. Once the mission begins, you’ll be introduced to the hidden space and learn how to use it for crafting, potion making, and customizing your own magical area.
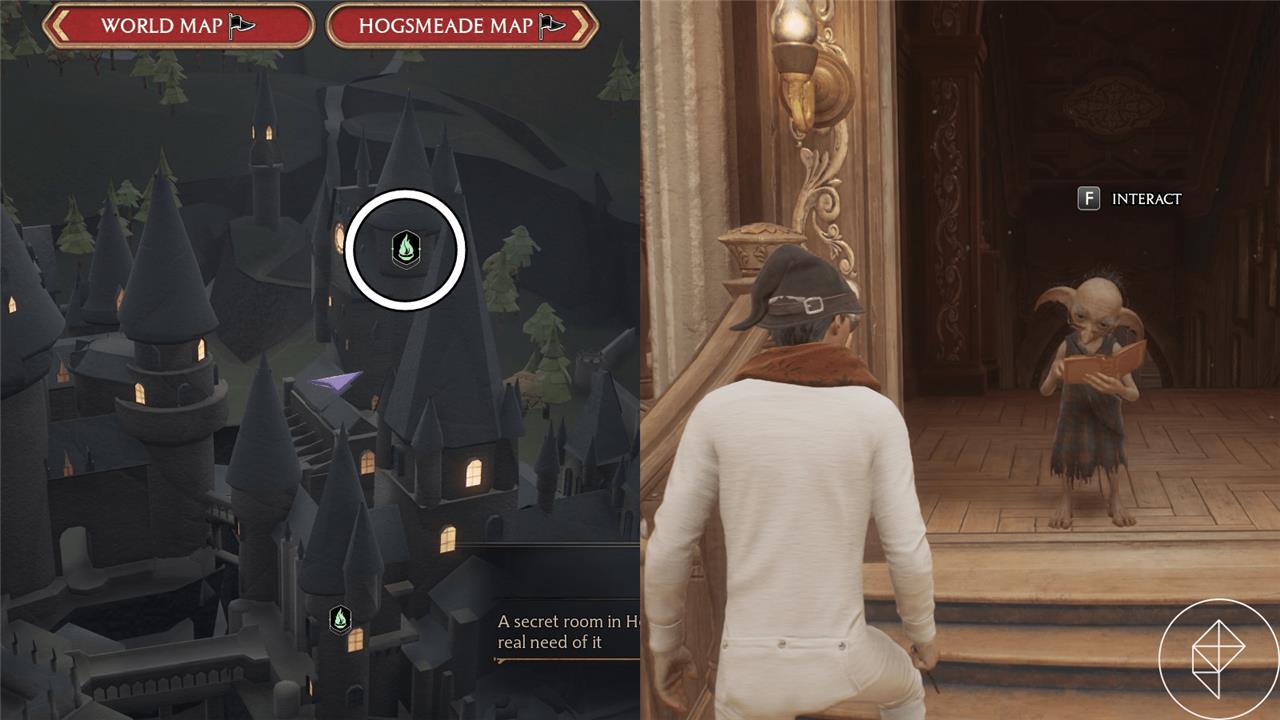
After completing the main story quest “The Room of Requirement,” you’ll unlock the Room of Requirement for you to use and a floo flame in the Secret Rooms section of the Hogwarts map.
How to place, edit, and remove items in the Room of Requirement
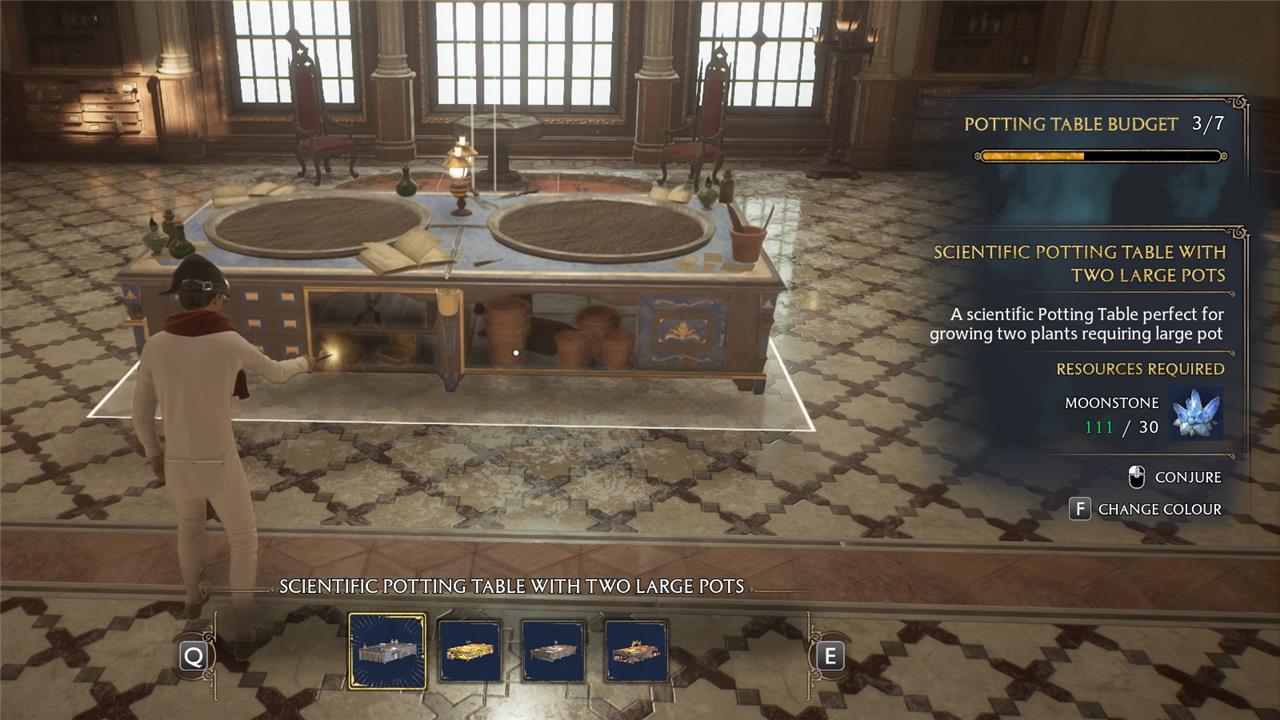
To place items in the Room of Requirement, open the conjuration menu and choose from available furniture, decorations, or utility objects, then position them using the placement tool. Items can be rotated, resized, or moved freely to fit your preferred layout. To edit existing objects, interact with them and select the customization option to adjust color, material, or style. If you no longer want an item, choose the remove option to clear space and recover resources for future use.
You’ll learn the Conjuring spell and Evanesco during the main story quest “The Room of Requirement,” and the Altering spell during the following side quest, “Interior Decorating.”
- Conjuring spell – Allows you to place items in the Room of Requirement
- Altering spell – Change the appearance or orientation of an item when cast in the Room of Requirement. The Altering spell can also be used on anything from the ceiling to the floor.
- Evanesco – Removes items from the Room of Requirement while also returning some moonstone
To use the spells, press “T” (on PC) or right on the D-Pad (on consoles), and equip them to your hotbar. These spells are only usable in the Room of Requirement, so make sure to switch them out when you leave.
How do I expand the Room of Requirement in Hogwarts Legacy?
You can expand the Room of Requirement by progressing through the main storyline and completing Professor Weasley’s quests. As you advance, new sections and features become available, such as upgraded crafting stations, larger décor areas, and the Vivarium for magical beasts. You can also rearrange or add furnishings at any time through the customization menu, giving you more space and flexibility to design your ideal workspace.
Not including the Vivarium expansions, the Room of Requirement can expand two times, giving you more space to place stations, furniture, and decorations. You can customize how the room will look by changing the appearance of the ceiling, walls, and floor. To do so, you must complete two quests:
- After the quest “Interior Decorating,” another section of the Room of Requirement will open.
- After completing the main story quest “The Final Repository,” the room from the “Interior Decorating” quest will expand even more.
How to unlock more decorations for your Room of Requirement
Access more decorations for your Room of Requirement by gathering Conjuration Spell books scattered across Hogwarts. These books appear as glowing blue tomes on desks, shelves, or podiums in classrooms, the library, and common rooms. Cast Revelio to spot them easily, then interact to collect. Return each one to the Conjuration station in your room to add new furniture and decor options to the Vivification menu. With all books found, your customization choices expand greatly.
You may notice that a lot of decorations are not available when you first unlock the Room of Requirement. To get more decorations, you can find them in random chests around the world, or receive them after completing certain quests.
Where do I get more stations to put in my Room of Requirement?
You can find new stations for your Room of Requirement by progressing through main and side quests that introduce new crafting or utility features. Vendors in Hogsmeade, such as Tomes and Scrolls, sell additional station recipes you can purchase with Galleons. Completing certain exploration challenges and story missions may also reward special stations or upgrades, allowing you to expand your setup for potion brewing, plant growing, and gear enhancement.

Head over to Tomes and Scrolls in Hogsmeade to find all of the stations you’ll ever need for your Room of Requirement. Check the table below to see all of the stations you can buy and how much they cost:
All of the stations from Tomes and Scrolls
Tomes and Scrolls offers every station needed to manage your spellbook collection. Stock up on conjured paper, exceptional ink, and fine parchment through its shelves. Use the writing desk to craft new entries or revise existing ones. The nearby bookbinder station binds pages into complete volumes. All these tools let you organize and expand your magical library with ease.
Item |
Item Description |
Cost (gold galleons) |
|---|---|---|
| Chopping Station | This station periodically produces a plant byproduct, so keep an eye on it. | 1,500 |
| Dung Composter | Use it to create fertiliser that can be used to increase the yield of a seeded plant. | 1,000 |
| Hopping Pot | This type of magical little pot will periodically brew a randomly selected potion. | 3,000 |
| Material Refiner | Use it to produce moonstone essential for additional Conjuration spellcrafts. | 1,500 |
| Potting Table with a Large Pot | Use its pot to grow all sorts of useful magical plants. | 1,000 |
| Potting Table with Two Large Pots | Use its pots to grow all sorts of useful magical plants. | 3,000 |
| Potting Table with a Medium Pot | Use its pot to grow all sorts of useful magical plants. | 750 |
| Potting Table with Two Medium Pots | Use its pots to grow all sorts of useful magical plants. | 1,500 |
| Potting Table with Three Medium Pots | Use its pots to grow all sorts of useful magical plants. | 3,000 |
| Potting Table with Three Small Pots | Use its pots to grow all sorts of useful magical plants. | 400 |
| Potting Table with Five Small Pots | Use its pots to grow all sorts of useful magical plants. | 2,500 |
| Medium Potions Station | Perfectly suited to all of your potion brewing needs. | 1,000 |
| T-Shaped Potions Station | Perfectly suited to all of your potion brewing needs. | 2,000 |
When do you unlock the Vivarium in Hogwarts Legacy?
You gain access to the Vivarium after completing the main quest “The Caretaker’s Lunar Lament.” Professor Ronen assigns this task during the main storyline, sending you to meet Gladwin Moon at the lower levels of the Astronomy Wing. Once you speak with him and follow his instructions through the Floo Flames network to the tower bridge, he reveals the Vivarium and teaches you the beast-caregiving spell. From there, it serves as a spacious outdoor enclosure linked to the Room of Requirement for housing captured magical creatures.
After completing the main story quest “The Elf, the Nab-Sack, and the Loom,” you’ll unlock the first Vivarium which is where you can place any magical beast that you capture. The Vivarium is also where you will care for your beasts by feeding and grooming them.
How can I summon more beasts in my Vivarium?
To summon more beasts in your Vivarium, gather additional beast dens from across the map by completing Merlin Trials or exploring high-level areas like the Forbidden Forest. Return to the Vivarium with each den active in your inventory, then interact with the Conjuring Altar to place it down. Once set, approach the den and use the Vivarium interface to call forth the new beast for care and breeding. Repeat this process to expand your collection up to the maximum capacity of 18.
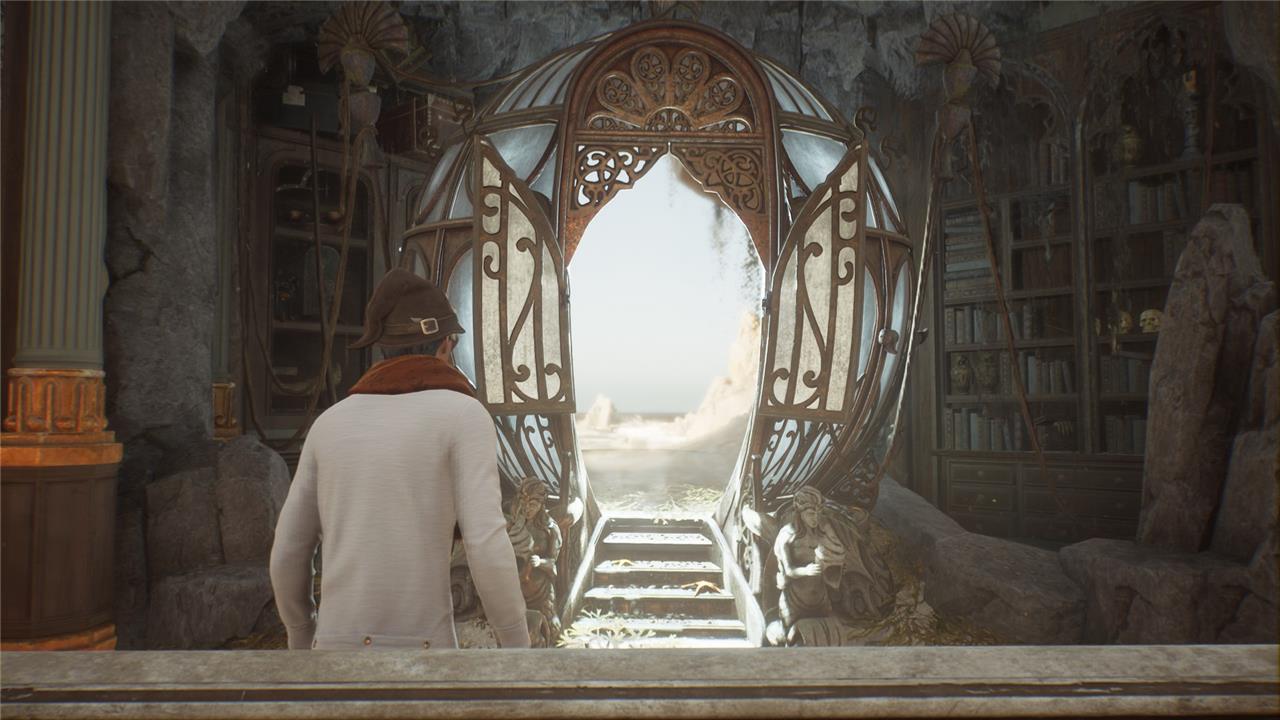
As you complete Deek’s quest line, your Room of Requirement will expand, unlocking more Vivariums for you to place your magical beasts. For each side quest you complete, you’ll unlock another Vivarium, which can hold up to four species and 16 beasts. To see what each of the Vivariums look like, check out the gallery below.


Here’s a list of all of Deek’s quests that you have to complete:
- “The Elf, the Nab-Sack, and the Loom”
- “The Plight of the House-elf”
- “Foal of the Dead”
- “Phoenix Rising”
How to upgrade your gear in the Room of Requirement?
You can improve your equipment in the Room of Requirement by using the Loom, which becomes available once you complete the related quest for Deek. Place the Loom anywhere in the room and use it to upgrade gear attributes or apply magical traits from beasts you’ve collected through Vivariums. Gathering the right materials, such as Moonstone and beast ingredients, allows you to enhance specific stats and customize your gear to suit your preferred combat style.

After you complete the quest “The Elf, the Nab-Sack, and the Loom,” you’ll unlock the Loom to place in your Room of Requirement. Interact with the loom and select the gear that you’d like to upgrade. From here, you can upgrade your gear’s offense or defense up to three times and assign a trait to it by using magical beast ingredients.
Keep in mind, the quality of your gear dictates what level trait you can assign to it.
- Well-appointed (Green) – No traits
- Superb (Blue) – Trait level one
- Extraordinary (Purple) – Trait level two and below
- Legendary (Orange) – Trait level three and below
On numerous occasions in recent years, billionaire and Harry Potter creator J.K. Rowling has taken public stances against inclusive transgender laws and trans rights, and has written fiction that has been condemned by LGBTQ organizations for its use of harmful anti-trans tropes. Hate crimes, as well as legislation that denies the rights of trans people, have become more prevalent in the U.K. since 2019, and, more recently, in the United States as well.
According to an FAQ from Hogwarts Legacy publisher Warner Bros. Interactive – the parent company of Avalanche Software, the game’s developer – Rowling is “not directly involved” with the creation of Hogwarts Legacy. Regardless, the sales and widespread attention generated by a AAA video game will benefit Rowling, and that has led some fans to decide not to buy the game. For a more in-depth explainer of the yearslong controversy leading up to Hogwarts Legacy‘s release, read AELGAMES’s breakdown.
How to unlock and use the Vivarium in Room of Requirement
You unlock your first Vivarium by progressing Deek’s quest line in the Room of Requirement, then you use it to house, care for, and farm materials from magical beasts you rescue.
How to unlock the first Vivarium
-
Progress the main story until you get the quest “The Elf, the Nab-Sack, and the Loom” from Deek in the Room of Requirement. This quest comes shortly after you’ve unlocked the Room and learned about beast gear upgrades.
-
Complete “The Elf, the Nab-Sack, and the Loom”:
-
Learn to use the Nab-Sack.
-
Go out into the open world with Deek’s guidance and capture a few specific beasts (for example Puffskeins, Jobberknolls, etc.).
-
Return to the Room of Requirement with those beasts.
-
-
After returning, a cutscene introduces the first Vivarium (the forest-style area) as an attached space to your Room of Requirement; this area then becomes permanently accessible as your beast sanctuary.
Unlocking additional Vivariums
Each extra Vivarium is tied to further quests from Deek, and every Vivarium has its own biome and beast capacity.
-
The first Vivarium (Forest) unlocks from “The Elf, the Nab-Sack, and the Loom.”
-
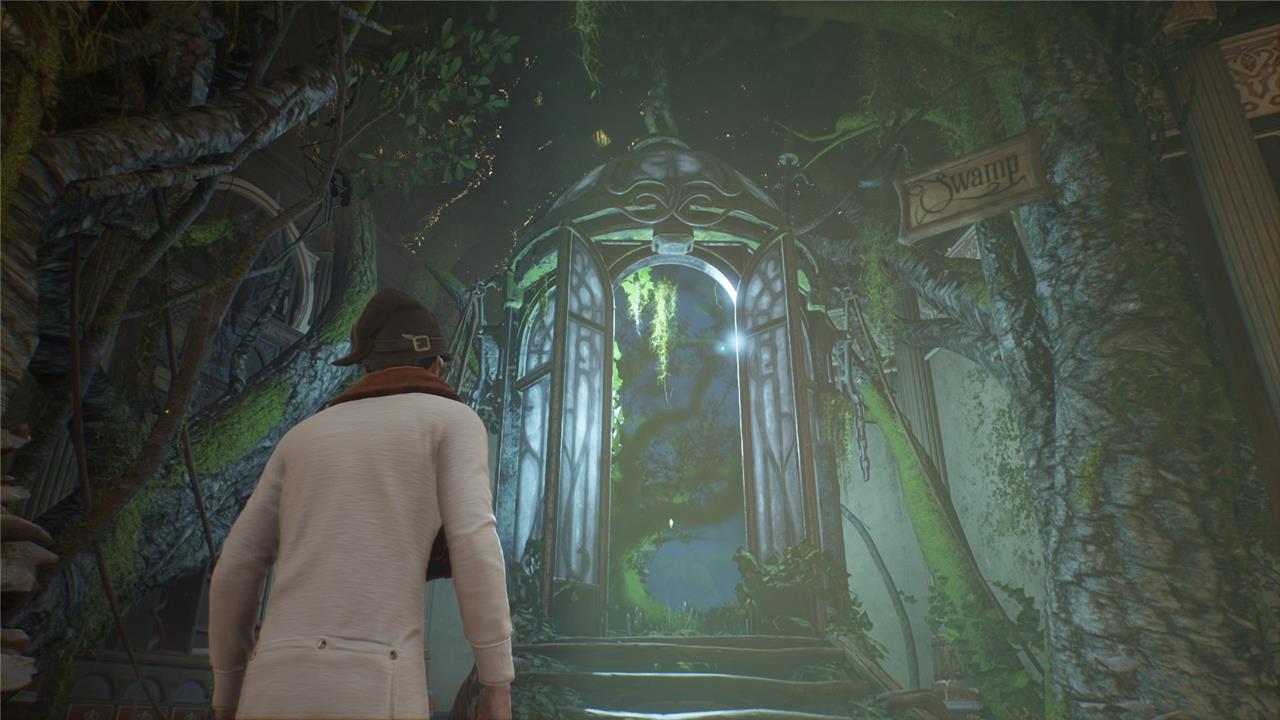
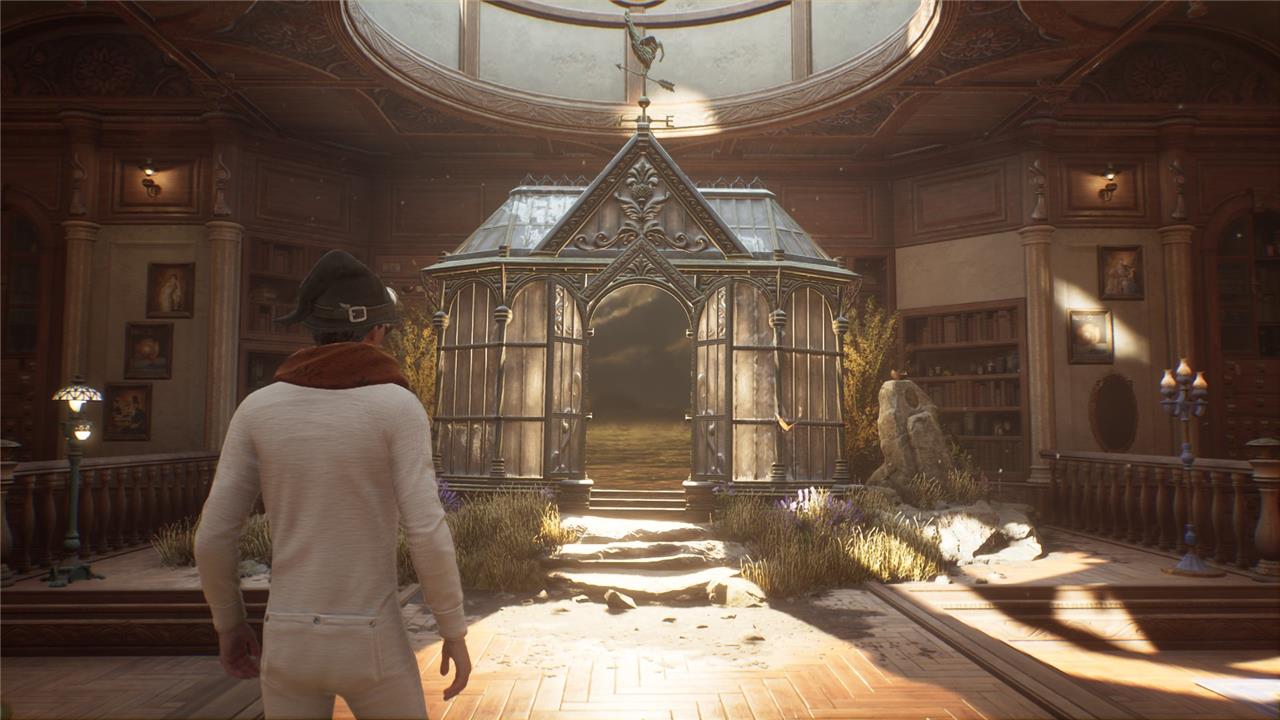
Further Deek quests such as “The Plight of the House-Elf,” “Foal of the Dead,” and “Phoenix Rising” unlock new biomes (like coastal, swamp, and grassland areas).
-
Each Vivarium can house multiple species and a limited total number of beasts; as you unlock more Vivariums, your overall capacity grows so you can keep many more rescued creatures.
How to enter and manage the Vivarium
-
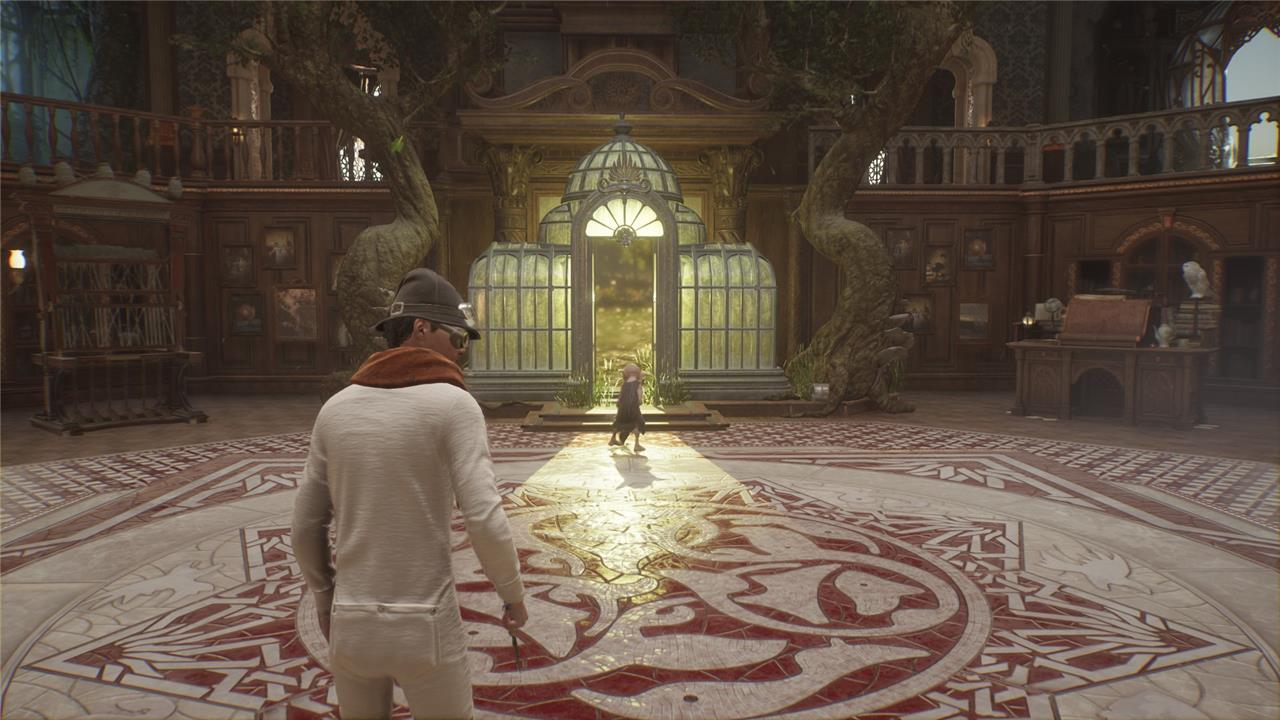
Entering: In the Room of Requirement, look for the large archway/doorway shimmering with a natural scene inside; interact with it to step into your Vivarium.
-
Moving beasts in and out:
-
Open the beasts menu while in a Vivarium to add beasts you’ve captured with the Nab-Sack to that space.
-
You can also reassign beasts between Vivariums if you want certain species grouped together.
-
-
Capacity: When a Vivarium is full, the game will indicate you cannot add more beasts until you release or move some elsewhere.
Using the Vivarium (beast care and materials)
-
Feeding and brushing:
-
Equip the Feed and Brush tools and use them on each beast occasionally.
-
Caring for beasts fills their “bond” and eventually lets you collect materials from them.
-
-
Collecting materials:
-
After feeding and grooming, you can interact with a beast again to collect its rare material (like Puffskein Fur, Mooncalf Fur, etc.).
-
These materials are used with the Enchanted Loom in the Room of Requirement to upgrade gear and apply traits.
-
-
Respawn and timing:
-
Beast resources regenerate over time; revisit your Vivarium periodically, care for them again, and harvest more materials.
-
This loop (care → collect → upgrade gear) is one of the main reasons to invest in Vivarium management.
-
Customizing and optimizing your Vivarium
-
Decoration: You can use the Conjuring spell inside the Vivarium to place structures and decorative items (beast pens, shelters, small ruins, etc.) similar to how you decorate the main Room of Requirement.
-
Organization tips:
-
Put similar species together (for example, all flying beasts in one Vivarium, land herbivores in another) to make feeding and material collection quicker.
-
Keep an eye on which materials you use most in gear upgrades and prioritize beasts that provide those, so you always have a steady supply.
-
If you tell me which beasts you’re focusing on (for example, for certain traits or stats), I can suggest a specific Vivarium layout and a care routine that minimizes grinding.
How to rescue and add beasts to the Vivarium
You rescue beasts in Hogwarts Legacy by using the Nab-Sack at Beast Dens, then “release” them from your beast inventory while standing inside a Vivarium so they appear in that habitat.
1. Requirements before rescuing beasts
-
Progress Deek’s quest “The Elf, the Nab-Sack, and the Loom” to unlock: the Nab-Sack, your first Vivarium, and basic beast-care tools.
-
After this quest, Beast Dens will be marked on the open-world map with paw icons, and any beasts you capture go into your beast inventory (not directly into a Vivarium).
2. How to rescue beasts with the Nab-Sack
-
Equip the Nab-Sack on your spell wheel like a spell.
-
Travel to a Beast Den (paw icon), crouch or approach carefully so you don’t scare them, then cast the Nab-Sack at a beast.
-
Follow the button prompts on screen (for example, repeated presses of Square on PlayStation / X on Xbox) to complete the capture; when successful, that beast is added to your beast inventory.
-
You can capture most beasts this way; rarer or skittish ones (like Unicorns) may require better positioning and using spells like Levioso to hold them still.
3. How to add beasts to a Vivarium
Once you’ve caught some beasts, you need to move them from inventory into a Vivarium.
-
Fast travel to the Room of Requirement, then walk through the archway into a Vivarium.
-
Inside the Vivarium, use the on-screen prompt to open the beast management menu (R1 / RB / H / similar, depending on platform).
-
In that menu, you’ll see two sides:
-
Your beast inventory (rescued beasts you’re carrying).
-
The current Vivarium’s residents.
-
-
Highlight a beast in your inventory and press the indicated button (for example, A on Switch/Xbox, Square on PlayStation, or the shown key on PC) to add it to the Vivarium; it will then physically appear in the habitat.
4. Removing or releasing beasts
-
To free space in a Vivarium, open the same management menu, highlight a resident beast, and move it back to your inventory.
-
From your beast inventory in the character menu, you can:
-
Release a beast back into the wild (permanent, can’t undo; you’d have to catch another at a den).
-
Or sell extra beasts at Brood and Peck in Hogsmeade for Galleons and to free slots.
-
5. Practical tips
-
Keep each Vivarium near its species limit but don’t overfill with species you don’t use, so you can easily add new rare beasts later.
-
Rescue multiple copies of useful species (like Puffskeins, Mooncalves, etc.) so you have a steady supply of their materials for the Enchanted Loom.
-
If you can’t add a beast, check: Vivarium species limit, total beast limit, or whether you’re in the correct Vivarium (you might want to group certain beasts by biome).
If you tell me your platform (PC, PlayStation, Xbox, or Switch), I can list the exact default buttons for capturing and placing beasts.