Hidden among the floating ruins above Hyrule, the Momosik Shrine challenges players with clever puzzles and precise glider control. This guide shows exactly where to find it and how to solve every step to claim its reward.
When you’re done, our shrine locations page or interactive Hyrule map can direct you toward something else to do.
Momosik Shrine location
Momosik Shrine is found in the Lanayru region, just north of Kakariko Village, on a cliff overlooking the valley. The shrine coordinates are roughly (4592, -940, 1143), and it can be reached by climbing from the village or gliding down from the nearby mountains. The surrounding area features gentle slopes and scattered trees, making it easy to spot the structure’s glowing top from a distance. A nearby cave entrance provides an alternate route, connecting to the shrine chamber through a short tunnel.
The Momosik Shrine is found within the Eldin Canyon region, just east of Death Caldera. The exact coordinates are (2960, 2758, 0538).
Visiting the Momosik Shrine location will start the “Death Caldera Crystal” shrine quest.
Momosik Shrine ‘Death Caldera Crystal’ walkthrough
Momosik Shrine features the “Death Caldera Crystal” puzzle, located on the western rim of Death Caldera in the Eldin region. To complete it, players must locate the green crystal southeast of the shrine and use Zonai devices or Recall to transport it safely across the lava. Watch out for falling rocks and lava plumes along the route. Once the crystal is placed on the shrine pedestal, the barrier fades, granting entry and a Spirit Orb reward.
Momosik Shrine’s “Death Caldera Crystal” puzzle starts out being an inviting Ultrahand puzzle, but be prepared to fight a Talus!
1. Since you’re headed into a lava-filled cave, first equip the Flamebreaker Armor or an elixir that can prevent high-heat damage.
2. Follow the green beam until you’re blocked by the mountain, then swerve to your right to find the entrance to a cave.
3. Approach the wall of blue rocks and either smack it with a makeshift hammer or blow it up with bomb arrows. Summoning Vow of Yunobo, Sage of Fire, can also expedite the destruction. The quest is through this wall.
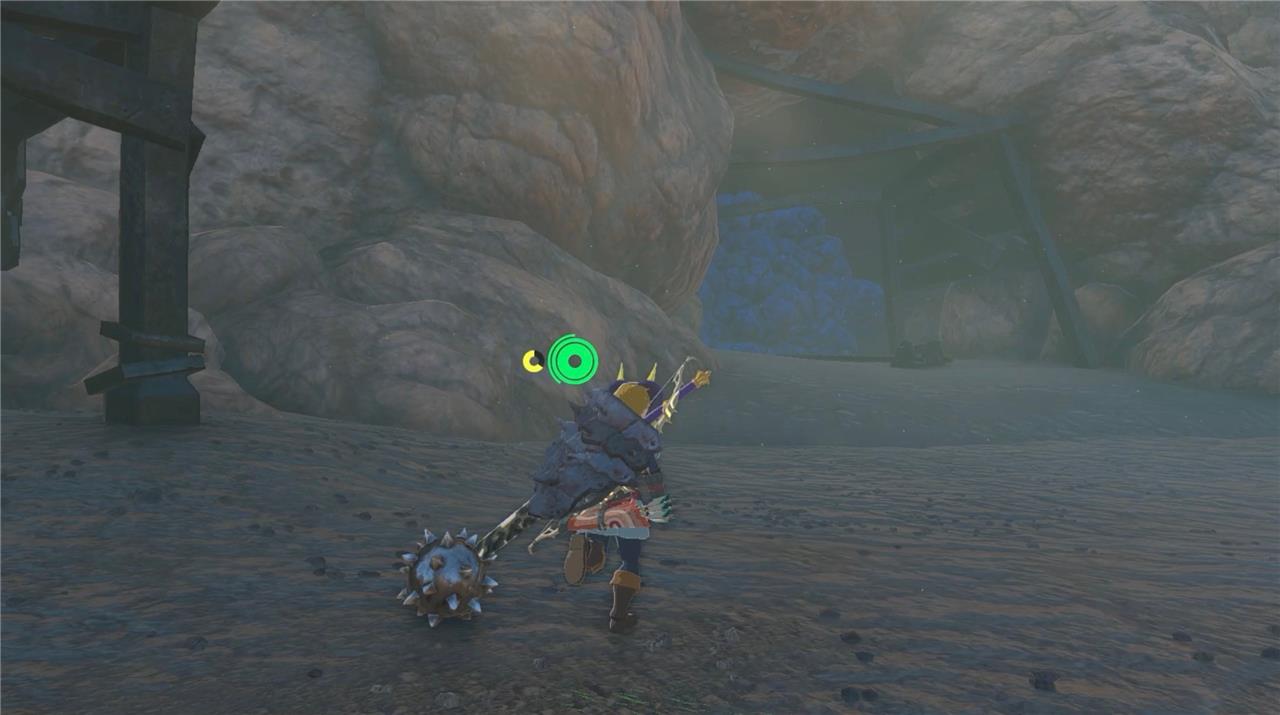
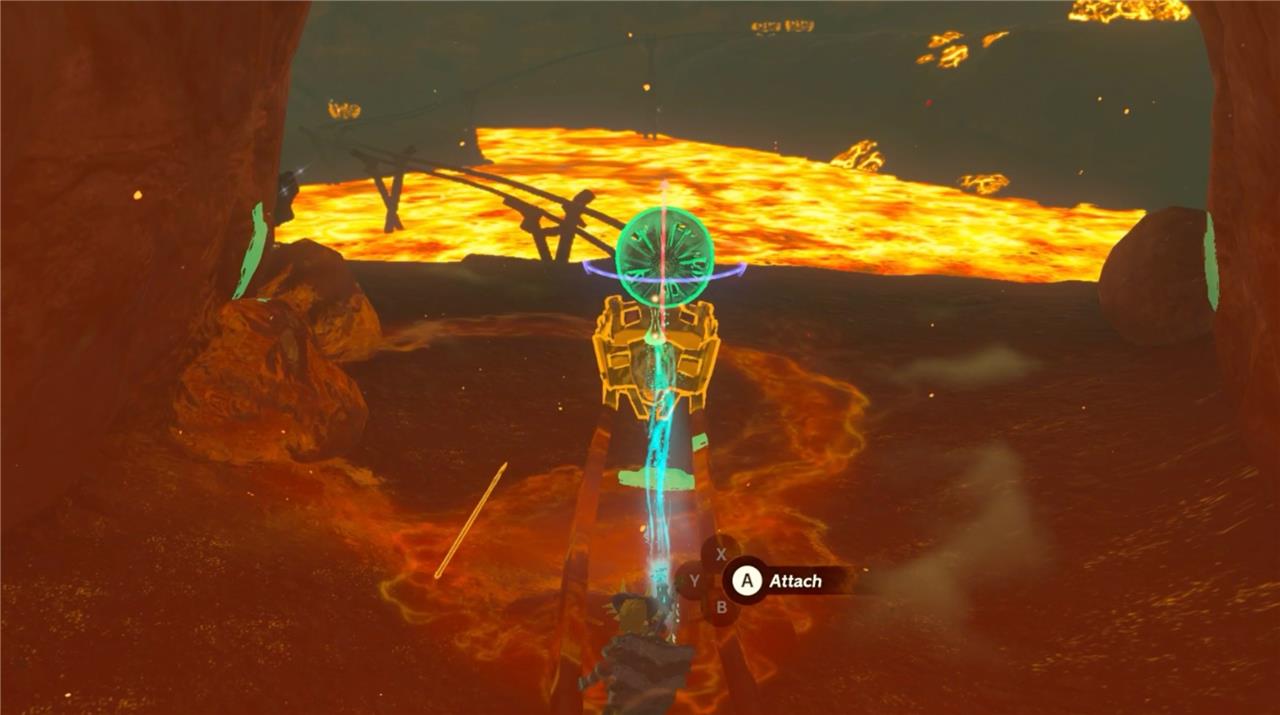
4. Breaking through reveals Death Mountain East Tunnel. Take out the Horriblin on the ceiling then continue on to find a mine cart. Use Ultrahand to position it on the track. Attach the nearby fan to the cart using Ultrahand.
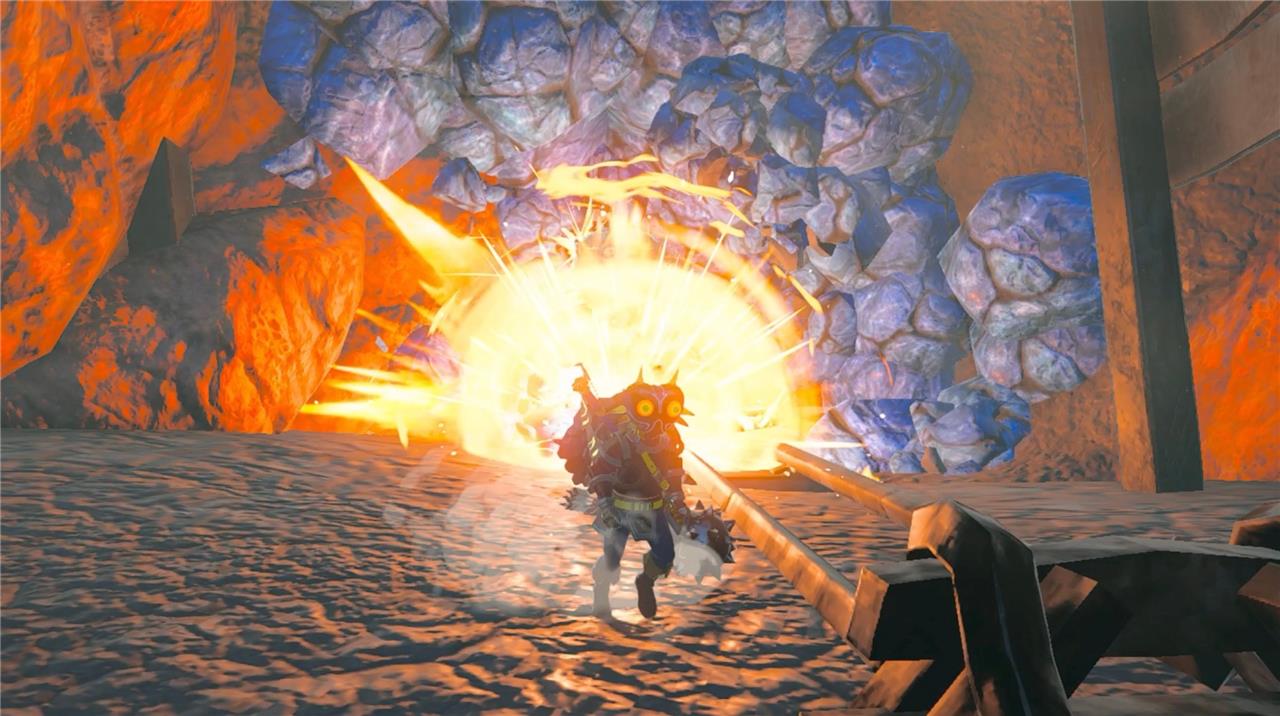
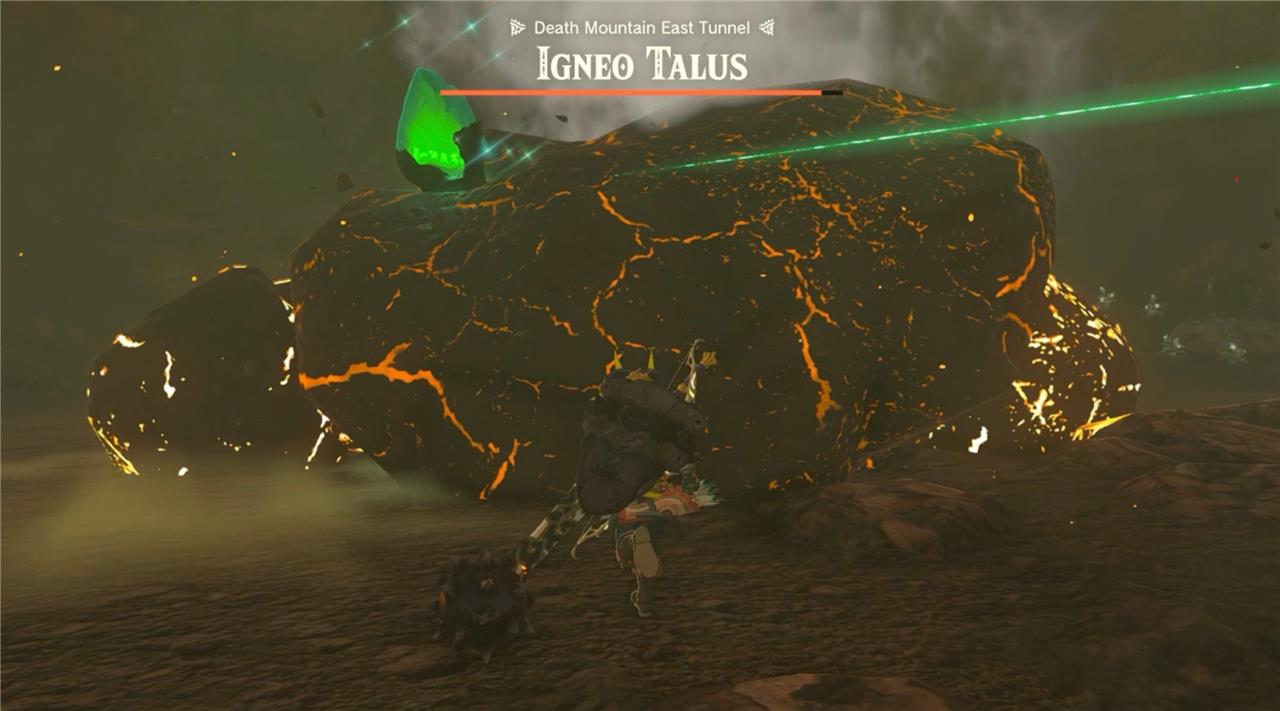
5. Ride the cart along the track to the platform across the room. The crystal is in a molten rock in the middle of the room. which turns out to be Igneo Talus! Watch out, he’s gonna pound the ground and spray molten rock your way.
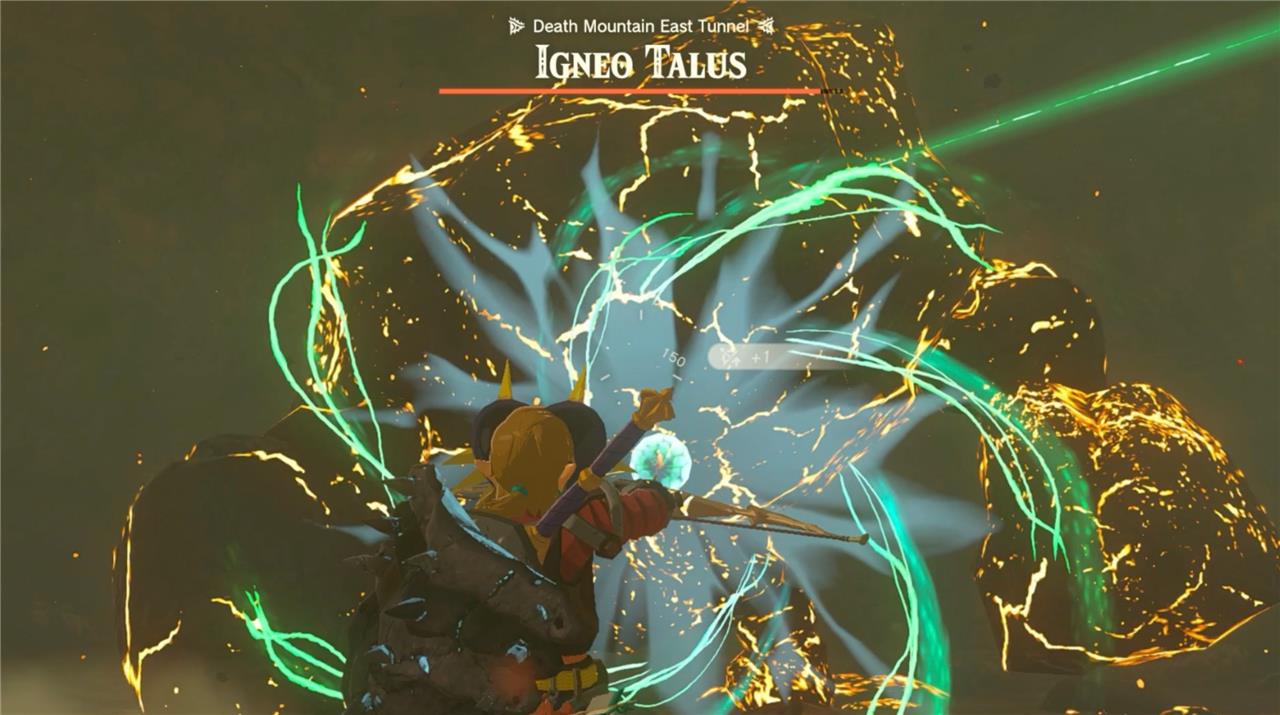
6. Defeating the Igneo Talus is like other Talus battles, but this guy’s on fire. To ensure you don’t burst into flames, attach splash fruit to your arrows to cool down the stone exterior. A hit will send the Talus to the floor, giving you a chance to climb up his back and hit the crystal on top.
7. After defeating the Igneo Talus, collect the Talus heart (or Fuse with a sword of shield), then head back to the cart. Rebuild the cart using Ultrahand so it’s position to travel back to the original platform. Grab and place the crystal in the cart using Ultrahand.
How do I start The Death Caldera Crystal shrine quest
To start “The Death Caldera Crystal” shrine quest in The Legend of Zelda: Tears of the Kingdom, travel to the Momosik Shrine location on the eastern side of Death Mountain in the Eldin region (coordinates approximately 2959, 2758, 0524).
Activation Steps
Examine or activate the empty shrine pedestal/platform directly in front of the Momosik Shrine entrance. This immediately triggers the quest and emits a green beam of light (tether) pointing northwest toward the crystal’s location in the nearby Death Mountain East Tunnel cave.
Preparation Tips
Glide from the Ulri Mountain Skyview Tower or Sitsum Shrine for easy access, and equip Flame Guard armor or elixirs beforehand due to the extreme heat in the area. The beam guides you precisely to the cave entrance blocked by blue rocks, which you must break using bomb flowers, Yunobo’s ability, or a hammer.
What gear do I need before entering Death Mountain East Tunnel
Fireproof gear is essential before entering Death Mountain East Tunnel in The Legend of Zelda: Tears of the Kingdom due to the extreme volcanic heat and magma inside. Without it, Link will take continuous burn damage.
Required Gear
Equip the full Flamebreaker Armor set (Helm, Armor, Boots) for complete Level 3 Flame Guard protection, which prevents all heat damage without time limits. Alternatively, drink Fireproof Elixirs crafted from Fireproof Lizards, Smotherwing Butterflies, and monster parts to gain temporary Flame Guard (up to 30 minutes with advanced recipes).
Combat Preparation
Bring strong weapons (attack power 20-30+), healing items, attack buffs, and ice-based arrows or White Chuchu Jelly fused to arrows for the Igneo Talus boss. A hammer or Yunobo’s Charge ability helps break the entrance’s blue rock wall, plus a fan and mine cart tools for navigation.
Acquisition Tips
Purchase Flamebreaker pieces in Goron City from the Ripped and Shredded armor shop, or obtain the chest piece via the “Yunobo of Goron City” main quest. Stock multiple elixirs as backups, available from nearby vendors like Foothill Stable.