Hidden across the reimagined Spanish village, the Blue Medallions in Resident Evil 4 Remake challenge players to keep sharp eyes and steady aim. This guide pinpoints every medallion, merchant request, and secret reward waiting along Leon’s grueling path through Capcom’s modern classic.
Blue medallions return, and are arguably the headliner once again, but these optional missions in the Resident Evil 4 remake do more than have you looking up high for shiny things to shoot. They make for a great excuse to explore corners of the map that you might have missed while following the main path. From taking care of rats to fishing, there is plenty for Leon to procrastinate his search for Ashley with.
How requests work in Resident Evil 4 remake
Requests in Resident Evil 4 Remake are optional side missions that players can complete for rewards such as Spinels, which can be exchanged for valuable items. These tasks range from destroying blue medallions and selling specific treasures to defeating certain enemies. Requests are usually marked with blue slips found around the environment, often posted near merchant areas or major locations. Once accepted, progress is tracked in the menu, allowing players to complete them at their own pace while exploring each chapter.
There is a total of 19 requests to take care of throughout the course of the story. There is a certain number for each region in the game – the Village, Castle, and Island areas – and you’ll need to complete them before moving on to the next region. Otherwise they’ll be marked as failed.
However, if you start over in a new game plus save after finishing the story once, the progress will remain for the requests’ corresponding challenge. But you’ll have the option to repeat them if you want as they’ll reset in each new playthrough.
Completing requests rewards you with Spinels, which are used for purchasing special items in the merchant’s store. Some of the tasks require you to fetch specific items and sell them, so you’ll be gaining a bit of money for your troubles every now and then, too.
You’ll usually find requests either close to doors as you follow the main path, or around the merchant’s shops. That being said, except for a few that require you to advance past a point in the story first, you can tackle them before finding the request itself.
Here is how to complete all of the Resident Evil 4 remake requests, going from all four blue medallion locations, then all other requests in order.
Blue Medallion farm locations (Destroy the Blue Medallions 1)
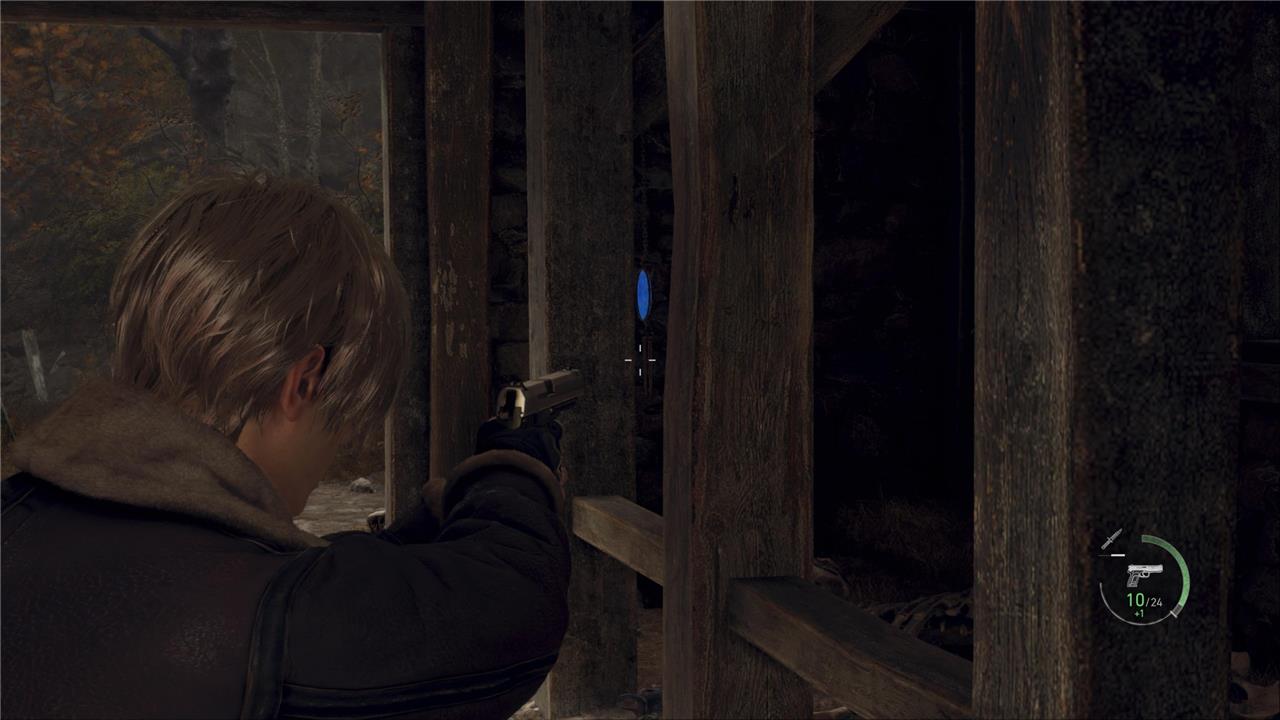
The first Blue Medallion request in the Resident Evil 4 remake takes place on the farm area shortly after Leon’s encounter with the village. Six medallions are scattered around the barns and animal pens. You can spot one hanging on the windmill, another above the barn door, one under the bridge near the well, and others on the sheds and watchtower. Shooting all six completes the request, allowing players to turn it in at the Merchant for Spinels and other rewards.
Area: Farm
Reward: Spinel x3
You’ll need: 5 medallions
The first batch of blue medallions is in the farm area as you’re heading towards the lake. You can either tackle them during your first visit or at any point afterward, as long as you don’t head over to the extraction site in the main story, since you won’t be able to return.
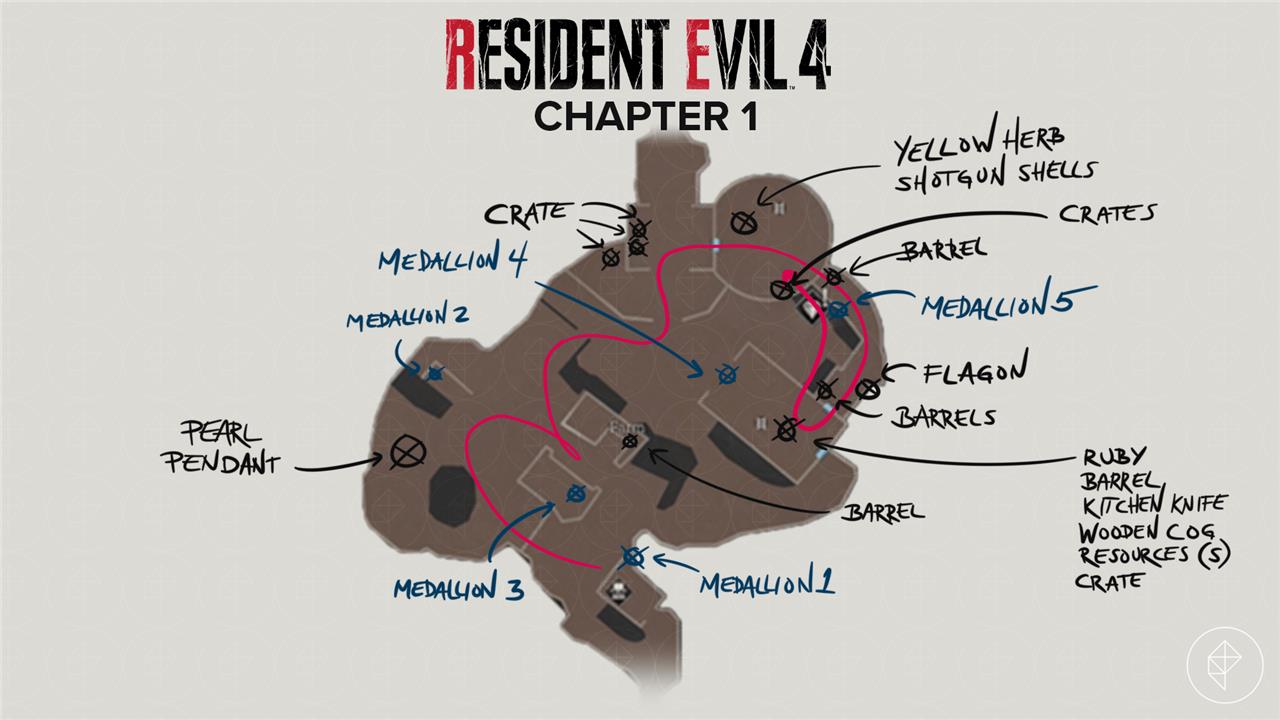
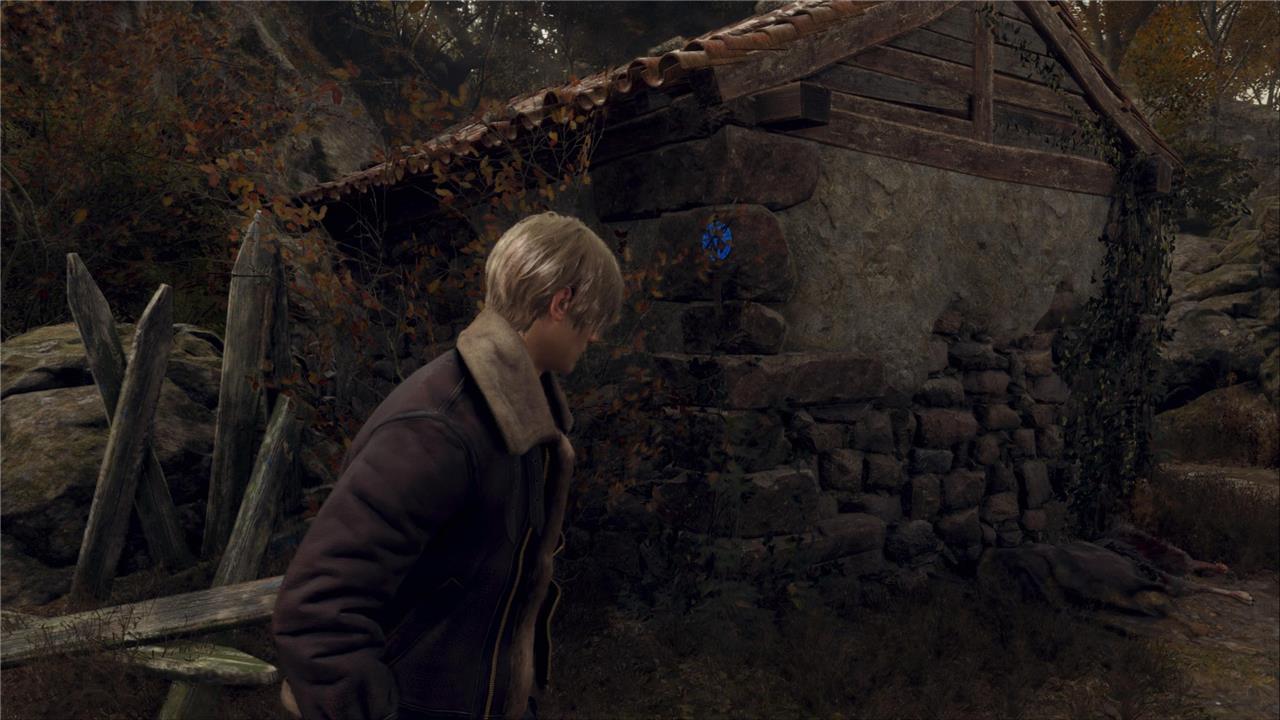
Starting from the southern corner of the area, the first medallion is hanging outside of the house with the typewriter inside.
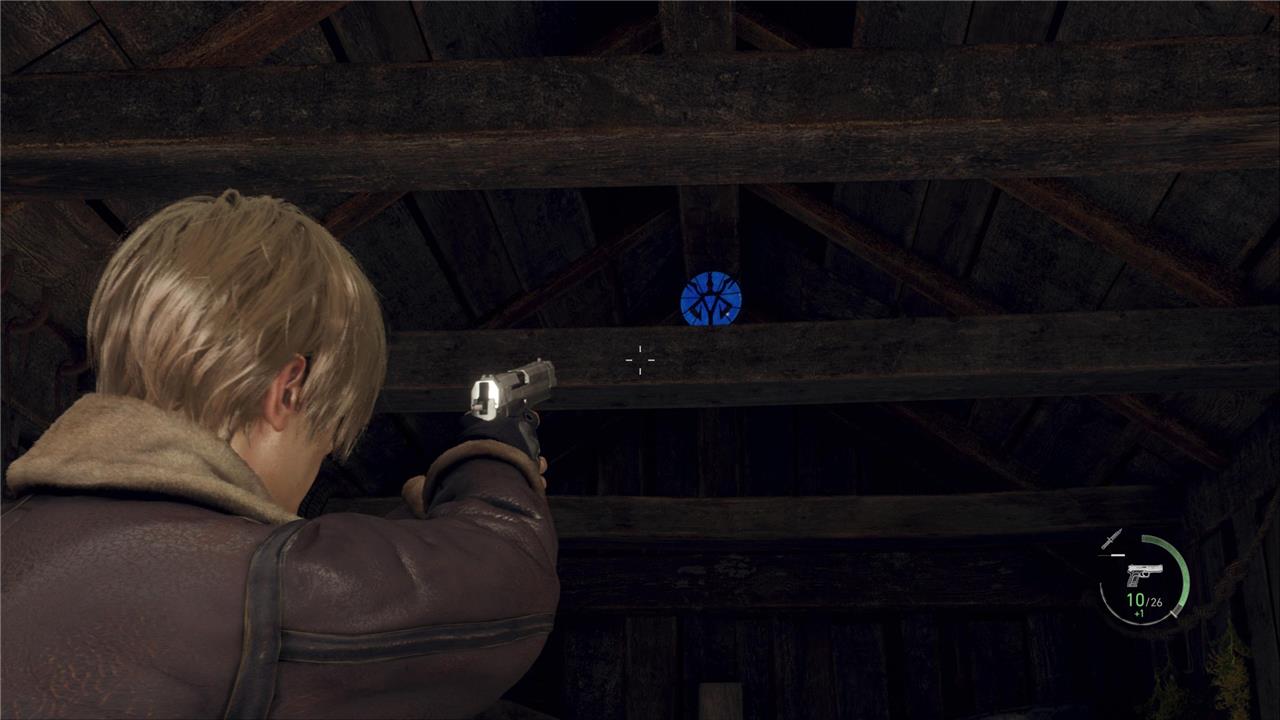
The second medallion is hanging from the ceiling inside the small barn on the western side of the farm.
The third medallion is behind one of the pillars inside the large barn in the mid-south part of the area, below the word “farm” if you’re looking at the map.
The fourth medallion is hanging from the upper window of the biggest barn toward the north side of the farm.
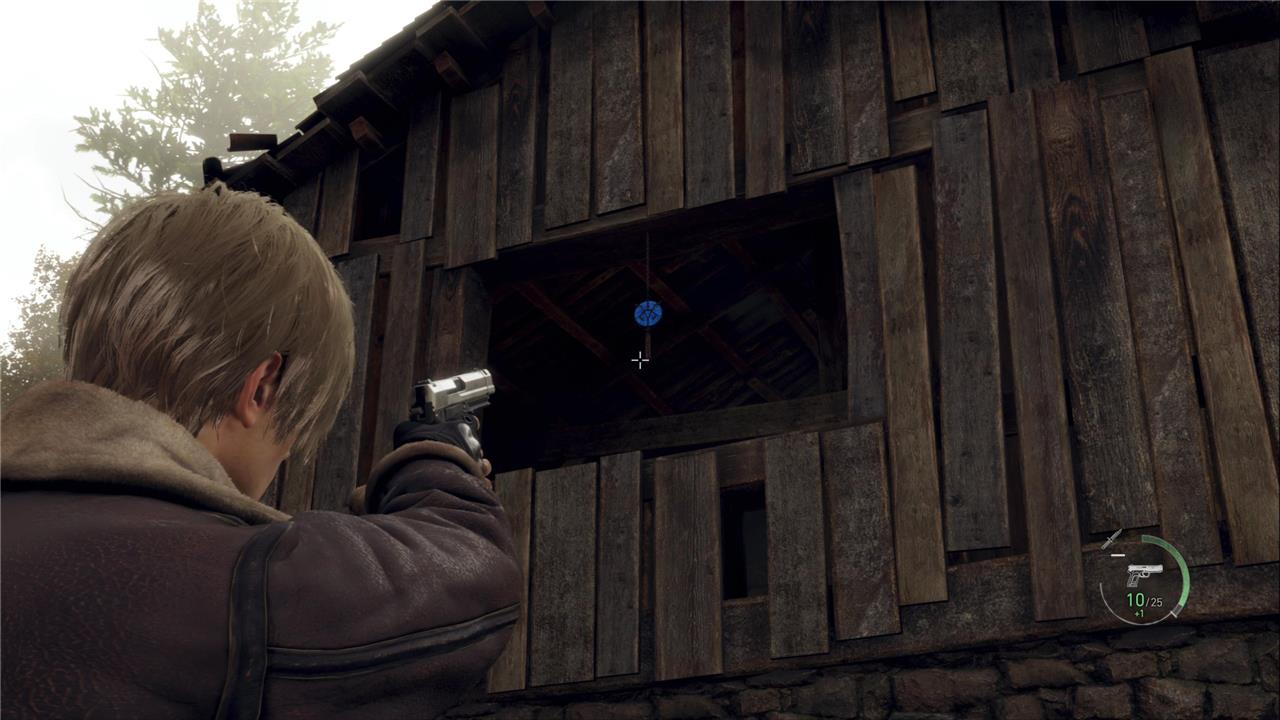
The fifth medallion is hanging underneath a passage with a broken ledge, which surrounds a door to the circle-shaped structure of the farm area, where you hop inside to activate the mechanism to move forward. From the barn, head over to the upper floor and shoot at it from the outside, standing on the opposite corner.
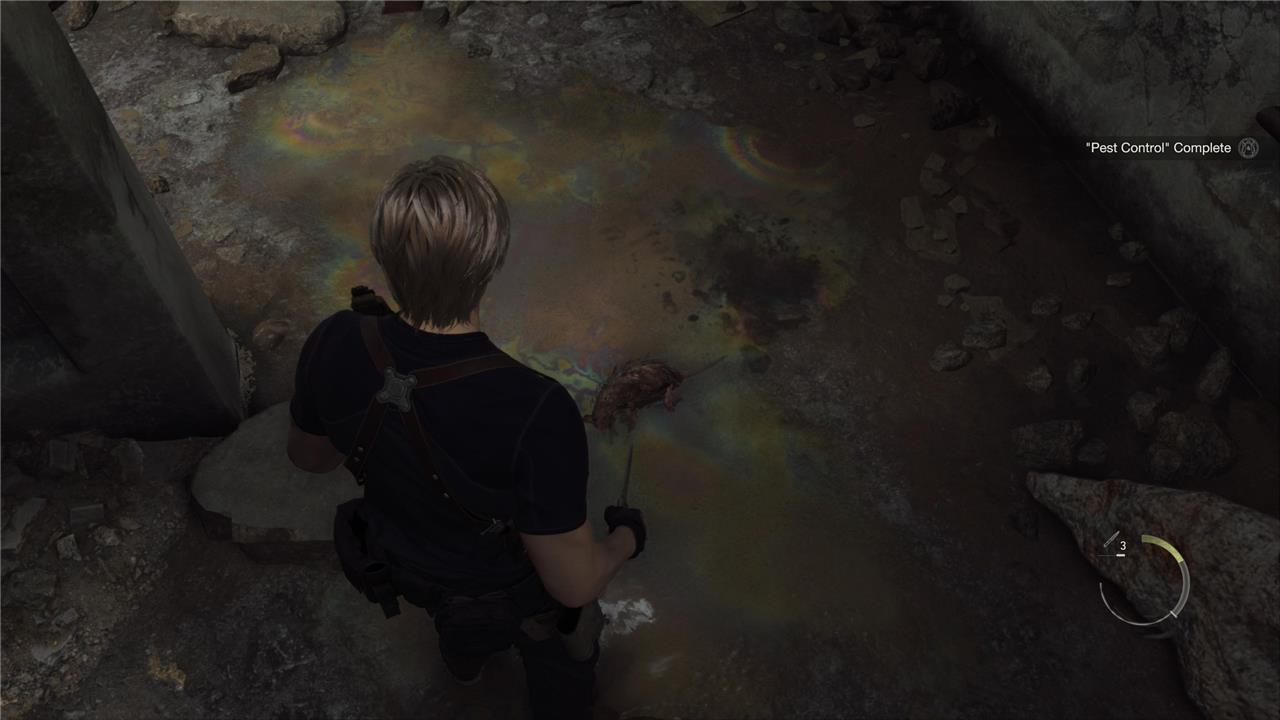
Pest Control
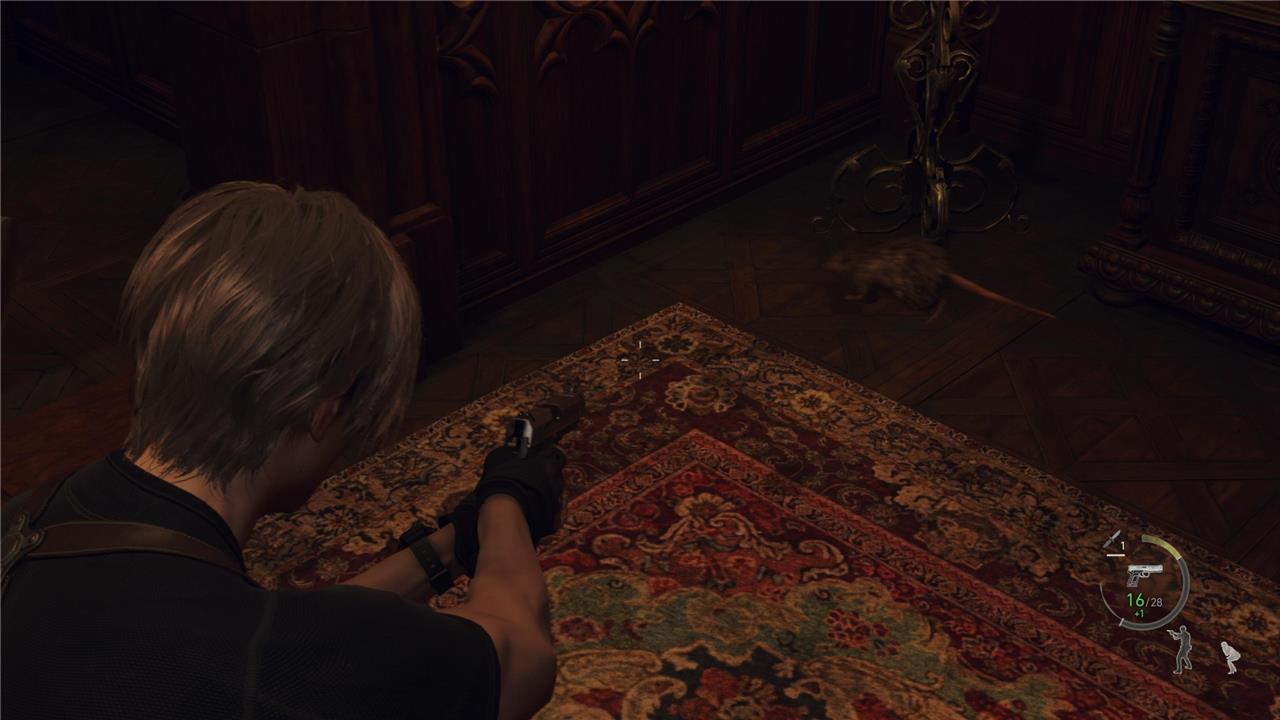
The Pest Control requests ask players to eliminate the rats infesting certain areas of the map. These small targets often appear near storage rooms, kitchens, or merchant zones, and must be taken out with a firearm or knife to complete the task. Listening carefully for squeaks can help locate them, as they move quickly through the environment. Completing these extermination jobs rewards Spinels, which can be traded for rare items at the Merchant.
Area: Abandoned Factory
Reward: Spinel x3
You’ll need: 3 rats
As you follow the main story, Leon will end up inside the Abandoned Factory, where you’ll get a handy tutorial regarding stealth and the overall use of your knife. While there isn’t a specific request sign, you’ll come across three rats here. Take care of them using your knife (or your weapons after you’ve recovered your things) to complete the task. Remember to use closed caption subtitles to see the “[rats squeaking]” prompt so you don’t miss them.
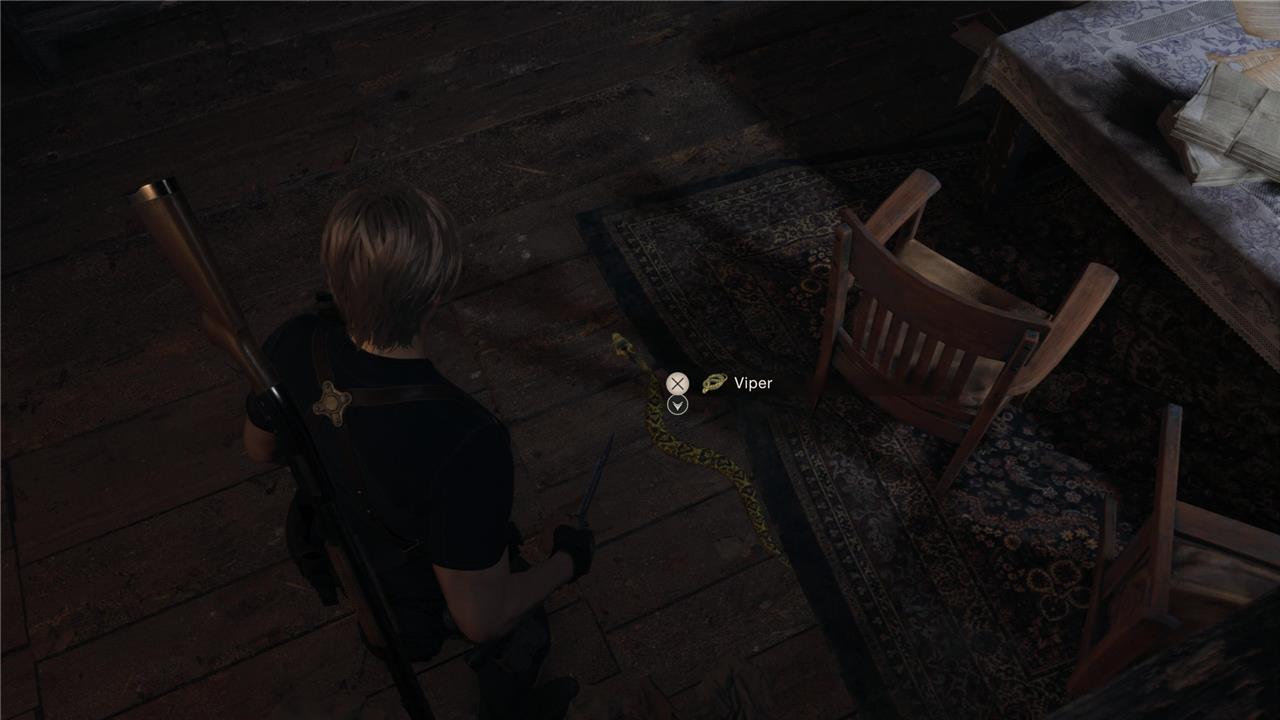
Viper Hunter
Spot the six Blue Medallions in the church graveyard for Viper Hunter. Smash the first hanging above the entrance archway. Shoot the second behind the church on a windowsill. Find the third inside the church atop a tall gravestone. Grab the fourth outside near the merchant by the tree. Target the fifth on the church roof’s edge. Destroy the last one inside the church on a hanging lantern.
Area: None specified (I recommend the Fish Farm)
Reward: Spinel x4
You’ll need: 3 vipers
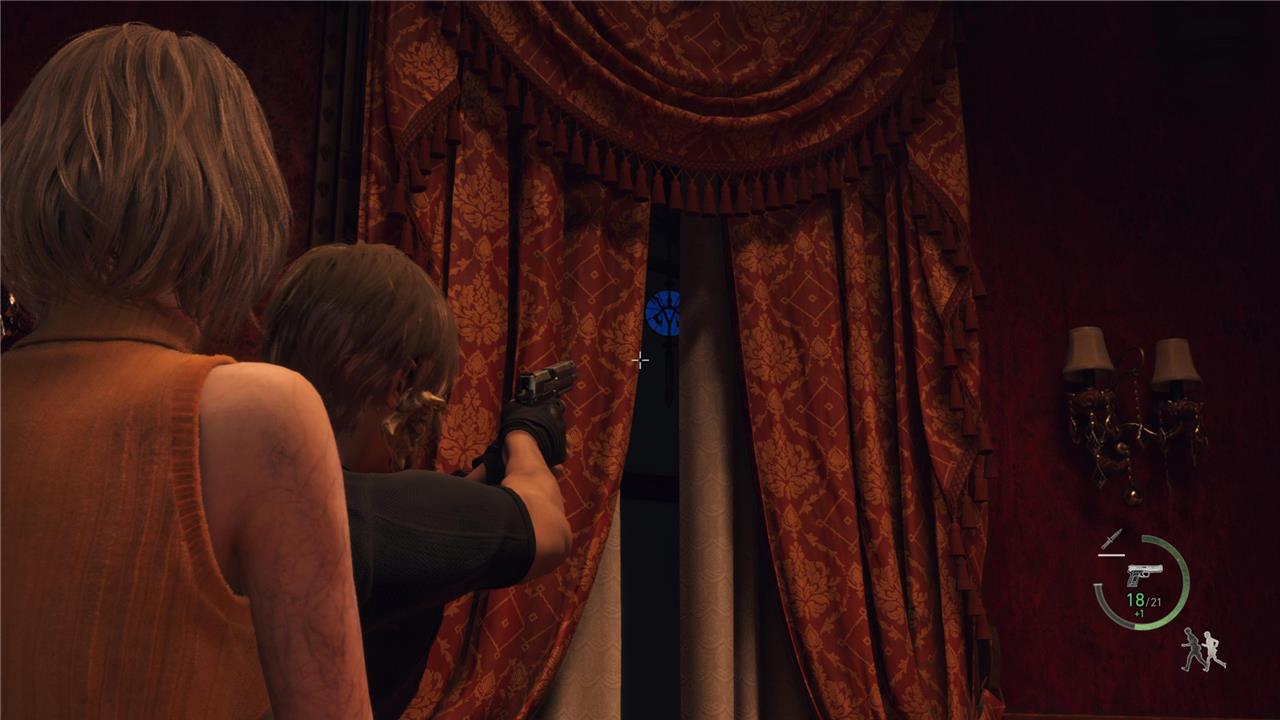
In the Village region, you’ll begin to find vipers inside crates like in the original. Killing them will let you grab them as loot, which you can then use to heal yourself or sell to the merchant. For this task, you’ll need three of them, and the Fish Farm is the perfect place to tackle the request, as there are plenty of them swimming on the water. Either knife or shoot them, it doesn’t matter. Retrieve at least three and sell them to the merchant.
Grave Robber
This request tasks Leon with retrieving a valuable treasure from a graveyard in the Village area. To complete it, you need to find and sell the requested item to the Merchant once you’ve explored the cemetery. Be sure to check behind gravestones and near the church grounds, as certain valuables can be easily missed among the tombs and pathways leading out of the area.
Area: Church
Reward: Spinel x2
You’ll need: 2 emblems engraved on tombstones
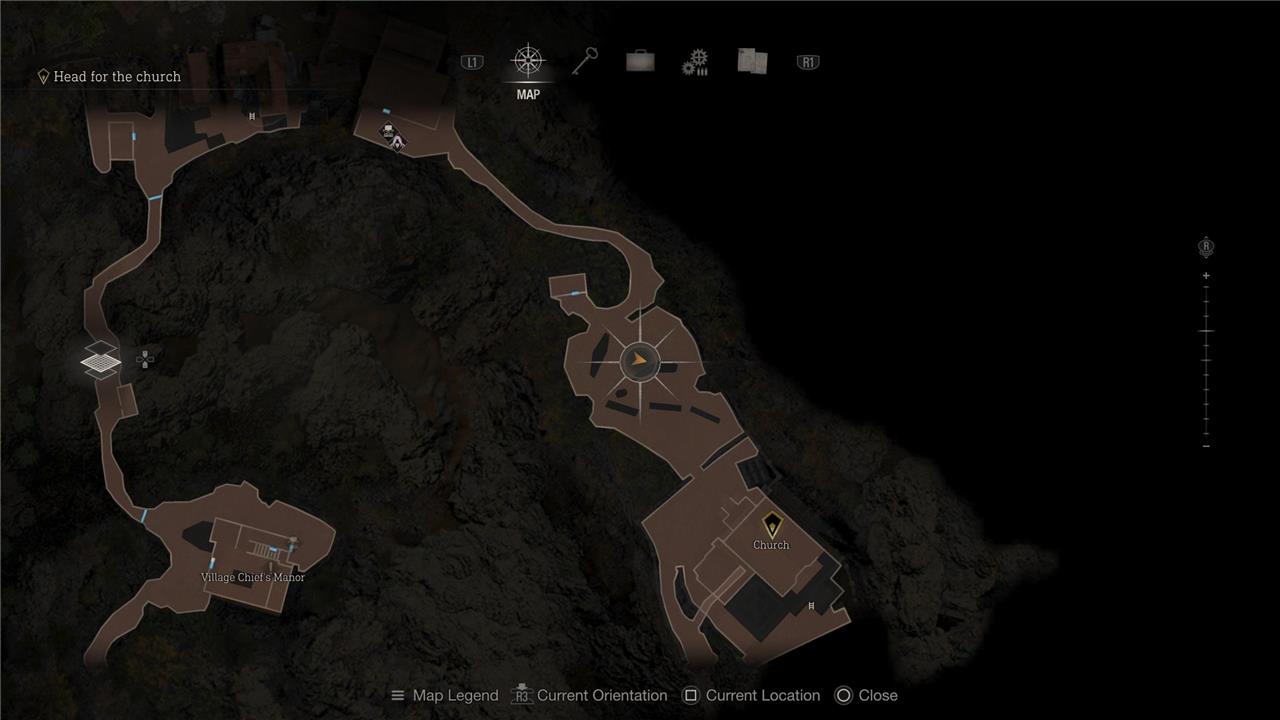
As you’re heading to the church, you’ll come across a graveyard with a few enemies around. All tombstones have an engraved emblem that you can destroy.
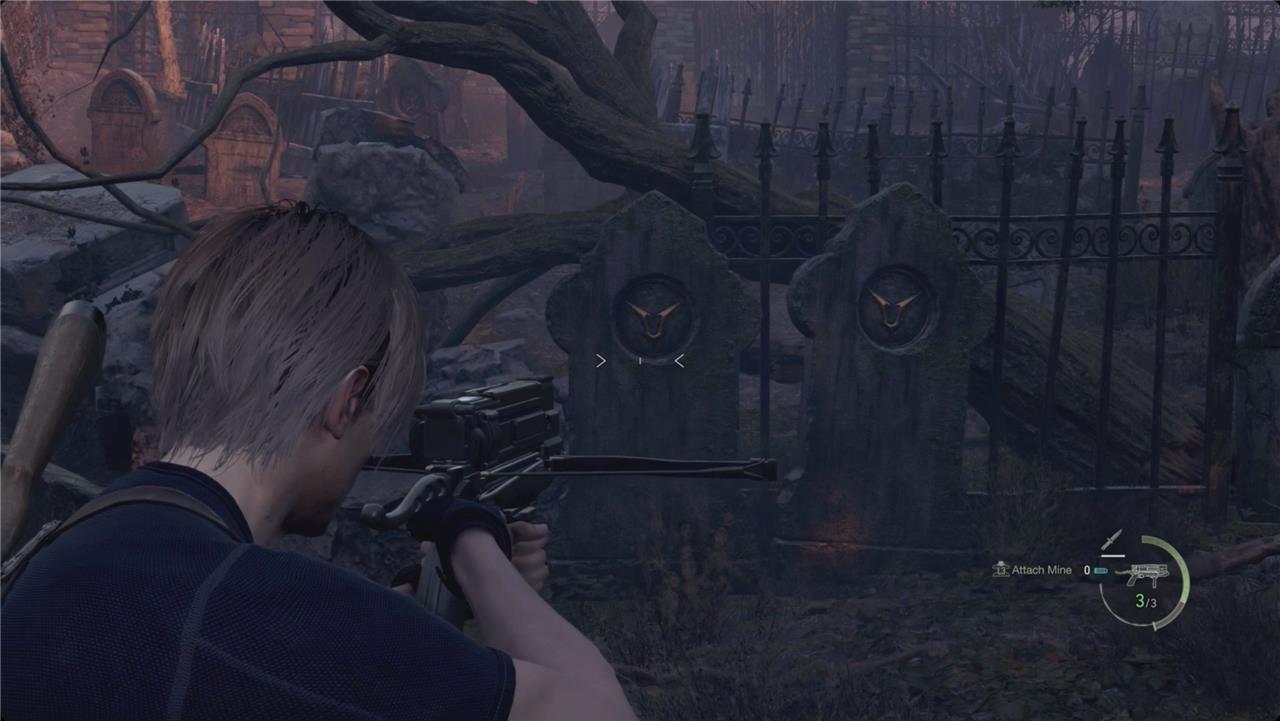
Most of them don’t do anything, but if you break the ones from the two tombstones that are placed next each other in the center of the graveyard, you’ll complete the request. I recommend using the knife to save bullets, especially this early on in the story.
Blue Medallion quarry, fish farm locations (Destroy the Blue Medallions 2)
The Blue Medallions in the quarry and fish farm areas can be found scattered across both zones. In the quarry, check the wooden beams near the elevator and the rocky ledges overlooking the water. At the fish farm, several medallions hang on the outer walls of the huts and near the boat dock. Shooting all of them completes the Merchant’s request, rewarding you with valuable Spinels to trade for special gear.
Area: Quarry and Fish Farm
Reward: Spinel x4
You’ll need: 5 medallions
The second batch of blue medallions is in both the Quarry and Fish Farm areas as you’re tasked to cross the lake. You can either tackle them during your first visit or at any point afterward, as long as you don’t head over to the extraction site in the main story, since you won’t be able to return.
Here are the quarry and fish farm locations at a glance on a map:
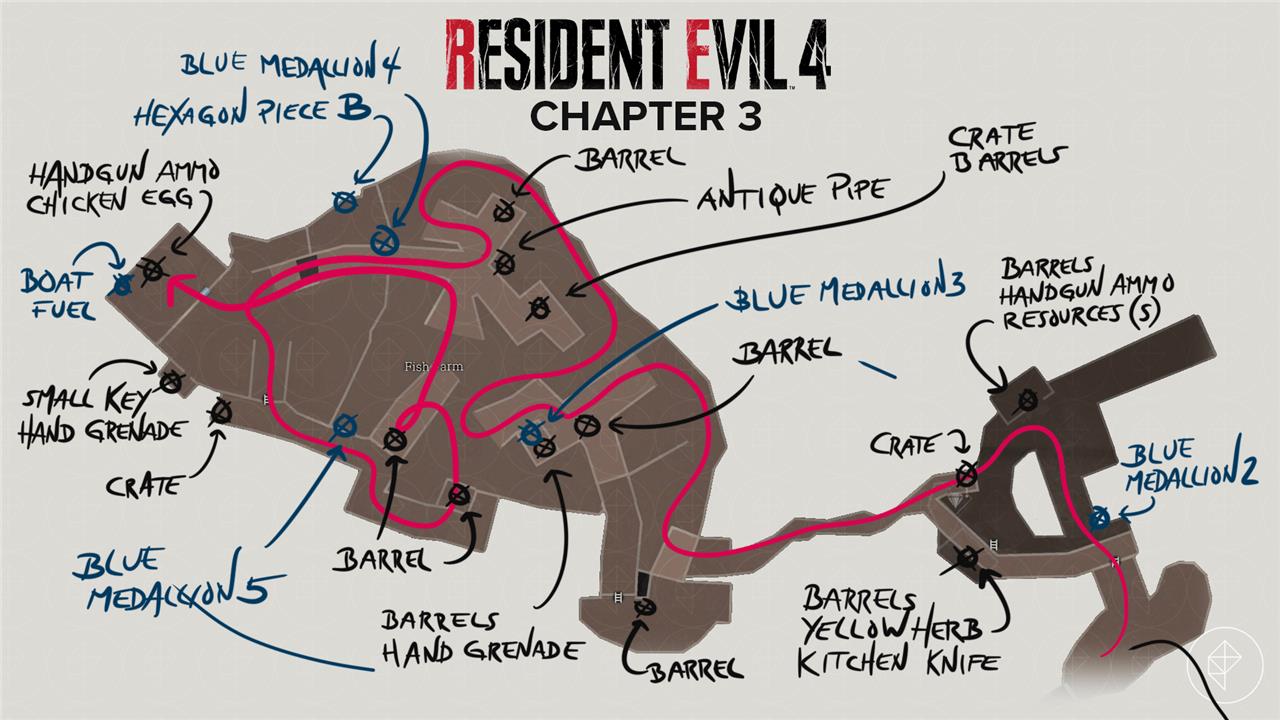
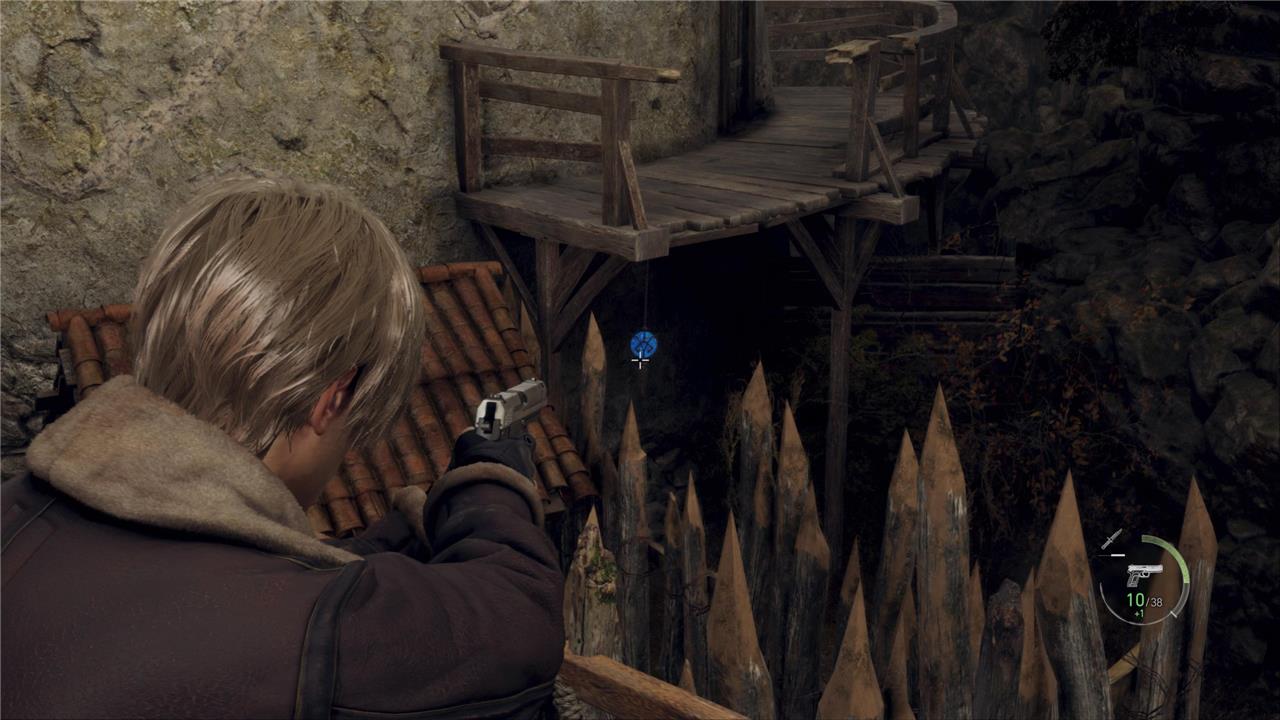
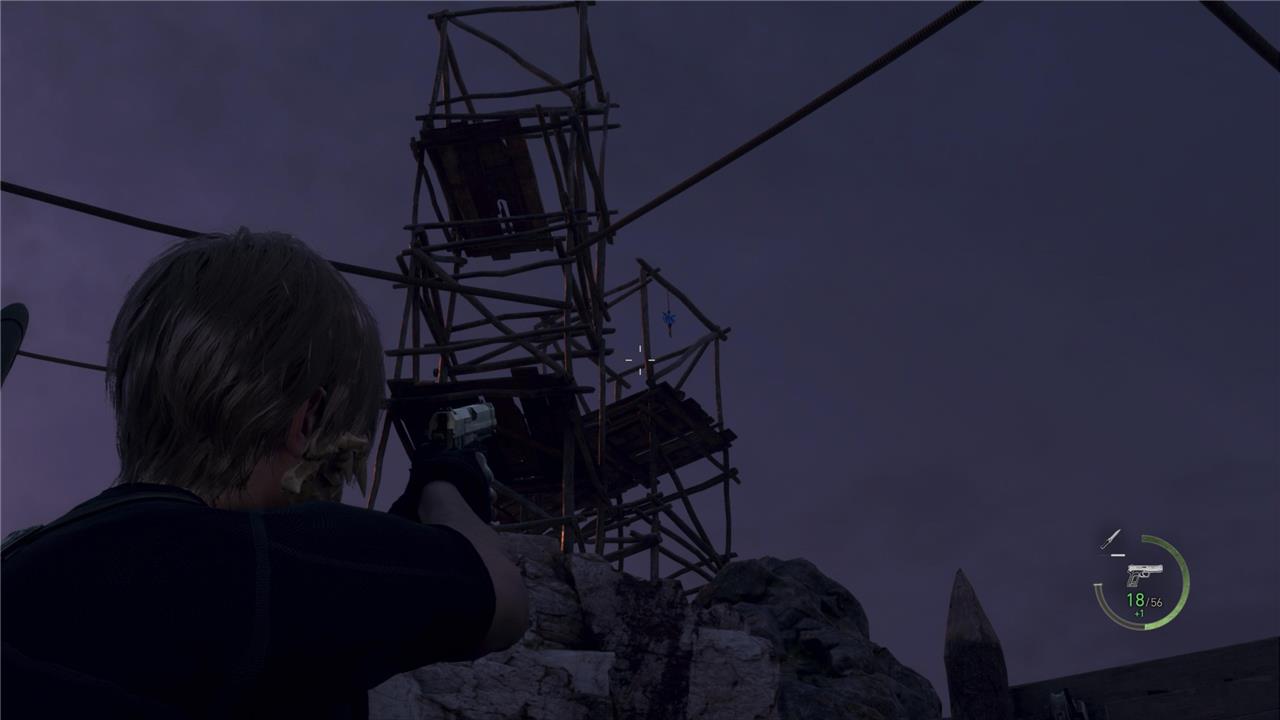
Starting from the Quarry, the first blue medallion is hanging from the tower made out of boards, which is to the upper left of the passage that leads north.
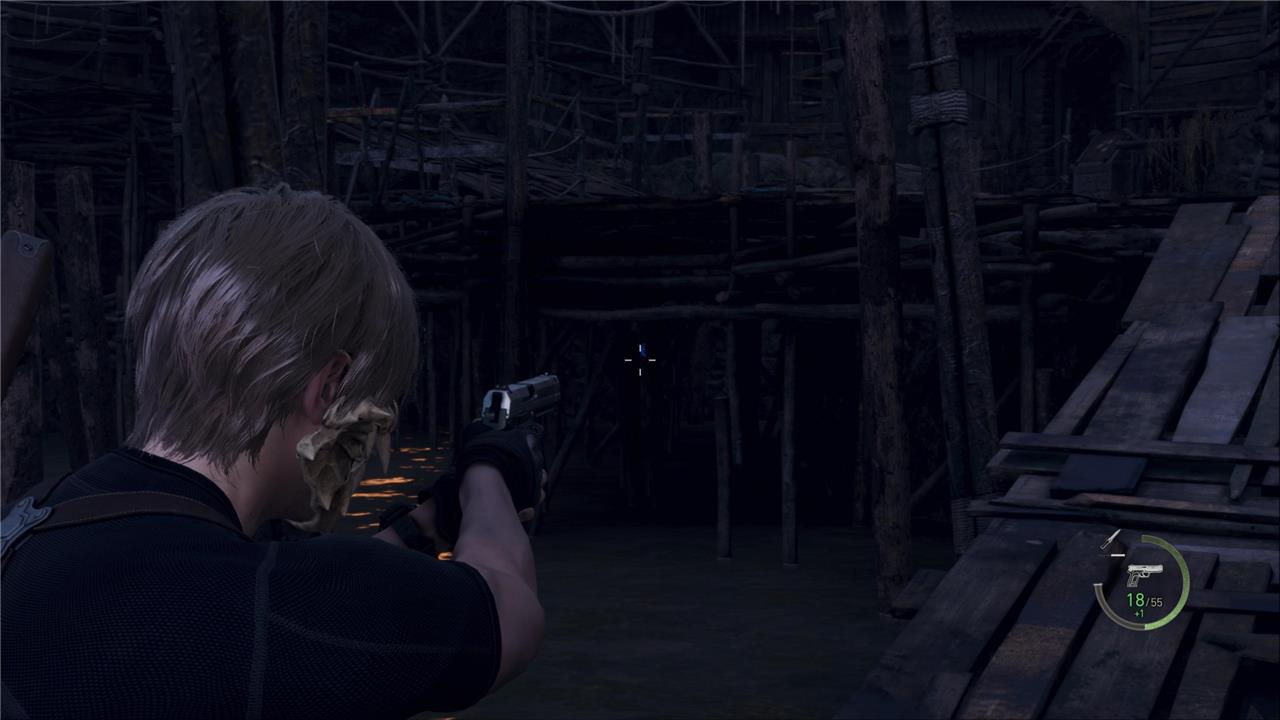
The second blue medallion is on the spot where the boat is located. Head to ground level and aim underneath the boardwalk, facing the side where the emblem puzzle is.
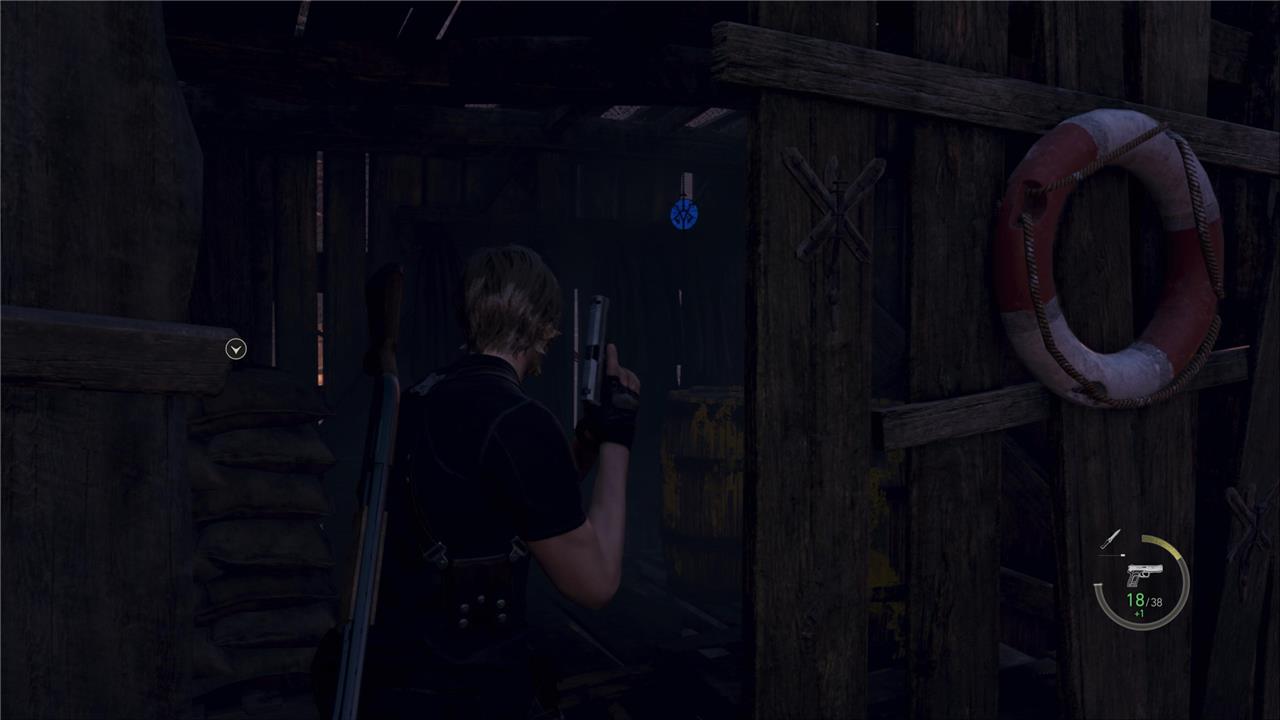
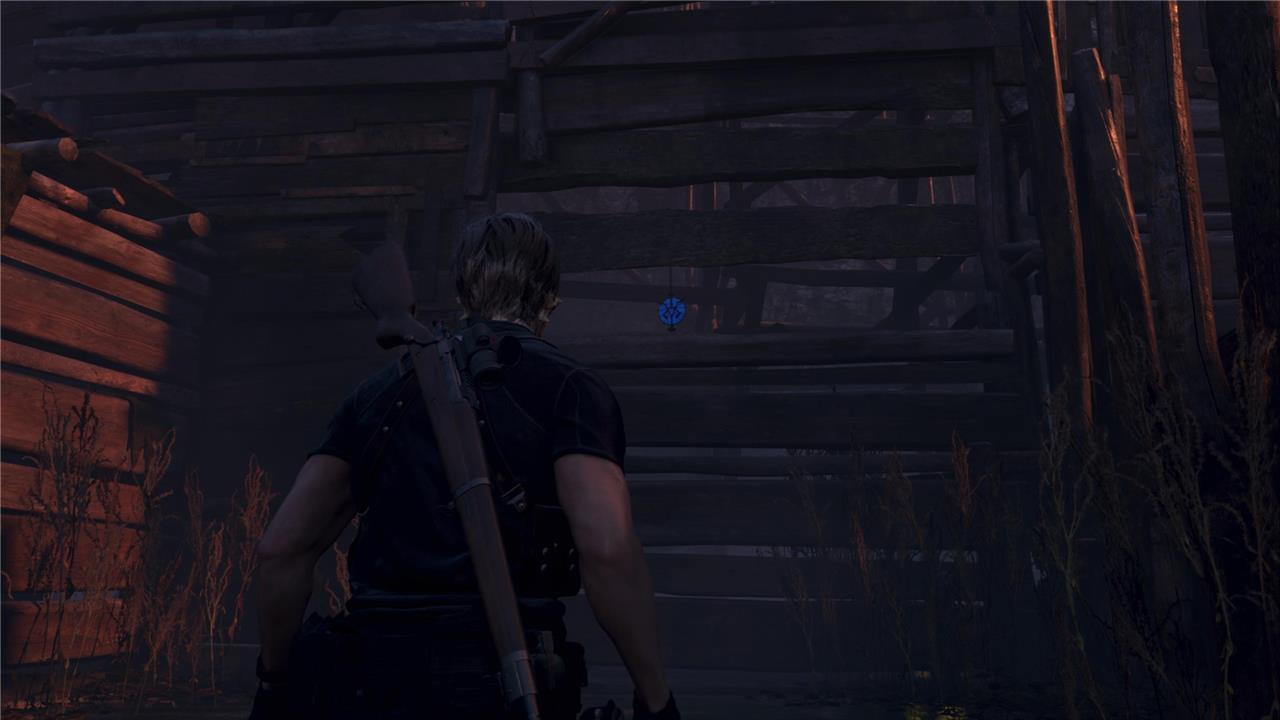
Onto the Fish Farm now. Starting from the eastern side of the area, the third blue medallion is inside the shack with the typewriter.
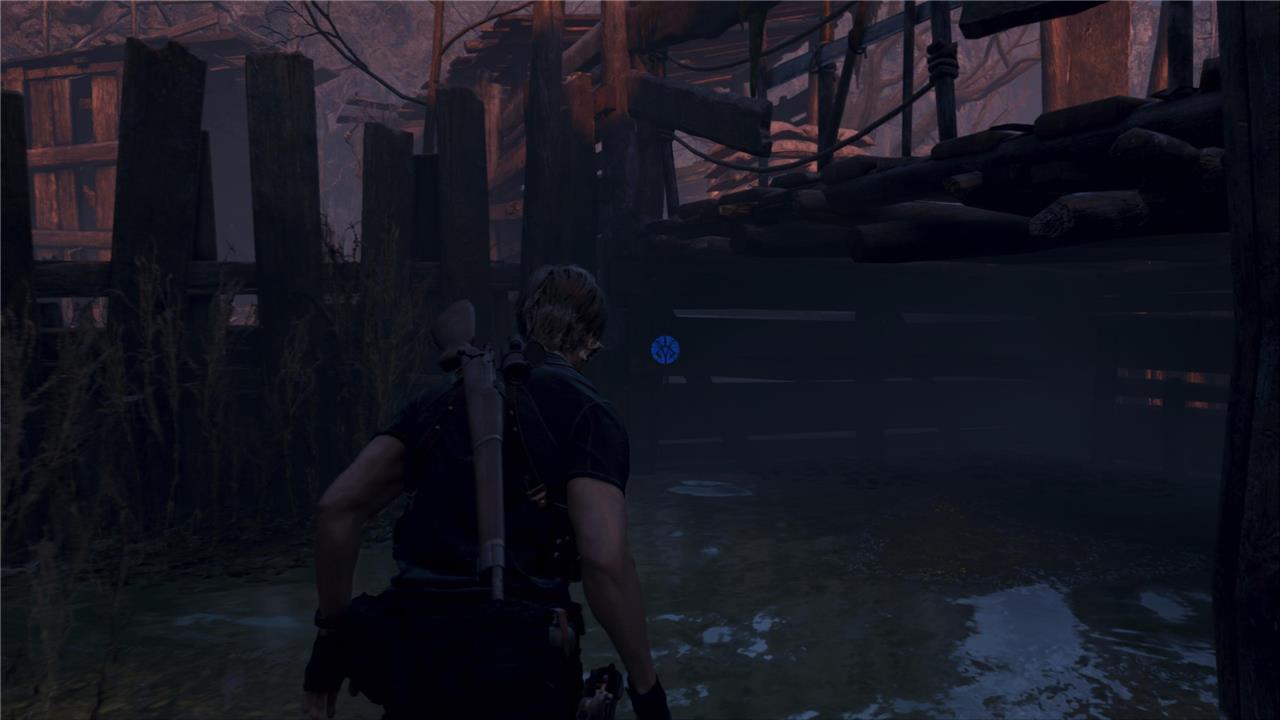
The fourth blue medallion is hanging on the southern wall of the Fish Farm, to the left of the structure below “Fish Farm” on the map, in between the cracks of the wall.
The fifth blue medallion is underneath the boardwalk up north of the Fish Farm. If you take the ground-level path as you traverse the water in that upper area, head west and you’ll find the medallion at the same level as the divisor line of the map.
Egg Hunt
Spot the 16 blue medallions in the church graveyard for Village Chief Bitores Mendez’s request. Smash them with your weapon or shoot them down from perches on crosses, walls, and ledges. Check high spots near the church entrance and mausoleum, plus ground-level ones by graves and fences. Return the last piece to Mendez at his house to claim 5 spinels.
Area: None specified (I recommend east of the lake)
Reward: Spinel x3
You’ll need: 1 gold chicken egg
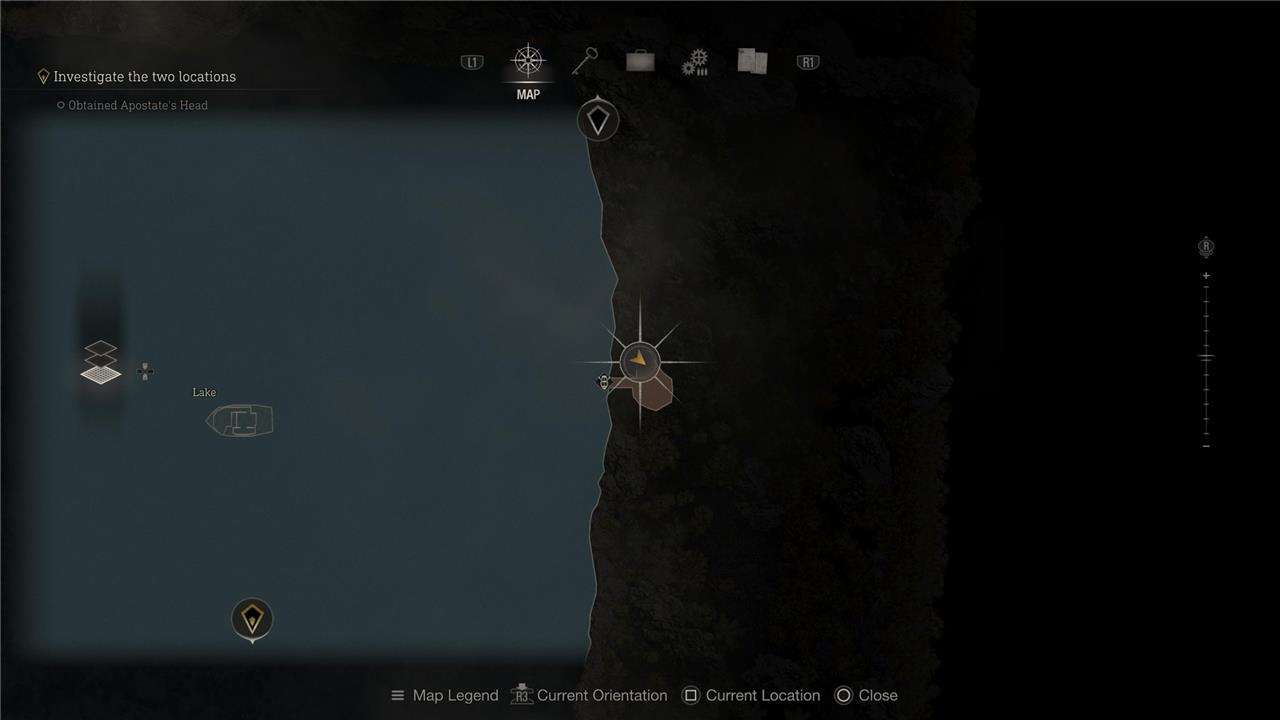
As you’re investigating the lake on your boat after the boss encounter, you’ll notice a small island right on the eastern side of the lake itself, following the same line as the shipwrecked boat in the center. Take Leon there and hop off to find a chicken farm. If you head to the eastern side (using the map as reference) you’ll find the gold chicken egg. Go ahead and sell it to the merchant during your next stop at his shop.
Catch Me a Big Fish
This request from the Merchant tasks you with catching a large fish known as the Lunker Bass. You can find it swimming near the boat dock in the lake area after acquiring the boat. Shoot it with your weapon, then collect it and sell it back to the Merchant for a good reward. Make sure to free up inventory space before you pick it up, as the fish takes up several slots.
Area: Lake
Reward: Spinel x4
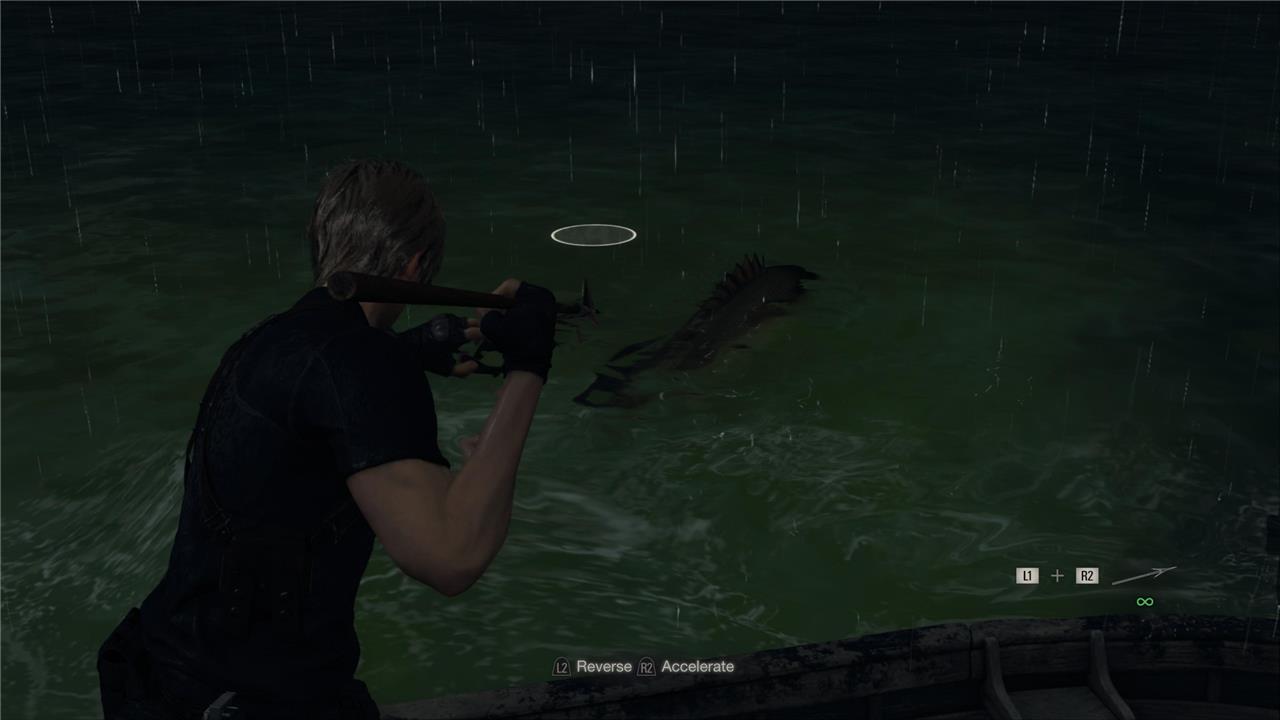
You’ll need: 1 Lunker Bass
The Lunker Bass is found in the Lake area, slightly northeast of the Boat House. As soon as you arrive with your boat, you’ll notice a large figure moving on the water. Go ahead and throw spears at the fish until it’s dead. Then, go ahead and pick it up (it’s a big ‘un, so make space in your inventory first) to sell it to the merchant.
A Savage Mutt
The request “A Savage Mutt” appears in Chapter 5 after reaching the Village Square again. You’ll find it on the notice board near the church entrance. It tasks you with eliminating a powerful mutated dog lurking in the Village area at night. The creature prowls near the Village Chief’s Manor, and defeating it rewards you with valuable Spinels. Approach carefully-it’s fast, aggressive, and more resilient than regular Ganado hounds.
Area: Village Chief’s Manor
Reward: Spinel x8
You’ll need: 1 wild dog
This request becomes available after you’ve escaped from the Church with Ashley. The main story will take you through the village again and up north, but before you do, return south toward the Village Chief’s Manor.
Head inside the room on the upper floor of the manor, and activate the mechanism behind the crack in the wall to drop the ladder from the attic. Then, command Ashley to pull it down and you’ll be able to get up there. Loot the place, including the Clockwork Castellan inside, and then head outside.
Once you return to the main path towards the village, you’ll see a large dog on the other side of the gate. It will then be waiting for you in the village itself. Using the shotgun and the AMP is a good way of dealing with it, as well as any grenades you may have. It moves faster than other dogs, and has more life than usual, so be wary.
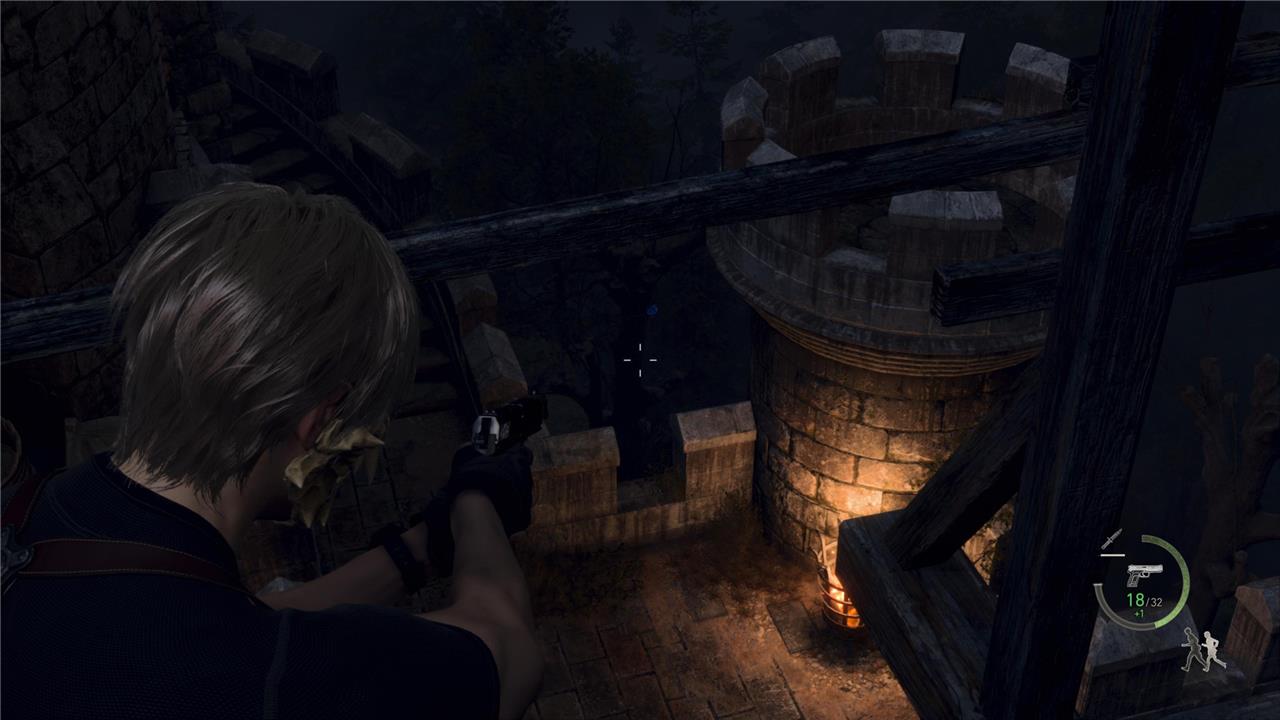
Blue Medallion castle gate locations (Destroy the Blue Medallions 3)
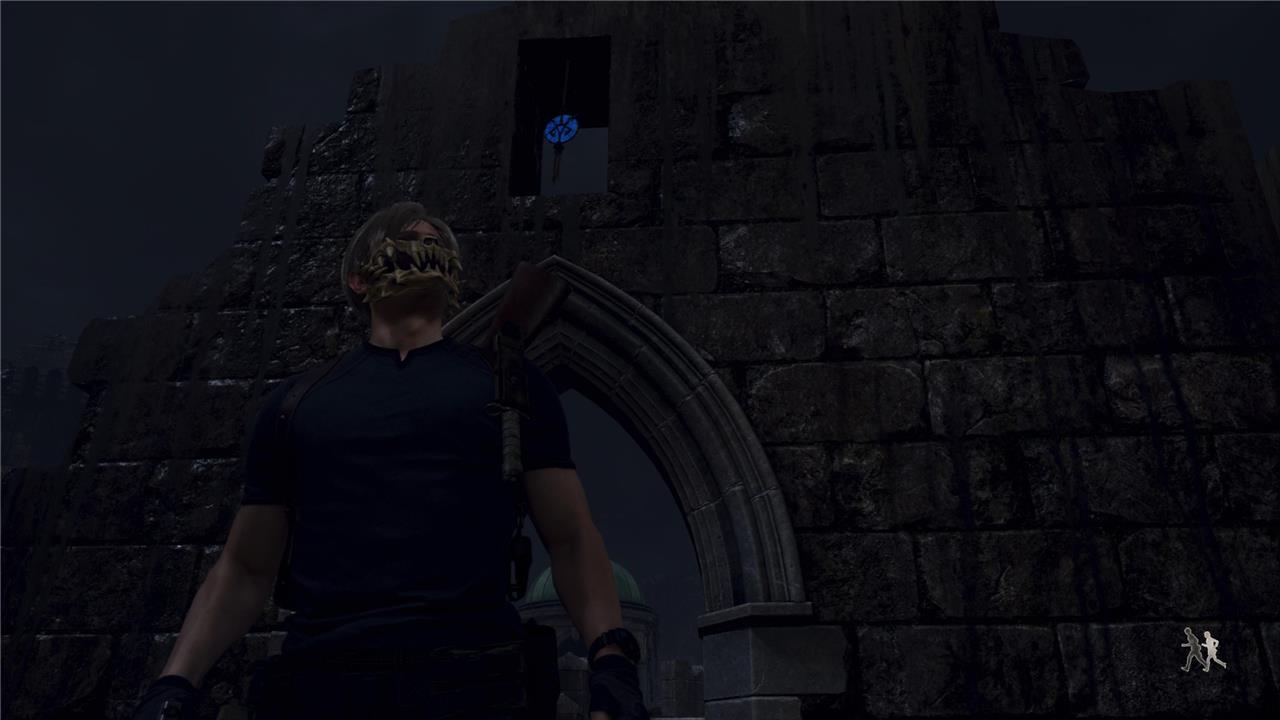
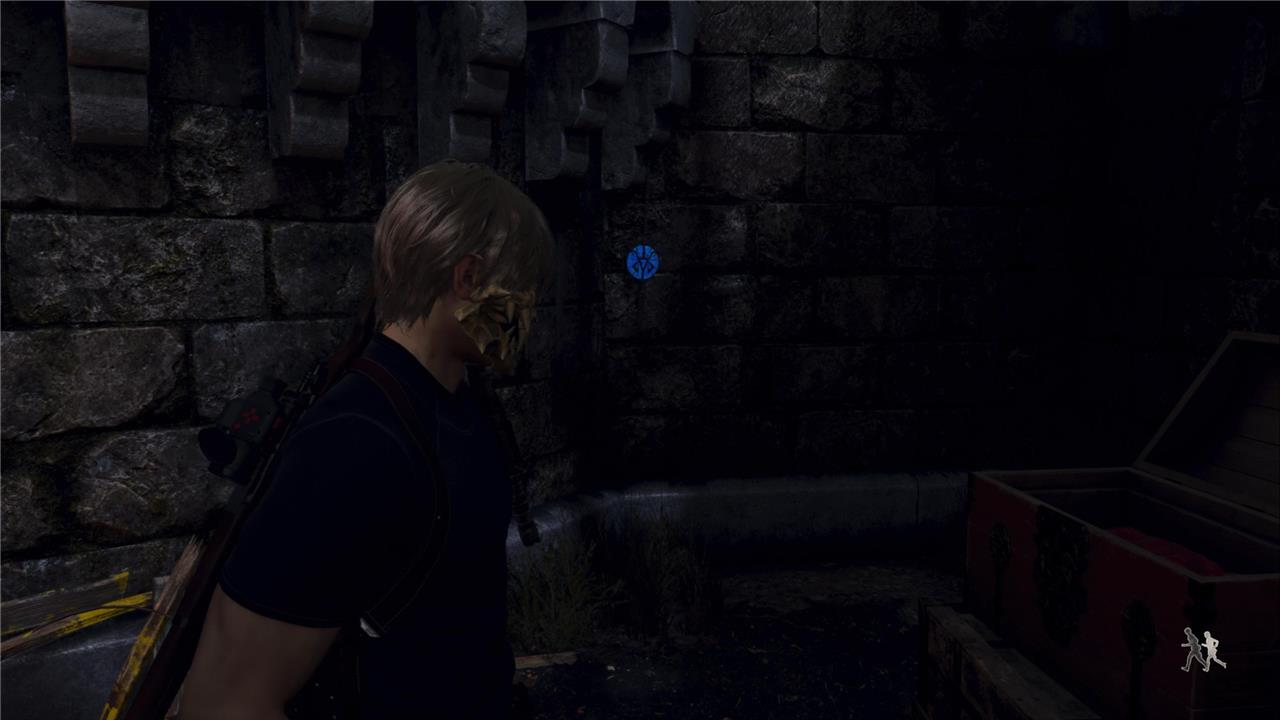
In the Castle Gate area of Resident Evil 4 Remake, six Blue Medallions hide among structures during Chapter 7. Spot the first in a window atop the roofless building near the start; turn north for the second in another window above it. Shoot the third high on the distant wall, then drop under the raised cannon platform for the fourth dangling below. Climb the nearby ladder into the building for the fifth on the wall by a chest, and head toward the chapel’s castle wall to find the sixth hanging from a tree branch. Destroying all six earns five Spinels from the Merchant.
Area: Castle Gate
Reward: Spinel x5
You’ll need: 6 medallions
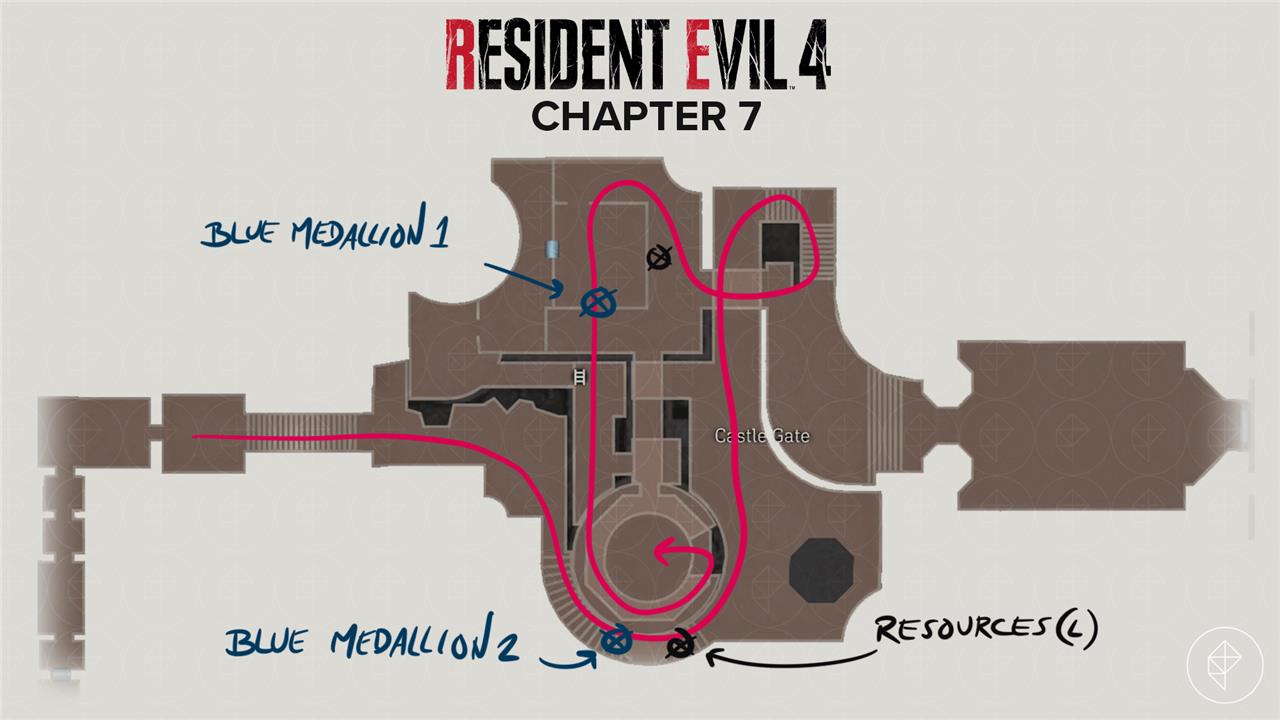
The third batch of blue medallions is in the Castle Gate area where you need to use the cannon.
You can either tackle them during your first visit or at any point afterward, as long as you don’t head over to the clocktower in the main story, since you won’t be able to return.
Starting from the northern spot of the area, you’ll see the first blue medallion hanging from off the map next to the northern wall that surrounds the castle.
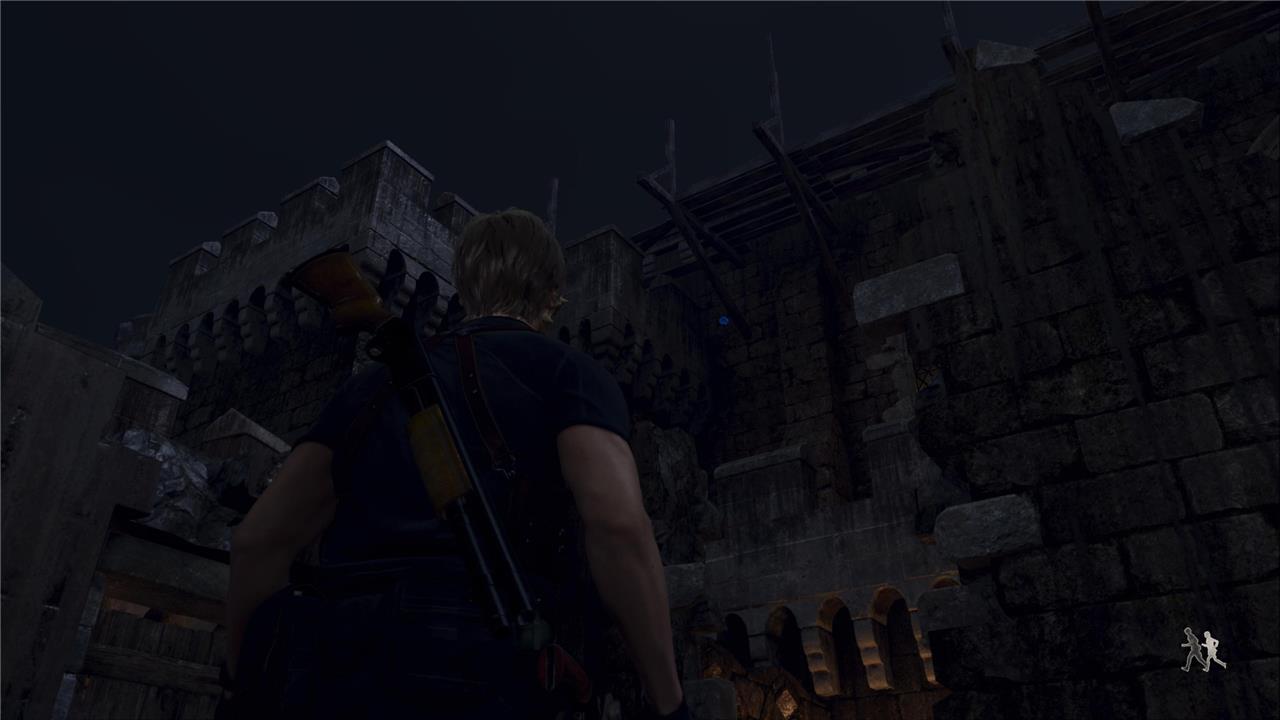
The second blue medallion is on a tiny window of the open room of that north area, where you find the enemy that has the parasite when you first step into the Castle Gate.
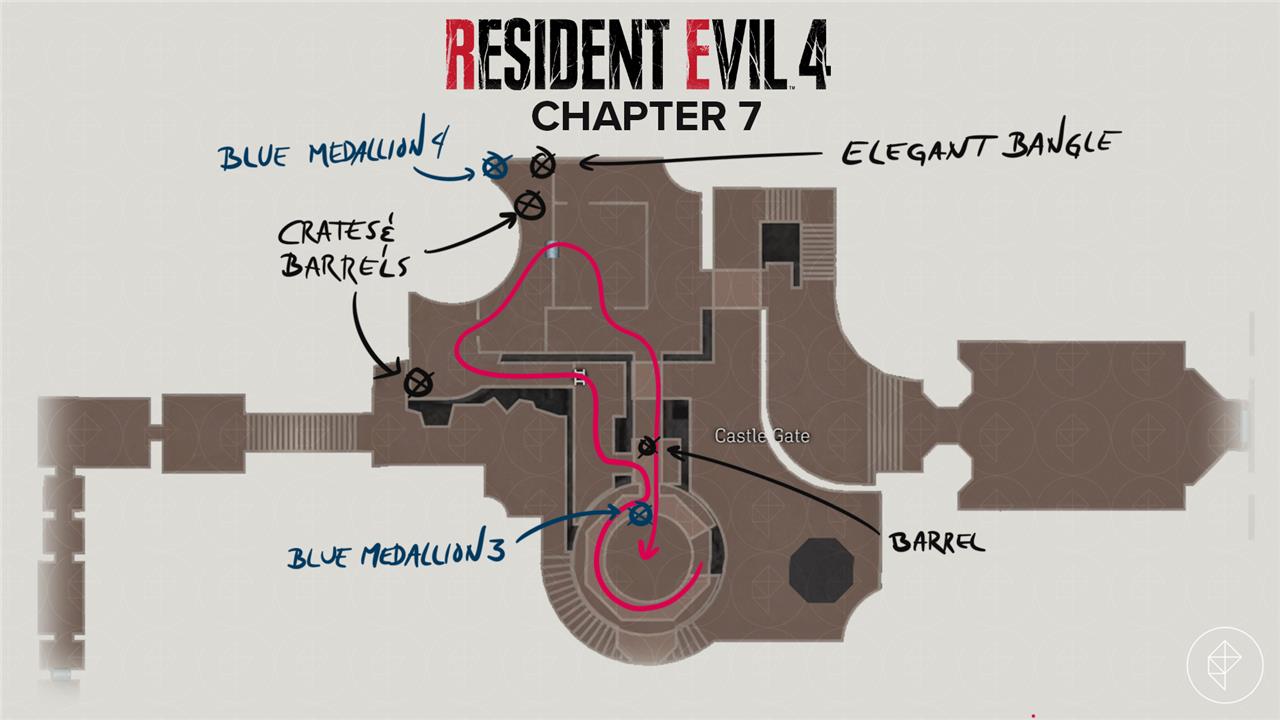
Without leaving that northern corner of the Castle Gate, head to the very northwestern corner to find the third blue medallion next to the treasure chest.
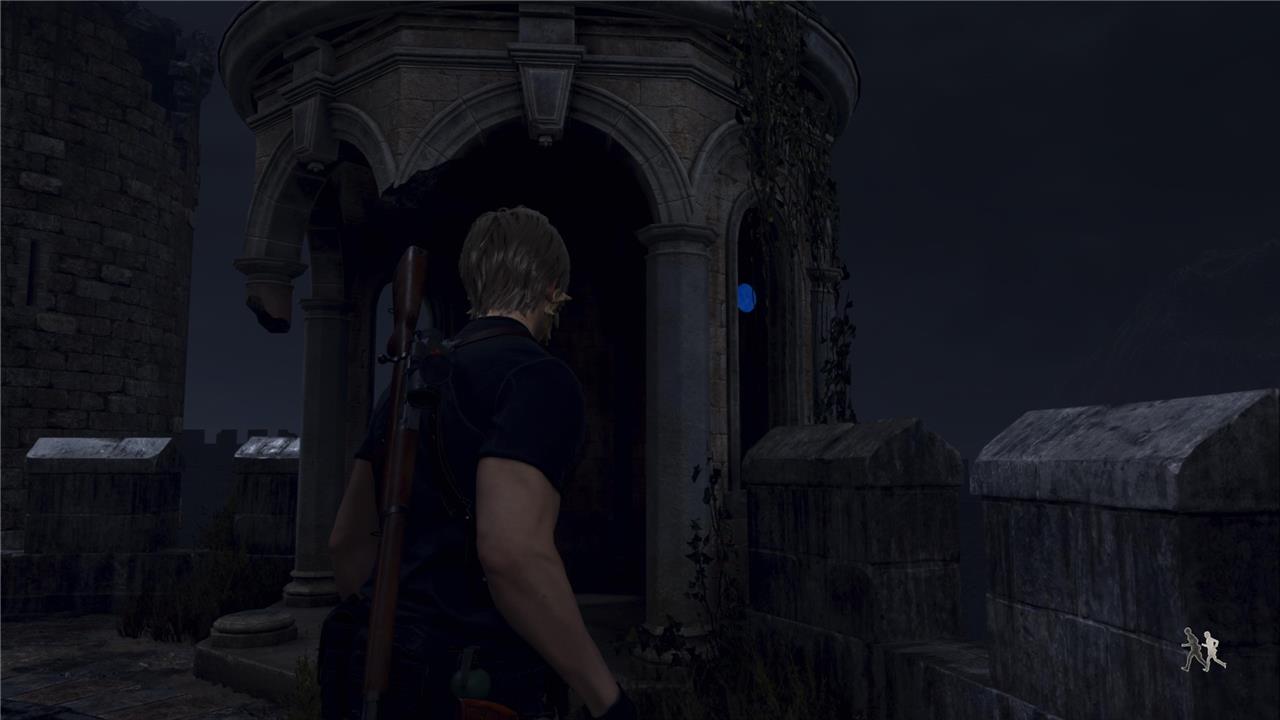
The fourth medallion is on the southern side of the Castle Gate area. If you’re looking at the map, it’s inside the destroyed shrine-looking structure that is next to the southern ledge of the castle. If you approach it from the right side, you’ll see the medallion hanging on that window that overlooks the outside area of the map.
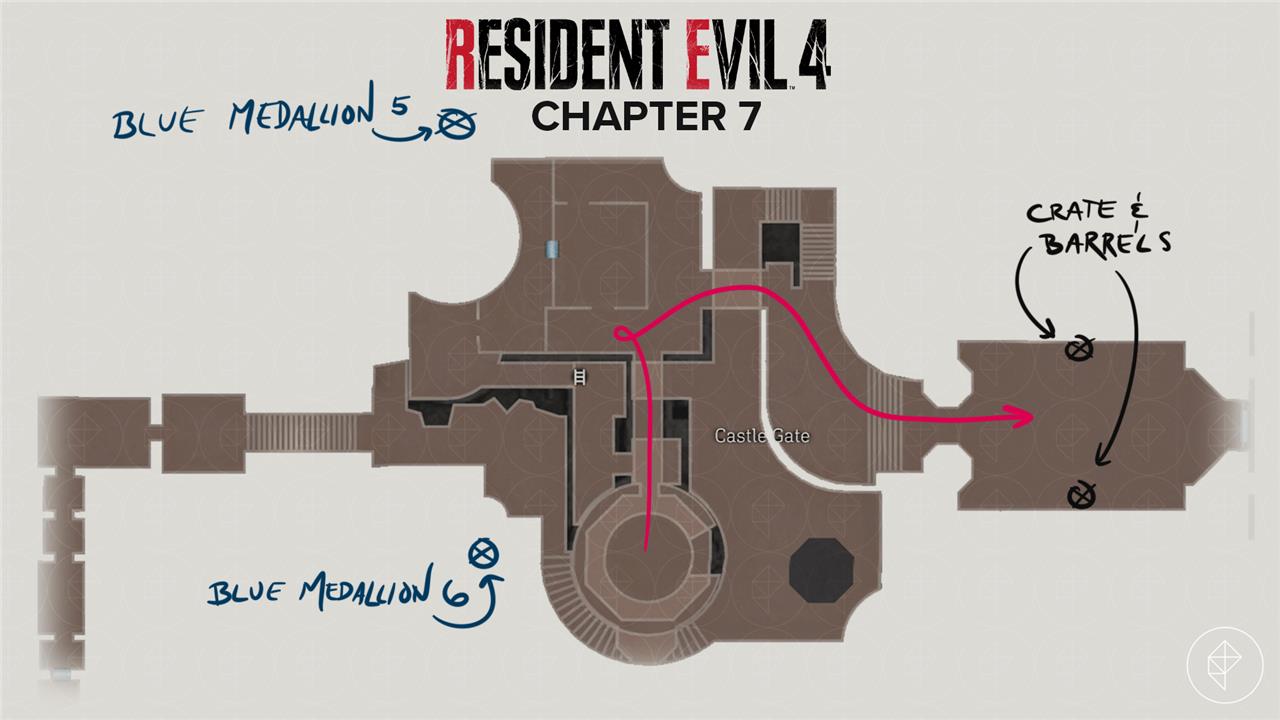
The fifth blue medallion is inside the room where you destroy the boulder entrapment that activates the cannon mechanism. You can destroy it by aiming at the western side of the room at ground level.
The sixth blue medallion is outside of the Castle Gate, found on the southwestern corner of the map. For this one, I recommend standing from where the ladder site in the middle of the area. Once you’re up on that balcony, aim southwest (using the map as reference) to find the medallion hanging from a tree. In the view, you’ll have a staircase on the left, a tower on the right, and the tree right in the middle.
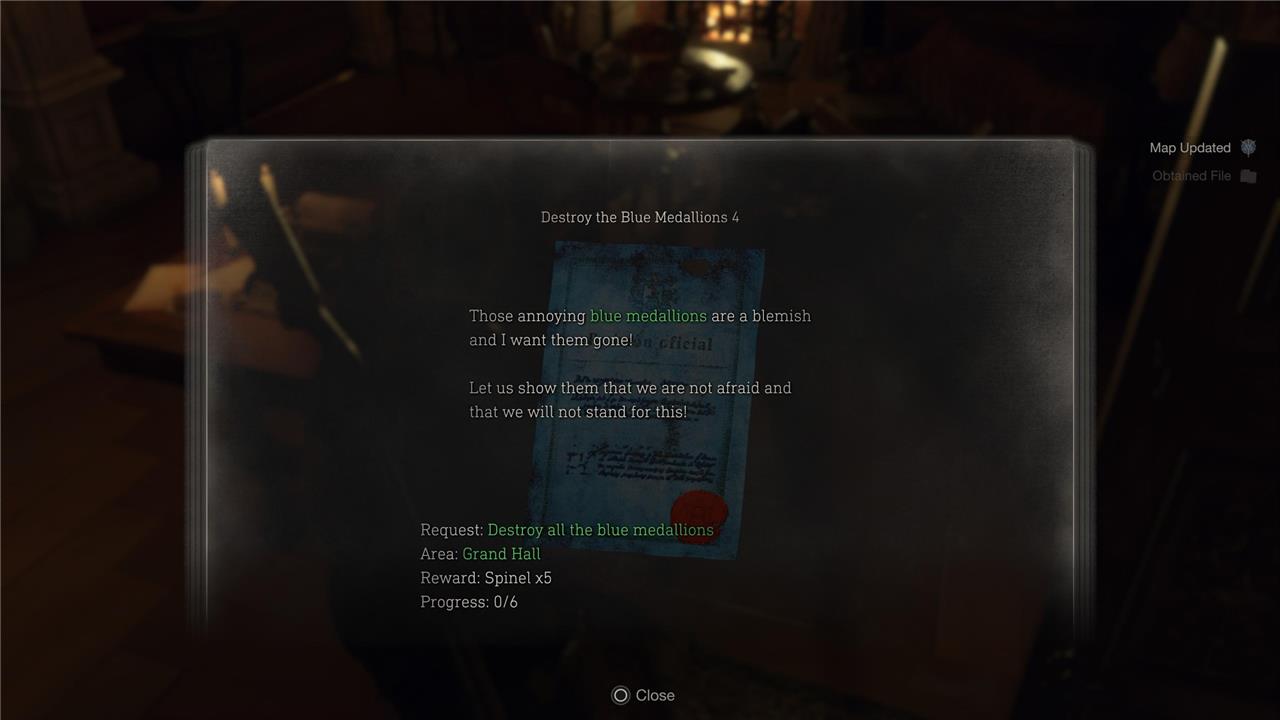
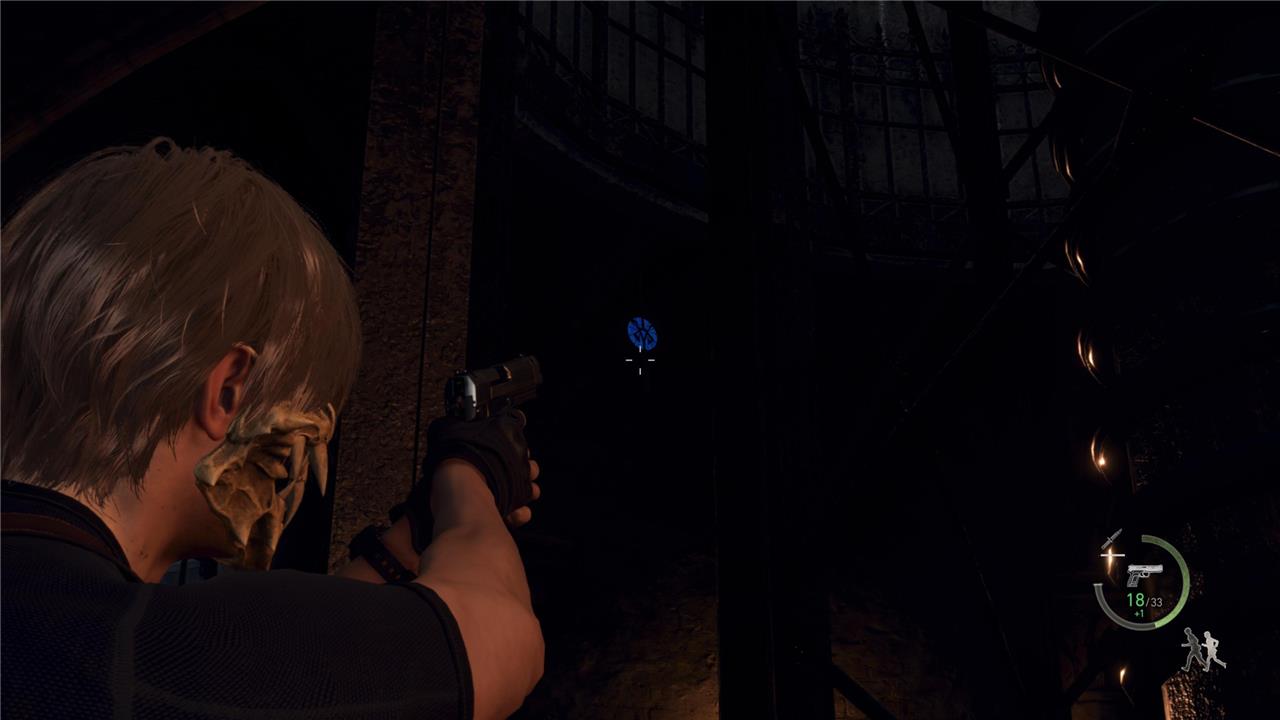
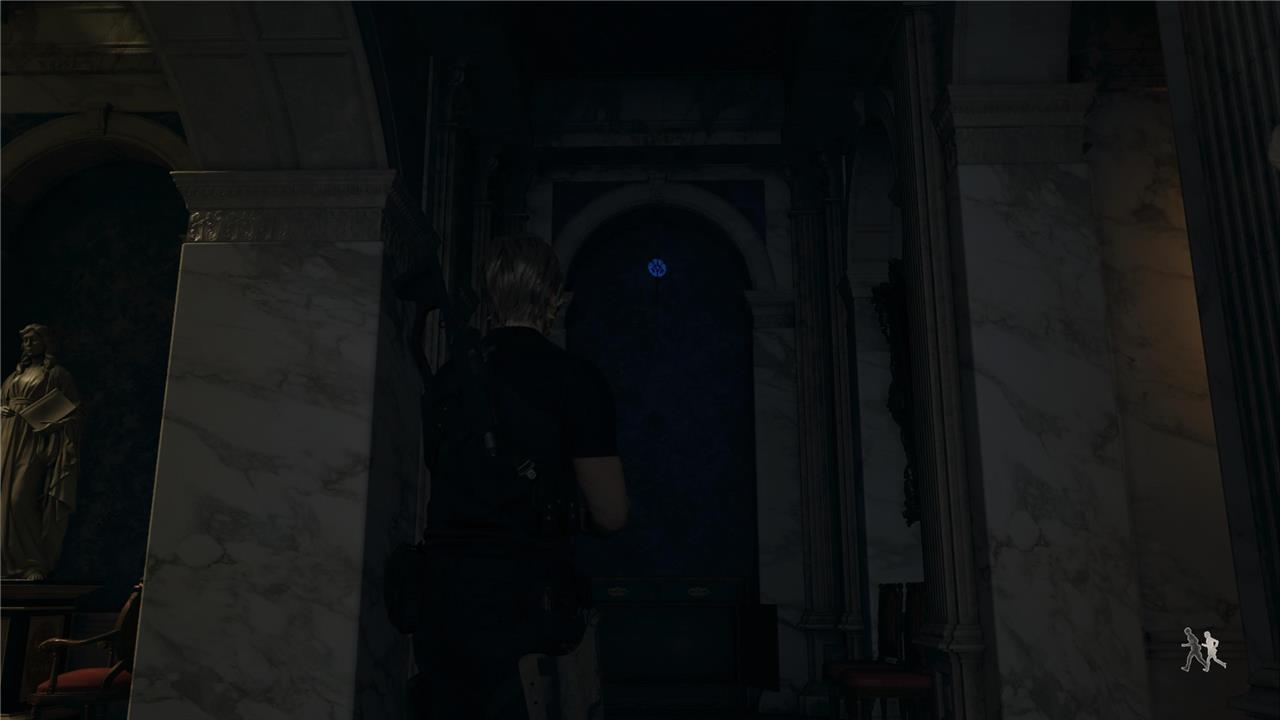
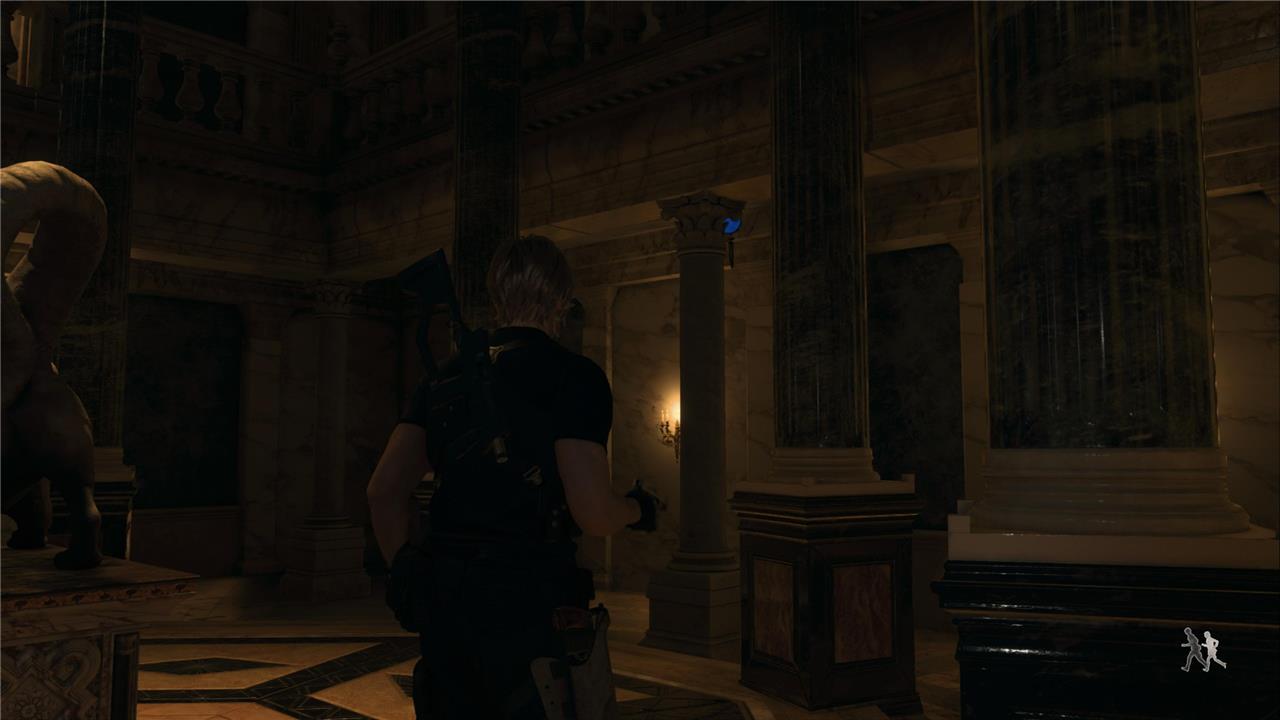
Blue Medallion grand hall locations (Destroy the Blue Medallions 4)
Several Blue Medallions are scattered throughout the Grand Hall area. One hangs from a chandelier above the main floor, another is fixed high on the western wall near the mounted animal heads, and a third can be found above the door leading to the Armory. In the small dining room connected to the hall, one Medallion is positioned above the large window, while the final one is outside on the terrace, visible through the broken railing.
Area: Grand Hall
Reward: Spinel x5
You’ll need: 6 medallions

The fourth batch of blue medallions is in the Grand Hall area of the castle. You can either tackle them during your first visit or at any point afterward, as long as you don’t head over to the clocktower in the main story, since you won’t be able to return.
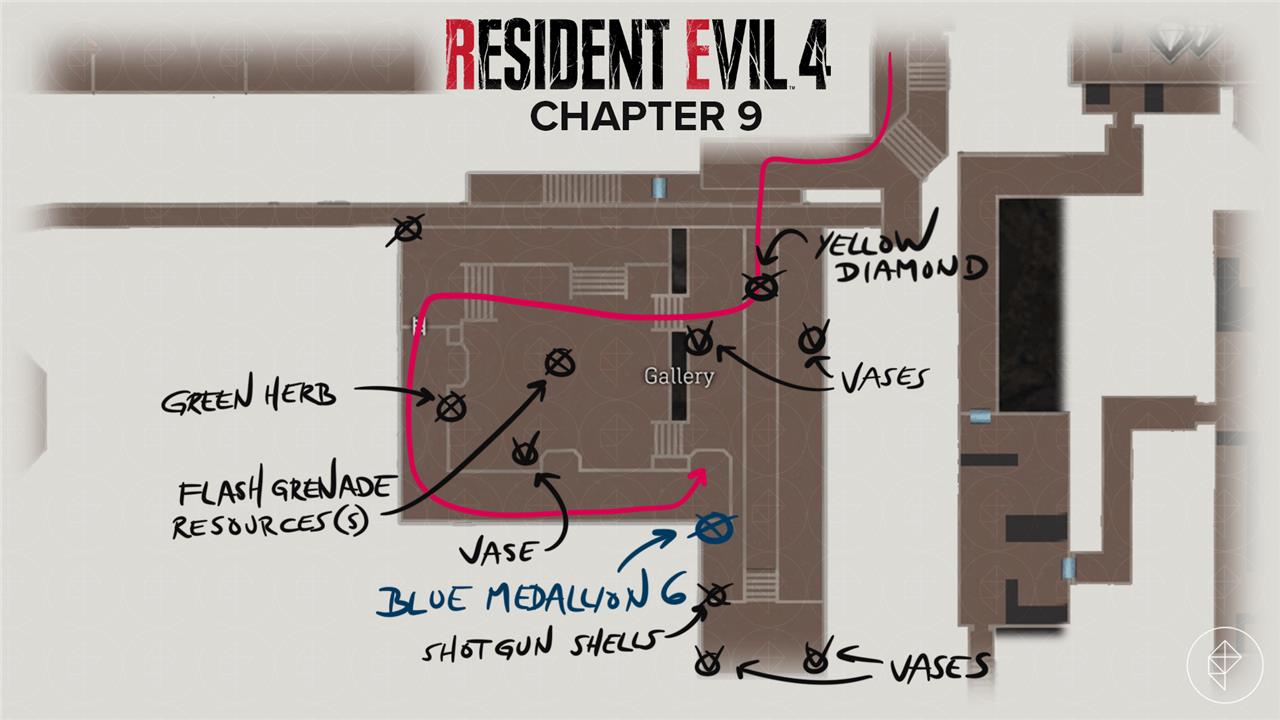
Starting from the western entrance to the Grand Hall, the first blue medallion is on that southern corner before you step into the hall itself, above the drawer with treasure inside.
The second blue medallion is on the far eastern side of the Castle Hall, behind the three-headed statue, hiding behind a pillar close to the eastern wall.
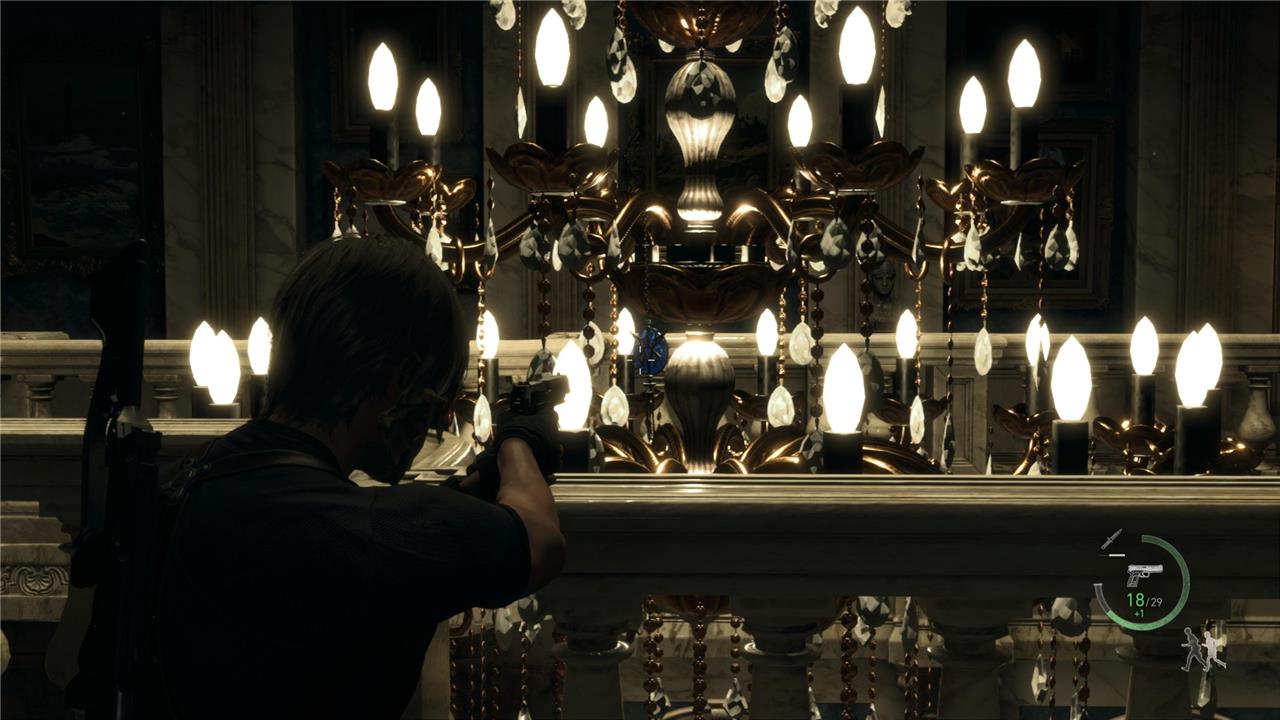
The third blue medallion is on the upper floor of the Grand Hall, hanging from the chandelier. You can get a clear view of it if you aim from the northern side towards the center of the room.
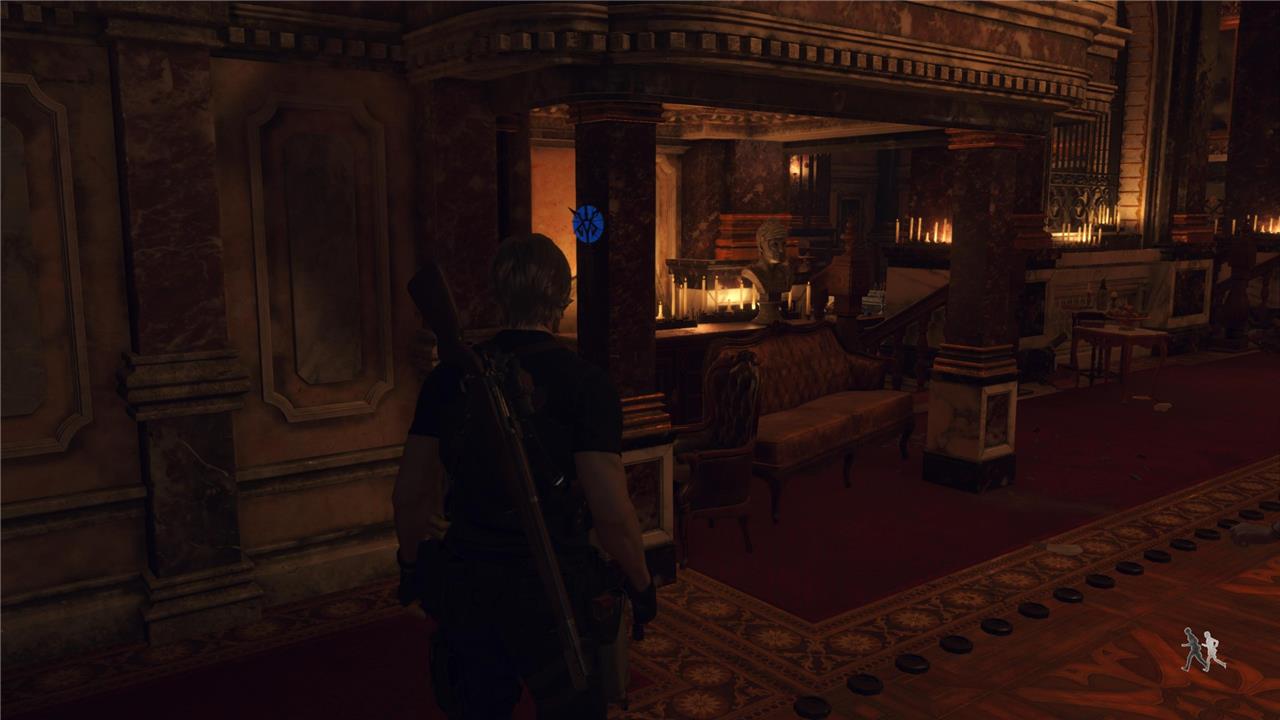
The fourth blue medallion is inside the Gallery area, which you’ll enter while searching for the three animal heads. Standing on the southern corner, look to your left to find the medallion hanging from a pillar.
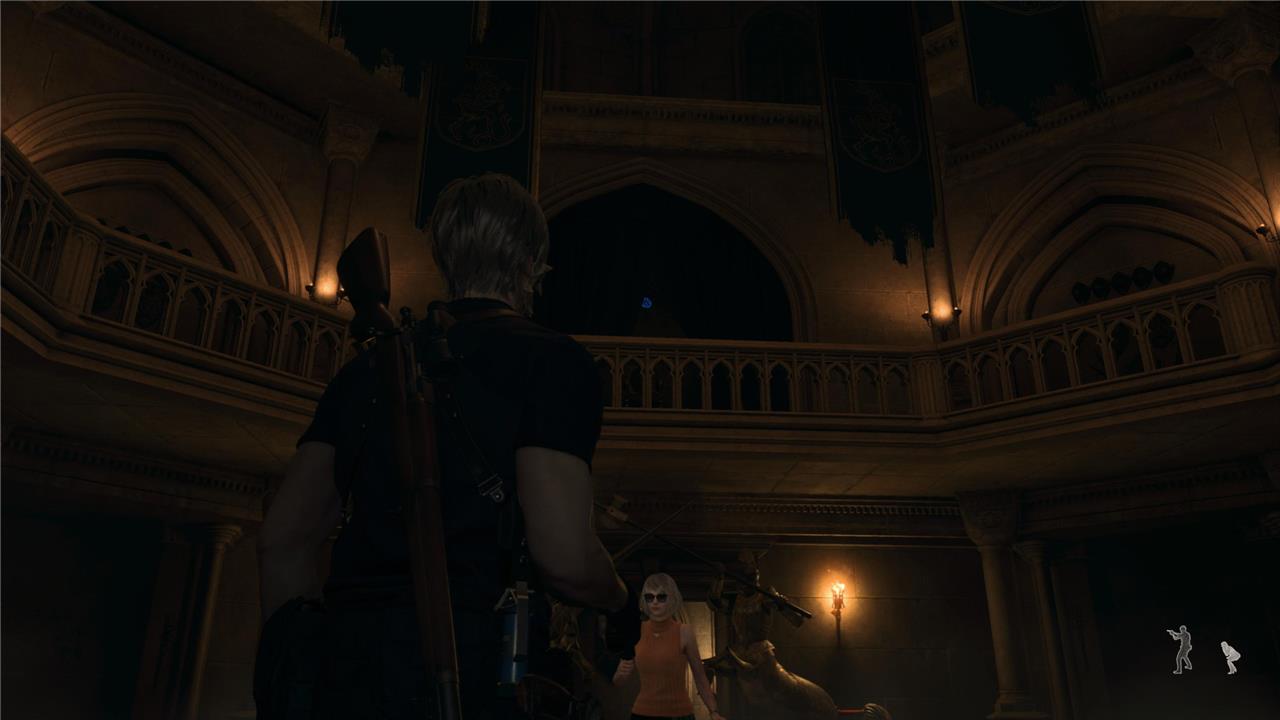
The fifth blue medallion is inside the Armory area. From ground level, after fighting the knights, aim at the southern side of the area (using the map as reference) and look above to find the medallion hiding in between the opened curtains.
The sixth blue medallion is inside the Dining Hall. Head over to the northeastern side of the hall itself, and aim at the window to find the medallion hidden in between the curtains.
More Pest Control
This request sends Leon back to the Farm and the Quarry areas, where new Blue Medallions have been placed for players to find and destroy. Check under walkways, on wooden beams, and near structures hidden by shadows or hanging from trees. Once all medallions are destroyed, the Merchant will reward you with valuable Spinels that can be traded for special gear, making it worth revisiting these familiar spots.
Area: Grand Hall and Library
Reward: Spinel x3
You’ll need: 3 rats
This request has two parts. You can kill the first two rats as you’re searching for the statue heads. I found one in the corridor that leads to the Armory, and the other one a few steps into the Dining Hall before turning the corner. As always, they’ll move around once you get close.
The third rat is inside the Library, and you can only get to it once Leon has access to it. I found it roaming around the corridor with the animal heads hanging on the walls. Remember to use closed caption subtitles to see the “[rats squeaking]” prompt so you don’t miss them.
Merciless Knight
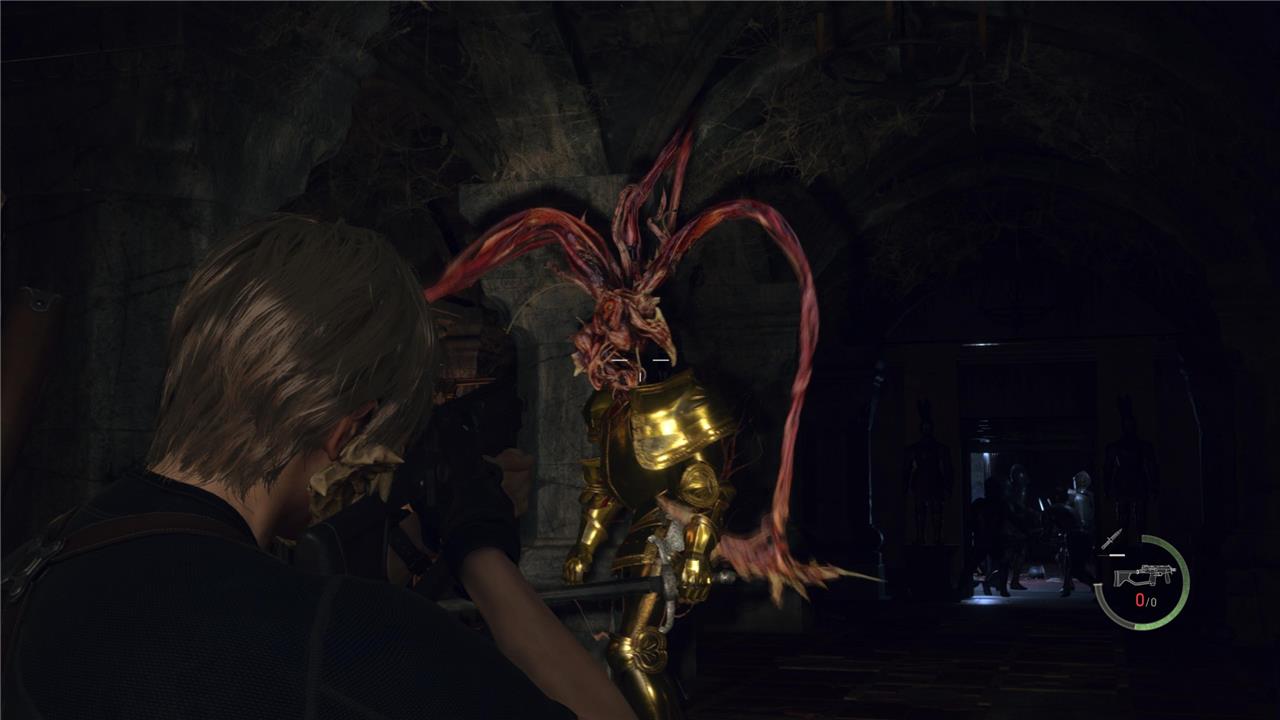
The Merciless Knight request is found in the castle section, accessible after reaching the Audience Chamber. You’ll find the target in the Mausoleum, surrounded by two armored knights that make the fight tougher. Use heavy weapons like the shotgun or rifle to break their armor, and aim for exposed weak points. Completing this request yields valuable rewards, so prepare healing items and strong ammo before entering the room.
Area: Mausoleum
Reward: Spinel x8
You’ll need: 1 golden knight
Similarly to “More Pest Control,” you first need to gain access to the Library section with Leon during the main story. Once you do, make all the way back to the Mausoleum to find the golden knight, who is accompanied by two regular ones.
The trick here is that it’s harder to expose the parasite inside the golden knight. I recommend taking care of the two companions first by either shooting them with a regular weapon and following up with a melee attack, or using your rifle to expose the parasite with a clean shot. Then, pop a quick shock grenade to take them down.
As for the golden knight, your best bet is to bait and switch the enemy to attack so you can parry. This is going to leave it sort of stunned for a brief moment, giving you the chance to go around and pop that parasite out. The attacks hit hard, but the usual encounter isn’t that different from the regular knights.
Insect Hive
The Insect Hive request appears in Chapter 11 and tasks players with shooting five Blue Medallions scattered across the Hive area. These medallions are tucked among the organic walls and hanging nests, often blending with the dark environment. Pay attention to the upper ledges and corners above the tunnels, as a few targets are positioned high up. Destroying all medallions completes the request and earns Spinels, which can be exchanged for valuable upgrades at the Merchant.
Area: Hive
Reward: Spinel x4
You’ll need: 4 hive entrances
Once you’re traversing the Hive with Luis after the cart rail sequence, the hive itself is located at the heart of the area. There is a request here that tasks you to shoot at four “hive entrances” around it. Basically, these look like beating orbs with a distinct yellow glow. They’re kind of disgusting, so it’s good we get to destroy them.
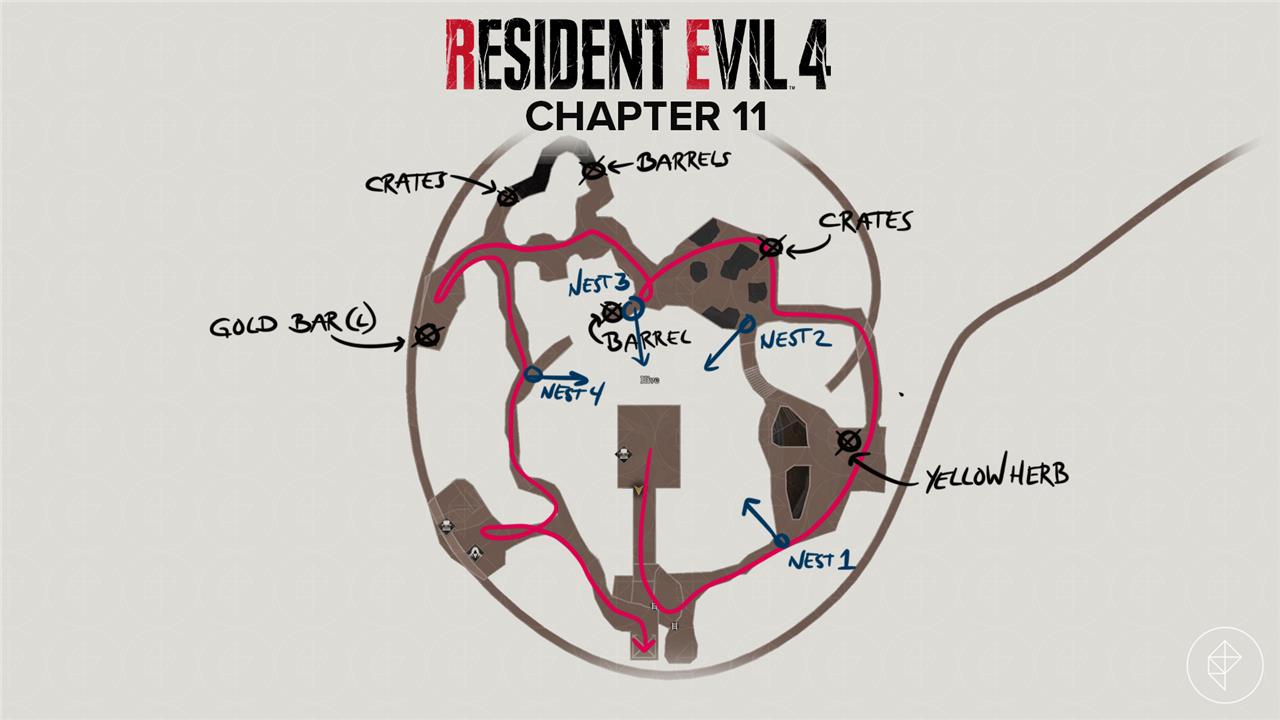
Considering that the rest of the hive is fairly monotonous in design, you won’t have a hard time finding the entrances. In summary, you’ll have a clean shot to the first one after you first emerge from the caves, the next two after the second, and the last one once you’re on the last stretch of that road before bumping to get to the elevator.
You’ll basically be going around the hive as you progress through the area – as long as you keep an eye on the hive, you’ll hardly miss them. In the worst case scenario, you can retrace your steps before leaving the hive.

Jewel Thief
The Jewel Thief request tasks Leon with tracking down a crow that has taken a valuable gemstone from the church. Players can find the culprit perched near the Quarry-Fish Farm area, where it drops the gem once defeated. Bring the recovered item to the Merchant to complete the request and earn a reward for your effort.
Area: Courtyard
Reward: Spinel x3
You’ll need: 1 Scratched Emerald
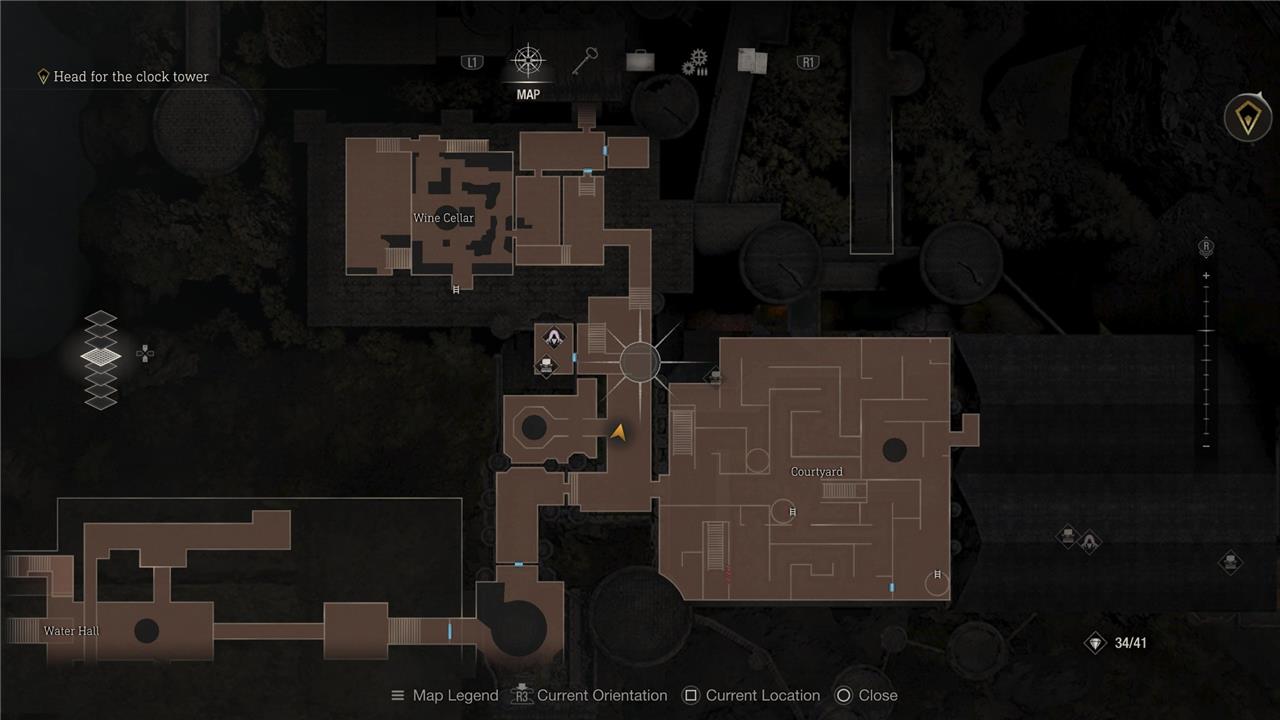
This request can be completed as soon as you gain access to the Courtyard area. It tasks you with finding a crow’s nest in the courtyard itself, but the trick here is that it’s outside of the maze itself.
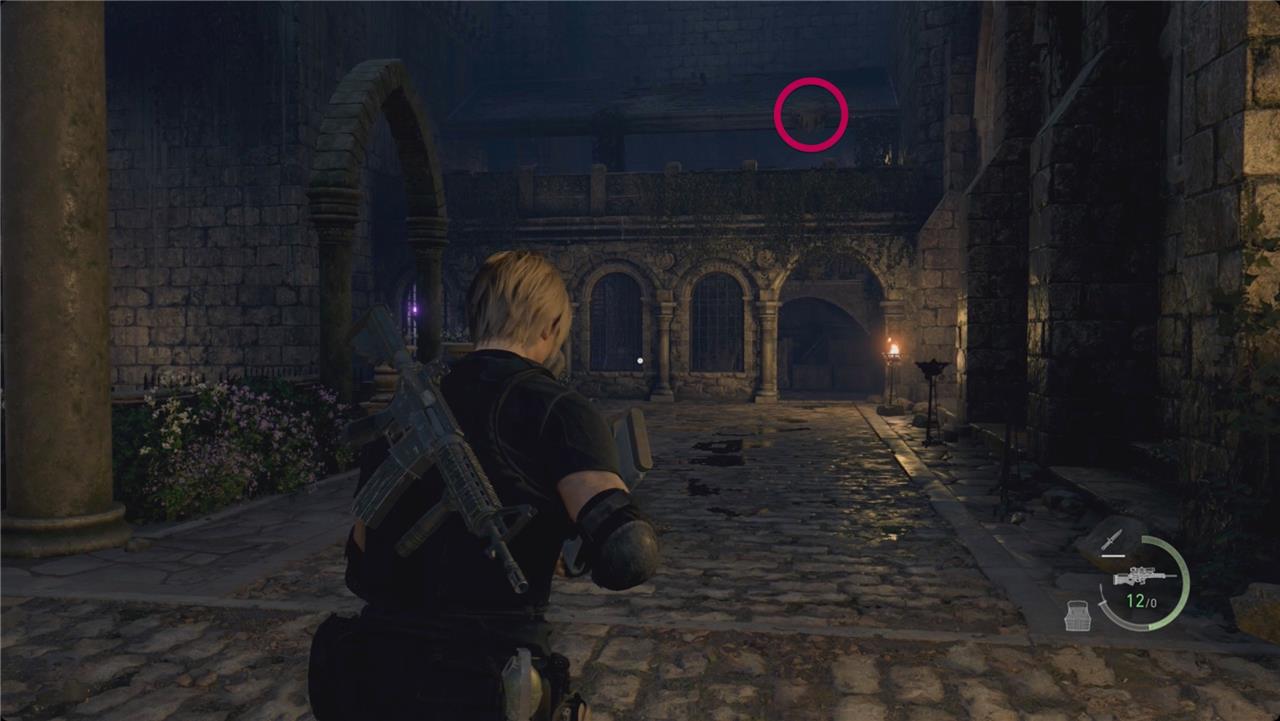
After the merchant’s shop, stand in the same line as the road that leads to the fountain on the western side of the corridor (using the map as reference). Aiming north, look above the bridge to find the nest. Shoot it down with any long-distance weapon you have, and the Scratched Emerald will fall down to the ground. You can then go ahead and take a few steps back into the shop to sell it and complete the request.
The Disgrace of the Salazar Family
The Salazar family’s legacy has crumbled under centuries of corruption and twisted ambition. Ramón Salazar, once a noble heir, turned his ancestral home into a breeding ground for the Las Plagas parasite, serving the sinister cult that ruined his lineage. Players exploring the castle will see how pride and blind devotion transformed the family’s fortune into a nightmare, leaving behind cryptic relics and cursed halls that reflect their fall from grace.
Area: In the Castle’s Throne Room
Reward: Spinel x4
You’ll need: Hit Ramon’s portrait with “something”
You can complete this request once Leon is back in the castle after his ventures underground. Head over to the Throne Room all the way east of the castle, where you’ll find some conveniently placed chickens around. Loot any of the eggs, take time, and throw it to Ramón’s portrait, which is found on the left wall. There is also a gold chicken egg here, which you keep to sell it to the merchant later.

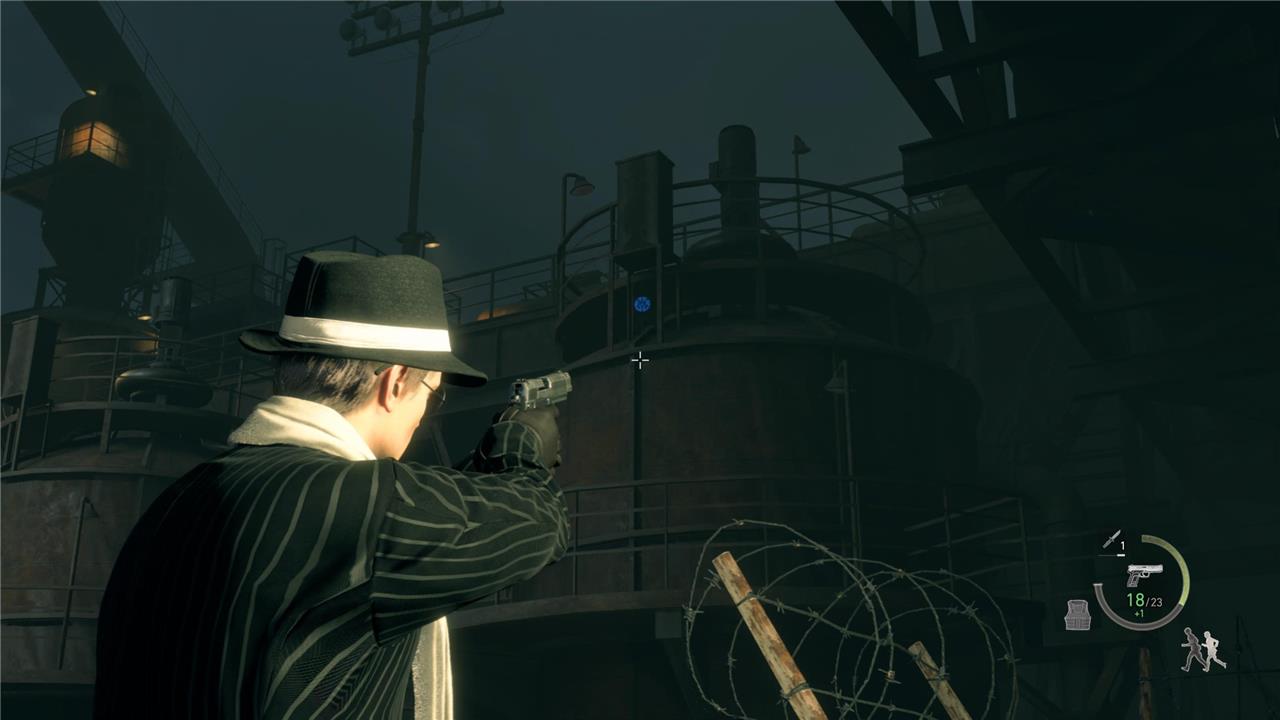
Blue Medallion cargo depot locations (Destroy the Blue Medallions 5)
Blue Medallion cargo depot locations in Destroy the Blue Medallions 5 include ramps at the central yard near the storage cranes, a fenced lot adjacent to the maintenance building, and a compact behind-the-wall area behind the east hangar, each offering distinct routes and cover for efficient looting.
Area: Cargo Depot
Reward: Spinel x5
You’ll need: 5 medallions
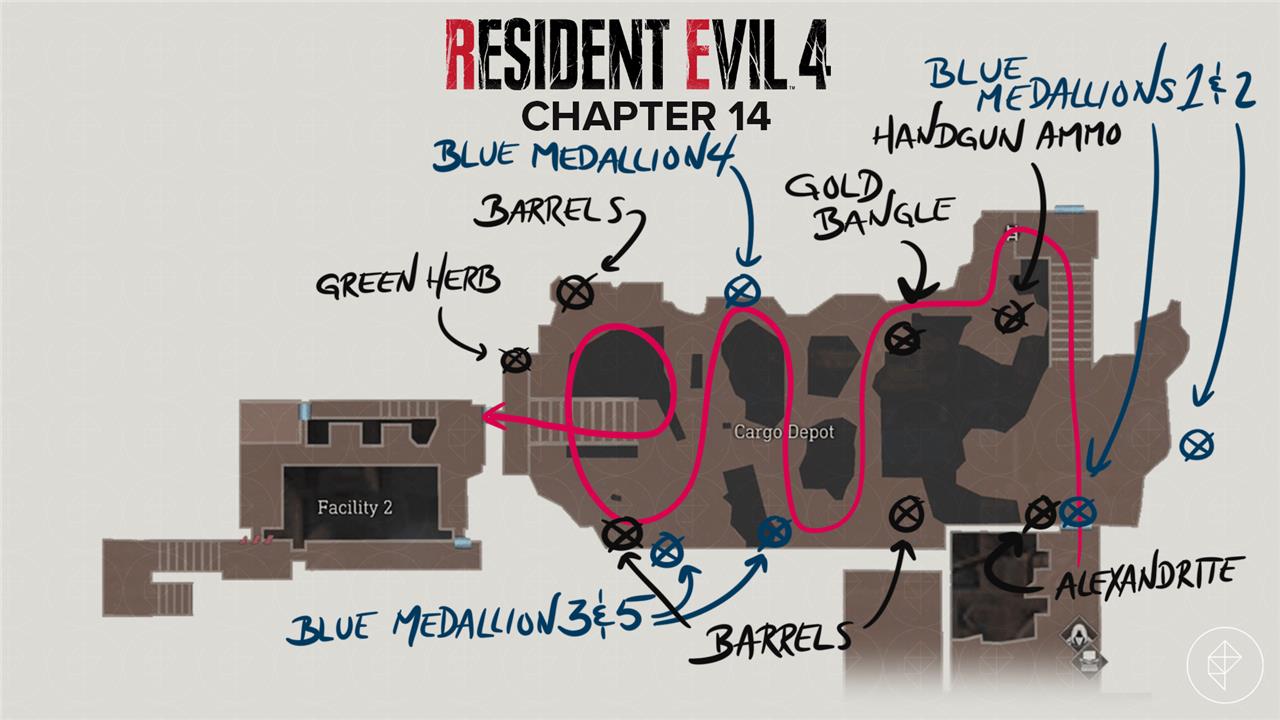
I recommend tackling this one as soon as you’re able to explore the Cargo Depot area, since you can get all of them before even entering into the main area itself. You can grab them afterwards, of course, just make sure not to head over to the summit as you’ll eventually get locked out once That One Character appears to confront Leon.
Starting from the door right after the merchant shop as a reference point, the first blue medallion is outside the map, hanging to the left of the lone fuel tank that is on the eastern side while looking at the map.
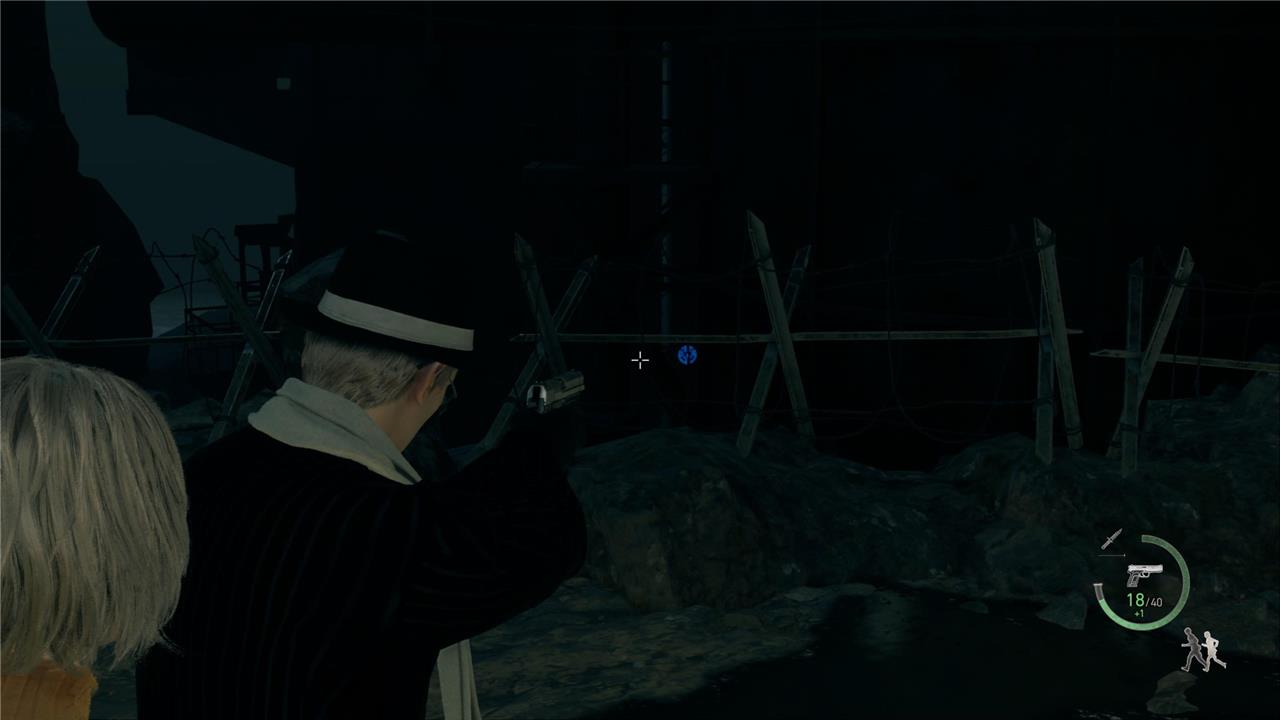
The second blue medallion can be shot at as soon as you go up the first stairs that you come across in the Cargo Depot, before falling to the other side to continue your way forward. Once there, turn around and aim towards the large structure from where you just came from. If you look above, the medallion is hanging from underneath a pathway.
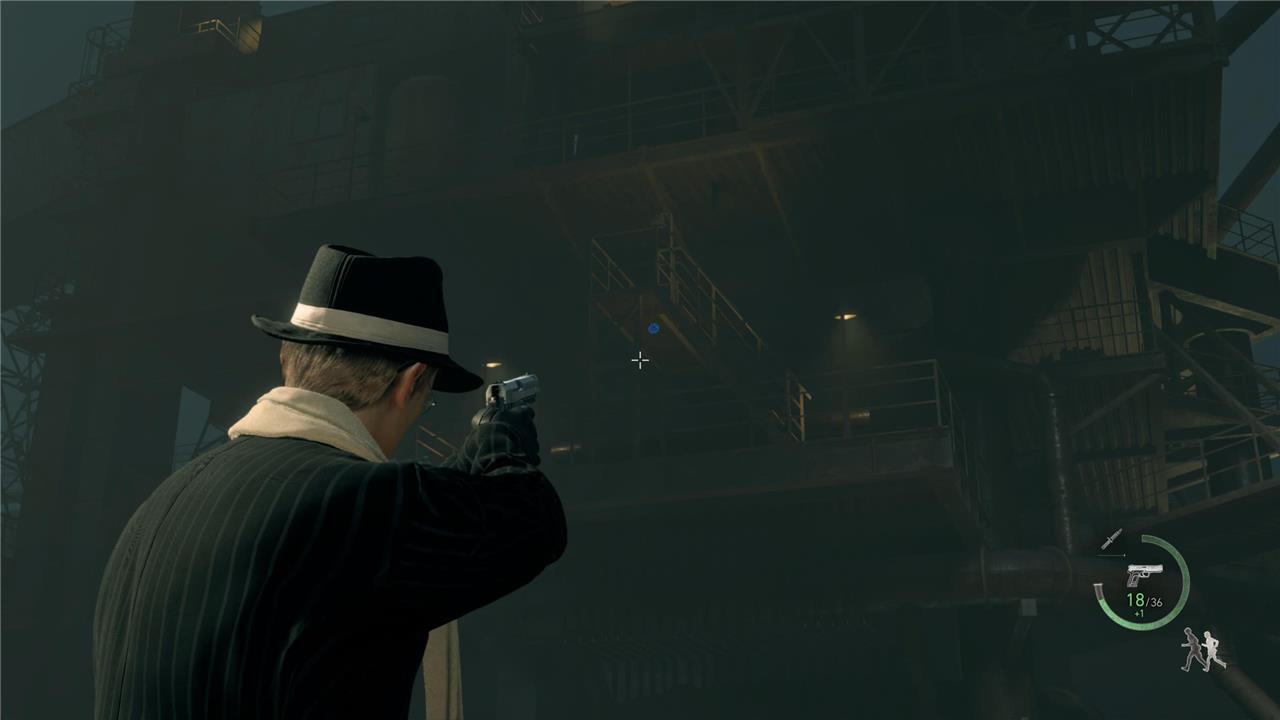
The third blue medallion is on your way to the main staircase, as you’re traversing the containers and fighting with the enemies there. In the southern corner of the area, using the map as reference, you’ll see the medallion next to a red container.
The fourth medallion is also in the same area, this one located close to the northwestern corner of the map, next to some cages with bags inside.
The fifth blue medallion can be shot as soon as you go up the staircase from the Cargo Depot area before heading to the main area where the objective is. As soon as you’re on the surface, aim at the southern side of the map to find the medallion hanging from a fuel tank in the distance.
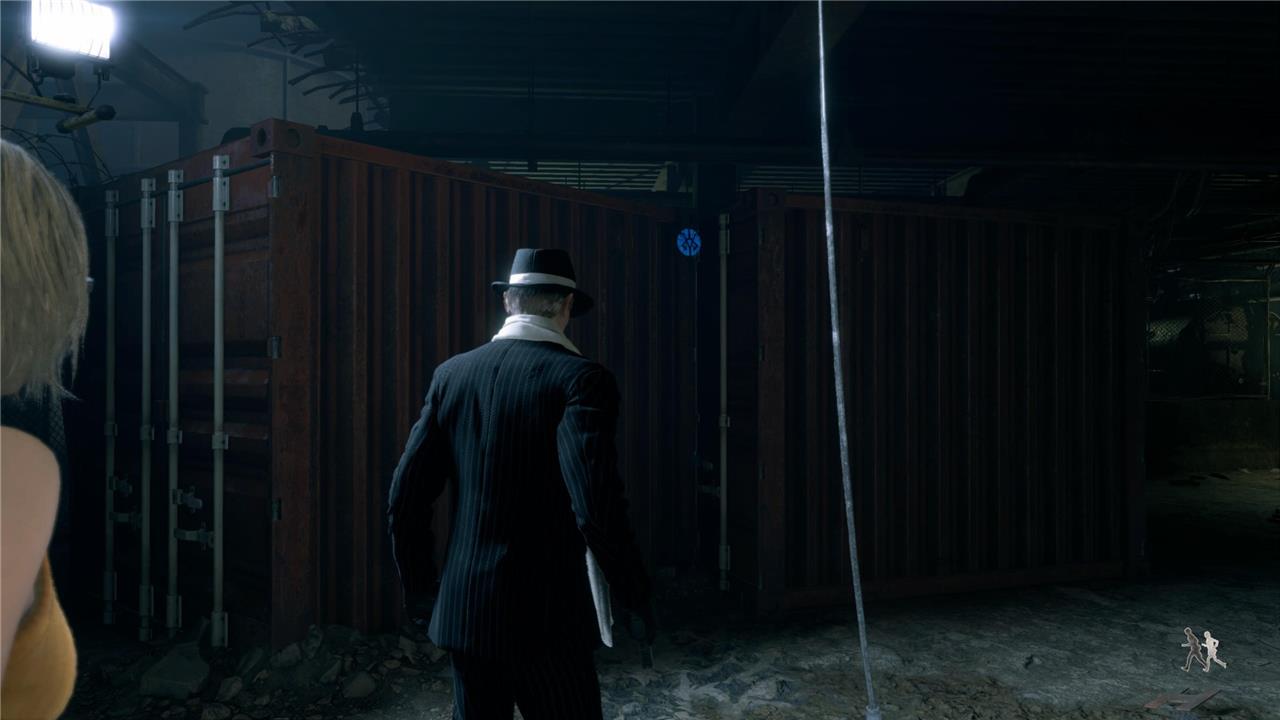
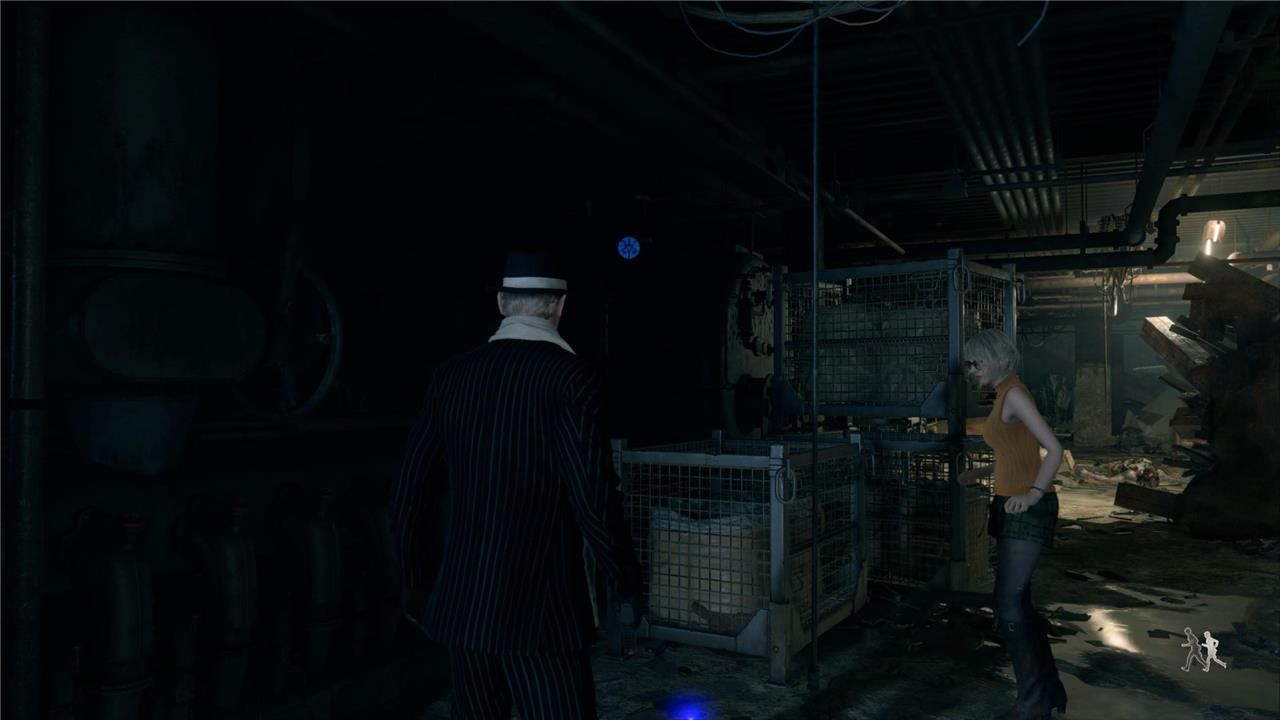
Even More Pest Control
This request tasks Leon with clearing out more vermin around the castle grounds. You’ll find rats scurrying near the Grand Hall and in the corridor leading toward the Armory. Make sure to listen for their squeaks-they blend in easily with the dim environment. Equip a handgun or knife to deal with them quietly, and check corners or dark spots where they tend to hide. Completing this earns you more Spinels from the Merchant for valuable upgrades.
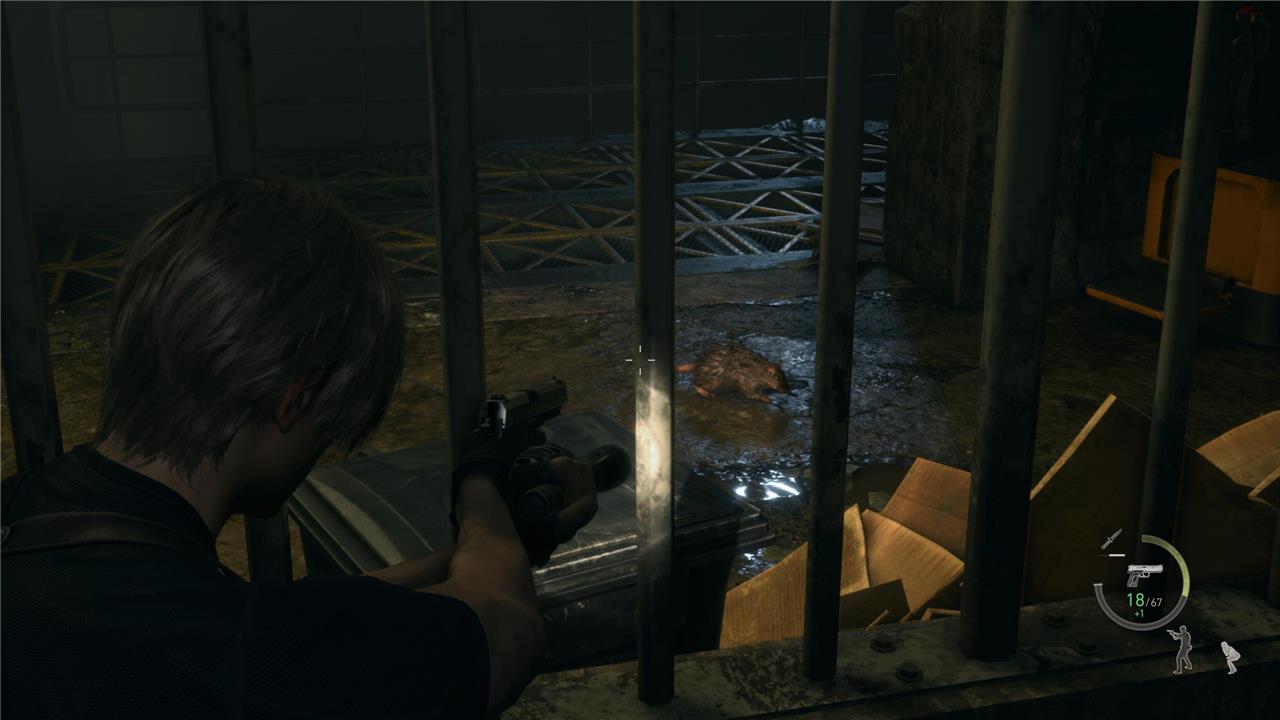
Area: Waste Disposal
Reward: Spinel x3
You’ll need: 4 rats
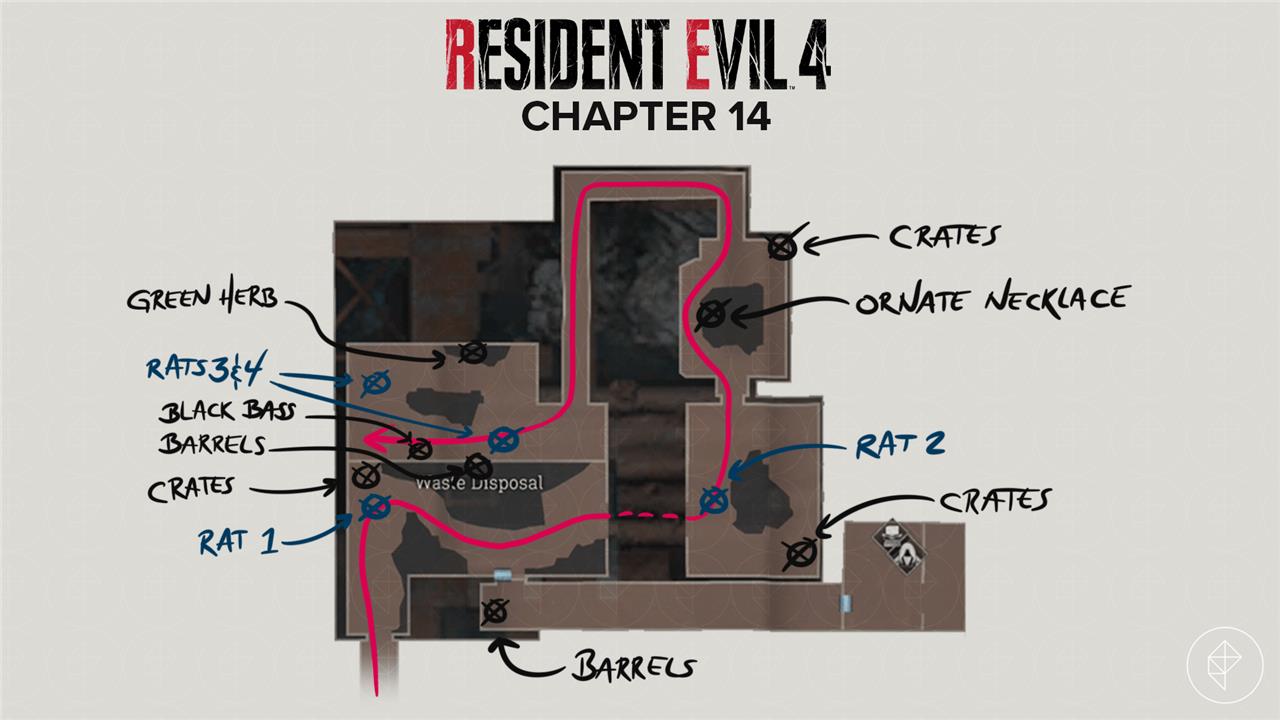
As you’re roaming the Waste Disposal area with Ashley, you’ll encounter four rats, one in each of the sections of the map itself. The room will quickly turn into chaos after Leon makes it to the other side, so I recommend just keeping an eye on the floor and taking the rats one by one as you’re making progress.
By this point you should have the infrared scope, which can be helpful to track them down. Once more, remember to use closed caption subtitles to see the “[rats squeaking]” prompt so you don’t miss them.
The Wandering Dead
The Wandering Dead request appears in the Village area and tasks players with eliminating a powerful armored enemy lurking in the quarry. This enemy moves slowly but can withstand a lot of damage, so bring heavy firepower or explosives to bring it down quickly. Completing the request rewards valuable treasures and contributes to your progress toward completing all merchant tasks in the area.
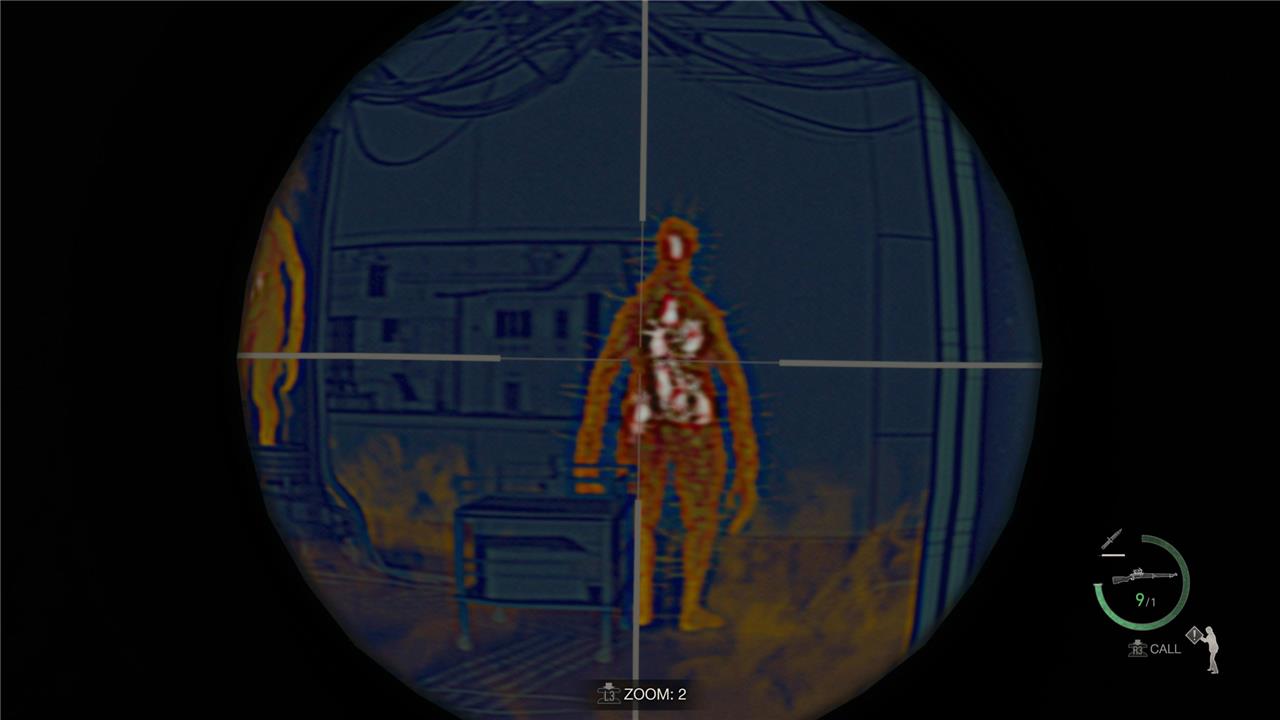
Area: Incubation Lab
Reward: Spinel x8
You’ll need: 1 rare regenerator
Regenerators are scary enough on their own, but the one needed for The Wandering Dead request is even more fucked up. After you’ve completed that whole section, you’ll stumble upon a request to return to the Incubation Lab, which is the room with all the regenerators floating inside the tubes.
Once you’re there, you’ll see a different regenerator, which is akin to the one in the original that had spikes on its body. The trick with this one is that, if you fail to hit one of its weak points, it’s going to automatically counterattack with a flurry of spikes. For this, I recommend using the infra-red sensor, and keeping your distance as much as possible.
In my experience, I didn’t have to take down the weak point inside its head. Instead, I destroyed all the parasites in the body – there are plenty of them, but some shots can take care of two at once. Lastly, don’t rely on grenades or other explosives, as you will end up destroying the incubation tubes around you and have even more regenerators to deal with.
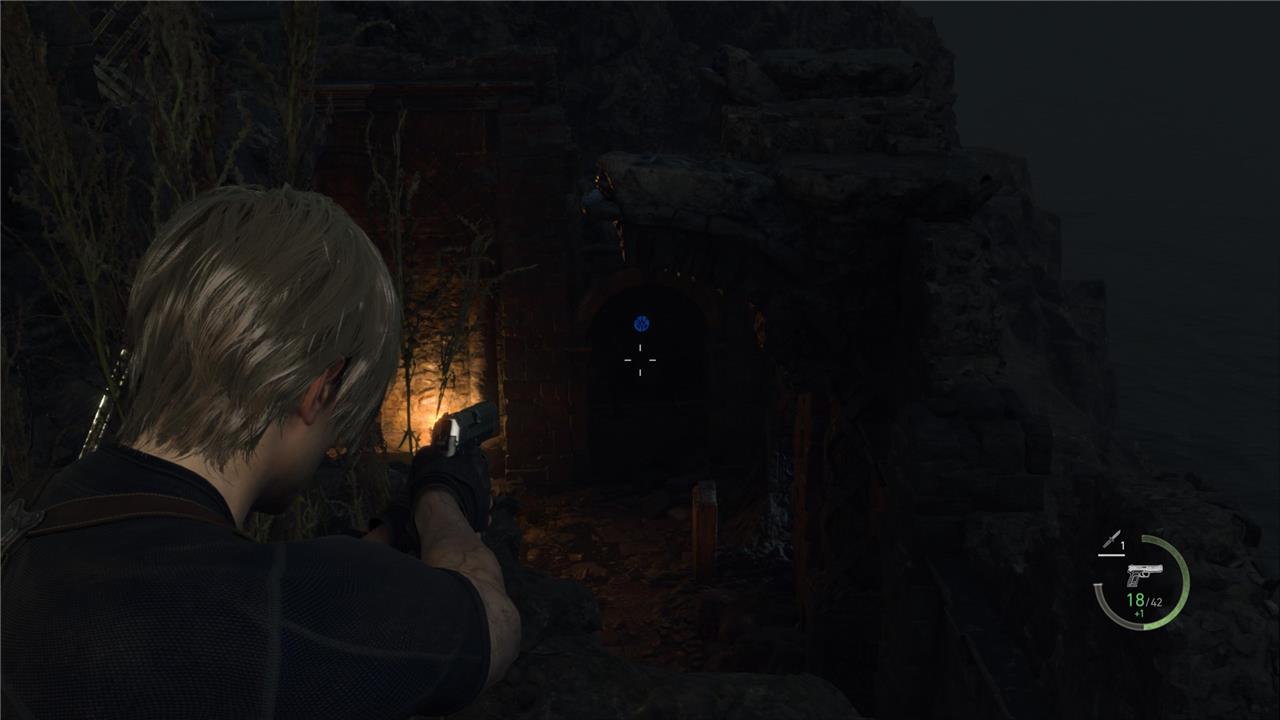
Blue Medallion cliffside ruins locations (Destroy the Blue Medallions 6)
Several Blue Medallions are scattered across the Cliffside Ruins area, hanging from stone archways, wooden structures, and cliff edges near the water. Check behind the broken shrine walls, above the narrow pathways, and around the boat dock before leaving. Some are placed high up, requiring a rifle or precise handgun aim to hit them from a distance. Scanning the area carefully before advancing helps ensure none are missed.
Area: Cliffside Ruins
Reward: Spinel x5
You’ll need: 5 medallions
The sixth batch of blue medallions is in the Cliffside Ruins area of the island. You can either tackle them during your first visit or at any point afterward, as long as you don’t head over to the summit after going through the Specimen Storage, otherwise you’ll miss them in this playthrough.
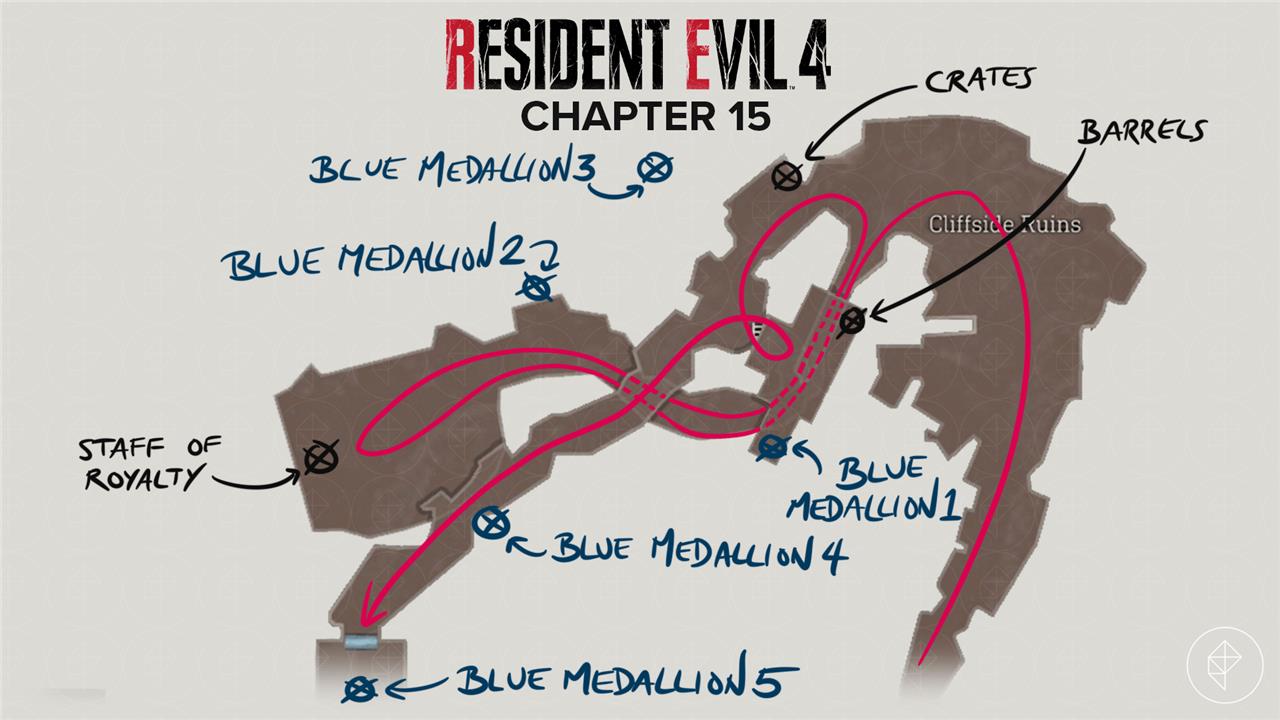
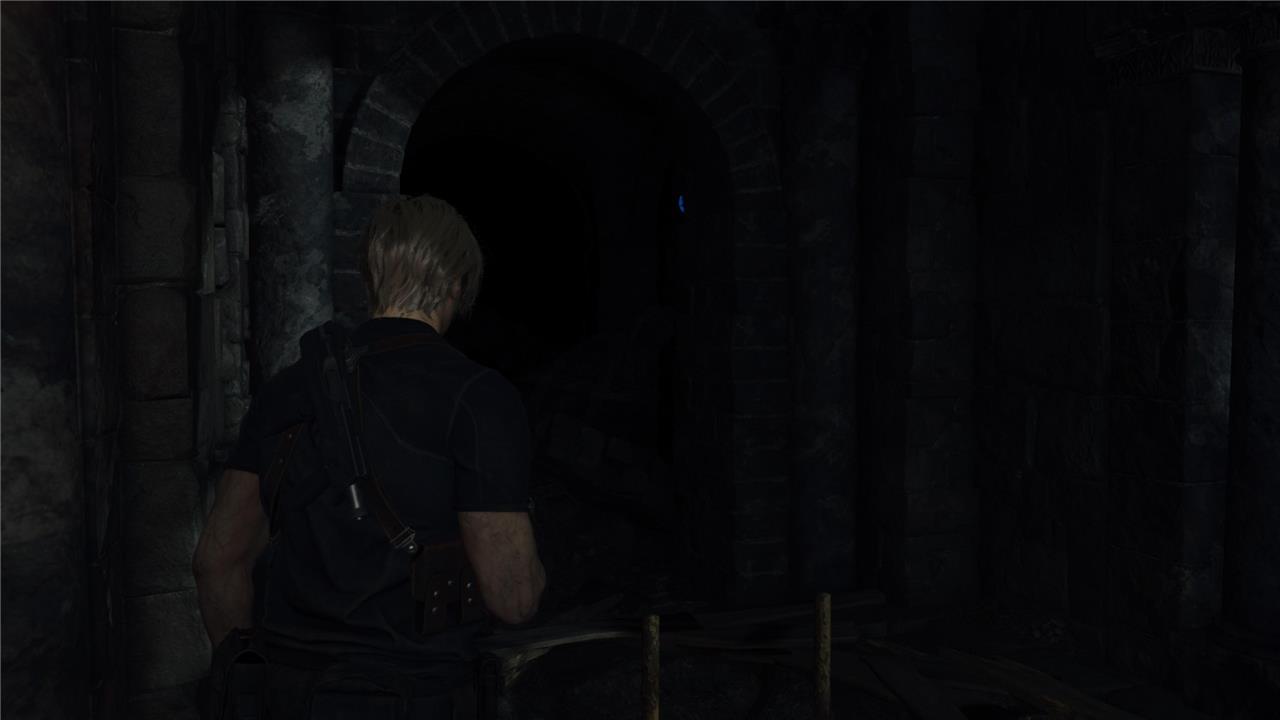
Starting from the eastern side of the Cliffside Ruins, you can find the first blue medallion hanging right at the entrance to the underground passage.
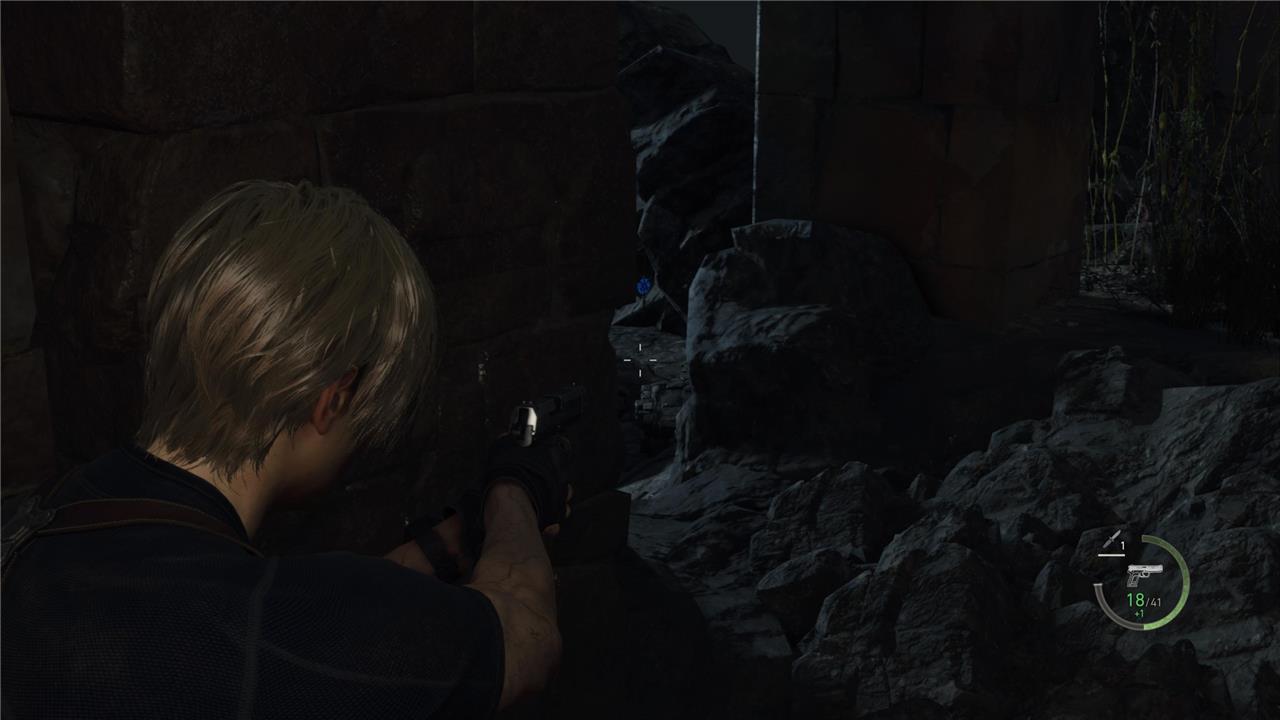
The second blue medallion can be shot at from the underground area of the Cliffside Ruins, aiming towards the outside part of the map up north, in between two pillars and next to the rocks off site.
The third blue medallion is hanging to the left side of the loose pathway that takes you to the other side of the ruins.
The fourth blue medallion can be found after using the ladder present in the area. Once you’re at the top, aim southwest (using the map as reference) and move to the left until you see the medallion behind the right side of the door.
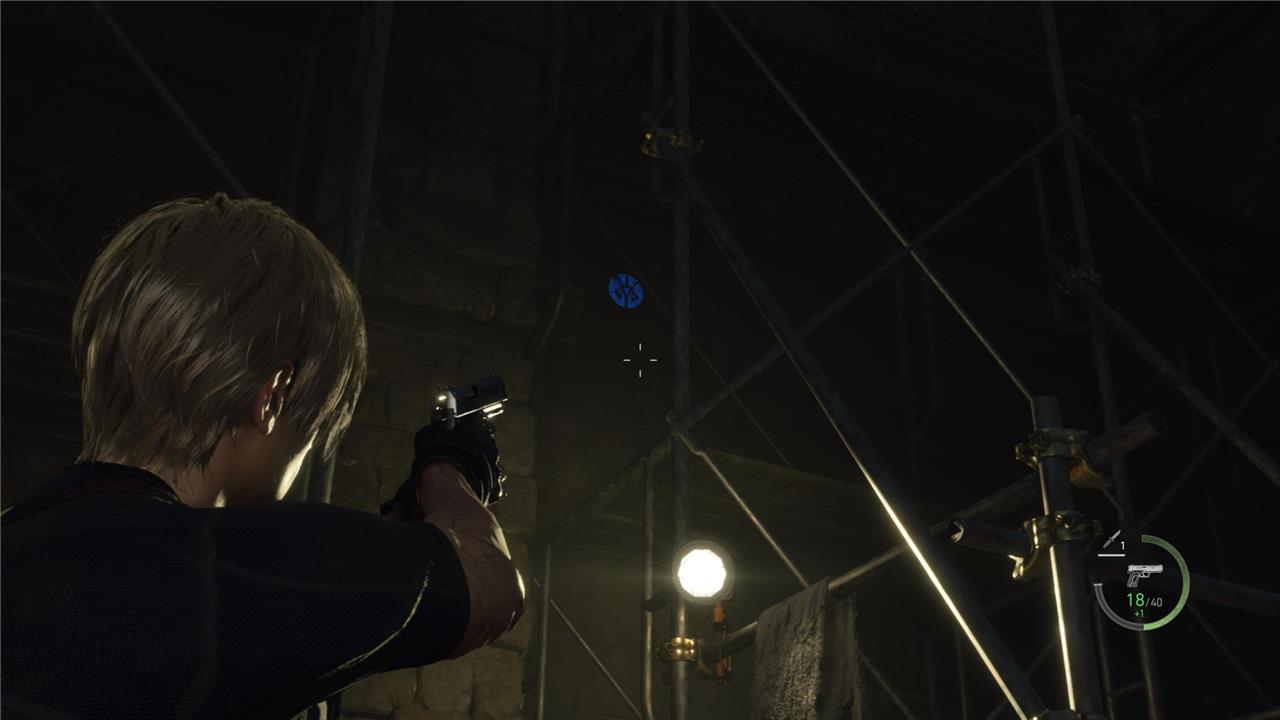
The fifth blue medallion is hanging on the tower that is at the top of the Specimen Storage building. Before you head down towards it, look above and use your rifle to take it down.
All Merchant Requests locations and rewards in RE4 Remake
Resident Evil 4 Remake features 19 Merchant Requests, optional side tasks that reward Spinels for trading exclusive items like treasure maps and upgrades. Completing all unlocks the “Jack of All Trades” achievement; return to any merchant after each to claim rewards.
Village Requests (Chapters 1-5)
These early tasks focus on medallions, pests, and hunts in the Village area.
| # | Name | Chapter | Location | Reward |
|---|---|---|---|---|
| Destroy the Blue Medallions 1 | Farm | 3 Spinels | ||
| Pest Control | Abandoned Factory (3 rats) | 3 Spinels | ||
| Viper Hunter | Town Hall (sell 3 vipers) | 4 Spinels | ||
| Grave Robber | Church graveyard | 2 Spinels | ||
| Destroy the Blue Medallions 2 | Quarry & Fish Farm | 4 Spinels | ||
| Egg Hunt | Mural Cave (sell Gold Chicken Egg) | 3 Spinels | ||
| Catch Me a Big Fish | Lakeside Settlement (catch Lunker Bass) | 4 Spinels | ||
| A Savage Mutt | Town Hall (marked on map) | 8 Spinels |
Castle Requests (Chapters 7-12)
Mid-game requests involve more medallions, rats, knights, and portraits in the Castle.
| # | Name | Chapter | Location | Reward |
|---|---|---|---|---|
| Destroy the Blue Medallions 3 | Castle Gate | 5 Spinels | ||
| Destroy the Blue Medallions 4 | Grand Hall | 5 Spinels | ||
| More Pest Control | Grand Hall (3 rats) | 3 Spinels | ||
| Merciless Knight | Grand Hall (specific knight) | 8 Spinels | ||
| Insect Hive | Hive area (destroy hive) | 4 Spinels | ||
| Jewel Thief | Ballroom (recover emerald) | 3 Spinels | ||
| The Disgrace of the Salazar Family | Ballroom (destroy portrait) | 4 Spinels |
Island Requests (Chapters 14-15)
Late-game tasks target medallions, rats, and undead in the Island facilities.
| # | Name | Chapter | Location | Reward |
|---|---|---|---|---|
| Destroy the Blue Medallions 5 | Facility Storage | 5 Spinels | ||
| Even More Pest Control | Cargo Depot (3 rats) | 3 Spinels | ||
| The Wandering Dead | Cargo Depot (specific zombie) | 8 Spinels | ||
| Destroy the Blue Medallions 6 | Cliffside Ruins | 5 Spinels |
Total Spinels: 84. Requests are missable if areas lock post-chapter, so tackle them promptly; maps mark objectives after pickup.
How to complete Pest Control rat locations in Chapter 2
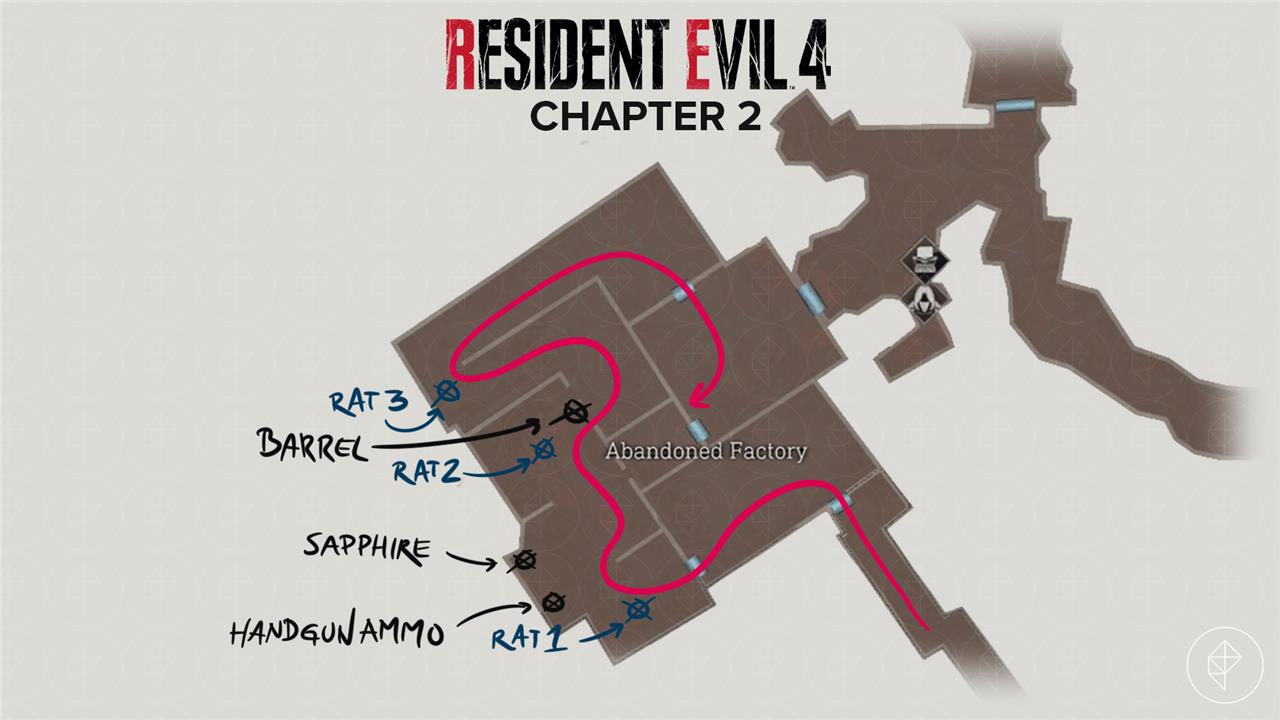
Pest Control is the second merchant request in Resident Evil 4 Remake’s Chapter 2, found right of the merchant outside the Abandoned Factory. It requires killing three specific rats inside the factory for a 3 Spinel reward; complete it before leaving for Chapter 3’s lake boss, as the area locks afterward.
Rat Locations
Head back into the Abandoned Factory from the merchant (follow the yellow path on maps in guides). Rats die to one pistol shot or knife stab and are marked once the request is active.
-
Rat 1: End of the long hallway in the northwestern corner, past the rake-wielding Ganado-roams the western dead-end area.
-
Rat 2: Main room near climbable windows to the hallway (middle-left room); visible through the window, scurries on the floor.
-
Rat 3: Center of the main room, running near the brick furnace with the Sapphire treasure-south of Rat 2.
Return to any merchant after all three are dead to claim Spinels, which unlock exclusive trades like the Laser Sight.