Tucked away behind locked machinery, the wrench in Resident Evil 4 Remake isn’t just lying in plain sight-it’s your ticket to progress. Here’s where to find it before the clock runs out on your next fight for survival.
Wrench location clues in Resident Evil 4 remake
Clues to the wrench’s whereabouts start with the note mentioning a “tool” connected to an escaped test subject near the Incubation Lab, hinting that the item is not lying in plain sight but hidden with the experimental enemies there. As you explore the lab, the clusters of Regeneradors in the suspended tanks and the nearby Overwrite Terminal setup suggest that one of these creatures is holding what you need. The environment layout, from the proximity of the Incubation Lab to the keycard console to the strategic placement of regenerating enemies, subtly directs you to examine each tank carefully. Once you obtain and use the Biosensor Scope, the final clue comes from spotting the wrench silhouette inside a specific Regenerador, confirming that defeating that enemy is the only way to claim it.
After following the objective marker to the keycard reader in the Incubation Labs, you’ll discover that a grate is covering the panel. Leon comments to himself that he’ll need a wrench to open it. Despite the fact that there are red wrenches lying on several workbenches throughout this chapter, those aren’t the wrenches Capcom wants you to find. It can be a bit misleading!
What’s more, a note on the floor above the Incubation Labs, which highlights the word “tool” (a strong nod to the wrench in question), is also a bit confusing. According to the file labelled “Case 2002-f: Escaped Test Subject,” said subject escaped cryogenic stasis, went on a killing spree, and was eventually contained. Because of the wording, though, it’s unclear whether the wrench is inside some corpse somewhere else in the level, or back in the test labs from which it initially escaped.
Resident Evil 4 remake Wrench location
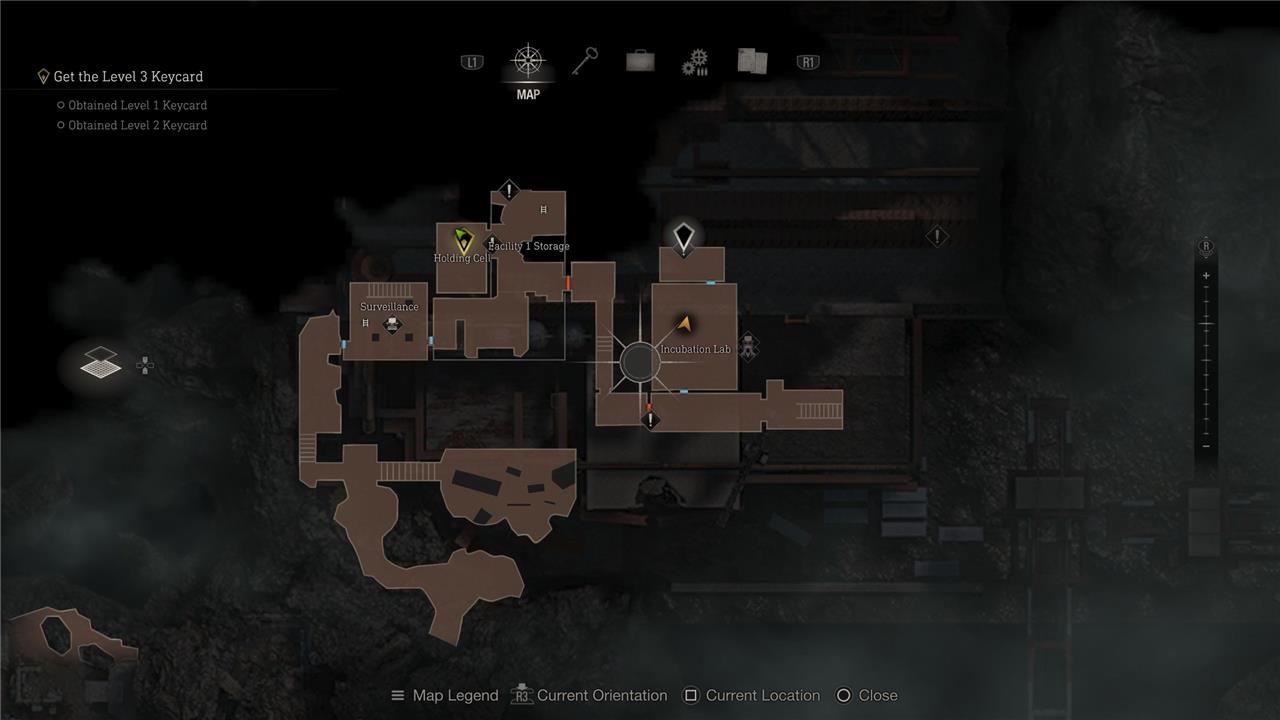
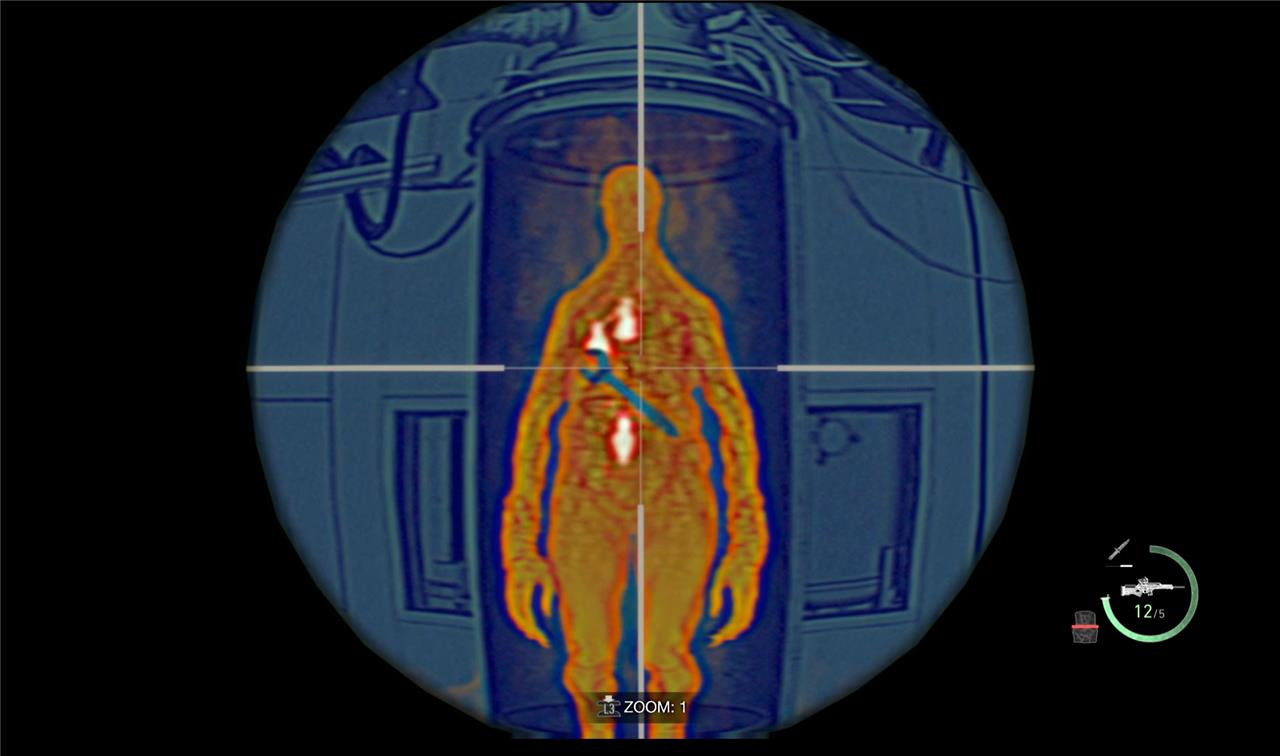
In Resident Evil 4 Remake’s Chapter 13, the Wrench lies inside a Regenerador’s stomach within the incubation tanks south of the locked Overwrite Terminal in the Incubation Lab. Grab the Bio-Sensor Scope first from a nearby security room to spot the parasite core, then destroy it by shooting or meleeing after the enemy breaks free from its tank. Once defeated, cut open the body to retrieve the Wrench, which unlocks the Level 3 Keycard.
Worry not: We’re here to tell you that the test subject is, in fact, back in cryogenic stasis. Equip whichever rifle you’ve been using (in our best guns guide, we recommend rolling with the Stingray), make sure the heat scope is attached, and aim at the Regenerador floating in the tube at the Southeast corner of the Incubation Labs. You’ll see the wrench outlined in its stomach. (Do these things have stomachs?)
Before you start shooting in order to break the tank and release the Regenerador, know that you can kill the upper two parasites with one shot if you stand slightly to the left of the tank. Once the glass breaks and the creature escapes, you’ll only have one parasite left to eliminate.
Recover the wrench, open the grate on the card reader, and insert your keycard to begin the upgrade process. This being a survival-horror game, the key will actually take a bit of time to fully upgrade – you’ll need to defend against a horde of enemies in the Incubation Labs before the key is ready to withdraw. Once it does, you’re one step closer to rescuing Ashley and escaping the underground facility.
How to defeat Regenerador with Biosensor Scope
To defeat a Regenerador with the Biosensor Scope, you need to reveal and destroy the parasites inside its body one by one.
Basic setup
-
Attach the Biosensor Scope to a rifle or LE 5 SMG (Stingray or SR M1903 are ideal for precision).
-
Make sure you have some distance and room to kite; Regeneradors are slow but have long reach.
How to kill it reliably
-
Aim with the Scope: Look at the Regenerador through the scope to see glowing parasite “hearts” inside its body.
-
Target the parasites: Shoot each glowing parasite; each one usually dies in a single accurate hit, and you must destroy all of them for the Regenerador to stay dead.
-
Prioritize center-mass: Go for the torso parasites first since they are easiest to hit while backing away.
-
Control its movement: If it gets too close, shoot a leg to knock it down or stagger it, then back off and resume shooting parasites.
-
Finish and confirm: Once all parasites are destroyed, it will collapse and won’t regenerate anymore; if it’s still moving, you missed one, so quickly scan again with the scope.
Extra tips
-
A semi-auto rifle or LE 5 with the Biosensor makes this much easier thanks to faster follow-up shots.
-
For Iron Maiden variants (spiky ones), there is usually an extra parasite in the head that appears after you destroy the body ones, so check the head last.
Best weapon to equip Biosensor Scope on for Regenerators
The best weapon to equip the Biosensor Scope on for killing Regeneradors is the LE 5 SMG, thanks to its high rate of fire and how forgiving it is if you miss parasite shots.
Why LE 5 is best
-
Rapid fire lets you correct bad shots and quickly sweep across multiple parasites in one burst.
-
Low per-bullet damage is not a downside, because each parasite dies in a single hit from any caliber.
Other good choices
-
Stingray (rifle): Great if you’re confident in your aim; high power, quick follow-up shots, and good ammo efficiency.
-
SR M1903 (rifle): Hits very hard but slower handling, better for patient sniping of parasites at longer range.
-
CQBR assault rifle: Balanced option with good rate of fire and accuracy, but it burns through rifle ammo quickly.
If you struggle under pressure or on higher difficulties, prioritize putting the Biosensor on LE 5 and play mid-range, strafing while tracking parasites with short, controlled bursts.