Ready to stake your claim in the vastness of Starfield? Building an outpost is your first step to transforming uncharted planets into thriving hubs of resource extraction, crafting, and exploration. Whether you’re looking to establish a mining operation, a cozy base, or a strategic waypoint, this guide will walk you through the essentials of placing your Outpost Beacon, gathering key materials, and expanding your frontier empire across the Settled Systems on PC and Xbox.
In this Starfield guide, we’re going to tell you literally everything you need to know about how to build an outpost. And if you want to undo, our guide on how to delete an outpost can help.
How to choose a planet for an outpost
When choosing a planet for an outpost in Starfield, prioritize planets with a calm atmosphere and abundant essential resources like Aluminum and Iron, which are crucial for building and expanding your outpost. Avoid planets with extreme conditions such as excessive heat, cold, gravity, or toxic atmospheres unless you have upgraded the Planetary Habitation skill to handle those environments. Look for locations where multiple resource veins overlap to maximize harvesting efficiency, ideally spots that provide a variety of materials such as Aluminum, Iron, Nickel, and Cobalt. Scouting several planets and placing outpost beacons before committing helps identify the best site for your needs, whether for resource farming, manufacturing, or a comfortable base camp.
The process of picking a planet is very long and tedious, especially if you’re looking for a specific combination of elements (that also happen to actually sit next to each other on the map). You’ll need to fly around the solar system checking the information on planets as you hover your cursor over them and scan them.
What resources should a planet have?
For your first base, you really want to look for a planet that has either aluminum or iron and helium-3. You’ll also want to make sure it doesn’t have any extreme conditions – like scorching heat – that make it impossible to build on.
If that sounds like a lot to juggle, our list of the best planets to build your first outpost on can help.
How to set up a factory at an outpost
To set up a factory at an outpost in Starfield, start by selecting a planet with abundant resources using your scanner, then place an Outpost Beacon to claim the area. Build a small indoor base beginning with an Outpost Airlock and Hab modules to create a workable environment. Next, establish power sources such as solar arrays or fueled generators to run your extractors and machinery. Set up resource extractors linked to appropriate storage containers to gather raw materials automatically. Incorporate an Industrial Workbench to manufacture components from these resources. Finally, add defenses like turrets to protect your factory from enemy attacks, ensuring your production runs smoothly even when you’re away. Efficiently linking multiple outposts can further enhance resource flow and manufacturing capacity.
Once you’ve found your new home, select a landing zone while in orbit (A on Xbox or left click on PC). Once you’re on the planet, you’ll need to open your scanner and wander around a bit to find that perfect sweet spot for your base.
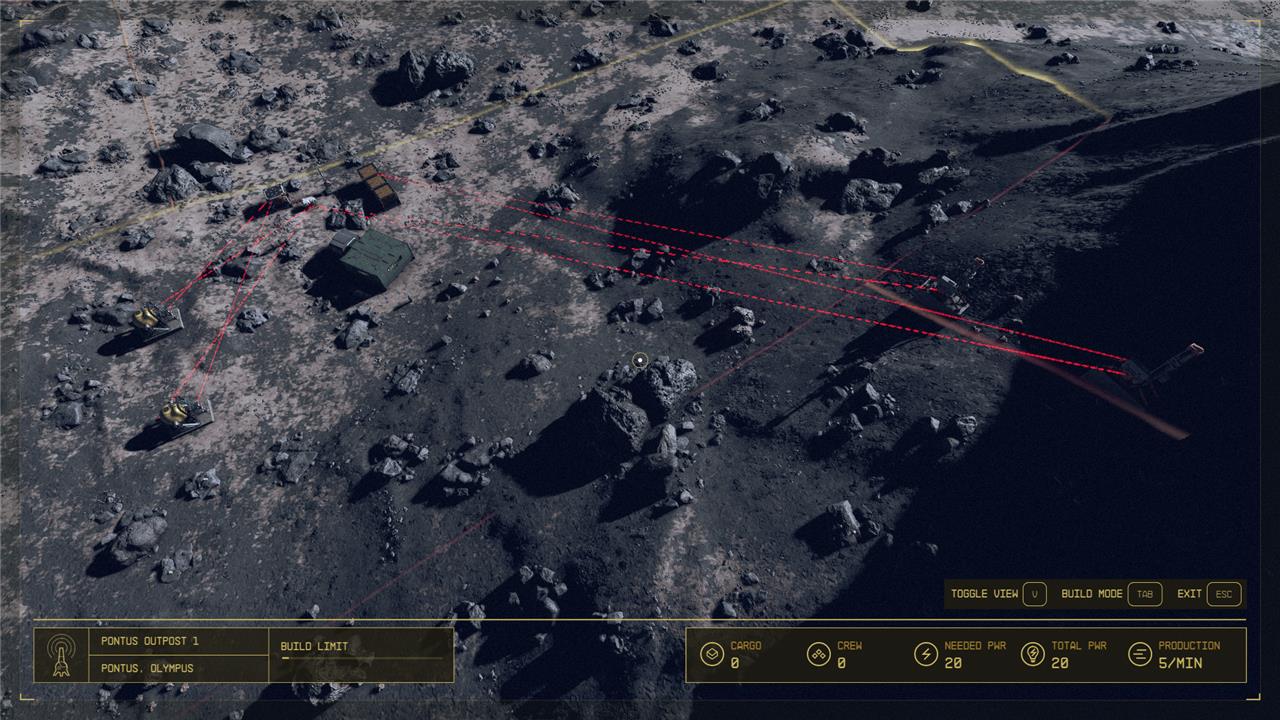
Before you start, all of the processes that comprise building an outpost are much easier if you use the top-down camera view, which you can activate by pressing the back button in build mode on Xbox and the V key on PC.
Where to place your beacon for an outpost

With your planet picked out, it’s time to pick a spot for your beacon, which will denote where your outpost lives. Pull out your scanner on any planet and hit the X button on console or the R key on PC to activate your beacon placer. If the outpost button is grayed out on your screen, it means you’re in a restricted area and can’t place a beacon down.
Once you pull out the beacon, you’ll need to decide where it goes. If you look in the top left portion of your screen, you’ll see which resource deposits are in your base’s vicinity. Once you see both resources you want in the list (helium-3 and either iron or aluminum for this guide), drop the beacon.
This will create a pretty sizable build area nearby. You’ll be free to build anywhere inside the beacon for as long as it’s there. Just be warned that if your base overlaps with a restricted section, you won’t be able to build there.
You can interact with your beacon anytime to rename your outpost, remove your outpost, or enter build mode. You can also enter build mode while in your outpost area by hitting the outpost button again with your scanner pulled up.
What you need to start
Your beacon is free to place as long as you don’t have too many outposts at once – you can increase the number you can have with the Planetary Habitation skill. Your mining machines, on the other hand, take quite a few resources.
Here’s what you’ll need for some of the most common buildings:
- 2x Gas Extractor (for helium-3): four nickel, five aluminum, and three copper
- 2x Metal Extractor (for iron and aluminum): five iron, four aluminum, two tungsten
- Fueled Generator (for power): one Austenitic Manifold, one Isocentered Magnet, four tungsten, one Tau Grade Rheostat
- Gas Storage (for helium-3): three Adaptive Frames, five tungsten, six copper
- Solid Storage (for Iron or aluminum): six iron, three Adaptive Frames, five aluminum
For an ideal setup, that’s:
- Eight nickel
- 23 aluminum
- 12 copper
- 16 iron
- 13 tungsten
- One Austenitic Manifold
- One Isocentered Magnet
- One Tau Grade Rheostat
- Six Adaptive Frames
If you have enough, two or even three extra Solid Storage boxes will help you be more efficient.
If you’re missing any of the elements listed above, you can either mine them with your hand cutter (which takes forever) or buy them from a resource shop. The Trade Authority on most planets sells at least some resources. But most settled planets also have a dedicated resource shop, like Jemison Mercantile in the New Atlantis Spaceport. Head to one of these shops and buy whatever you need. If they run out of stock, go sleep for 24 hours and come back.
These shops also, typically, carry things like Adaptive Frames that you’ll need to build machines. But you can also craft these at an Industrial Workbench, if need be.
How to setup power in your base
The first thing you’ll need to do if you want to get your factory going is to set up a power structure. If you’re using solar panels, simply place them wherever you’d like and hook up whatever you’d like to power with wires. (To connect wires to things, hold A on Xbox or E on PC when interacting with your power source to pull up the extras menu and select wire, then drag the wire to the machine you want to power and either click or hit the A button again.)
Solar panels can be good, but they’re expensive to build, don’t produce much power, and rely heavily on the type of planet you’re on (i.e., if it’s sunny or not). The more universal solution (and the reason you’re looking for planets with a resource and helium-3) is the Fueled Generator, which has a more complex setup, but is absolutely worth it.
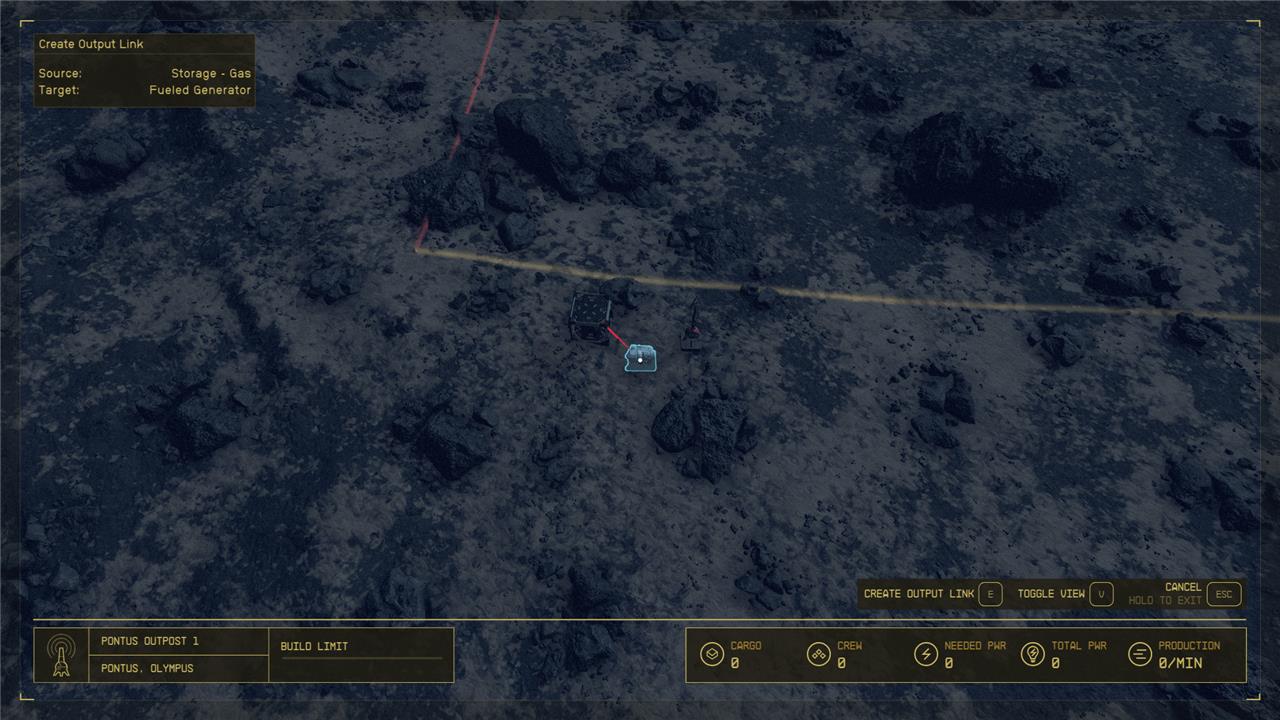
Build your Fueled Generator on the ground and then build a Gas Storage box next to it. Place some helium-3 in the Gas Storage and then exit the build menu but not the outpost menu. Look at the Gas Storage box and hit RT on Xbox or right click on PC to create an output link. Then look at the Fueled Generator and hit the confirm button to create an output link between the two. Once you’ve hooked up some machines to the generator, hit the interact button to turn the generator on and the helium-3 in your storage box will start supplying it.
How to setup a helium-3 loop
The first thing you want to do after you have power is secure your helium-3 loop, so that your generator will stay on.
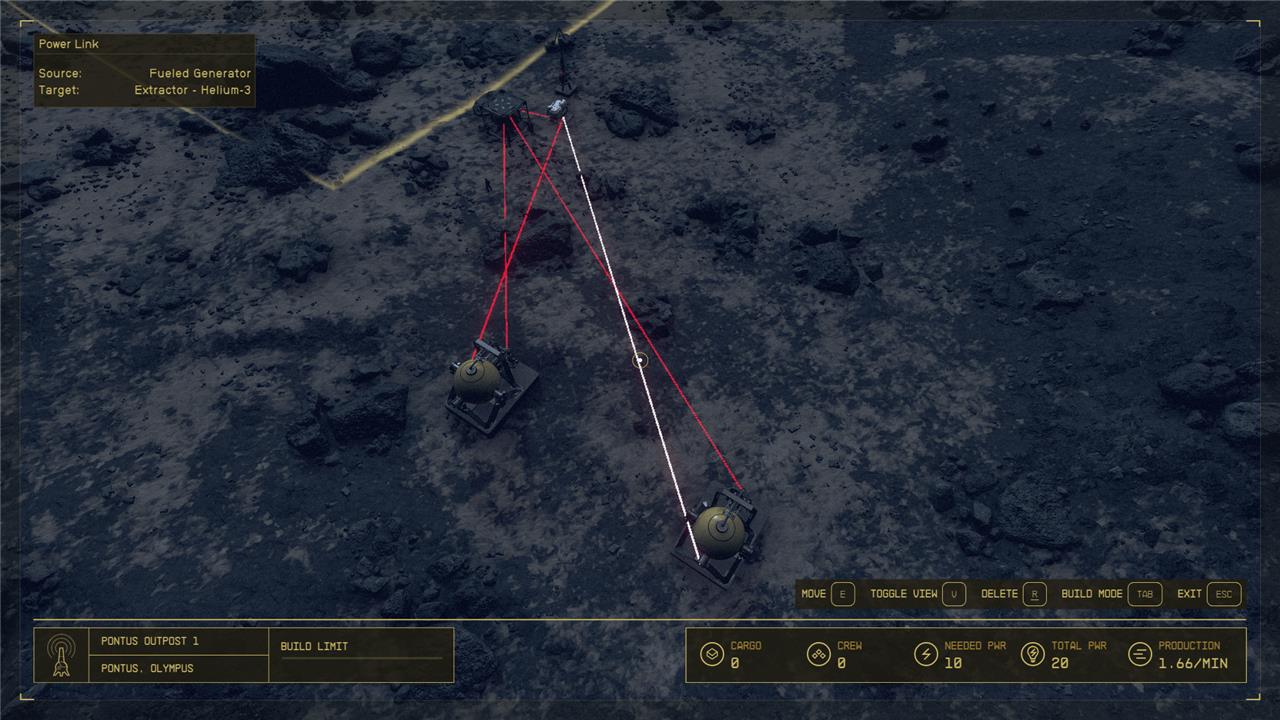
Open the build menu and dive into the top-down view we mentioned earlier. Select the Extractor – helium-3 from your menu and scan around until you find your helium-3 deposits highlighted on the ground (they’re bright green). Place your two extractors as close together as you can to reduce wasted space – just know if you try to place them too close, the game will tell you to create more distance. As far as we can tell, your extractors will produce just as much helium-3 if they’re on the edge of the patch or the middle.
Once both extractors are down, create an output link to the Gas Container. This will create a loop where your generator is powering your extractors, which is then filling the container with more helium-3, which is then feeding your generator to keep the extractors going.
With only two helium-3 extractors, you may find that the generator drains faster than the extractor can keep up. However, with two extractors, you’ll actually gain a little bonus helium-3 over time and your generator will never shut off. If you want to make sure your loop is working properly, sit and watch your Gas Container for a minute or so. If the number of helium-3 you have never drops more than one below your original number (say you have 50 helium-3, the number will likely drop to 49 at some point, but should never drop to 48), you have a perfect loop.
How to setup an iron or aluminum loop
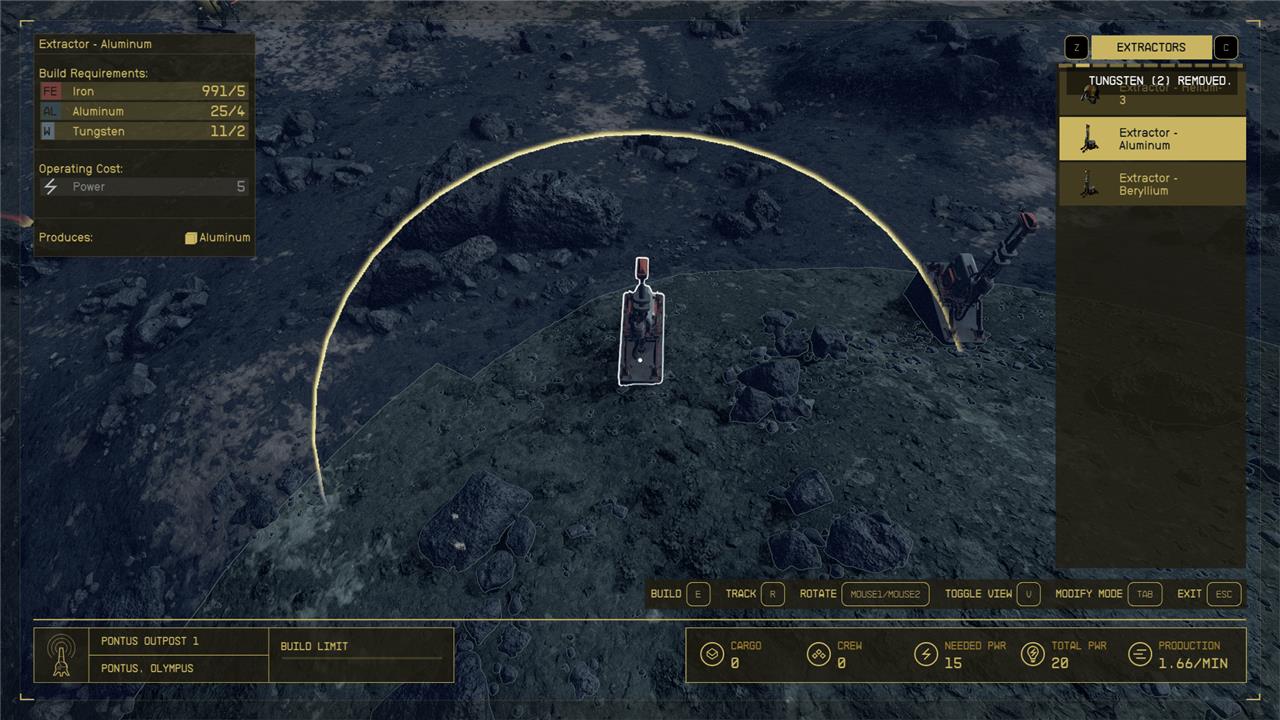
Setup one (ideally two, just to take up all 20 energy that the generator supplies) Extractor – aluminum or Extractor – iron in the fields that match those resources (iron is a rusty brown color while aluminum is gray). Then setup at least one Solid Storage unit near your beacon or any other convenient location. Connect both extractors to the generator via wires and the Solid Storage via output links and voila, you’ll have a box full of resources in no time.
One final tip on the storage boxes is to link multiple of them together. Basically, place two or three and then have the extractors link to the hardest one to reach (the top of the stack, for example). Then create an output link from the box your extractors are connected to the box next to it. If you have three, connect the second box to the third box (which should be in the most convenient spot for you to grab). If you do this, you’ll create an overflow contingency, where the same two extractors can fill up all three boxes before shutting off.
If you followed all our instructions, congratulations, you now have a fully automated resource farm in Starfield!
How to build a base
To build a base in Starfield, start by selecting a suitable planet with abundant resources like aluminum, iron, and helium-3, as these are essential for early construction and resource extraction. Use your scanner to deploy an Outpost Beacon by pressing the designated button (X on Xbox or R on PC), which claims the area for your outpost. Choose a flat, open area free of large obstacles to make building easier. Begin by constructing resource extractors to gather materials, power sources such as solar arrays or wind turbines to keep your outpost running, and storage units to hold your collected resources. Adding workbenches allows crafting and research, while building defenses like turrets protects your base from hostile threats. As you expand, consider building landing pads and cargo links to connect multiple outposts and facilitate resource transfer. Managing power supply is crucial, so ensure your total power generation exceeds demand. With these steps, you can establish a functional and expandable base to support your adventures across the Settled Systems.
Building a base is far more personal than building a factory or farm in Starfield, so your experience will differ from ours based on your taste and sense for design. Still, there are some universal basics we can help you with.
What you should build
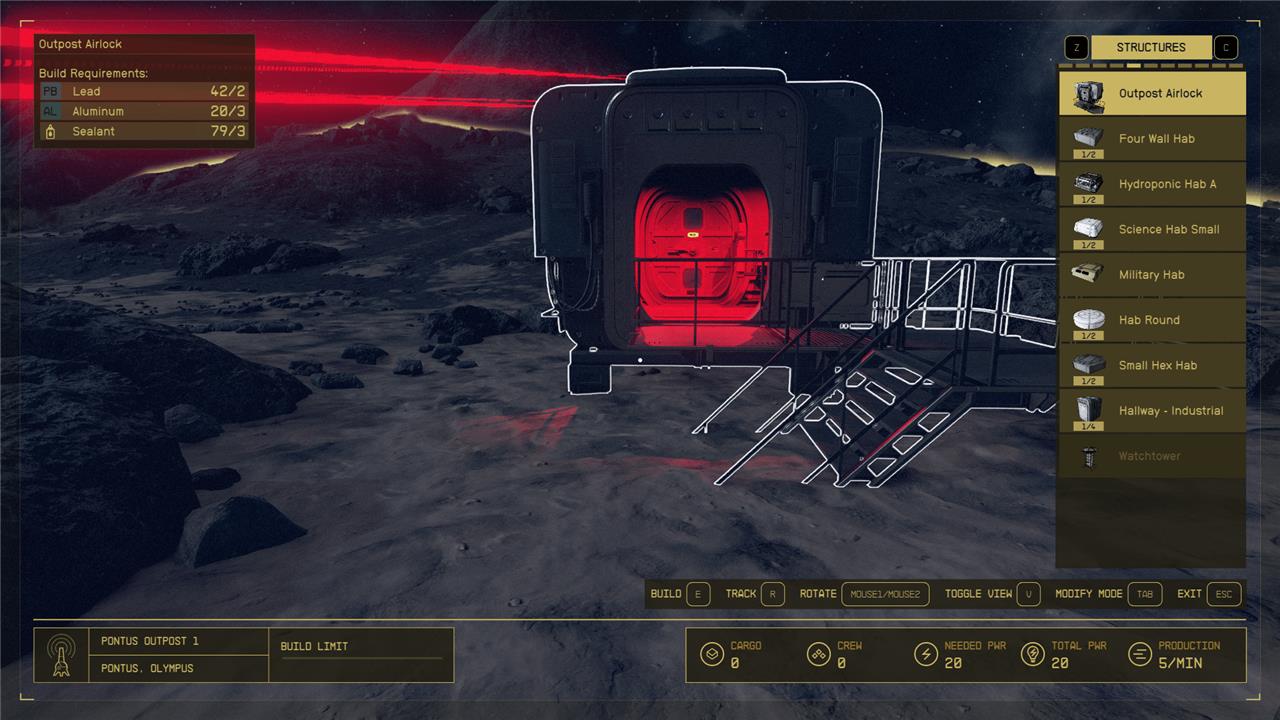
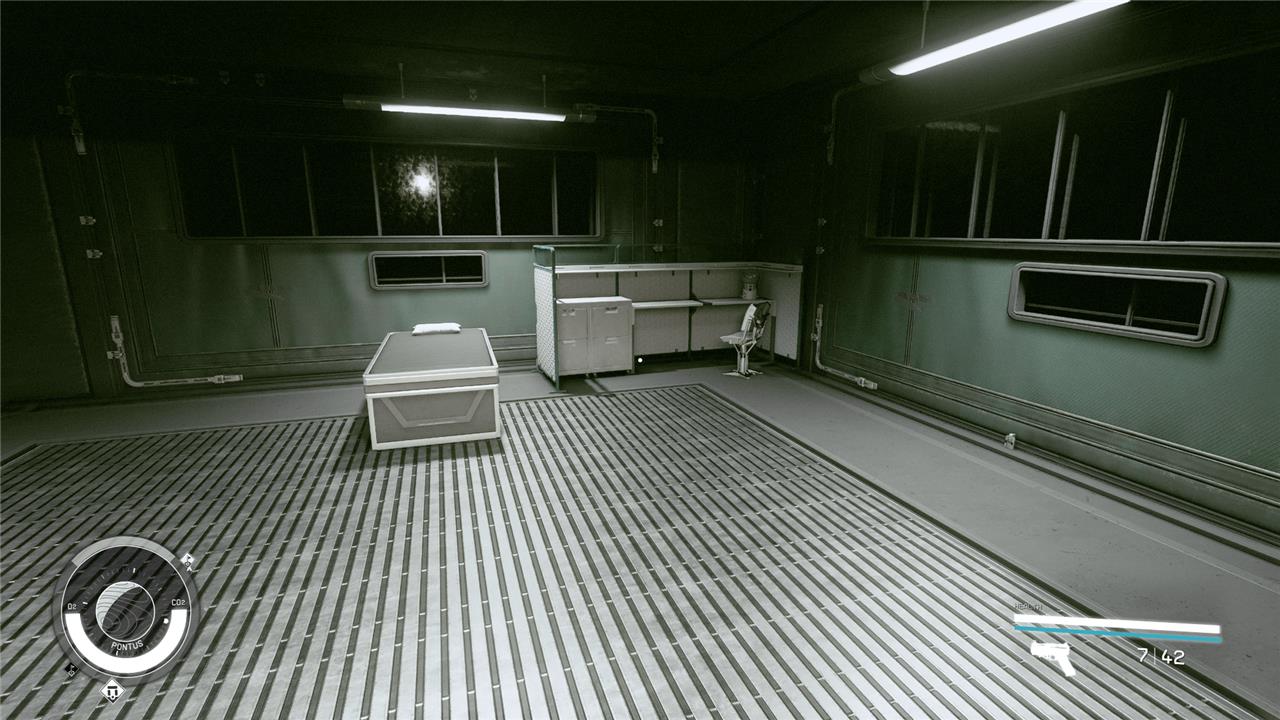
If you want to build a base in Starfield, the first thing you’ll need to build is an airlock. Open the menu and get to the “structures” tab. Build it near some flat ground or, at the very least, make sure you set the height (lift up on the stick or your mouse) so that it’s far enough off the ground that you can build things on the edge of it.
With the airlock set, select a hab of your choosing (you can hit left and right on the d-pad or the arrow keys to change styles) and connect it to the airlock. That’s all you really need for a base, but you can also attach different rooms to expand the size of your hab.
Inside, you can use the furniture, decorations, and displays menu to make your hab look as fancy or as spartan as you’d like. One thing we would suggest is a bed, as it lets you wait in your base and skip forward in time. When you awake, your little farm should’ve produced plenty of resources for you to sell or use.
It’s also potentially worth putting some crafting stations here via the crafting menu, as this will let you produce some of the materials you’ll need for more complex machines – should you choose to expand here – and even research better extractors.
Assigning crew to your outpost
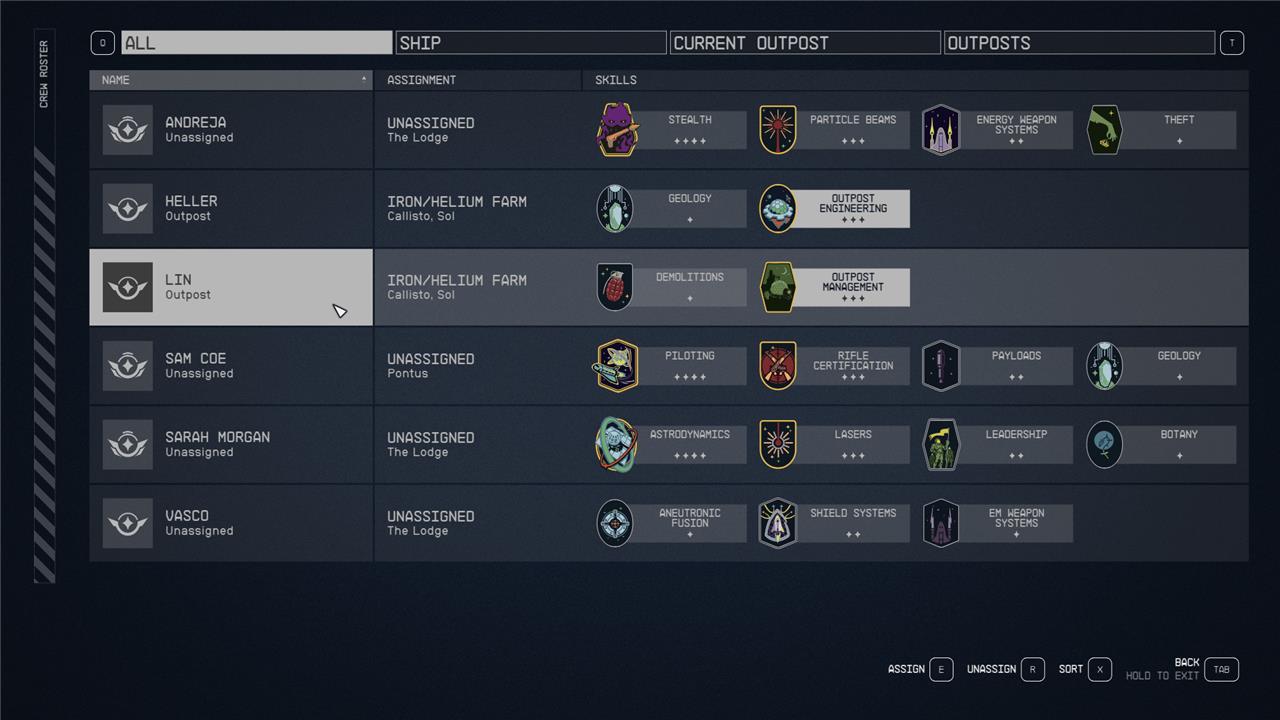
Once you have a base up and running, you can build a crew station via the miscellaneous menu. Once you have a crew station, you can assign crew members to your outpost by opening your ship menu and pressing Y on Xbox and C on PC. This will pull up the crew menu, which will allow you to select members to assign to your outpost.
What are the key steps to start building an outpost in Starfield on PC or Xbox
To start building an outpost in Starfield on PC or Xbox, follow these key steps:
-
Choose a suitable planet and location: Use your scanner to survey planets and find a spot rich in the resources you want to extract. Perform a planetary scan before landing to ensure the area contains desired minerals.
-
Place an Outpost Beacon: While on the planet, open your scanner and press [H] on PC or [X] on Xbox to enter Outpost Builder mode. Place the Outpost Beacon at your chosen location, which defines the buildable area of your outpost and allows fast travel to it later.
-
Enter Build Mode: After placing the beacon, you enter Build Mode where you can construct various structures. You can switch between Build Mode and Modify Mode to move or delete objects, and Clear Mode to remove obstacles.
-
Build essential structures: Start with a simple habitat (four walls and an airlock) to provide an indoor area. Then build an Industrial Workbench to craft more complex items. Next, place extractors on nearby mineral deposits to gather resources and set up power sources to keep your outpost running.
-
Expand and automate: As you gather resources, expand your outpost by adding crafting stations, storage, and defenses. You can also set up automated factories and delivery routes to efficiently manage resource production and generate income.
These steps will help you establish a functional outpost to support your exploration and crafting endeavors in Starfield on both PC and Xbox.
How do I locate the best spot for my outpost in Starfield
To locate the best spot for your outpost in Starfield, focus on these key strategies:
-
Identify your outpost’s purpose: Decide if you want to farm specific resources, generate income, or create a versatile base. This will guide your choice of planet and location based on the resources available there.
-
Use planetary scans and biomes: Before landing, scan the planet to reveal resource veins and biomes. The best spots often lie where two different biomes meet, as these areas tend to have multiple resource types clustered together.
-
Look for resource-rich planets and moons: Some well-known locations include moons in the Narion system (like Andraphon) for Aluminum, Iron, and Helium-3; Zamka in the Alpha Centauri system for diverse materials; and Jemison for safe, resource-rich areas near trade hubs.
-
Test by placing the Outpost Beacon: While on the planet, drag the Outpost Beacon around to preview nearby resources. If the beacon’s radius shows valuable materials, that spot is a good candidate. If not, fast travel and try another location.
-
Fine-tune placement: Move the beacon pixel by pixel near biome edges or resource clusters to maximize the number and variety of resources within your outpost’s range.
By combining these methods-scanning for resources, targeting biome edges, and testing beacon placement-you can find optimal outpost locations that maximize resource gathering and efficiency in Starfield.