Congratulations on your new Nintendo Switch 2! Before diving into exciting games like Mario Kart World or revisiting classics like The Legend of Zelda: The Wind Waker, you’ll want to ensure your setup is flawless and your data from the original Switch is safely transferred. Whether you’re ready to move all your users, save data, and settings in one seamless wireless transfer or prefer uploading your data to Nintendo’s servers for later download, this guide will walk you through every step to get your new console up and running without missing a beat.
But there can be a few hitches along the way, so to get your Switch and Switch 2 ready for launch day, we have a few tips that can potentially save you some time and frustration.
How to prepare to set up a Switch 2
To prepare for setting up your Nintendo Switch 2, start by ensuring you have a stable internet connection and your Wi-Fi details handy, as the console will require a system update right after powering on. Have your Nintendo Account credentials ready to log in and access your digital library and cloud saves. It’s also recommended to connect the Switch 2 to a power source using the included AC adapter to avoid interruptions during setup. If you plan to transfer data from your original Switch, make sure it is updated with the latest system software and that all user accounts have accepted the necessary terms. You can begin the data transfer either by placing both consoles close together for a wireless transfer or by uploading your data to Nintendo’s server ahead of time if you won’t have your old Switch on hand. Following these steps will help ensure a smooth and efficient setup experience for your new Switch 2.
Before setting up a Switch 2 – whether or not you’re transferring data from an original Switch – you’ll want to prepare by ensuring the following:
- Have your wireless internet connection info handy. Nintendo Switch 2 requires a day-one system update to play. Make sure you know your wireless router address and password so you can quickly download the system update.
- Have your Nintendo Account login information at the ready. To get signed in to your account and have access to your digital purchases and cloud saves, you’re gonna need your Nintendo Account. This is also a good time to set up two-factor authentication on your Nintendo Account if you haven’t done so already.
- Plug in your Switch 2 to an AC adapter. You should probably use the one included with the system, but like most devices, Nintendo wants to ensure your system has uninterrupted power while installing system software. If you need to clear some space on a power strip or surge protector so you can plug in the Switch 2 AC adapter, do so before you start setting up your new console.
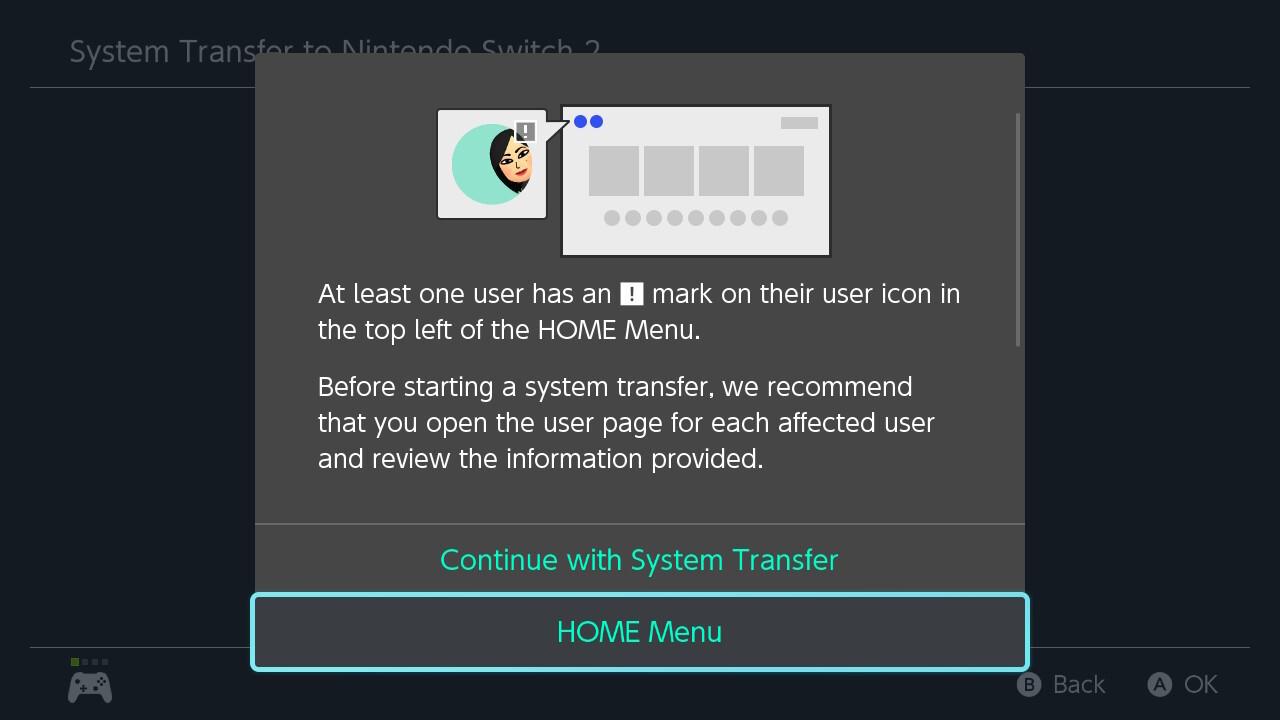
- If you’re transferring data from an existing Switch to Switch 2, make sure your original Switch is up to date with the latest system updates installed. And if you have multiple user accounts set up on your original Switch, make sure they’ve all accepted the necessary terms and conditions. Otherwise, the process may be interrupted, and you’ll have to futz with your original Switch.

How to update Switch 2 system software day one
To update your Nintendo Switch 2 system software on day one, simply follow the on-screen prompt to download and install the mandatory system version 20.1.1 during the initial setup. This update is essential to unlock key features such as compatibility with Nintendo Switch 1 games, Nintendo Switch Online, Virtual Game Cards, and the Nintendo eShop. Ensure your console is connected to Wi-Fi and plugged into power to avoid interruptions. If you skip the update during setup, you will be prompted to install it when accessing features that require the latest software. Completing this update will ensure your Switch 2 is fully functional and ready for game transfers and online connectivity.
After turning on the Switch 2 for the first time, you’ll be prompted to perform a system update. In our experience, this process takes only a few minutes – but during a busy launch day or launch weekend, there’s a good chance it could take longer as Nintendo’s servers are slammed with millions of new Switch 2 owners.
Download the Switch 2 day-one system update. This may take a little time, but the good news is that Nintendo has programmed some content to keep you informed and entertained during the process. There are cool, lo-fi beats to install system updates to, and tutorials about how to detach the Switch 2 Joy-Con controllers and information about other accessories for the system.
How to transfer Switch 1 data to Switch 2
To transfer data from one Nintendo Switch to a Nintendo Switch 2, you can either connect both systems wirelessly for local transfer or upload your data to a server for later download. Ensure both consoles are nearby for local communication. To begin, go to System Settings on your original Switch, select “System Transfer to Nintendo Switch 2,” and follow the prompts. Note that all users will be migrated, but those without a linked Nintendo Account and games without cloud save backups won’t be revertible to the original Switch.
If you’re transferring game and save data from an original Switch to Switch 2, don’t stress: This process is pretty easy and mostly hands off. Here’s what to expect.
Sign into your Nintendo Account. Nintendo makes this easy by providing a QR code to scan that will quickly get you signed into your account and give you a confirmation code to get the sign-in process started. You can also manually sign into your Switch 2 using your email/username and password.
Make sure your Switch and Switch 2 are physically near each other. Nintendo’s on-screen prompts indicate that both systems should be right next to each other, but I transferred data with the two systems about six feet apart.
Start the data transfer. This will require having both your Switch and Switch 2 on, then going into the Switch’s settings, then system settings, and scrolling all the way down to System Transfer to Nintendo Switch 2. Depending on how much content you have stored on your original Switch, the transfer process should take about 10 minutes or less.
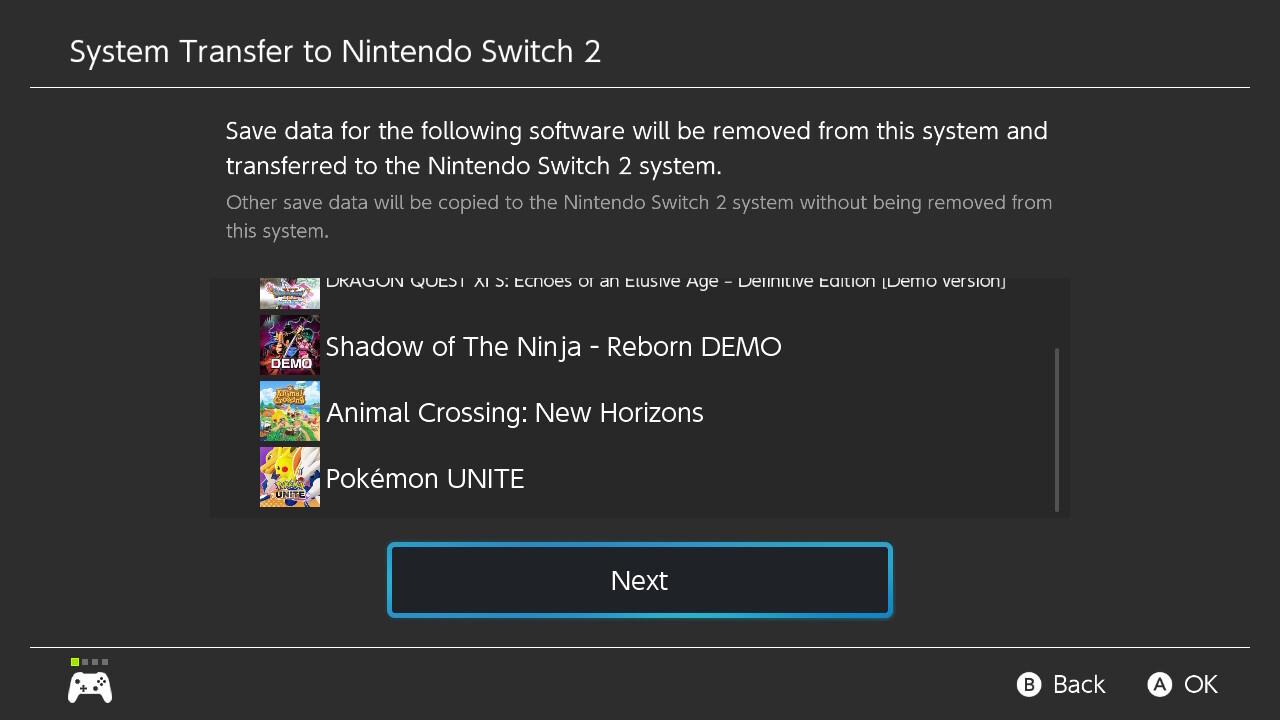
Acknowledge the warnings, which may sound a little scary. As you transfer data from Switch to Switch 2, you’ll be warned that save data for some games will be removed from the Switch so that it can be transferred to Switch 2. This includes save data for certain Pokémon games, Animal Crossing: New Horizons, and demos.

Transfer screenshots and video captures. If you have data like screenshots stored on a microSD card in your Switch, you’ll be asked to manually eject the card, plug it into your Switch 2, and transfer the data to the new system. This is quick, and should only take a minute or two, depending on how much screen capturing you’ve done.
Want to discover the easiest way to transfer your data from Switch 1 to Switch 2
The easiest way to transfer your data from your original Nintendo Switch to the new Nintendo Switch 2 is via a wireless local connection between the two consoles. Simply keep both systems close together, connect them to the internet, and follow the on-screen prompts in the System Transfer menu on each device. This method moves your users, save data, digital games, screenshots, and videos directly and securely without needing to upload to a server first.
If you don’t have your original Switch handy when setting up the Switch 2, you can instead upload your data to Nintendo’s cloud server and download it later to the new console. This option requires an internet connection and a linked Nintendo Account, and your data will be stored for up to one year before you must complete the transfer or cancel it.
For most users, the local wireless transfer is the quickest and simplest method to seamlessly continue your gaming experience on the Nintendo Switch 2.
Which transfer method is faster: wireless or server upload
The wireless local transfer method between the two Switch consoles is generally faster than uploading data to a server and then downloading it to the new console. This is because the wireless transfer occurs directly and locally between the devices, avoiding the limitations of internet upload and download speeds, which are often asymmetric and slower on the upload side. Server uploads depend heavily on your home internet’s upload bandwidth, which is typically much lower than download speeds, causing the transfer to take longer.
In contrast, the wireless transfer uses a direct local connection that can utilize higher speeds available on the devices’ Wi-Fi hardware, making it the quicker option for transferring user profiles, save data, and games from Switch 1 to Switch 2.
