Dive into the mysterious world of Hyrule like never before in Zelda: Echoes of Wisdom, where Princess Zelda takes center stage to unravel dark rifts swallowing the land and the hero Link himself. Our comprehensive walkthrough guides you through the main story and reveals the best dungeon order to conquer the eight sprawling dungeons, from the eerie Suthorn Ruins to the perilous Lanayru Temple. Whether you’re breaking out of jail in Hyrule Castle Underground or mastering the power of Echoes with the enigmatic Tri, this guide ensures you won’t miss a single secret or strategy on your quest to save Hyrule.
The specific choices you make at each fork in the road have little major bearing on the game, as you will eventually visit every location anyway, but for those stumped on what to do first, we have your back.
If you’re still nervous before starting your journey, we have a beginner’s guide to provide some tips, along with the most useful echoes to keep your eye out for. While you complete the story, you’ll want to seek out collectables, like heart pieces, stamps, and fairy bottles, too.
Below, we give a brief overview of the full main story in Zelda: Echoes of Wisdom, noting narrative beats you may get tripped up by along the way, as well as the best orderof dungeons and regions to take when you’re prompted with a choice of multiple options.
Zelda: Echoes of Wisdom walkthrough overview
The “Zelda: Echoes of Wisdom” walkthrough provides a comprehensive guide through the main story, helping players navigate the expanded world of Hyrule as Princess Zelda. It covers all major quests, key dungeons, and side content, offering detailed strategies for defeating bosses, solving puzzles, and collecting important items such as Echoes, Heart Pieces, and Might Crystals. The walkthrough also suggests the best order to tackle the eight main dungeons, balancing player choice with an efficient progression through the game’s branching paths. Throughout the adventure, players will face mysterious rifts and use Zelda’s unique Echoes ability to restore the land and rescue Link, making this guide essential for a smooth and complete experience.
Over the course of Echoes of Wisdom, you’ll start in the Suthorn Forest. You’ll then tackle the Gerudo Desert and the Jabul Waters (with a choice of which to hit first). You’ll go back to Hyrule Castle before another fork: Faron Wetlands, Eldin Volcano, or Hebra Mountains. Once you complete all three, your journey leads you to the Eternal Forest before culminating in the point of no return, Null’s Body.
That’s the birds-eye view. For a deeper rundown – including details on what these sections entail and what upgrades or unlocks you can expect to get from each – read on. We also offer our advice for which regions to tackle first at the two split paths in Echoes of Wisdom.
Starting out in Suthorn Forest
Starting out in Suthorn Forest marks the beginning of your journey in Zelda: Echoes of Wisdom, where you first encounter the mysterious Still World. After escaping from Hyrule Castle Underground, you enter this eerie forest fragmented by rifts, requiring you to leap across floating islands and summon creatures to overcome shadowy enemies. Along the way, you explore caves, solve puzzles by activating switches, and collect treasure chests containing rupees. This area serves as an introduction to the game’s mechanics and leads directly to the Suthorn Ruins dungeon, setting the tone for the challenges ahead in the main quest “The Mysterious Rifts”.
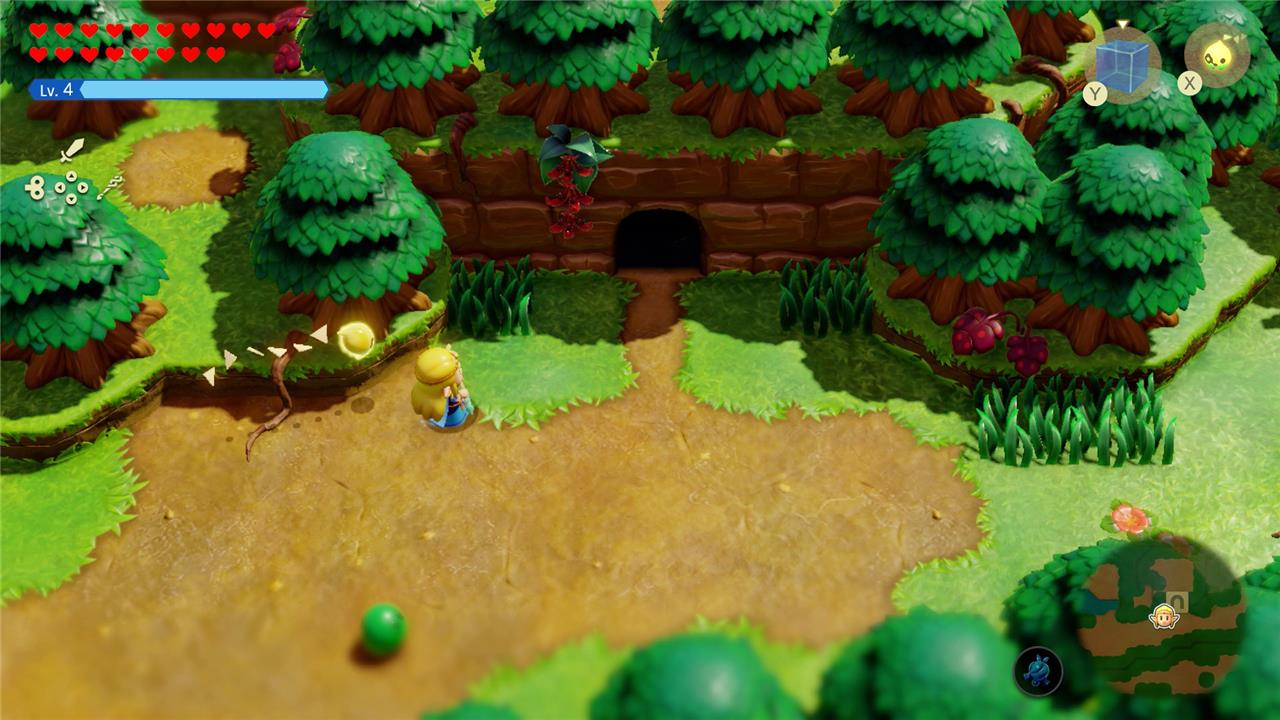
The beginning of your journey is brief, but sudden. Once you make it out of the beginning cavern and you report back to Hyrule Castle about link and these void rifts, another rift opens up, and you land yourself in jail. There are a few segments to this opening portion:
- Break out of jail and get past the guards in Hyrule Castle Underground
- Head toward the Suthorn Ruins
- Venture through the Stilled Suthorn Ruins and the Suthorn Ruins, which serve as a bit of a tutorial for your various abilities with Tri
After you get that rift closed up, you’ll be able to head to Lueburry’s workshop, where you’ll discuss a gameplan with him and the official you rescued from the Ruins. Tri will point out that they can see a few huge rifts, pointing you in two directions.
Gerudo Desert or the Jabul Waters – which to do first?
When deciding whether to explore the Gerudo Desert or Jabul Waters first in Zelda: Echoes of Wisdom, it largely depends on your preferred difficulty and gameplay style. The Gerudo Desert is closer to the starting area and offers more challenging enemies and useful echoes like the Flying Tile Echo, which aids traversal and combat early on. It also provides the Bow of Might, enhancing Zelda’s abilities. On the other hand, Jabul Waters is slightly farther but easier, featuring the Water Block Echo that helps with vertical movement and puzzle-solving. While the Gerudo Desert is recommended as the first destination for its strategic advantages and smoother progression, choosing Jabul Waters first is also viable and won’t disrupt the game’s natural flow. Ultimately, the choice hinges on whether you want a tougher early challenge or a gentler introduction to new mechanics.
After the opening segment, you’ll need to make a choice between helping the Gerudo people in the Gerudo Desert or helping the Zora in Jabul Waters. Don’t fret, as you will need to do both to complete the story, but which one should you do first?
The Gerudo segment of the game unlocks an extremely helpful echo that allows you to quickly travel over gaps and pits horizontally. You’ll also unlock the Bow of Might, allowing you to use a bow and arrow when in Swordfighter form. To complete the Gerudo portion, you’ll need to do the following:
- Head to Gerudo Valley
- Help the Gerudo close the rift for the Stilled Desert Temple Ruins
- Get through the Cryptic Cavern
- Close the rift in the Gerudo Sanctum dungeon
The Zora segment in the Jabul Waters will unlock another very helpful echo that allows you to travel up cliffs vertically with ease (no need for those beds anymore). You’ll also encounter an echo that will allow you to use bombs, so you can grab things behind cracked walls and blow up baddies. To complete the Jabul Waters portion, you’ll need to do the following:
- Go to the Jabul Waters
- Help the Zora close the Stilled Upper Zora River rift
- Beat up Jabu-Jabu in a short boss fight
- Close the rift in the Jabul Ruins dungeon
That said, we personally found the bow and arrow more helpful, so doing the Gerudo segment first helped us complete the Zora segment easier. However, it’s up to you as both of the dungeons will give you useful tools that will help you finish the other one.
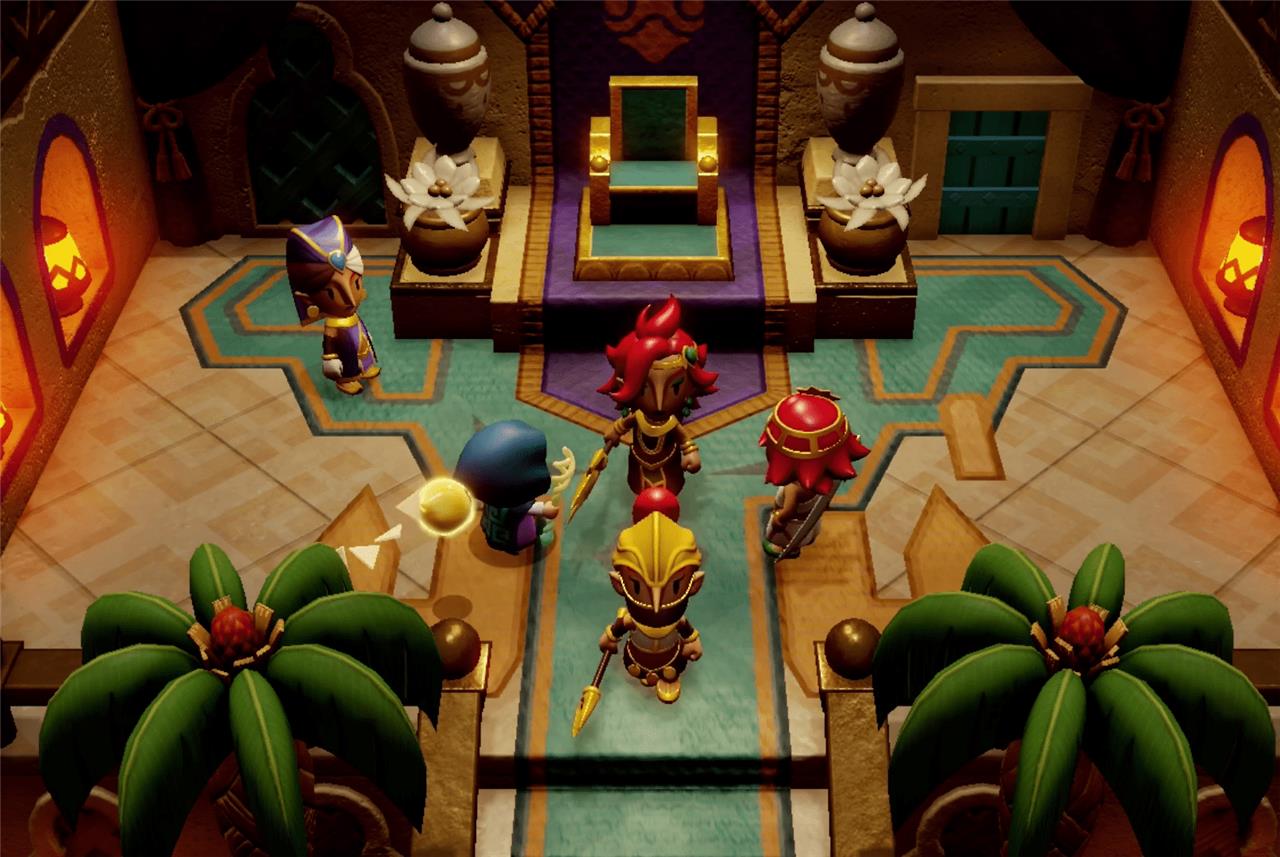
Returning to Hyrule Castle
Returning to Hyrule Castle in Zelda: Echoes of Wisdom marks a pivotal moment in the main story, as the castle is now engulfed by a dark rift filled with dangerous enemies and puzzles. After completing the Zora and Gerudo temples, players must head to Castle Town and enter the castle through a well, bypassing the usual entrance blocked by the rift. Inside, the dungeon challenges players with stealth sections against Rift Guards, combat encounters including a Level 2 Darknut, and environmental puzzles like moving the throne to reveal hidden passages. The goal is to reach the stilled King of Hyrule and vanquish the rift threatening the castle, using all the echoes and skills acquired so far to navigate and survive this intense dungeon.
Once you close up those two giant rifts, you’ll be tasked with heading back to Hyrule Castle. It’s finally time to save the king and sort some stuff out. This part is extremely linear once you get there, as you’ll need to get through a stilled version of Hyrule Castle, which is effectively another dungeon.
After saving the king, Tri will notice three more gigantic rifts open up across the map in three key locations: the Faron Wetlands, Eldin Volcano, and the Hebra Mountains.
Before you head off to these locations, now is a great time to fully explore the map more. Between the Water Block Echo you got from the Zora and the Flying Tile Echo you got from the Gerudo, you have the tools to pretty much wander the whole map. You should take some time to explore and do some side quests. Power yourself up a little bit by finding heart pieces and Might Crystals to upgrade your weapons. Enemies will start hitting a bit harder, so you’ll want to be able to take them on with no issues. Finally, you can now start to get outfits from amiibo scans.
Faron Wetlands, Eldin Volcano, or Hebra Mountains – which to do first?
When deciding whether to tackle Faron Wetlands, Eldin Volcano, or Hebra Mountains first in Zelda: Echoes of Wisdom, the recommended order is to start with Eldin Volcano, followed by Faron Wetlands, and then Hebra Mountains. Eldin Volcano is suggested as the first choice because it provides abundant fire-based Echoes and the Bombs ability for Swordfighter Mode, which are crucial for surviving and progressing through the other two regions. The fire Echoes from Eldin help clear obstacles like spider webs in Faron Wetlands and keep Zelda warm in the cold Hebra Mountains. Faron Wetlands is best tackled second, as its electric enemies are more effective after gaining Eldin’s fire abilities, and Hebra Mountains last due to its harsher environment and more complex puzzles. This sequence optimizes puzzle progression and combat readiness throughout the game.

Again, you’ll be at a crossroads, but the order in which you do the dungeons doesn’t really matter. You will get different tools from different dungeons, though.
The Eldin Volcano is expectedly home to the Goron people and fire-based monsters. You will get full access to bombs in this segment of the game (not just bomb-like echoes), which are usable in your Swordfighter form. The Eldin Volcano portion goes as follows:
- Climb up the Eldin mountain to get to the Goron people
- Help the Gorons by completing the Stilled Goron City segment
- Find the two elders to figure out how to get to the top of the mountain
- Enter the Eldin Temple to get rid of the rifts
The Faron Wetlands is home to the Deku Scrubs and electric-based monsters (and their echoes, of course). The dungeon here focuses on spider-like enemies that help you scale up walls both in the 2D-platforming sections and the 3D overworld parts. The Faron Wetlands portion is as follows:
- Head to the Faron Wetlands
- Help Blossu un-rift his house via the Stilled Blossu’s House area
- Escape from the Deku Scrub Lockup prison
- Enter the Faron Temple to cleanse the rifts from the area
The Hebra Mountains is the home of yeti-like creatures and ice-based monsters. This area did feel notably a bit harder than the others and didn’t offer us much to add to our arsenal of skills (but that’s just our opinion). The Hebra Mountain segment follows this path:
- Head up the Hebra Mountains in the north
- Help Condé by closing the Stilled Hebra Mountain Cave rift
- Follow Condé up the mountain to find his brother
- Complete Lanayru Temple to close the rifts over the region
Based on this, we would recommend going to the Eldin Volcano first, as having bombs on hand is just a nice perk to have. From there, you can head to the Faron Wetlands next and then the Hebra Mountains once you’ve powered yourself up a bit.
[Ed. note: We discuss spoilers to the ending portion of The Legend of Zelda: Echoes of Wisdom below. Make sure you’re actually at this point of the game before scrolling below the comically long image or risk being spoiled.]

Going to the Eternal Forest
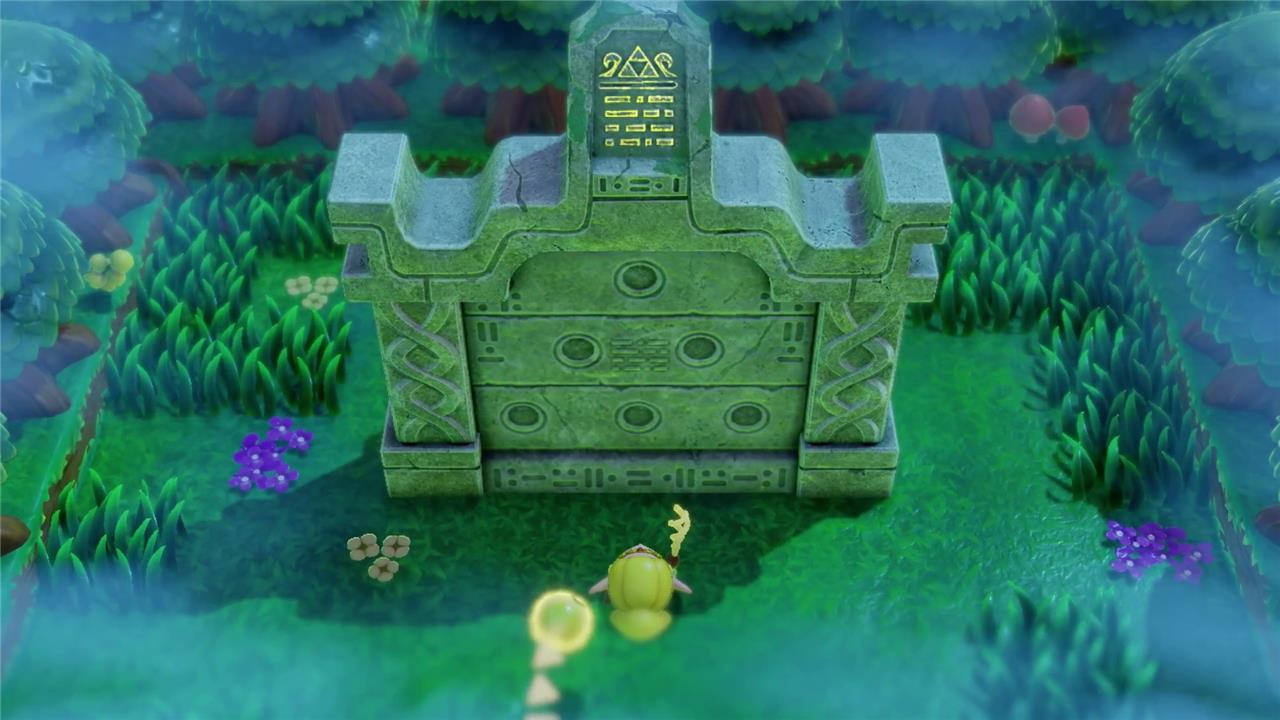
After completing the three goddess temples in Eldin, Lanayru, and Faron, your next destination in Zelda: Echoes of Wisdom is the Eternal Forest, located just north of Hyrule Castle. This area marks the beginning of the final main quest, “The Prime Energy and Null.” Upon entering the foggy forest, you will meet General Wright and his guards, triggering a series of events that lead you to an ancient stone monument and the discovery of the Ancient Orb Echo. Your task is to find six pedestals scattered throughout the forest, each requiring the placement of the Ancient Orb to unlock a hidden path. The journey through the dense and initially confusing foliage involves defeating enemies like Deku Babas and sword moblins to access all pedestals. Once all orbs are placed, the forest clears to reveal a path deeper into the ruins, setting the stage for the final confrontation with Null.
After the above part, you’ll be sent back to Hyrule Castle and you’ll be on the last portion of the game. Head to the Eternal Forest, which is the only part of the map you may have not been to. It’s directly north of Hyrule Castle, and though your minimap will be obscured while you’re inside, it’s not as deep of a labyrinth as it is in other Legend of Zelda games.
After solving a short puzzle and watching a few cutscenes, you’ll end up in the Stilled Ancient Ruins, a somewhat linear platforming area, where you’ll just need to make it from the south of the map to the northern portion. Using tools like Water Block and Flying Tile Echoes should make quick work of any problems you have, though there’s nothing wrong with needing to summon a couple beds if need be. By this point of the game, you should be able to summon quite a number of items.
Once you make it north, you’ll be tasked with a short battle against the Null version of Zelda, and then you’ll free Link from his crystal prison.
You now have the option to actually continue on to the final part of the game. Tri will warn you that if you continue, you cannot turn back, so it’s best to get your affairs in order before you go. Backtrack any Pieces of Heart you may want, complete any side quests that you left hanging, and of course, make a bunch of health-restoring smoothies.
The point of no return: Null’s Body
Null’s Body marks the critical point of no return in Zelda: Echoes of Wisdom, where players must fully commit to the final dungeon and its challenges. Upon entering, Link and Zelda reunite, but Zelda sacrifices her Swordfighter Form, relying solely on her Echoes to combat enemies alongside Link. The dungeon features a mix of combat and puzzles, including moments where Link and Zelda are separated and must cooperate remotely using Echoes. The climax is a multi-phase boss fight against Null, requiring strategic use of summons and careful targeting of Null’s arms to progress. Once inside Null’s Body, players cannot return to Hyrule until the final boss is defeated, so it’s essential to be fully prepared with all upgrades and resources before proceeding.
Together with Link, you’ll venture through the last dungeon of the game, Null’s Body. The dungeon portion is actually quite short – but the boss fight is lengthy. After that, that’s it. You’ll unlock a few collection perks after beating the game, but that’s really it!
What is the most effective dungeon order to maximize my progress in Echoes of Wisdom
The most effective dungeon order in Zelda: Echoes of Wisdom to maximize your progress is as follows:
-
Suthorn Ruins – The mandatory starting dungeon that sets the stage.
-
Jabul Waters – Gain the Bombfish Echo early, which is very useful for breaking walls and exploration.
-
Gerudo Desert – Obtain the Flying Tile Echo for better traversal and the Bow of Might for combat upgrades.
-
Hyrule Castle – A key story dungeon that must be completed before the next set of dungeons.
-
Eldin Volcano – Recommended as the first of the next three temples because it provides fire-based Echoes essential for surviving later regions.
-
Hebra Mountains – Follow Eldin to handle cold damage and ice enemies more easily.
-
Faron Wetlands – Last of the trio, where water and spider webs are better managed with the previous Echoes.
-
Eternal Forest (Null’s Body) – The final dungeon and setting for the climax of the game.
This order balances acquiring traversal and combat Echoes early, easing exploration and combat challenges in subsequent dungeons, and aligns with story progression requirements.
Which dungeon provides the most essential tools early in Echoes of Wisdom
The Gerudo Sanctum dungeon provides the most essential tools early in Zelda: Echoes of Wisdom. It grants the Flying Tile Echo, an indispensable traversal ability that lets you cross large gaps quickly, and the Boomerang Boarblin Echo, which is highly effective for combat early in the game. Additionally, you acquire the Bow of Might here, enhancing your combat capabilities in Swordfighter Form. These tools collectively make Gerudo Sanctum the best early dungeon for both exploration and combat advantages, easing progression through subsequent areas and dungeons.