Step into the heart of Nessus and unravel the secrets of Destiny 2’s most ambitious Exotic mission yet-Encore. This sprawling challenge pushes Guardians through intricate platforming, fierce Vex encounters, and cunning puzzles, all culminating in a showdown with the enigmatic Conductor. Complete this mission to claim the Choir of One, the franchise’s first special Exotic auto rifle, and unlock a weapon as unique as the journey itself.
In this Destiny 2 guide, we’ll walk you through how to complete the “Encore” Exotic mission and craft the Choir of One Exotic for yourself.
How to leave the opening area in ’Encore’ in Destiny 2
To leave the opening area in the “Encore” Exotic mission in Destiny 2, start by moving toward the right wall illuminated with a blue light. Climb up the angled ledge along this wall, then jump into a hole located in a white spherical Vex structure below. After a short descent, you will enter a large chasm where you should look straight ahead and jump toward a blue light to land on a platform. From there, shimmy along the narrow walkway to your left, then jump down to a red-lit square platform below. Continue by crossing moving platforms on the right side, patiently ascending as you go. Eventually, jump to a central illuminated ledge and climb up two platforms. Finally, look for a purple hole to drop down, which leads you out of the opening area and toward the next part of the mission.
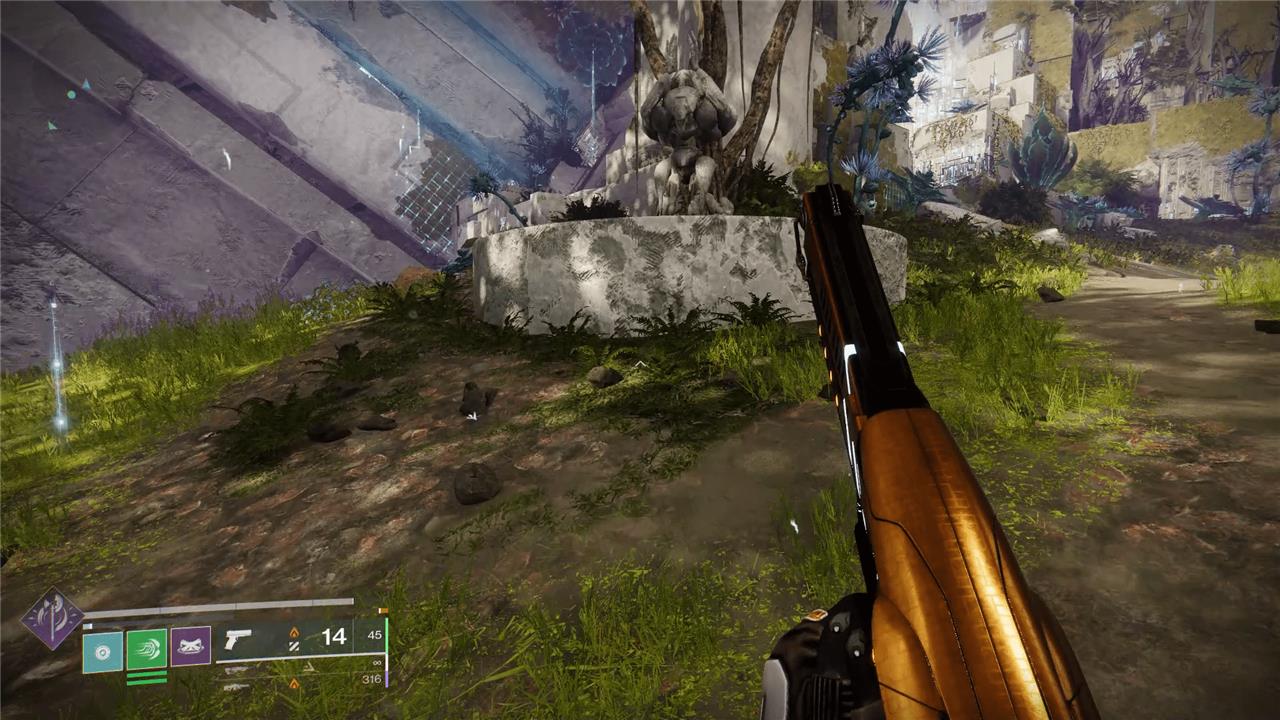
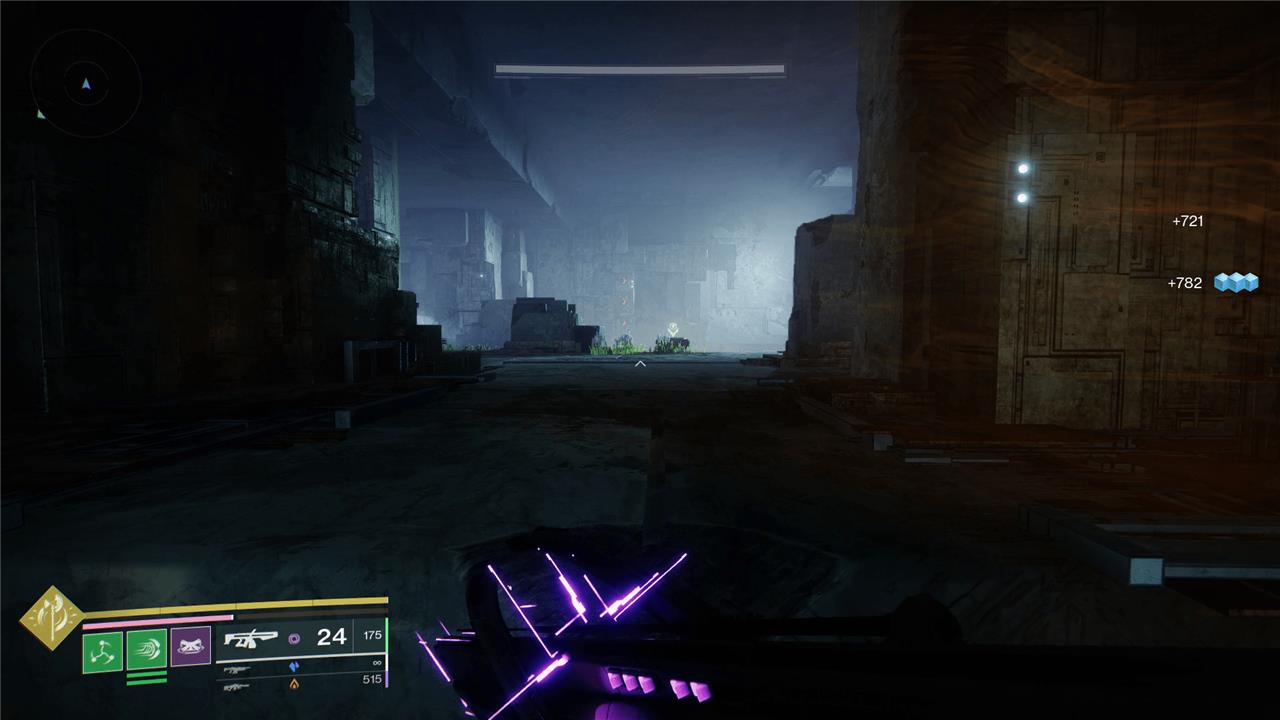
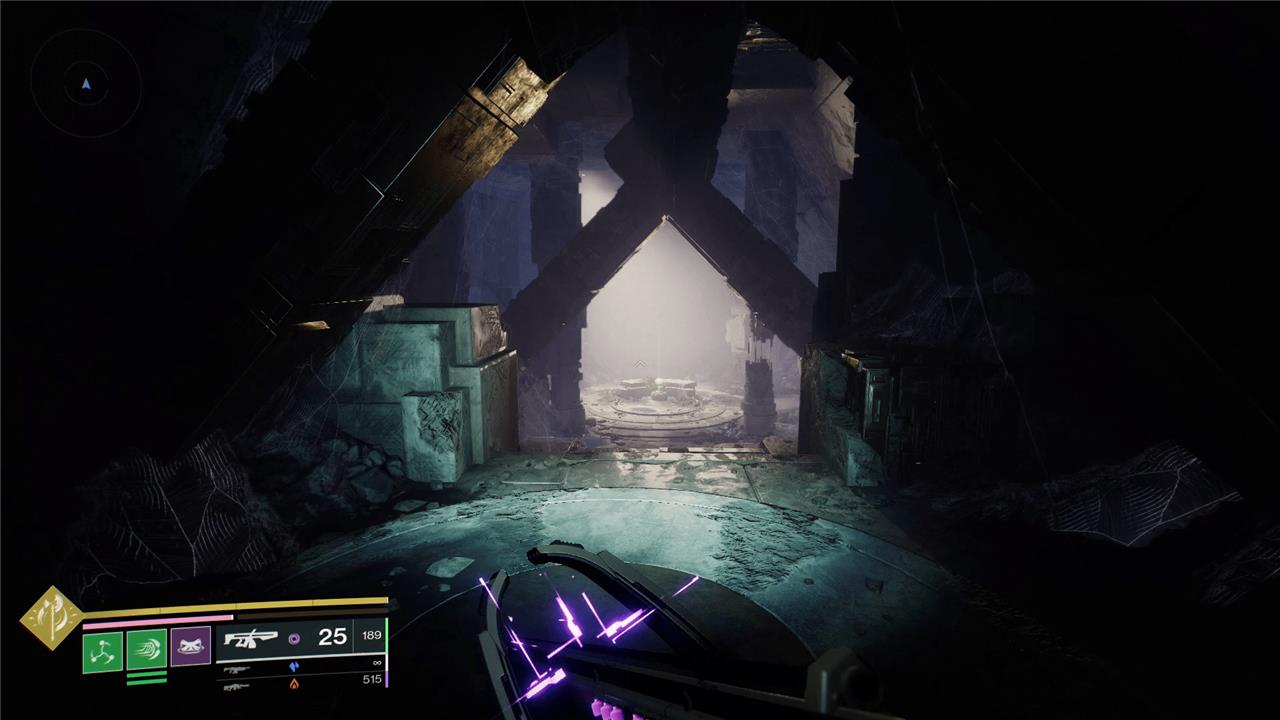
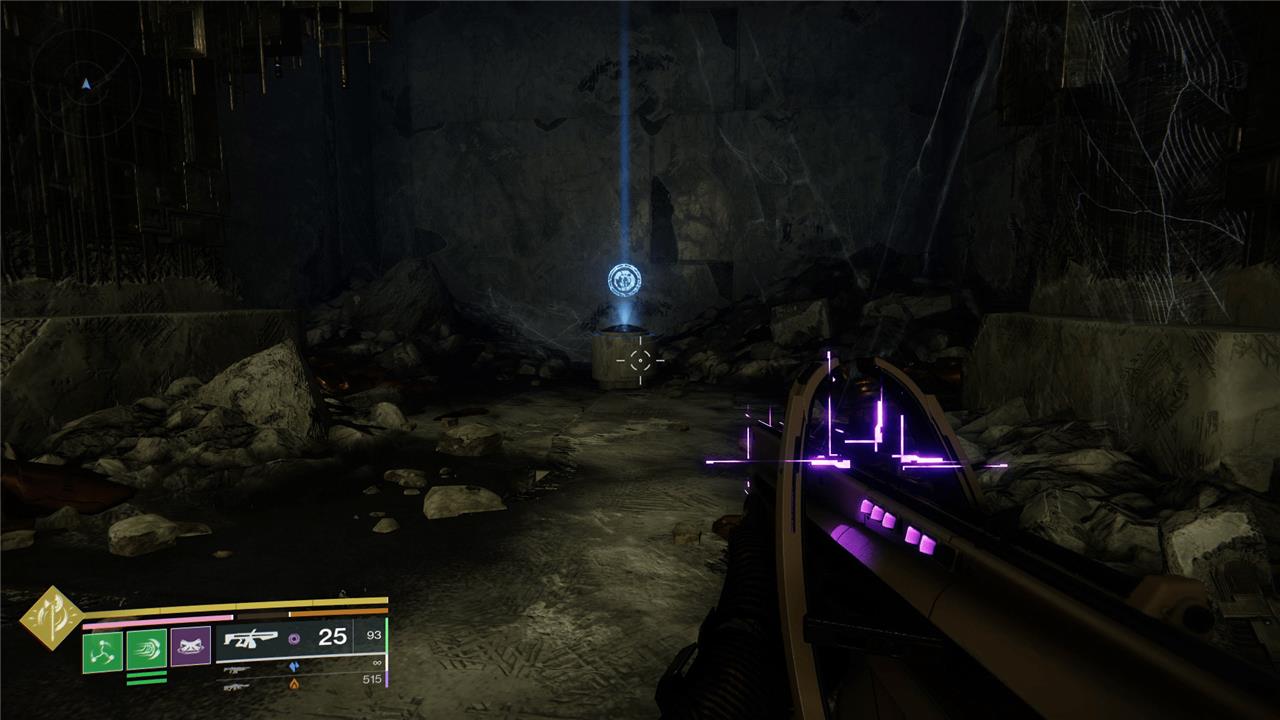
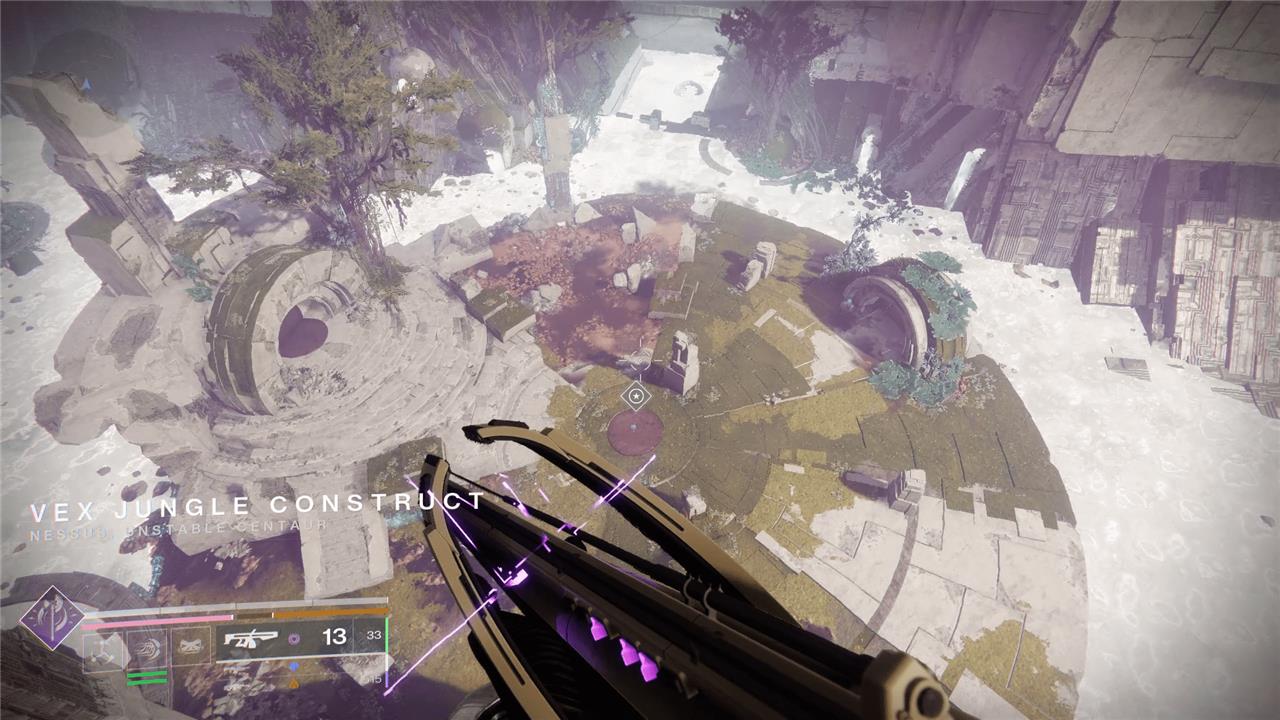
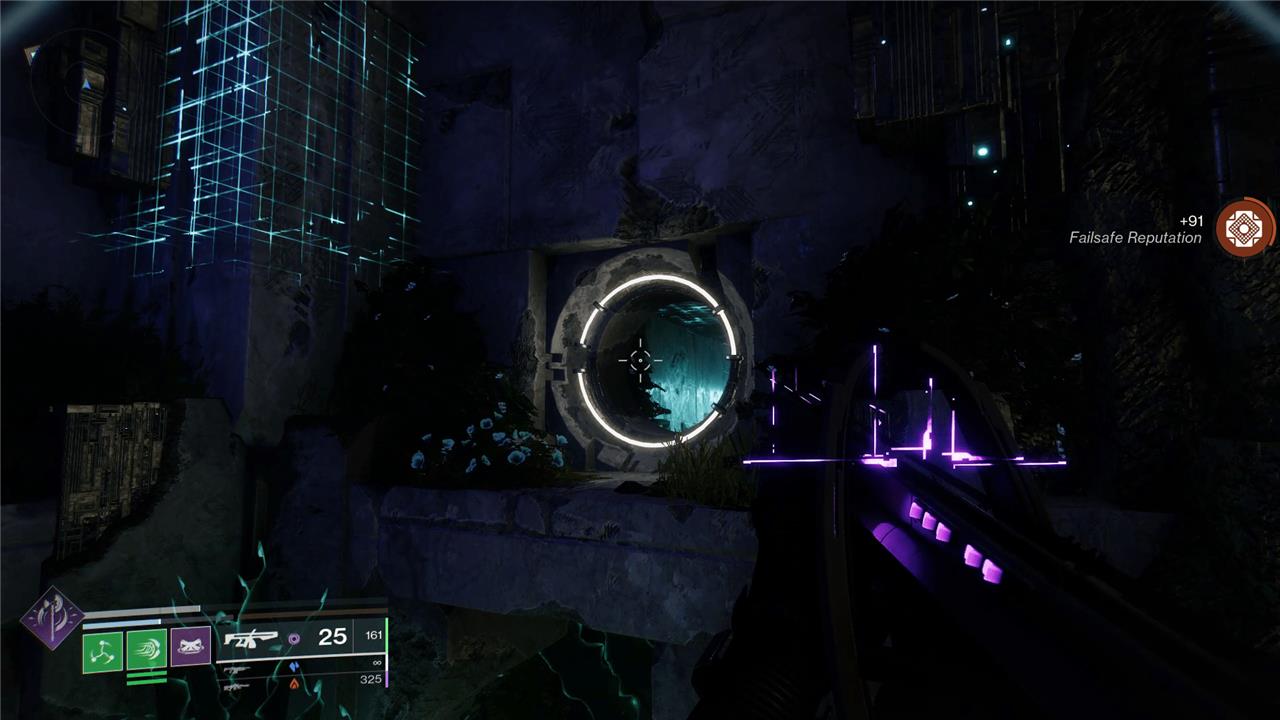
When you first arrive in the “Encore” mission, you’ll be trapped on a plateau with no mission marker to point you in the right direction. Like most Exotic missions, solving the “where am I supposed to go” puzzle is your first challenge.
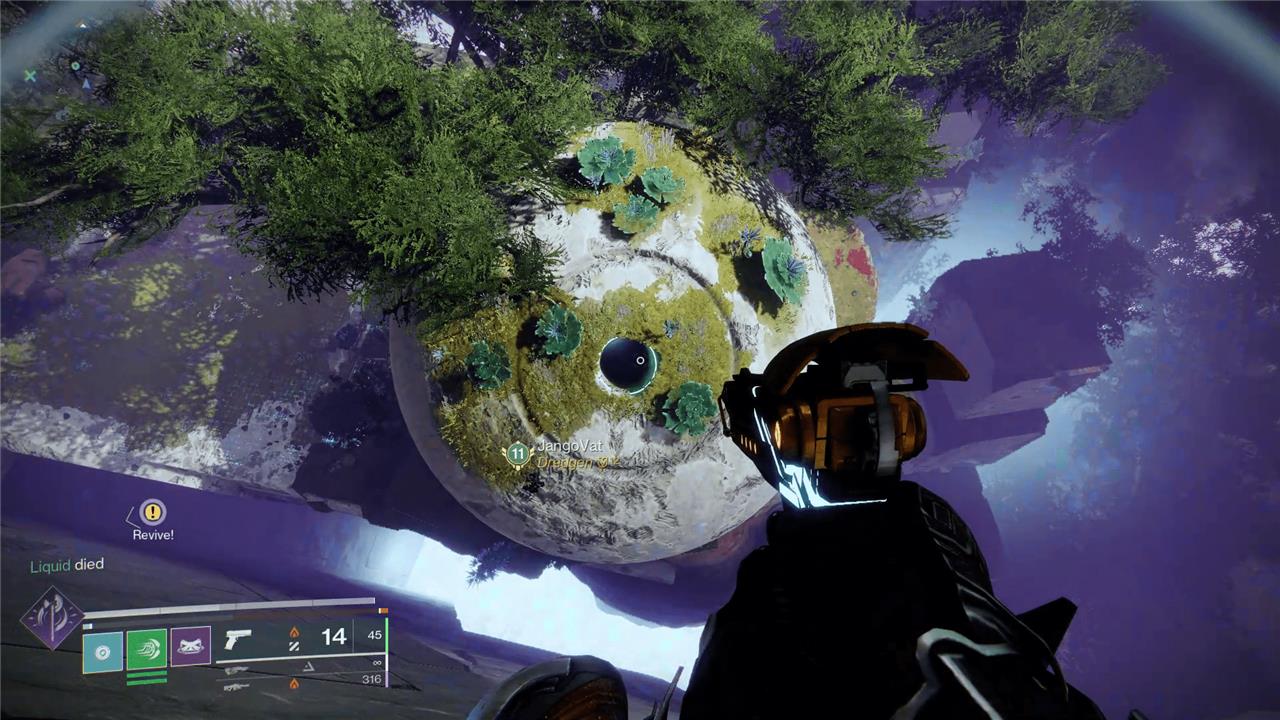
There are a couple of red herrings in this area, which will lead you to dead ends. Where you actually want to go is to the far right of the arena, east of the massive orb. You’ll see a cut in the wall that leads up to a steep ramp – look for the blue lights to the east of the kneeling Minotaur statue if you’re having trouble. Follow the path up to the top and then look to your left and down at the big ball. You’ll see a hole at the top of the ball. Jump into it.
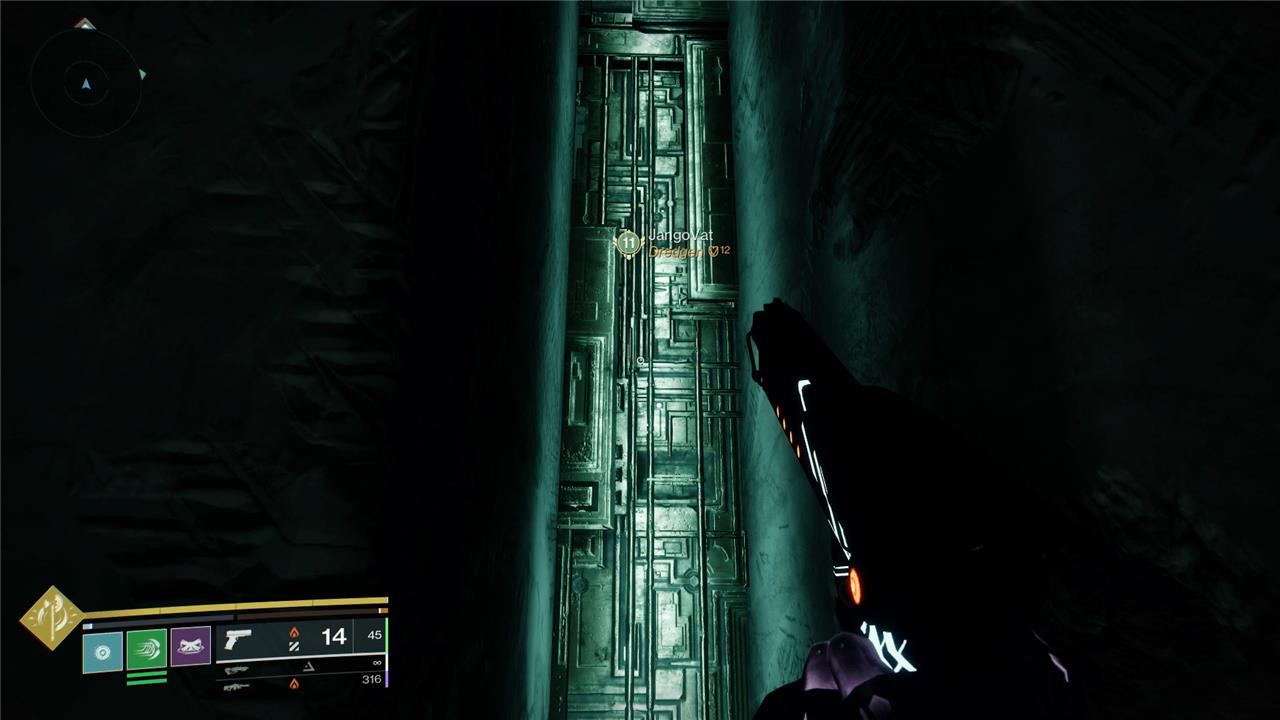
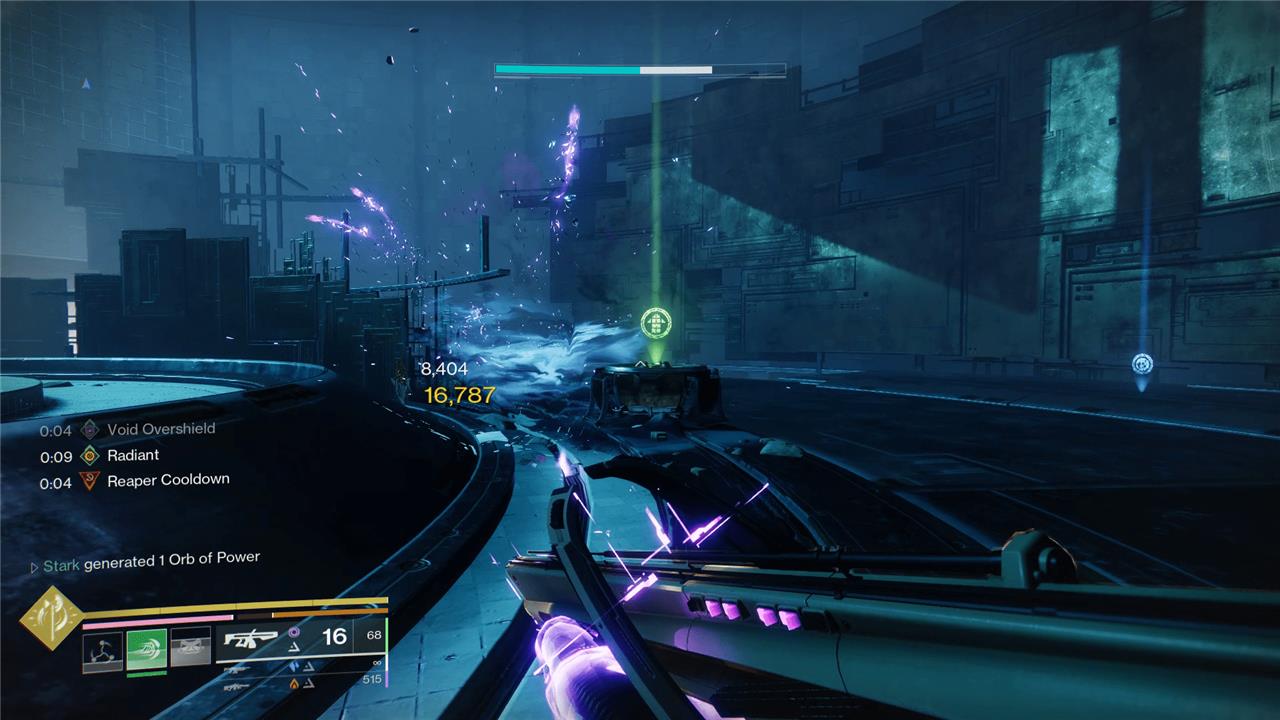
Once you reach the bottom, follow the lights forward, avoiding the pits. Jump past the giant smasher and hug the wall on your left. When you reach the end of the wall, jump down to the gap on your right. Continue forward until you reach an elevator platform. Stand on the landing for the elevator and wait for the one on the right to appear. Ride it up, walk forward, jump onto the moving platform, and then onto the spire in the middle of the room.
Once on the spire, take a series of two elevators up to the very top. Walk down into the two slides and jump to the main platform in the middle of the new room. Straight ahead, look for the piston that crushes into the slide below. Do not take the slide, and instead ride the piston up. Do this again with the second piston you encounter.
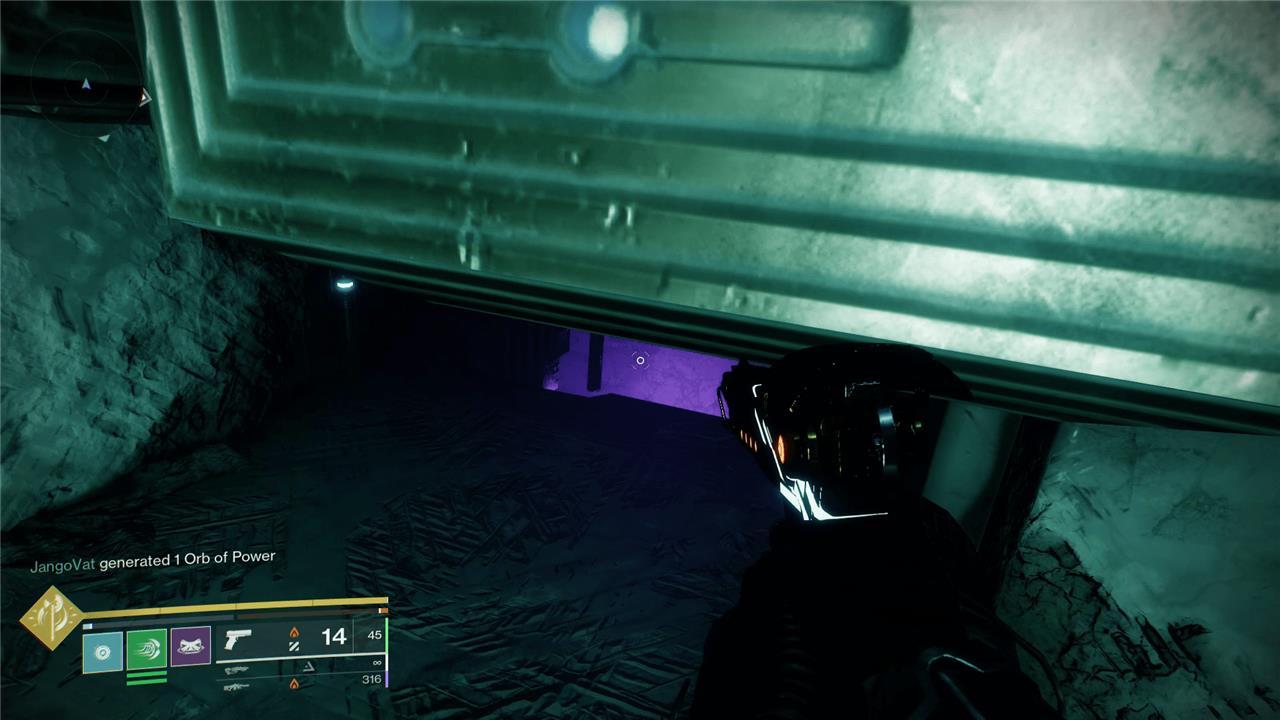
Proceed forward and slide down into the small corridor. Instead of going left here – which looks initially like it’s the only option – walk forward and turn right. You’ll find a pit that’s filled with purple light. Jump down the hole.
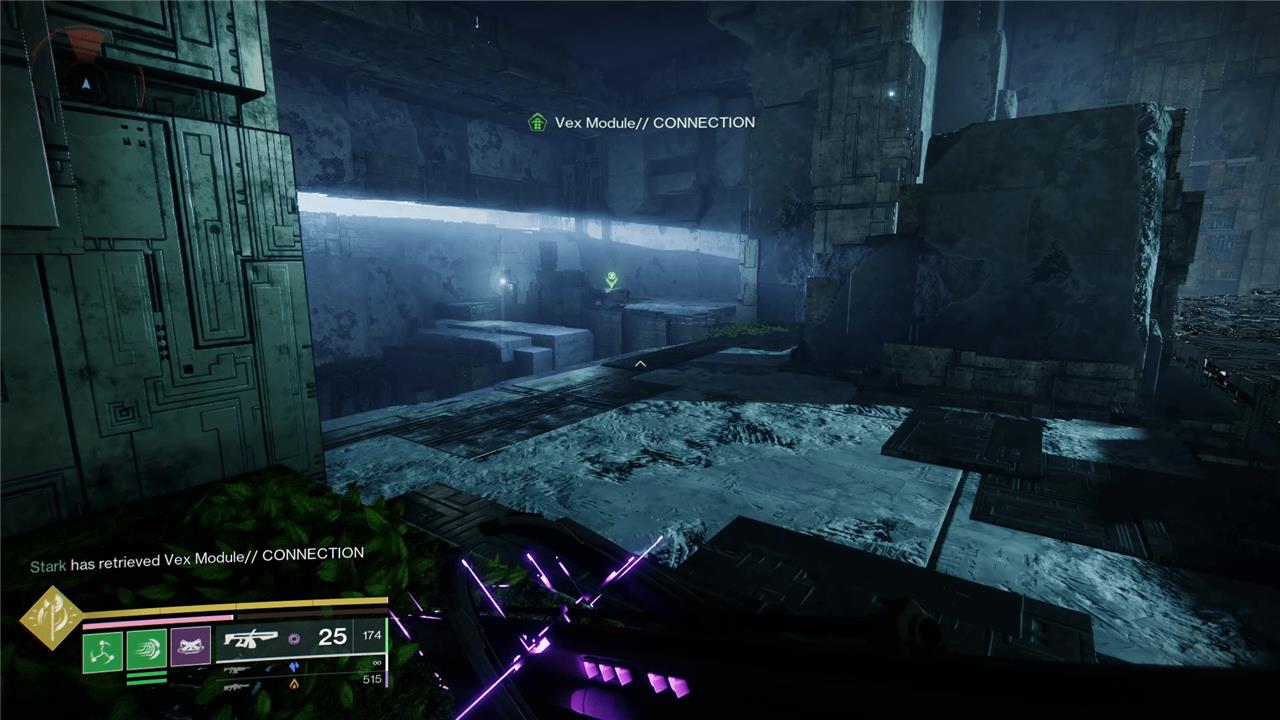
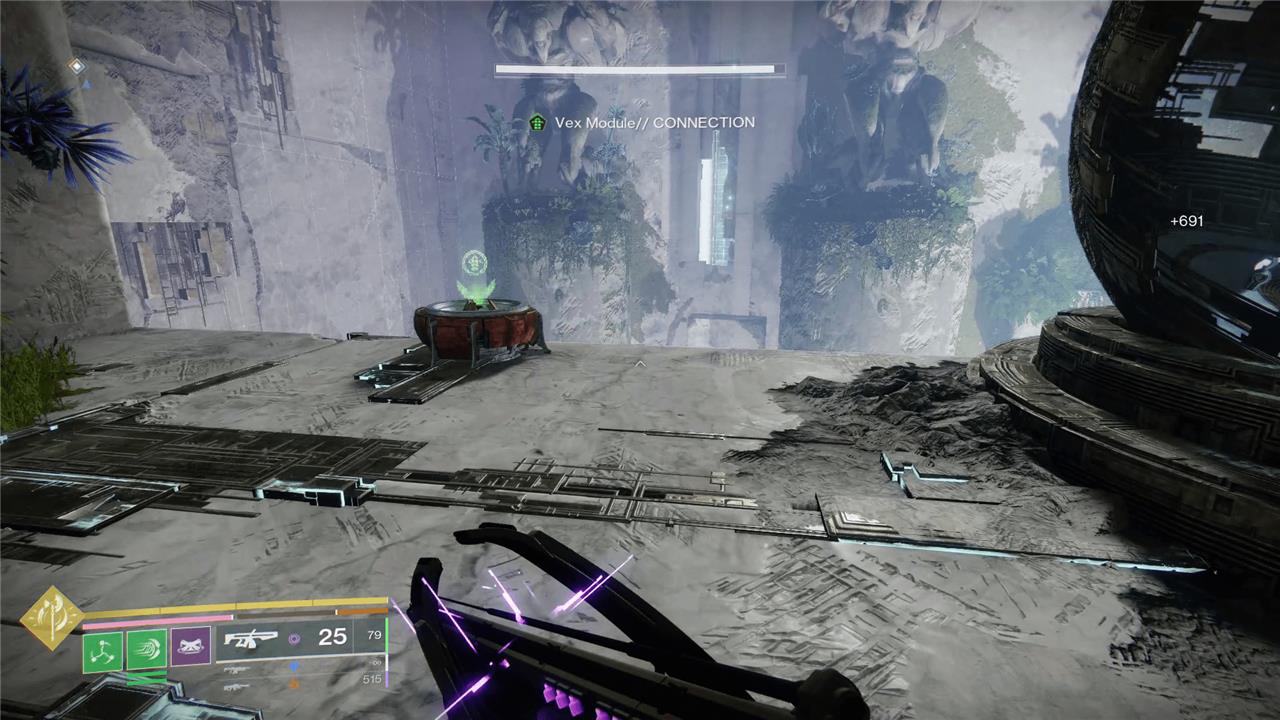
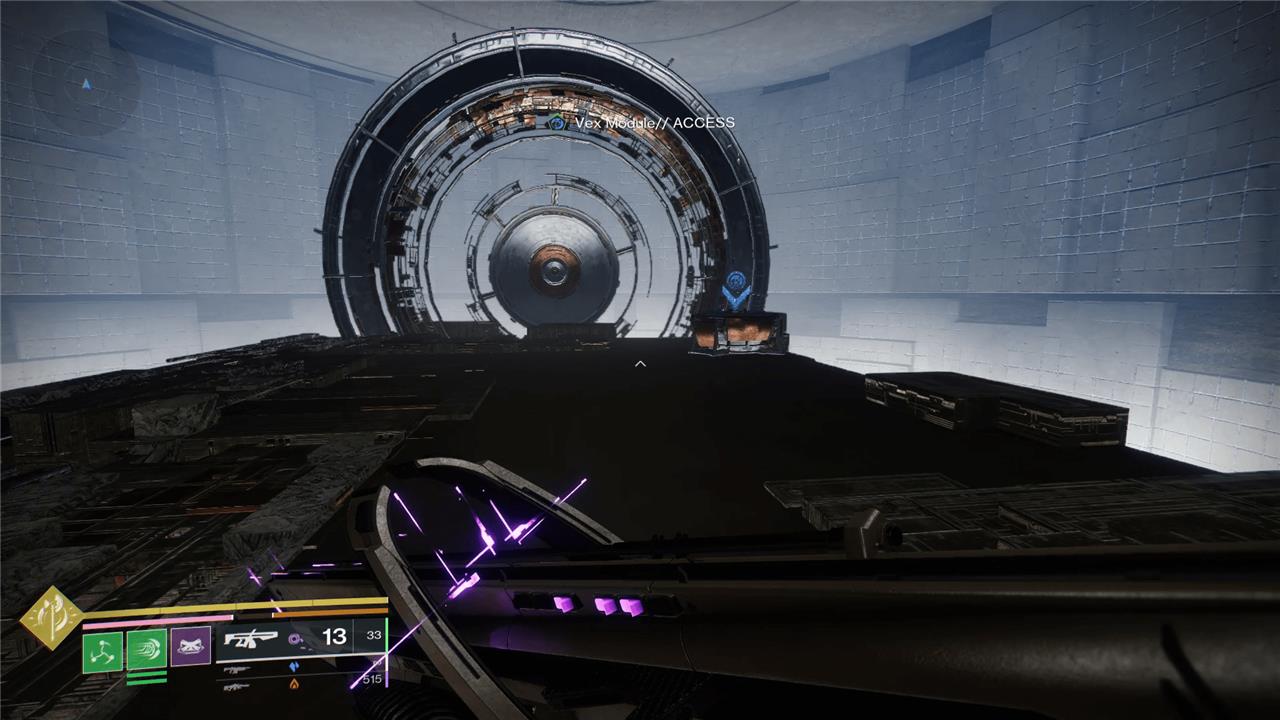
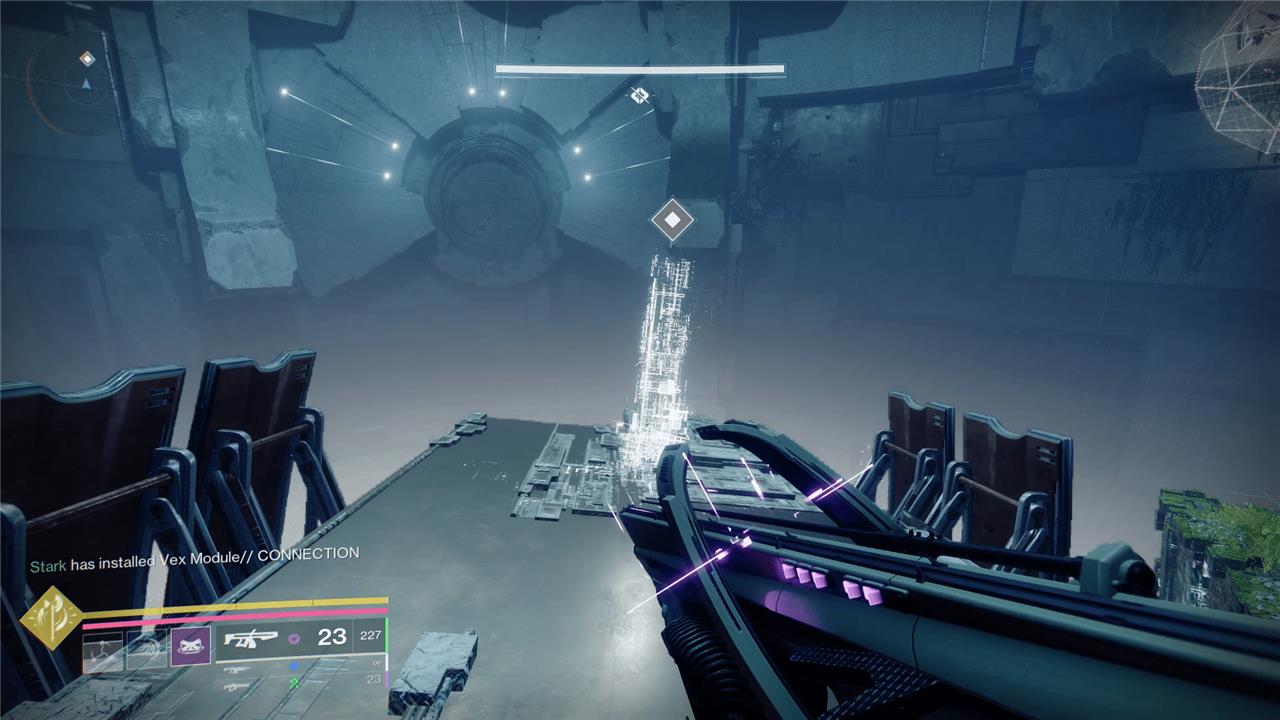
Take the right path forward once you land and you’ll find your first Vex Module // CONNECTION node.
How to solve the first puzzle in ’Encore’ in Destiny 2
To solve the first puzzle in the “Encore” mission in Destiny 2, start by entering the puzzle area and turning left after crossing the initial bridge. You will need to interact with a series of Vex Connection Nodes. First, uninstall the Connection Module from node #1, then install it into Connection node #2 located at the center of the room, which is marked by three red diamonds. Activate the Vex spire switch that appears at node #2. Next, uninstall the module from node #1 again and transfer it to node #3 on the left side of the arena. Activate the second Vex spire switch by jumping through the open wall near node #3. Finally, retrieve the module from node #3 and move it downstairs to node #4 across a small Radiolaria river. This sequence activates all necessary obelisks and opens the path forward in the mission.
A bulk of the “Encore” mission is spent in these Vex Module puzzles, which involve you picking up a module – either in the environment or from an enemy – and plugging them into a corresponding node, which in turn causes something to happen. For most of this first puzzle, you’ll only be using CONNECTION, which is the green module.
Once you find the hub, take a right and go down the path. This is where the puzzle begins. Here is your quick, step-by-step breakdown of puzzle 1:
- Enter the puzzle and turn left after the first bridge and uninstall CONNECTION module #1 from CONNECTION node #1.
- Install CONNECTION module #1 into CONNECTION node #2, which is in the center of the room, across from the wall with the three red diamonds.
- Access the vex spire switch that manifest on the CONNECTION node #2 bridge.
- Uninstall CONNECTION module #1 and install it in CONNECTION node #3, which is on the left side of the arena.
- Cross the CONNECTION node #3 bridge and jump through the open wall to flip the second vex spire switch.
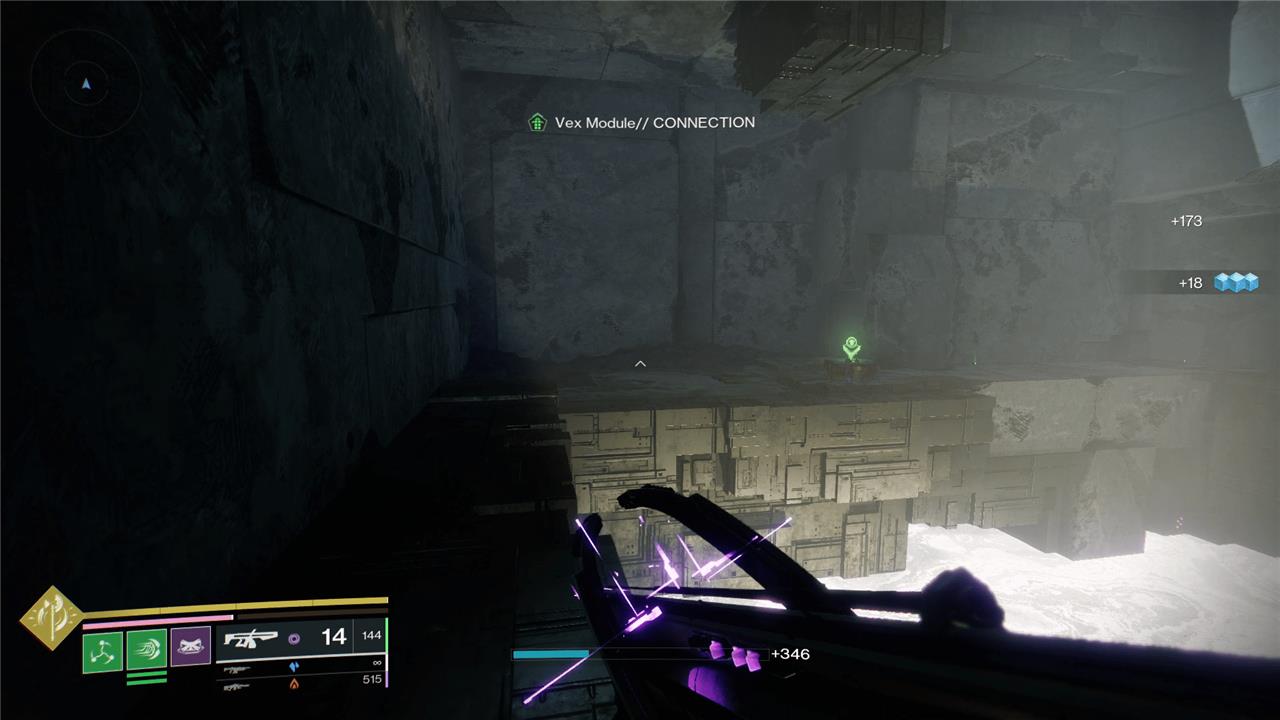
- Grab CONNECTION module #1 from node #3 and take it downstairs to install into CONNECTION node #4, which is across the small Radiolaria river.
- Cross the CONNECTION node #4 bridge into the side room, kill the enemies, and pick up the PARTITION module.
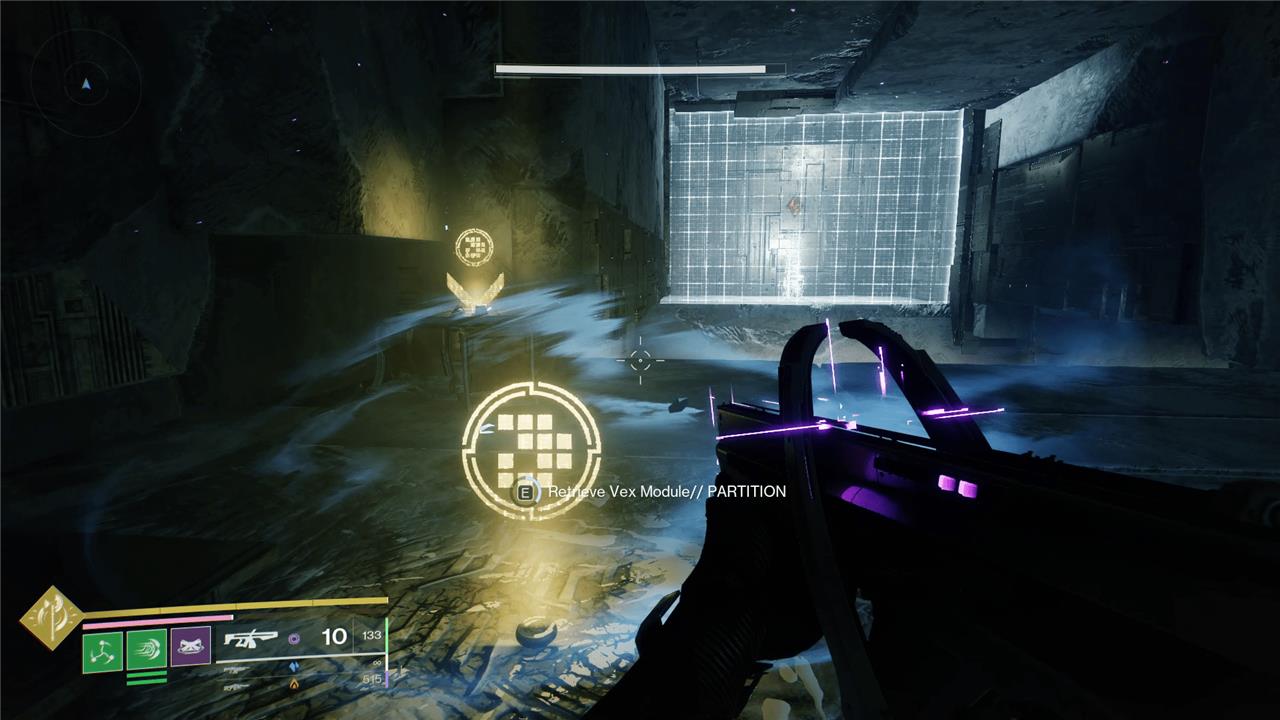
- Plug the PARTITION module into the PARTITION node to make the wall to your left dissolve.
- Go through the now-open wall to pick up CONNECTION module #1 from CONNECTION node #4, and plug it into CONNECTION node #5, which is next to the PARTITION node.
- Cross the CONNECTION node #5 bridge and access the third and final spire switch.
- Grab CONNECTION module #1 from node #5 and return to node #2 via the PARTITION wall, leaving the PARTITION module installed.
- Install CONNECTION module #1 into CONNECTION node #2 and walk across the bridge, through the now open wall.
- Follow the path until you find CONNECTION module #2 on a pedestal.
- Grab CONNECTION module #2 and run back to CONNECTION node #1 as fast as possible.
- Install CONNECTION module #2 into CONNECTION node #1 and collect CONNECTION module #1 from CONNECTION node #2.
- Take CONNECTION module #1 across the CONNECTION node #1 bridge and back to the main area of the mission.
- Defeat the enemies before finally plugging CONNECTION module #1 into CONNECTION node #6, which is on the edge of the cliff.
How to solve the second puzzle in ’Encore’ in Destiny 2
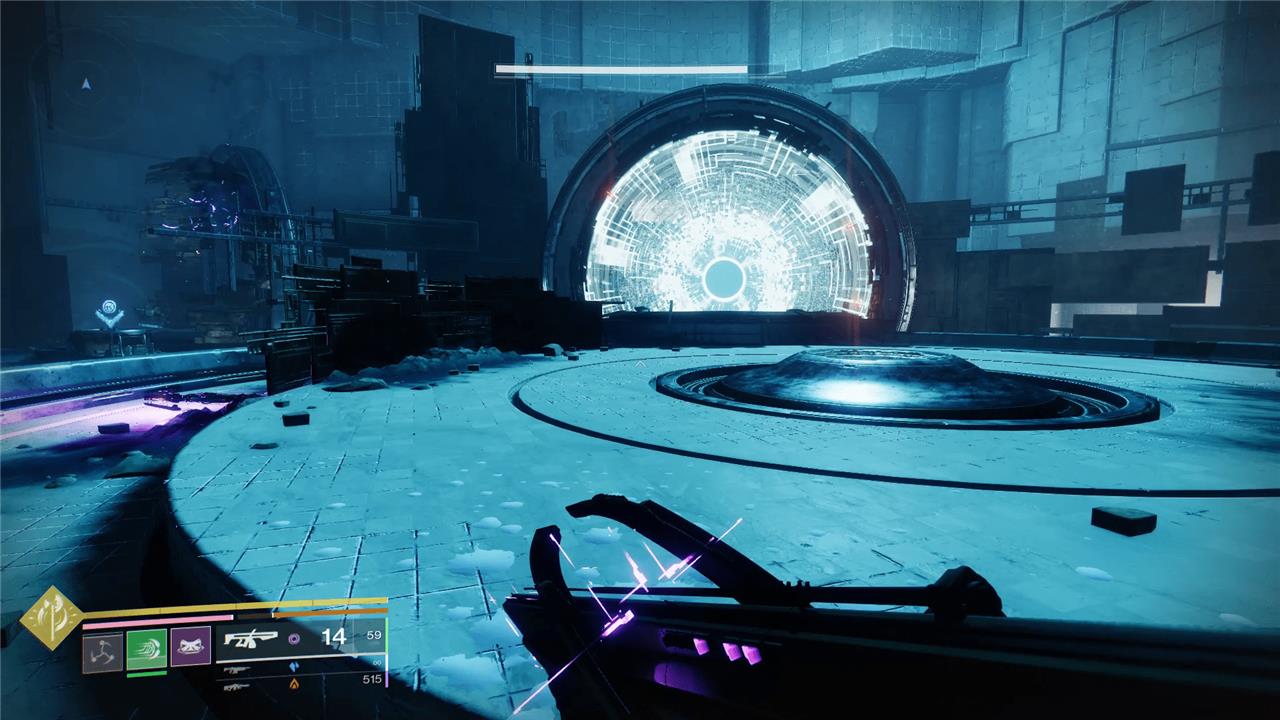
To solve the second puzzle in the “Encore” mission in Destiny 2, you need to interact with a series of ACCESS modules and portals on the second floor. First, retrieve ACCESS module #1 from a pedestal and insert it into the corresponding node to open a portal. Use this portal to enter a circular arena where you defeat Vex enemies and collect ACCESS module #2. Insert module #2 into another node on the right side of the arena, then return through the portal to uninstall ACCESS module #1. Use module #1 again by placing it into a third node against the arena wall. Finally, obtain the CONNECTION module from a node in the arena to complete the puzzle sequence and progress further in the mission.
Head across the new platform and then jump down into the cylinder on your left once you reach the lake of Radiolaria. Jump to the larger spire and walk around to the left to reach the booster. Take it to the next level, then take the next booster, and the third booster after that.
Once you reach the next room, clear out the enemies that appear. Keep clearing until everything is gone and you’re left with a Vex Module // PARTITION on the ground. Grab it and plug it into the node straight across from where you entered. When the wall disappears, head inside and take the booster up to the second level.
This is where the puzzle actually starts. Here is your quick, step-by-step breakdown of puzzle 2:
- On the second floor, acquire ACCESS module #1 off the pedestal
- Plug ACCESS module #1 into ACCESS node #1 to create a portal
- Take the ACCESS node #1 portal to the circular arena and clear out the Vex
- Pick up ACCESS module #2 off the ground in the circular arena
- Install ACCESS module #2 into ACCESS node #2 on the right side of the arena.
- Take the ACCESS node #2 portal back to ACCESS node #1.
- Uninstall ACCESS module #1 and return to the circular arena via the ACCESS node #2 portal.
- Install ACCESS module #1 into the ACCESS node #3, resting against the wall in the arena.
- Grab the CONNECTION module out of CONNECTION node #1, in the arena.
- Take the CONNECTION module through the ACCESS node #3 portal an install it in CONNECTION node#2, which is to the right.
- Go back through the ACCESS node #3 portal and unplug ACCESS module #2 from ACCESS node #2.
- Go back through the ACCESS node #3 portal and plug ACCESS module #2 into ACCESS node #4, which is on the CONNECTION node #2 bridge.
How to defeat Eexonios and Iziira in ’Encore’ in Destiny 2
To defeat Eexonios and Iziira in the “Encore” Exotic mission in Destiny 2, focus on managing both bosses who roam freely during the encounter. Eexonios is a Subjugator, and Iziira is a Tormentor, each with distinct attack patterns. Use grapple grenades to escape their slam attacks, especially when your screen glows red, signaling danger. When one boss becomes immune, take the nearby portal to reposition and regroup. Be patient, listen for teleport cues from the enemies, and prioritize aggressive attacks to whittle down their health. After defeating them, loot the chest to progress in the mission.
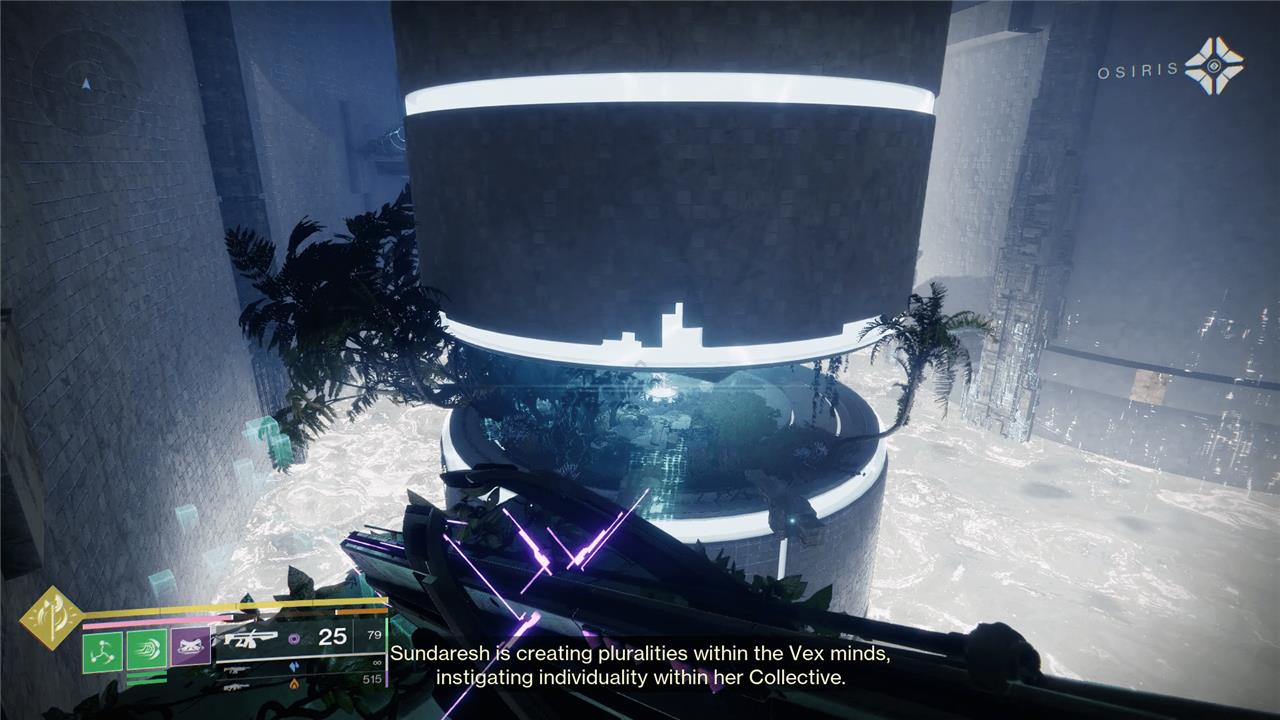
When you head through the final portal in the second puzzle, you’ll emerge in the Vex Jungle Construct for the mission’s first of two boss fights, which is actually a double boss fight with a Tormentor and a Subjugator.
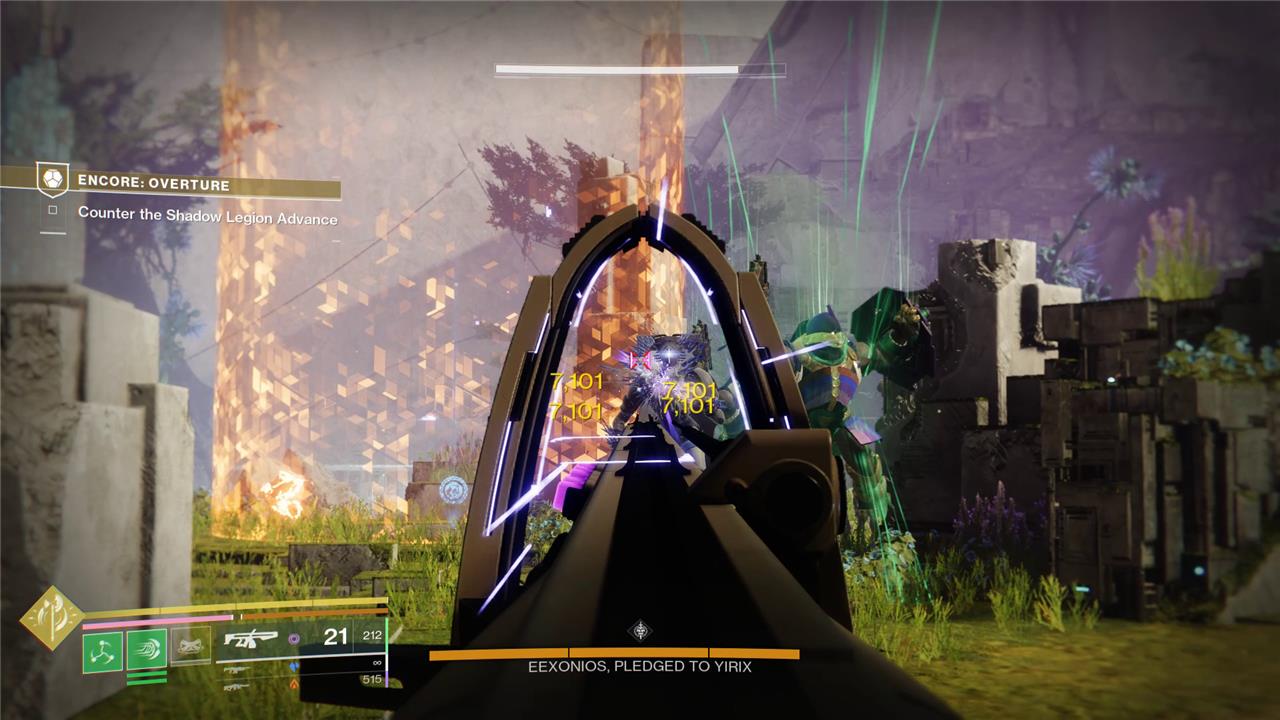
When you step forward and start the fight, Eexonios, Pledged to Yirix, will appear. Use a precision weapon or Microcosm to deal with this thing. Once you take down the first segment of its health bar, it’ll retreat, allowing you to grab the Vex Module // ACCESS in the arena. Use it on the ACCESS node on the right side of the arena.
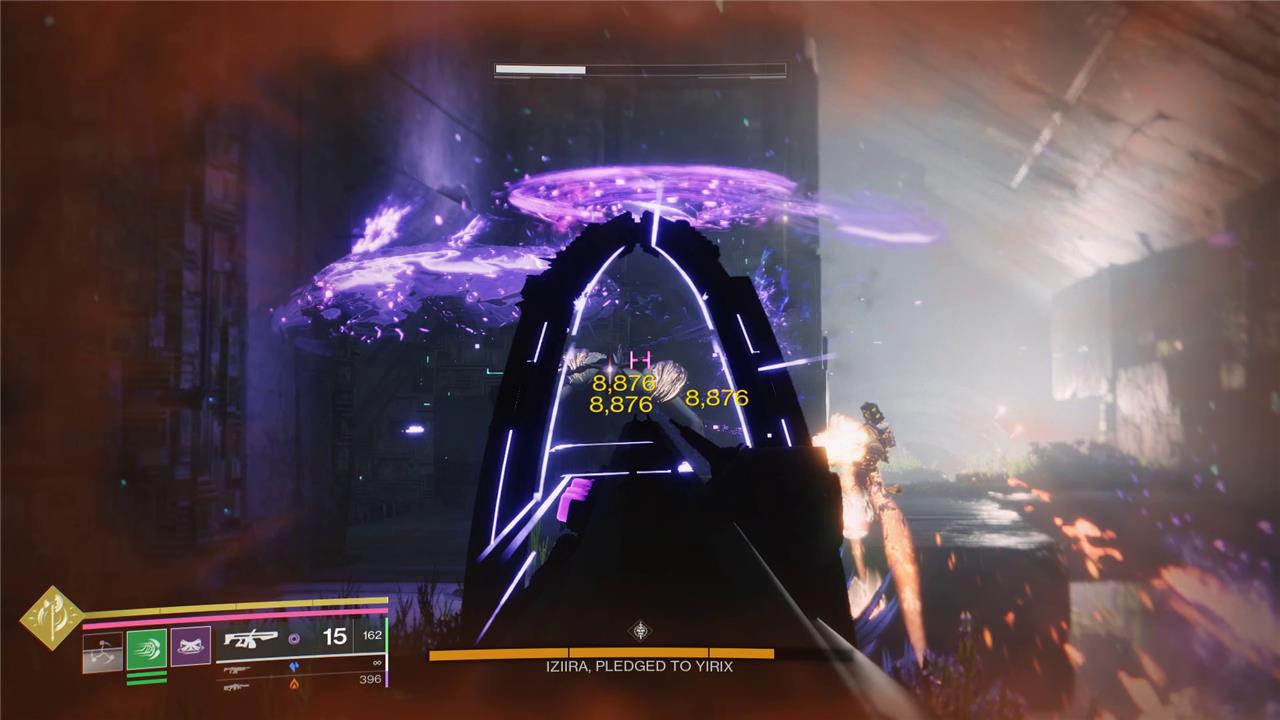
On the other side of the portal, you’ll meet Iziira, Pledged to Yirix, a Tormentor. Use precision weapons to pop its shoulders, which should be enough damage to cause it to retreat. It’ll drop another ACCESS module. Grab it and install it in the node at the end of the room.
Hop into the portal and you’ll find Eexonios waiting for you on the other side. Carefully take its health down another third – watching for the Stasis crystals and the legion of enemies in the arena – to get yet another ACCESS module. Plug it into the node and continue forward.
You’ll now be in a room with Iziira again, but now they’ll be rampaging the way Tormentors do. Luckily there are portals in here that you can use to hop from one side of the arena to the other. Use these to avoid Iziira until you can take it down to a third health, just like the Subjugator. Grab the ACCESS module, plug it in, and head through one final time.
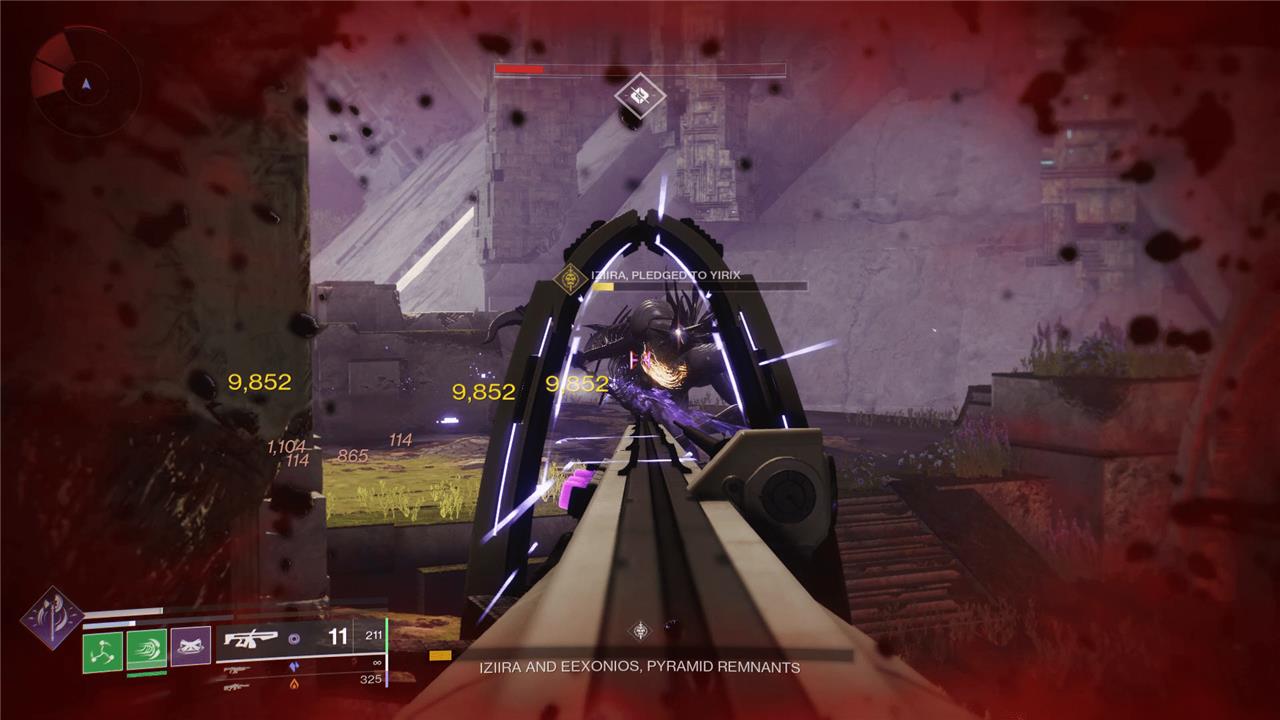
You’ll now be back in the arena you started in and both bosses will be here with you. Take Eexonios out first by running around in circles in order to keep Iziira off of you – burning a Super on the Subjugator is a great play here, if yours is up. Once it’s just you and the Tormentor, carefully plink away at it from the high ground. Grab the chest that appears at the end of the fight and head through the portal at the top of the ramp.
Jump up and into the little tunnel on the right of the room. Follow the path forward until you find a bunch of Vex. Just kill the enemies here and then hang a left around the big, stone rectangle. Climb up the rocks to reach some old buildings that you’ll recognize from Venus if you were a player of the original Destiny. Clear the enemies here and then push forward through the mission. Defeat the next round of Vex in the Venus-like area and then go through two portals.
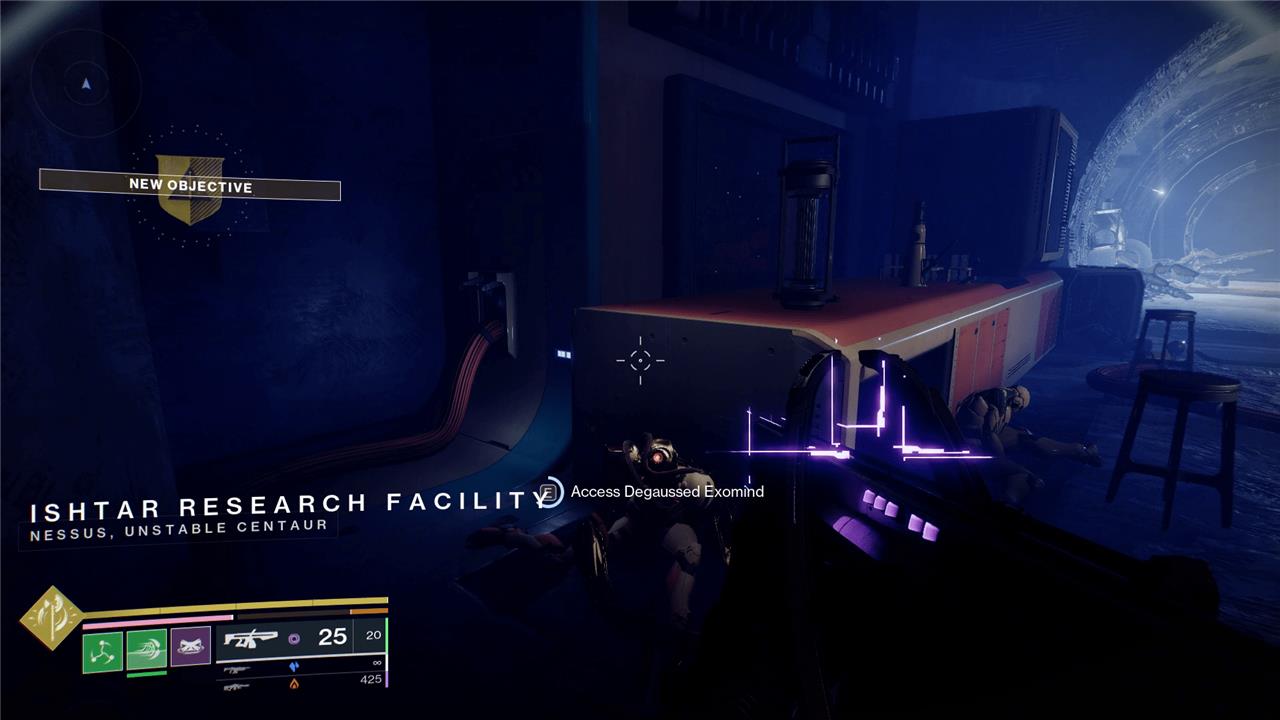
You’ll now be in Maya’s old study, in the Ishtar Research Facility. Look at the dead Exo on the left side of the room, leaning up against the table and interact with it using the “Access Degaussed Exomind” prompt. This will both play some dialogue and give you a Specimen to bring back to Failsafe in the HELM. Follow the path through the study until you reach a dead end. Wait for the dialogue to stop playing and the wall will open. Head down and into the final boss’ arena.
How to defeat Parodos in ’Encore’ in Destiny 2
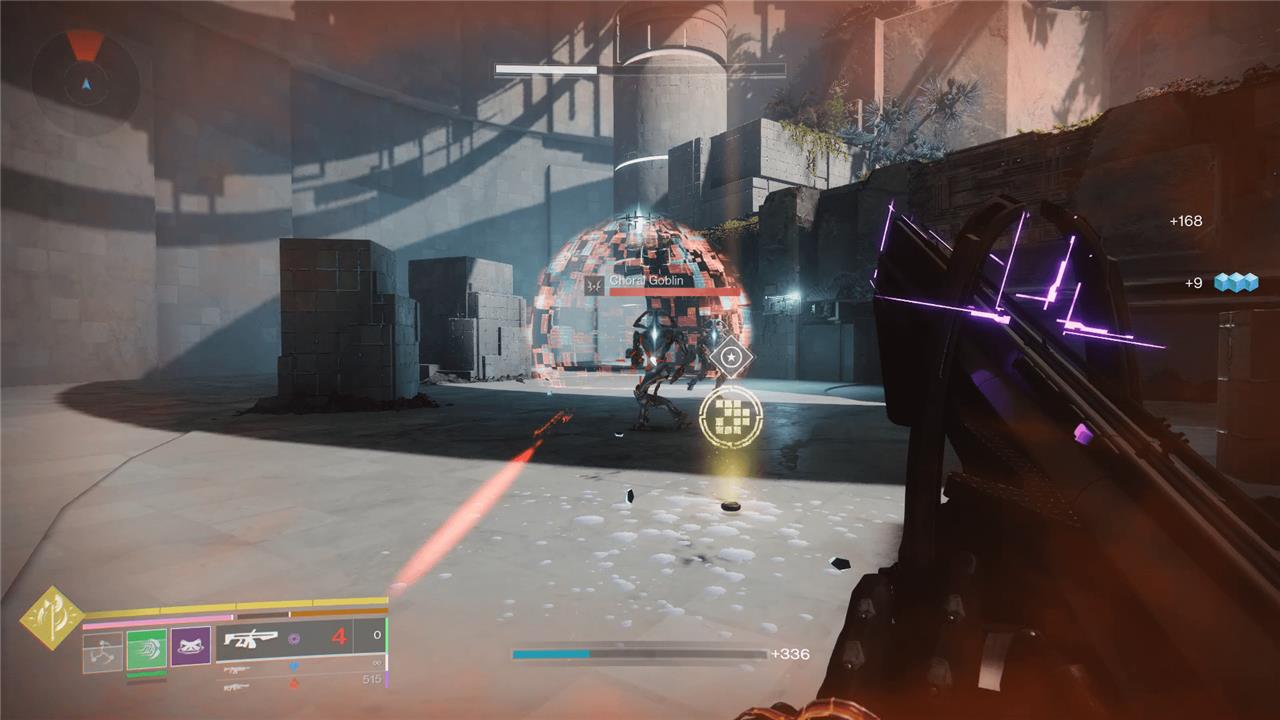
To defeat Parodos, the Choral Mind, in the “Encore” mission in Destiny 2, start by killing the Independent Variable Minotaur to obtain the Connection module and deposit it at the center plate to interact with the conflux. Parodos will then teleport to either the back left or back right of the arena. Use the Connection buff to spawn platforms on the side Parodos appears, then capture the vex plate that appears on those platforms to break the boss’s shield. After capturing the plate, shoot the pyramid node near Parodos to enter the damage phase. When Parodos reaches half health, death walls will divide the arena into sections, and you’ll need to use Access modules dropped by Minotaurs to move between these sections while repeating the plate capture and damage cycle. In the final phase, Parodos moves to the center of the arena, where you must shoot the node and deal the finishing damage. Be sure to stay in the same arena segment as the boss during plate captures and node shots to avoid bugs that can soft-lock the fight.
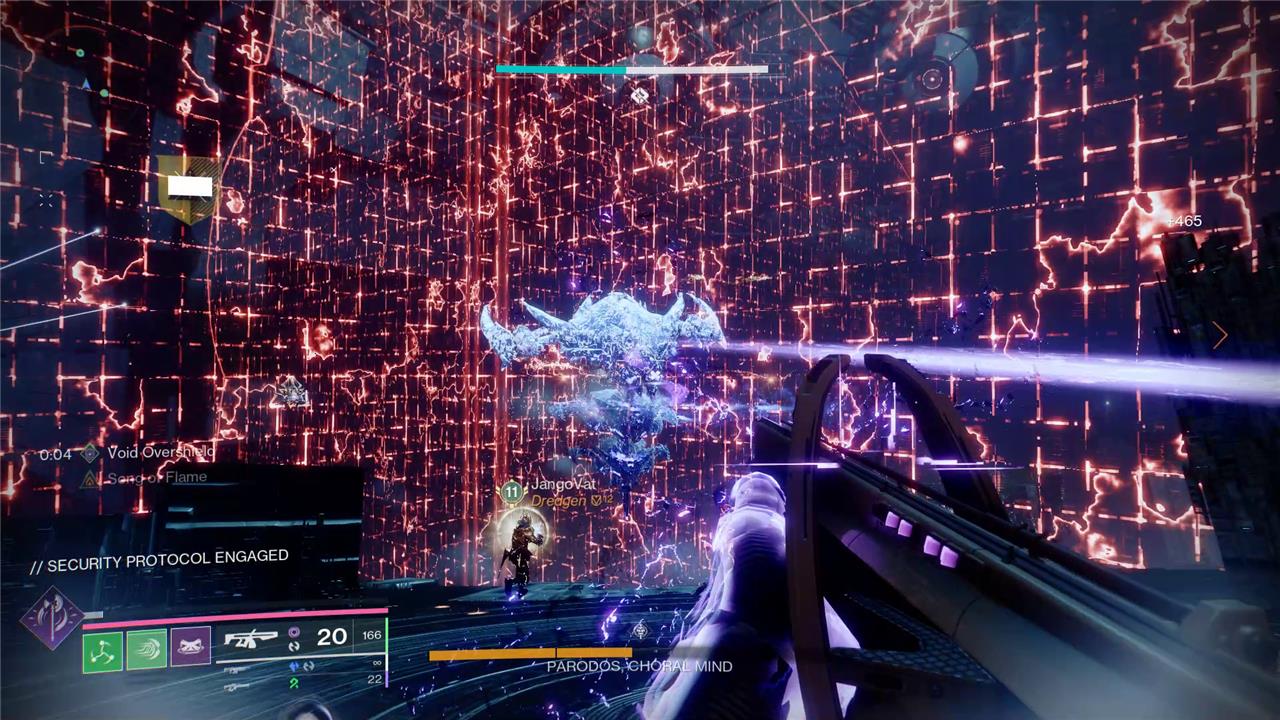
Parodos, Choral Mind, is the final boss of “Encore” and the giant Hydra that has been following you around this entire time. In true Destiny fashion, you’ll need to use everything you’ve learned so far to defeat them. And also in true Destiny fashion, the mechanics are much simpler when you actually have to do them mid-combat. Grab your rally flag and step forward to start the fight.
First, kill the big Vex Minotaur to get a CONNECTION module, then plug it into the node in the middle of the arena. This will cause a bridge to appear, which has a spire switch on it. Access it and then uninstall the CONNECTION module. The boss will then retreat to the back left or right of the room, and a Cyclops will appear on whatever side they move to. Take the module over to that side and plug it into the CONNECTION node there to spawn a massive plate hub. Defeat that Vex that swarm while standing on thered plate. Once you stand there long enough, you’ll activate the plate and create a weak spot on the boss’ shield. Destroy the weak point and get ready to deal some damage.
When you pop the boss’ shield, wait for it to teleport in front of the plate. Use all the ammo and Supers you can to take the boss’ health down to half in one go – there is an issue where the boss fight can break entirely if you go too slow here, but you shouldn’t have a problem if your entire Fireteam focuses the boss. Once it reaches half health, a red cage will appear around the platform you’re on. Keep dealing damage to the boss while also working to take down the big Minotaur that spawns. Once you hit the next milestone on the boss’s health bar, grab the ACCESS module that drops from the Minotaur and plug it into the portal behind you.
You’ll return to where you first started the fight and Parodos will have another weak point on its shield. Destroy it and then use whatever ammo you have left to finish off the boss. Once it’s dead, grab the chest that appears in the middle of the arena to both complete the mission and earn your new Choir of One Exotic.
What does the Choir of One Exotic auto rifle do in Destiny 2?
The Choir of One Exotic auto rifle in Destiny 2 is a unique Void weapon introduced in Episode: Echoes Act 3, obtained by completing the Exotic mission “Encore: Overture.” It features two distinct firing modes: when aiming down sights, it fires extended-range, heavy-caliber projectiles with increased precision damage, functioning like a scout rifle; when hip firing, it launches multiple slow-moving projectiles in a spread pattern that detonate on impact, similar to a fusion rifle. Its intrinsic perk, Fanatical Lance, causes rapid final blows to make targets explode into pools of radiolarian fluid, dealing area damage. Additionally, the weapon is craftable and can be customized with three different Catalysts that enhance its performance in various ways, such as increasing rate of fire, magazine reload, or applying volatile status to nearby enemies.
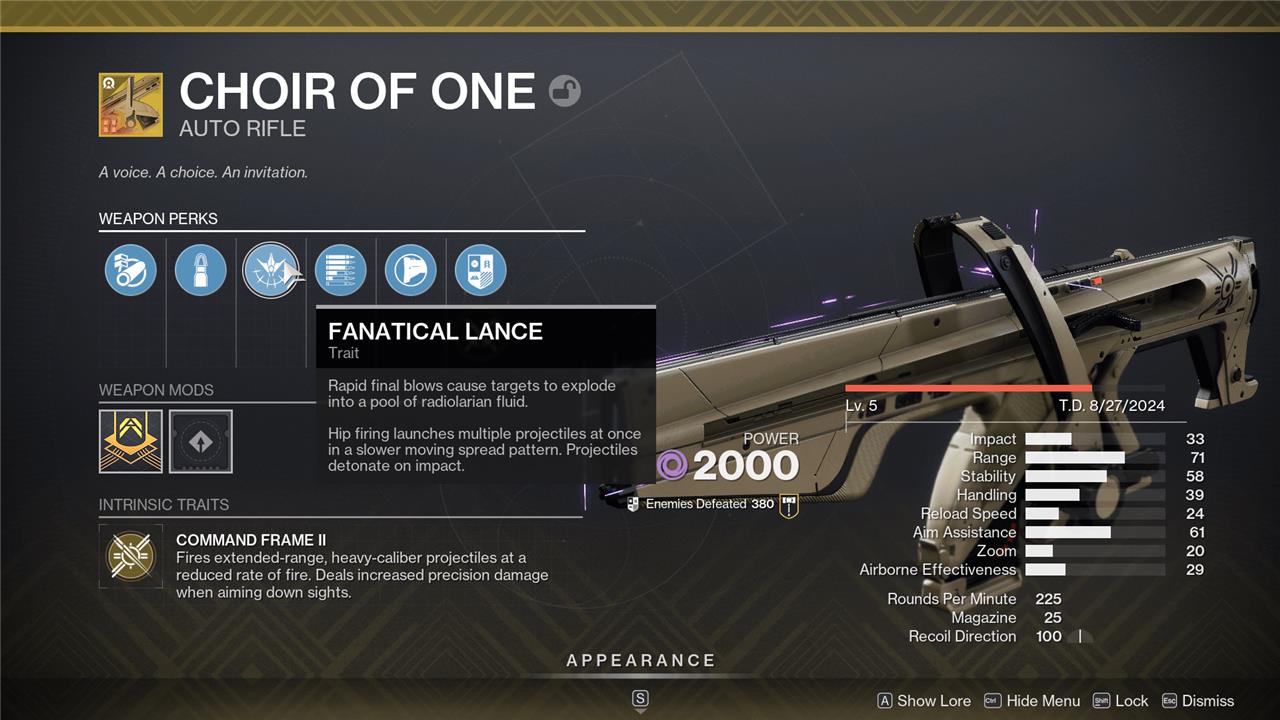
Choir of One is the first of its kind, a Void auto rifle that uses Special ammo instead of Primary. And while it doesn’t have unlimited ammo like its auto rifle brethren, it makes up for it with incredible damage.
Choir of One’s Intrinsic perk is called Command Frame, which causes it to fire extended-range, heavy-caliber bullets at a slow RPM. These bullets deal increased precision damage when aimed down sights. The Fanatical Lance Exotic perk causes rapid kills to create a damaging pool under enemies. Additionally, hip-firing the weapon causes it to shoot a Vex Wyvern shot, which consumes five times the ammo of a normal shot but does extreme damage.
Like all craftable Exotics, you can upgrade the Command Frame in the “Encore” mission, which will allow you to change out the magazine, stock, and barrel perks. You can also earn new Catalysts each week, starting with Subsistence.
What secret strategies help beat the Encore mission solo
To beat the Encore Exotic mission solo in Destiny 2, several secret strategies can greatly improve your chances:
-
Healing and Survivability: Equip healing grenades or abilities such as Restoration, Devour, or a Heal Clip weapon to sustain yourself during the boss fight, as the arena offers little cover and heavy damage is incoming.
-
Weapon Loadout: Use an auto rifle with the damage resist artifact mod for general combat, and high-damage weapons like Whisper of the Worm or Rocket launchers for boss phases. Sunshot and God Roll BXR are recommended for early encounters and boss damage respectively.
-
Boss Mechanics: During the final boss fight against the Choral Mind Hydra, kill the Minotaur to obtain Command Modules and dunk them on the correct plates to disrupt the boss’s shield. Be ready to fend off Vex adds while holding the plates. After shield disruption, focus DPS on the boss’s pyramid object to trigger damage phases. Avoid pushing the boss past HP thresholds unless you can finish it, as this may bug the fight.
-
Traversal and Platforming: Use momentum-building weapons like the Eager Sword to save time and navigate jumps efficiently. Pay close attention to pillar and deposit mechanics to progress smoothly through the mission.
-
Avoid Certain Modifiers: If possible, avoid the “flying units” modifier on the final boss fight, as it increases AOE damage and complicates DPS phases.
-
Patience and Practice: The mission can be lengthy and challenging solo, but knowing the exact routes and encounter strategies can reduce completion time from an hour to around 15-20 minutes.
-
Troubleshooting Bugs: Be aware that some players have encountered bugs in the boss room requiring multiple attempts to complete the fight.
Following these tips and carefully managing your positioning, healing, and damage output will help you solo the Encore mission and earn the Choir of One Exotic auto rifle.
What loadouts are best for surviving the final Hydra fight solo
For surviving the final Hydra fight solo in Destiny 2’s Encore mission, the best loadouts emphasize sustained damage, survivability, and utility to handle both the boss and adds:
-
Primary Weapon: Use a high-damage, rapid-fire auto rifle such as the Choir of One itself or a God Roll Better Devils or Sunshot for crowd control and consistent damage output.
-
Special Weapon: Equip a powerful sniper or rocket launcher like Whisper of the Worm or a rocket launcher with cluster bombs to quickly break the Hydra’s shield and deal burst damage during vulnerable phases.
-
Heavy Weapon: A rocket launcher or grenade launcher with tracking or cluster bombs is ideal to maximize damage on the Hydra’s core.
-
Armor Mods: Include healing mods such as Healing Grenades or Devour to sustain through the fight, and damage resistance mods to mitigate the Hydra’s heavy attacks.
-
Subclass: Choose a subclass with strong healing and survivability, such as the Warlock’s Well of Radiance or the Hunter’s Revenant with Devour, to maintain health while focusing on damage.
-
Tactics: Focus on killing the Minotaur to obtain Command Modules and dunk them on plates to disable the Hydra’s shield, then unload your heaviest damage on the exposed core. Keep moving to avoid heavy attacks and manage adds efficiently.
This combination balances damage output and survivability, enabling solo Guardians to endure the Hydra’s punishing attacks and complete the fight.