Ready to wield a legendary weapon that marks you as a true Final Fantasy XIV veteran? The ARR Zodiac relic weapon quest is a marathon of dungeons, trials, and grind-but the stunning rewards and exclusive
Unlike the Stormblood relic and Shadowbringers relic weapons, these weapons do not require any specific field operations duty. Rather, you’ll be sent around all the ARR zones and dungeons repeatedly to grind the steps for this relic weapon.
Below we detail everything you need to know about getting an A Realm Reborn Zodiac relic weapon.
A Realm Reborn Zodiac relic weapons, explained
The A Realm Reborn (ARR) Zodiac relic weapons in Final Fantasy XIV are level 50 relic weapons introduced in the original ARR expansion. These weapons require a lengthy and involved questline that sends players across various zones, dungeons, and trials to gather materials and complete tasks. The process starts with the quest “The Weaponsmith of Legend” and involves multiple stages including obtaining the base relic, upgrading it through Zenith, Atma, Animus, Novus, Nexus, and finally the Zodiac Zeta weapon. While these weapons are no longer competitive in combat due to their outdated stats, they remain popular for their unique visual effects and as collectible glamour items. The questline demands significant time and effort, involving dungeon runs, trial completions, and grinding for special items like Alexandrite and Light, making the Zodiac relic weapon a marathon challenge for dedicated players.
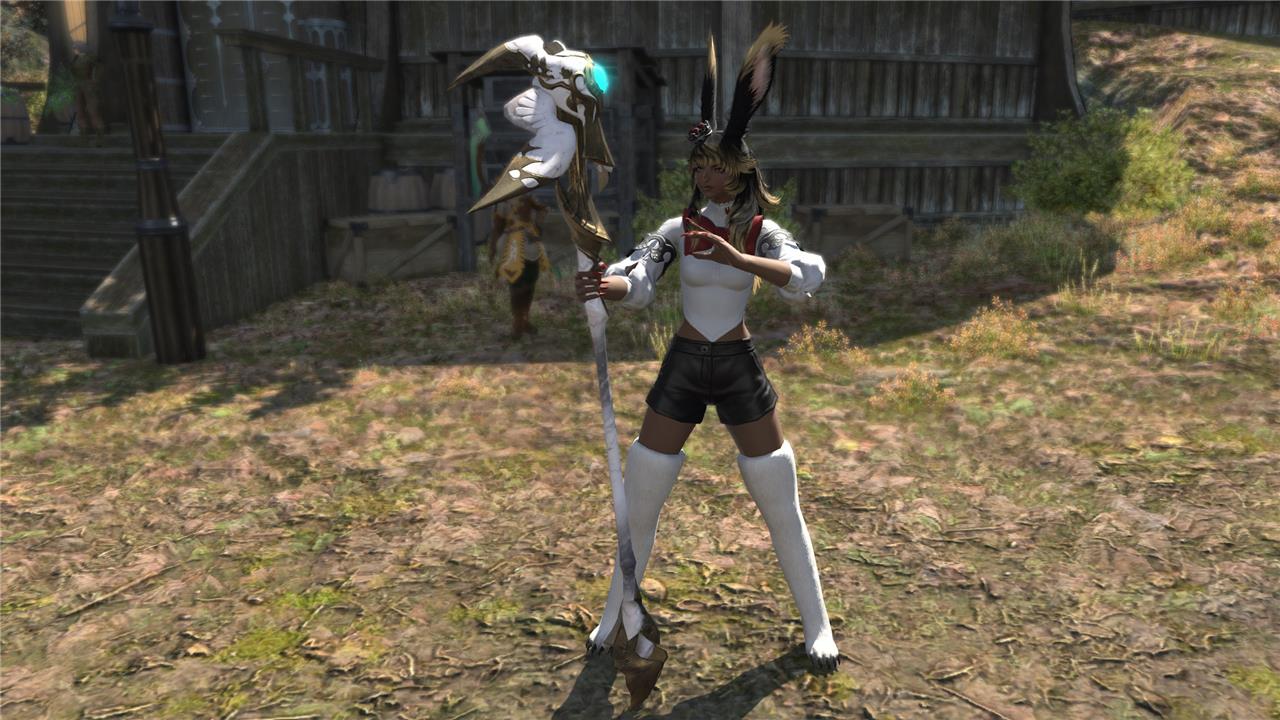
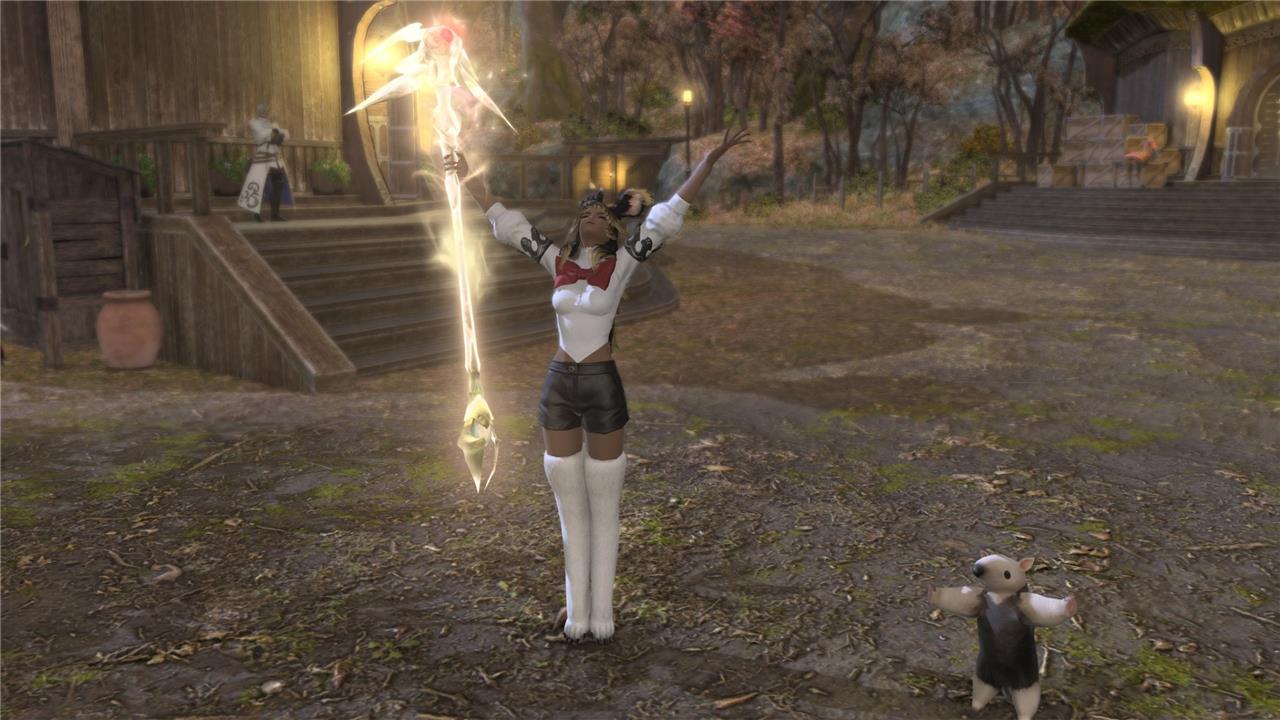
These weapons are one of a kind. While they used to be best-in-slot many moons ago, the only reason you’d want to grab these now is as glamour. The weapons look great; the first few stages are the poster child weapons for their respective jobs from when A Realm Reborn came out. They’re a great addition to your collection if you want a classic look to your outfit.
In order to make this weapon, you have to follow a ton of complex steps. If you want the full Zeta weapon, you’ll need to do all eight steps we list below. However, if you like the look of the Atma weapon and want to stop there, you can do that, too.
As expected with this old relic, you can only make ARR relic weapons for ARR jobs: Warrior, Paladin, White Mage, Scholar, Monk, Dragoon, Ninja, Bard, Black Mage, and Summoner.
You’ll also need to be careful to never discard your weapon. You cannot get the weapon back without having to redo the entire process. If you want a version of your weapon for glam, you can buy level 1 replicas from Drake in North Shroud next to Gerolt, but you’ll need to have your weapon on-hand to buy them. You can’t put the actual weapons into your glamour dresser, so you will need to buy replicas if you want to use them in glamour plates.
You can do this relic process on the free trial, but some of the steps require level 1 materia, which is extremely hard to get as a free trial player, so I don’t recommend it.
I also really only recommend doing this grind once the job you want the weapon for is level 70 or higher. You will have to spam a lot of dungeons, and it’s best to be able to do them unsynced on your own, rather than queueing for them and waiting for that queue to pop.
Step 1: How to get your base Zodiac weapon
To get your base Zodiac weapon in Final Fantasy XIV, you first need to be at least level 50 in the job you want the weapon for and have completed the A Realm Reborn main scenario quest “The Ultimate Weapon.” Then, start the quest “A Relic Reborn” by talking to Gerolt in North Shroud. This quest involves collecting a Timeworn Relic specific to your job from designated locations in the game world and delivering it to Gerolt. Afterward, you will be tasked with defeating several bosses, including Hydra from the Amdapor Keep dungeon and the three primals Garuda, Titan, and Ifrit in their hard modes. Once these objectives are completed and you turn in the required items, you will receive your base Zodiac weapon, which is the starting point for further upgrades in the relic weapon questline.
In order to make a relic weapon, you need to be at least level 50 in the job you want the weapon for, and you need to have beaten the A Realm Reborn main scenario quest “The Ultimate Weapon.” You also need to have the class and job quests for your selected job completed up to level 50.
You should also make sure to unlock the “Amdapor Keep” dungeon via the side quest “Ghosts of Amdapor,” as you’ll need it for this quest.
Honestly, this step is explained for you once you actually start the quests, but if you wanted to look ahead to see what the steps are, here they are laid out for you:
- Talk to Nedrick Ironheart in Vesper Bay (Western Thanalan) to start the quest “The Weaponsmith of Legend.” Complete said quest and you should end up at Gerolt in North Shroud. You won’t need to repeat this quest once you do it once.
- Talk to Gerolt as the job you want the weapon for to start the quest “A Relic Reborn.” He’ll mark a location on your map that varies depending on the job you’re playing as. Head to the marked location and bring him back the broken weapon.
- Obtain the specific weapon that Gerolt requests (either by crafting or buying it) and meld two of the specified materia to it. Your quest log will tell you which weapon and which materia to meld. Turn the weapon in to Gerolt when it’s finished.
- Complete the trial “A Relic Reborn: The Chimera” as the job you’re doing the relic for to get Alumina Salts. (If your selected job is high level, you can choose to do the duty unsynced, allowing you to defeat it quickly by yourself.) Talk to Gerolt again once you’ve finished the trial.
- Talk to Rowena in Revenant’s Toll and enter the dungeon “Amdapor Keep” as the job you’re doing the weapon for to get an Amdapor Glyph. (You can do this unsynced again, if you’re a high enough level.) Give Rowena the Amdapor Glyph.
- Head back to Gerolt and give him the book that Rowena gave you. He’ll give you an “unfinished” version of your weapon. Equip it and defeat the enemies listed. (The enemies are dependent on what job you’re playing as.)
- After talking to Gerolt again, complete the trial “A Relic Reborn: The Hydra” with your unfinished weapon equipped. (Just like the other steps, you can do this unsynced.)
- Unequip your weapon and hand it back to Gerolt.
- You’ll now be tasked with grabbing three items from primals. Complete the trials “The Bowl of Embers (Hard)” to get a White-Hot Ember, “The Howling Eye (Hard)” to get a Howling Gale, and “The Navel (Hard)” to get a Hyperfused Ore, in that order. You will need to complete these trials as the job you’re getting the weapon for, of course. (And yes, you can do these unsynced, too.) Hand the three items over to Gerolt.
- Buy a Radz-at-Han Quenching Oil for 15 Allagan Tomestones of Poetics from Auriana in Mor Dhona and give it to Gerolt. You can also buy these from the Rowena’s Representative NPCs in Ishgard, Limsa Lominsa, Gridania, and Ul’dah.
That’s it for the first step. It’s not too shabby!
Step 2: How to get your Zenith Zodiac weapon
To get your Zenith Zodiac weapon in Final Fantasy XIV, first ensure you have your base Zodiac weapon from the initial quest step. Then, purchase three Thavnairian Mists for 20 Allagan Tomestones of Poetics each (totaling 60 Poetics) from Auriana in Mor Dhona or from Rowena’s Representative NPCs in Ishgard, Limsa Lominsa, Gridania, or Ul’dah. After acquiring the mists, take your Zodiac weapon and the three mists to the furnace located to the left of Gerolt in North Shroud. Interact with the furnace to trade them in, and your weapon will be upgraded to the Zenith Zodiac weapon, which will have a soft glow when unsheathed. This upgrade is straightforward and quick compared to the other stages of the relic weapon questline.
As long as you have your Zodiac weapon in-hand from step one, you should be able to complete this part easy-peasy. To get your Zenith Zodiac weapon, do the following:
- Buy 3 Thavnairian Mists for 20 Allagan Tomestones of Poetics each (60 Poetics total) from Auriana in Mor Dhona. You can also buy these from the Rowena’s Representative NPCs in Ishgard, Limsa Lominsa, Gridania, and Ul’dah.
- Interact with the furnace to the left of Gerolt in North Shroud to trade your Zodiac weapon and the 3 mists in for your Zenith Zodiac weapon.
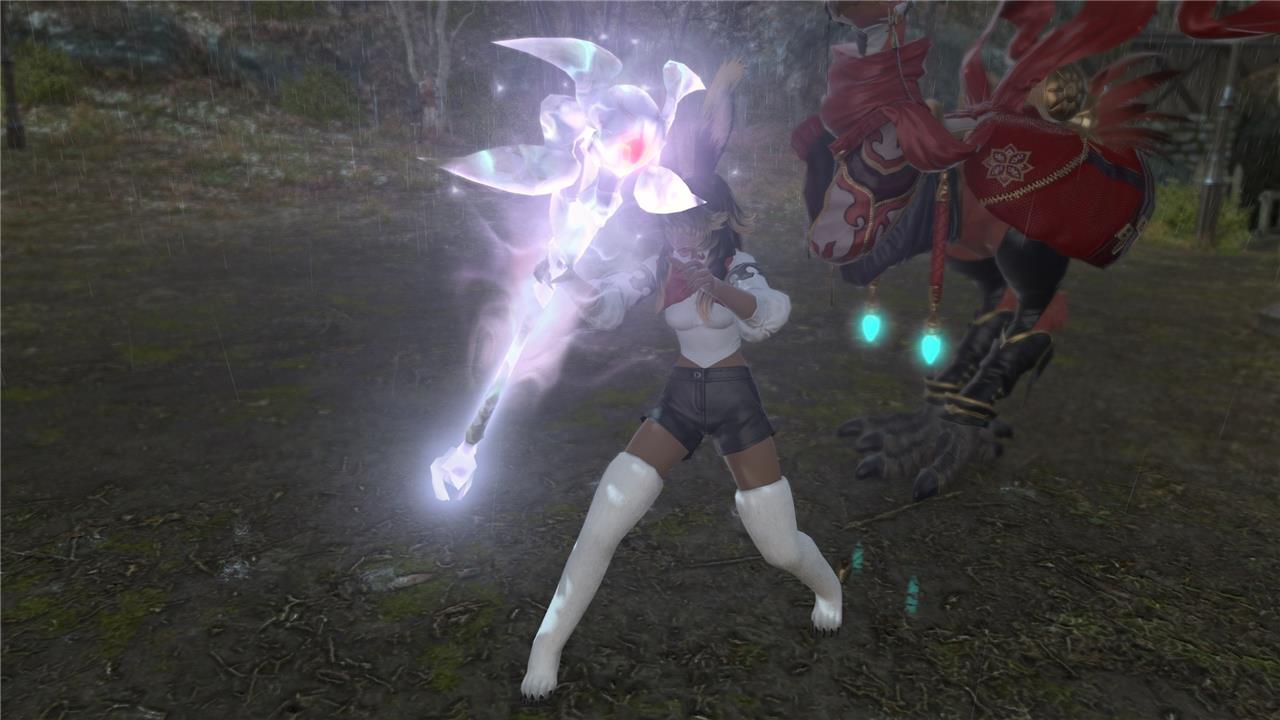
That’s literally it. Your weapon will now have a soft little glow to it, too!
Step 3: How to get your Atma Zodiac weapon
To get your Atma Zodiac weapon in Final Fantasy XIV, you first need to have your Zenith Zodiac weapon equipped. Then, speak to Gerolt in North Shroud to accept the quest “Up in Arms,” and immediately talk to Jalzahn at the nearby building. You must farm 12 Atma by completing FATEs in specific areas while your Zenith weapon is equipped. The Atma drops are random, so this step can be quite grindy. Once you have collected all 12 Atma, return to Jalzahn with your Zenith weapon unequipped and select the option to enhance your weapon. This will upgrade your Zenith weapon to the i100 Atma Zodiac weapon, which features a new color and loses its original glow.
The Atma step can be grindy, as you need to complete FATEs in order to upgrade your weapon. To start it, you’ll need to do the following:
- Equip your Zenith Zodiac weapon and talk to Gerolt in North Shroud to accept the quest “Up in Arms.” After finishing your conversation with Gerolt, turn around and talk to Jalzahn at the building in front of Gerolt.
- Farm 12 Atma from FATEs in from their respective areas with a Zodiac Zenith weapon equipped. It doesn’t necessarily need to be the one you’re upgrading.
- Unequip your Zodiac Zenith weapon and turn in both the weapon and all 12 Atma to Jalzahn to get your Atma Zodiac weapon.
You need to collect one of each Atma, which comes from different areas. They’re located as follows:
- Atma of the Archer: North Shroud
- Atma of the Goat: East Shroud
- Atma of the Maiden: Central Shroud
- Atma of the Lion: Outer La Noscea
- Atma of the Water-bearer: Upper La Noscea
- Atma of the Ram: Middle La Noscea
- Atma of the Crab: Western La Noscea
- Atma of the Fish: Lower La Noscea
- Atma of the Bull: Eastern Thanalan
- Atma of the Scales: Central Thanalan
- Atma of the Twins: Western Thanalan
- Atma of the Scorpion: Southern Thanalan
You’ll need to do FATEs in these areas to get the specific Atma. It doesn’t matter which FATEs you do in the area, but you do need to have a Zodiac Zenith weapon equipped while you do them. The FATEs only have a chance to drop an Atma, meaning you may get unlucky and have to do quite a bit of FATEs to get your weapon.
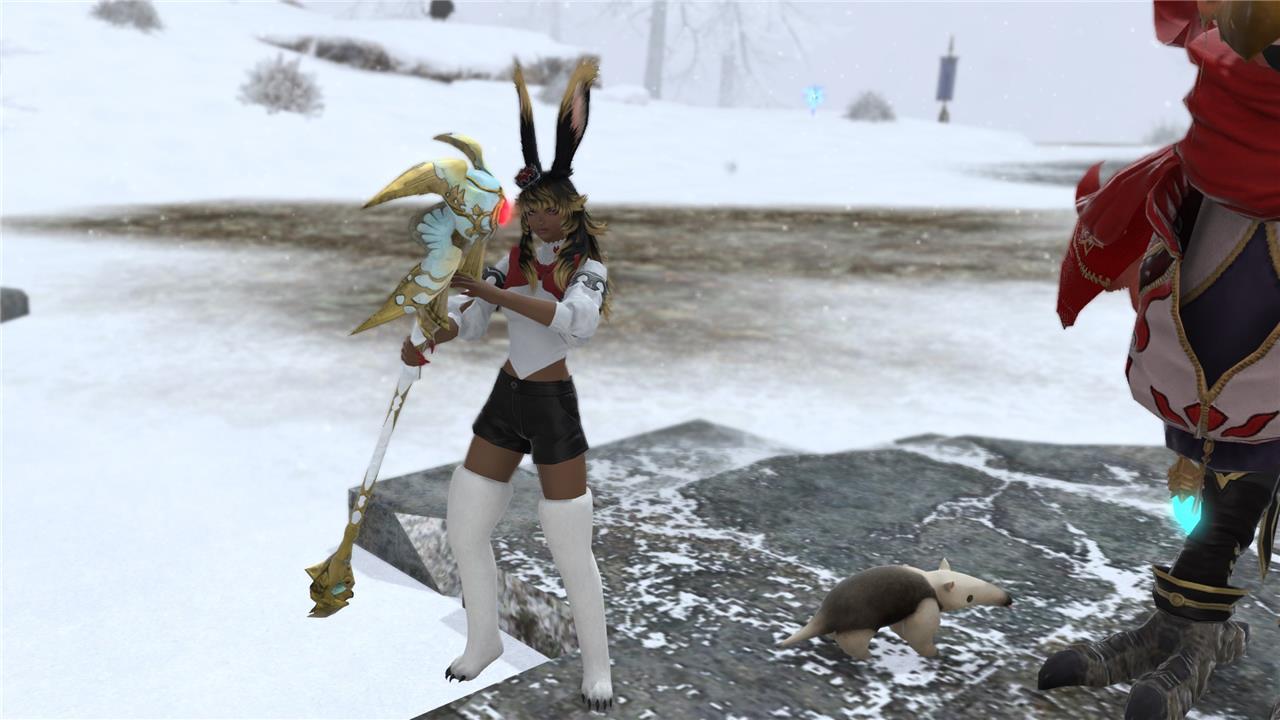
Your weapon will lose its glow, but get a new colorway.
Step 4: How to get your Animus Zodiac weapon
To get your Animus Zodiac weapon in Final Fantasy XIV, you first need to have completed the previous Atma step and have your Atma Zodiac weapon ready. The Animus step is notably grindy and requires completing nine different books, each with various objectives such as dungeons, FATEs, and other activities, while having your Zenith or Atma weapon equipped to collect the necessary items. You must also unlock several dungeons beforehand, though you do not need to complete their quests. After gathering all required items and completing the books, you will have a Sphere Scroll that needs to be infused with 75 materia and 75 Alexandrite. Finally, return to Jalzahn in North Shroud, unequip your Atma weapon, and select “Relic Weapon Atma Enhancement” to upgrade it to the Animus weapon. This process is a significant grind and mainly done for the weapon’s appearance rather than combat effectiveness.
This part is probably the sloggiest of it all, so brace yourself. Just as a reminder, making a relic weapon is a marathon, not a sprint (much like FFXIV as a whole), so remember to take breaks as necessary. Before you jump in, you should make sure that you have the following dungeons unlocked:
- “The Lost City of Amdapor” via the side quest “One Night in Amdapor“
- “The Wanderer’s Palace” via the side quest “Trauma Queen“
- “Copperbell Mines (Hard)” via the side quest “Out of Sight, Out of Mine“
- “The Sunken Temple of Qarn” via the side quest “Braving New Depths“
- “Haukke Manor (Hard)” via the side quest “Maniac Manor“
- “Halatali (Hard)” via the side quest “This Time’s for Fun“
- “Dzemael Darkhold” via the side quest “Fort of Fear“
- “Brayflox’s Longstop (Hard)” via the side quest “Curds and Slay“
- “Cutter’s Cry” via the side quest “Dishonor Before Death“
- “Pharos Sirius” via the side quest “Sirius Business“
- “The Aurum Vale” via the side quest “Going for Gold“
You don’t have to complete the dungeon or quest, just unlock the dungeon. (In fact, you will have to run these for this step, so you might as well wait and knock out two birds with one stone.)
To make your Animus weapon, you’ll need to do the following:
- Equip your Atma Zodiac weapon and talk to Jalzahn to start the quest “Trial of the Braves.”
- He’ll tell you to go talk to Rowena, who will redirect you to G’jusana in Mor Dhona.
- Buy a specialty book from G’jusana for 100 Allagan Tomestones of Poetics, open the book from your key item inventory, and take a look at what the book asks of you. The book will task you with killing 10 different enemies, along with completing three dungeons, three FATEs, and three levequests.
- Complete the tasks in the book and then head back to G’jusana to buy the next one. You need to complete nine books total to finish this step of your weapon (900 Poetics total).
- Once you finish out the nine books, unequip your Atma Zodiac weapon, talk to Jalzahn, and select “Relic Weapon Atma Enhancement” to upgrade it to an Animus weapon.
The book stuff is pretty straight-forward, albeit grindy. There are nine different books to complete, each with their own set of stuff to do. Rather than listing all of the objectives here (there are a ton), I’d recommend consulting the Final Fantasy 14 Online Wiki to go down the list of books, keeping the page for your current book open and completing each objective area by area. For your sake, here’s a list of all the books with links:
- Book of Skyfire I
- Book of Skyfire II
- Book of Netherfire I
- Book of Skyfall I
- Book of Skyfall II
- Book of Netherfall I
- Book of Skywind I
- Book of Skywind II
- Book of Skyearth I
Note that if the levequest that you need to do isn’t appearing in the list of available leves, you can refresh the list by completing one. Some FATEs won’t spawn unless another FATE gets completed, which is why I recommend you looking at the Wiki list.
You will quickly realize that each book has you essentially running back and forth between the same locations, making this task extremely annoying, especially since you can’t have multiple books at once. Luckily, if you’re overleveled, the enemies, dungeons, and levequests should be quick work, and the FATEs still shouldn’t be too bad even when it forces you to level sync. (As a level 90 White Mage, I was able to complete all the books completely solo – and my gear is pretty outdated.)
This step is really rough but you will eventually get into the rhythm, realizing where you need to go with each book faster as you complete more books. We got all of the tasks done in Mor Dhona first, would then go to Coerthas for those steps, and then go straight to Camp Bluefog in Northern Thanalan for levequests, and then go through all the zones in Thanalan, Shroud, and La Noscea in that order.
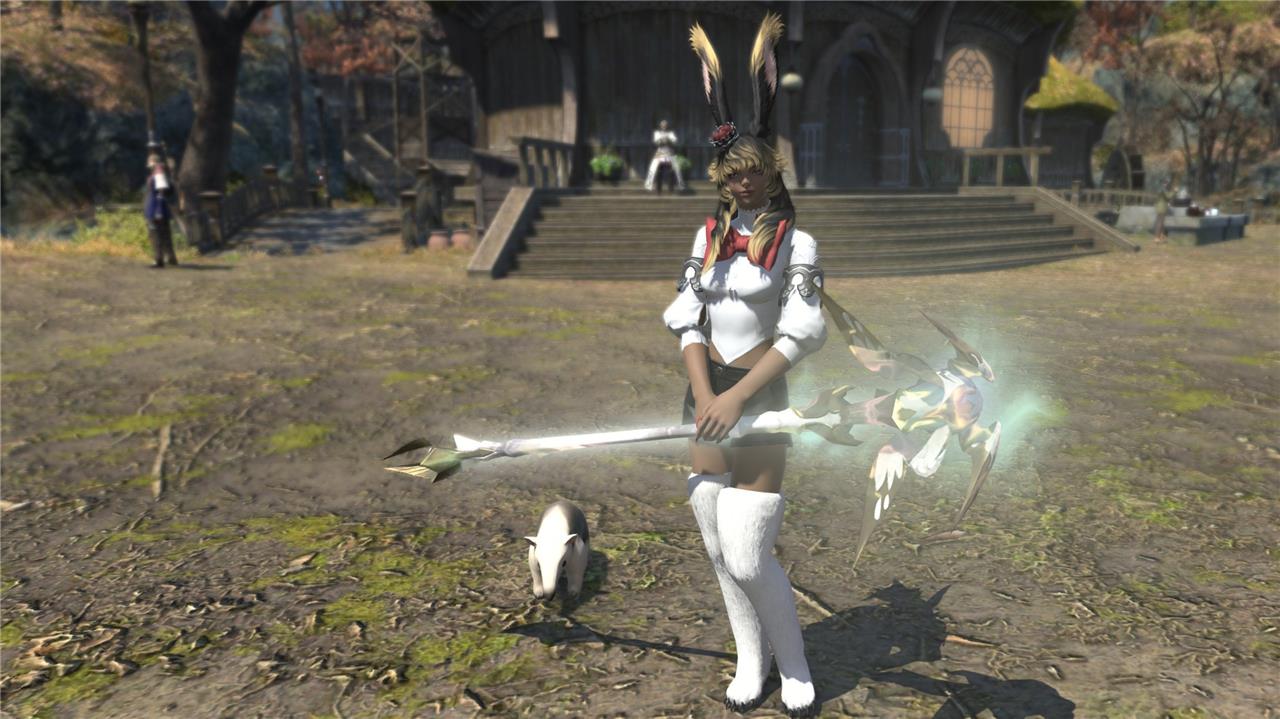
Your weapon is glowing again!
Step 5: How to get your Novus Zodiac weapon
To get your Novus Zodiac weapon in FFXIV, first equip your Animus weapon and speak to Jalzahn to start the quest “Celestial Radiance.” During this quest, you will need to purchase three bottles of Superior Enchanted Ink for 25 Poetics each, which can be bought from Auriana in Mor Dhona or from Rowena’s Representatives in the major cities. Then, talk to Hubairtin to exchange the ink for a Sphere Scroll that upgrades your weapon. Additionally, you will need to collect Alexandrite, which can be purchased for 50 Allied Seals each from your Grand Company Hunt Billmaster. Balancing farming Poetics and Allied Seals is recommended to efficiently gather the required materials. Once all steps are completed, you will have your Novus Zodiac weapon ready.
After the Animus step, this step feels like nothing, especially if you’ve been sitting on Poetics for a while.
To get your Novus weapon, do the following:
- With your weapon equipped, talk to Jalzahn to start the quest “Celestial Radiance” and follow the steps to complete it. You will need to buy 3 bottles of Superior Enchanted Ink for 25 Poetics each (75 Poetics total) during this quest. You can buy these from Auriana in Mor Dhona or from the Rowena’s Representative NPCs in Ishgard, Limsa Lominsa, Gridania, and Ul’dah.
- Talk to Hubairtin to start the quest “Star Light, Star Bright” and trade the ink for a Sphere Scroll for your weapon. You’ll now have a Sphere Scroll in your inventory that you can open freely.
- You’ll need to infuse 75 materia into your Sphere Scroll. In addition to the 75 materia, you’ll need 75 Alexandrite, which is required to fusing the materia into the scroll. The stats and materia you attach to your weapon doesn’t really matter since these weapons are extremely outdated and you should only be using these for glamour.
- Once you have your 75 materia in your Sphere Scroll, return to Jalzahn with your weapon equipped to complete the quest.
- Unequip your weapon, talk to him again and select “Relic Weapon Animus Enhancement” to upgrade to your Novus weapon.
How to use the Sphere Scroll
The Sphere Scroll is a weird mechanic that we never really see again after this. You have to meld 11 materia of one tier in order to be able to meld the next tier. So if you’re starting out, you’ll need to successfully meld 11 Piety I materia before you can meld any Piety II materia and so forth. As mentioned, the stats here don’t matter, so we just bought a bunch of the cheapest materia we could off the marketboard.
Level one materia can get expensive since it’s a bit of a rarity – you can only get it from the marketboard or by extracting material from fully spiritbonded low-level gear. This is why this process isn’t great for free trial players.
Where to get Alexandrite
There are a few ways to get Alexandrite:
- Earning a gold rating in FATEs with your Animus weapon equipped (again!)
- Completing Mysterious Maps as any job with any weapon, which you can buy from Auriana in Mor Dhona for 75 Poetics each. To do this, you’ll need to have the Decipher and Dig skill, which unlocks from the quest “Treasures and Tribulations.” Each map drops 5 Alexandrite.
- Buying the Alexandrite for 50 Allied Seals each from your Grand Company Hunt Billmaster.
I honestly recommend doing a bit of everything. You can only technically carry three maps at once (one in your inventory, one deciphered one, and one in your chocobo saddlebag), so going back and forth to Mor Dhona can be a pain. That being said, I had a handful of Allied Seals to spend, so going half-and-half was nice.
Step 6: How to get your Nexus Zodiac Weapon
To get your Nexus Zodiac Weapon in Final Fantasy XIV, first equip your Novus weapon and speak to Jalzahn in North Shroud to start the quest “Mmmmmm, Soulglazed Relics.” You will then Soulglaze your Novus weapon, which adds a special effect. Next, you need to fill your weapon with “light” by participating in various content such as dungeons, trials, FATEs, Treasure Hunts, Alexandrite Maps, and PvP while your weapon is equipped. Different activities grant different amounts of light, and you can track your progress using the Zodiac Glass item. Once your weapon reaches 2,000 light points, known as “bursting activity,” return to Jalzahn, unequip your weapon, and select “Relic Weapon Novus Enhancement” to upgrade your weapon to the Nexus stage.
Are you ready to do more ARR duties? Wahoo! To get your Nexus weapon, you’ll need to do the following:
- Equip your relic weapon and talk to Jalzahn to start the quest “Mmmmmm, Soulglazed Relics” (this game is so unserious) to get a Zodiac Glass.
- Talk to Jalzahn and select “Zodiac Relic Weapon Novus Soulglazing” and select your weapon to add the Soulglazed effect to it.
- Fill your weapon with light by doing content, like dungeons, trials, and FATEs. You can check the light levels of your weapon by using the Zodiac Glass in your inventory. You have to complete the duty with your relic weapon equipped to gain light.
- Once the Zodiac Glass says it has “bursting activity,” head back to Jalzahn with your weapon unequipped and select “Relic Weapon Novus Enhancement” to upgrade into a Nexus weapon.
How to earn light to soulglaze your weapon
Doing different A Realm Reborn content will give you different levels of light and some of the duties will give you bonus light. The duties that give bonus light rotate randomly every two hours and you can run any of the content unsynced, as long as your weapon is equipped at completion.
The light values rewarded and needed to complete your weapon are invisible, but you need 2,000 light for it to have “bursting activity.”
If you’re doing this solo, the fastest way to rake in light for your weapon is to run “The Bowl of Embers” unsynced. Since you can immediately obliterate Ifrit, you should be able to clear the duty in a matter of seconds, making it very fast, albeit grindy (again) to complete. With no bonus, normal gives 8 light. We were able to get through three Ifrit fights in a minute, netting in an easy 24 light per minute.
If you have a friend who is willing to spend a few minutes helping you out, you can choose to run “The Bowl of Embers (Extreme)” with them. If your friend is geared up at level 90, they should be able to one- or two-shot Ifrit, allowing you to net in 32 light per run and around 96 per minute.
If you don’t like running Ifrit, you can always kind of go down the list of content to keep things a little more engaging. Most ARR dungeons will give you 48 light, with a few giving less. Below you can see how much light each duty rewards.
FFXIV Nexus weapon light values
The Nexus stage is the sixth phase in the Zodiac Relic weapon progression in FFXIV and introduces the final glow effect for these weapons. To upgrade to a Nexus weapon, players must farm “light” by completing various content such as dungeons, trials, FATEs, and PvP with the relic weapon equipped. Different activities yield different amounts of light, which accumulates in the Zodiac Glass item, showing progress through various light levels from Feeble (8 points) to Newborn Star (128 points). When the weapon reaches 2,000 light points, known as “bursting activity,” players can upgrade their Novus weapon to the Nexus stage by speaking to the NPC Jalzahn. This process represents the game’s first iteration of light farming and typically takes a moderate amount of time to complete.
Light given |
Light given with bonus |
Duty |
|---|---|---|
| Feeble (8) | Gentle (16) | The Bowl of Embers, FATEs, treasure maps |
| Gentle (16) | Bright (32) | Alexandrite maps, Hard Trials, Urth’s Fount, The Porta Decumana, The Howling Eye (Extreme), The Minstrel’s Ballad: Ultima’s Bane, Binding Coil of Bahamut T4 |
| Bright (32) | Brilliant (48) | All Extreme trials except The Howling Eye, Binding Coil of Bahamut T1, 2, and 5, All Second Coils of Bahamut, All Final Coils of Bahamut, The Wanderer’s Palace, Amdapor Keep, Pharos Sirius, Copperbell Mines (Hard), The Lost City of Amdapor, Halatali (Hard), Brayflox’s Longstop (Hard) |
| Brilliant (48) | Blinding (96) | Sastasha, The Tam-Tara Deepcroft, Copperbell Mines, Halatali, The THousand Maws of Toto-Rak, Haukke Manor, Brayflox’s Longstop, The Sunken Temple of Qarn, Cutter’s Cry, The Stone Vigil, Dzemael Darkhold, The Aurum Vale, Castrum Meridianum, The Praetorium, Hullbreaker Isle, The Tam-Tara Deepcroft (Hard), The Stone Vigil (Hard), Snowcloak, Sastasha (Hard), The Keeper of the Lake, The Borderland Ruins (secure), The Labyrinth of the Ancients |
| Blinding (96) | Newborn Star (128) | Syrcus Tower, The World of Darkness |
Ultimately, you should do whichever you like best. If running “The Aurum Vale” quickly is the most engaging content for you, then all the more power to you.
Step 7: How to get your Zodiac Braves weapon
To get your Zodiac Braves weapon in Final Fantasy XIV, you first need to have completed the previous stages of the Zodiac relic weapon questline, including obtaining the Novus weapon. Then, you must speak to Remon to attach a Mahatma to your Novus weapon. You will need to awaken 12 Mahatmas by earning points through dungeons, raids, or FATEs, with Tam-Tara Deepcroft being a recommended farming spot. Once all Mahatmas are awakened, return to Jalzahn in North Shroud and select the quest “Zodiac Weapon of Awakening” to forge your weapon into the Zodiac Braves stage, which significantly upgrades its power and appearance.
This step is pretty material heavy and you’ll need to run a few more dungeons. In addition to being a Second Lieutenant rank in your Grand Company, you will need to have the following dungeons unlocked (in addition the ones that we’ve listed before):
- “Hullbreaker Isle” via the side quest “King of the Hull“
- “The Sunken Temple of Qarn (Hard)” via the side quest “The Wrath of Qarn“
- “The Tam-Tara Deepcroft (Hard)” via the side quest “Corpse Gloom“
- “The Stone Vigil (Hard)” via the side quest “Blood for Stone“
- “Sastasha (Hard)” via the side quest “It’s Definitely Pirates“
To actually start making your Zodiac Braves weapon, you’ll need to do the following:
- Unequip your Nexus weapon and talk to Jalzahn to start and complete the quest “Wherefore Art Thou, Zodiac.”
- Complete the quest “One Man’s Trash” from Ealdwine, if you haven’t already. Ealdwine is sitting right next to Jalzahn.
- Head to Mor Dhona. Talk to Papana to start the quest “A Ponze of Flesh,” Guiding Star to start “Labor of Love,” and Brangwine to start “A Treasured Mother.”
- Head to Central Thanalan and talk to Adkin to start the quest “Method in His Malice.”
- Turn in the required items (see below) and complete the dungeons required for each quest to get the specific item. The dungeons can be completed unsynced, as whatever job and with whatever weapon. You don’t need to be using your relic to clear get these dungeon drops.
- Once you finish all four quests, make sure your relic weapon is equipped and talk to Gerolt to start and complete the quest “His Dark Materia.”
- Unequip your weapon, talk to Jalzahn, and select “Zodiac Weapon Recreation” to upgrade your weapon to a Zodiac Braves weapon. There will be a prompt asking if you’re sure you want to proceed and that you will lose your relic weapon if the process fails – say yes anyway. It will succeed 100%, don’t worry.
Zodiac Braves weapon item requirements
You’ll need a handful of different types of currency to get past this quest. Notably you need to obtain these items from these merchants:
- 4 Bombard Cores (20,000 Grand Company seals each) from your respective GC Quartermaster (80,000 GC seals total)
- 4 Sacred Spring Water (200 Poetics each) from Auriana in Mor Dhona (800 Poetics total)
- 1 Bronze Lake Crystal (100,000 gil) from the Junkmonger in Upper La Noscea (26, 26)
- 1 Allagan Resin (100,000 gil) from the Merchant & Mender in Southern Thanalan (15, 29)
- 1 Furite Sand (100,000 gil) from the Merchant & Mender in Coerthas Central Highlands (13, 16)
- 1 Brass Kettle (100,000 gil) from the Tool Supplier & Mender in North Shroud (29, 19)
You will also need some items that are specifically crafted and high quality. You can buy them from the marketboard if you have the gil, but if you have level 50 crafters, you can make them yourself. However, to get the base materials for these crafts, you have to buy and desynth specific items sold by the Merchant and Mender in Western Thanalan (15, 29). Each desynth only has a chance to drop the relevant goods, and you may get other items instead. The items are as follows:
- Desynth an Aged Spear to get an Aged Spear Shaft to make a Perfect Firewood.
- Desynth an Aged Pestle to get Aged Pestle Pieces to make a Perfect Pestle.
- Desynth an Aged Mortar to get Aged Mortar Pieces to make a Perfect Mortar.
- Desynth an Aged Ring to get an Aged Eye of Fire to make a Furnace Ring.
- Desynth an Aged Grimoire to get Aged Vellum to make Perfect Vellum.
- Desynth an Aged Robe to get a Stained Cloth to make Perfect Cloth.
- Desynth an Aged Phial to get Dried Ether to make Perfect Pounce.
- Desynth an Aged Decanter to get Vintage Cooking Sherry to make Tailor-made Eel Pie.
To craft these yourself, you will also need the Master Recipes I book for each crafting job, too.
Step 8: How to get your Zodiac Zeta weapon
To get your Zodiac Zeta weapon in Final Fantasy XIV, you must first complete all prior steps of the ARR Zodiac relic weapon questline, starting from obtaining the base Zodiac weapon and progressing through the Zenith, Atma, Animus, Novus, and Nexus stages. The final step involves a quest called “Soul without Life,” where you turn in your fully upgraded Zodiac weapon to Gerolt in North Shroud. Once completed, you receive the Zodiac Zeta weapon, which features a unique glow and is the ultimate form of the ARR relic weapon. This process is a lengthy grind but culminates in a visually impressive and collectible weapon.
This is the last step. You’re almost there, you just have some more duty grinding to go!
To make your Zodiac Zeta weapon, you’ll need to do the following:
- Talk to Jalzahn with your weapon equipped to start and complete the quest “Rise and Shine.” Get used to talking to Remon in Swiftperch (where the quest ends).
- Talk to Remon to buy a Mahatma for 50 Poetics. Just like the Nexus step, you’ll need to imbue this Mahatma with light by completing duties.
- Fill in your first Mahatma, and then talk to Remon to buy the next one for another 50 Poetics and fill that one in, too. You’ll need to repeat this step many times, as you have 12 Mahatmas total to fill (600 Poetics total).
- After you fill in all 12 Mahatmas, talk to Jalzahn again with your weapon unequipped and select “Zodiac Weapon Awakening” to get your final Zodiac Zeta weapon.
How to earn light for Mahatmas
This is almost exactly the same as the Nexus step, though the values are different. Again, the amount of light rewarded and gained is invisible, but players have deduced that each Mahatma needs 40 light. There is also still a bonus that rotates every two hours (and the Nexus bonus duty is the same as the Zeta bonus duty). As per usual, you do need to have your weapon equipped when you finish the duty, and duties can be completed unsynced.
The duties also give different amounts of light now:
FFXIV Zeta weapon light values
For the FFXIV Zodiac relic weapon upgrade to the Zeta stage, light values play a crucial role in awakening each Mahatma, which are essential components of the weapon enhancement process. Each Mahatma requires 40 light points to be fully awakened, with light levels ranging from “No Sense” (0-3 points) to “Full Soul Resonance” (40 points). Players farm light by completing content such as dungeons, with Aurum Vale being the most efficient for this stage, as two runs typically awaken one Mahatma. Light gains vary by content and are categorized by descriptive levels like Feeble, Faint, Gentle, Steady, and Forceful, corresponding to increasing amounts of light points earned. This light farming is the final grind before completing the Zodiac Zeta weapon upgrade.
Light given |
Light given with bonus |
Duty |
|---|---|---|
| Feeble (4) | Faint (8) | FATEs, The Bowl of Embers, The Navel, The Howling Eye, A Relic Reborn: The Chimera, A Relic Reborn: The Hydra, The Dragon’s Neck |
| Faint (8) | Gentle (16) | The Porta Decumana, The Chrysalis, Battle on the Big Bridge, Battle in the Big Keep, all Hard Trials, Urth’s Fount, The Minstrel’s Ballad: Ultima’s Bane, The Howling Eye (Extreme), Alexandrite maps |
| Gentle (16) | Steady (24) | All ARR Extreme trials (except The Howling Eye and Ultima’s Bane), All Bahamut raids, Pharos Sirius, Copperbell Mines (Hard), Brayflox’s Longstop (Hard) |
| Steady (24) | Forceful (48) | Sastasha, The Tam-Tara Deepcroft, Copperbell Mines, The Thousand Maws of Toto-Rak, Haukke Manor, The Sunken Temple of Qarn, Cutter’s Cry, The Stone Vigil, Dzemael Darkhold, The Aurum Vale, Snowcloak, Castrum Meridianum, The Praetorium, The Keeper of the Lake, Sastasha (Hard), The Wanderer’s Palace (Hard), Amdapor Keep (Hard), The Borderland Ruins (Secure), The Labyrinth of the Ancients |
| Forceful (48) | Nigh Sings (64) | Syrcus Tower, The World of Darkness |
If one of the steady dungeons is on bonus, you can complete a Mahatma with a single run, making it pretty worthwhile. Otherwise the same rules apply from the Nexus step: Spam “The Bowl of Embers” if you’re running solo to get about 12 light per minute. Run “The Bowl of Embers (Extreme)” if you have a high-level friend willing to two-shot the boss for you.

And that’s all there is to it. You are now finished with your ARR relic weapon grind, but you can always start from the beginning if you want another one. Or you can move on to making a Stormblood relic or Shadowbringers relic weapon if you miss that grind.
If you’re just starting out in the massive world of Final Fantasy 14, we have tons of guides to help you. We have a beginner’s guide to get you started, along with guides detailing when you’ll get your mount and which Grand Company you should join.
Want to know the secret to turning your ARR relic into a Zodiac masterpiece in FFXIV
Unlocking the secret to transforming your ARR relic into a dazzling Zodiac masterpiece in FFXIV is a journey of patience and persistence. From equipping your Zenith weapon and farming Atmas through FATEs, to conquering grind-heavy book quests and filling your weapon with light in dungeons and trials, this guide reveals the step-by-step path to claim one of the most iconic weapons in the game. Prepare for a rewarding grind where every dungeon run and quest inch you closer to wielding a weapon that truly shines with your dedication.
What are the key steps to upgrade your ARR relic into a Zodiac masterpiece in FFXIV
The key steps to upgrade your ARR relic into a Zodiac masterpiece in FFXIV are as follows:
-
Unlock the Relic Quest
Complete the quest The Weaponsmith of Legend in Vesper Bay to unlock the Zodiac relic questline, then start the main quest A Relic Reborn by speaking to Gerolt in North Shroud. -
Obtain the Base Relic Weapon
Complete the initial questline including defeating the Dhorme Chimera and running the Amdapor Keep dungeon to receive your base Zodiac relic weapon. -
Upgrade to Zenith Weapon
Collect three Thavnairian Mists and combine them with your relic weapon at the furnace near Gerolt to upgrade it to the Zenith Zodiac weapon. -
Farm Atmas to Upgrade to Animus
Equip the Zenith weapon and farm 12 Atmas by completing FATEs in specific zones. After collecting Atmas, complete nine books by fulfilling various objectives (such as levequests, hunts, and crafting). Once all books are finished, return to Jalzahn to upgrade your weapon to the Animus stage. -
Infuse Materia to Upgrade to Novus
Obtain a Sphere Scroll and infuse it with 75 materia and 75 Alexandrite. Return to Jalzahn with the infused scroll and your Animus weapon to upgrade it to the Novus weapon. -
Farm Light to Upgrade to Nexus
Equip your Novus weapon and accumulate 2,000 Light by participating in dungeons, trials, FATEs, treasure hunts, and other activities. Once you reach the required Light, return to Jalzahn to upgrade to the Nexus weapon. -
Complete Zodiac Braves Quests
Complete four special quests (“A Ponze of Flesh,” “Labor of Love,” “A Treasured Mother,” and “Method in His Malice”) to obtain items needed for the next upgrade stage, Zodiac Braves. -
Final Upgrades to Zodiac Zeta
After the Zodiac Braves stage, continue with the final steps involving more quests and infusions to reach the ultimate Zodiac Zeta weapon, the masterpiece relic.
This process involves a significant grind but culminates in a visually stunning weapon and the coveted