Hidden high in the Hebra Mountains, the Nouda Shrine tests both your balance and timing with a snow-covered puzzle that rewards clever thinking more than brute strength. Here’s how to find it and clear every challenge inside.
When you’re done, our shrine locations page or interactive Hyrule map can direct you toward something else to do.
Nouda Shrine location
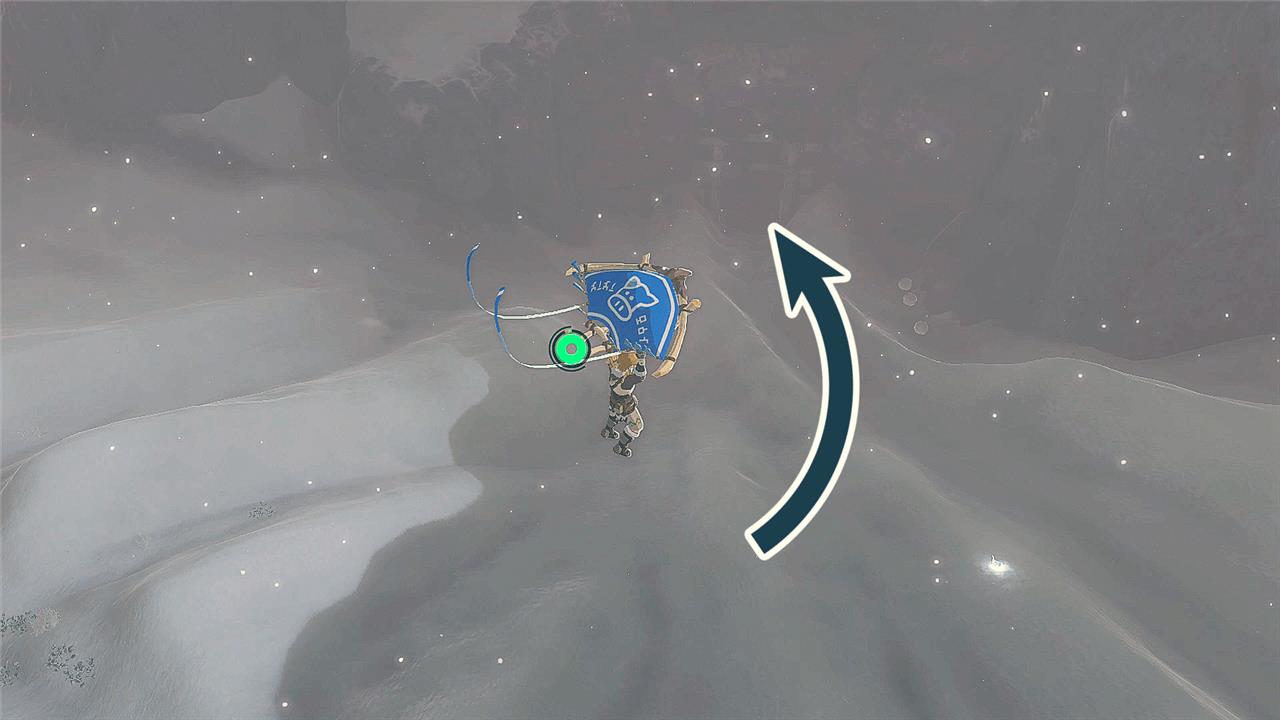
Nouda Shrine is found in the Hebra Mountains region, specifically north of Rospro Pass Skyview Tower. Its exact coordinates are roughly (-2319, 2205, 0174). The shrine sits on a snowy plateau surrounded by steep cliffs, so cold resistance is recommended before heading there. Players can spot it near a few pine trees and icy rock formations, making it easier to locate from nearby heights.
Nouda Shrine is found within the Hebra Mountains region. It’s cold there, so you’ll need some spicy meals or elixirs or, even better, the Snowquill Armor set.
Its exact location is (-2319, 2201, 0173). The shrine is a ways west-southwest of Snowfield Stable (and Orochium Shrine). Pikida Stonegrove Skyview Tower is a bit north of the shrine.
Nouda Shrine is inside of the Kopeeki Drifts Cave. Look for the large box canyon to the west of Snowfield Stable. The cave is along the southern wall – there should be a Blupee there to guide you.
Inside the cave, you’ll find a large pond of freezing cold water – and the shrine is on the other side.
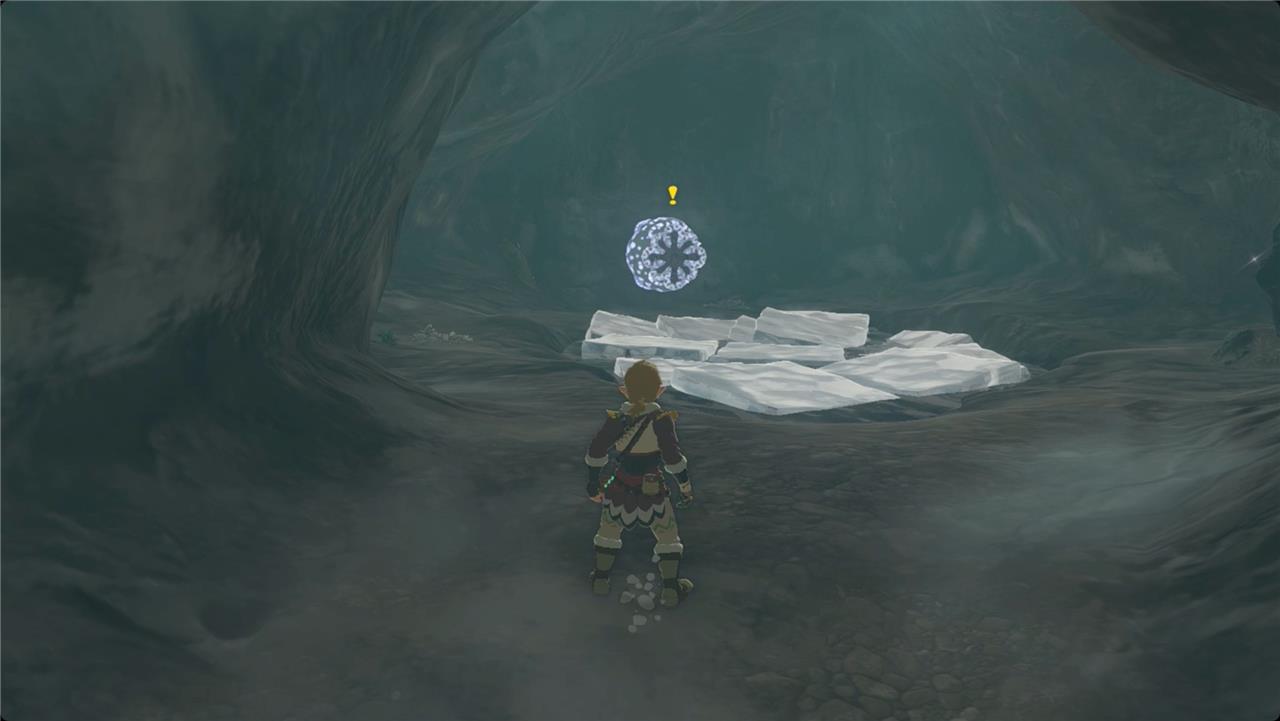
Take the first right down a narrow tunnel to find an Ice Like next to a much smaller pond. When the Ice Like spots you, it’ll start breathing its frost breath and create a bunch of squares of ice on the pond. Gather those up and carry them back to the larger room.
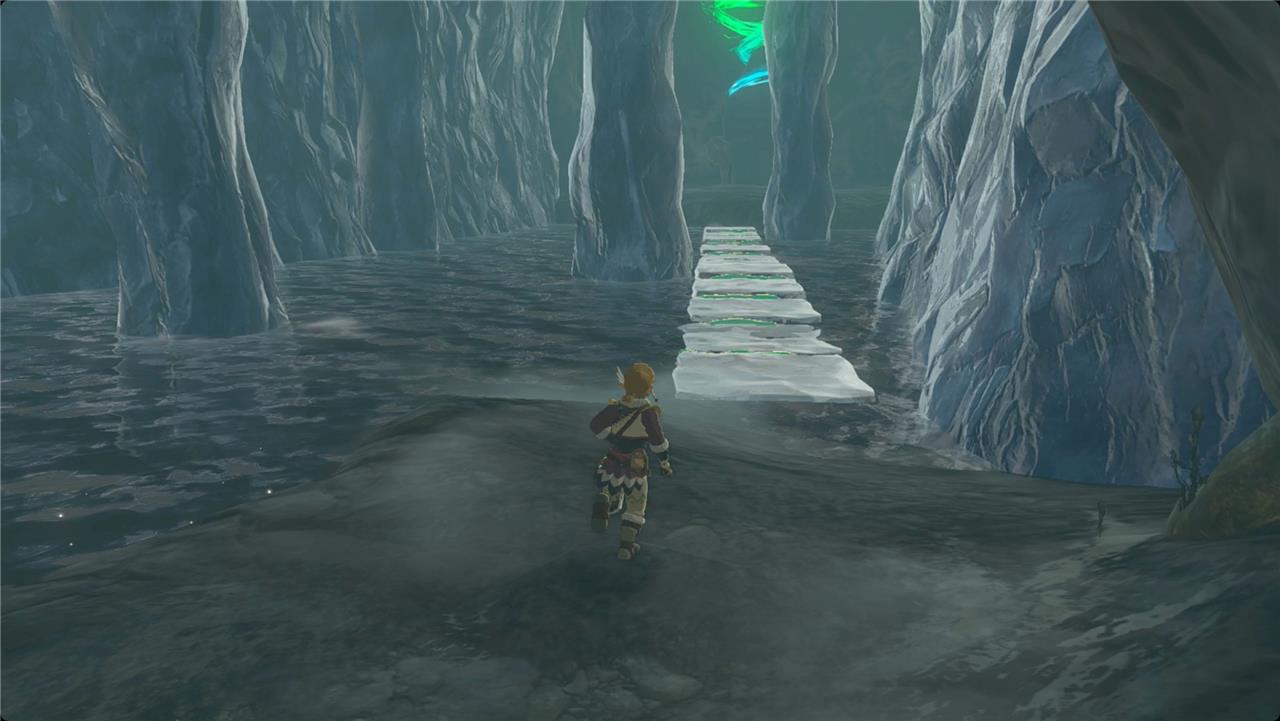
Use the squares of ice to cross the water – you can leapfrog with Ultrahand and just two squares, build an airboat if you have the Zonai devices, or just make a really longbridge (it takes about 12 squares to span the water).
Nouda Shrine walkthrough
Nouda Shrine challenges players with a mix of puzzle-solving and precise movement. Inside, you’ll use wind mechanics to glide across gaps and activate switches that control air currents. Timing is key to reaching higher platforms and collecting the chest containing valuable items. After solving each section, use the final wind current to reach the altar and claim the Light of Blessing.
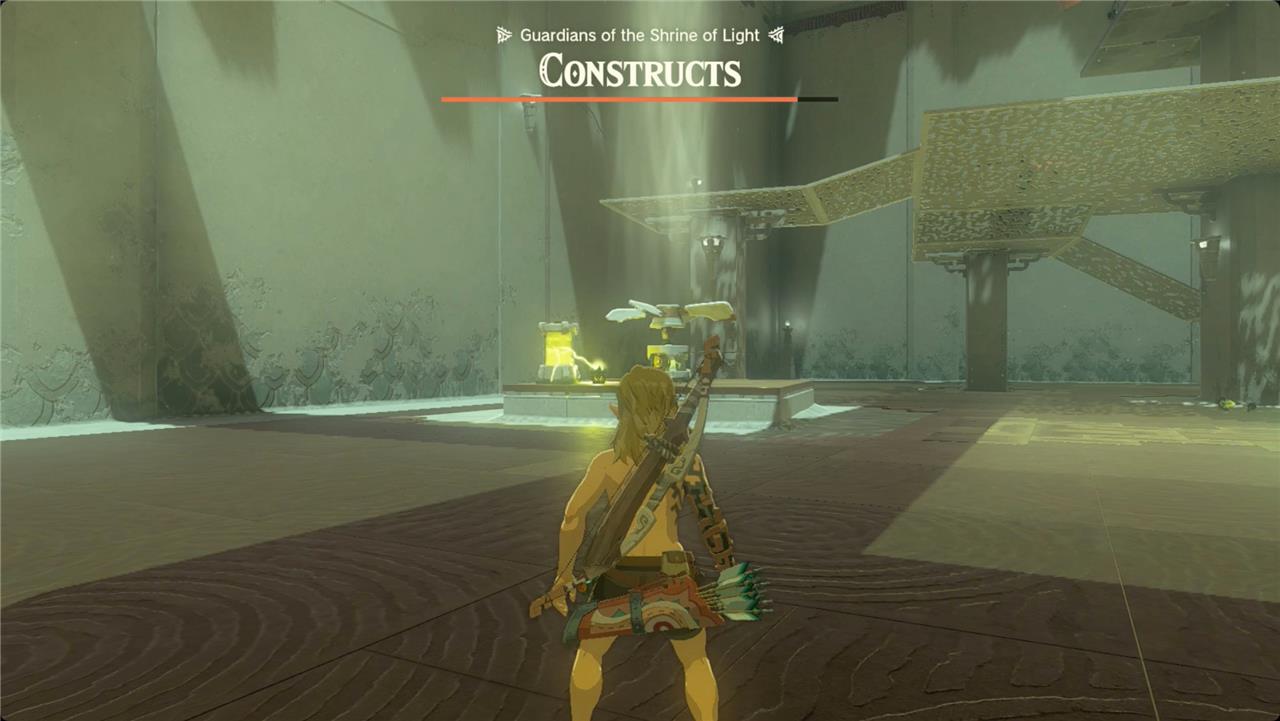
Nouda Shrine is a Proving Grounds challenge, so it strips all of your equipment and armor away and tasks you with defeating a handful of Constructs with just what you can find or scavenge.
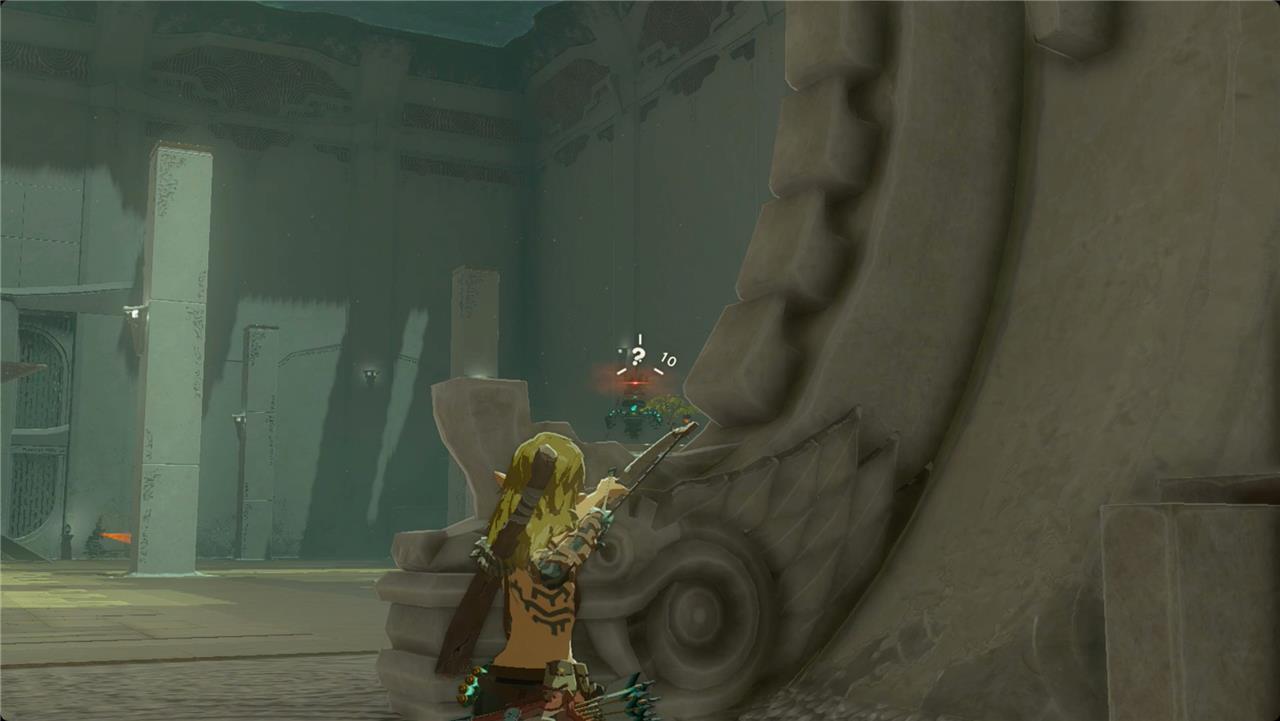
1. As you enter Nouda Shrine, grab the wooden stick, thick stick, old wooden bow, and arrows on the right.
2. As soon as you grab the bow, look into the arena and slightly to the right. Take out the Construct on the platform there, and then loop around the platform (heading counterclockwise to avoid detection) to find a ladder. Climb up and grab the fire fruit.
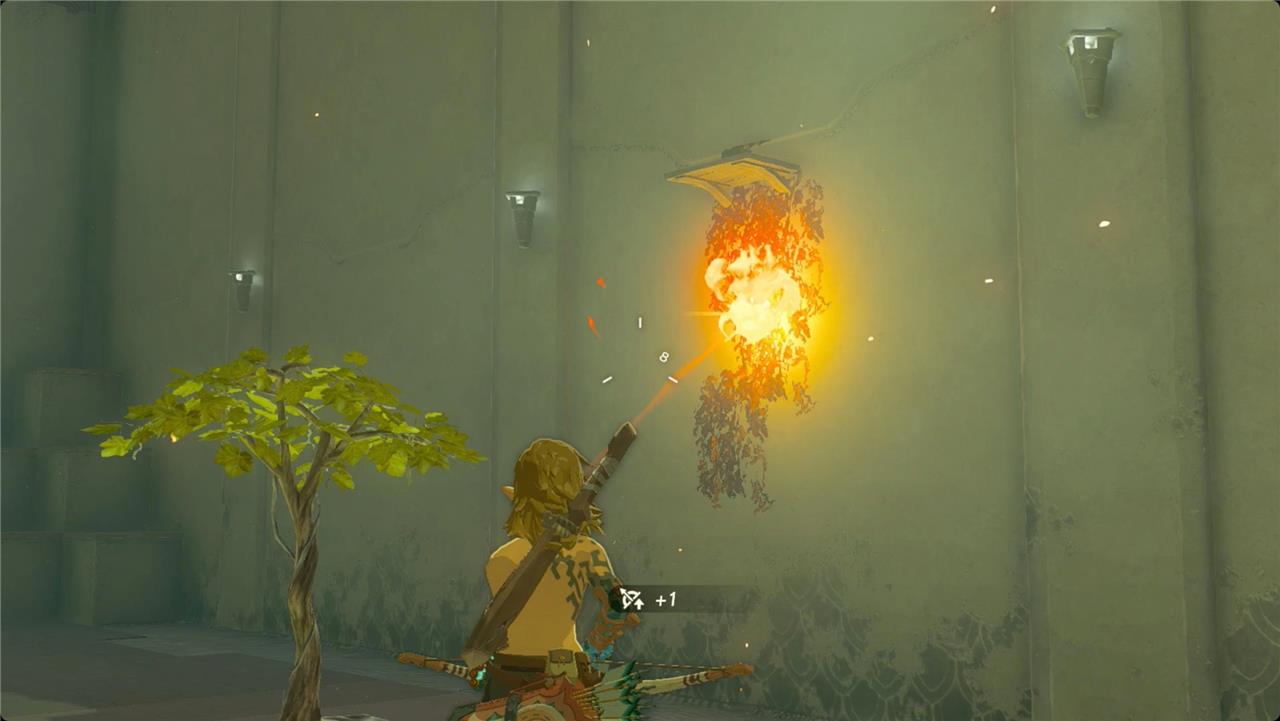
3. Fuse a fire fruit to an arrow, and shoot it at the vines on the right wall. That will destroy a platform and a Zonai shock emitter will fall for you to (F)use.
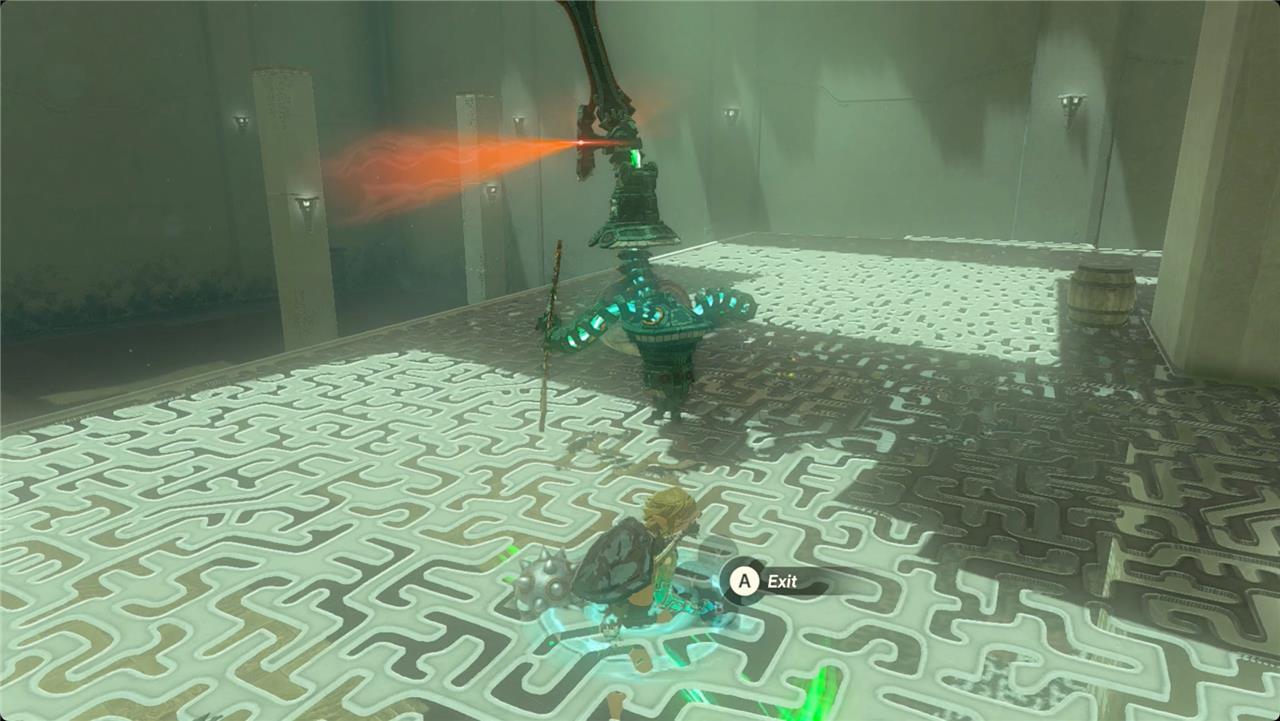
4. Turn it on and place it by the fan on the left side to create an updraft, or use it to charge the battery there for a mobile electrocution device. Or you can just Fuse it to a weapon to make a shock club.
Best route to reach Nouda Shrine from Snowfield Stable
Route from Snowfield Stable
The best route starts at Snowfield Stable in the Tabantha Frontier and heads west-southwest into the Hebra Mountains toward Kopeeki Drifts, a large box canyon. Ride a horse across the snowfields for efficiency, staying south of Pikida Stonegrove Skyview Tower, to reach the cave entrance at approximately -2402, 2286, 0171 along the southern wall-look for a Blupee nearby. Equip Snowquill Armor or consume spicy food/elixirs to resist the cold.
Terrain Navigation
Follow the snow drifts downhill into the canyon, avoiding steep cliffs by sticking to gentler slopes or using paraglider for short drops. The path involves snowy terrain and frigid water near the cave, so prepare for low temperatures around -2318, 2202, 0173. Horses handle the snow well until the final descent; dismount if needed for precision.
Cave Entry Tips
Enter Kopeeki Drifts Cave, turn right to aggro an Ice Like for frost blocks, then Ultrahand about 12 across the cold pond to the shrine. This ground route minimizes risks compared to skyview launches.
Fastest way to reach Nouda Shrine from Pikida Stonegrove Tower
Fastest Route Overview
Launch from Pikida Stonegrove Skyview Tower and head slightly south into Kopeeki Drifts, a large snowy box canyon in the Hebra Mountains. Glide or paraglide directly toward coordinates -2402, 2286, 0171 to spot the cave entrance along the southern wall, marked by a Blupee; this aerial shortcut skips ground traversal from Snowfield Stable.
Navigation Steps
After launching, maintain a south-southwest trajectory over the snowfields, dropping altitude to enter the canyon and land near the cave door at the hill’s base. Cold resistance via Snowquill Armor or spicy elixirs proves essential due to frigid conditions; horses become unnecessary with this sky-to-ground path.
Cave Access
Enter Kopeeki Drifts Cave, proceed right to an Ice Like for frost blocks, then Ultrahand 10-12 across the cold pond to reach Nouda Shrine swiftly. This method takes under two minutes post-launch, minimizing exposure to Hebra’s harsh terrain.