Unlocking fast travel in Prince of Persia: The Lost Crown transforms your journey across the sprawling world of Mount Qaf from a daunting trek into a swift, seamless adventure. But this powerful ability doesn’t come easy – you’ll need to defeat key bosses, harness mystical powers, and seek out hidden purple orbs to restore ancient Homa statues scattered throughout the Lower City and beyond. Ready to zip between Persian temples, shadowy forests, and mysterious underground dens? Here’s your essential guide to unlocking and mastering fast travel on Nintendo, PC, PlayStation, and Xbox.
There are 10 navigable biomes in The Lost Crown, ranging from the picturesque Hyrcanian Forest to the dreary Depths (the barely lit sewer area that’s requisite for this type of game). As of this writing, we’re not sure how many fast travel locations there are in total, but they’re fairly few and far between, usually just one or two per biome. Note too that you cannot fast travel to the Wak-Wak trees that serve as checkpoints.
Here’s how to unlock fast travel in Prince of Persia: The Lost Crown, plus a list of all the fast travel locations we’ve found so far.
How to unlock fast travel in Prince of Persia: The Lost Crown
To unlock fast travel in Prince of Persia: The Lost Crown, you need to progress to the game’s second chapter, “The Abducted Prince,” where you will head toward the Sacred Archive biome located in the Lower City. On your way, look for a purple distortion on your screen indicating a nearby fast travel point, typically near a Wak-Wak tree. Find the purple orb (a time rift) and destroy it to restore a Homa statue, which activates the fast travel location. The first unlocked point is in the Scholar’s Area, and from there, you can fast travel to other unlocked statues, including one in The Haven. Additionally, defeating the boss Jahandar grants the Rush of the Simurgh power, which helps in accessing more fast travel points by crossing previously inaccessible areas. Keep an eye out for the purple screen effect to discover and unlock more fast travel points throughout Mount Qaf.
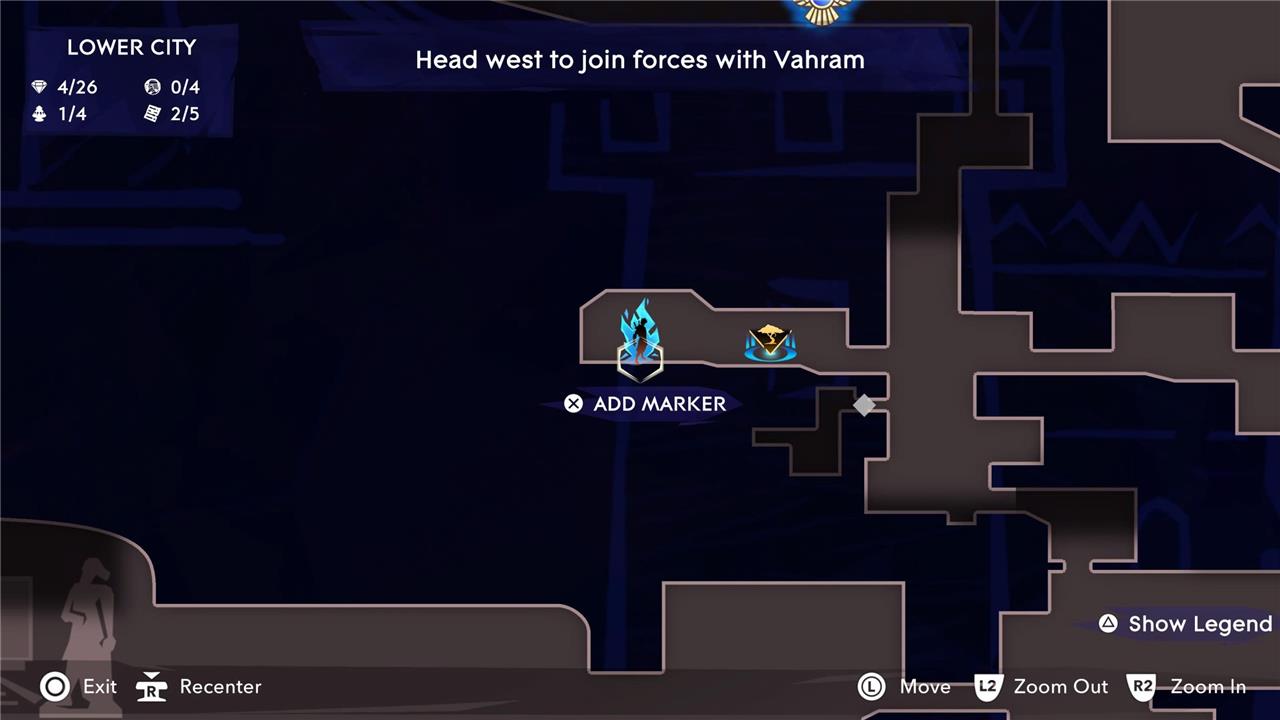
You can’t unlock fast travel in The Lost Crown until you head toward the Sacred Archive biome, but it’s technically in the Lower City. And you can miss it if you’re rushing.
As you approach the Sacred Archive, instead of heading up toward the waypoint (which you’ll see on your map when playing on Guided Mode), hang a left. You’re looking for this room:
You’ll see a purple orb in front of a broken plinth:
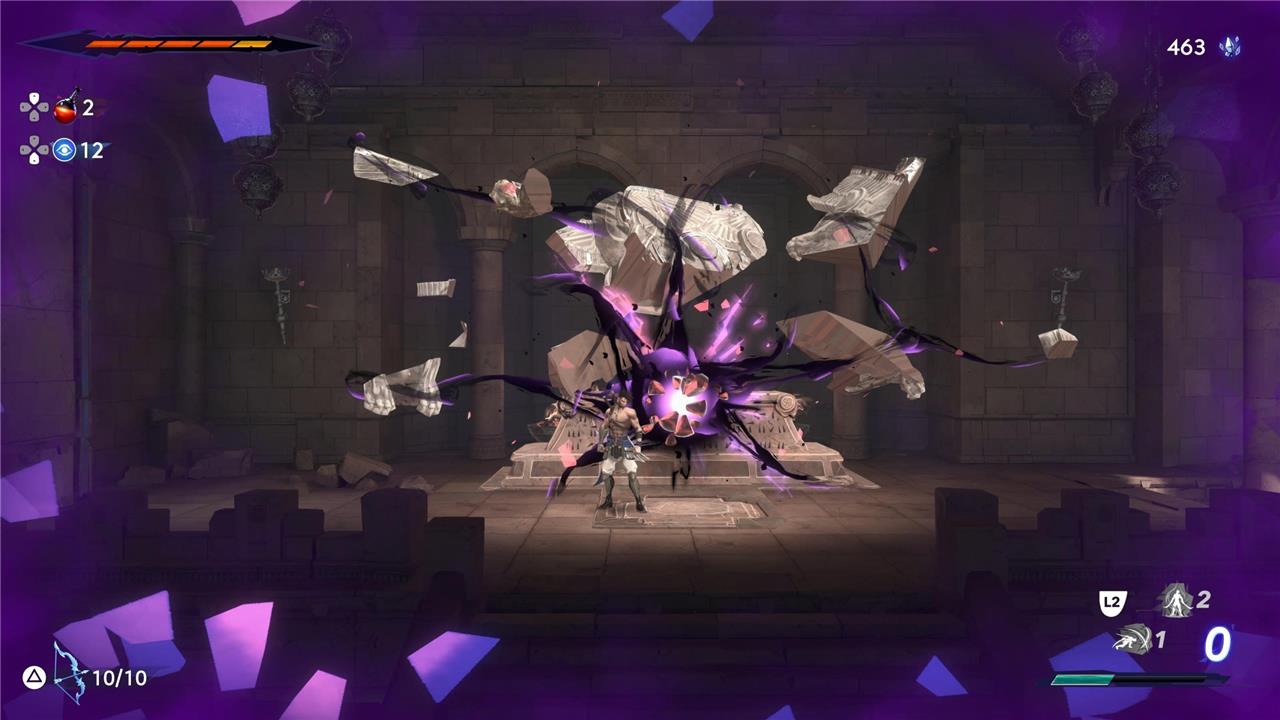
Smashing the orb will repair the plinth. Interacting with it will pull up a list of fast travel locations you’ve unlocked.
When you’re exploring, you’ll know you’re near a fast travel spot when your screen gets a purple overlay. If your screen starts looking like this.
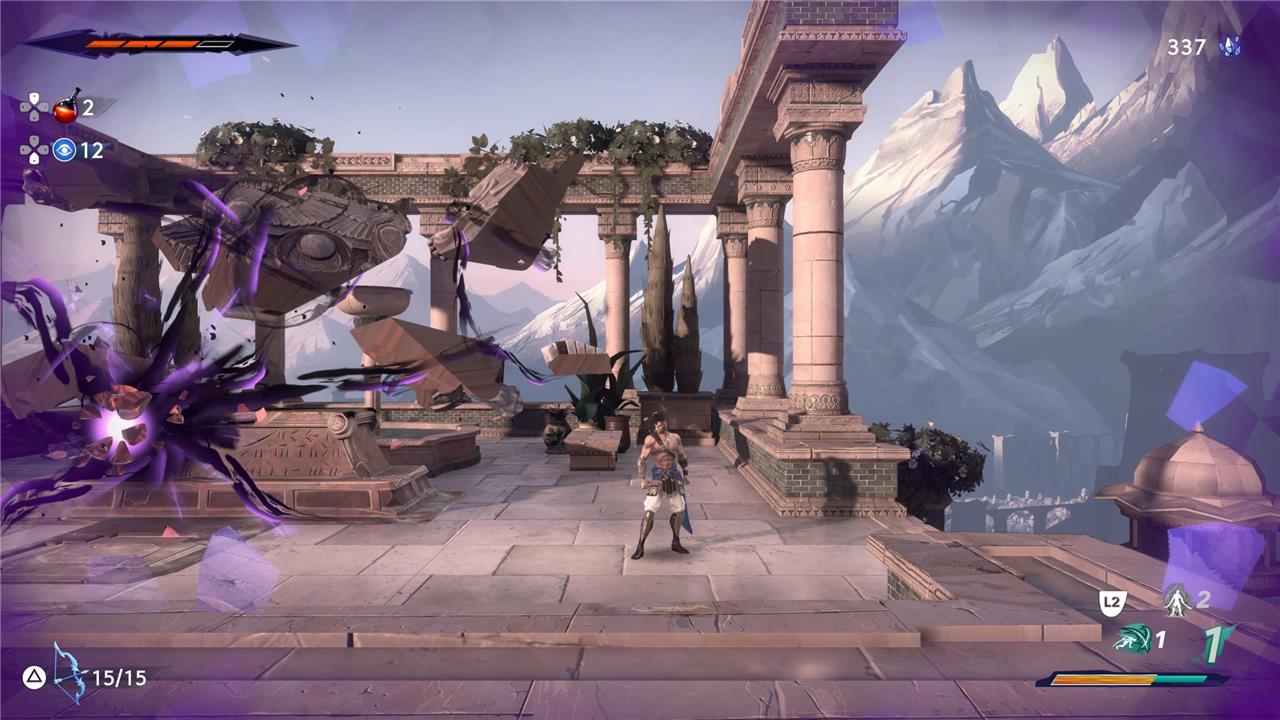
.then search the surrounding area until you find a fast travel spot. It’s usually near a Wak-Wak tree.
Fast travel locations in Prince of Persia: The Lost Crown
Fast travel locations in Prince of Persia: The Lost Crown are scattered throughout the expansive world of Mount Qaf, allowing players to quickly move between key areas once unlocked. These fast travel points are typically found near Wak-Wak trees and are activated by destroying nearby purple orbs, which restore Homa statues that serve as teleportation altars. Early notable fast travel locations include The Haven and the Scholar’s Area in the Lower City, with additional points spread across biomes such as the Sacred Archives, Upper City, Soma Tree, Pit of Eternal Sands, Raging Sea, Sunken Harbor, and Tower of Silence. Unlocking fast travel requires progressing to the second chapter and defeating the boss Jahandar the Manticore, after which players can start activating these points to ease navigation across the vast and winding map.
So far, we’ve found fast travel locations in Prince of Persia: The Lost Crown. Here they are:
Lower City – The Haven fast travel location
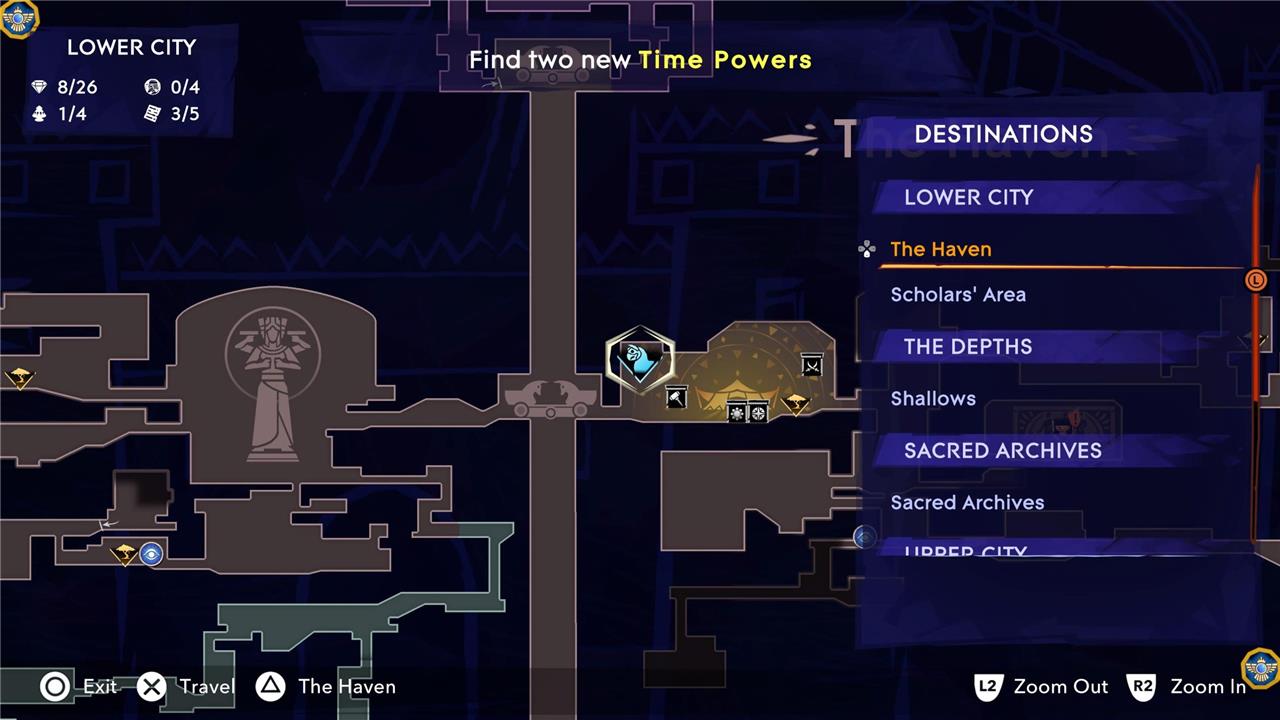
You’ll reach the Haven early on, but you can’t use it as a fast travel spot until you’ve unlocked the fast travel spot en route to the Sacred Archives.
Lower City – Scholar’s Area fast travel location
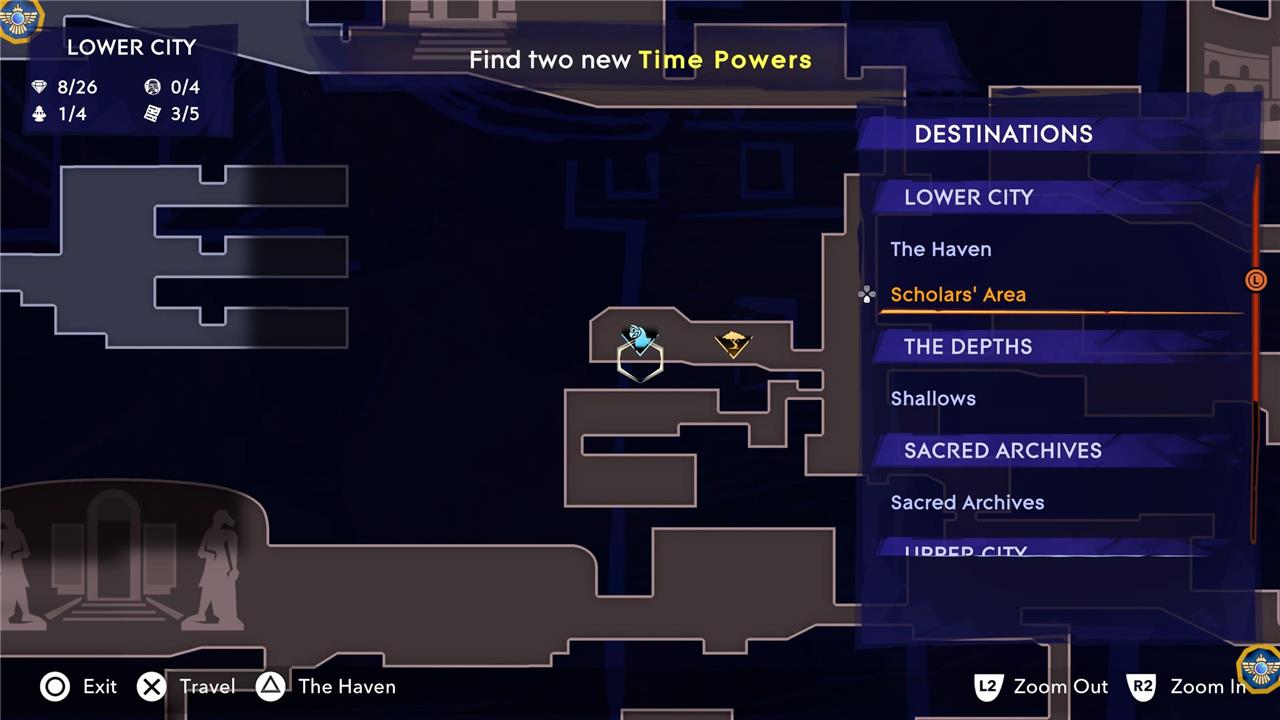
Though it’s technically in the Lower City, the Scholar’s Area fast travel spot is essentially your access point to the Sacred Archives.
Sacred Archives – Sacred Archives fast travel location
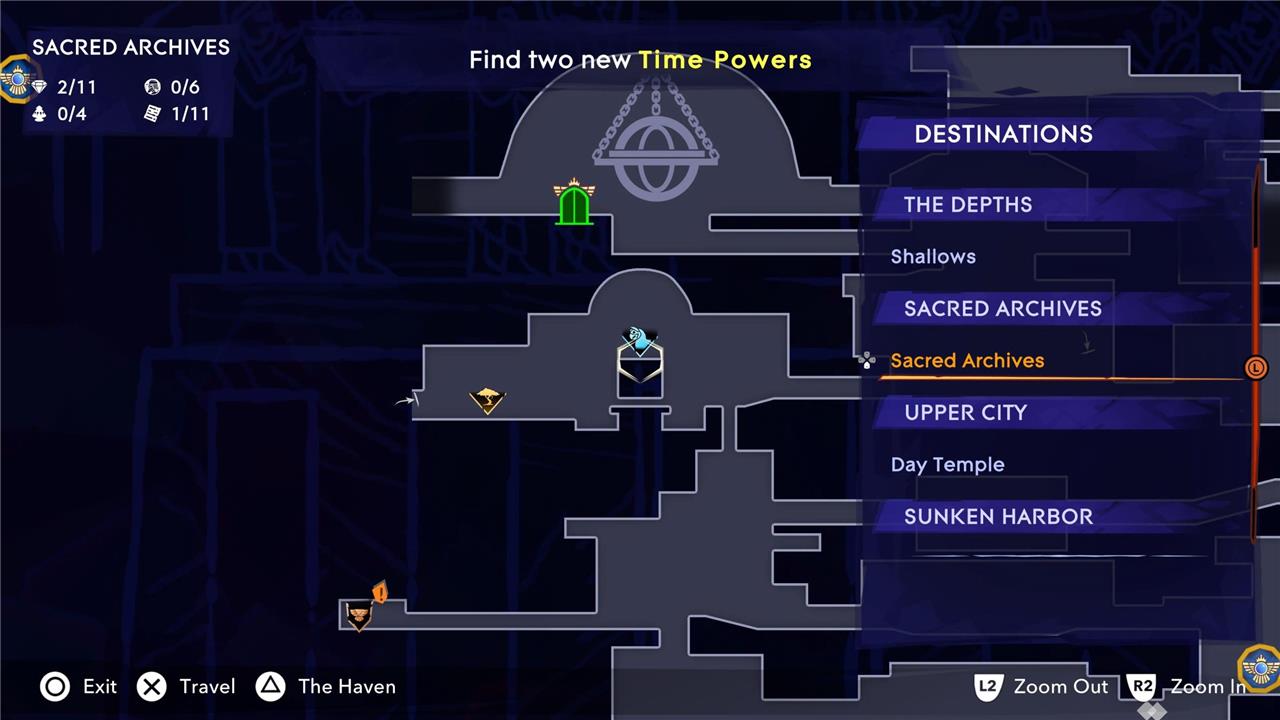
The actual Sacred Archives fast travel spot is a ways into the biome, located on the west side of the map.
Sacred Archives – Temple of Knowledge
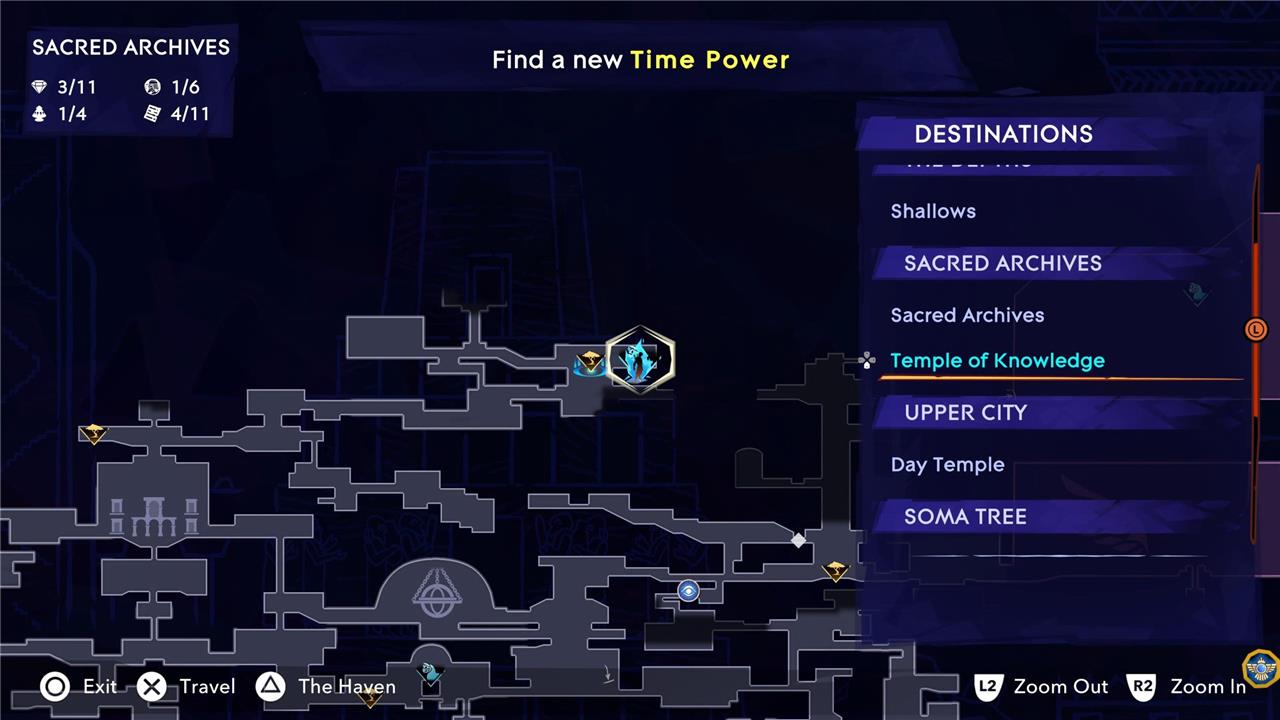
You can only reach the Temple of Knowledge fast travel spot after you’ve unlocked the Clarivoyance ability.
Upper City – Day Temple fast travel location
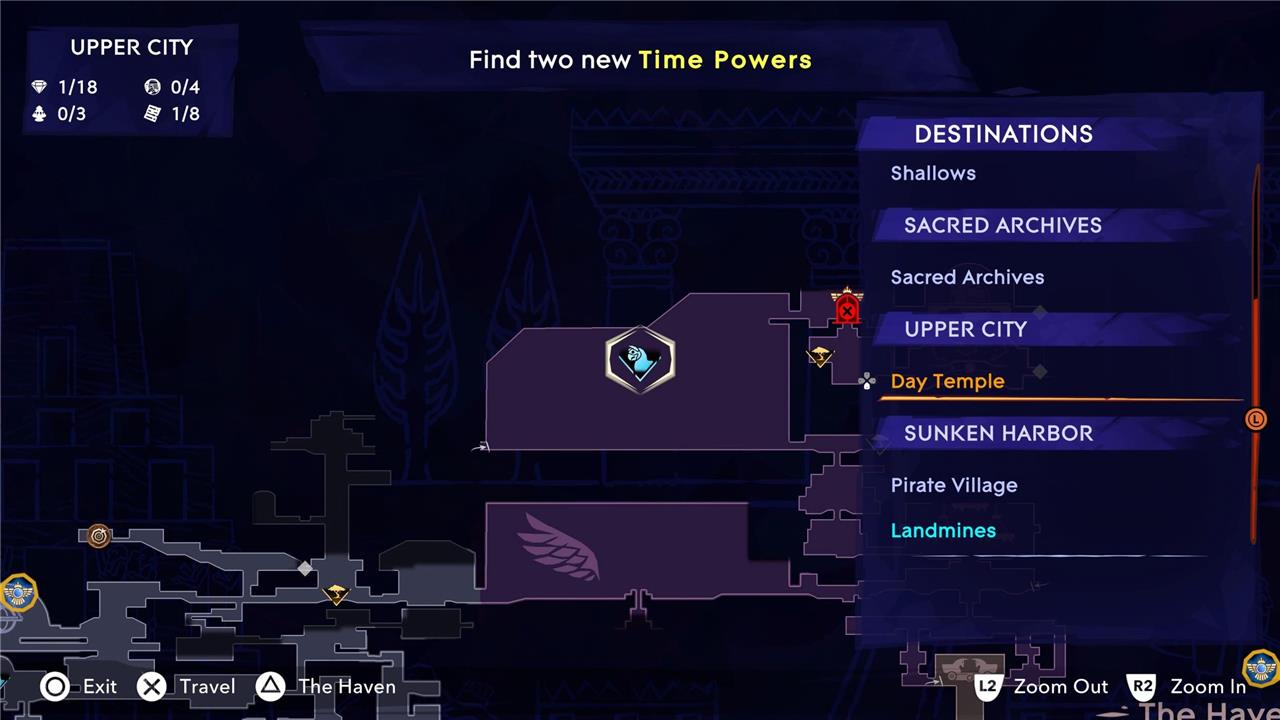
Before riding the lift to the top of the Upper City, make sure to activate the Day Temple fast travel spot in the biome’s spacious al fresco area.
Upper City – The Clockwork fast travel location
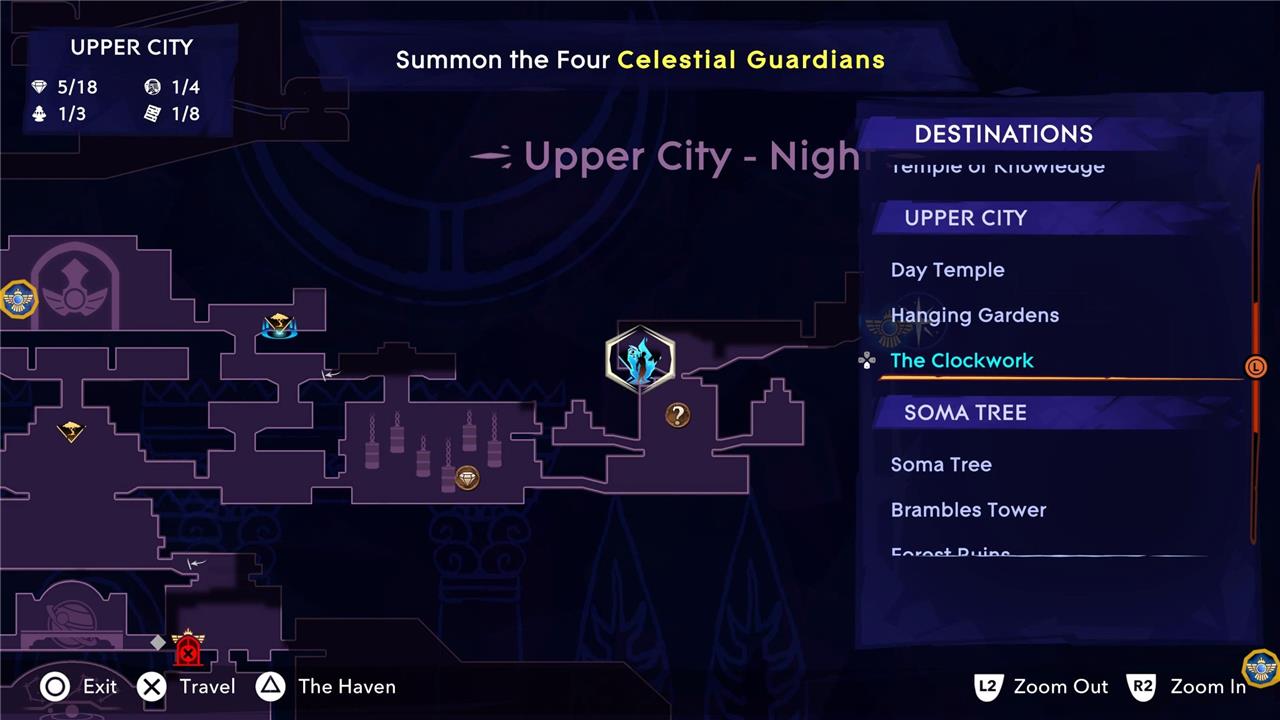
You’ll pass The Clockwork fast travel spot after solving the clock puzzle in the Upper City. In the chamber immediately after the puzzle, Instead of heading right toward the objective, turn left.
Upper City – Hanging Gardens fast travel location
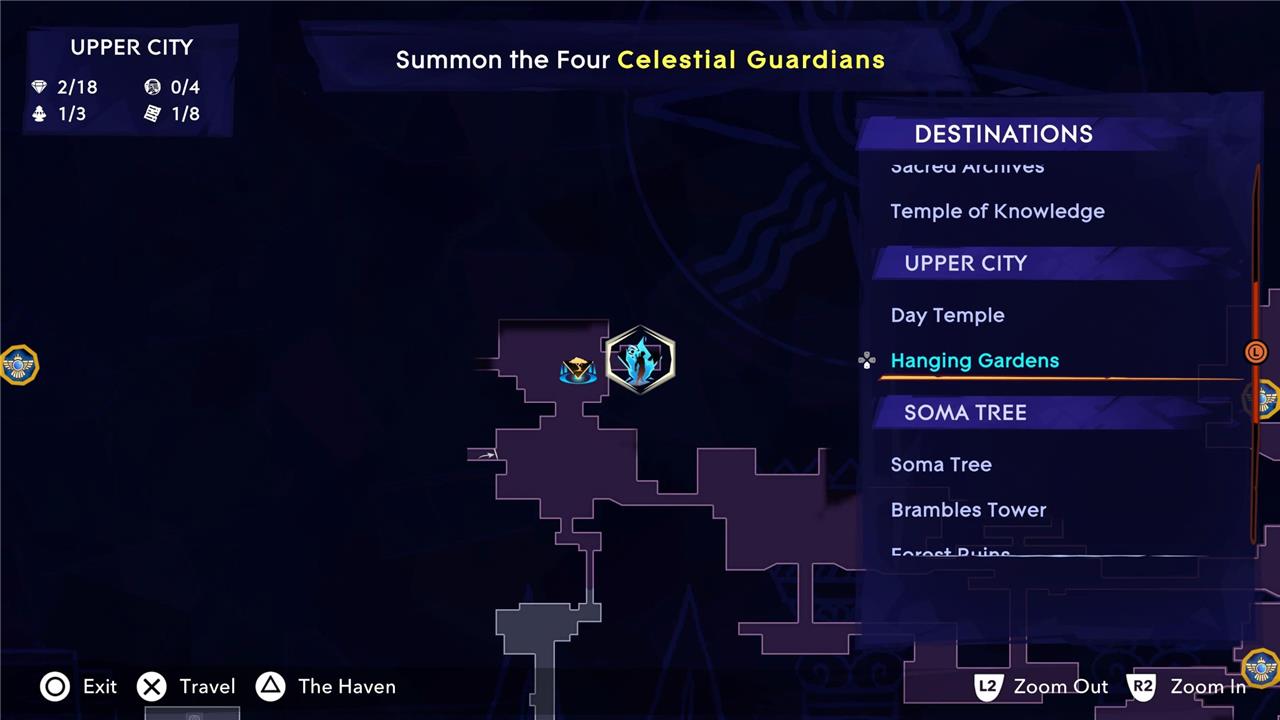
You can’t access the Hanging Gardens fast travel spot until you’ve unlocked the Gravity Wings (aka, the double jump).
The Depths – Shallows fast travel location
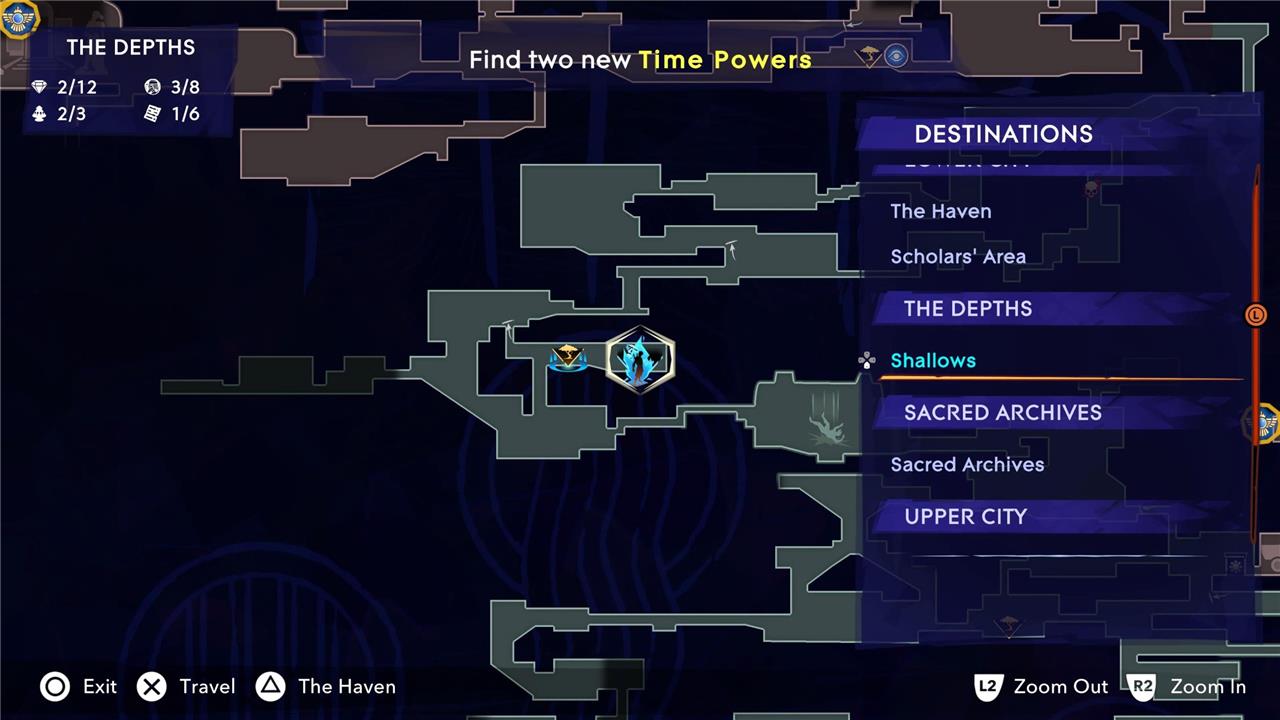
Not sure why you’d ever want to return to the Depths, but Shallows, the biome’s primary fast travel spot, is a bit west of where you first arrive in the Depths.
The Depths – Catacombs
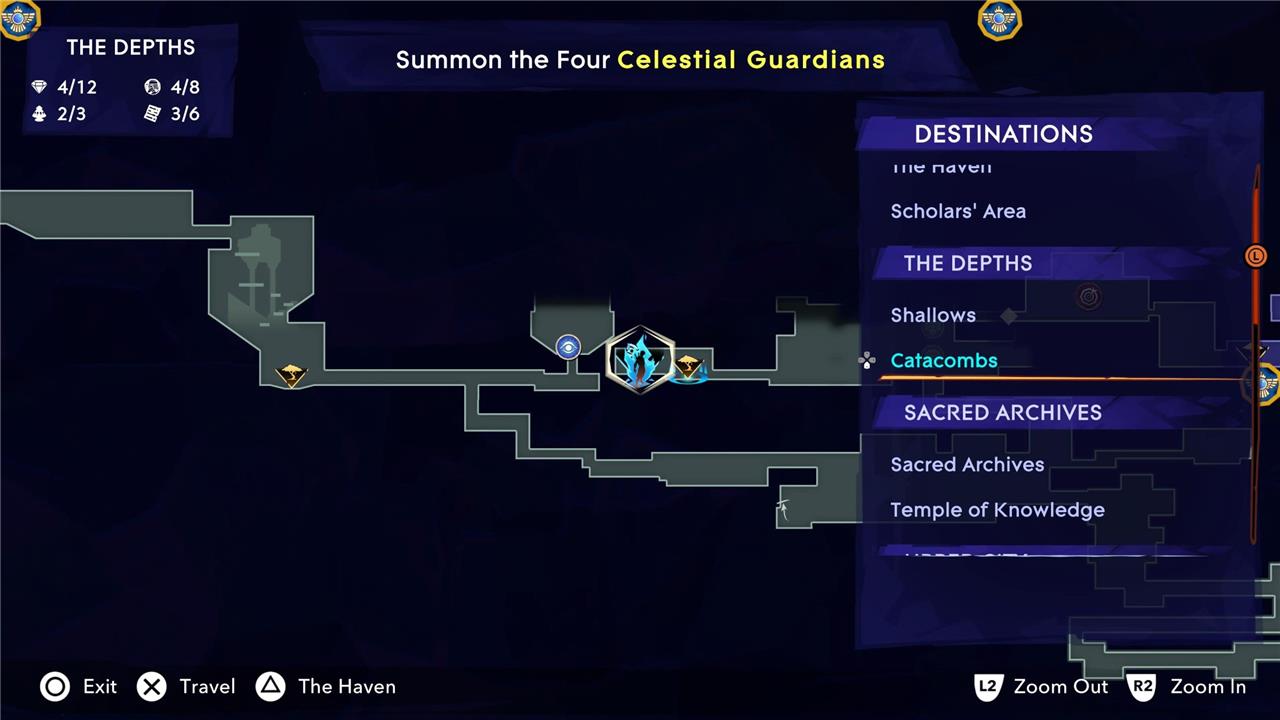
The Catacombs fast travel spot is near the Giant Crab boss fight, and servers as a good checkpoint to prepare for the battle.
Sunken Harbor – Pirate Village fast travel location
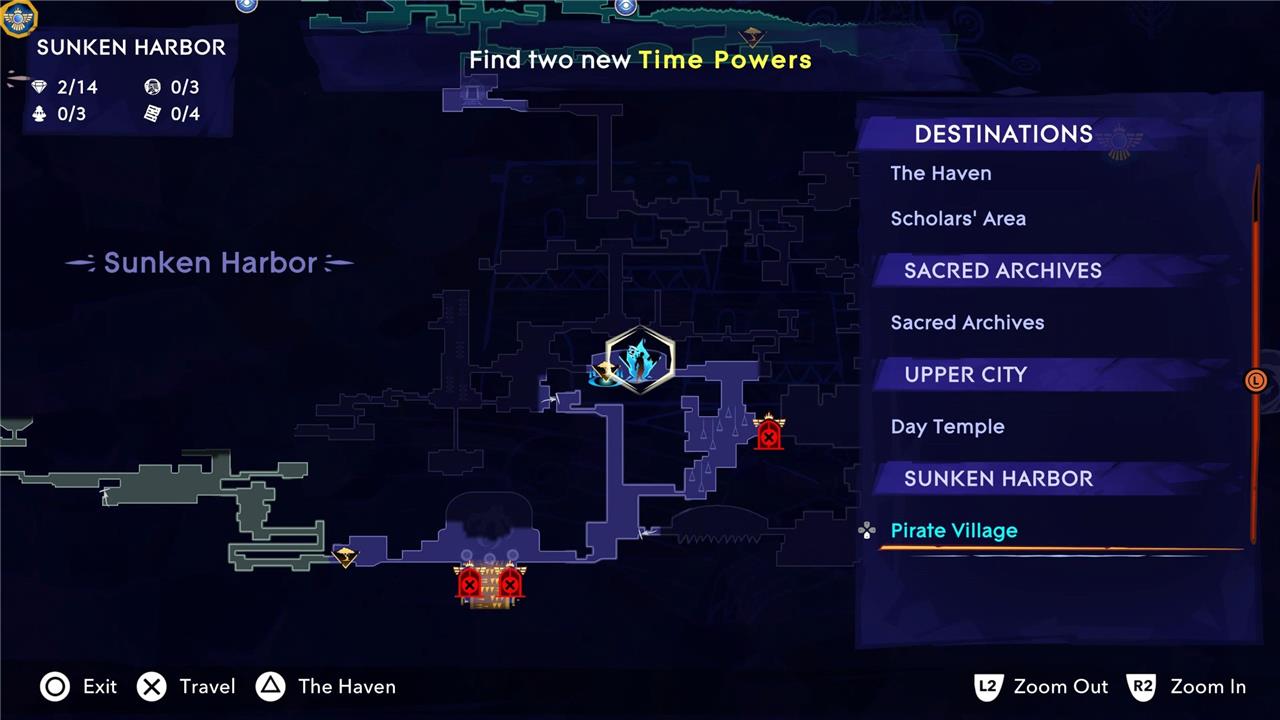
The Pirate Village fast travel spot is likely the first fast travel spot you’ll stumble upon after leaving the Depths. Freedom!
Sunken Harbor – Landmines fast travel location

As its name implies, yes, you will have to dodge some landmines en route to the Landmines fast travel spot in Sunken Harbor.
Soma Tree – Soma Tree fast travel location
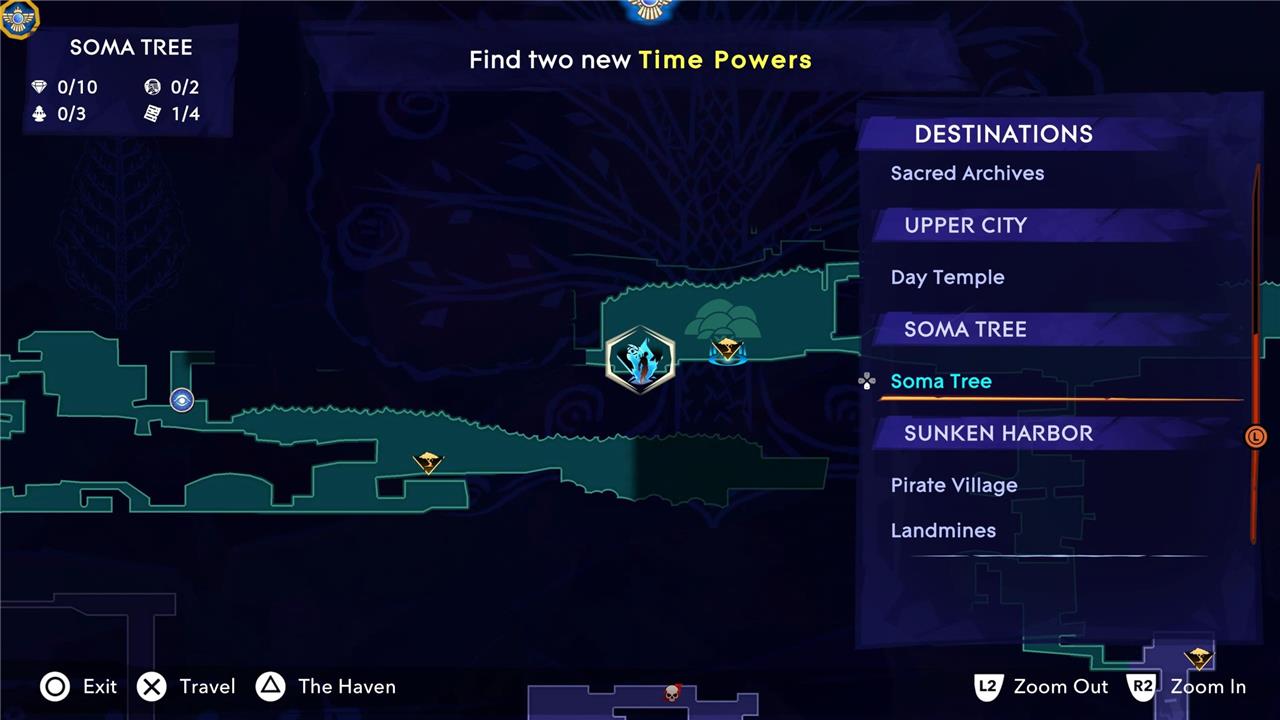
Though it appears adjacent to the Hyrcanian Forest, you’ll need to access the Soma Tree fast travel spot by way of Sunken Harbor.
Soma Tree – Forest Ruins fast travel location
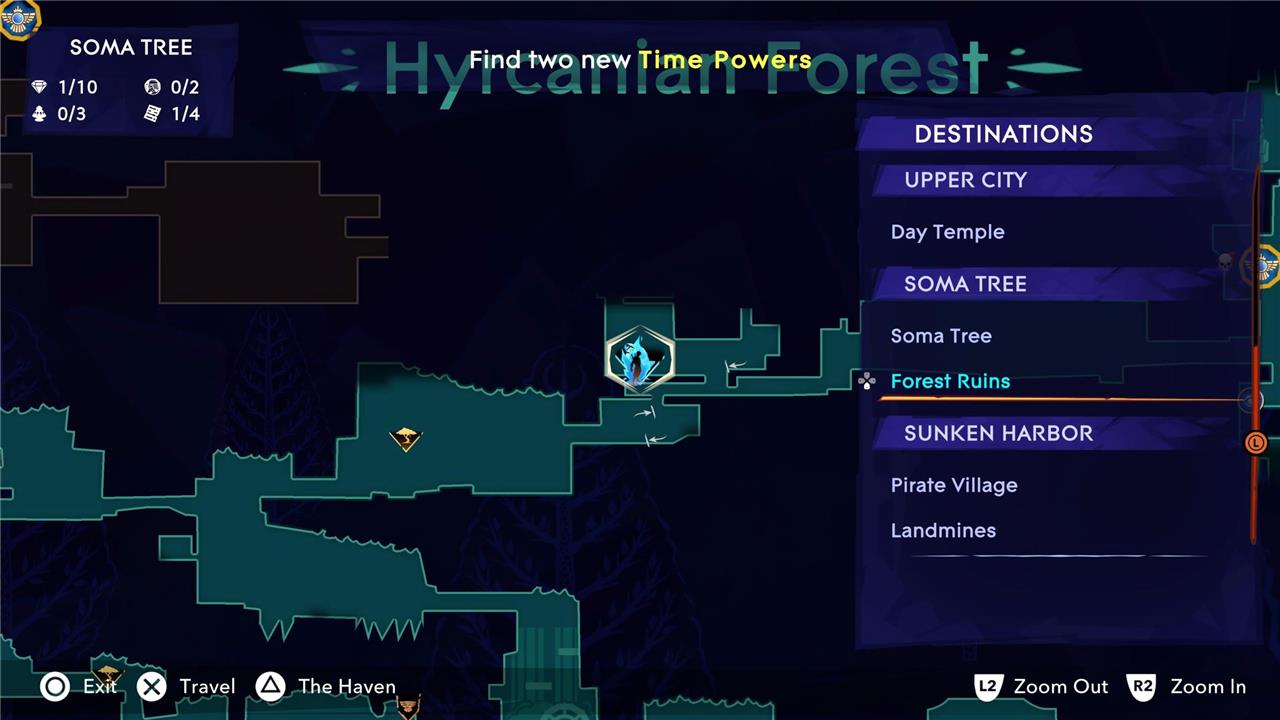
The Forest Ruins fast travel location connects the Soma Tree with the Hyrcanian Forest.
Soma Tree – Brambles Tower fast travel location
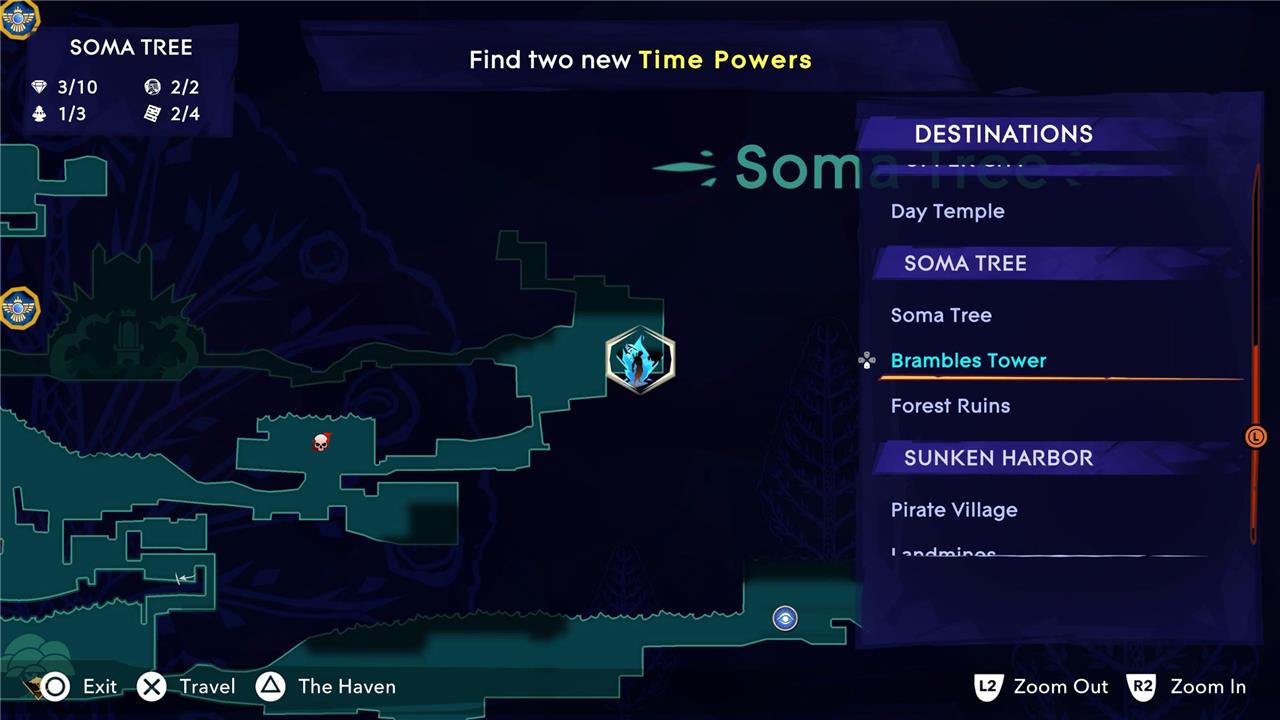
You’ll come across the Brambles Tower fast travel spot while scaling the Soma Tree.
Pit of Eternal Sands – Sealed Lair fast travel location
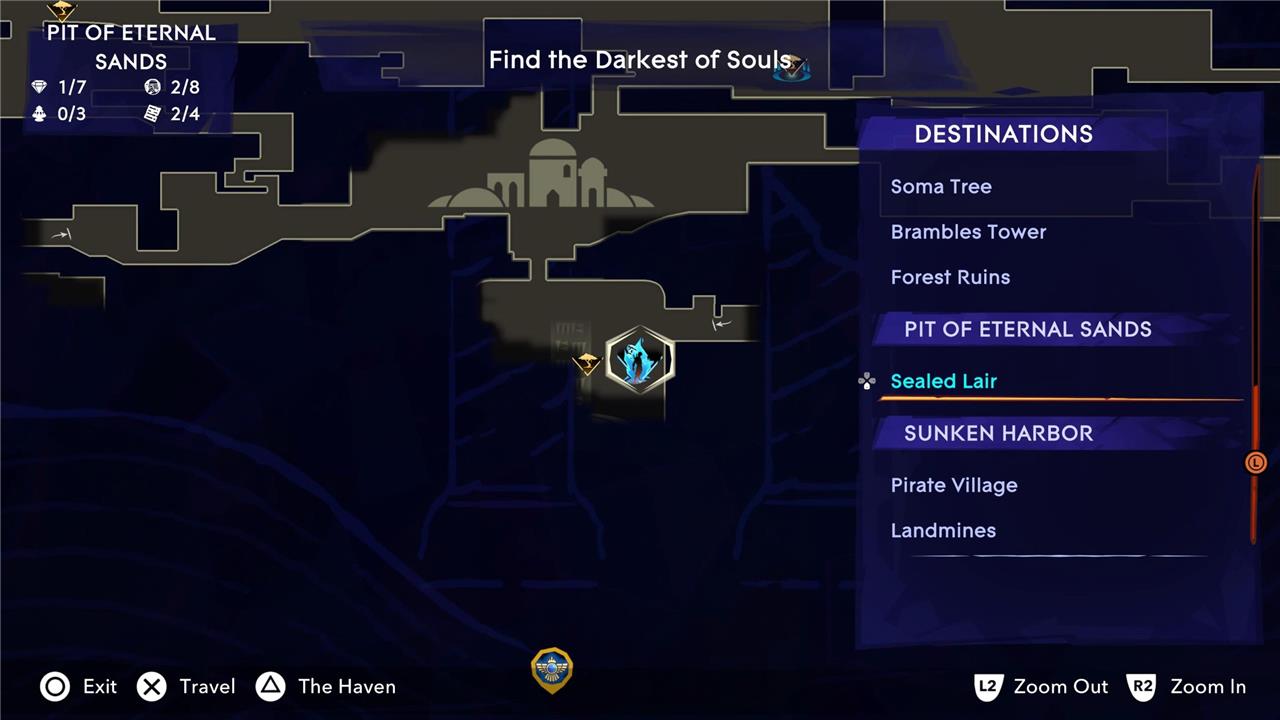
You’ll pass the Sealed Lair fast travel location on the way to the Azhdaha boss fight.
Pit of Eternal Sands – Sentinel’s Road fast travel location
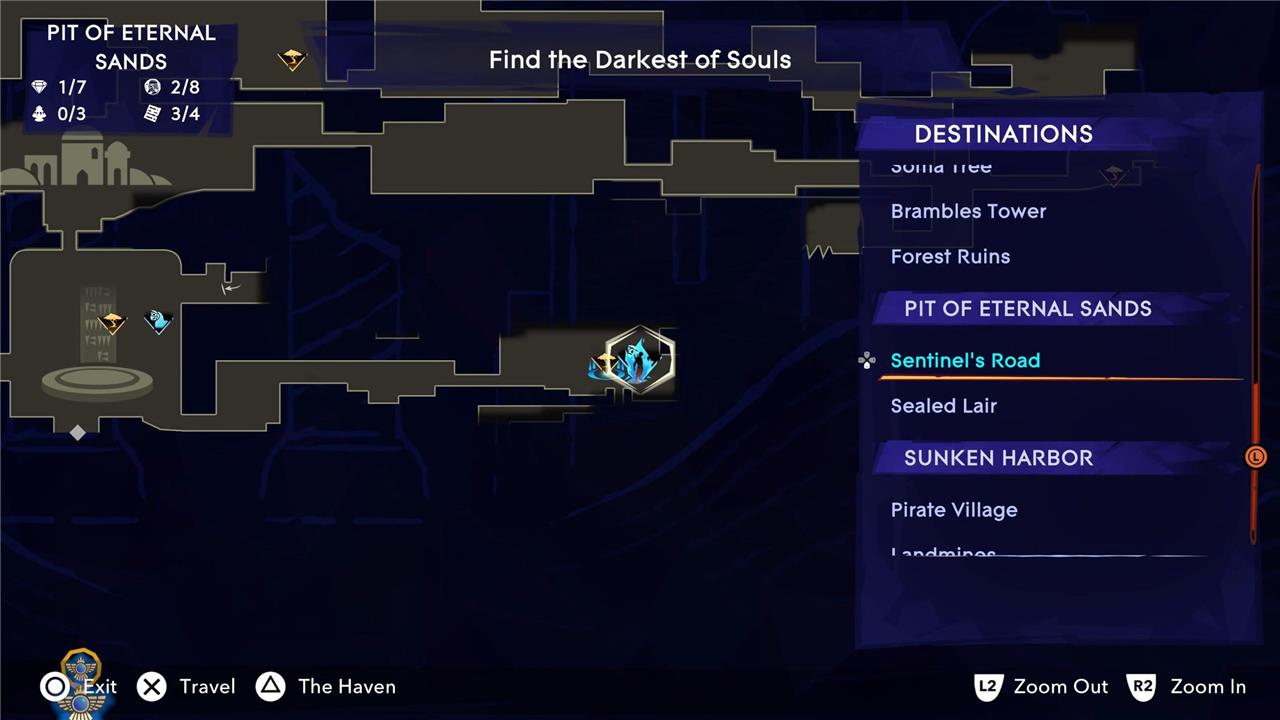
The Sentinel’s Road fast travel spot is due east of the Sealed Lair.
Raging Sea – The Holds fast travel location
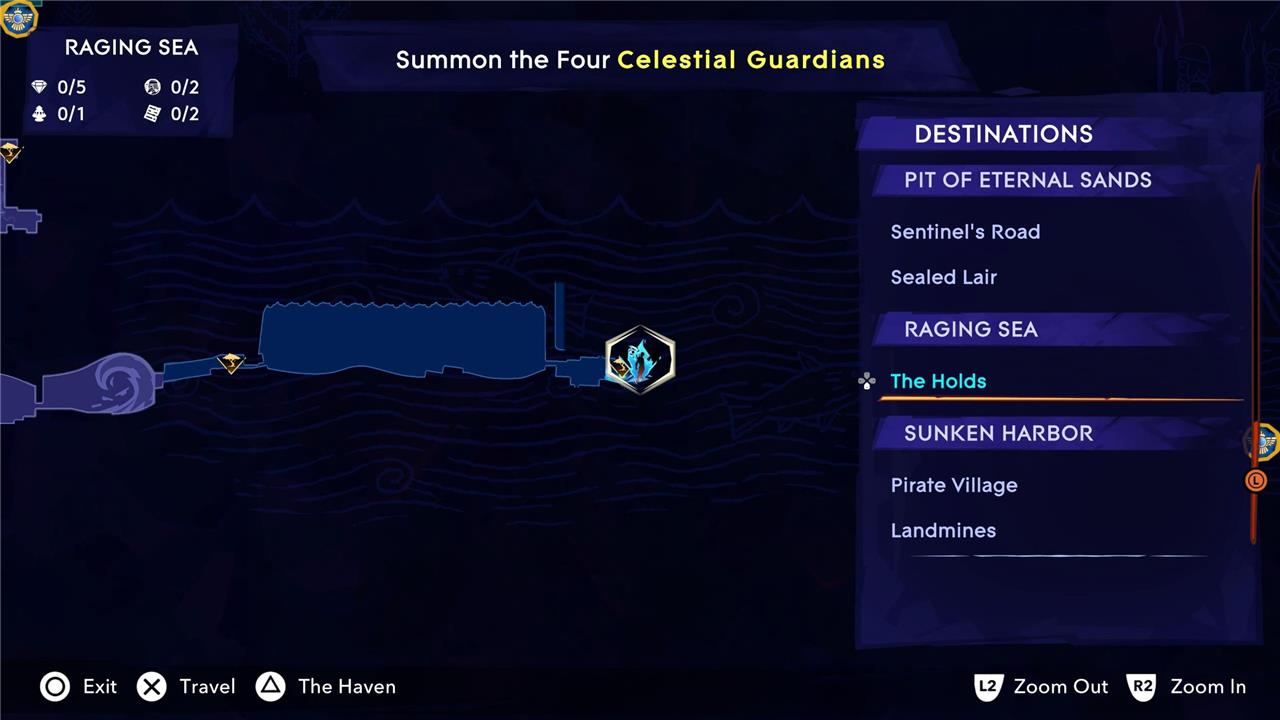
The Holds is located in the small room to the east of the second Wak-Wak tree you come across in the Raging Sea.
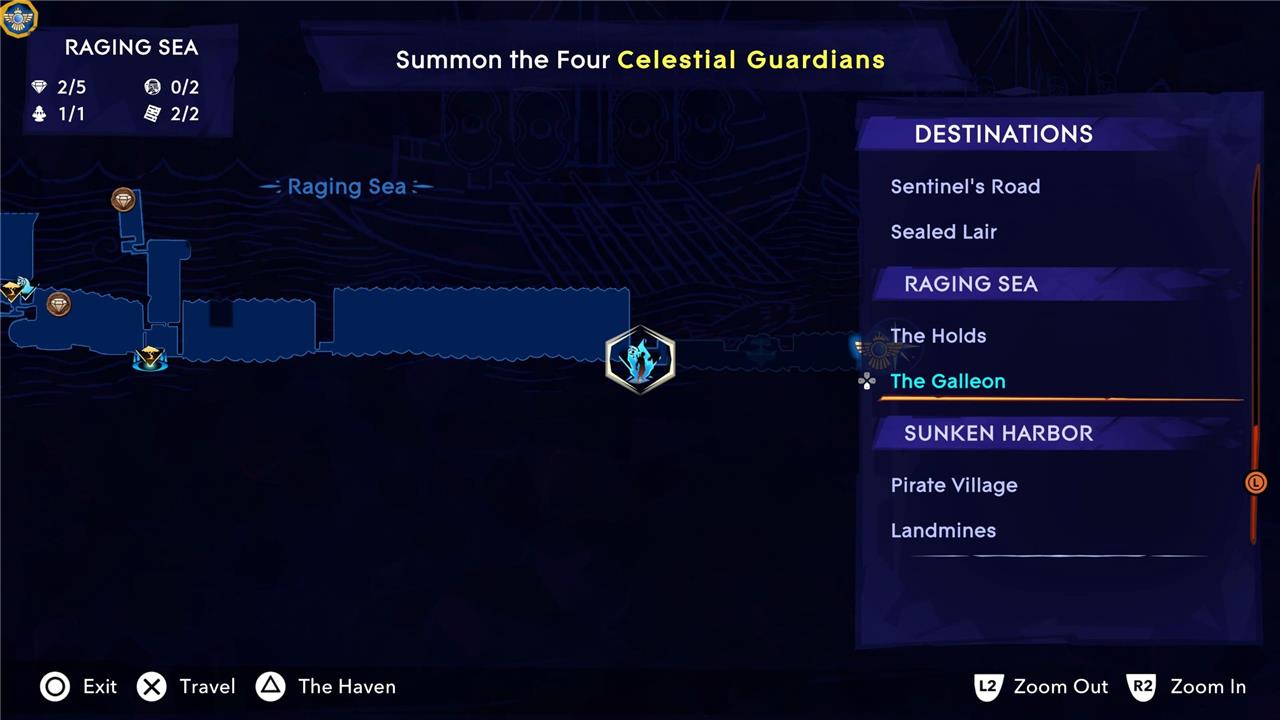
Raging Sea – The Galleon fast travel location
How do I activate fast travel in Prince of Persia: The Lost Crown
To activate fast travel in Prince of Persia: The Lost Crown, you must progress to chapter two, “The Abducted Prince,” and head toward the Sacred Archive biome located within the Lower City. On your way there, take the last left as you ascend towards the waypoint to reach the Scholar’s Area, where you’ll find a purple orb blocking a Homa statue. Destroy this orb to restore the statue, which unlocks fast travel.
Additionally, you need to defeat the boss Jahandar to acquire the “Rush of the Simurgh” power, which enables you to navigate certain areas and access fast travel points near Wak-Wak trees. When near a fast travel point, your screen edges will turn purple, signaling the presence of a time rift that you must destroy to activate the fast travel location.
Once activated, fast travel points allow you to teleport between them, starting with the Haven and Scholar’s Area in the Lower City. Be sure to explore and unlock as many of these points as possible to ease your traversal across Mount Qaf.
What is the exact sequence to unlock fast travel in chapter two
The exact sequence to unlock fast travel in Chapter 2 of Red Dead Redemption 2 is as follows:
-
Progress through the story until you complete the fifth mission of Chapter 2, “Money Lending and Other Sins.” Completing this mission unlocks the camp ledger behind Dutch’s tent.
-
Approach the ledger at your gang’s camp and purchase the upgrade “Dutch’s Lodgings” for $220. This upgrade improves the camp and encourages other gang members to contribute more.
-
Next, buy the “Next in Line” upgrade for Arthur’s Wagon for $325. This upgrade unlocks the fast travel map.
-
After purchasing these upgrades, you can fast travel by interacting with the map located near Arthur’s tent at camp. You can select any previously visited settlement and instantly travel there on your horse.
This process requires a total of $545 and becomes available only after advancing to the specified mission in Chapter 2.