Behind the veil of Where Winds Meet, a whispered path unfolds-one misstep could shroud your senses, yet the prize demands a gaze that sees beyond the obvious.
How to solve the lake puzzle in Where Winds Meet
The lake puzzle in Blind to the World is solved by draining the lake, then stepping on the four slabs in the correct order to align the Blind Girl statue’s gaze and reveal the concealed mechanism.
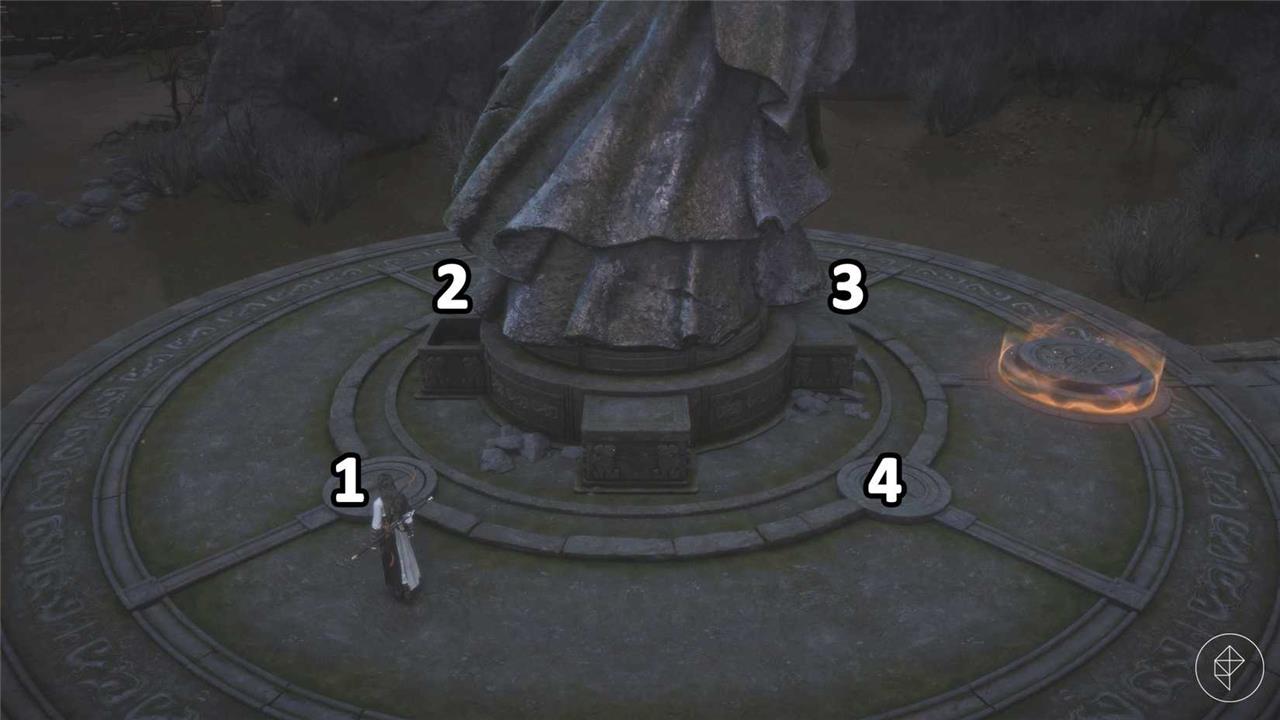
First, step on the large round pressure plate next to Uncle Tian (see picture below, left side). This will activate four smaller pressure plates around the blind girl’s statue.
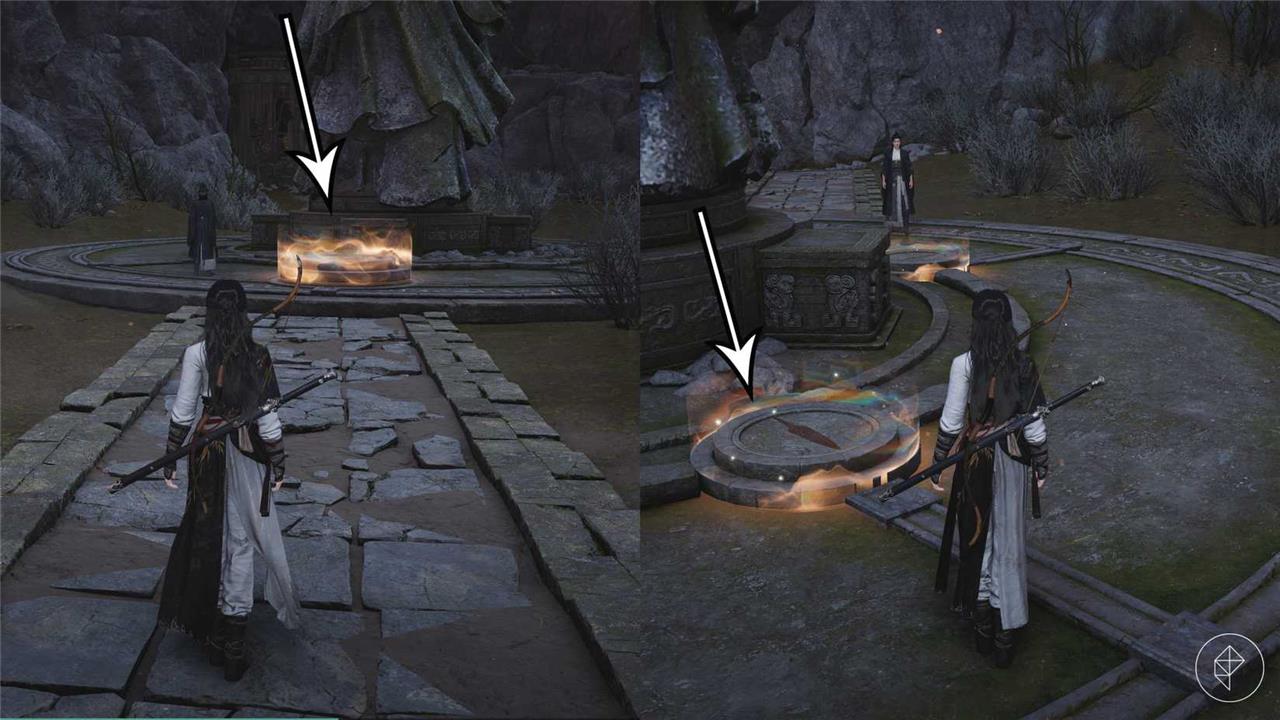
Now you must press the four small pressure plates in the correct order. Uncle Tian will give you a hint if you ask him; he thinks the pressure plates stand for the north, east, south, and west. To solve the puzzle, step on the plate in the north first, just behind the statue’s outstretched arm (see picture above, right side). This is the only pressure plate with a clear, reddish symbol.
From there, step on each remaining pressure plate in a clockwise rotation. Doing so will complete the “Blind to the World” lake puzzle and open a cave passage.
Pass the broken bridge in Where Winds Meet
After reaching the damaged bridge, approach it from the left side and use the nearby fallen beam as support to cross safely. Time your movement carefully, as some planks collapse under pressure. Once across, interact with the small stone marker to trigger the next part of the quest and reveal the hidden path leading toward the canyon ruins.
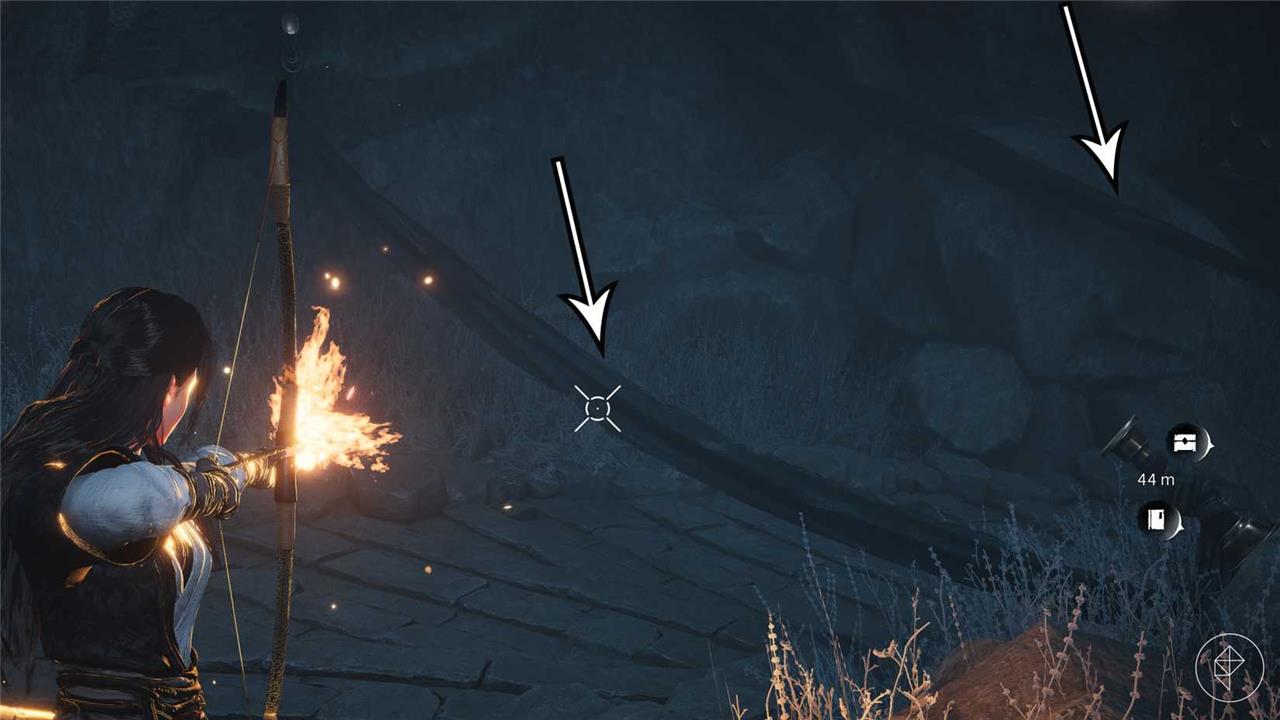
Descend into the cave, but don’t touch the black shawls, as they’ll set you on fire. Best to repay them in kind by shooting them with burning arrows before passing through.
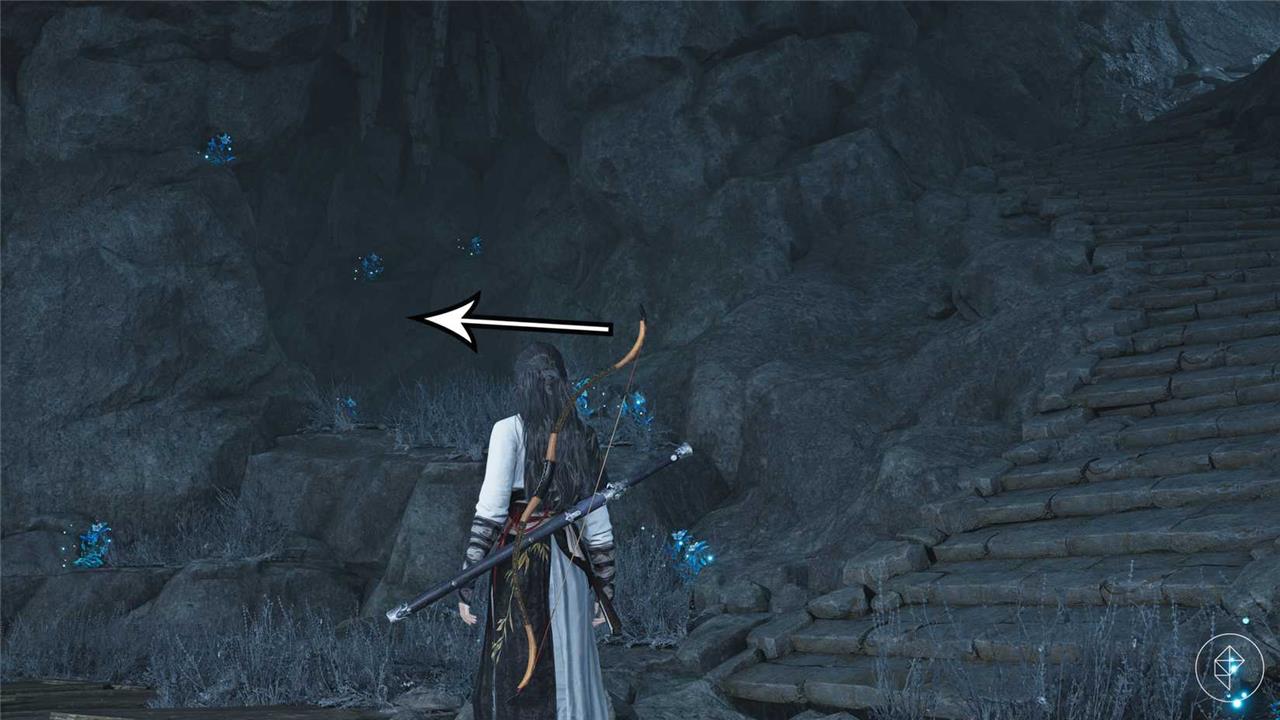
When you reach the broken bridge, do not jump down, but enter the cave entrance to the right instead. Don’t worry about the sparkly blue flowers; the screen will turn dark if you touch them, but the effect wears off in seconds.
When you hit a dead end, dive down and follow the waterway. The tunnel will lead you to the other side of the broken bridge, where you must speak with Uncle Tian again and open a locked door.
How to solve the bell puzzle in Where Winds Meet
To solve the bell puzzle before the stone gate, find the blue Moonlit Flowers near the pedestal overlooking the gate and step on them to darken your screen and heighten sound. While affected, activate the pedestal and listen to the ringing sequence, which plays as third bell, fourth bell, first bell, second bell from left to right. Step off the flowers, equip your bow, and shoot the plates above the bells in that exact order-3, 4, 1, 2-to break the seal and open the gate.
To open the locked door in Where Winds Meet, you must solve the bell puzzle. First, walk upstairs to the small stone pillar. See the red-glowing pressure plates above the four bells? You must hit them with arrows in the correct order to complete the puzzle.
Here’s where things get weird: Although the bells will ring in a certain order upon using the stone pillar, this isn’t the puzzle solution yet. Instead, touch the blue flowers first, so the screen gets dark, and then activate the stone pillar. The bells will now ring in a different order – this is the order you must copy.
How to solve the bell puzzle step-by-step
The bell puzzle in Where Winds Meet’s “Blind to the World” quest requires going temporarily blind via a Moonlit Flower to perceive the correct ringing sequence on four bells/symbols atop a high pedestal.
Preparation Steps
Approach the stone gate in the cave after navigating the blind sections with Tian. Climb the pedestal directly opposite the gate (use parkour or zipline if needed). Interact once to ring all four bells, noting their initial random order-this is not the solution.
Blinding Mechanic
Jump down and locate a nearby blue Moonlit Flower (glowing plant). Touch or interact with it to “blind” your character, altering vision to reveal vibrations or lit symbols. Return to the pedestal while blinded and interact again to re-ring the bells.
Shooting Sequence
With the blinded state active, observe the new lit order (typically right-to-left: second-from-right, rightmost, second-from-left, leftmost-but confirm visually as it may vary slightly per instance). Shoot the lit symbols/bells in exactly that order using arrows or ranged attacks. A correct sequence glows progressively and opens the gate; failures reset it.
Tips for Success
Stay blinded throughout (effect lasts briefly-re-touch flower if it fades). Position on high ground for clear shots. If stuck, exit/re-enter the area to reset.
Show the exact bell sequence for Solved by the Bell quest
Solved by the Bell refers to a side quest in Hogwarts Legacy, not Where Winds Meet. Its bell puzzle uses a fixed sequence on nine bells in Clagmar Castle, unlike the dynamic blinded sequence in Where Winds Meet’s “Blind to the World” quest.
Exact Sequence (Numbered 1-9)
Number the bells left-to-right, top-to-bottom (row 1: 1-5 left; row 2: 6-9 right). Strike in this order: 8, 5, 3, 4, 5, 1, 2, 4. This plays the Harry Potter theme, spawning a chest with Treasure-Seeker’s Longcoat, 400 Galleons, and 180 XP.
Visual Positions
-
Bottom-right (8)
-
Third-left (5)
-
Second-left (3)
-
Second-right (4)
-
Third-left (5, repeat)
-
Top-left (1)
-
Top-right (2)
-
Second-right (4, repeat)
Reset and Tips
Spam any bell to reset if wrong. Use basic cast (not Incendio); stand back for accuracy. Complete after finding the Musical Map in Henrietta’s Hideaway.