The Surveyor Vaults in Arc Raiders hide some of the game’s rarest rewards, but finding them isn’t as simple as following a marker. These secret chambers demand sharp instincts, coordination, and a bit of daring exploration before their treasures can be claimed.
Where to find surveyors in Arc Raiders
Surveyors tend to spawn in open areas where their blue beam is easy to spot, such as the Blue Gate map or wide, flat zones with clear sightlines. Keep checking the sky for a tall, bright blue column and head toward it, as that marks an active Surveyor event. On maps like Dam Battleground, patrol routes between landmarks such as the scrapyard and nearby lakes, regularly opening your map to catch Surveyor or Arc Courier icons that may be hidden behind terrain. If you prefer static references, use the community interactive map tools shared by creators to see confirmed Surveyor spawn spots before you drop into a raid.
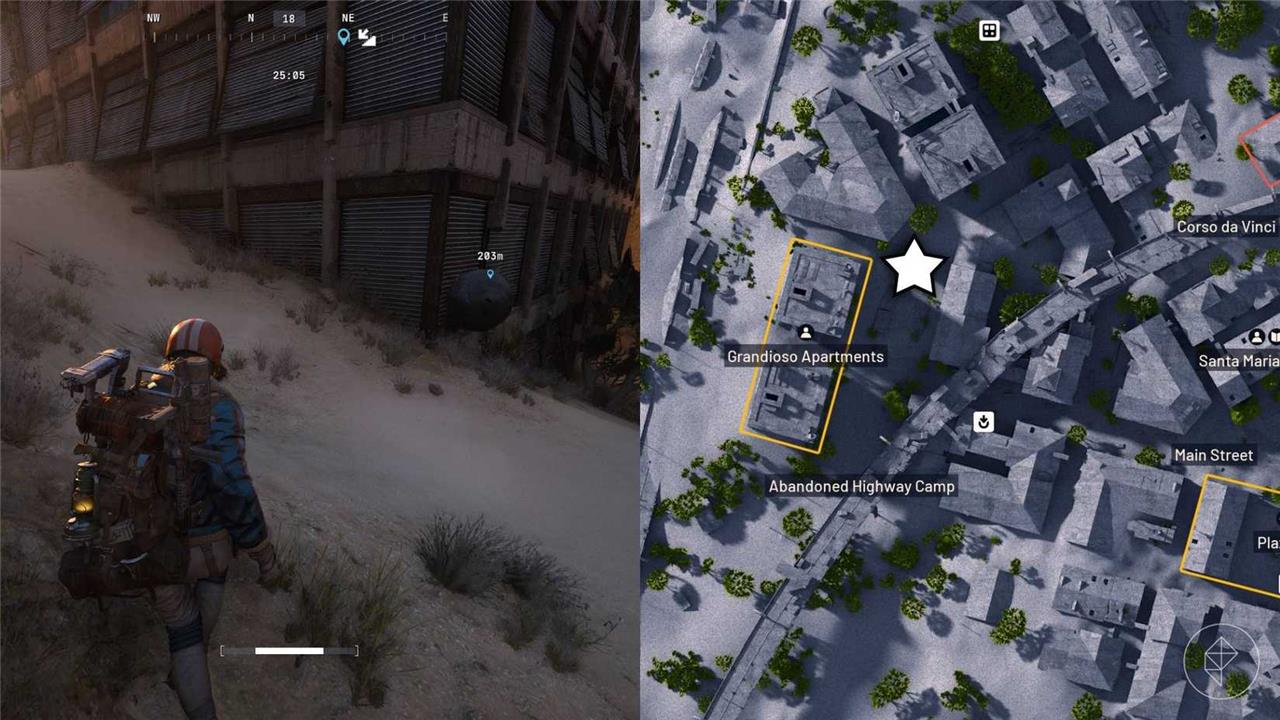
In our experience, the most common place to find surveyors in Arc Raiders is on Buried City. We found – and killed – one by the Grandioso Apartments, north of the Abandoned Highway Camp. However, they can spawn on any map, and there’s no guarantee there’ll be one in your match, so there’s a lot of luck involved.
If there is a surveyor in your game, you can find it very easily by looking for an enormous blue beam shooting into the sky. Surveyors emit this when they’re scanning, so hightail it in that direction as soon as you see one, as the beam can be seen from anywhere on the map.
To increase your chances of finding one, consider running night raids, because the blue beam is much easier to spot against the sky.
They’re often found in more remote areas of each map too: other players have reported finding them at the Adorned Wreckage on Blue Gate, Scrap Yard on Dam Battlegrounds, and Staff Parking on Spaceport. We don’t recommend going to Stella Montis to find them, because you won’t be able to spot the blue beam from afar.
How to get surveyor vaults in Arc Raiders
Surveyor vaults drop from damaged Surveyors and ARC Couriers during raids. Spot Surveyors by their blue vertical light beams from high ground on maps like Blue Gate or Spaceport, then hit them with weapons or grenades until armor plates fall for looting. Couriers offer a quicker option without chases, scattered across most maps in unbreached states.
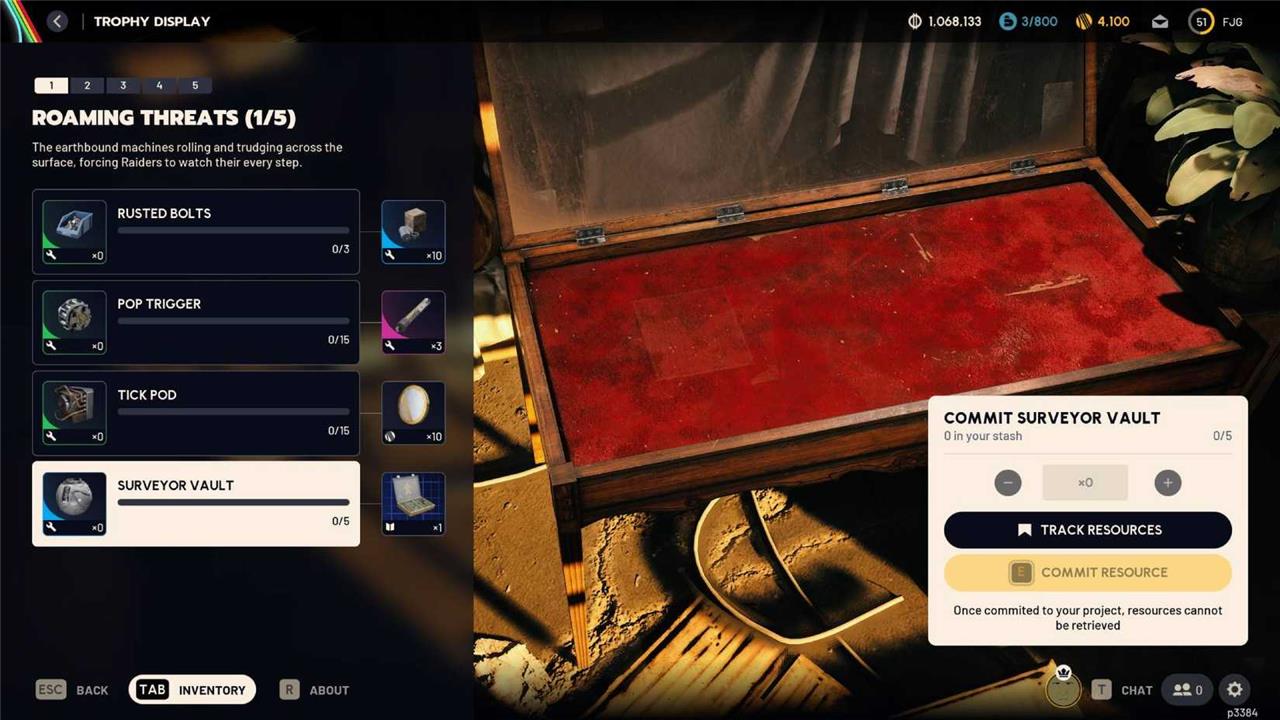
To get surveyor vaults, you don’t actually need to kill the surveyor, you just need to damage it enough that it drops some of its armor plating. Each of these parts can be looted, and has a chance of spawning a surveyor vault. Here are some tips for taking them down:
- Use a showstopper grenade to stop it in its tracks, followed by an explosive such as a trigger nade or heavy fuse grenade.
- Heavy ammo is much more effective at taking down its armor, so an anvil is the best weapon to use.
- If you don’t mind using the resources, a hullcracker and/or wolfpack will do significant damage.
- Don’t worry or panic when it charges at you, because it doesn’t deal much damage at all.
Mixed Signals quest full walkthrough in Arc Raiders
Mixed Signals is a straightforward “kill a Surveyor and loot its core” quest, but the roaming target makes it easy to mess up. Here’s a clean, step-by-step walkthrough.
Quest basics
-
Quest giver: Shani (unlocked after some early-game progress, e.g., after Dormant Barons or similar quests).
-
Objectives:
-
Destroy 1 ARC Surveyor.
-
Obtain 1 Surveyor Vault from it and extract with it.
-
-
Can be done on any map; Surveyors spawn in all regions.
-
Main rewards: Photoelectric Cloak and a Raider Hatch Key, plus some grenades/mines depending on version.
Step 1: Accept and prep
-
Talk to Shani and accept “Mixed Signals”.
-
Before queueing a raid, prepare:
-
Bring at least one heavy-ammo or high-damage weapon (Ferro, Anvil, similar).
-
Equip strong grenades: Showstopper, Snap Blast, or Trigger Nade are ideal.
-
Put points into mobility perks like Marathon Runner and Youthful Lungs if you have them, to chase the Surveyor.
-
Leave space in your Safe Pocket for the Surveyor Vault so you don’t lose it on death.
-
Step 2: Find the ARC Surveyor
-
Load into any map you know well (good extraction knowledge matters more than map choice).
-
As soon as you spawn, climb to some high ground and scan the sky.
-
You’re looking for a tall, straight blue laser beam going up into the sky; that marks a Surveyor.
-
Once you see the beam, sprint directly toward it; the Surveyor moves often and will relocate if you’re slow.
If you don’t see a beam immediately, keep moving, periodically checking the horizon from rooftops or hills until one appears.
Step 3: Destroy the Surveyor safely
The Surveyor is a fast, ball-like drone with armor plates and relatively low damage but high mobility.
-
Approach carefully so you can get close before it panics and starts fleeing.
-
Open with a grenade (Showstopper, Snap Blast, or Trigger Nade) to strip armor and/or stun it briefly.
-
During the stun window, dump heavy-ammo or high-damage fire into it (Ferro/Anvil or equivalent).
-
If you lack grenades, wait for it to fire its laser: an armor plate opens; shoot that exposed spot, then follow up quickly to finish it.
-
Stay aware that when it’s about to explode it may rush toward you and deal damage, so back off slightly at low HP.
Key point: Don’t let it get distance-chasing it across the map wastes time and stamina, so commit hard when you engage.
Step 4: Loot the Surveyor Vault
-
After it dies, go to the wreckage and search the drop pile.
-
Pick up the Surveyor Vault (this is the quest item).
-
Immediately move it into your Safe Pocket if possible so it’s secured even if you die later.
If your Safe Pocket is full and you can’t rearrange, you must survive and extract normally for the quest to count, so play more cautiously.
Step 5: Extract and turn in
-
Once you
Best weapons and loadout to solo kill ARC Surveyor
To solo kill an ARC Surveyor consistently, build for burst explosives plus one strong heavy-ammo gun, and a bit of survivability/mobility.
Best weapons for Surveyors
Aim for fast burst damage while it’s stunned or “scanning” (when plates open).
-
Heavy primary: Anvil or other heavy-ammo LMG/AR-style weapon with good DPS and mag size; they are widely recommended as the easiest heavy to get and very effective versus Surveyor armor.
-
Precision backup: Ferro or similar sniper/DMR if you’re confident with aim, to hit the exposed weak spot when it opens during scanning.
-
Explosives (core of the build):
-
Trigger grenades: Stick them to the Surveyor and detonate during or just after its scan; two well-placed triggers can almost or completely delete it.
-
Showstopper or other stun grenades: Stun it for several seconds so it doesn’t flee while you dump damage.
-
Wolfpack grenade: Overkill but extremely strong; players report one Wolfpack can one-shot a full-health Surveyor.
-
Solo loadout recommendation
Focus on cheap, repeatable tools rather than rare exotics.
-
Weapons:
-
Primary: Anvil (or your best heavy-ammo gun) with at least one damage or stability upgrade.
-
Secondary: Mid-range rifle or Ferro-type sniper for general use; you mostly swap to heavy only for the Surveyor.
-
-
Throwables:
-
2-4 Trigger grenades as main Surveyor killers.
-
Optional 1-2 Showstoppers or other stuns to hold it still.
-
Use Wolfpack only if you’re rich in mats; many players prefer to save them for bosses/queens.
-
-
Gear/perks:
-
Light shield or any shield you’re comfortable with; you won’t face huge sustained damage, but a bit of extra HP helps.
-
Mobility perks (stamina, sprint speed) so you can reach the Surveyor quickly and chase if it flees. (General Surveyor guides emphasize mobility and closing distance.)
-
One looting/sensor augment only if you’re also farming; otherwise prioritize combat perks.
-
How to execute the kill
Use your tools in a short, controlled burst so the Surveyor dies before it can run.
-
Approach from cover until you’re within easy grenade range; avoid giving it too much time to start kiting.
-
Open with a stun (Showstopper or similar) or immediately stick 1-2 Trigger grenades while it’s calm; they will not aggro it until detonation in many cases.
-
Detonate Triggers, then instantly hold down fire with your heavy (Anvil, etc.) into its body/plates; 30-40 heavy rounds plus the grenade blasts are usually enough.
-
If it survives and tries to flee, wait for it to enter the scanning animation where a panel opens, then either:
-
Stick more Triggers, or
-
Snipe the exposed weak point with Ferro/precision shots, followed by more h
-