A ruined outpost lies smoking on the edge of the canyon, and your squad is sent to uncover what wiped it from the map. In the “Reduced to Rubble” quest, every clue buried in the wreckage pushes you closer to a discovery that could turn the tide of Arc Raiders’ war against the machines.
‘Reduced to Rubble’ quest walkthrough in Arc Raiders
In the Reduced to Rubble quest, you’ll sprint through collapsing corridors, dodge debris, and activate critical reactors to destabilize the area. Watch for patrols, time your movements with environmental hazards, and collect key data to unlock the final objective. Stay fluid in your route to adapt to sudden blocks and use improvised cover to slip past enemies as you reach the climax.
To complete “Reduced to Rubble,” you’ll need to “take a photo” of the collapsed highway and follow the trail of destruction through the Broken Earth in Blue Gate. Although it sounds like you might need to find a camera somewhere, you won’t have to worry about that!
Below, we’ve detailed how to finish each objective of the “Reduced to Rubble” quest.
Take a photo of the collapsed highway
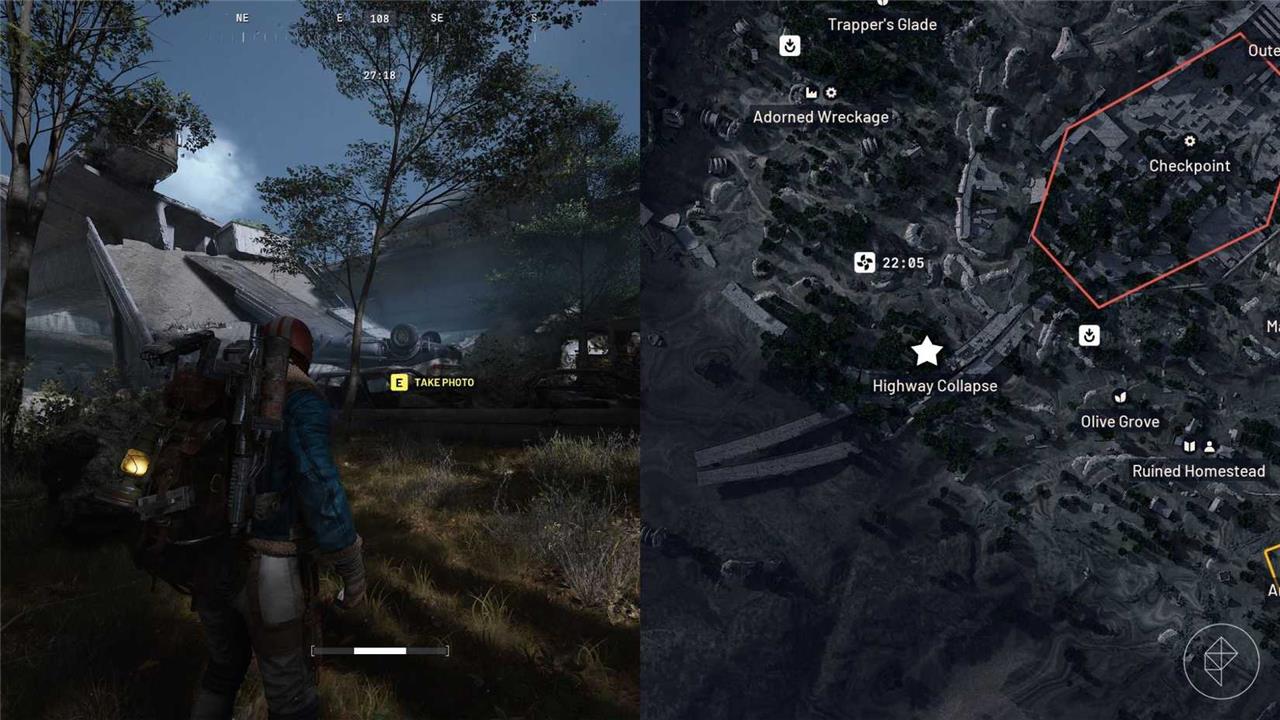
Despite “take a photo” being new verbiage for Arc Raiders, all you need to do is find the correct spot in Blue Gate and interact with the prompt, much like objectives you’ve completed in other quests.
The exact spot for the collapsed highway photo is, believe it or not, just above the “Highway Collapse” text on the Blue Gate map. Amongst the trees and next to some overturned cars, you’ll see the “take photo” prompt, which will tick this objective off.
Follow the trail of destruction through the Broken Earth
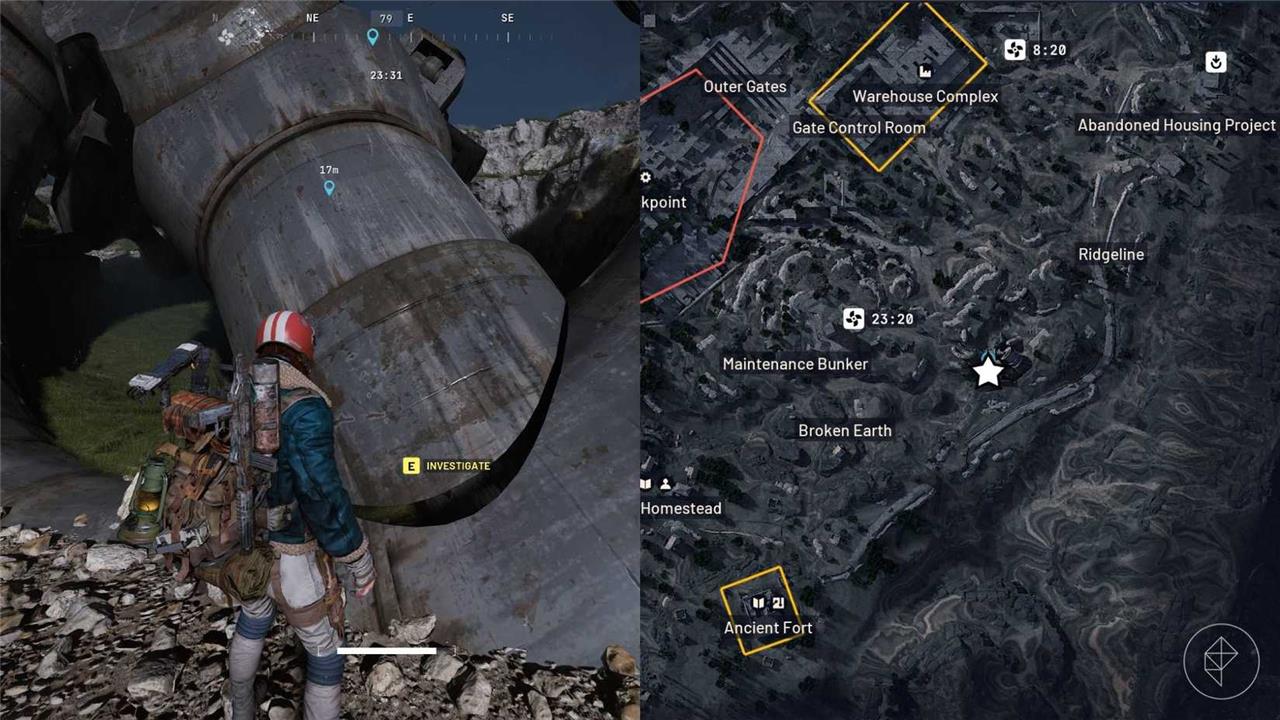
Next up, you need to head down a specific path through the Broken Earth place of interest marked on the map. From Highway Collapse, head east, through Olive Grove and towards the Broken Earth landmark. Continue past it and you’ll receive a new objective: investigate the unknown Arc machines.
Where exactly is the collapsed highway photo spot in Blue Gate
The collapsed highway photo spot on Blue Gate is on the west side of the Highway Collapse POI, just a little north/above the “Highway Collapse” text on your Blue Gate map.
Map location
-
Open the Blue Gate map, find the “Highway Collapse” label in the southern part of the map, then put your marker slightly above (north of) the text and to its west side along the edge of the broken highway.
-
You should be roughly at the southern world border, on the western edge of the concrete where the highway breaks off and drops toward the forest.
Exact spot to stand
-
Stand just west of the collapsed highway section, between a tree, a rock, and some overturned cars, on the dirt/grass right next to the broken slab; when you are in the correct spot, the “Take photo” prompt appears without having to use any gear.
-
If you hit the world border behind the bridge, walk along it until you are roughly lined up with the crack in the bridge and the clump of trees; the “Take photo” prompt will appear there in mid-air when you face the broken highway.
How do I follow the trail of destruction after the photo in Reduced to Rubble
From the collapsed highway photo spot, the “trail of destruction” is basically a straight push east into Broken Earth, then up toward the big wrecked ARC machine, not a series of tiny hidden clues.
Step 1: Go from Highway Collapse to Broken Earth
-
After the photo, turn to face east and move toward the Olive Grove area, then continue on to the Broken Earth landmark on your map.
-
You do not need to interact with anything along the way; simply walk the route from Highway Collapse to the Broken Earth POI to satisfy the “through the Broken Earth” part.
Step 2: Stay in the “valley” heading northeast
-
Once your objective says “follow the trail of destruction through the Broken Earth,” keep moving past the Broken Earth marker, staying in the scarred valley / dried-out channel that runs northeast away from the highway.
-
Look for more and more wreckage as you go; you are heading toward the large scrap-metal ring and massive ARC wreck between Broken Earth and Ridgeline, directly east of Maintenance Bunker.
Step 3: Watch for the objective update
-
As you move up that valley and get closer to the big wreck, the “trail of destruction” step will auto-complete and the quest text will change to “Investigate the unknown ARC machines.”
-
At that point, just keep going a little farther into the wreck site until you see the yellow interaction prompt on the large downed ARC machine; interacting there progresses you to the final investigation step and effectively ends the “trail” part.