Hidden high above Hyrule Ridge, the Turakawak Shrine challenges players with shifting platforms and precise timing. This guide breaks down how to reach it, solve its puzzles, and claim its chest without missing a single secret.
TurakawakShrine location
Turakawak Shrine sits on a high ridge in the Hebra region, west of Rito Village and just south of the Hebra Mountains. You can spot its green glow from a distance if you glide from the village or nearby sky islands, but the cold climate means you should bring warm gear or food before heading there. The shrine is on a relatively open plateau, with a few enemies and rough terrain nearby, so climbing and stamina management help you reach it more easily.
Turakawak Shrine is located in the Tabantha Frontier region. It’s relatively accessible on foot, just make sure you have some fire elemental items like fire fruit or Red Chuchu jelly so you can burn through the brush blocking it. Its exact coordinates are: (-3496, -0198, 0066).
Turakawak Shrine walkthrough
Inside Turakawak Shrine, use the wind currents and gliders to reach higher platforms and cross gaps. Begin by activating the fan platform to glide to the upper ledge, then adjust the fan’s angle to propel a metal cube. Use it as a stepping stone to the shrine’s next section. Continue solving air-based puzzles by redirecting fans and gliders until you reach the final area. Activate the crystal to complete the shrine and receive your reward.
As the name suggests, this shrine will have you stacking blocks with Ultrahand in order to complete the shrine. It can be a bit tricky to figure out where the chest is and how to stack the blocks correctly to complete the shrine, so look closely at how we did it.
1. You start off in a room with a metal block and an upper area. Walk up to the metal block sitting in front of Link. Use Ultrahand to move it next to the wall and climb up it to reach the raised floor.
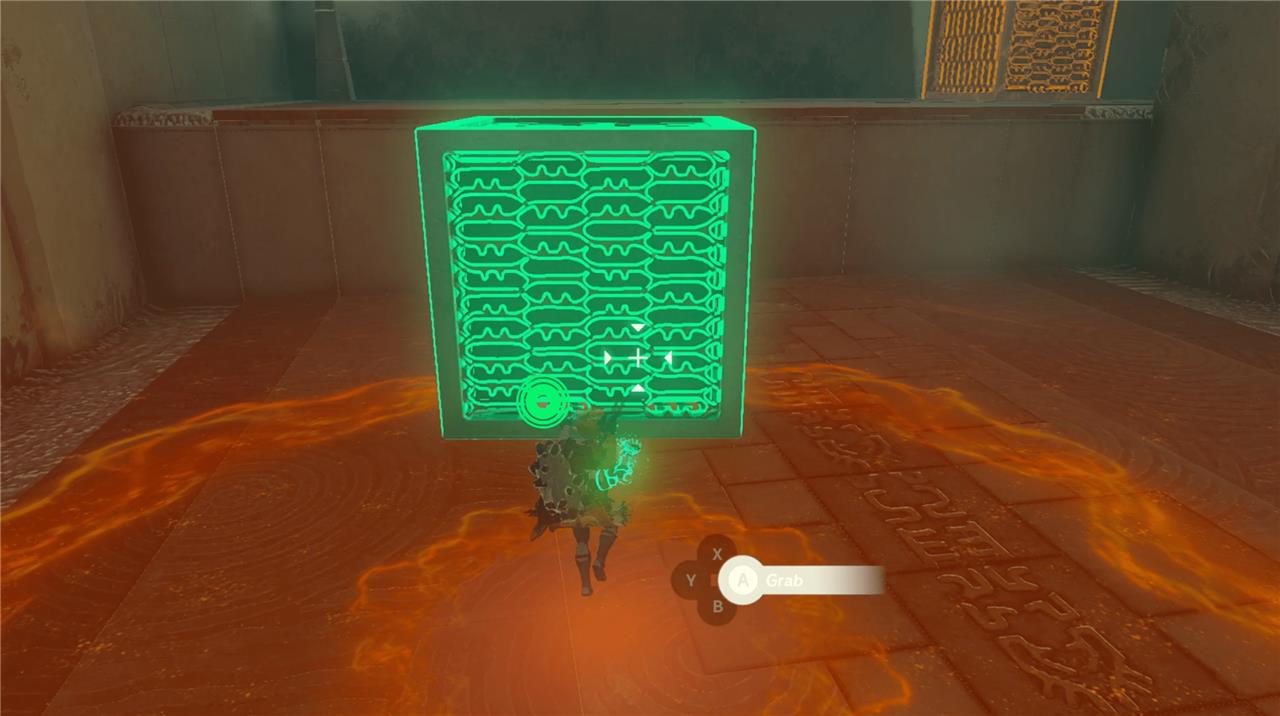
2. You’re now on a higher floor and there is a second block there. Use Ultrahand on the block you just climbed up on and stack it on top of the other metal block. Use Ultrahand to attach it to the other block so it forms a stable structure comprising of two blocks.
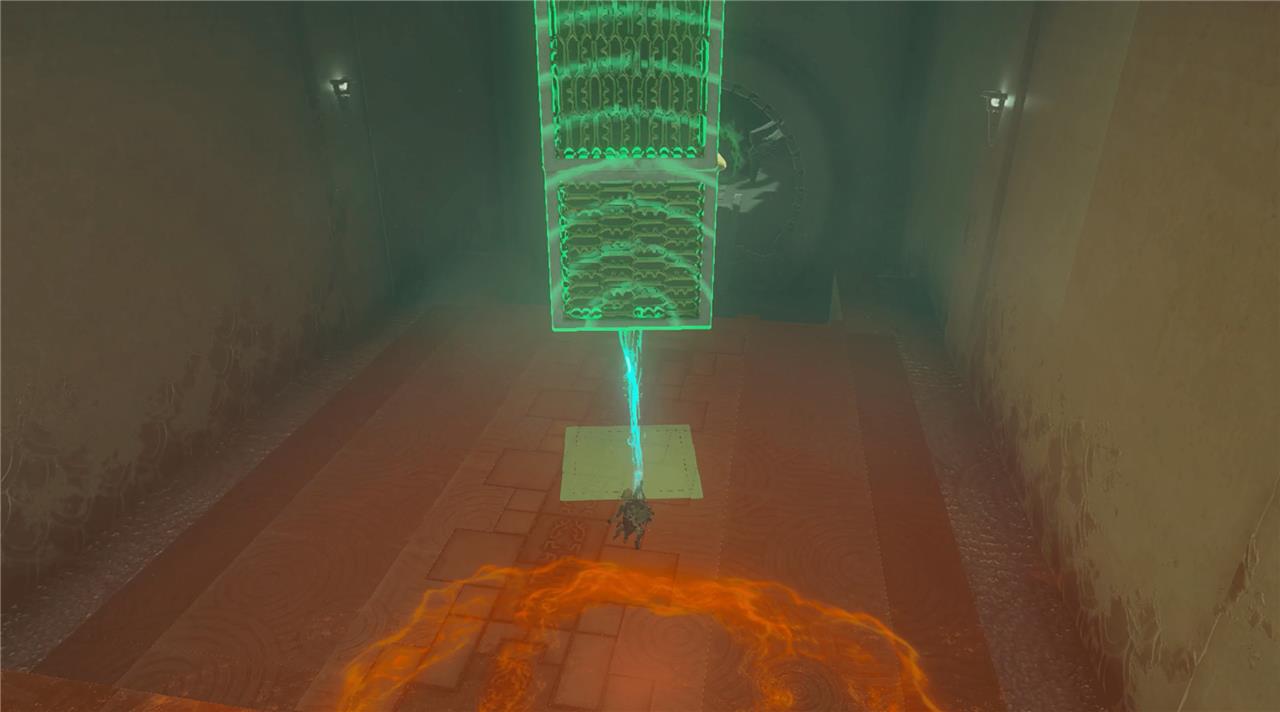
3. There is a hidden chest you can get now. It is well hidden. It is technically on the floor above but it is only accessible via this area. Look up towards the ceiling and you will see a metal grate hanging above the lower area.
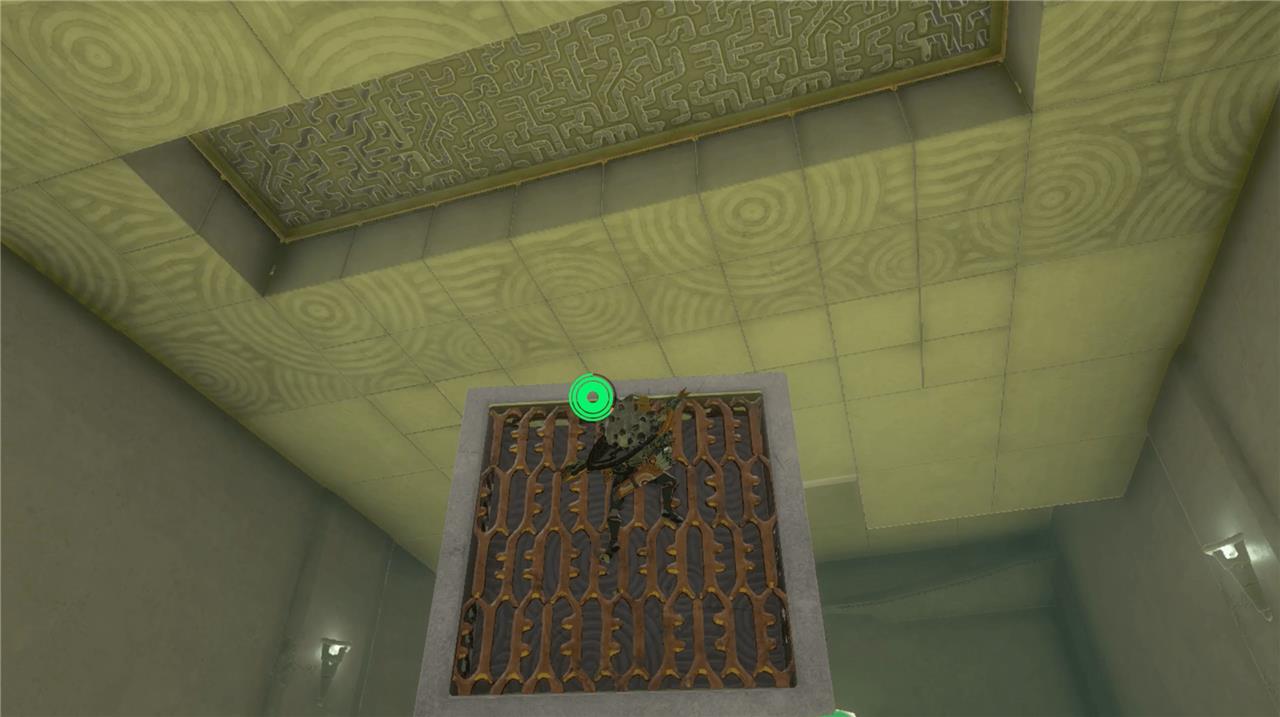
4. Use Ultrahand and place the two stacked blocks underneath the metal grate. Climb up the blocks.
5. Once you climb up, you’ll be high up enough to use the Ascend ability on the grate above you. Use Ascend and arrive in the room with a chest. Open it to get a magic rod.
6. Exit the area with the chest using Ascend. You’re on a higher floor now. Backtrack to the lower room where you made the tower of two blocks. You’ll need them to complete the shrine.
7. Once you are back in the room where you stacked the blocks, grab them once again and place them so they line up with the ladder that leads to the higher room you just came from.
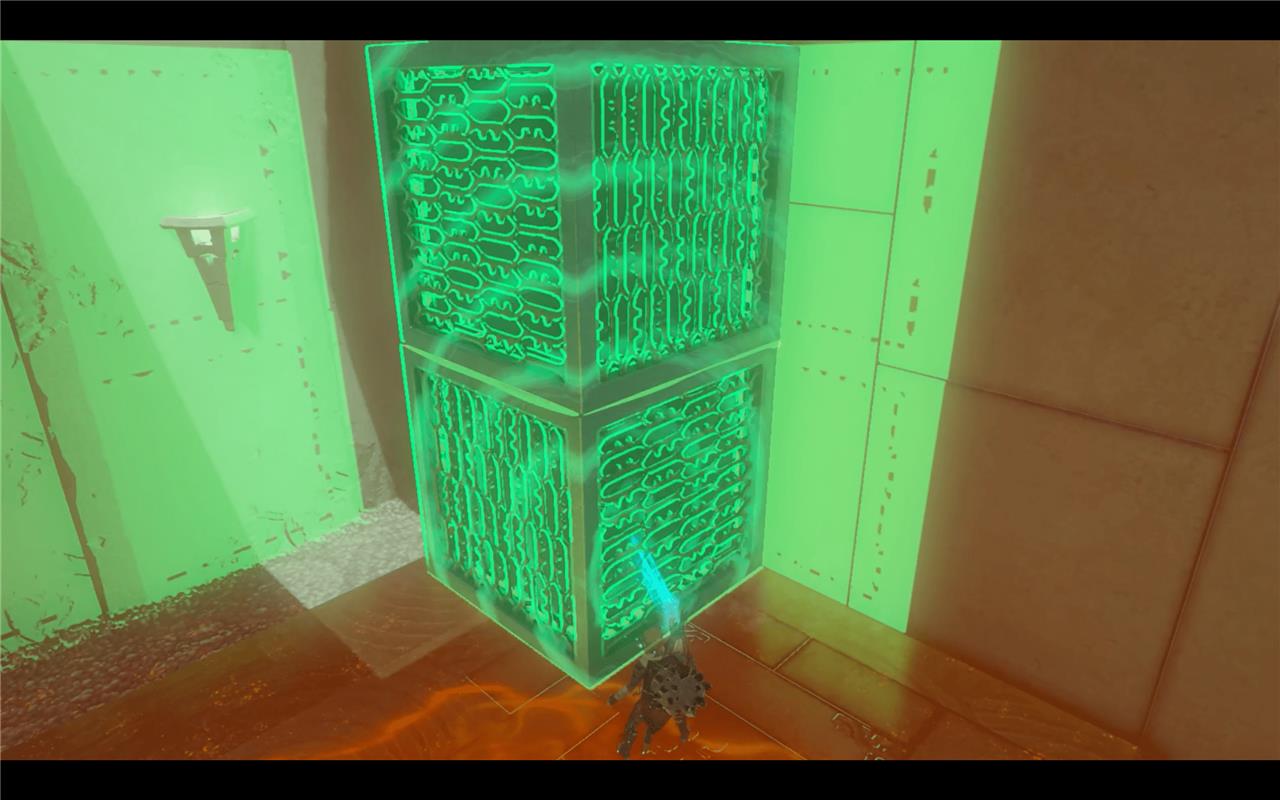
8. Climb up the blocks and up the ladder to get into the higher room. Using Ultrahand, grab the two stacks of blocks and bring them onto the upper level.
9. This room has a third block, except for this one you can’t climb. Use it to build a path up to the end of the shrine.
9. You can’t stack the three blocks right up on top of each other since you can’t climb on one of the blocks. Use Ultrahand to attach it to the side of the climbable block. You will need to place it low enough so Link can jump up onto it from the other block without climbing, as pictured below.
Best ways to reach Turakawak Shrine without taking damage
Turakawak Shrine is surrounded by thorny brambles that cause damage on contact, so safe approaches avoid direct ground contact with them. The best methods use elevation or ranged fire to bypass or clear the thorns without risk.
Paragliding from High Ground
Launch from the Gerudo Highlands Skyview Tower (southwest of the shrine) or nearby cliffs north of Lake Illumeni to glide directly over the brambles to the entrance.
This zero-damage method requires minimal stamina if you aim straight and use stamina food if needed.
Updraft Gliding Technique
Start a campfire near the thorns, toss in a Hylian Pine Cone for a quick updraft, and paraglide over the brambles from a safe distance.
This works well from ground level without prior elevation.
Burning Thorns Safely (Ranged)
Use fire arrows, Fire Fruit, or bomb flowers from afar to ignite the thorns, letting them burn out before approaching on foot-no contact needed.
Stay on higher ledges during ignition to avoid heat or spread.
Which elemental items safely clear the brambles without hurting Link
Fire-based items like Fire Fruit, fire arrows, or bomb flowers fused to arrows safely burn away the thorny brambles around Turakawak Shrine from a distance, preventing contact damage to Link.
Recommended Fire Items
-
Fire Fruit: Fuse to arrows for precise, long-range shots that ignite thorns without close proximity.
-
Fire Arrows: Ready-made option for instant safe clearing; aim from elevated spots like nearby cliffs.
-
Bomb Flowers: Explode on impact to spread flames across bramble clusters safely.
Usage Tips
Shoot from high ground (e.g., overlooking Lake Illumeni) or paraglider height to avoid heat splashback while thorns burn out completely.
No ice, electric, or wind items work for burning; only fire reliably clears without hurting Link.